If you’re looking for a nice, easy salami to make that evokes the sensory experiences of traveling to Italy, look no further than to this salami. This is a good jumping off point to make salami because it uses a moderate amount of traditional, Italian spices. After making this salami, you can decide if you want to use more fennel, make a spicy variety, or throw in some crazy spice that’s a favorite of yours.
Planning Phase:
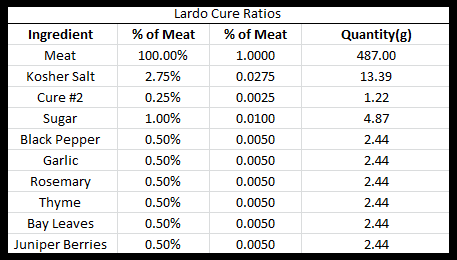
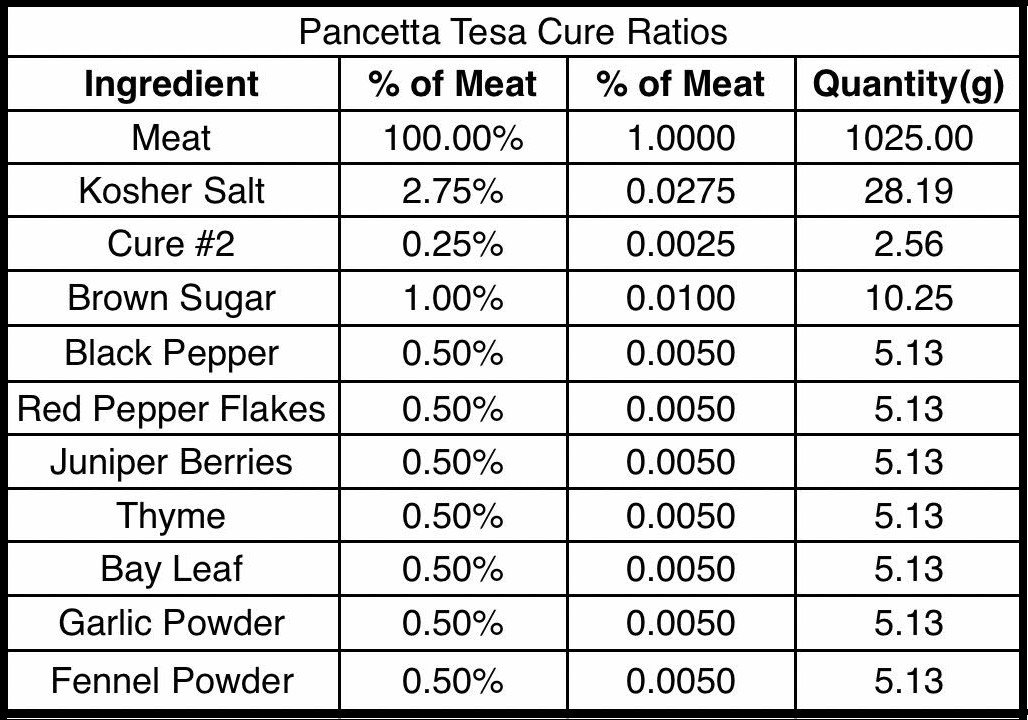
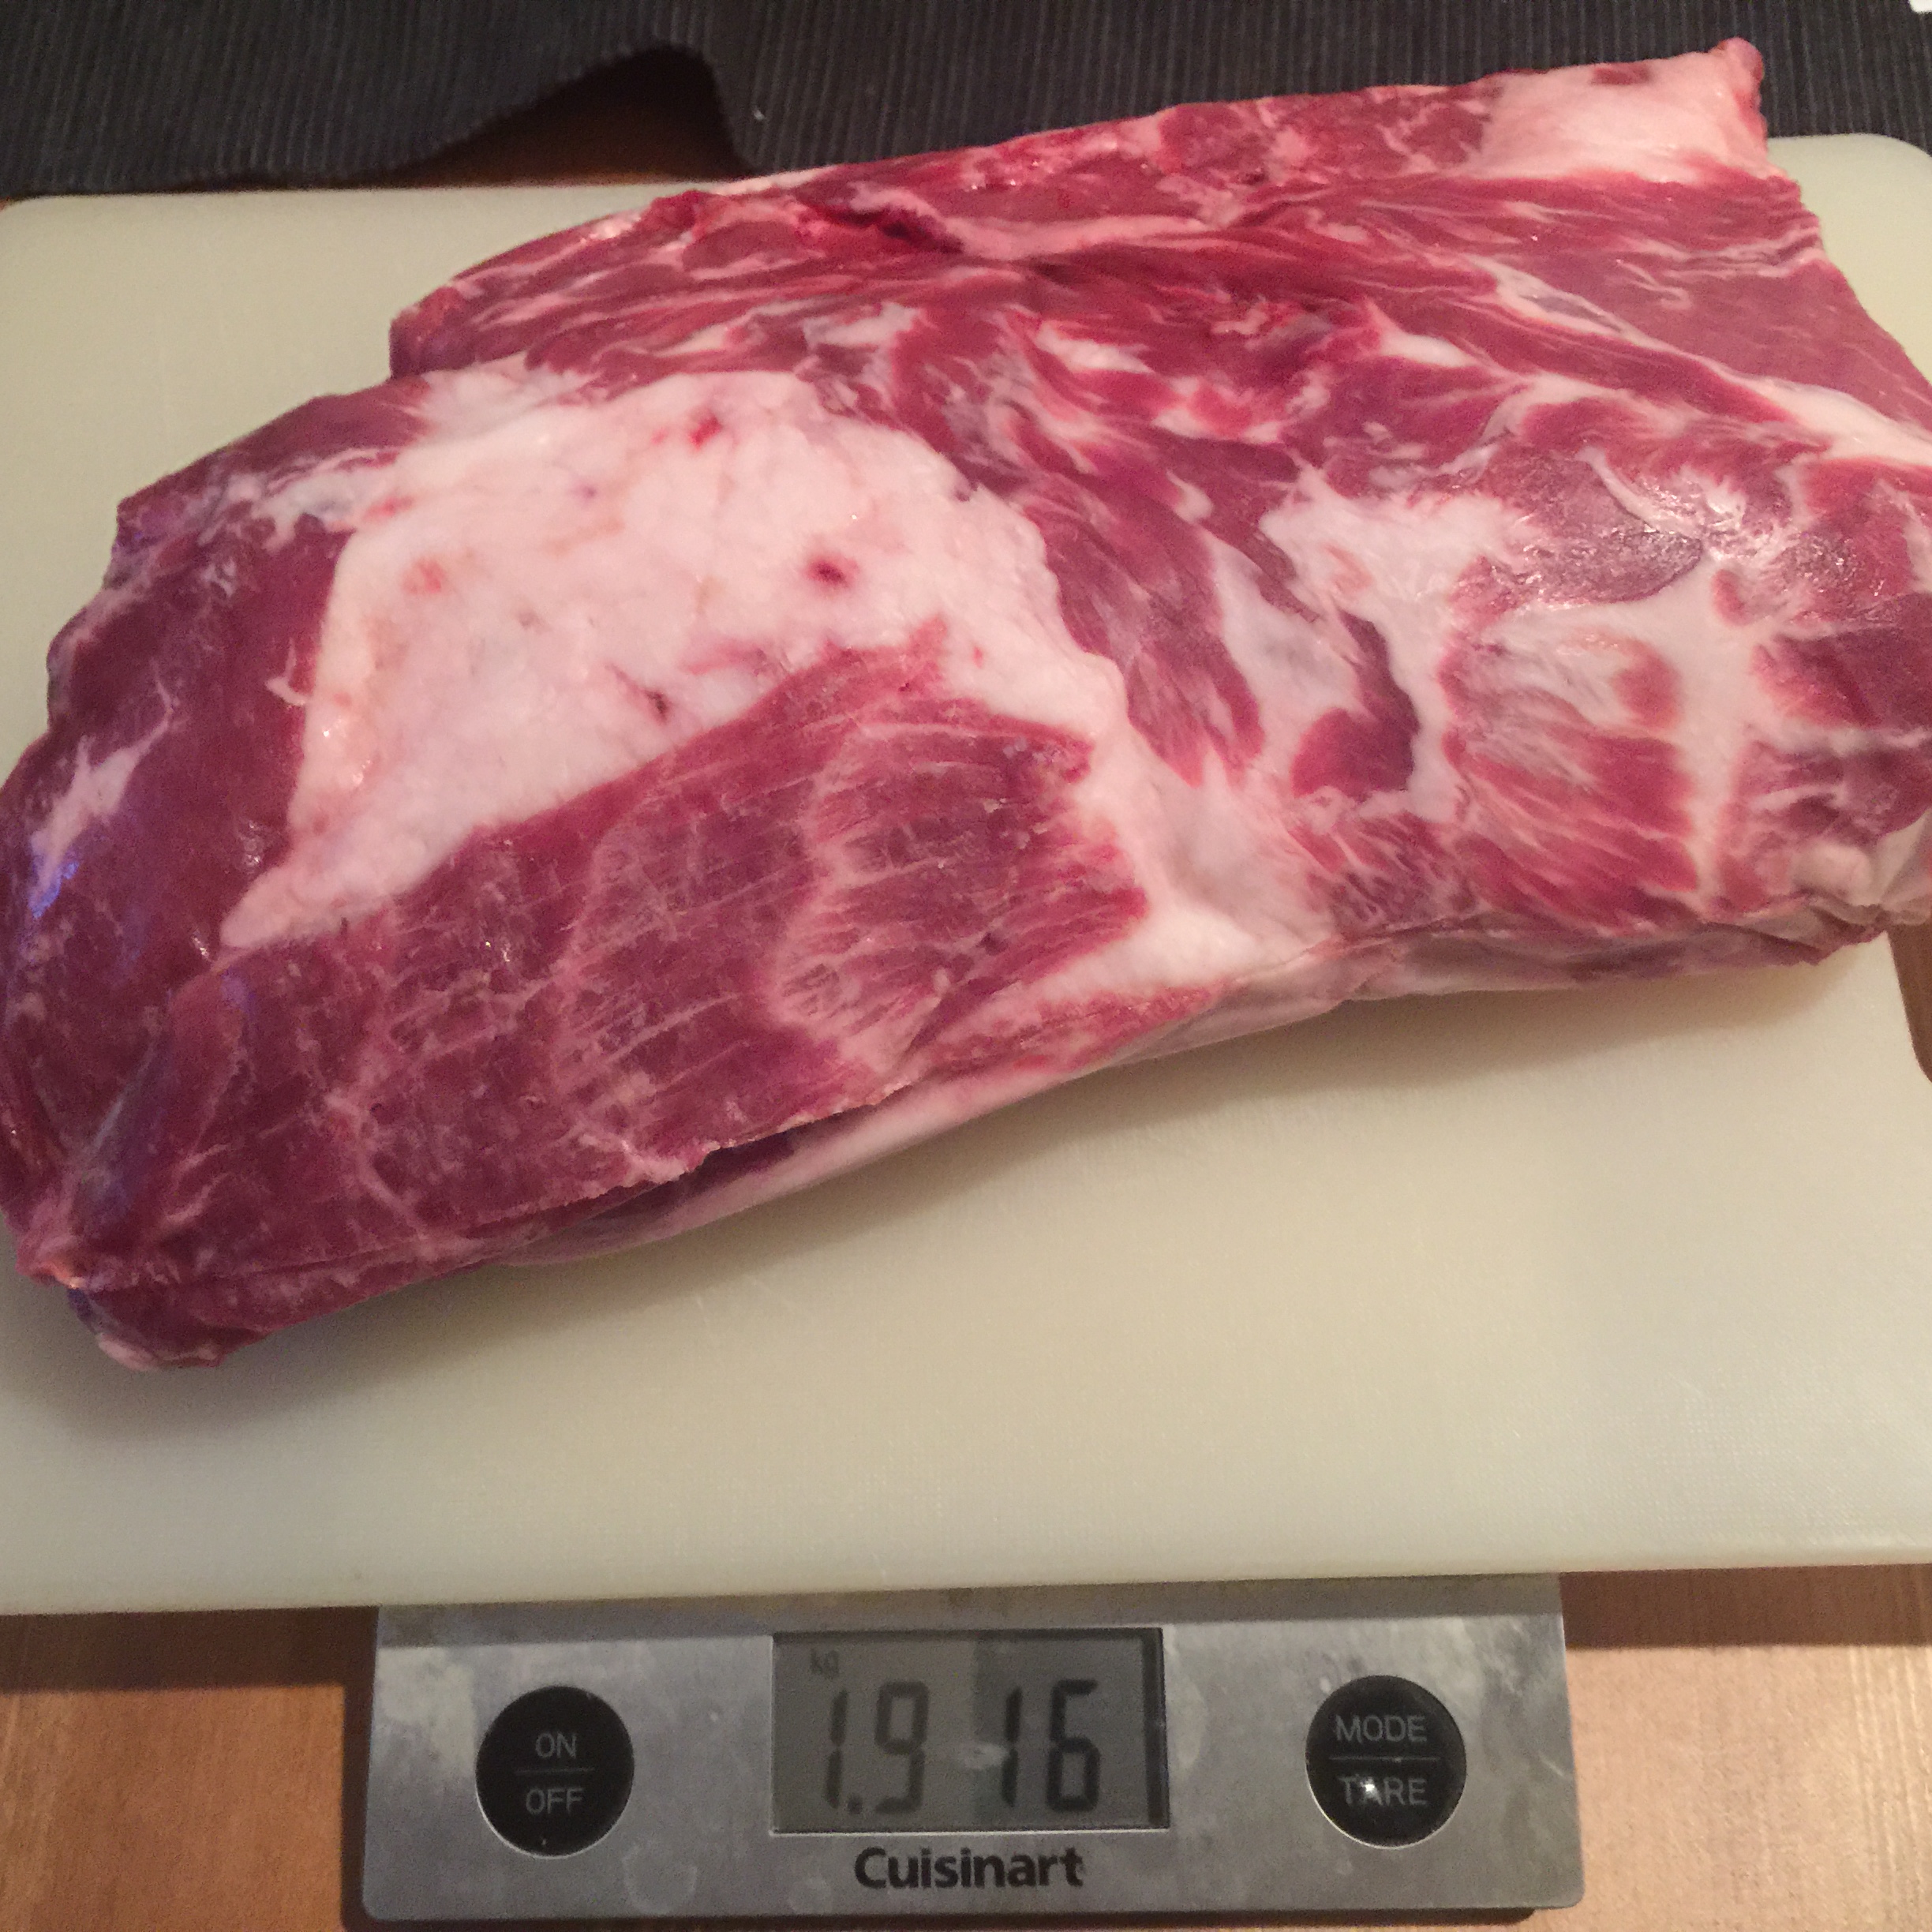
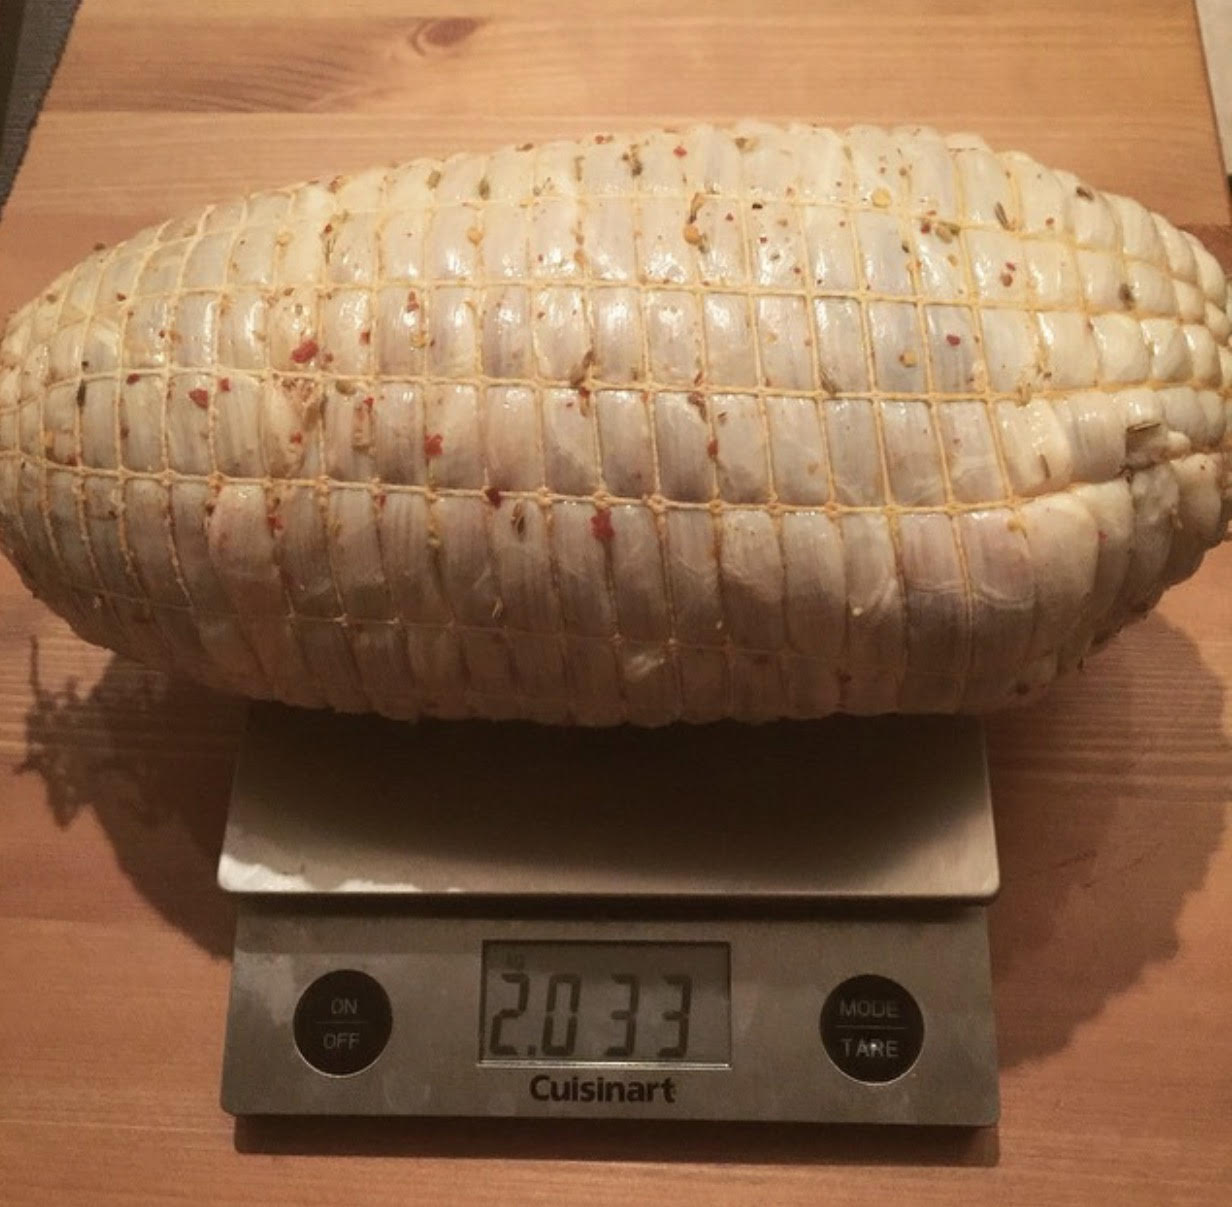
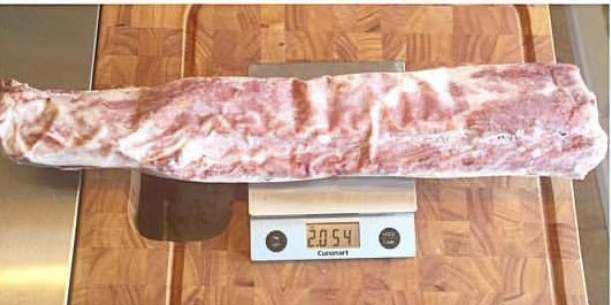
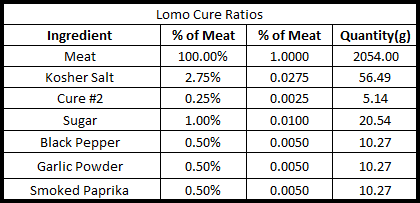
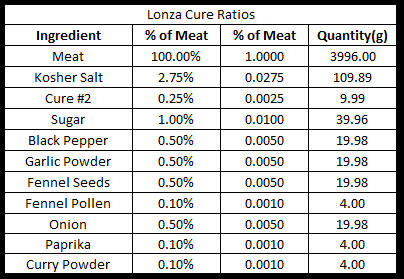
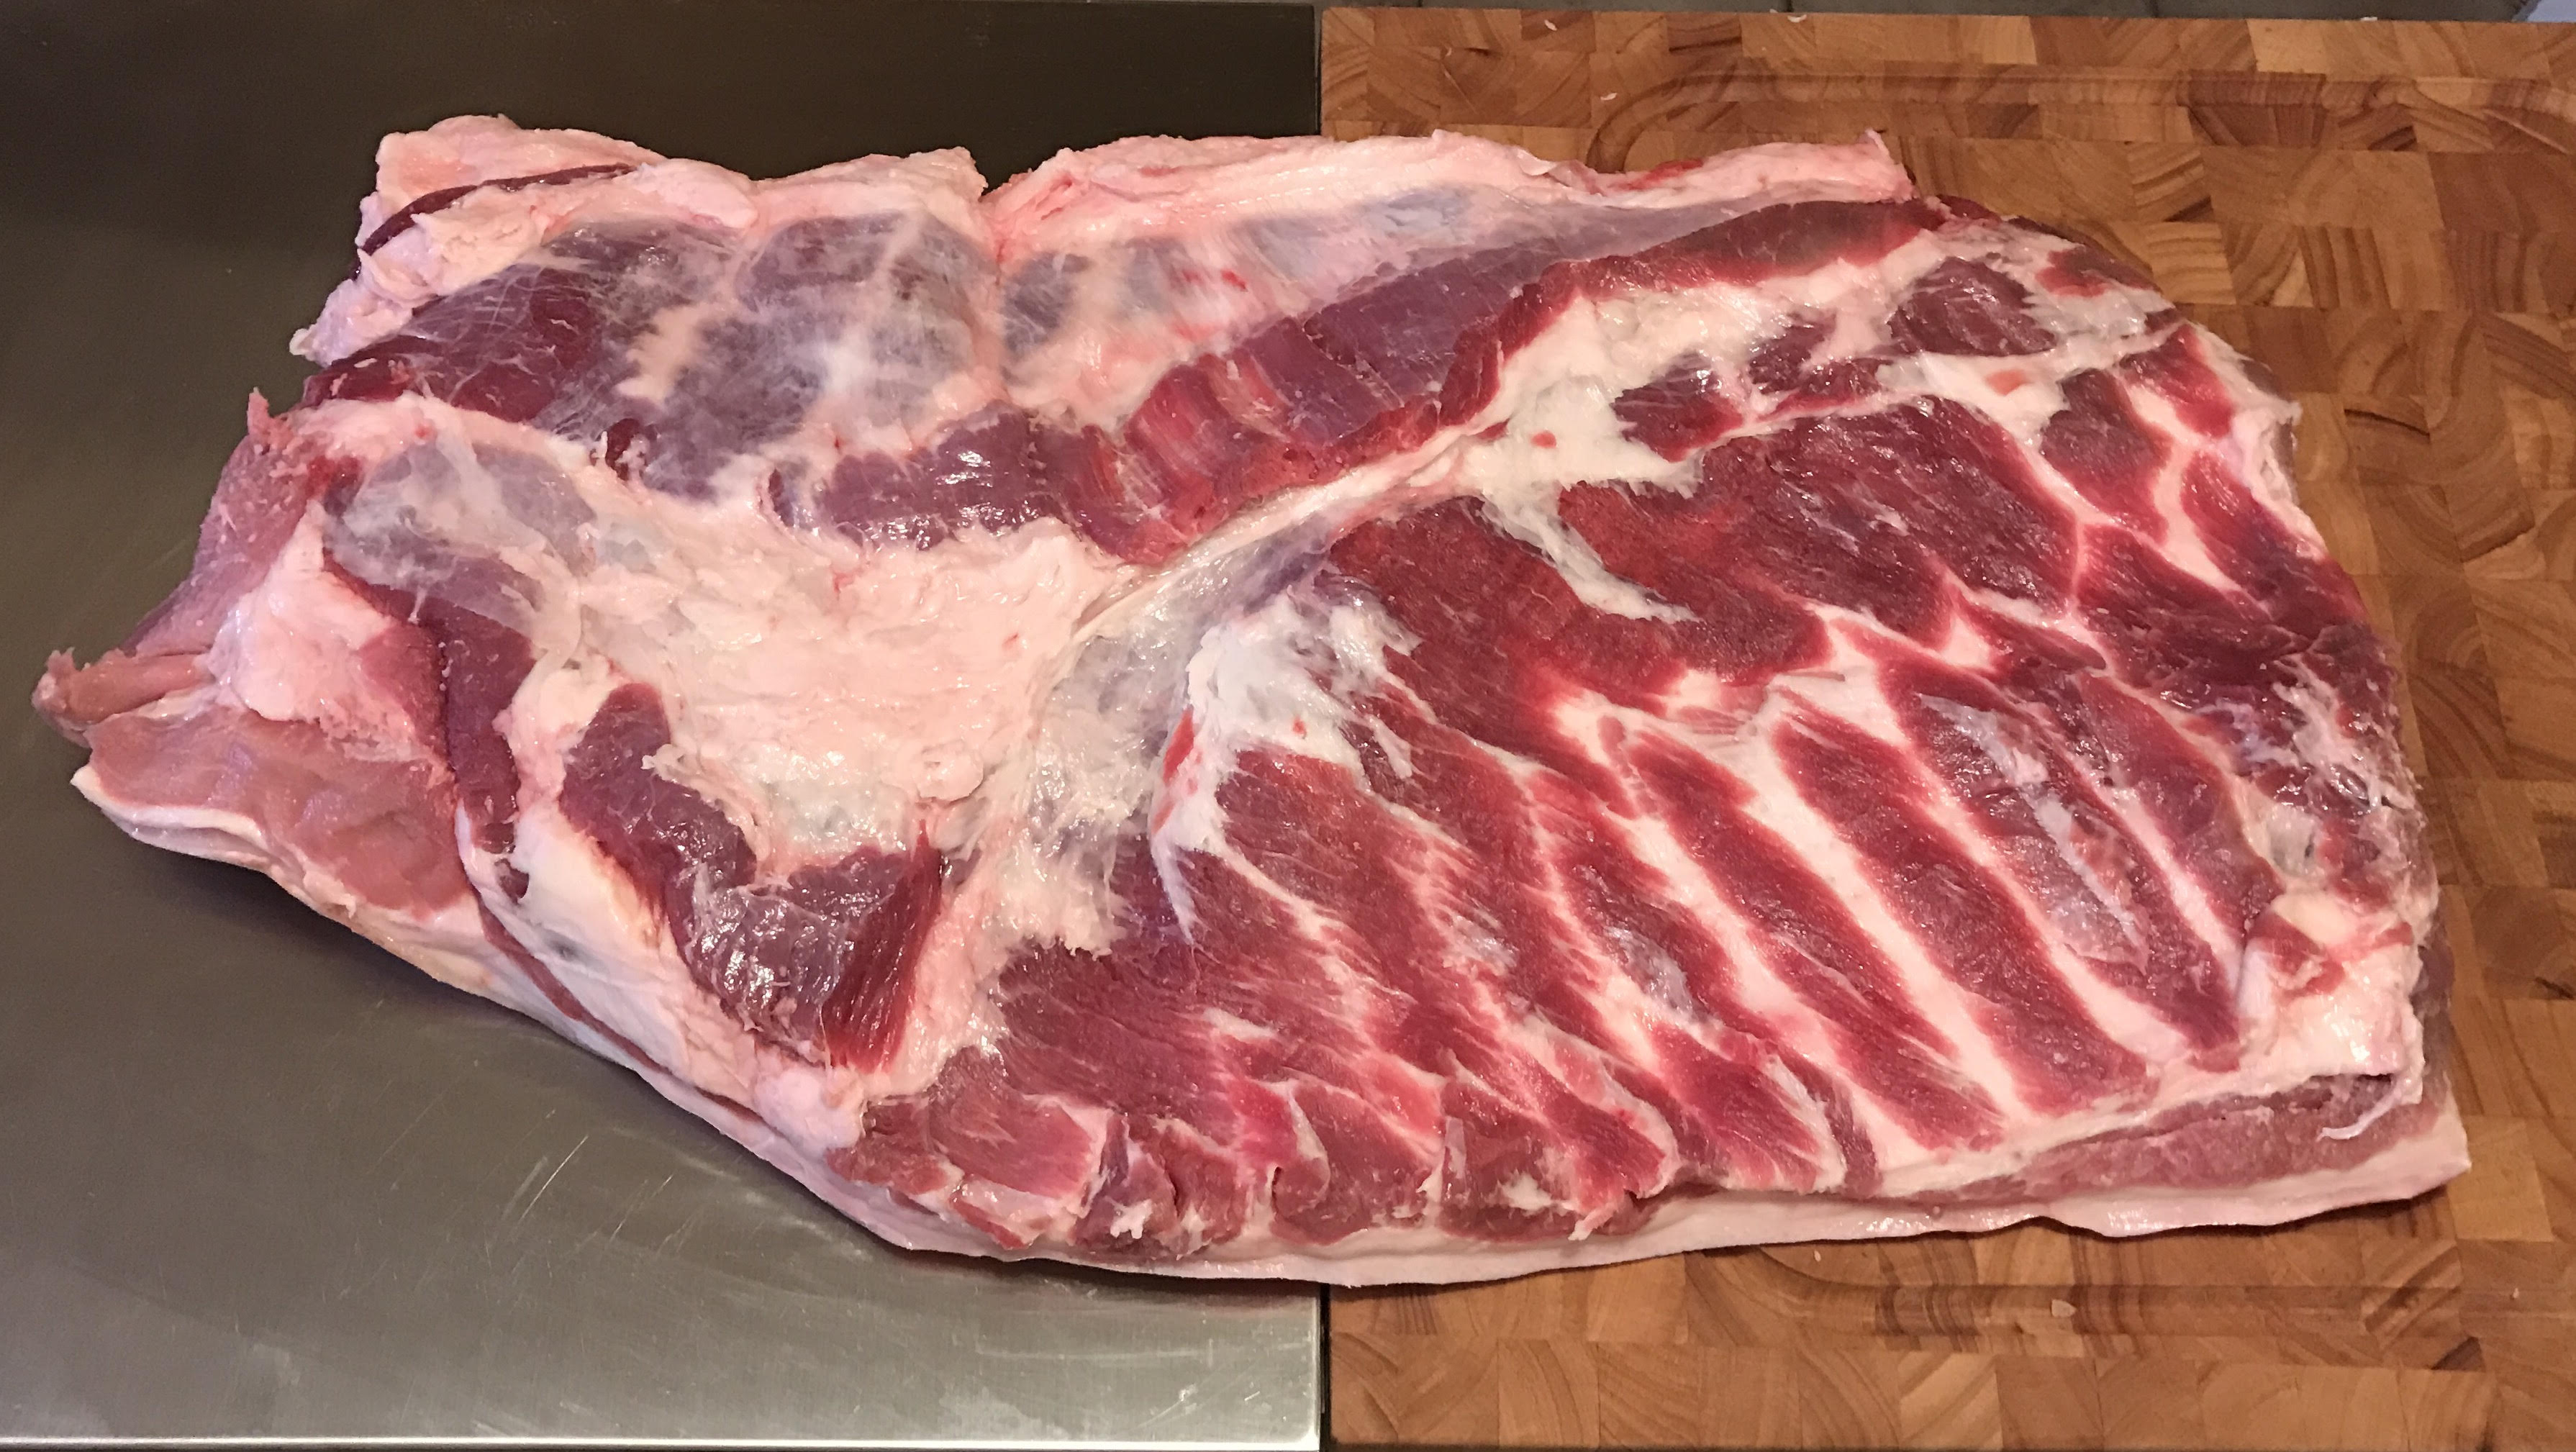
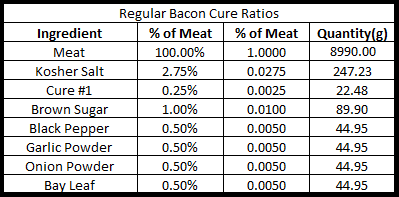
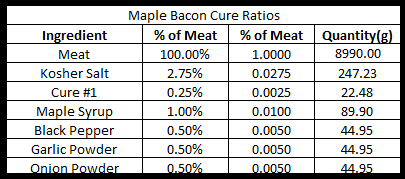
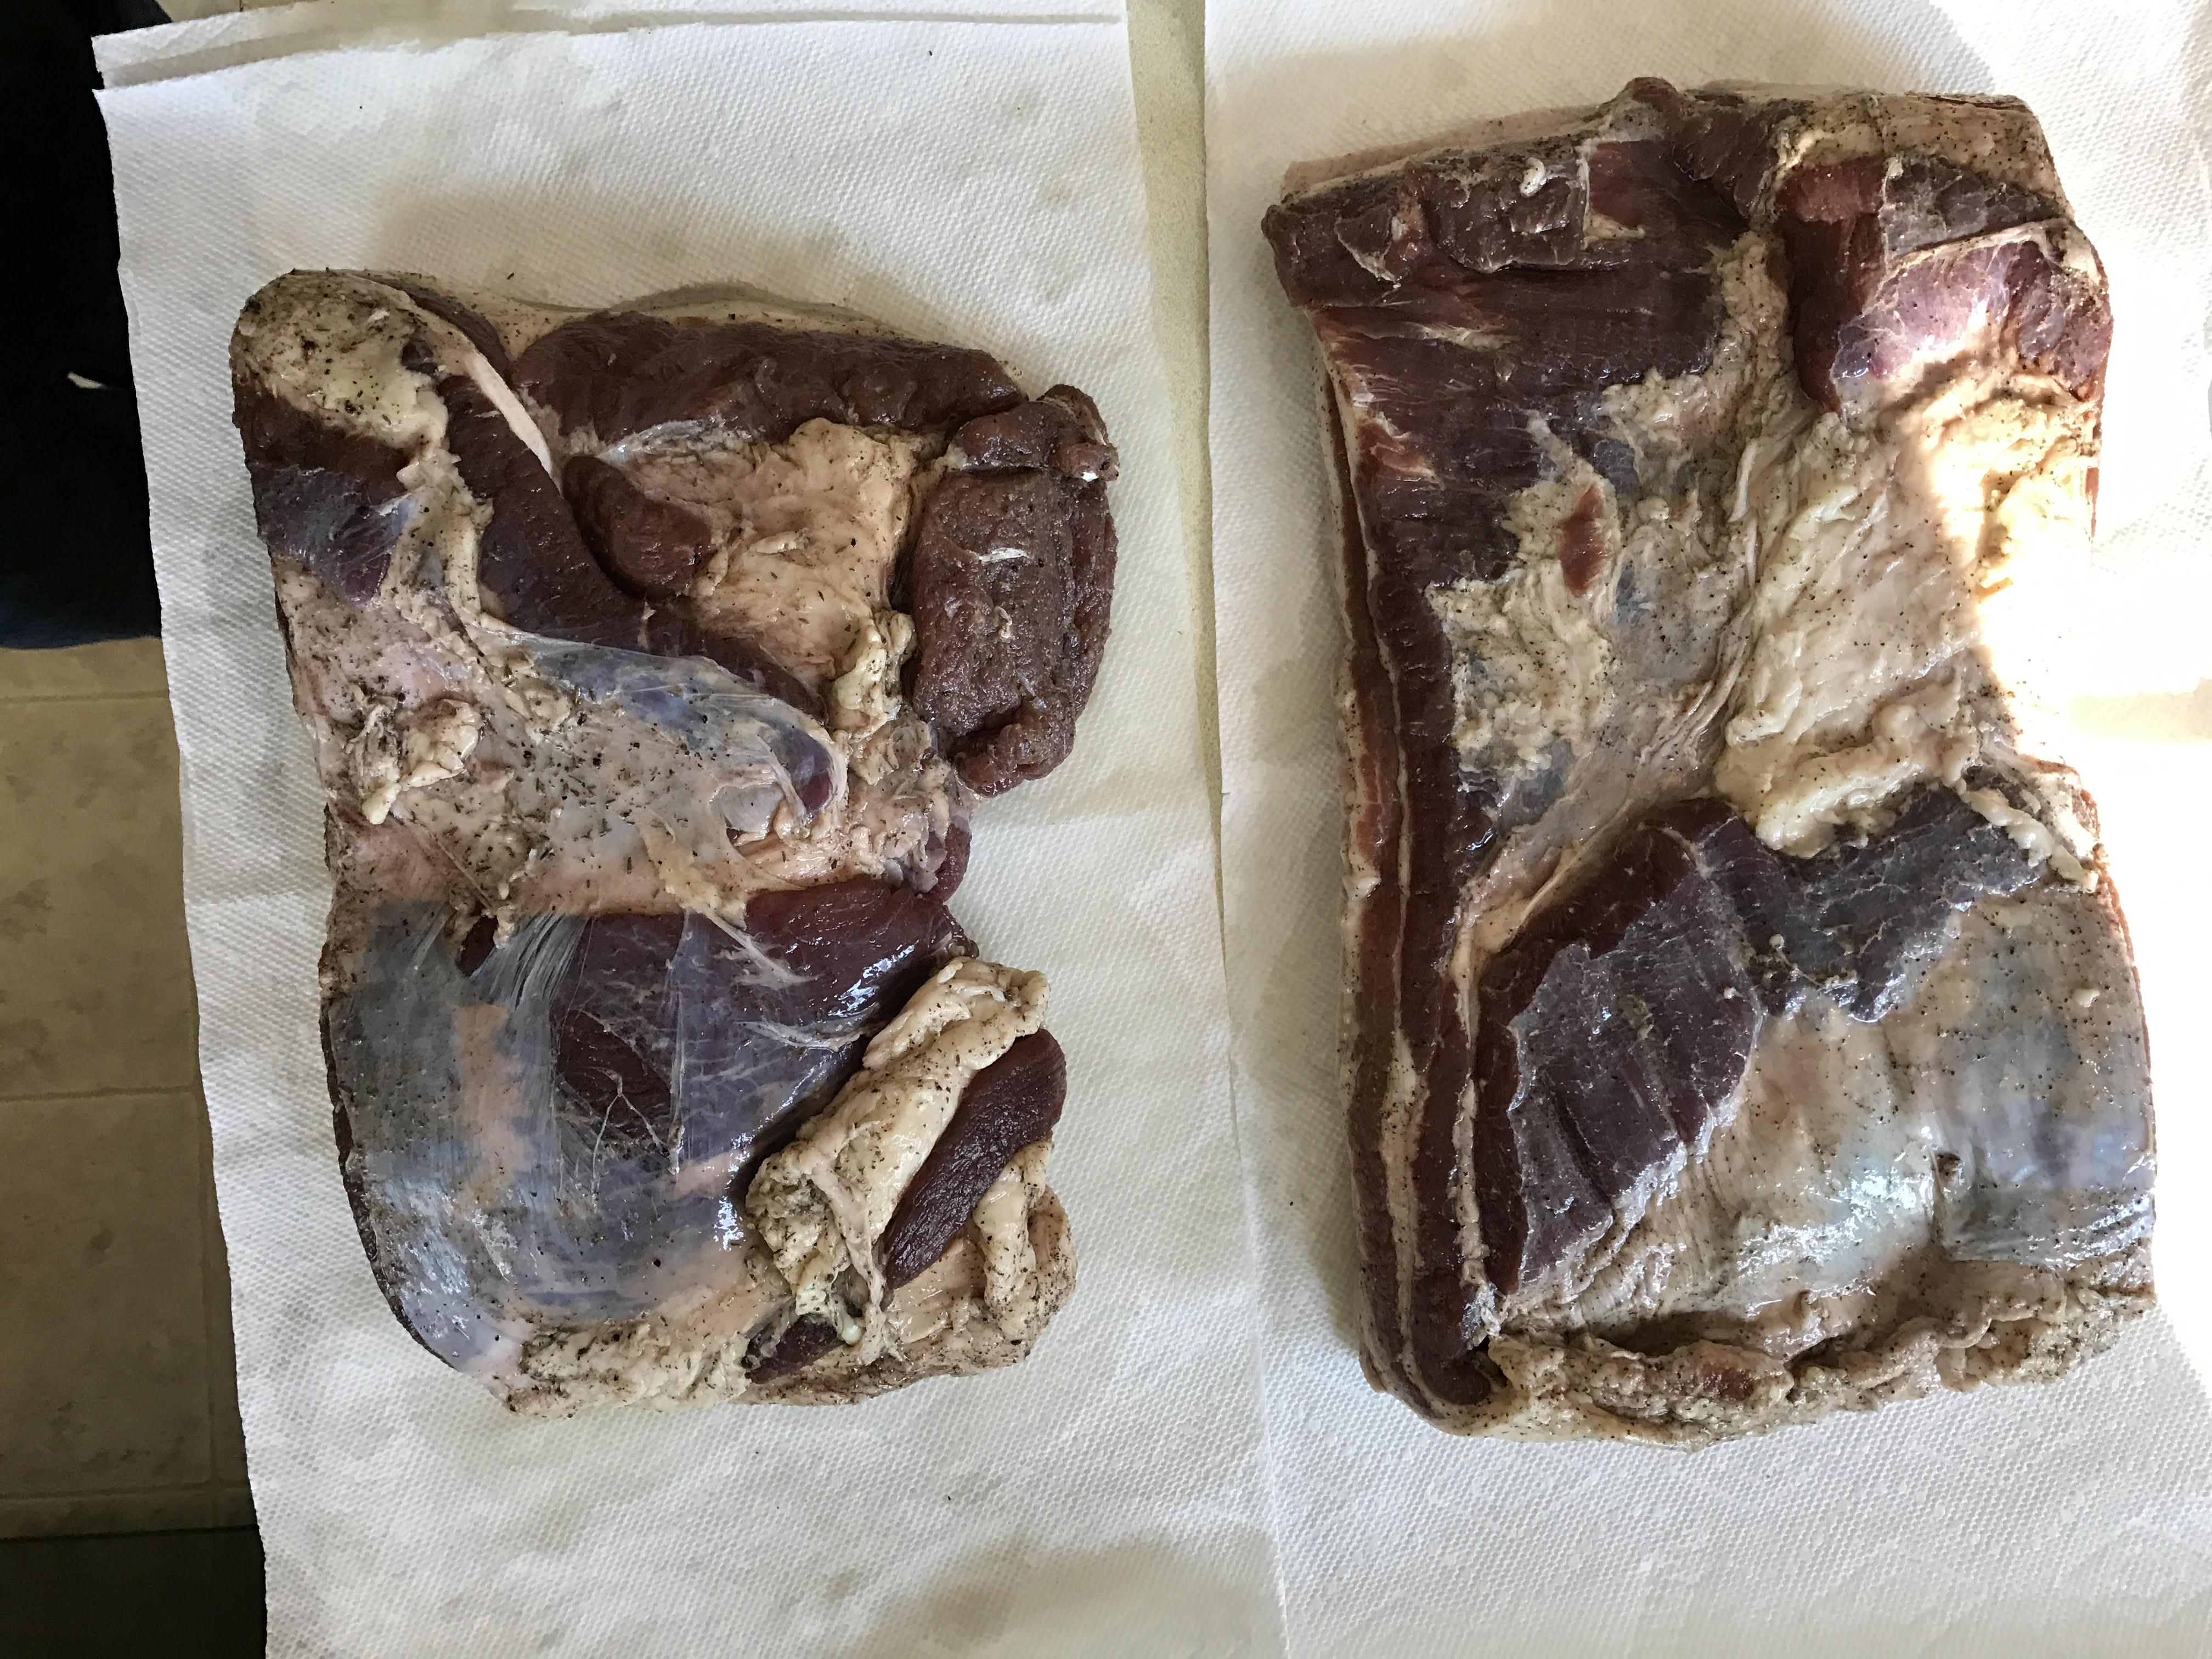
The first step is to weigh your meat and input it into your spreadsheet. A good ratio of lean meat to fat is generally around 70% to 30%. This can be achieved if you get a nice fatty shoulder, although I like mixing meat from the shoulder and the belly. Based on the weight of the meat, you will be given how much of each spice you want to use.
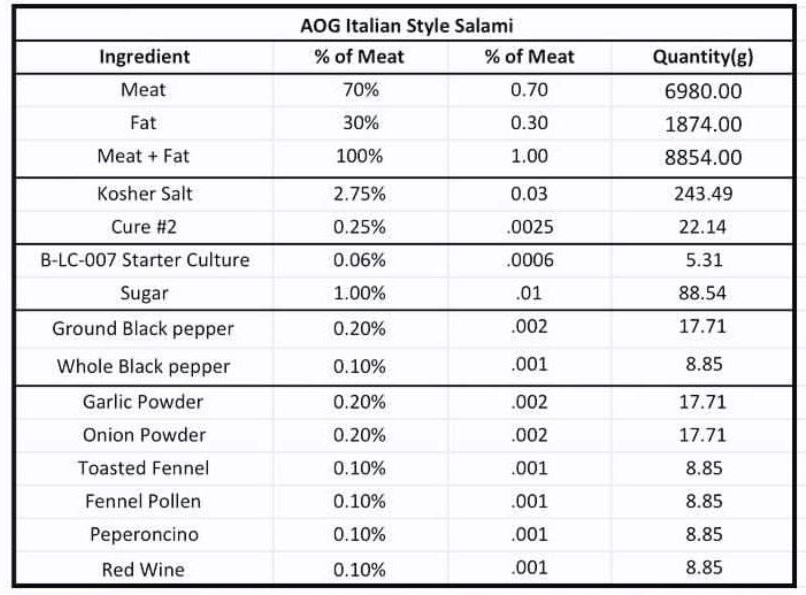
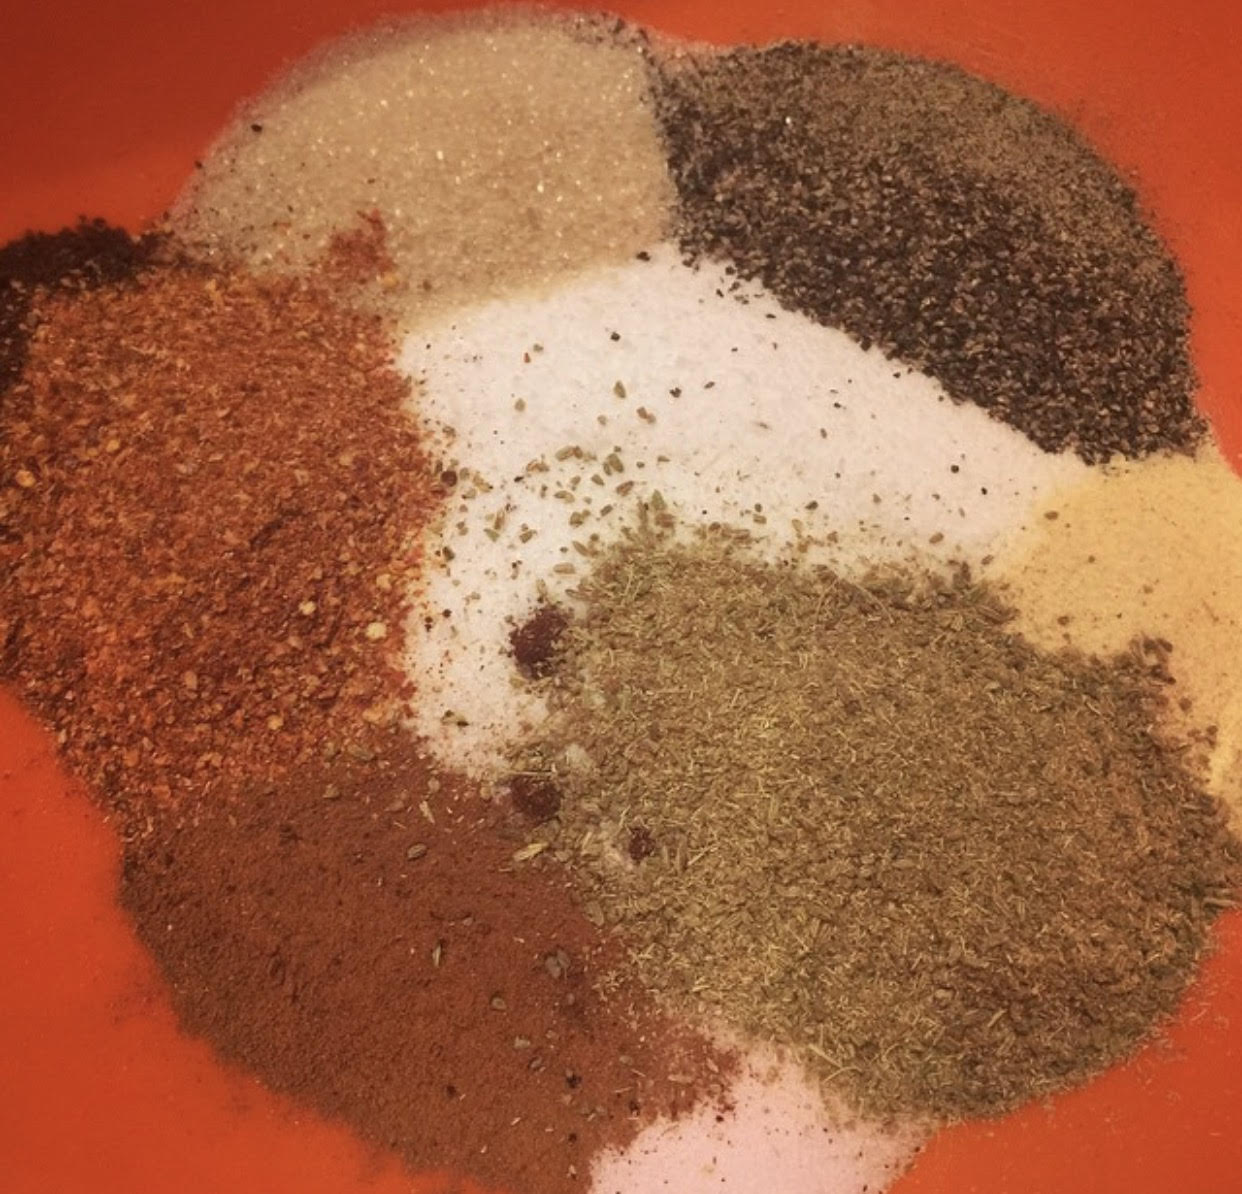
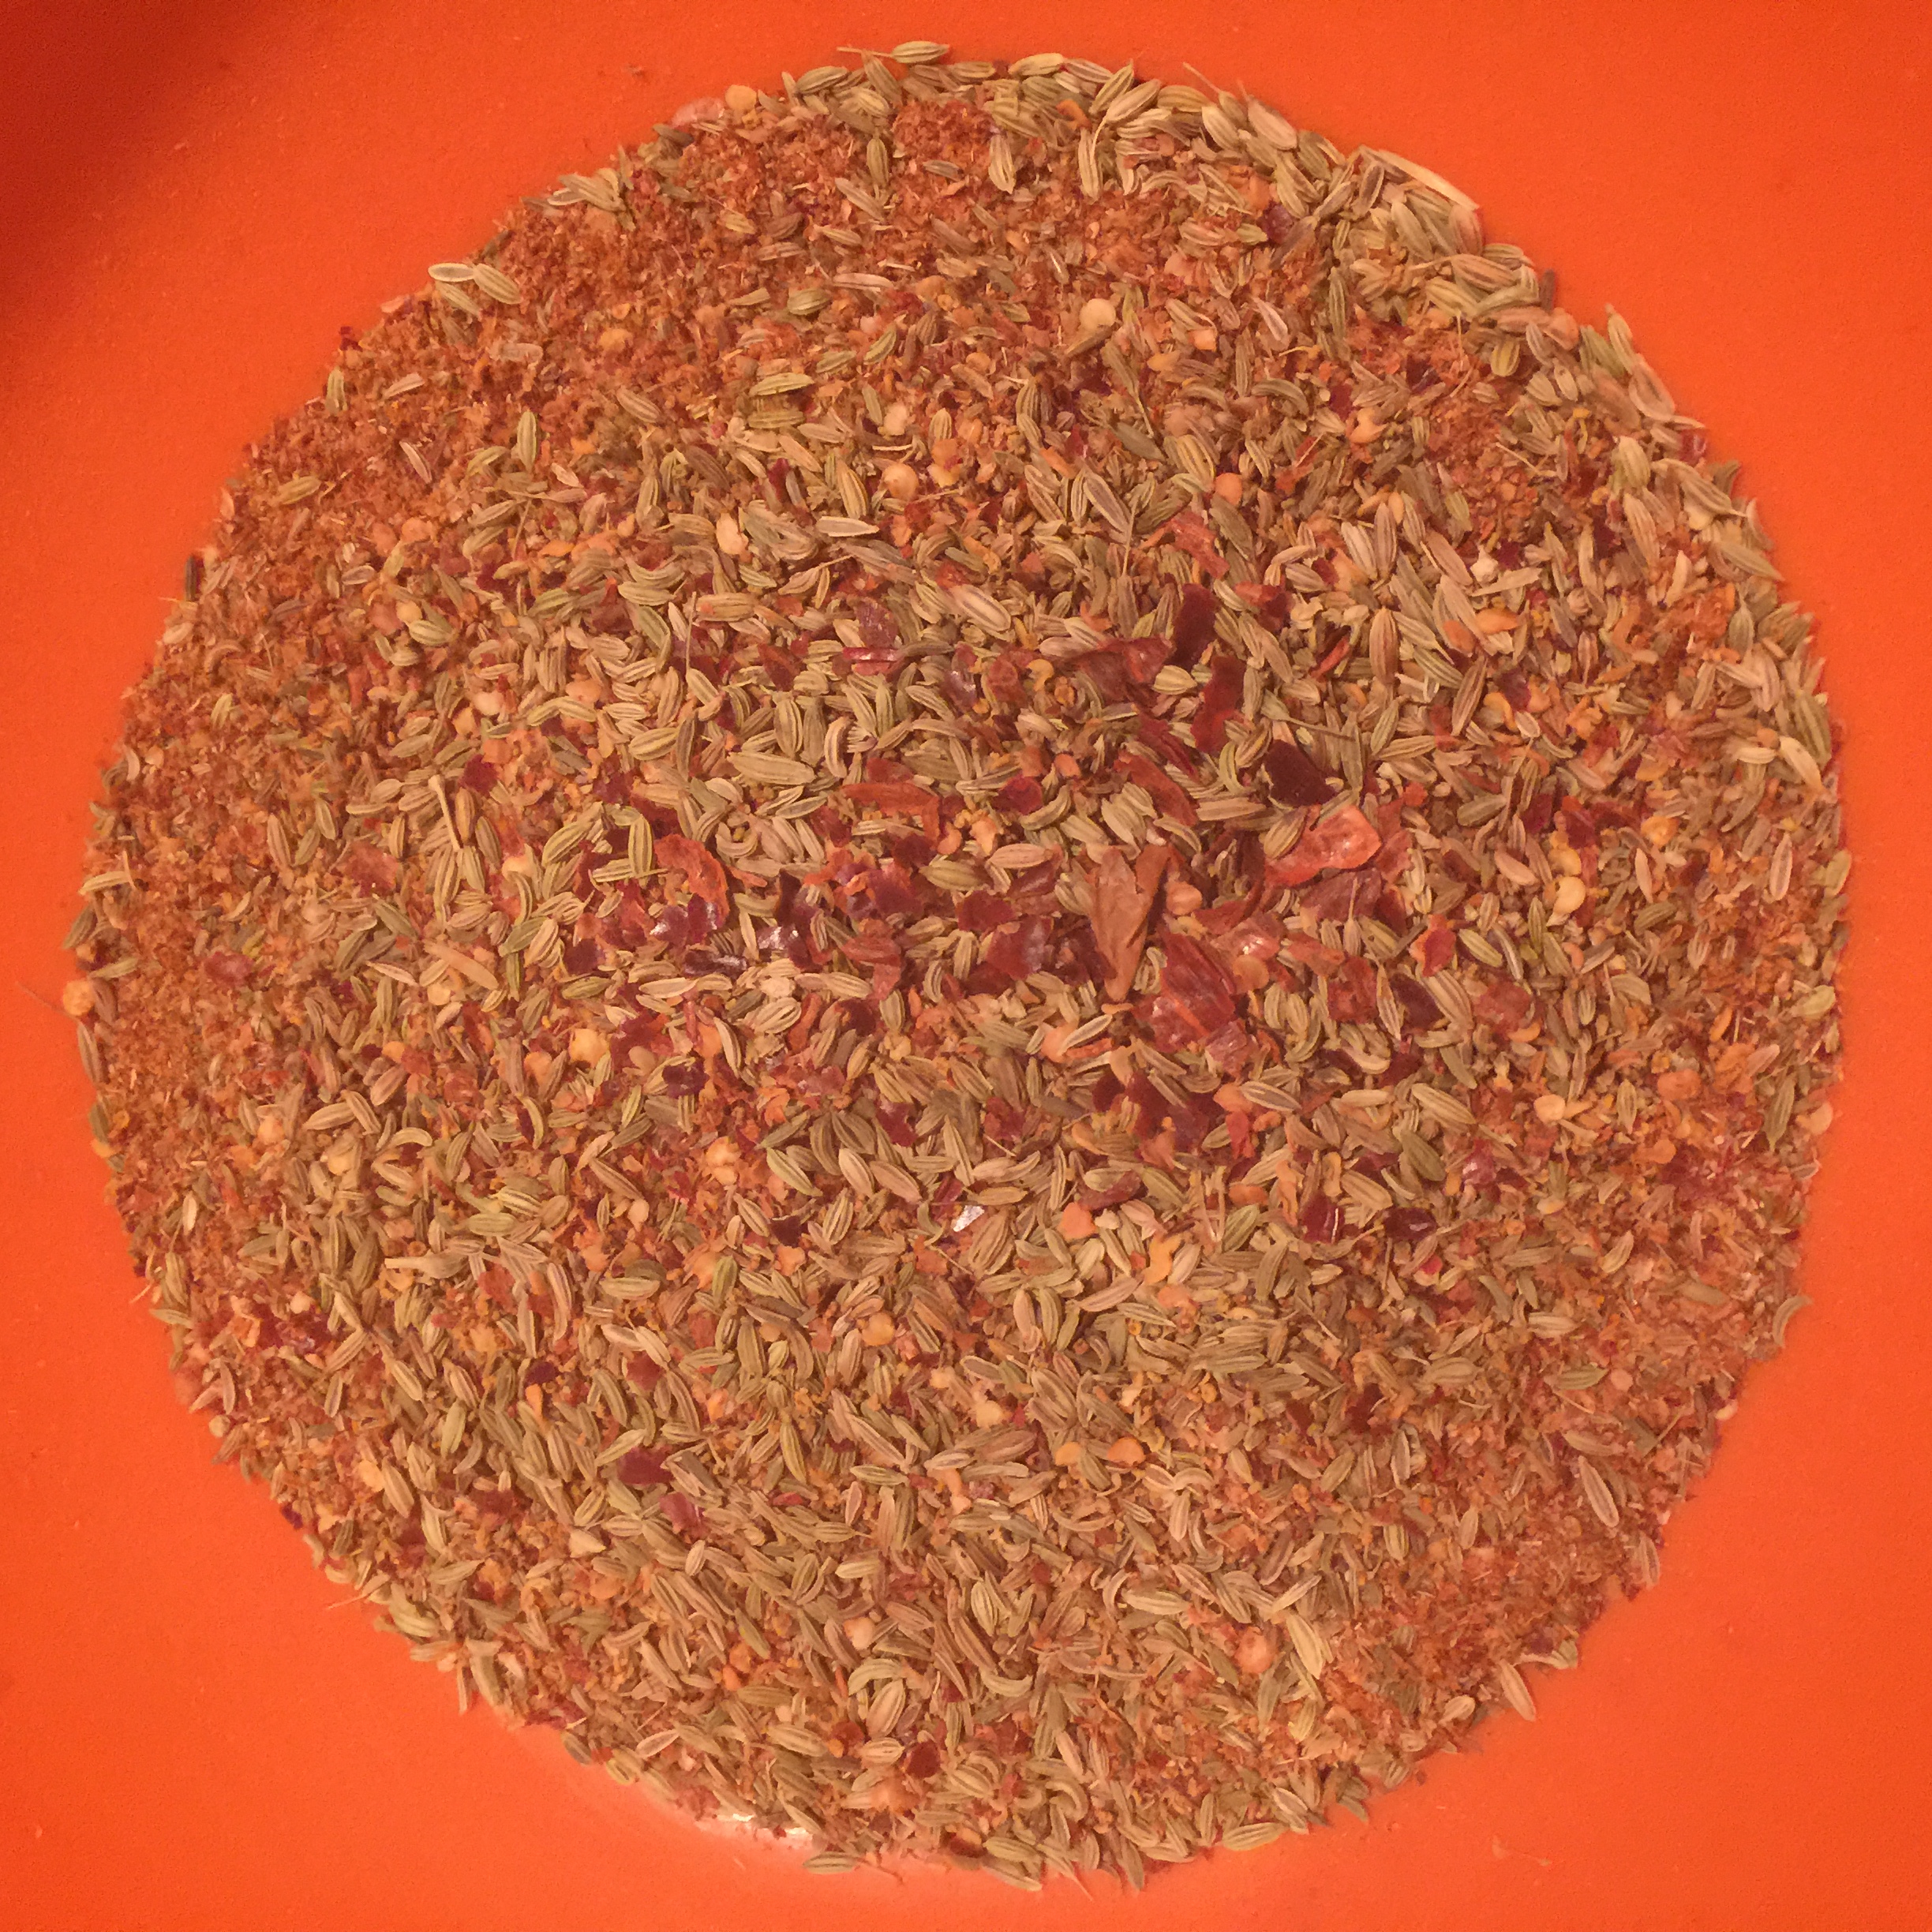
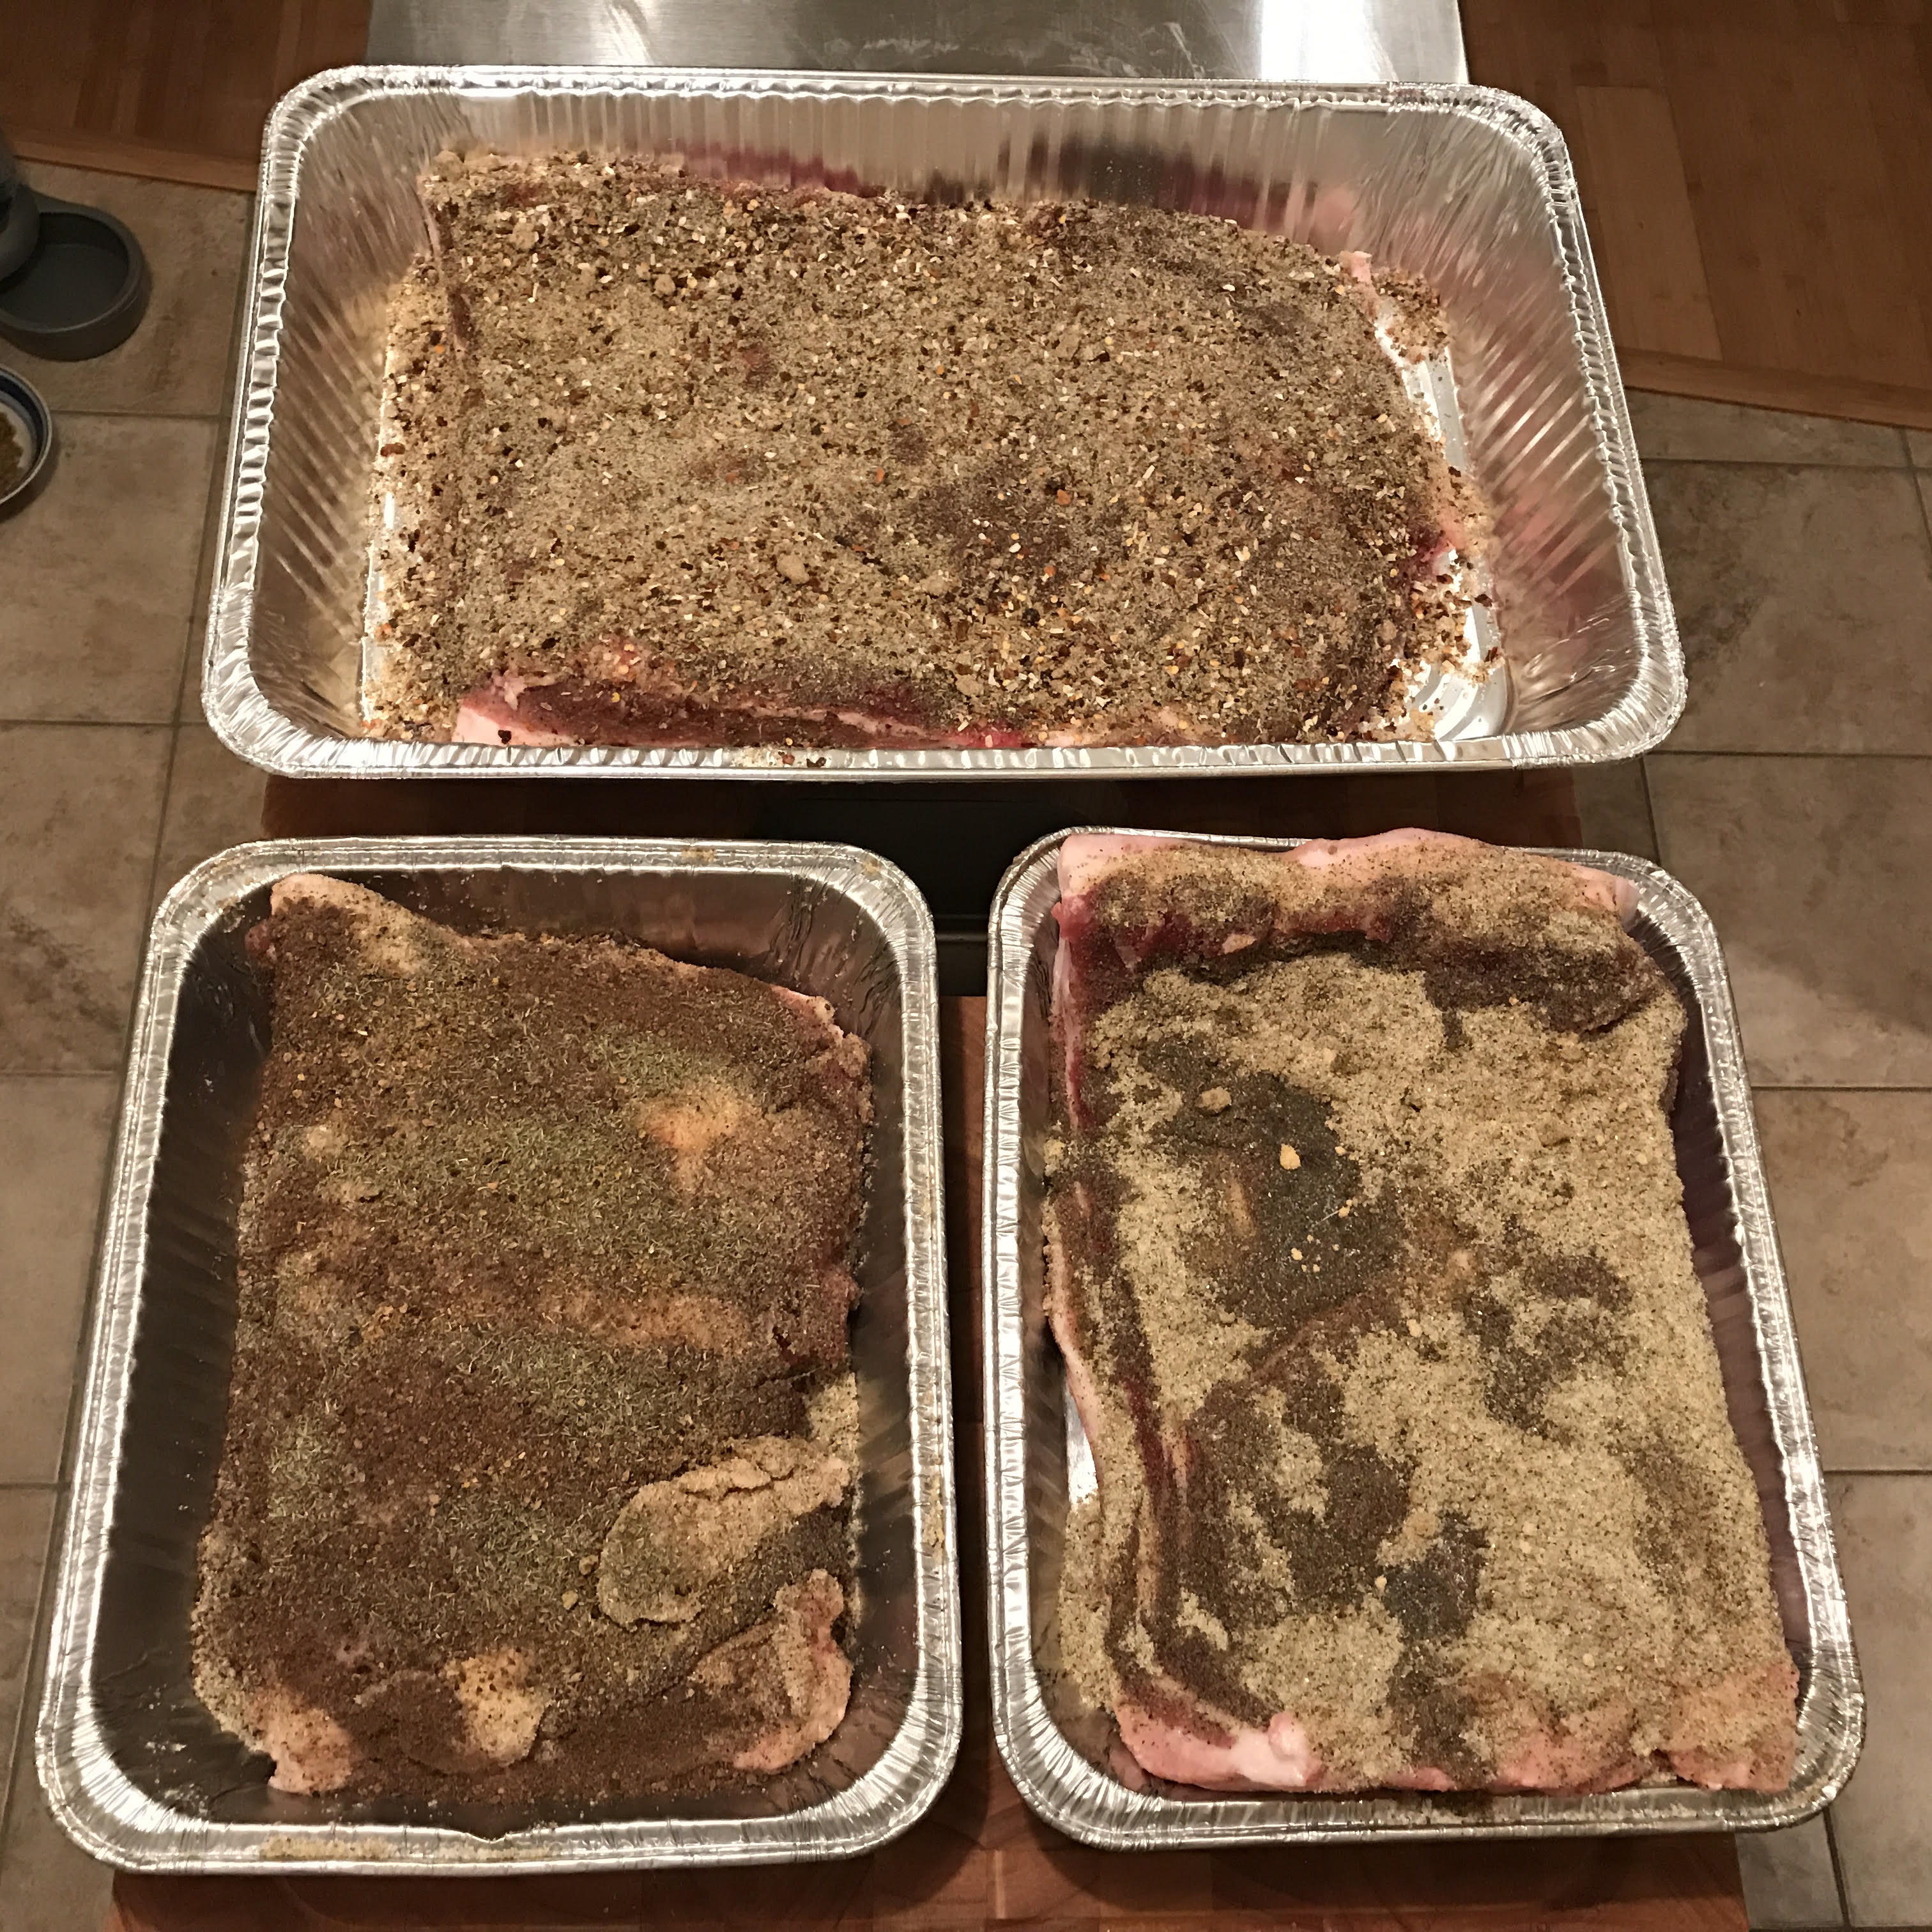
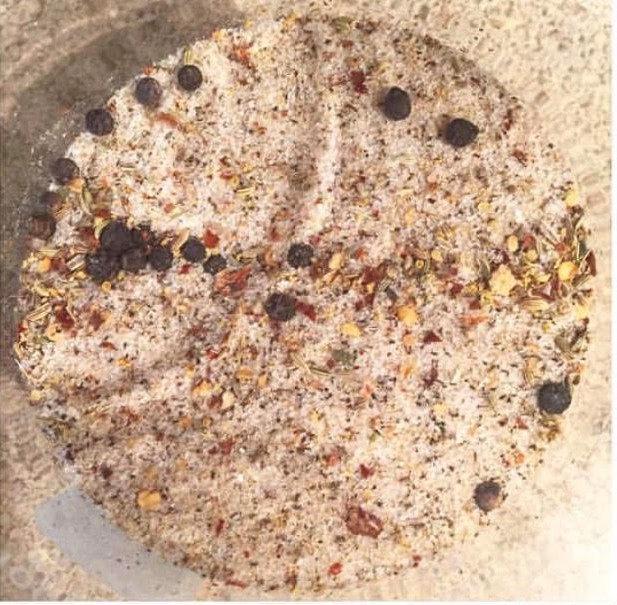
Then you want to weigh out all the spices that you will be using.
To prepare for the next steps, I like to freeze my meat for a few hours before starting. This helps to keep the meat cold during the grinding process, and makes things go more smoothly.
Cubing Phase:
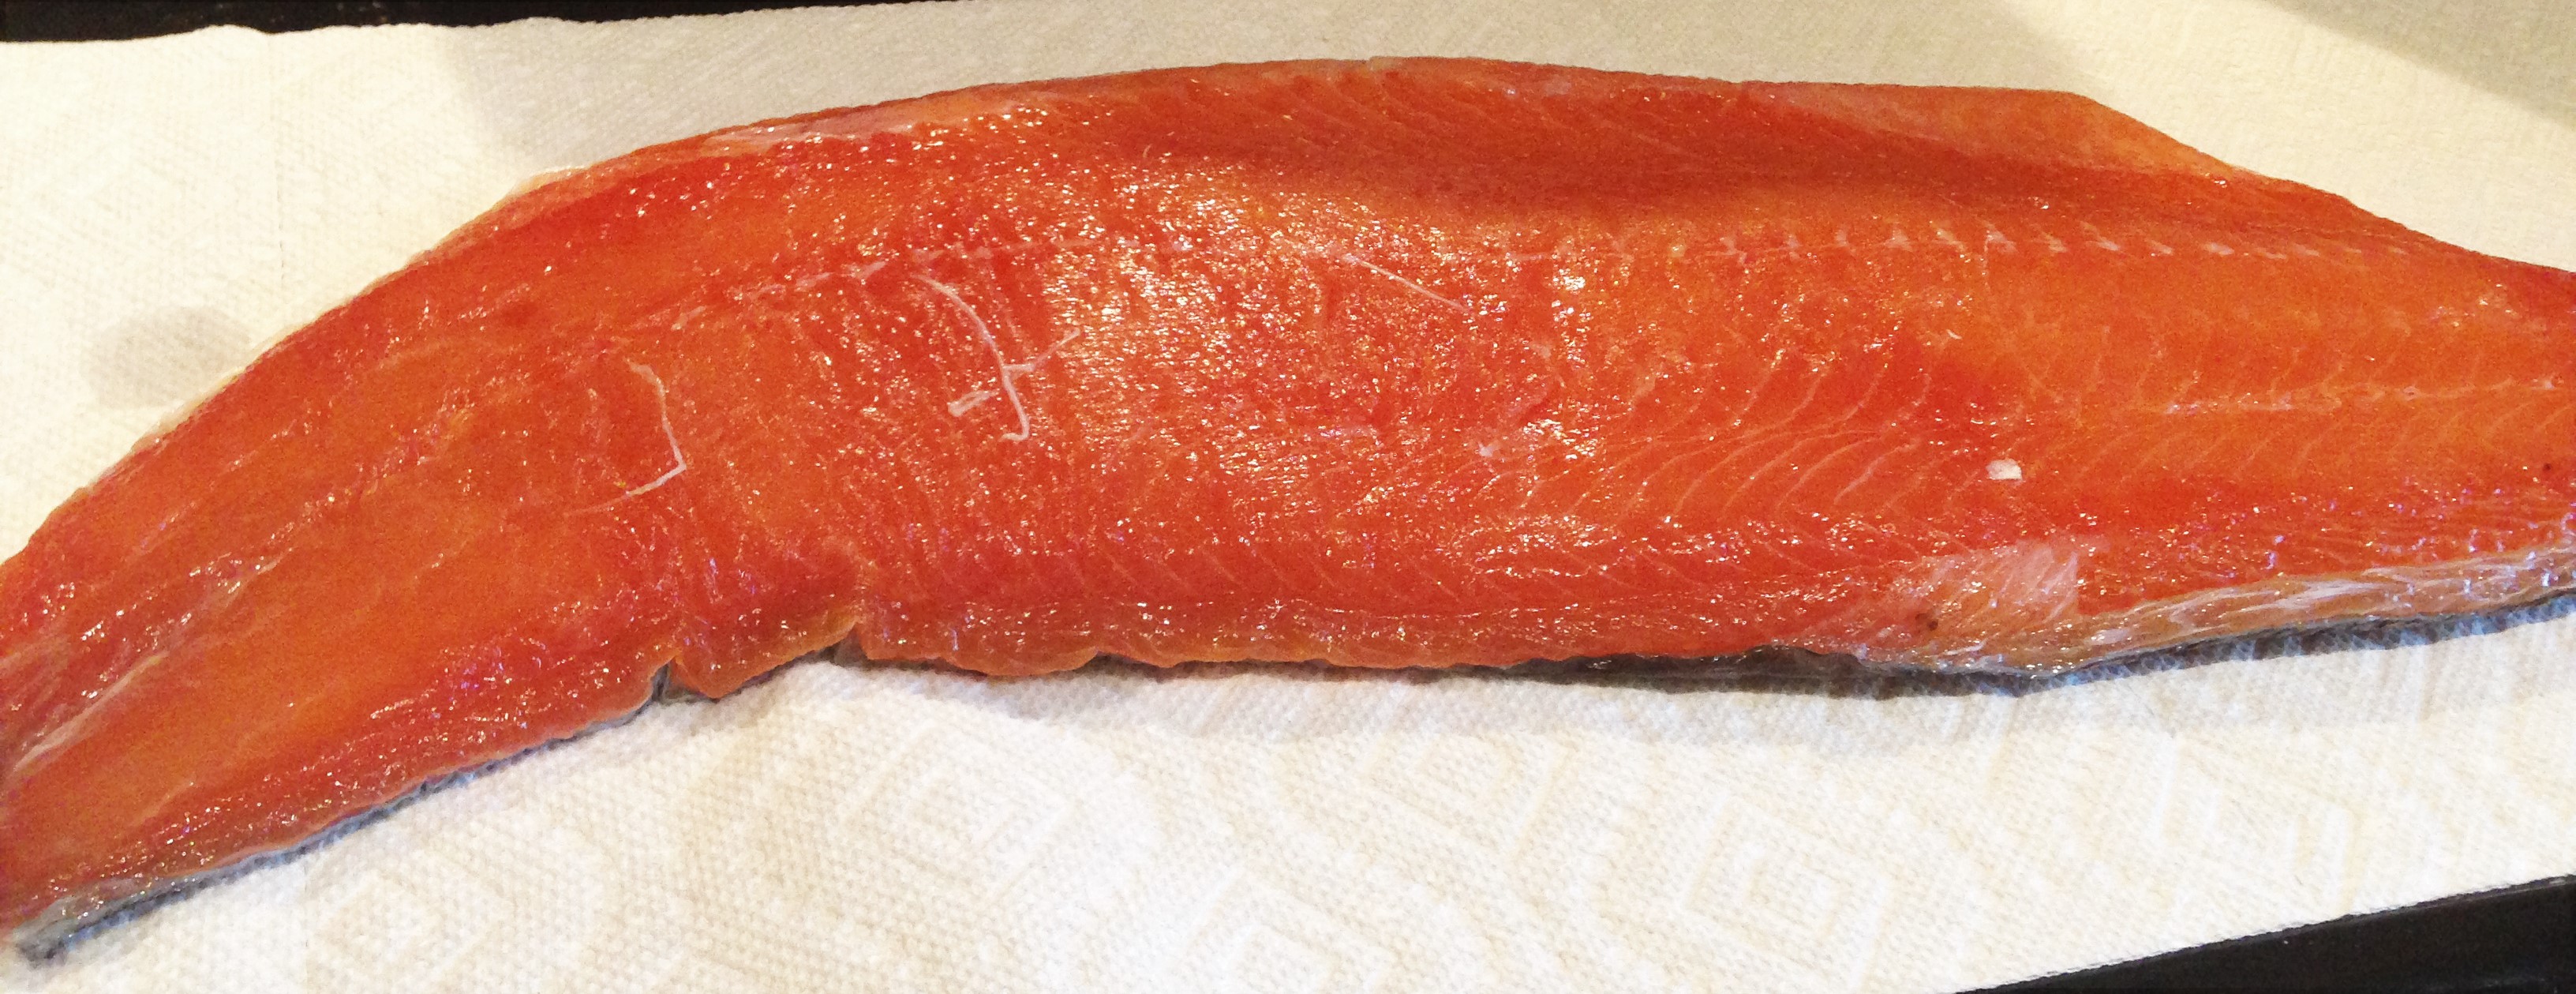
Next, you want to take the cold meat and cube it into pieces that will fit into your grinder, usually about an inch by an inch by an inch.
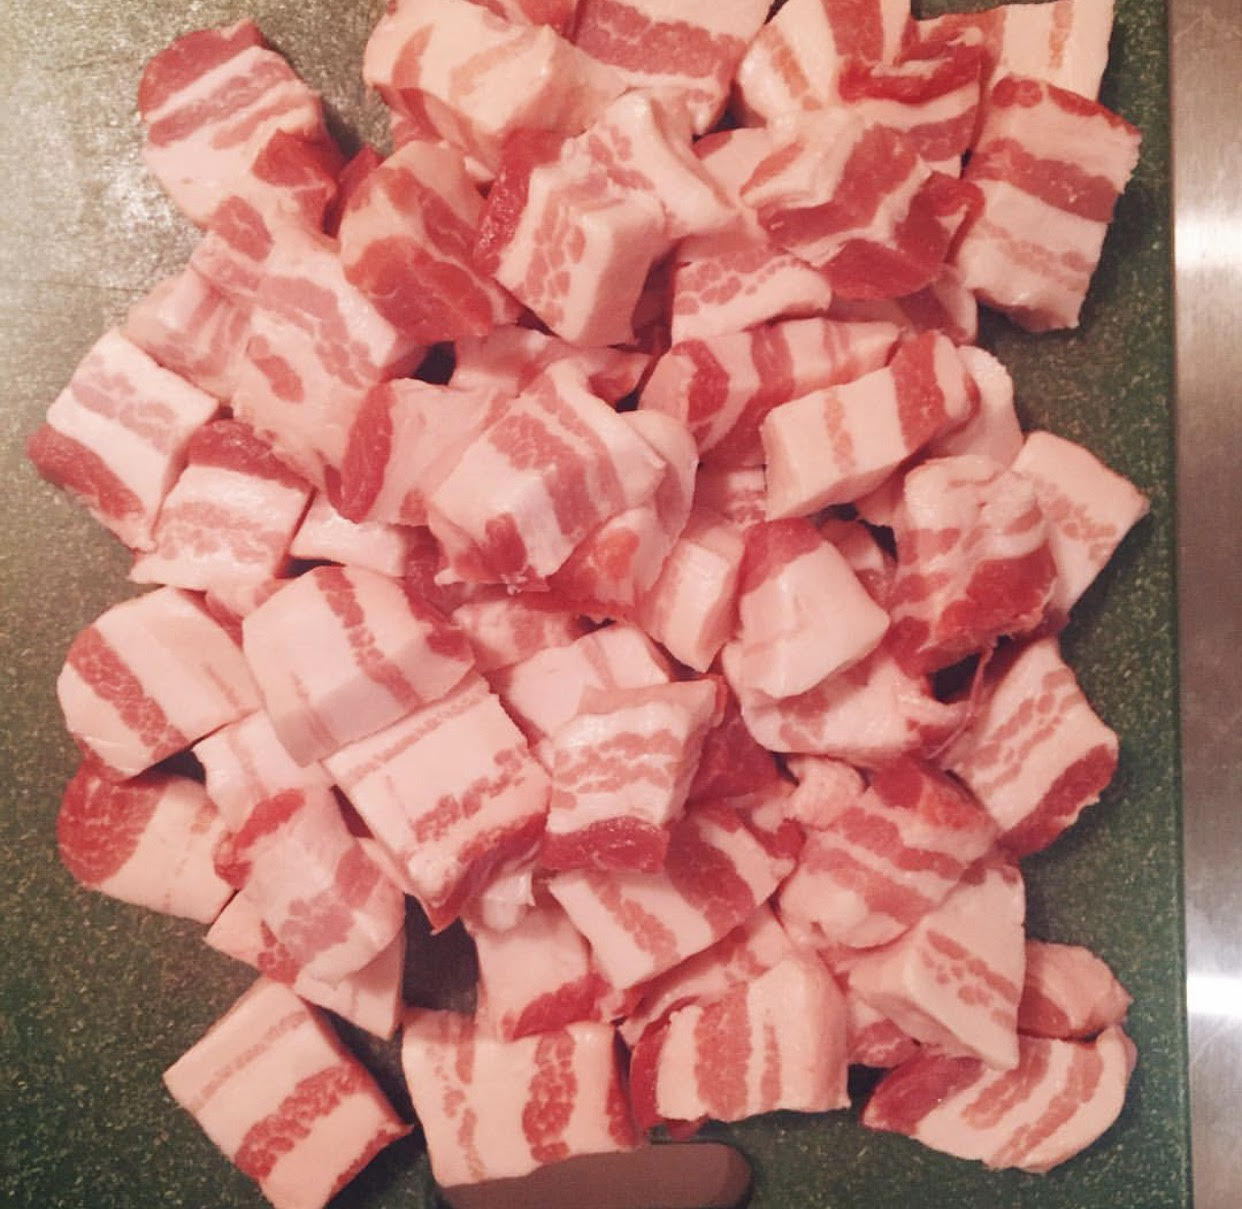
I separate the meat from the fat, since I may end up grinding them with different size grinds.
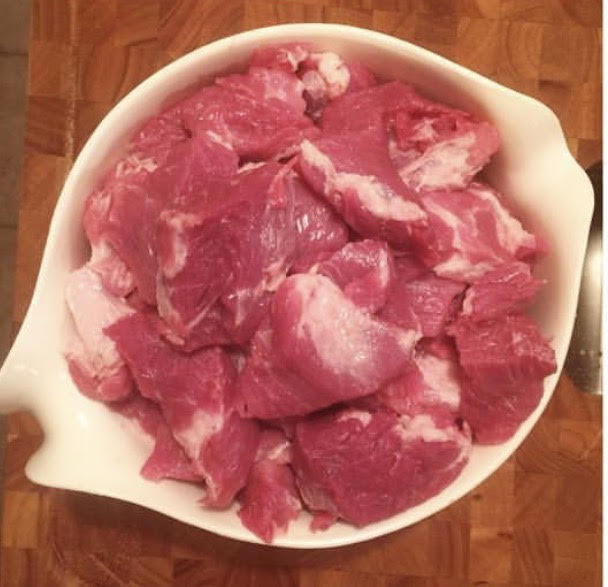
You can cube both the meat and the fat, unless you are planning to hand dice the fat instead of grinding it. If you are planning to hand dice the fat, cut it into pieces that are the size you want in the salami, usually about ¼ of an inch on each side.
Mixing Phase Part 1:
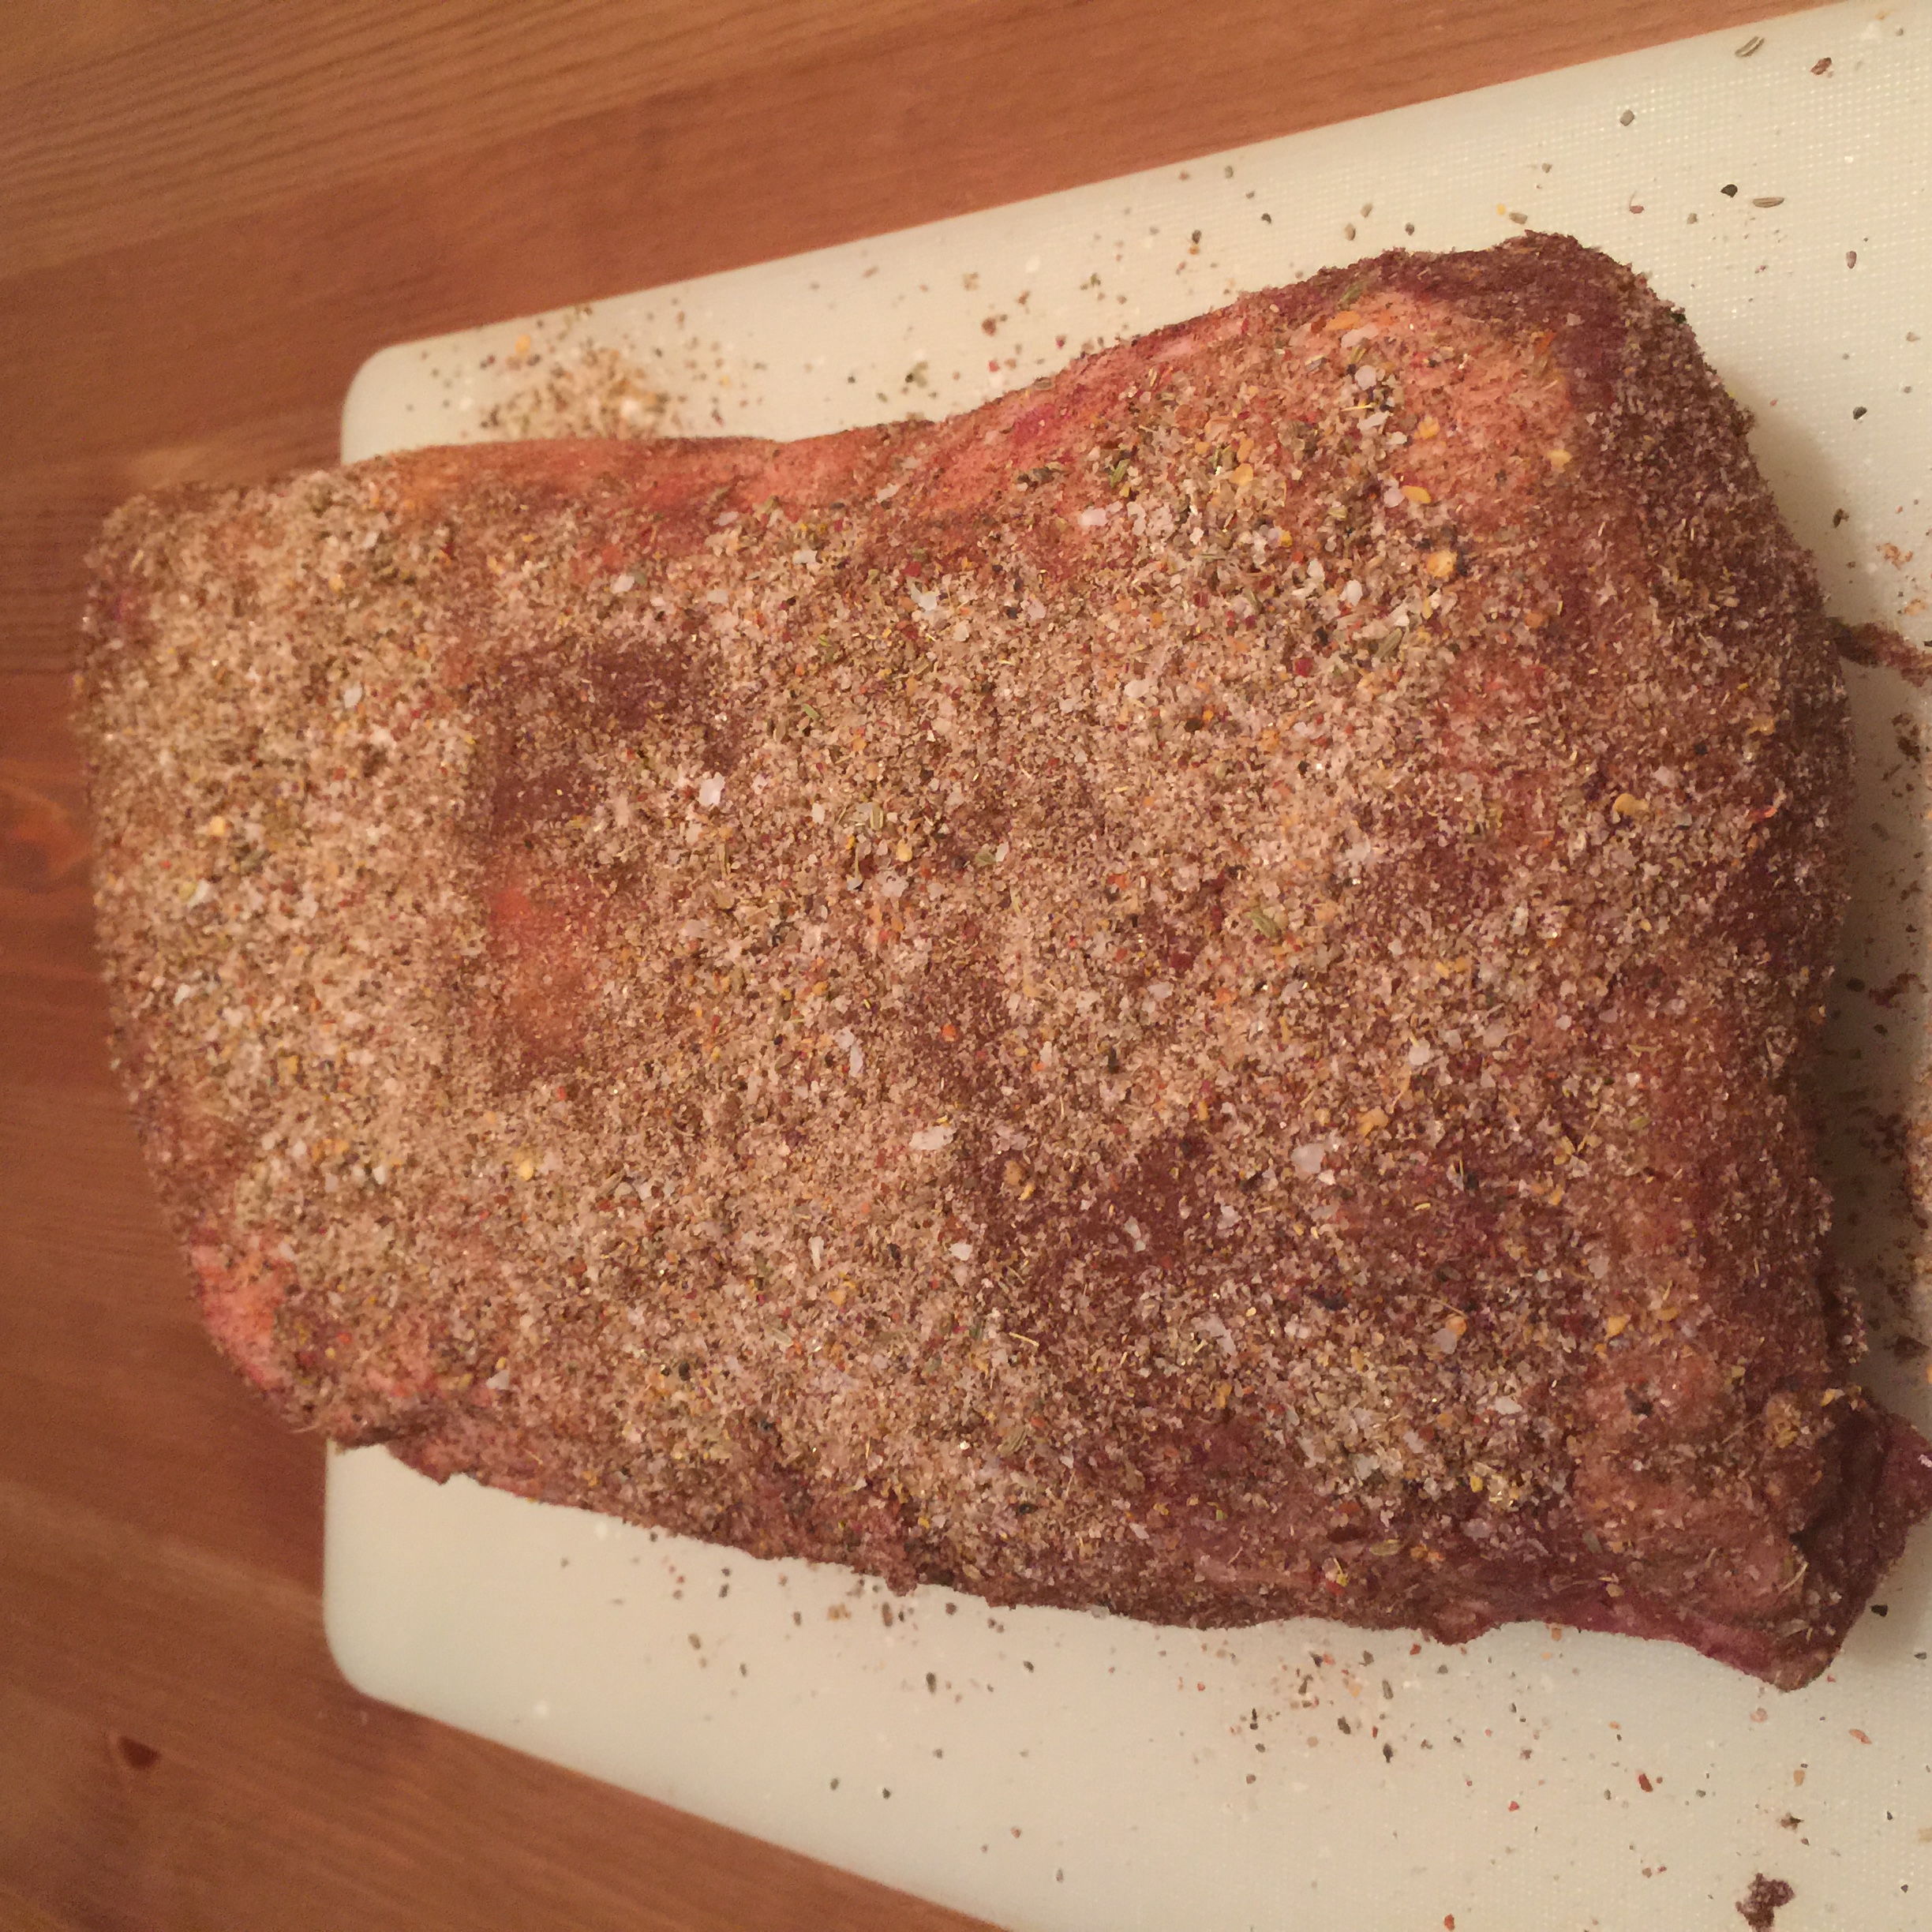
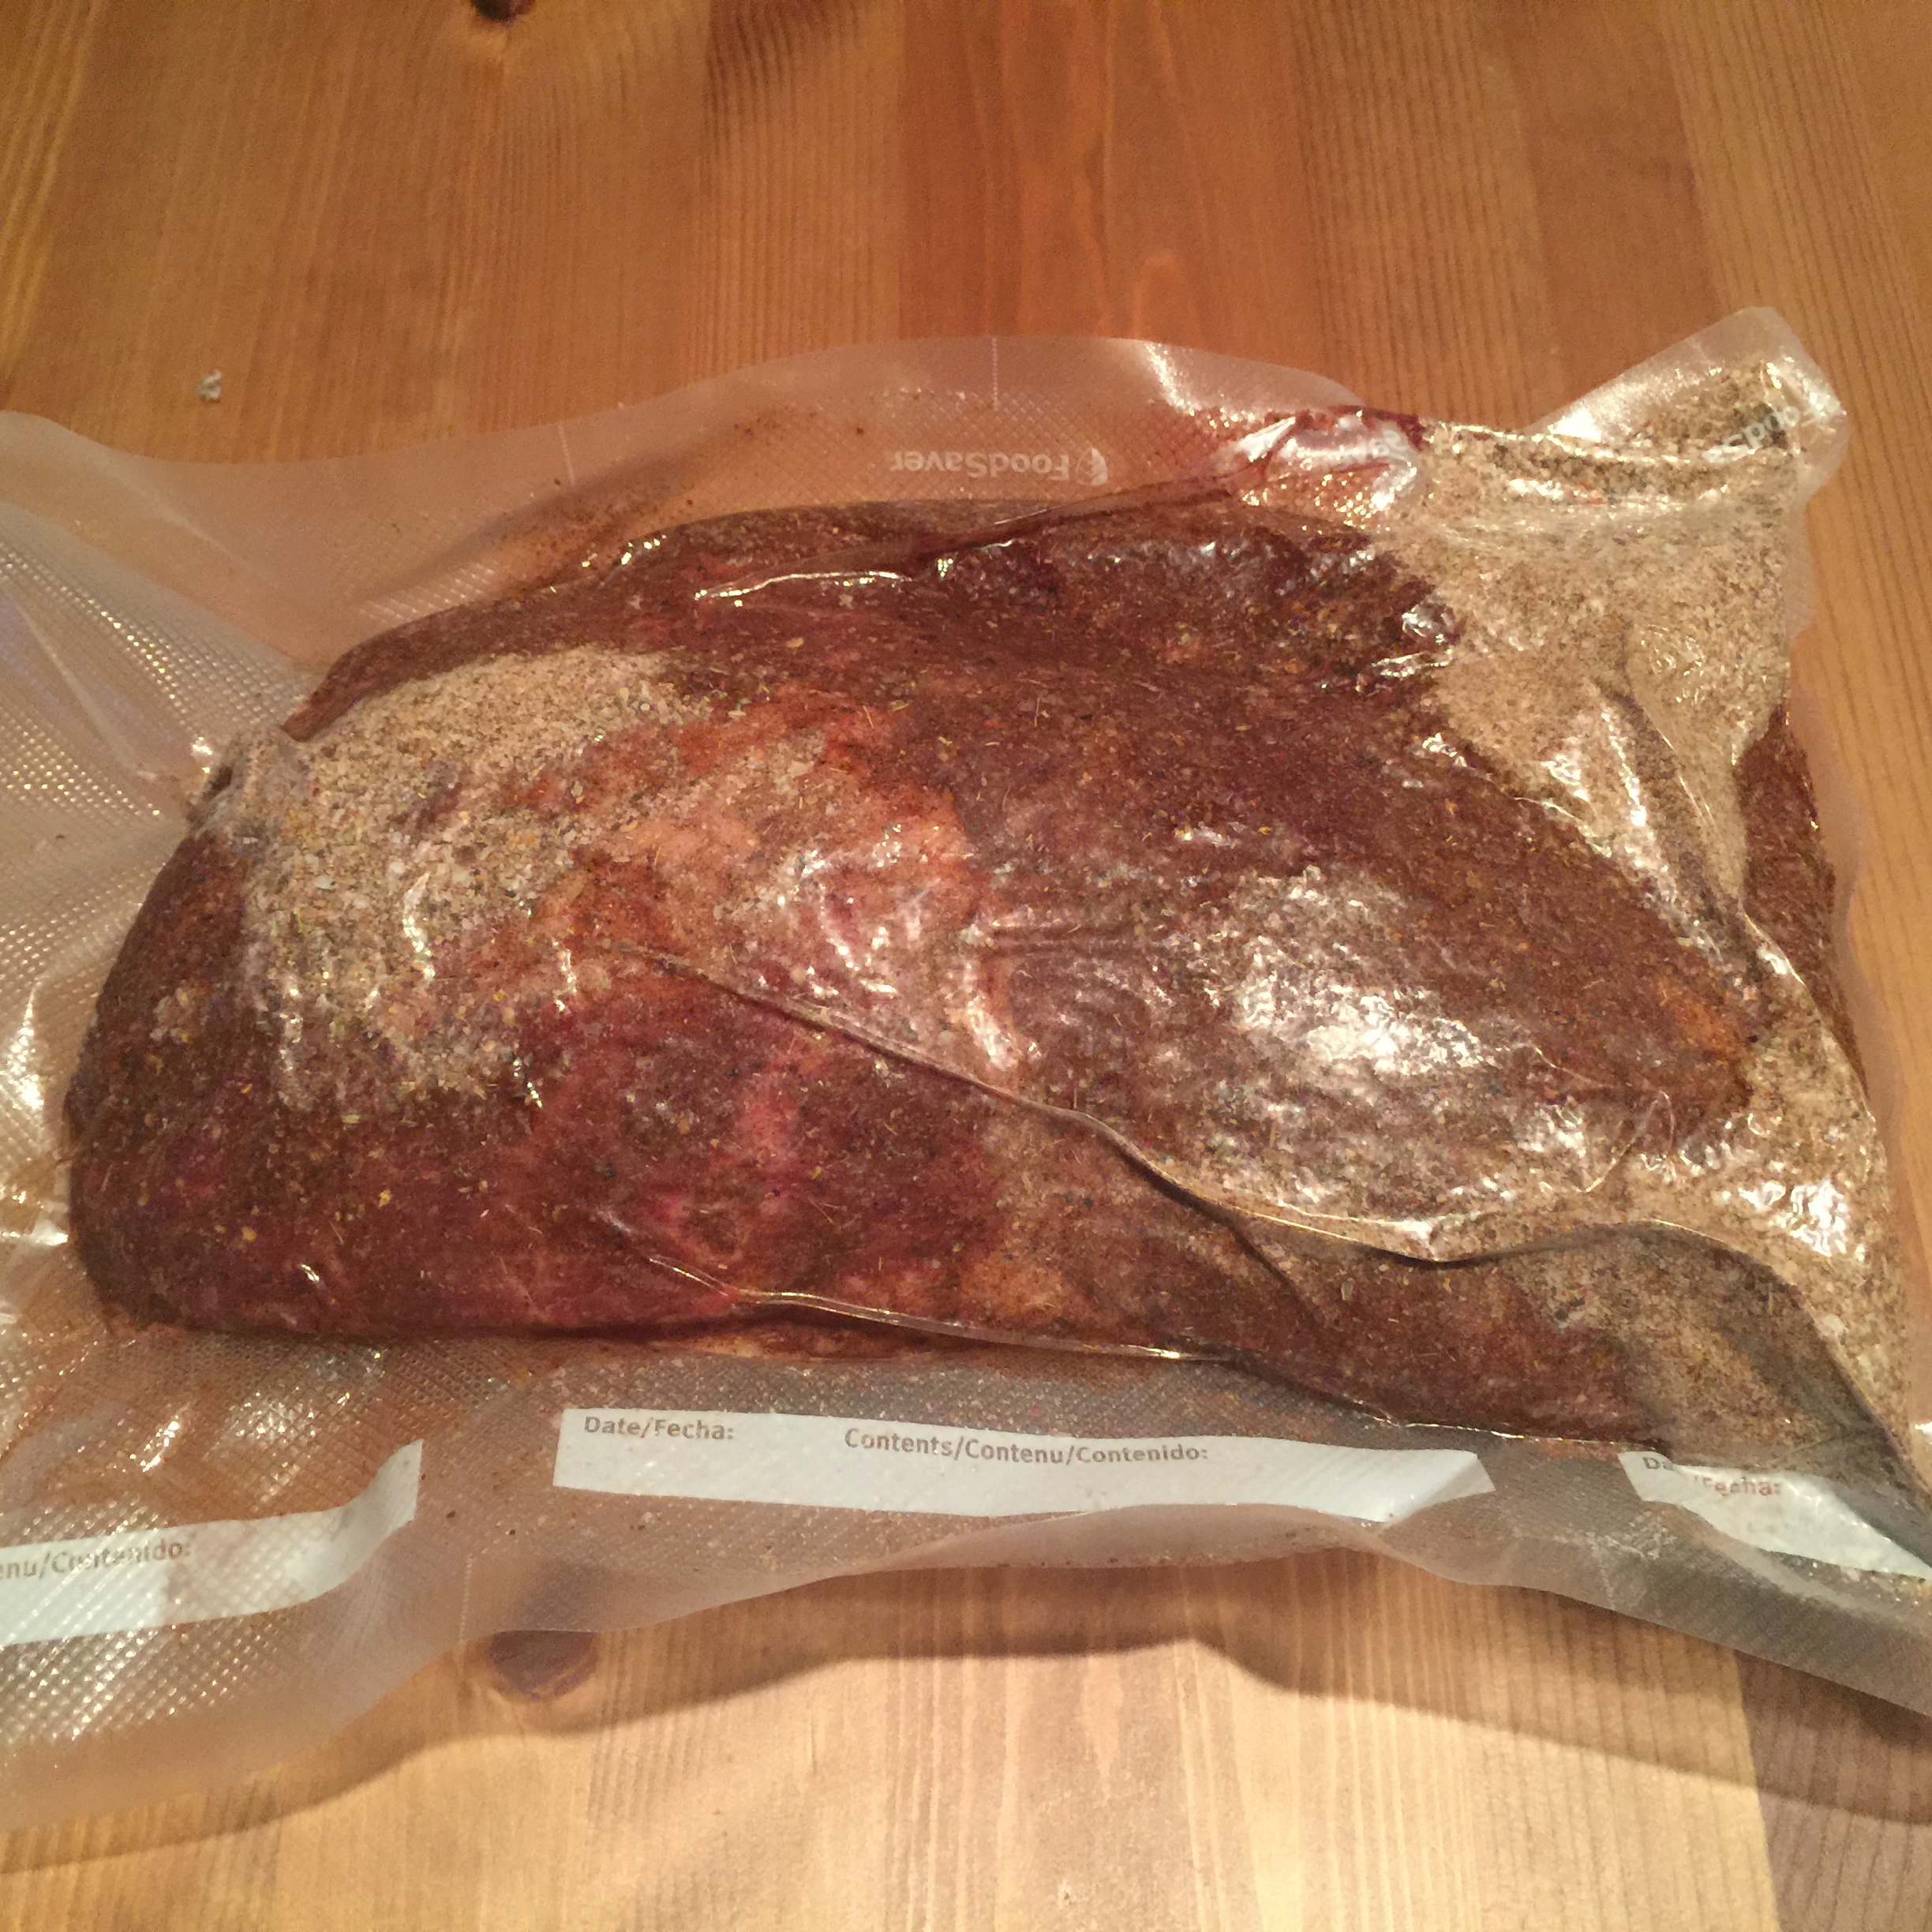
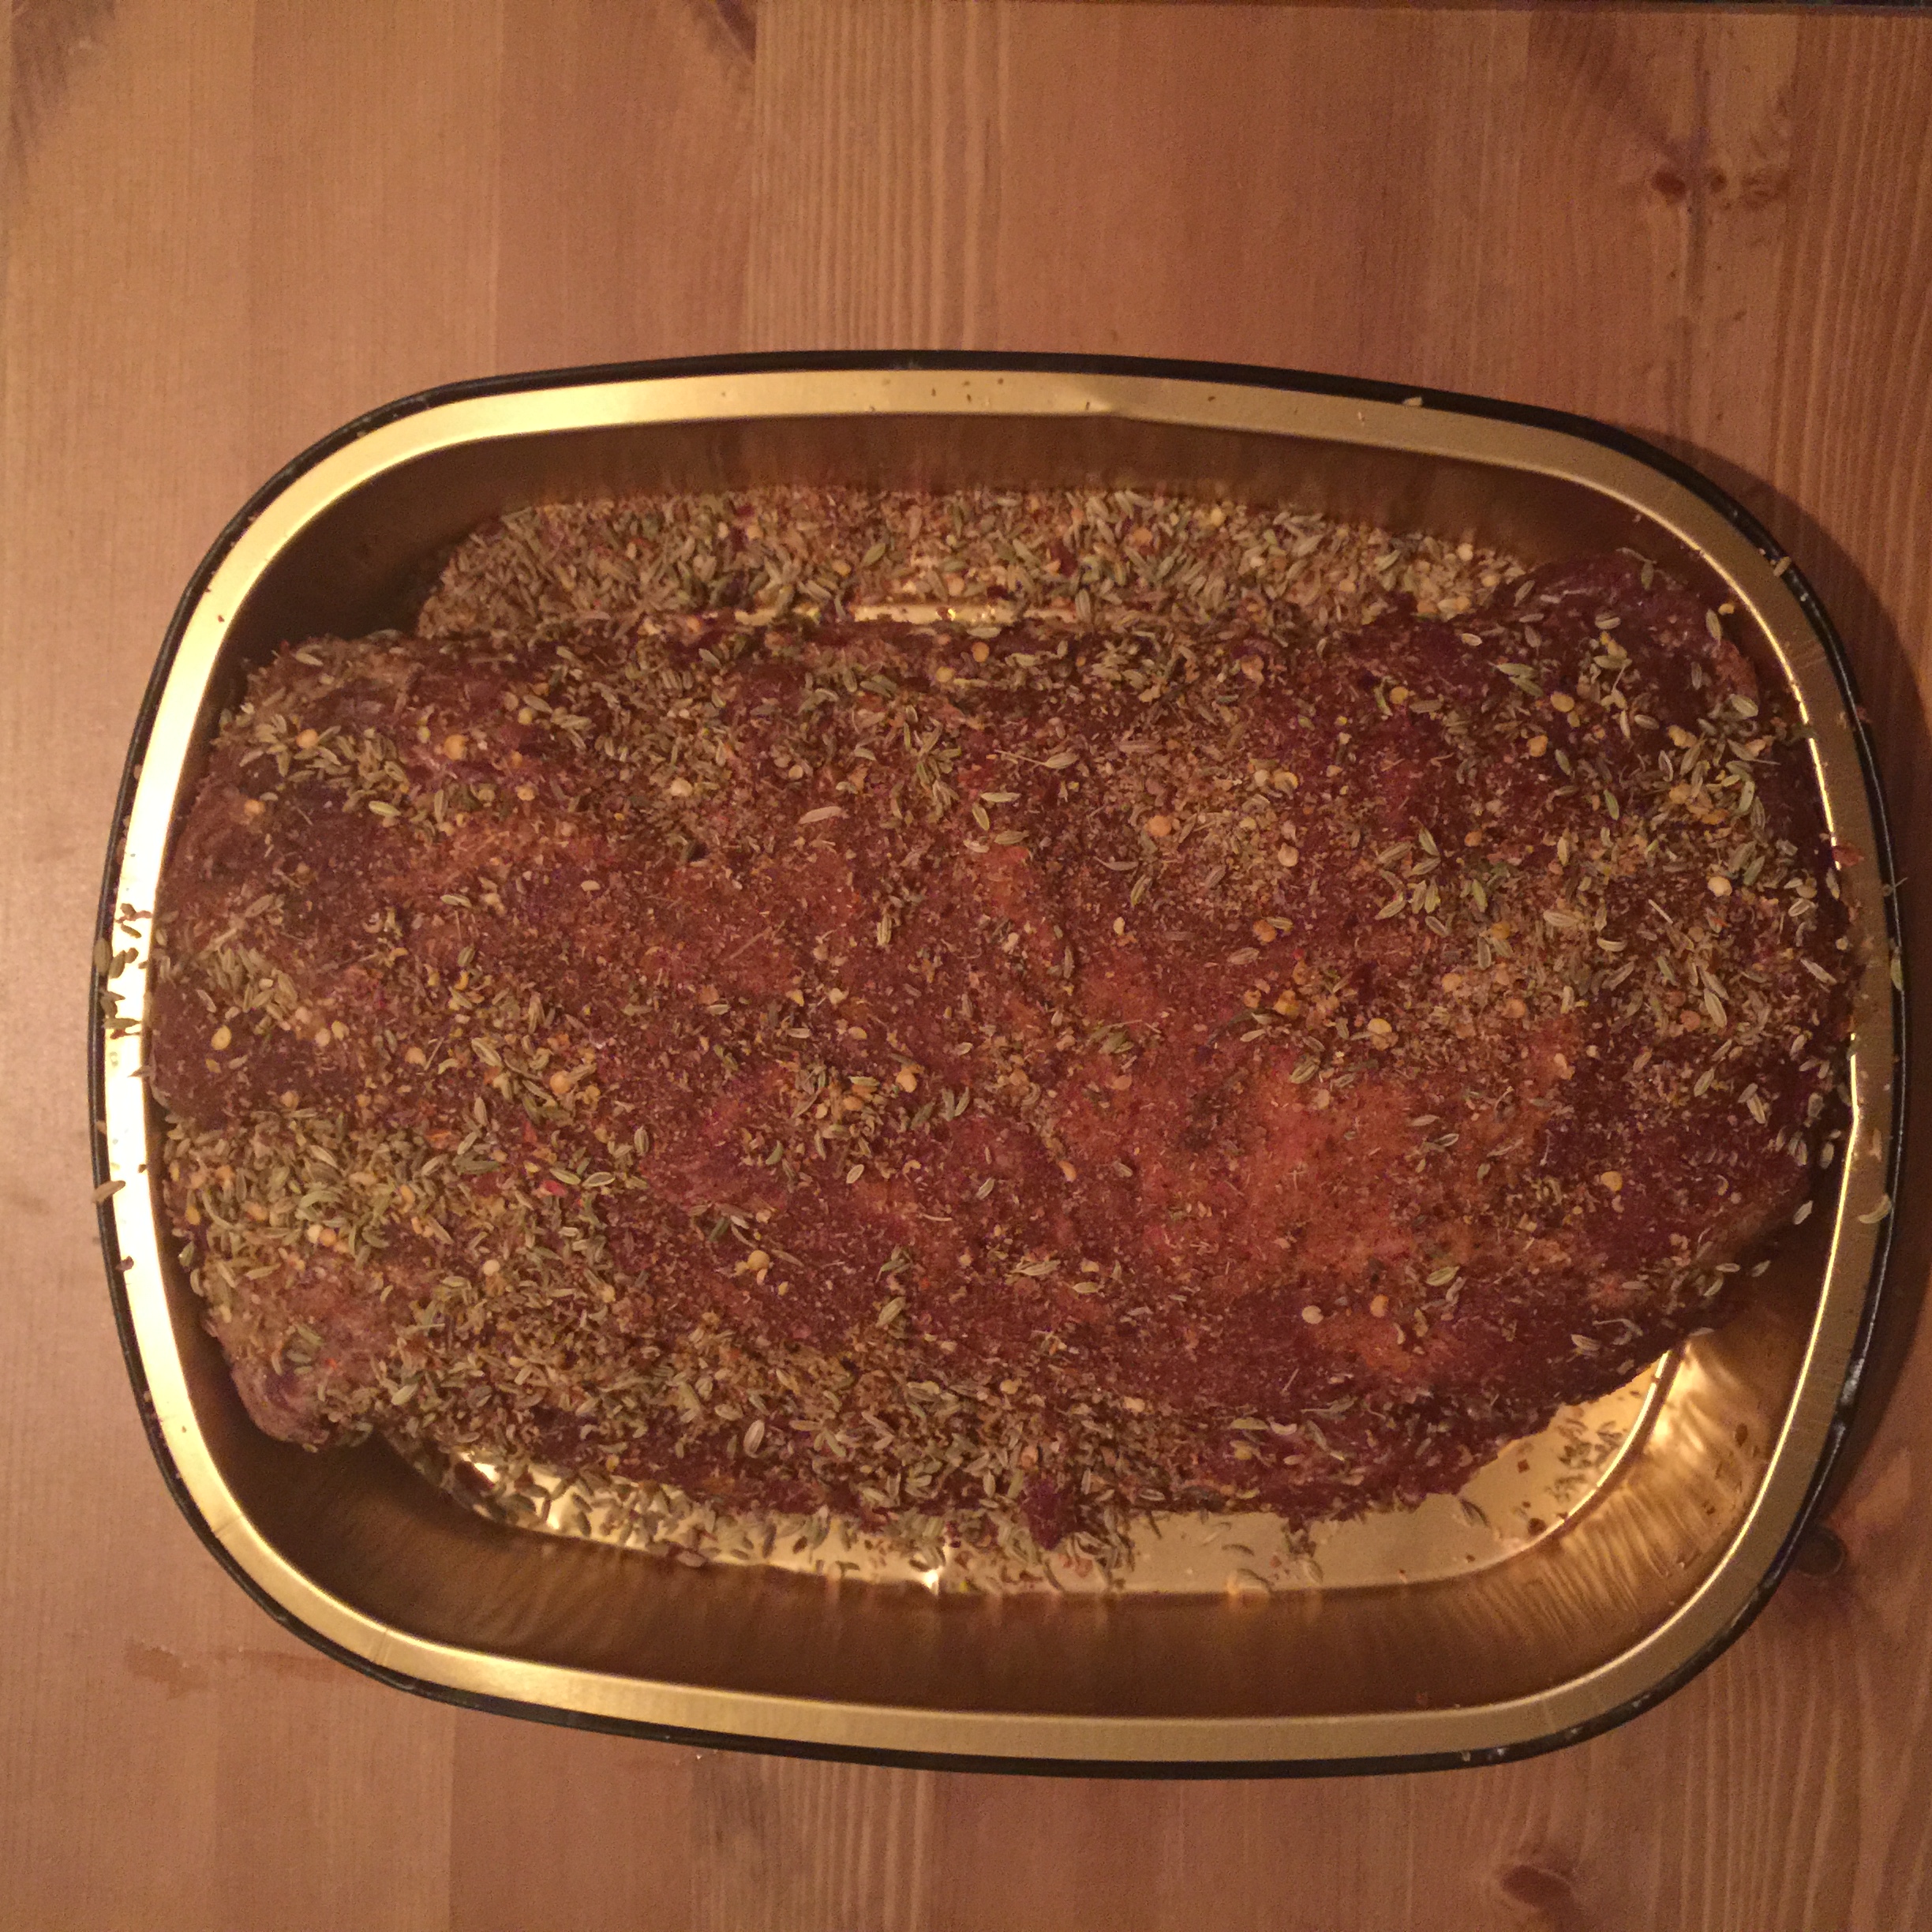
Once the meat and fat is cubed, you want to mix it with the cure spices and the starter culture dissolved either in the wine or if you prefer, water.
Grinding Phase:
Now that you have the meat and fat all mixed with the cure and ready to go, it’s time to grind that meat! I like to use 3/16” grinder plates for the meat and 3/8” grinder plate for the fat (if I decide not to hand dice the fat).
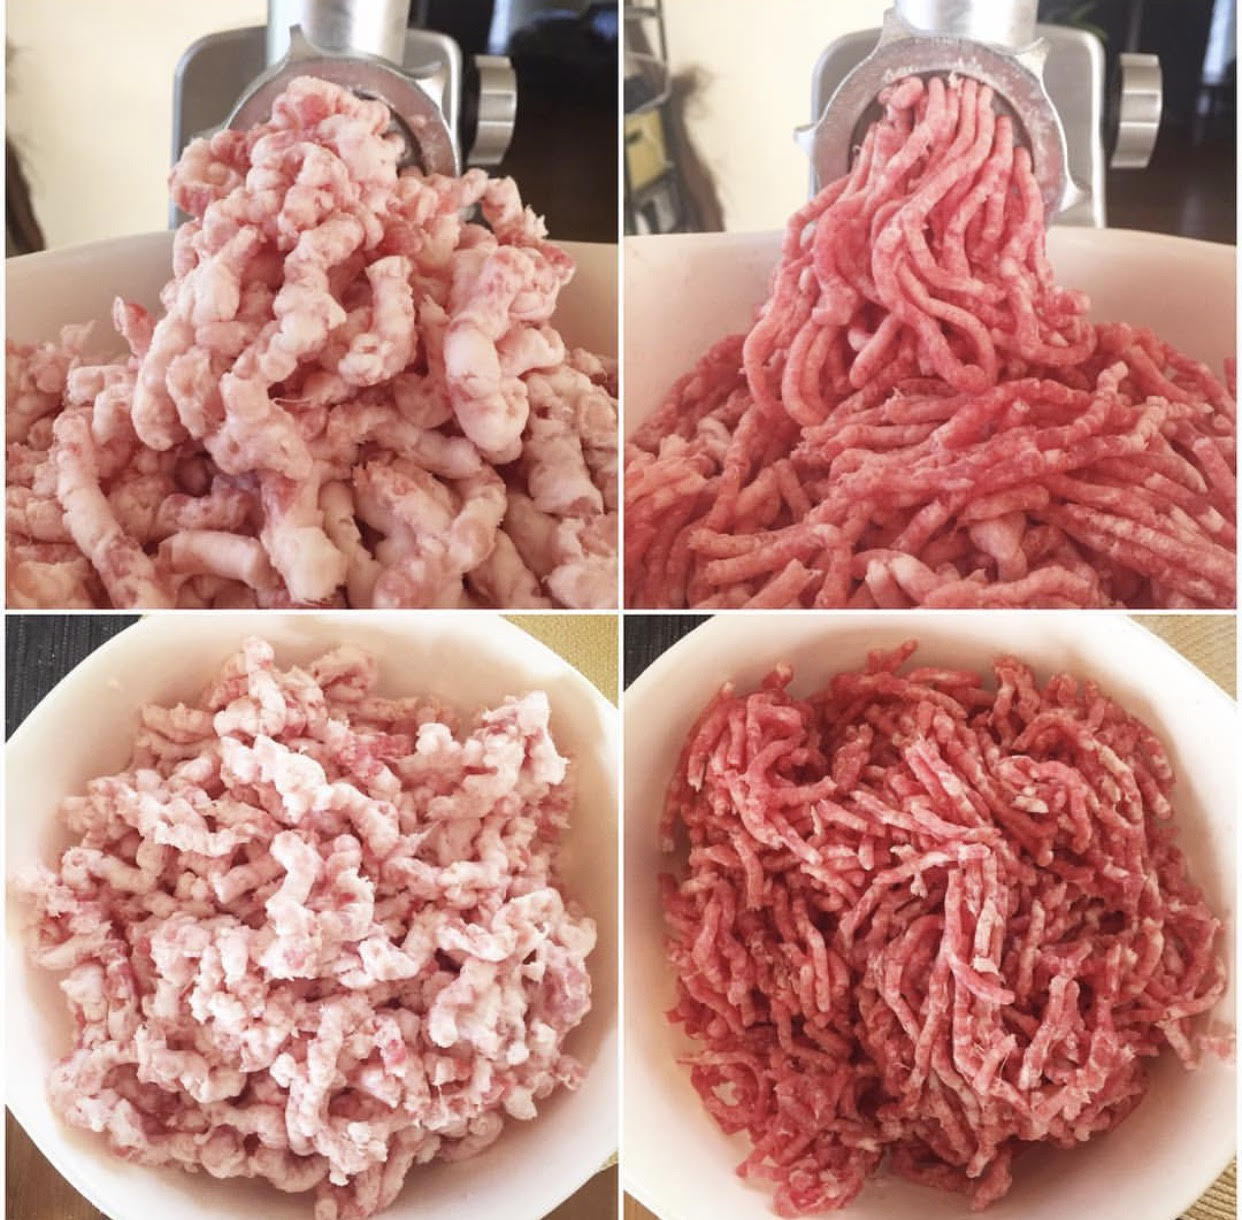
Run the meat through the grinder, making sure to keep everything as cold as possible, and return to the fridge or freezer when not in use.
Mixing Phase Part 2:
When you have finished the grinding phase, you should have a nice mixture of ground meat with the cure mixture and the starter culture thoroughly mixed in. The next step is to mix the meat and the fat together. This can be a tricky part. Ideally, you want to mix the meat and fat so that the mixture becomes tacky and sticks together, but not so much that the fat starts to smear. You can usually accomplish this if you keep the meat cold and work fast. This is either done using a stand mixer or by hand. One you have mixed everything together, you can leave the mixture to chill overnight in the fridge (which can help to increase the cohesion of the meat), or you can move on to the next phase.
Stuffing Phase:
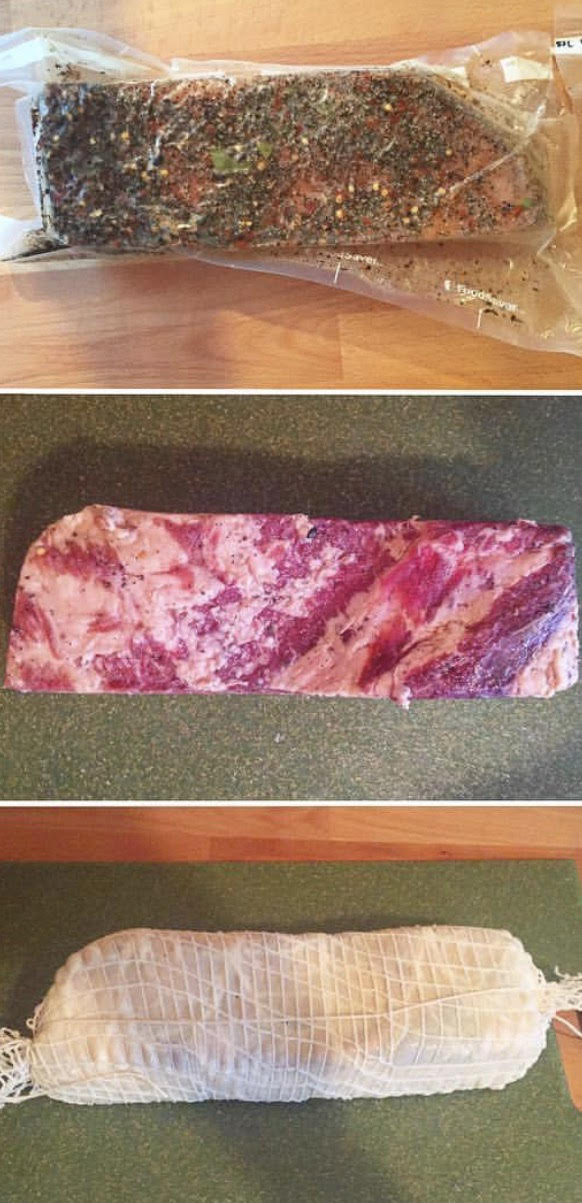
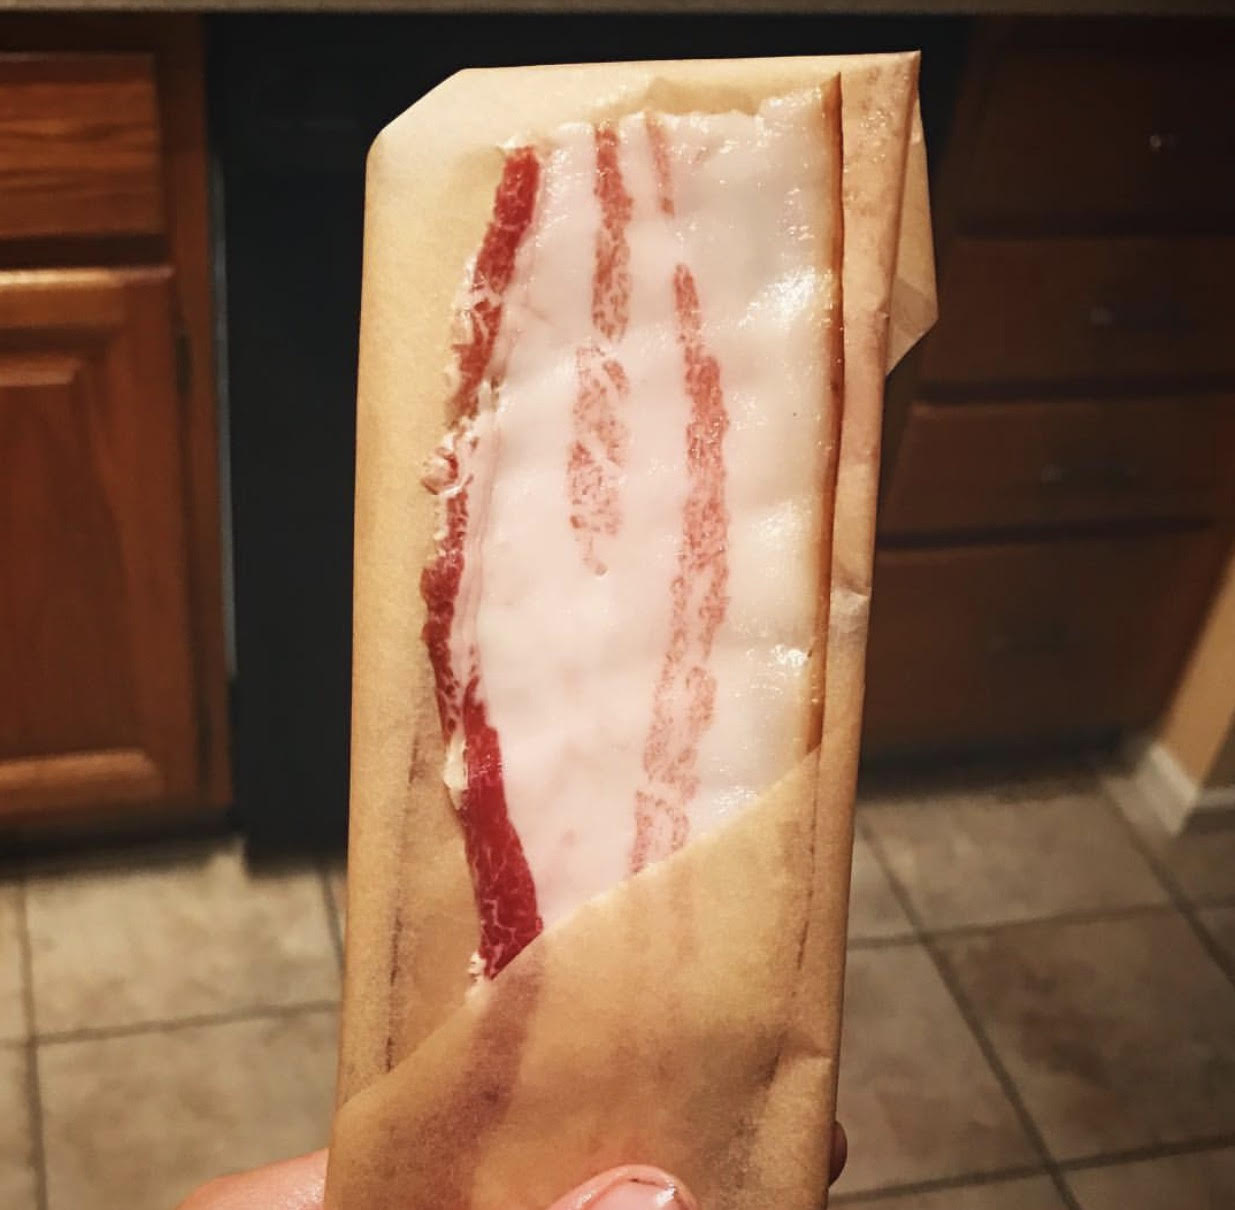
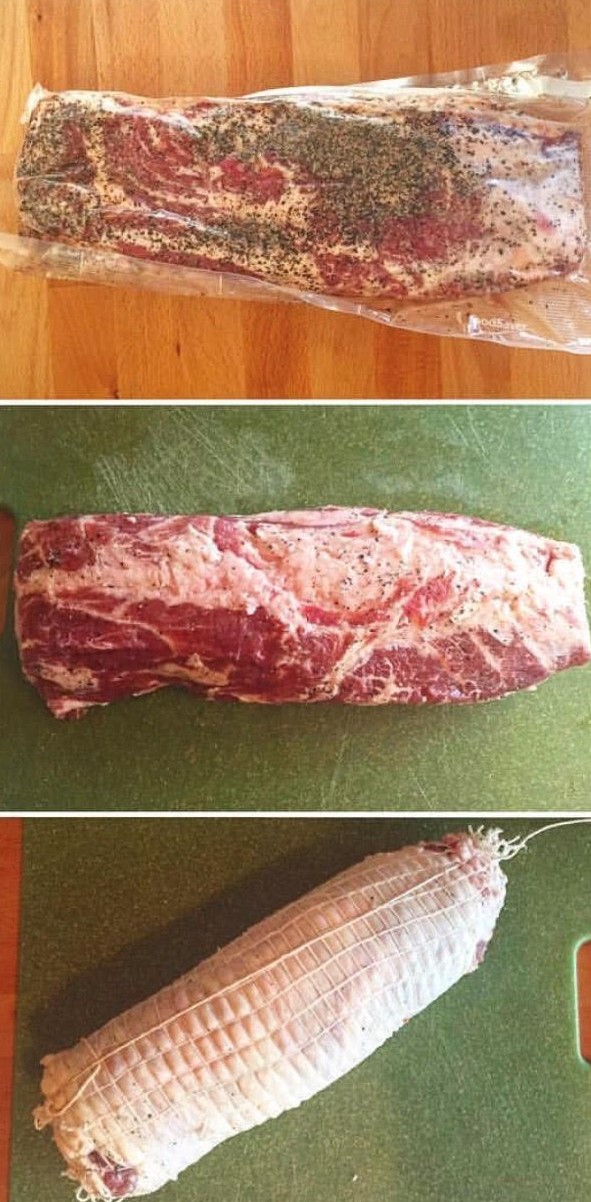
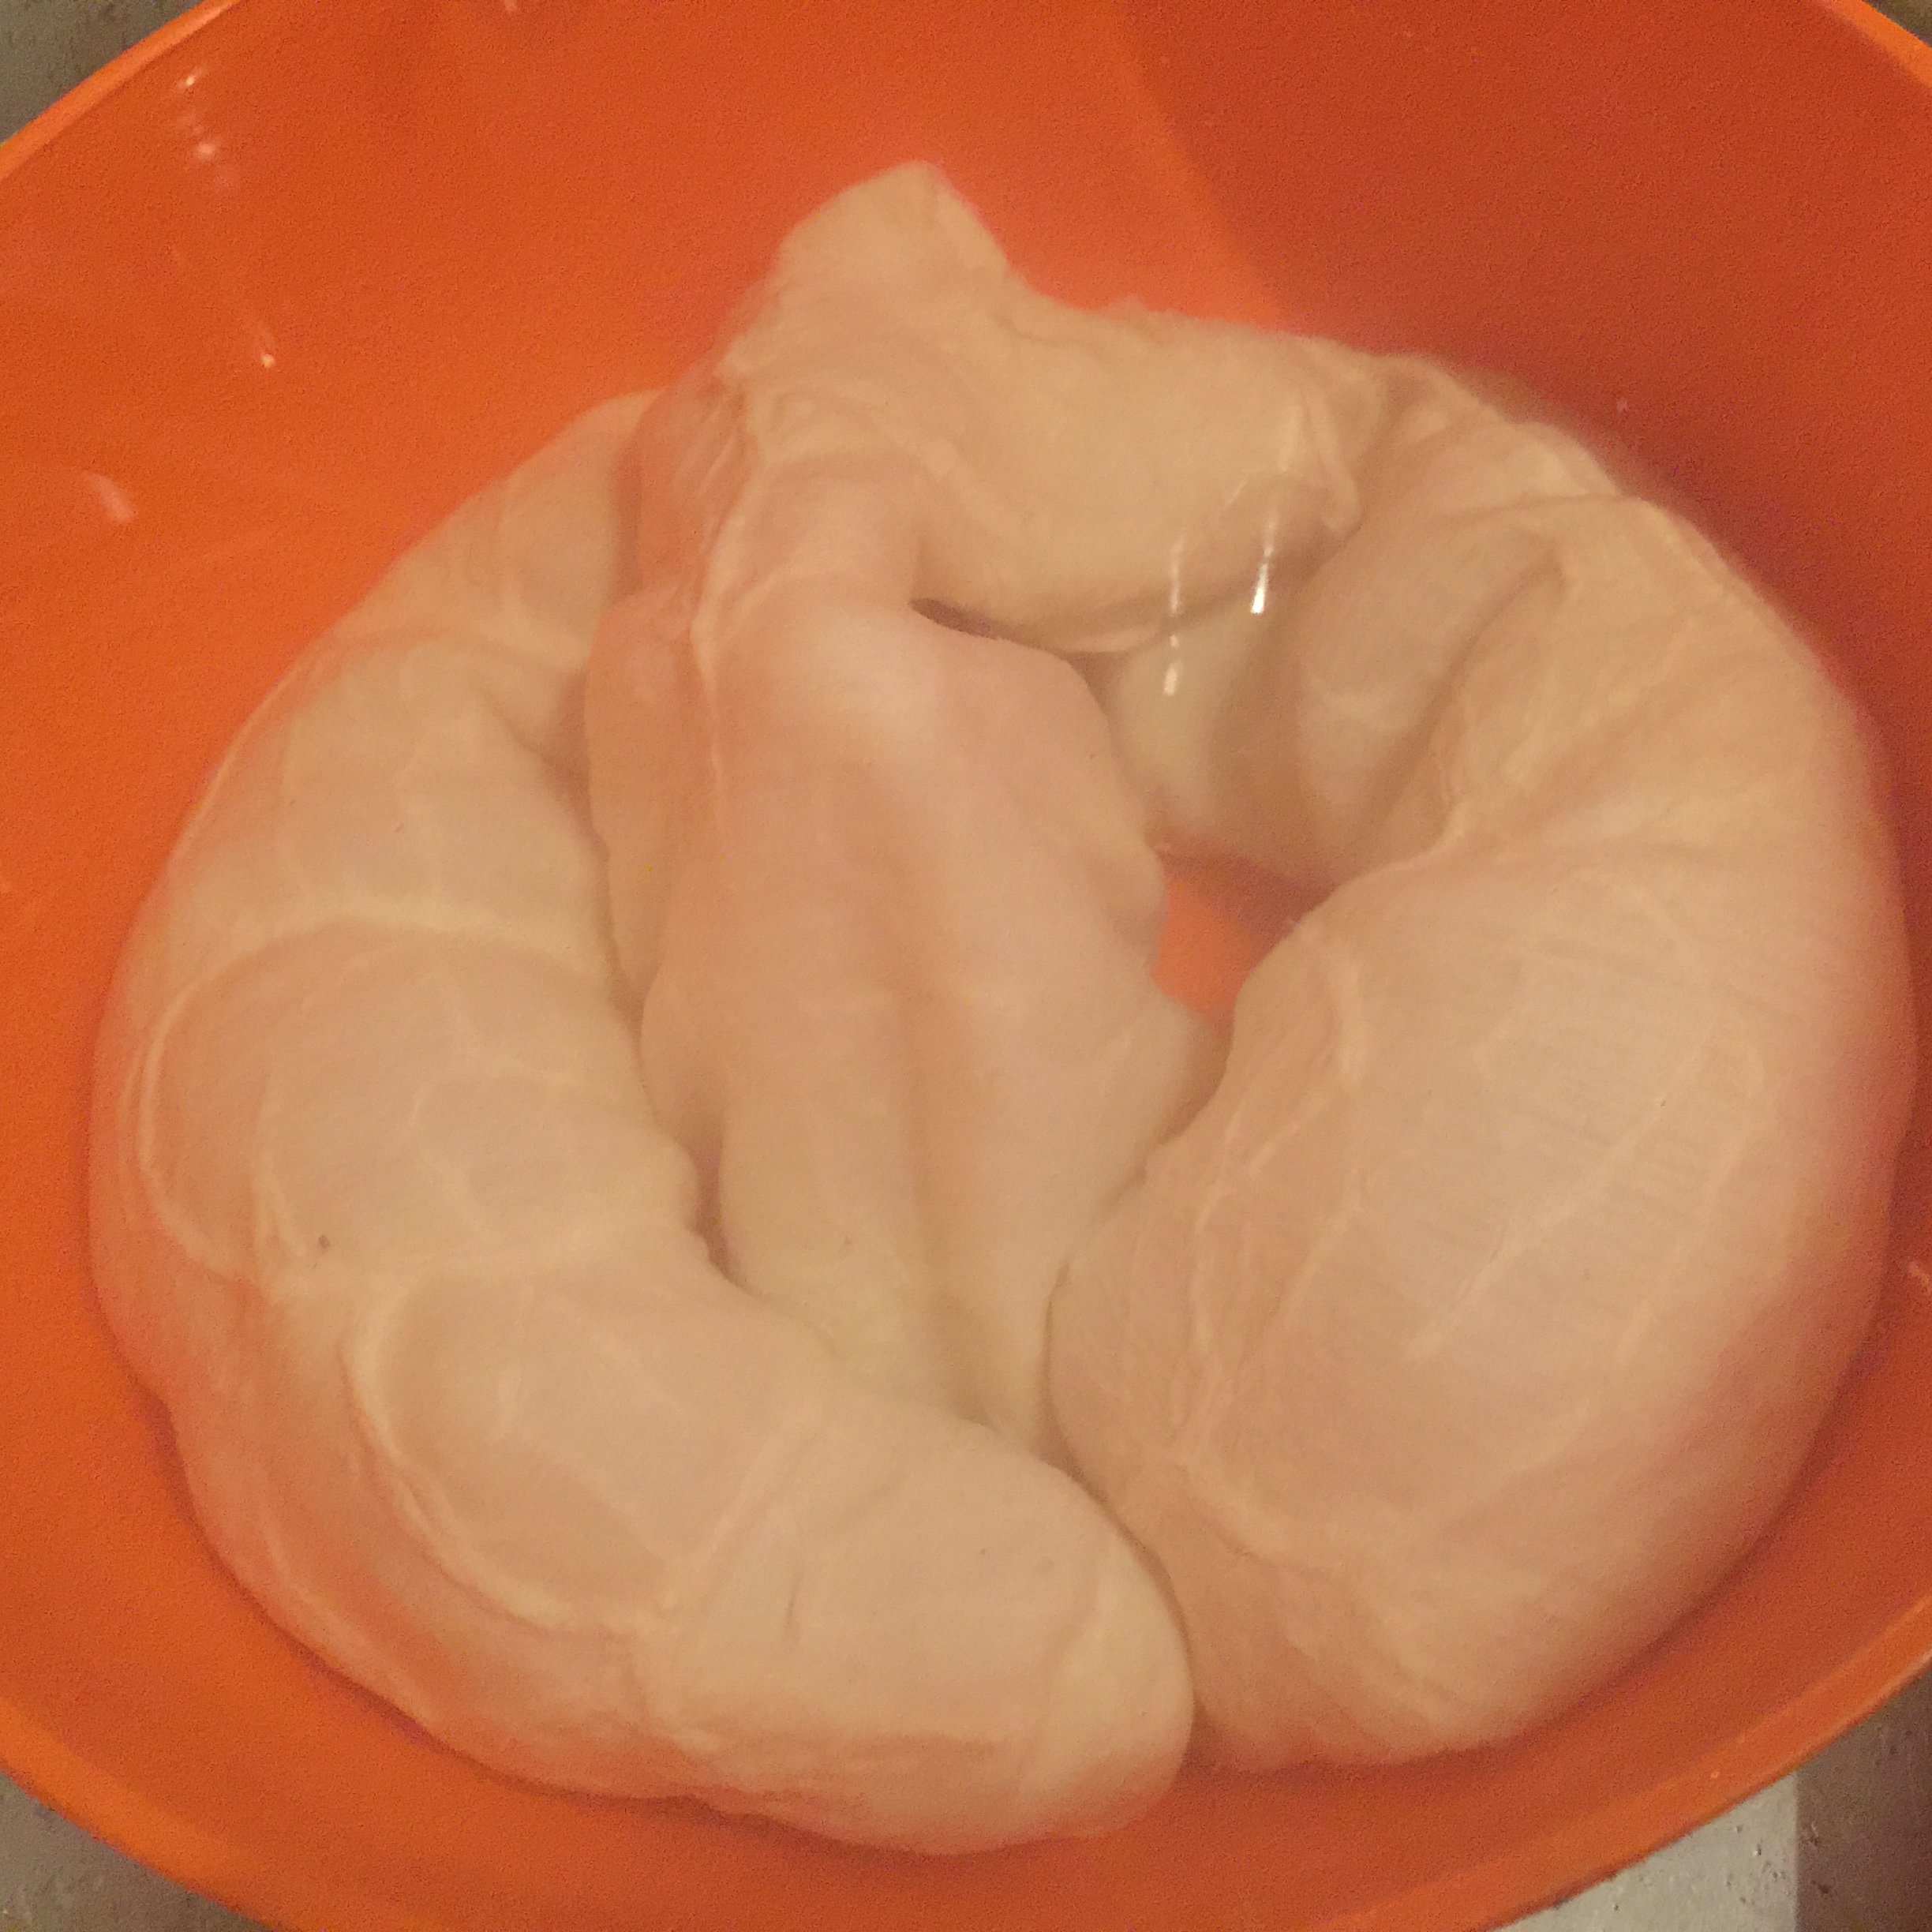
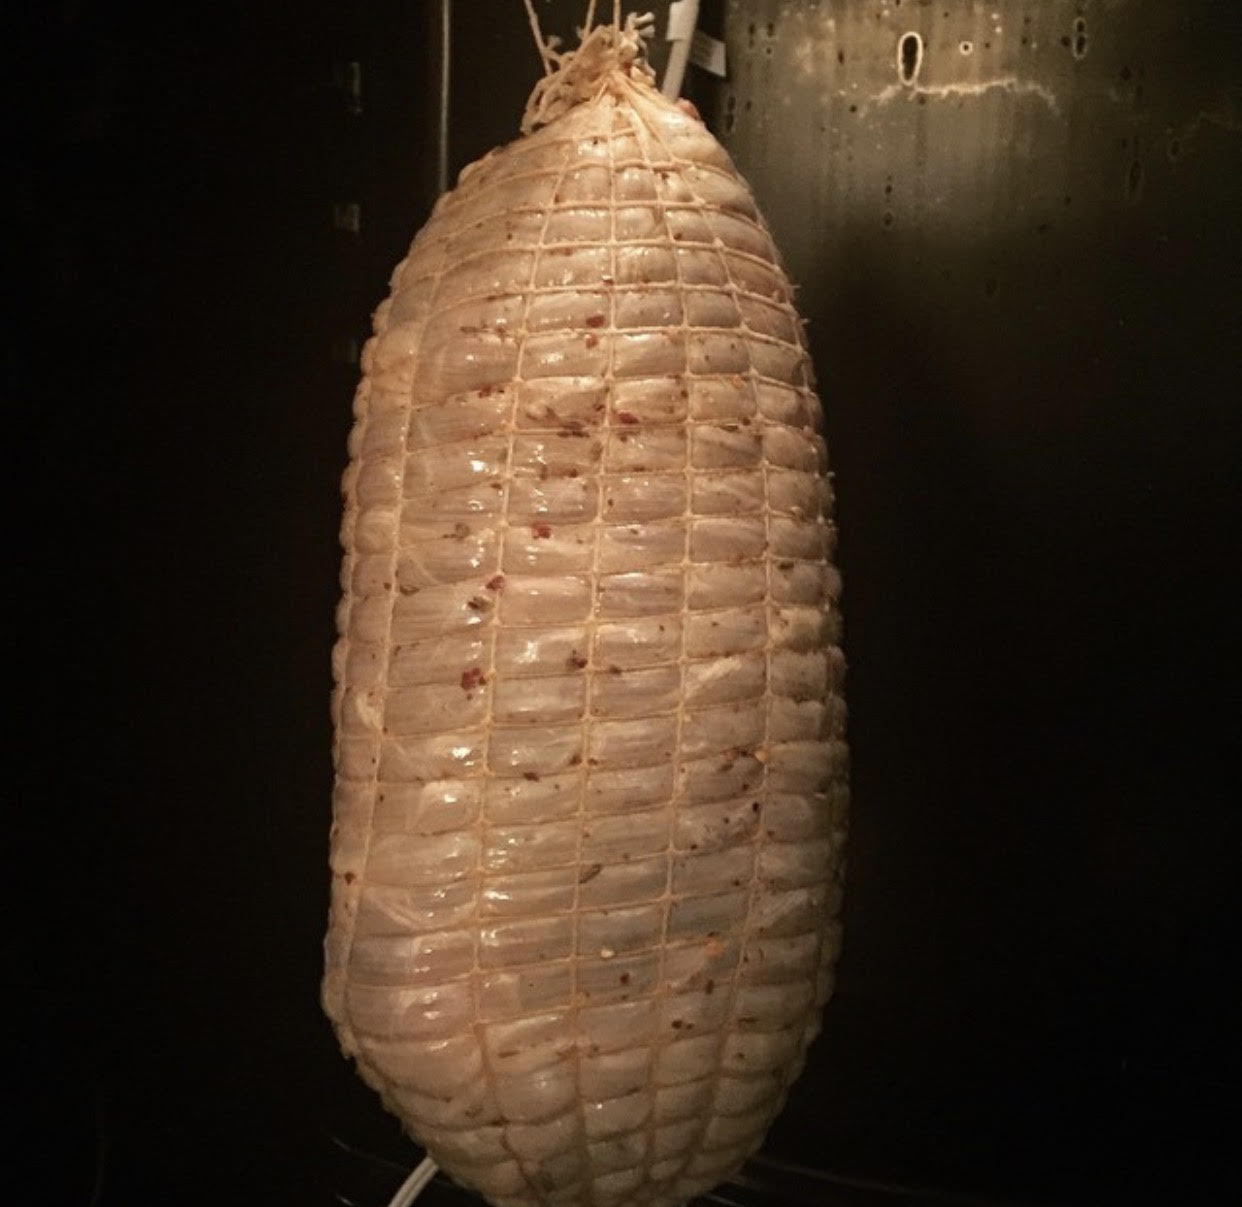
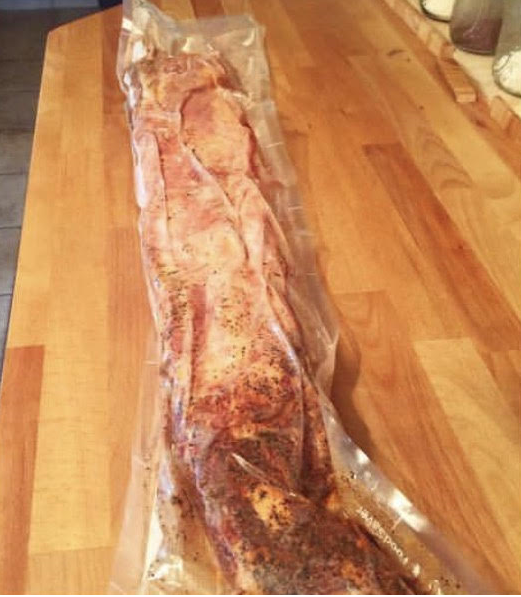
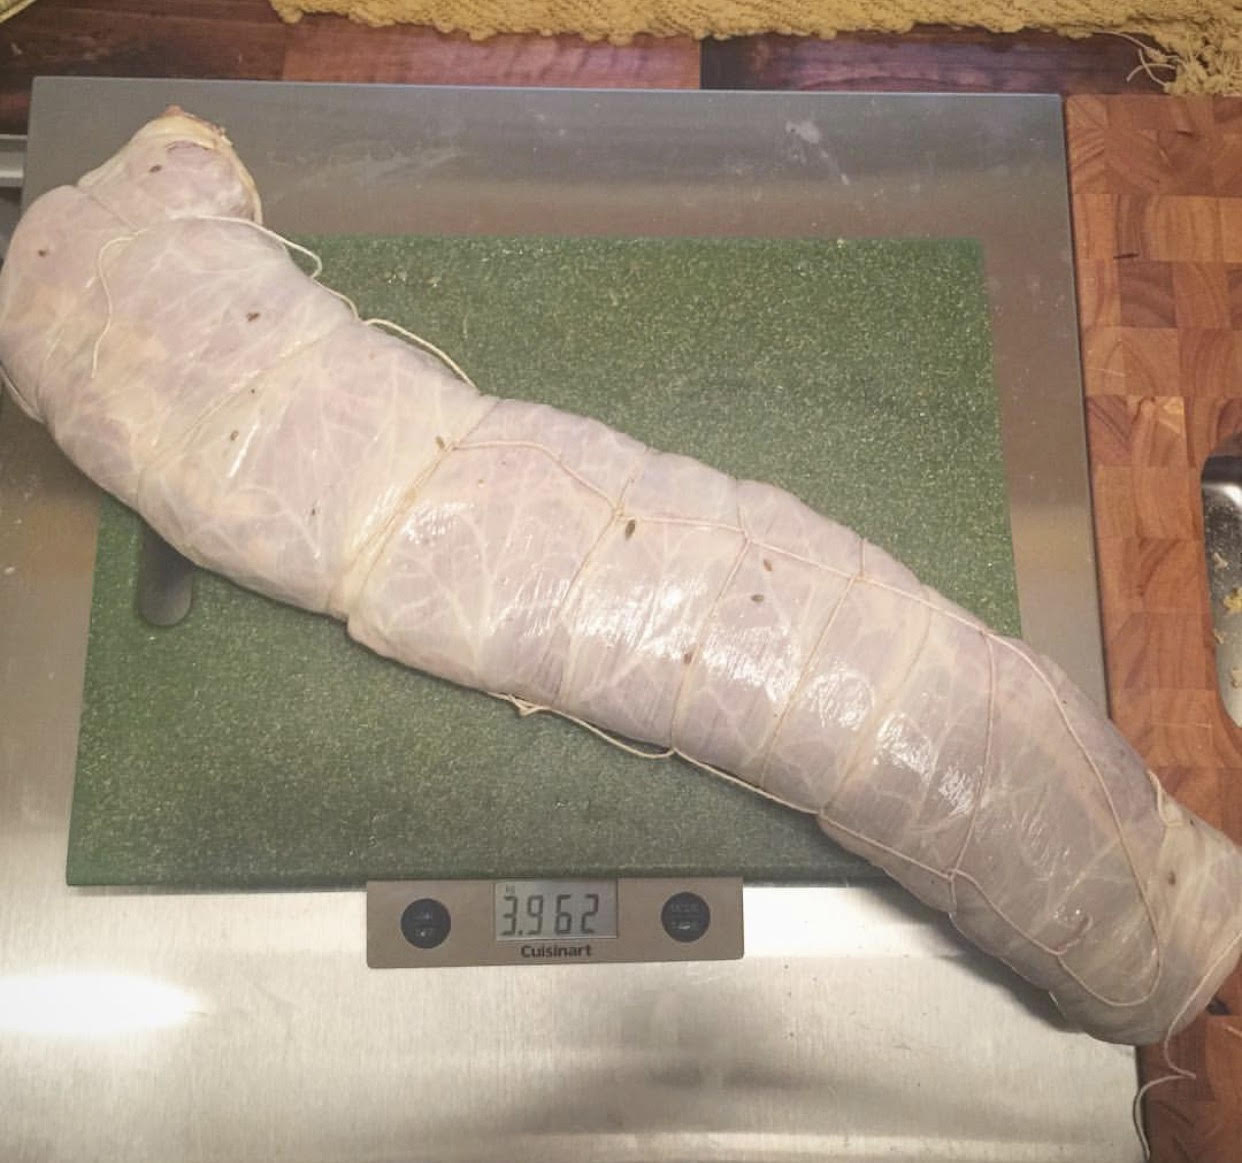
Finally, we’re ready to stuff the meat. There are many options for casings, from the variety of natural casings that are available, to artificial collagen casings. The casings you choose will help determine the final diameter of your product as well as its final shape. Collagen casings are fine, and might be preferred by beginners since they are easy to store and use, don’t have an odor, and are relatively difficult to burst. For the traditional Italian style salami made here, I prefer using beef middles.
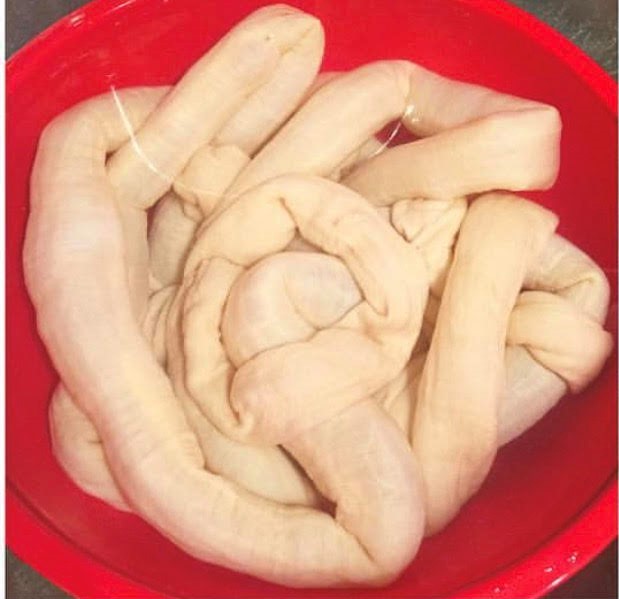
In order to stuff salami, you can use the stuffing horn that comes with many grinders, or you can use a dedicated stuffer. I have a dedicated hand crank stuffer, which I prefer to using the grinder to stuff the salami.
The first step is to tie off the end of the casing, and slide it down the stuffing horn.

With one hand on the casing, and one hand working the stuffer, start to stuff the salami at a constant rate. Ideally, you want to allow the meat to fill up the casing without having room for air gaps. This will put pressure on the casing walls, hopefully without bursting the casing. This is easier in certain types of casings compared to others, and over time you’ll find the right balance of pressure to apply to the casings that you use. When you get to the end of the casing, tie it off, and start again with a new casing until you finish stuffing all of the meat that you have prepared.
Fermentation Phase:
Temperature: 75ᵒF/23-24C
Humidity: 80-90% RH (strain dependent)
Time: 48-72 hours (until pH drops to at least 5.3)
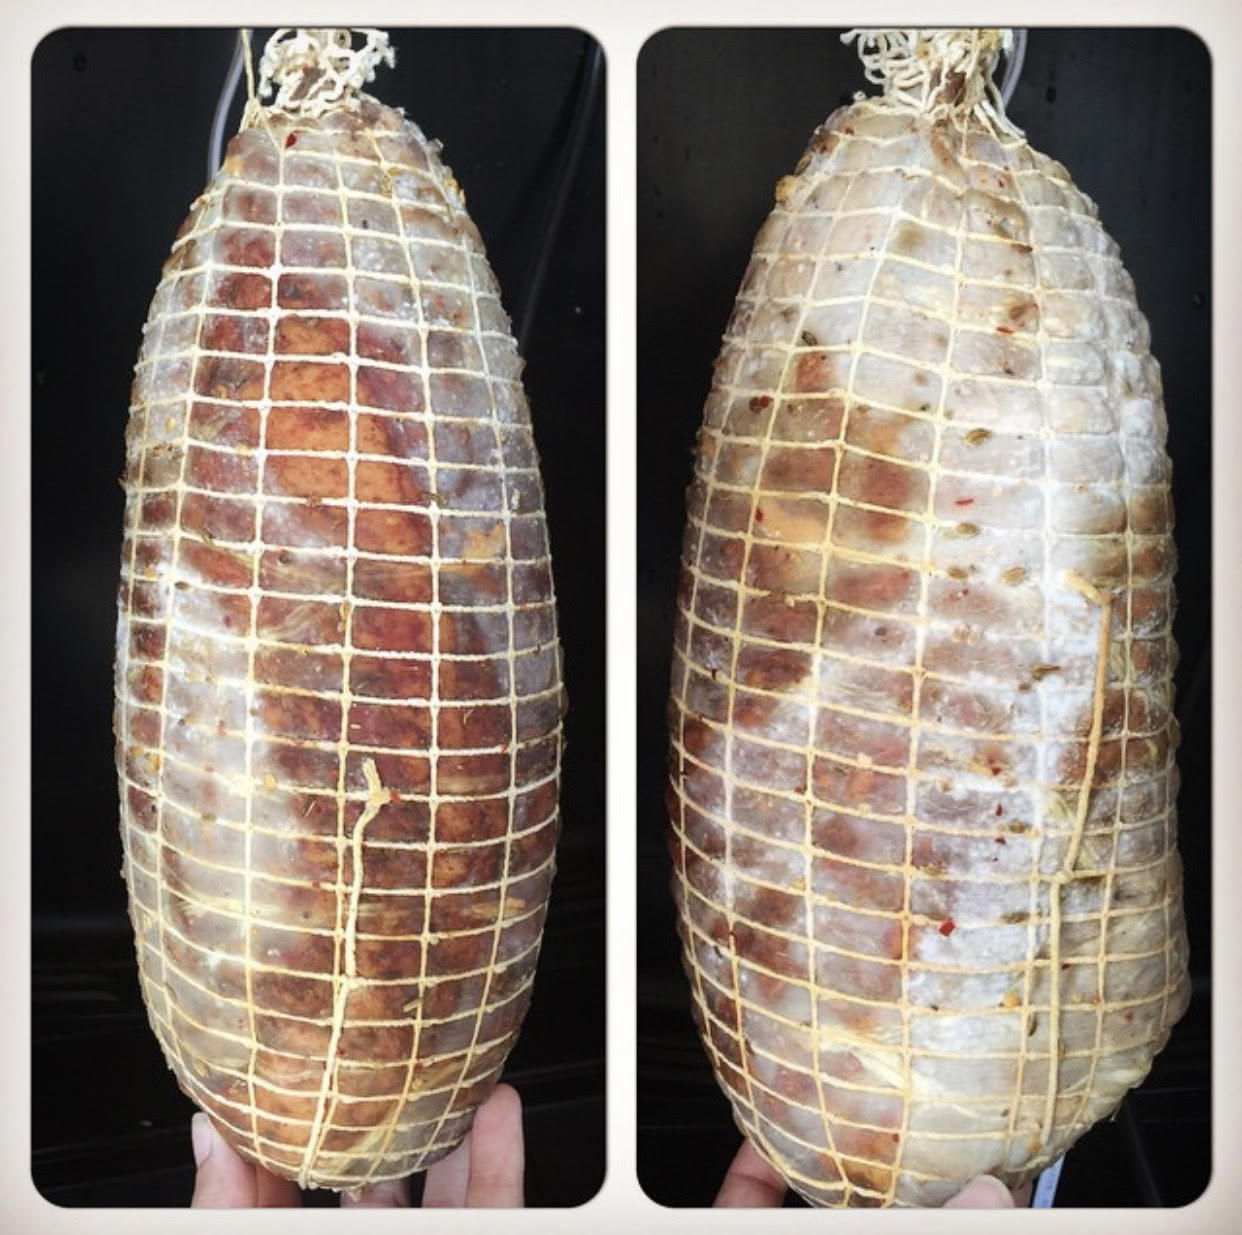
At this point, you’ve finished all the heavy lifting! You want to put your salami in a fermentation chamber in order to jump start the beneficial starter culture that was added to the meat, which will make it both safer and tastier over time. People have come up with very clever ways to do this, from dedicated chambers to DIY hacks. The temperature and humidity you want will vary based on the starter culture that you use. For B-LC-007, I aim for 64-75 ⁰F and 80-90% humidity. In order to achieve this, I use my oven with the light on and an open pan with water in it. I also spray the meat with a bactoferm mold-600 solution to encourage the growth of the beneficial penicillium nalgiovense.
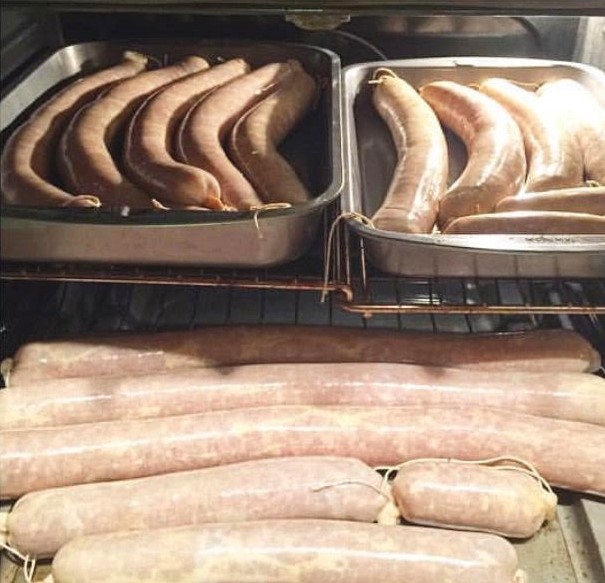
If you have a pH meter, you want to monitor the pH during this phase. Ideally, the pH will drop below 5.3 during the fermentation phase. If you don’t have a fermentation meter, you can do this stage by time and smell. I generally let my salami ferment for 48-72 hours before moving on to the next phase.
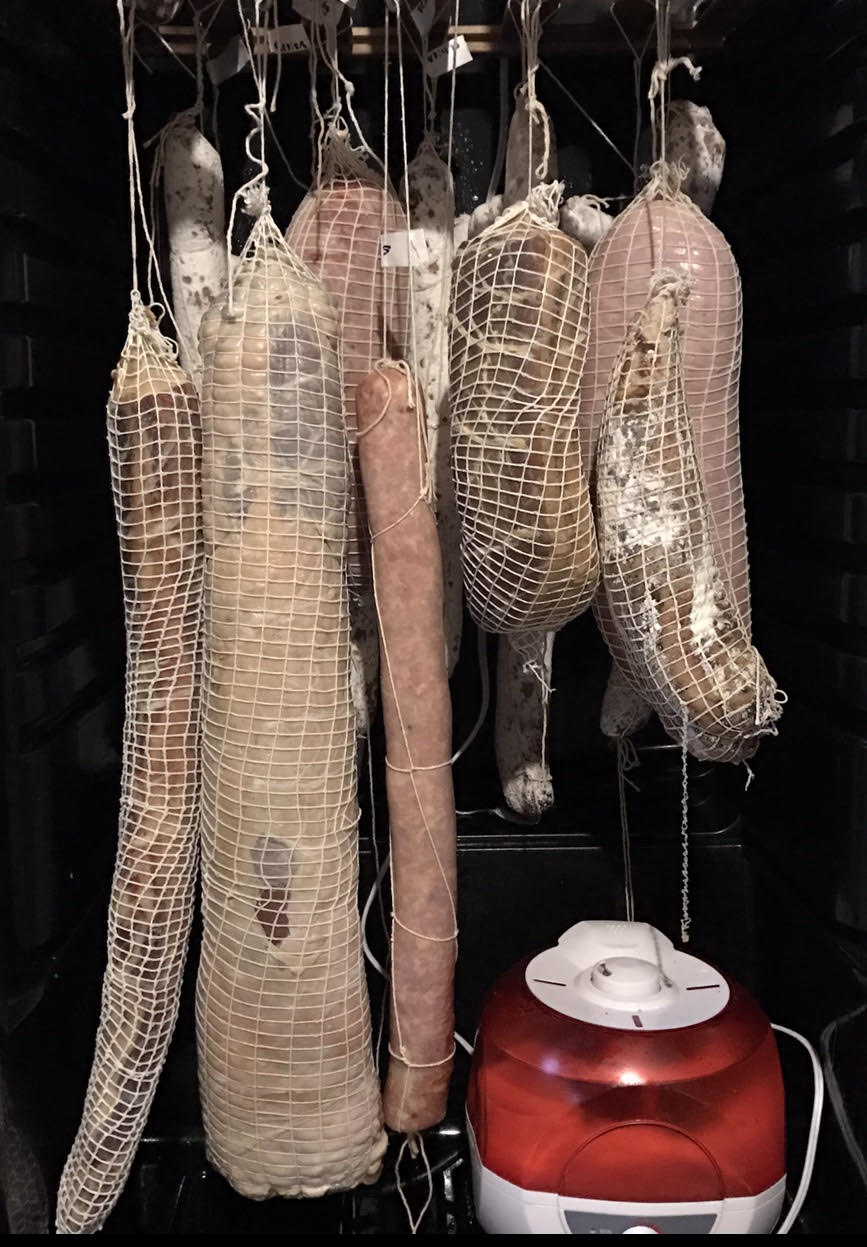
Drying Phase:
Temperature: 54F/12C
Humidity: 70% RH
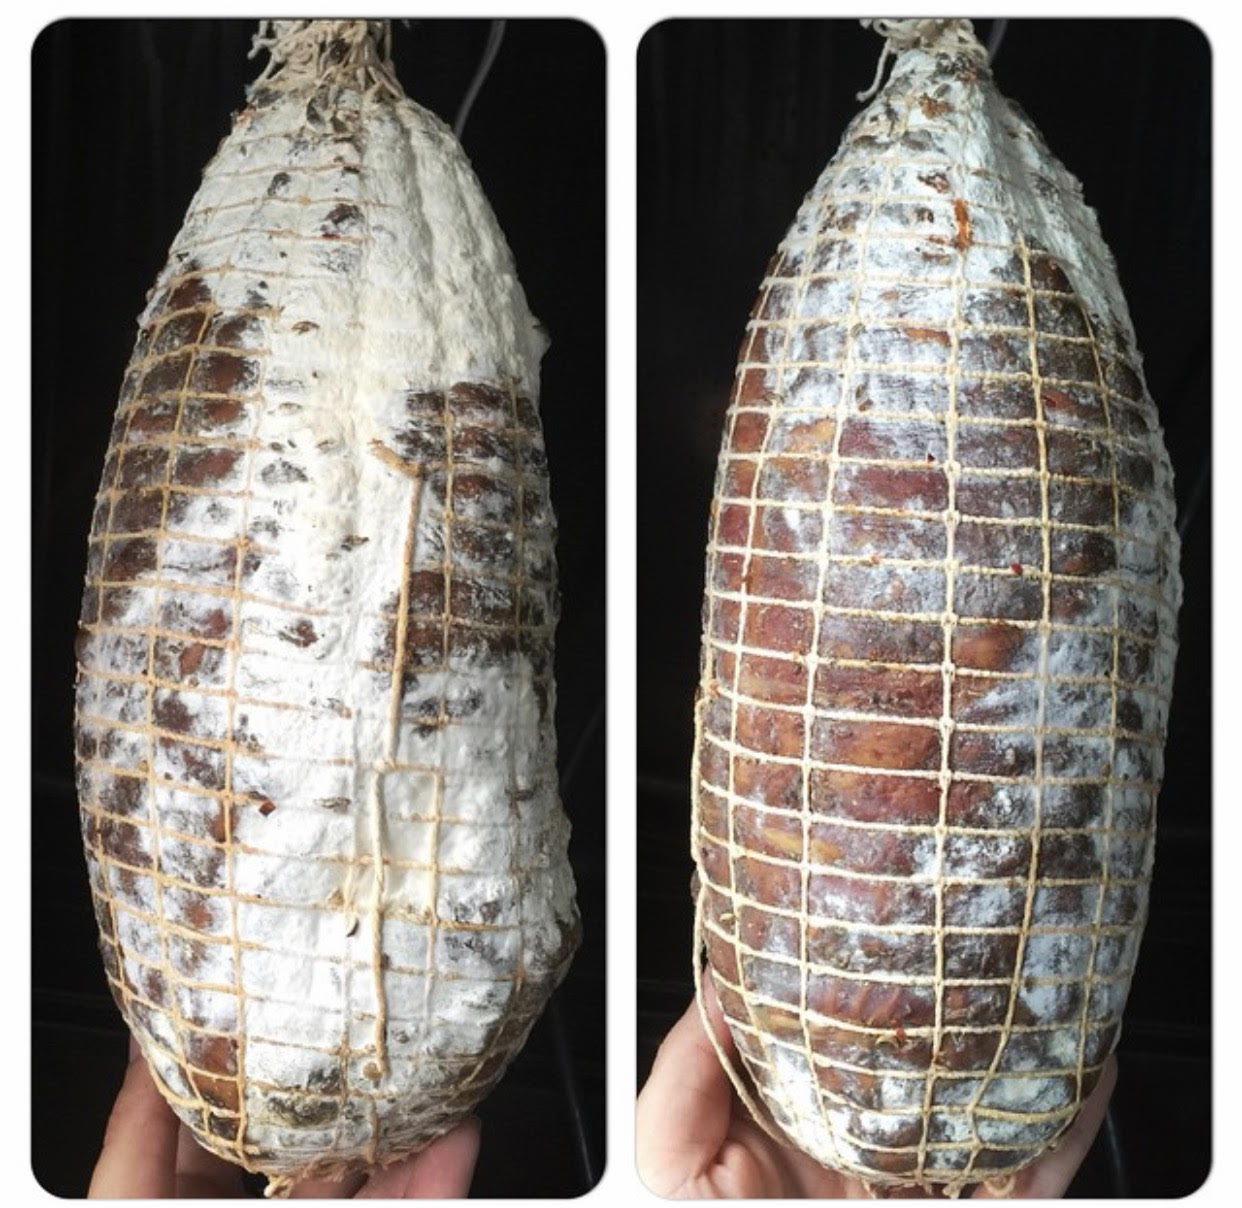
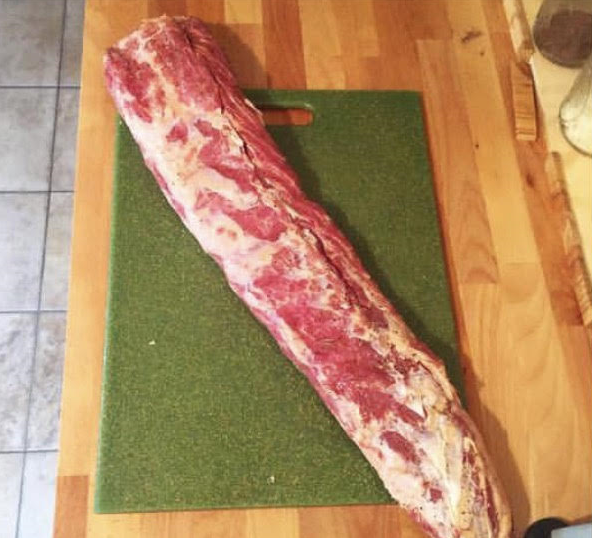
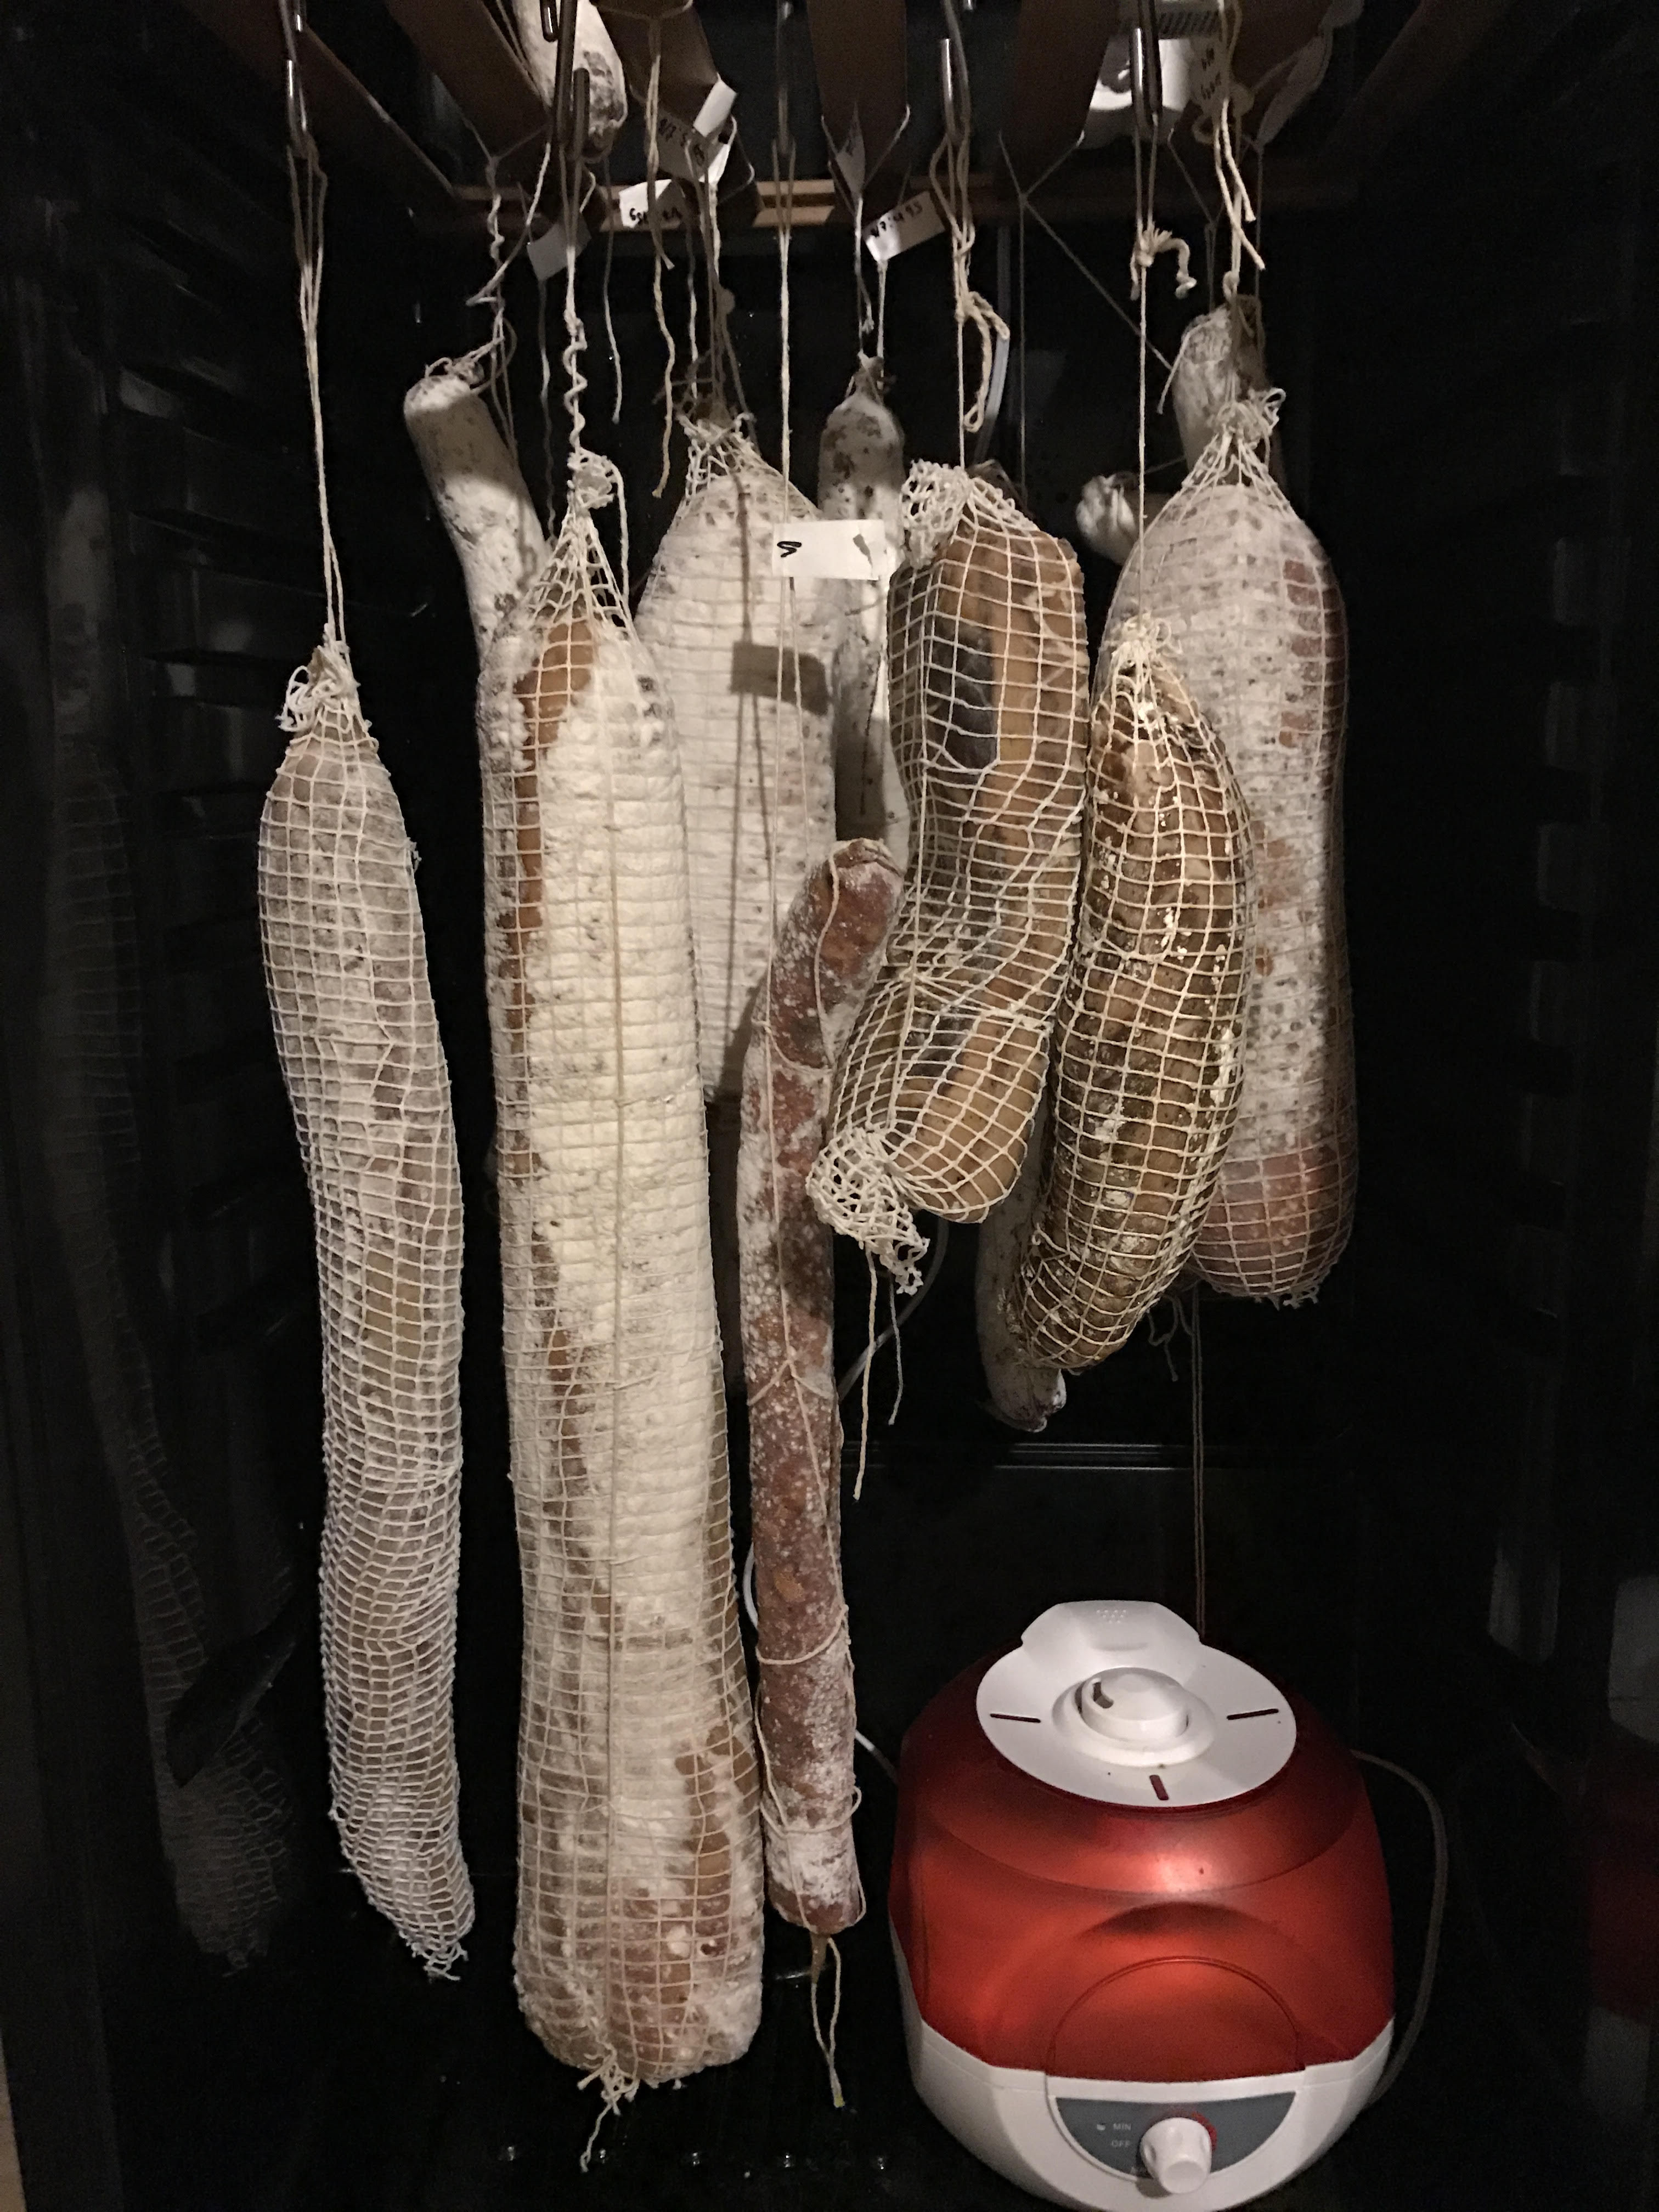
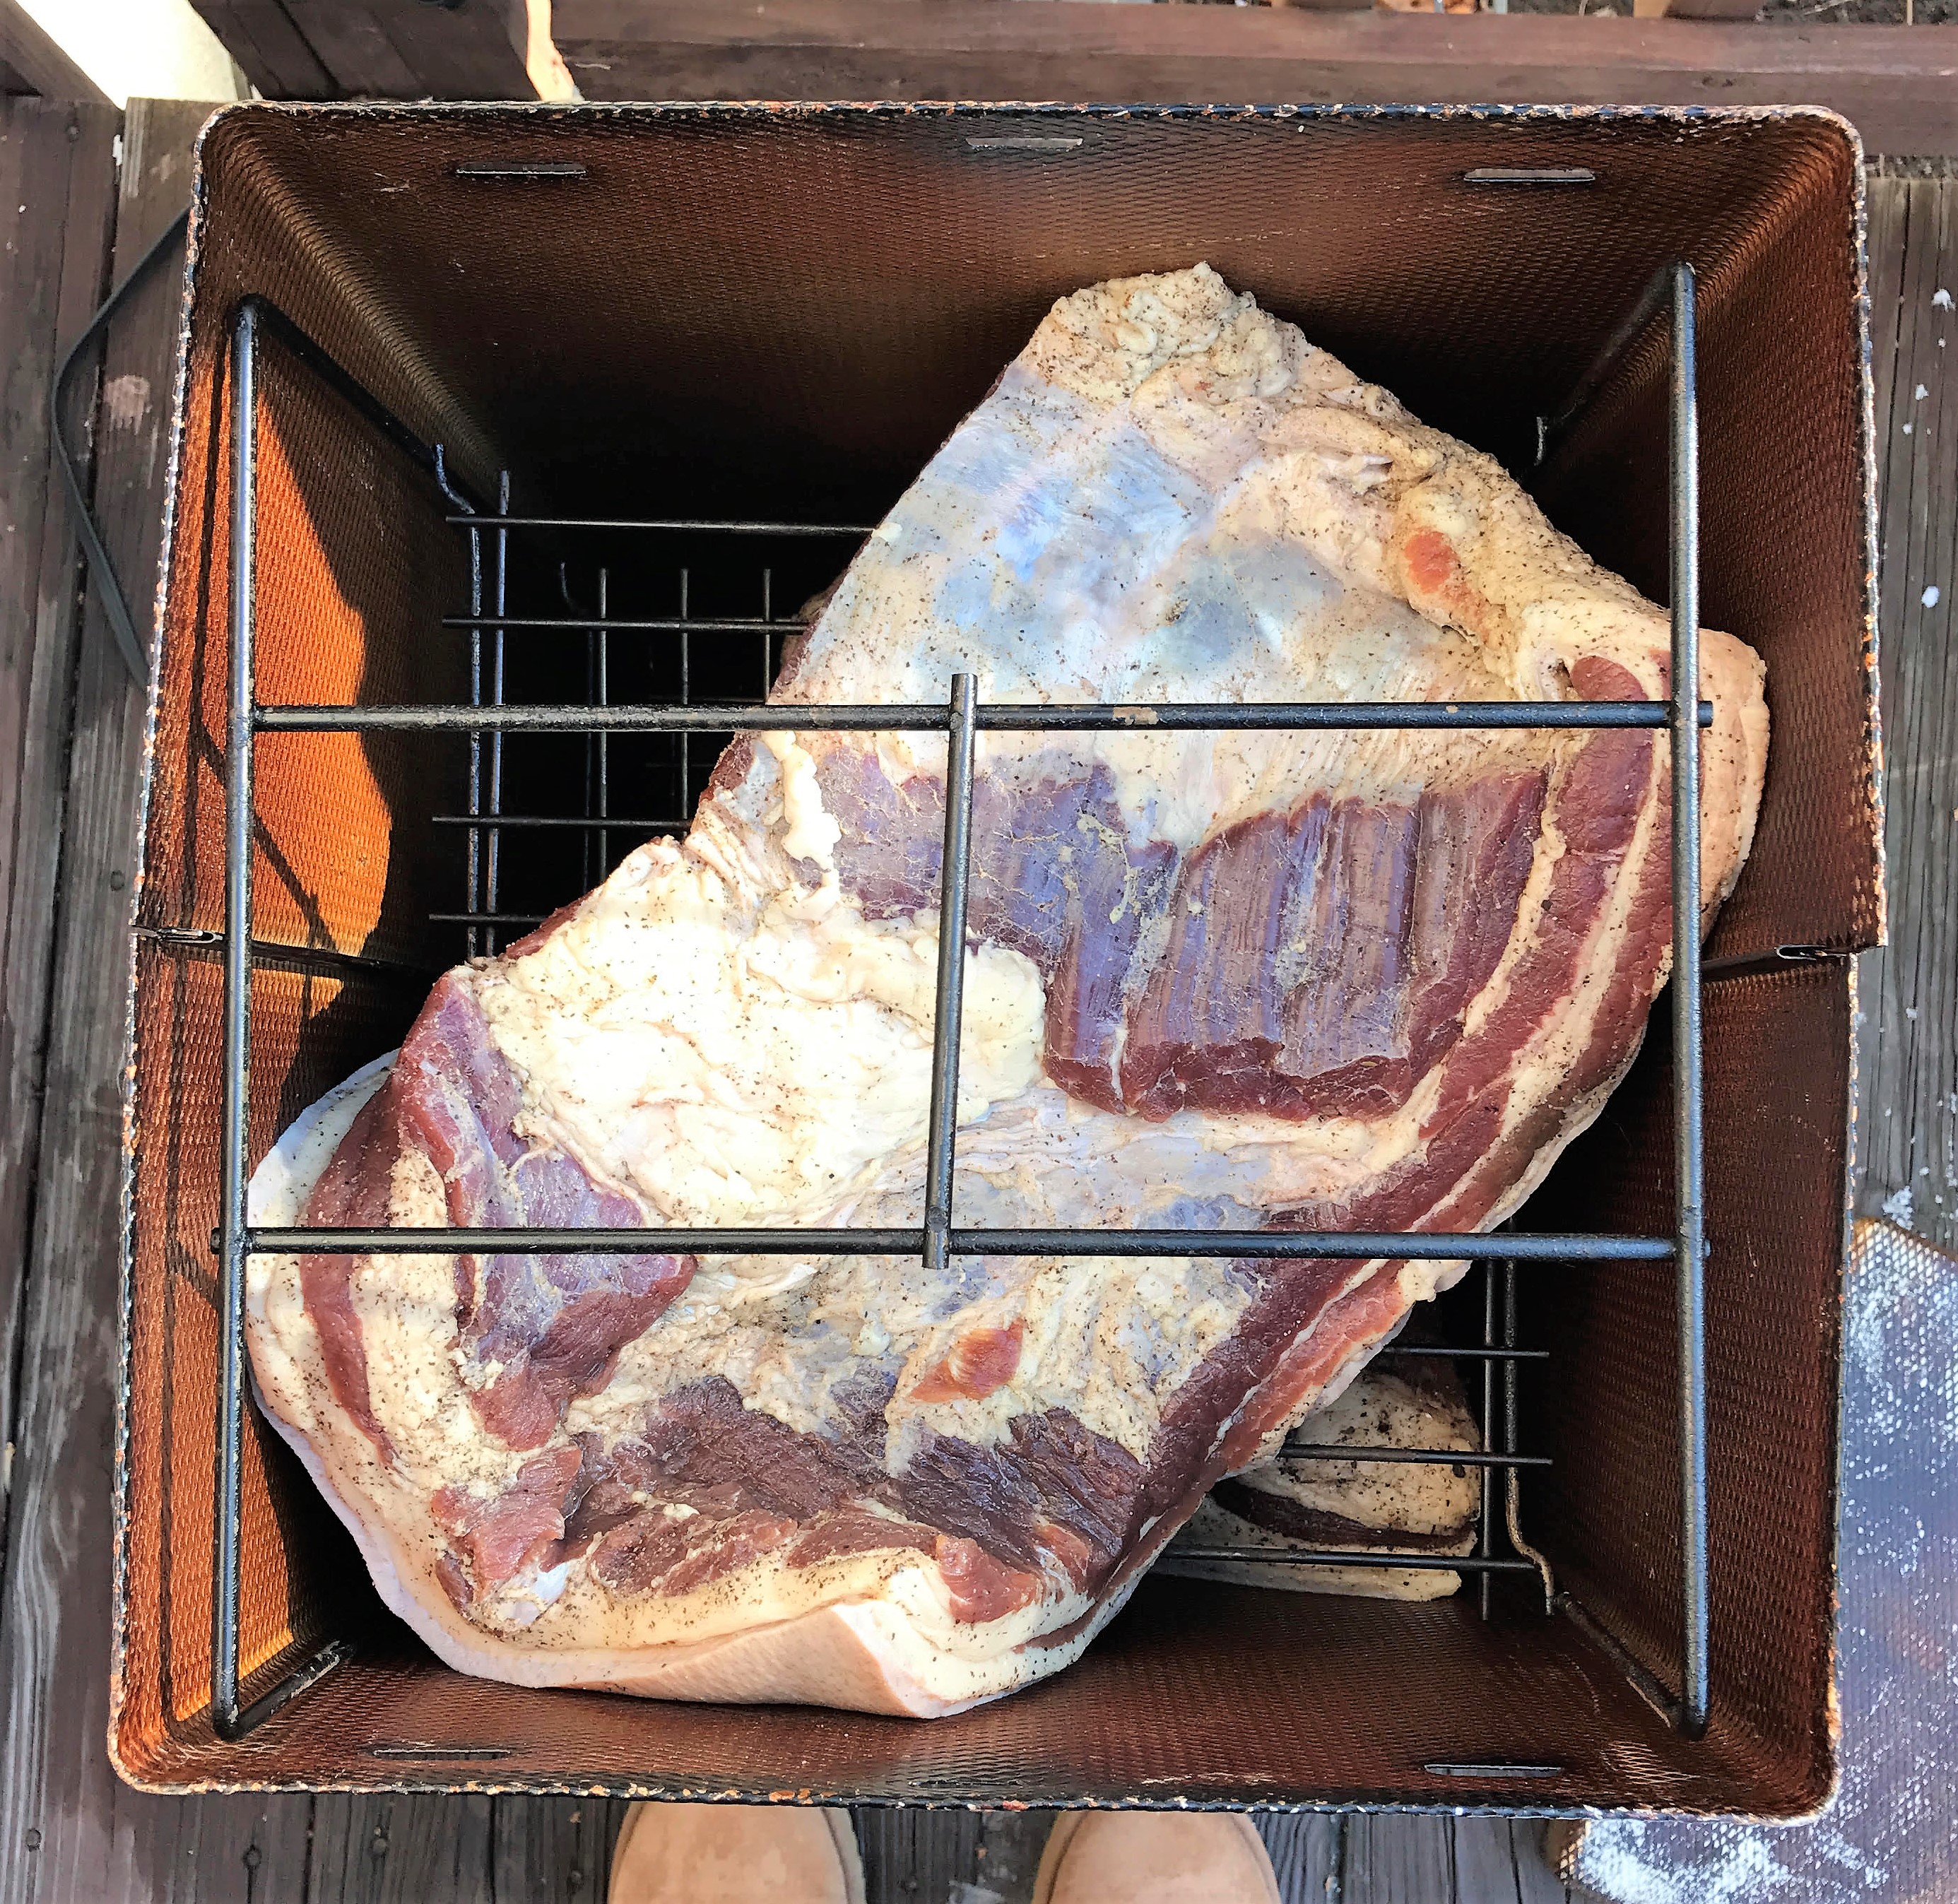
After you’ve allowed your salami to ferment for the appropriate amount of time, it’s time to let it dry. This is best done in a curing chamber with a temperature around 55F and a humidity of 70% RH.

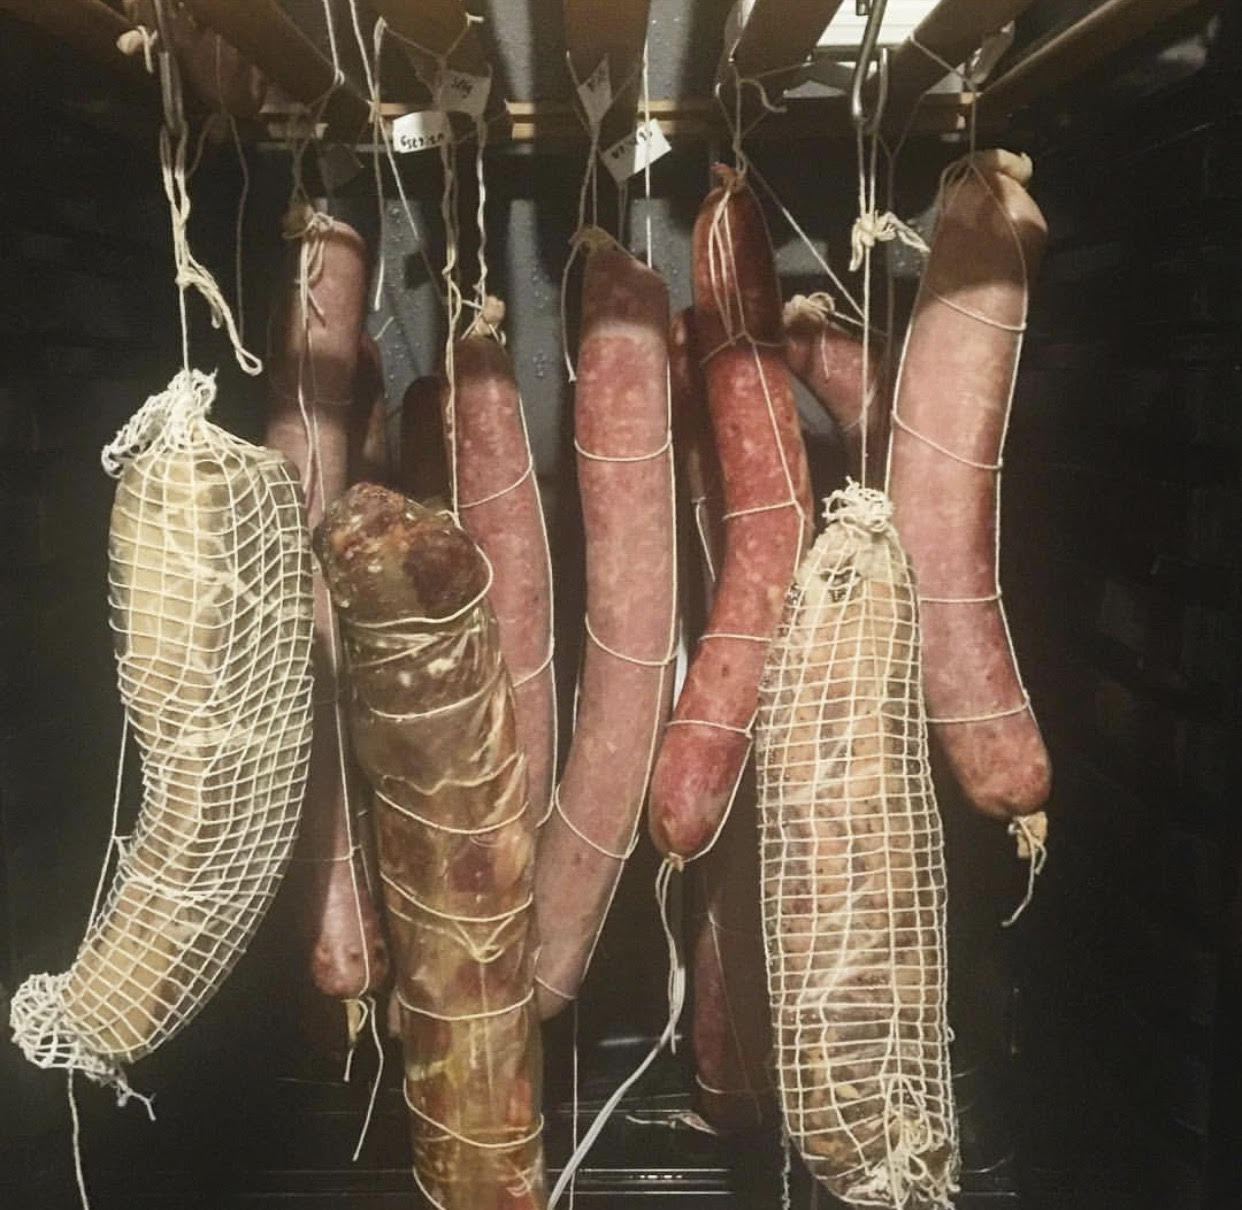
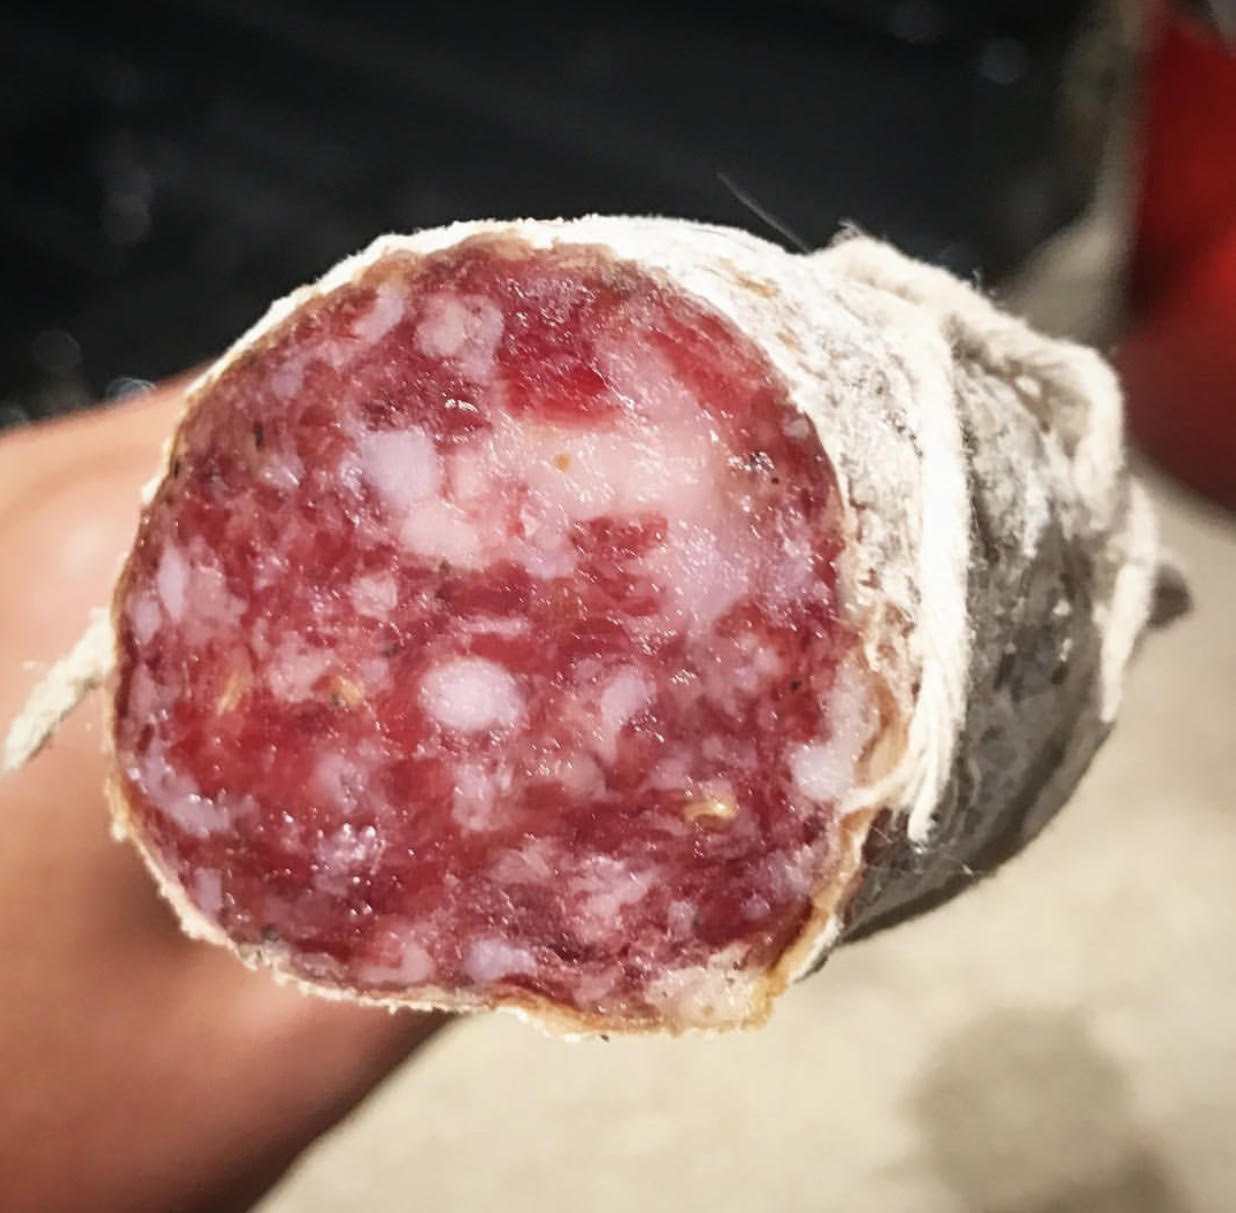
Overtime, you will see beneficial mold growth on the salami in your curing chamber.
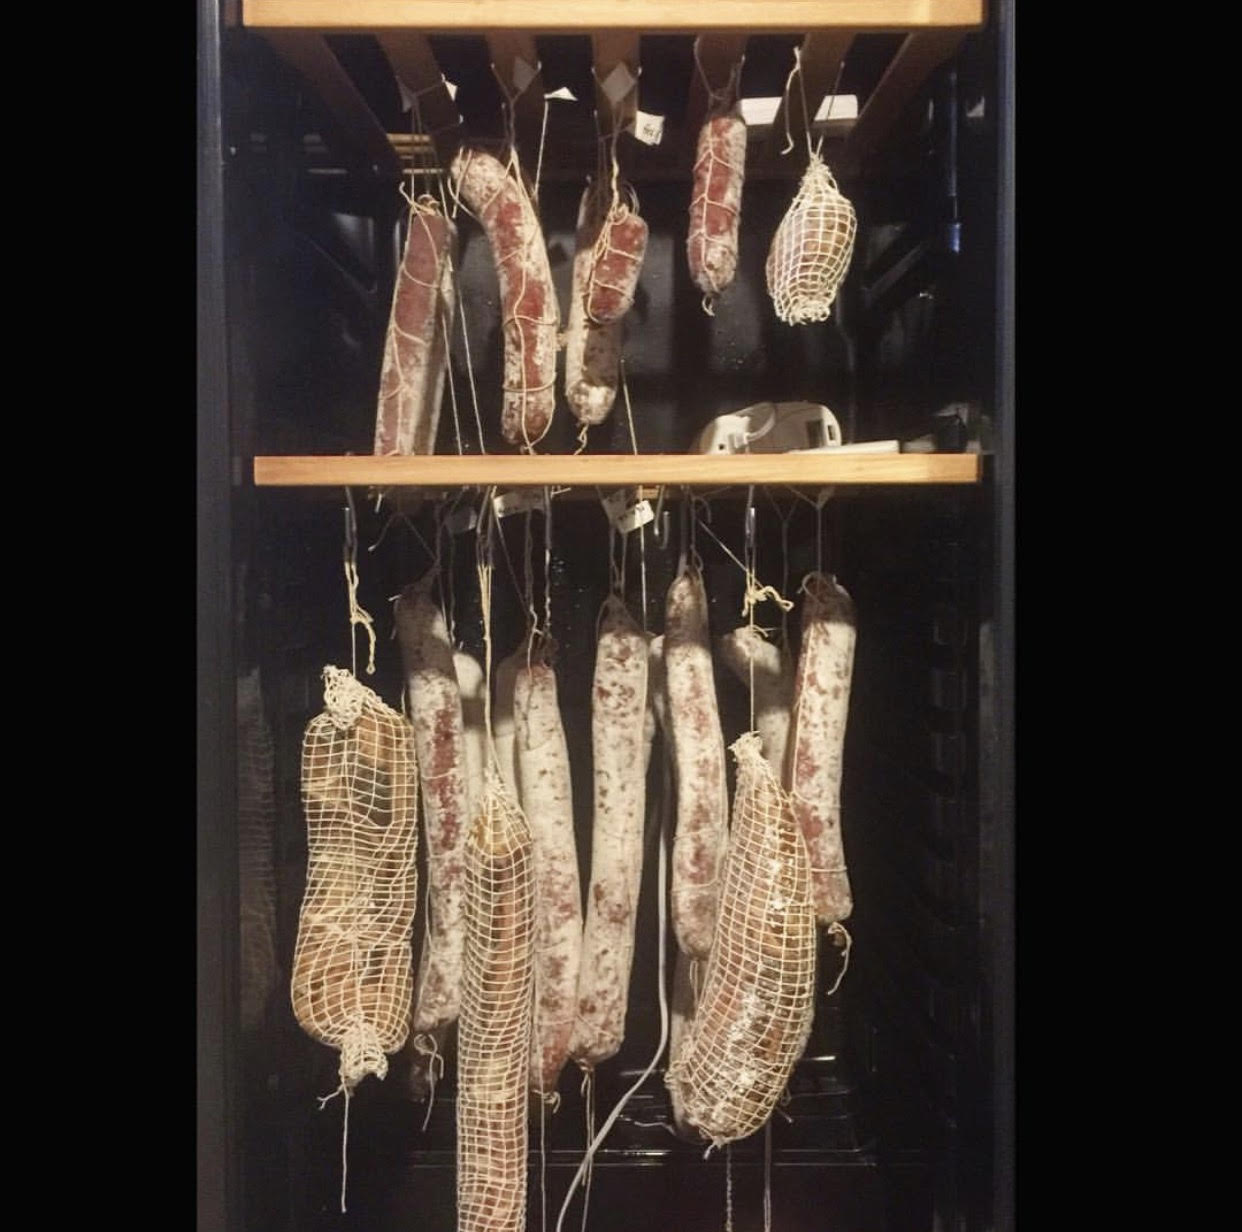
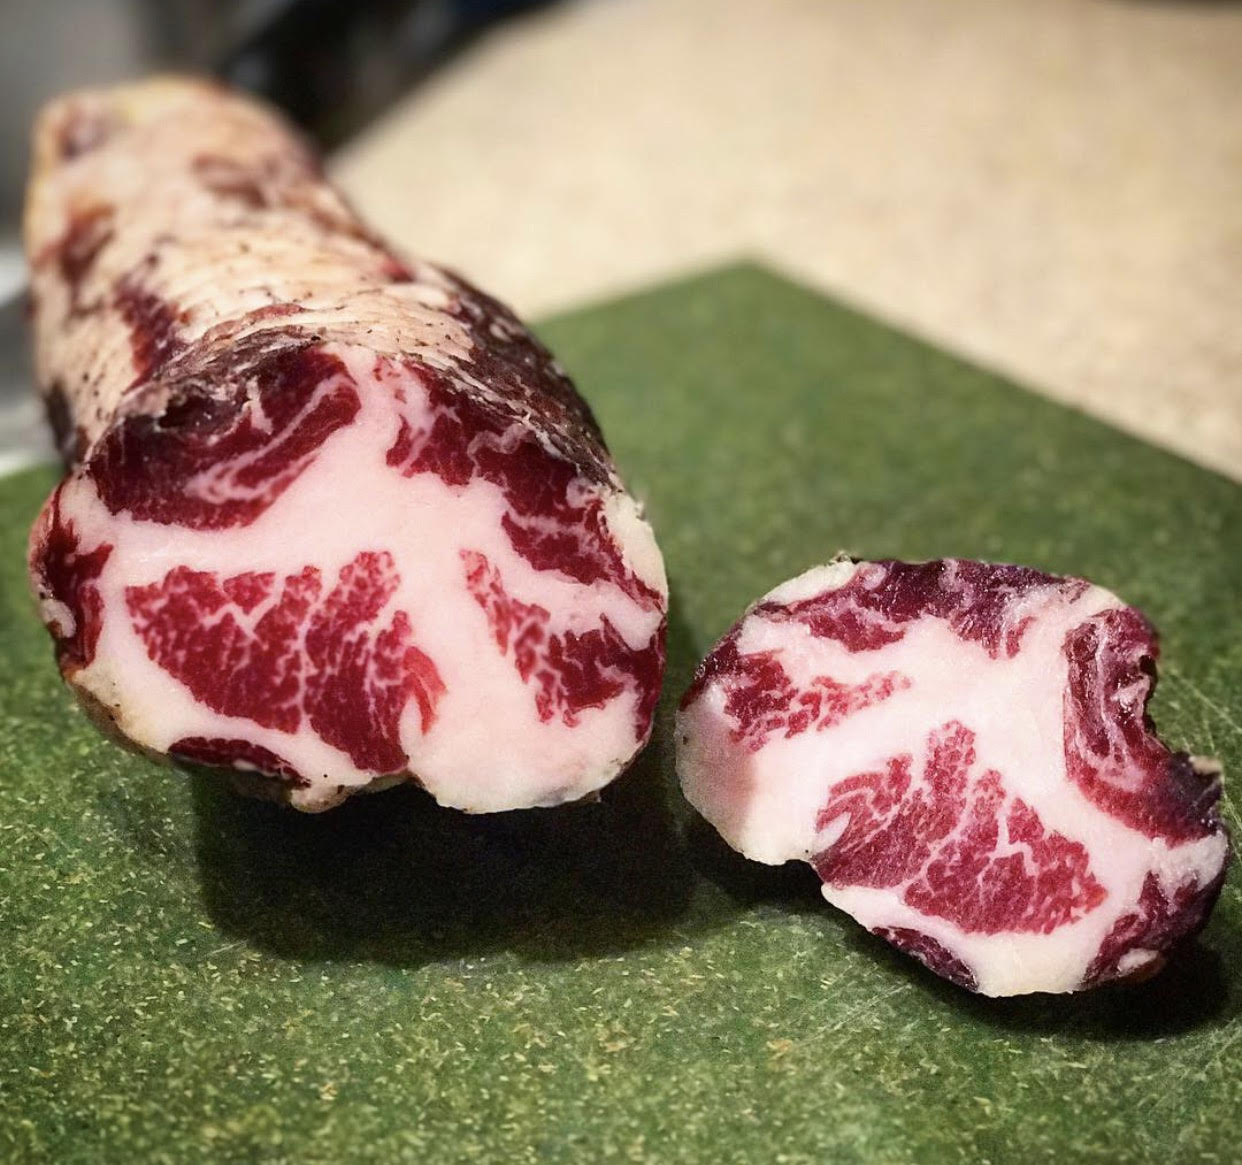
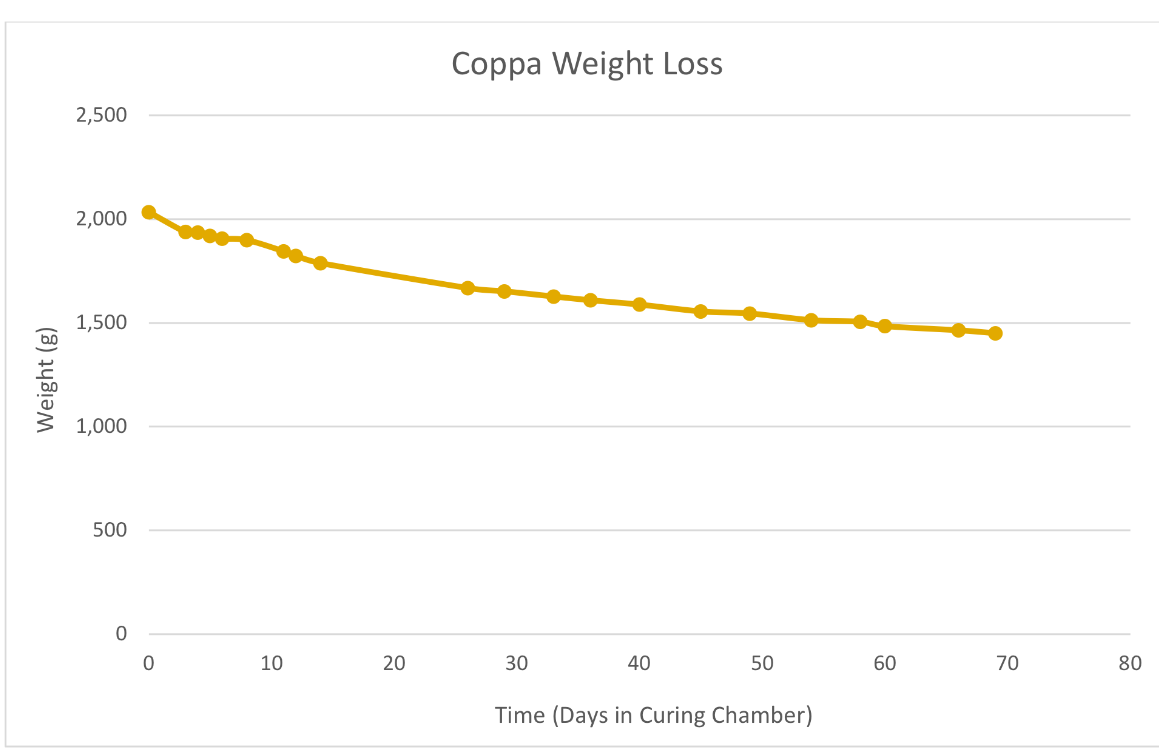
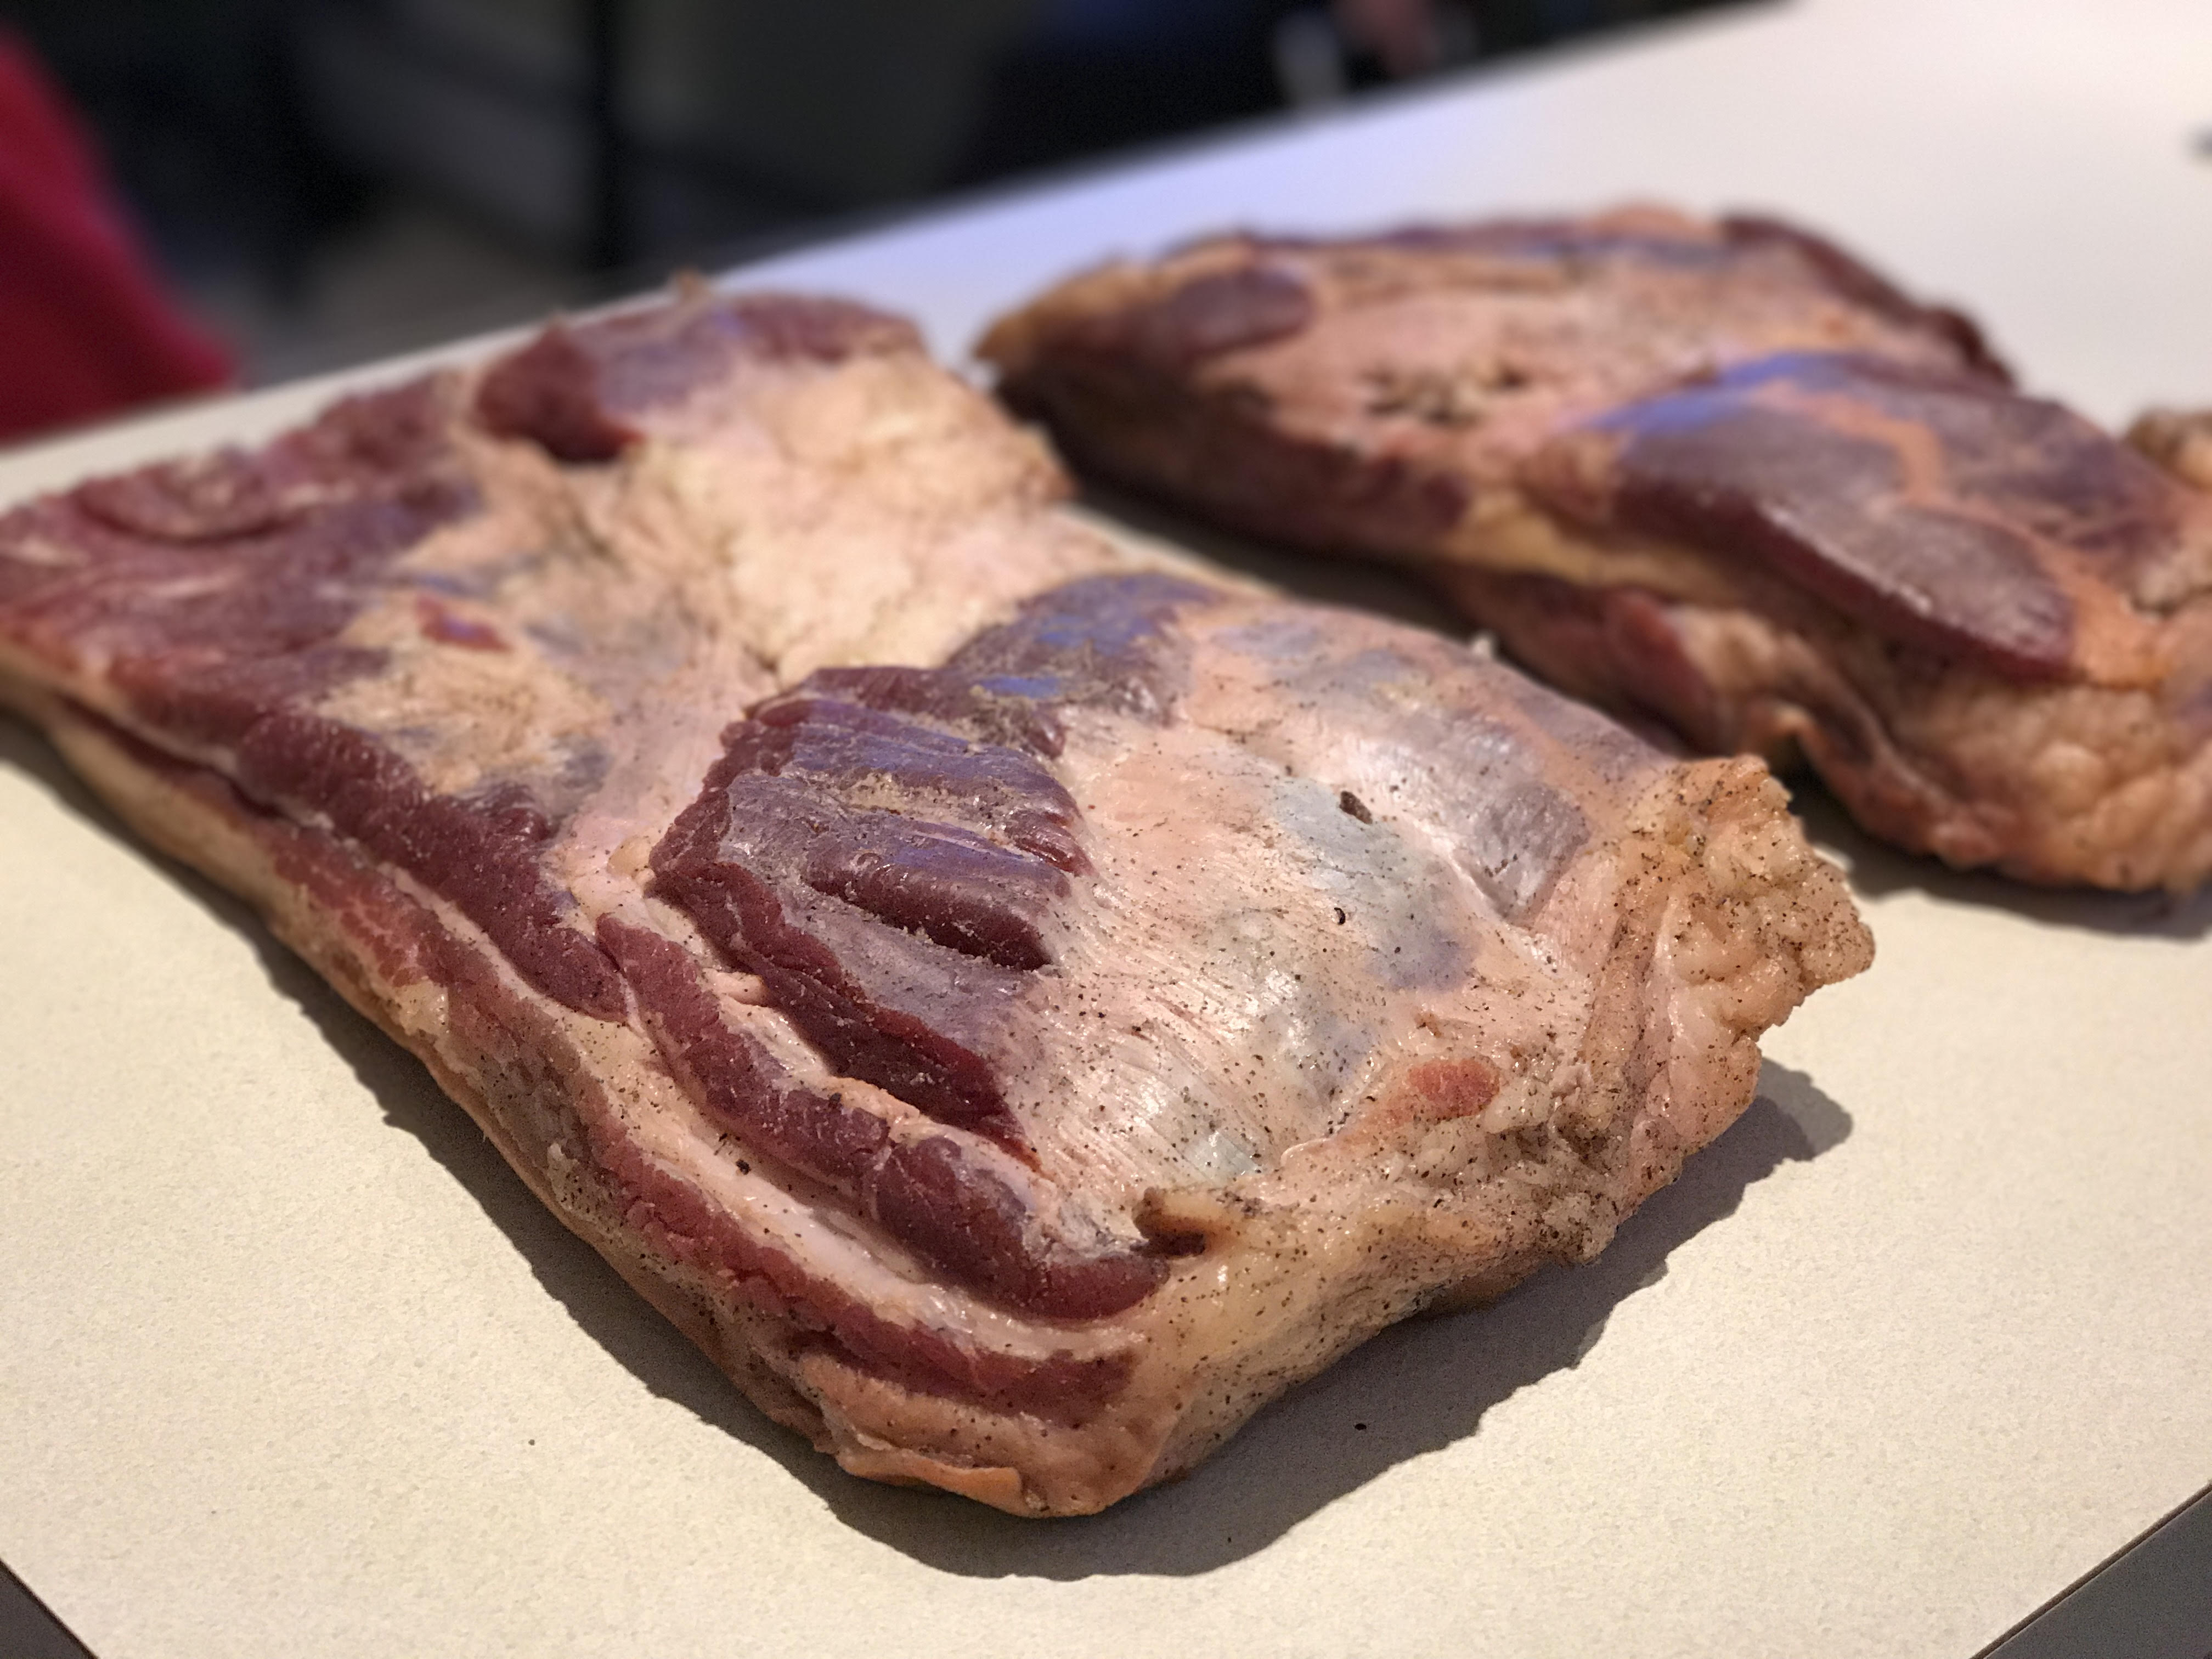
I track the salami weight loss over time, and pull them from the chamber at 40% loss of the original weight.
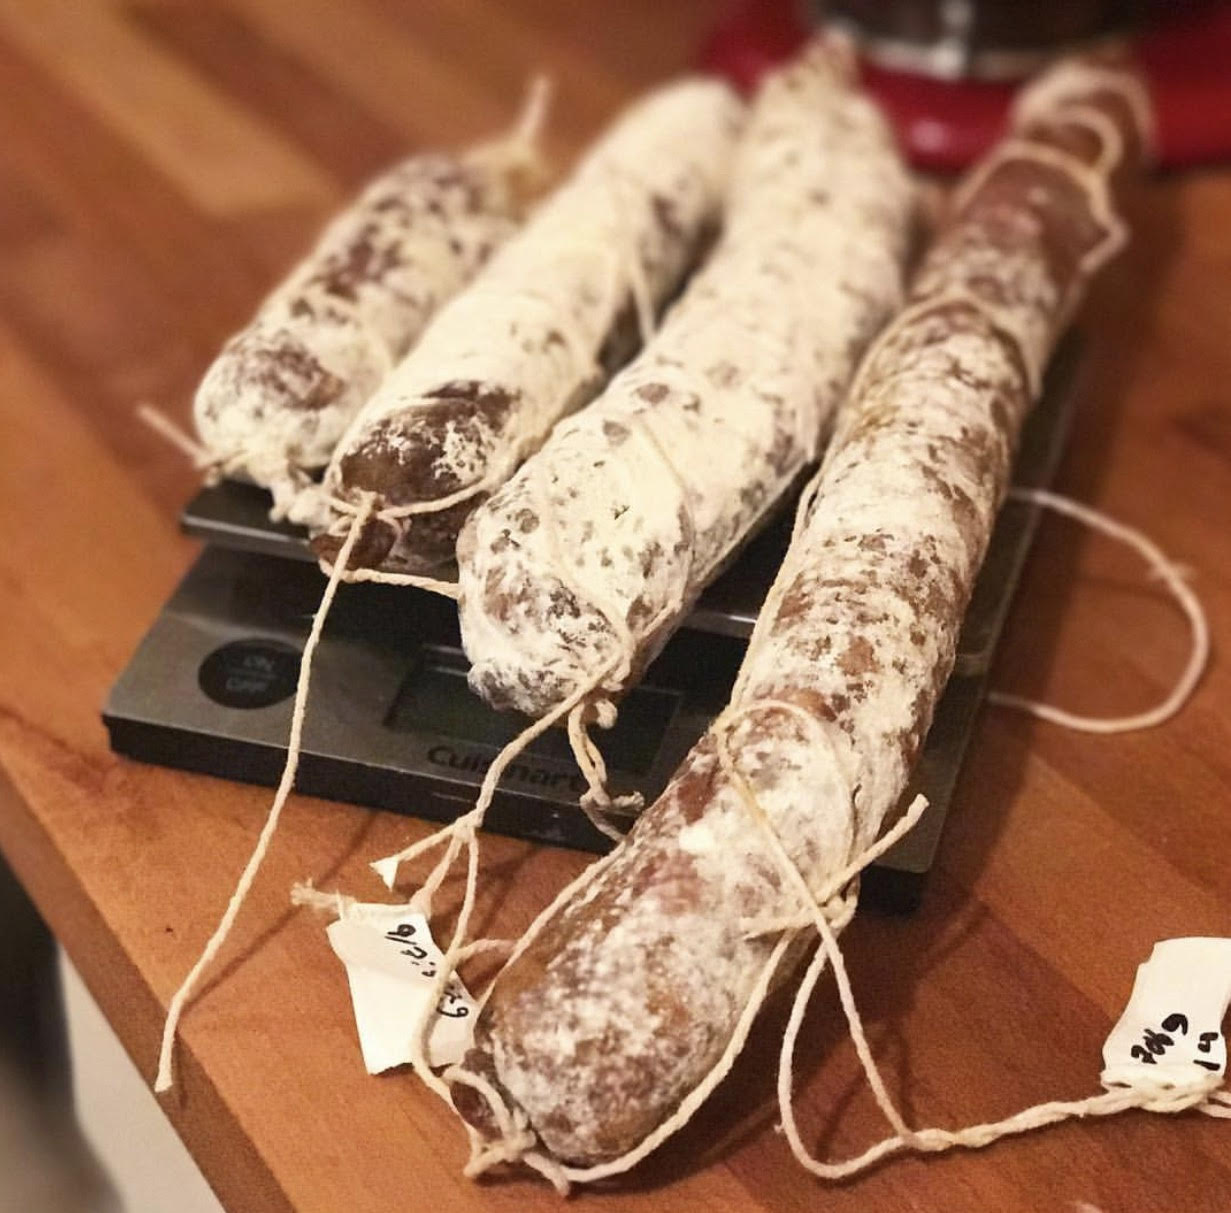
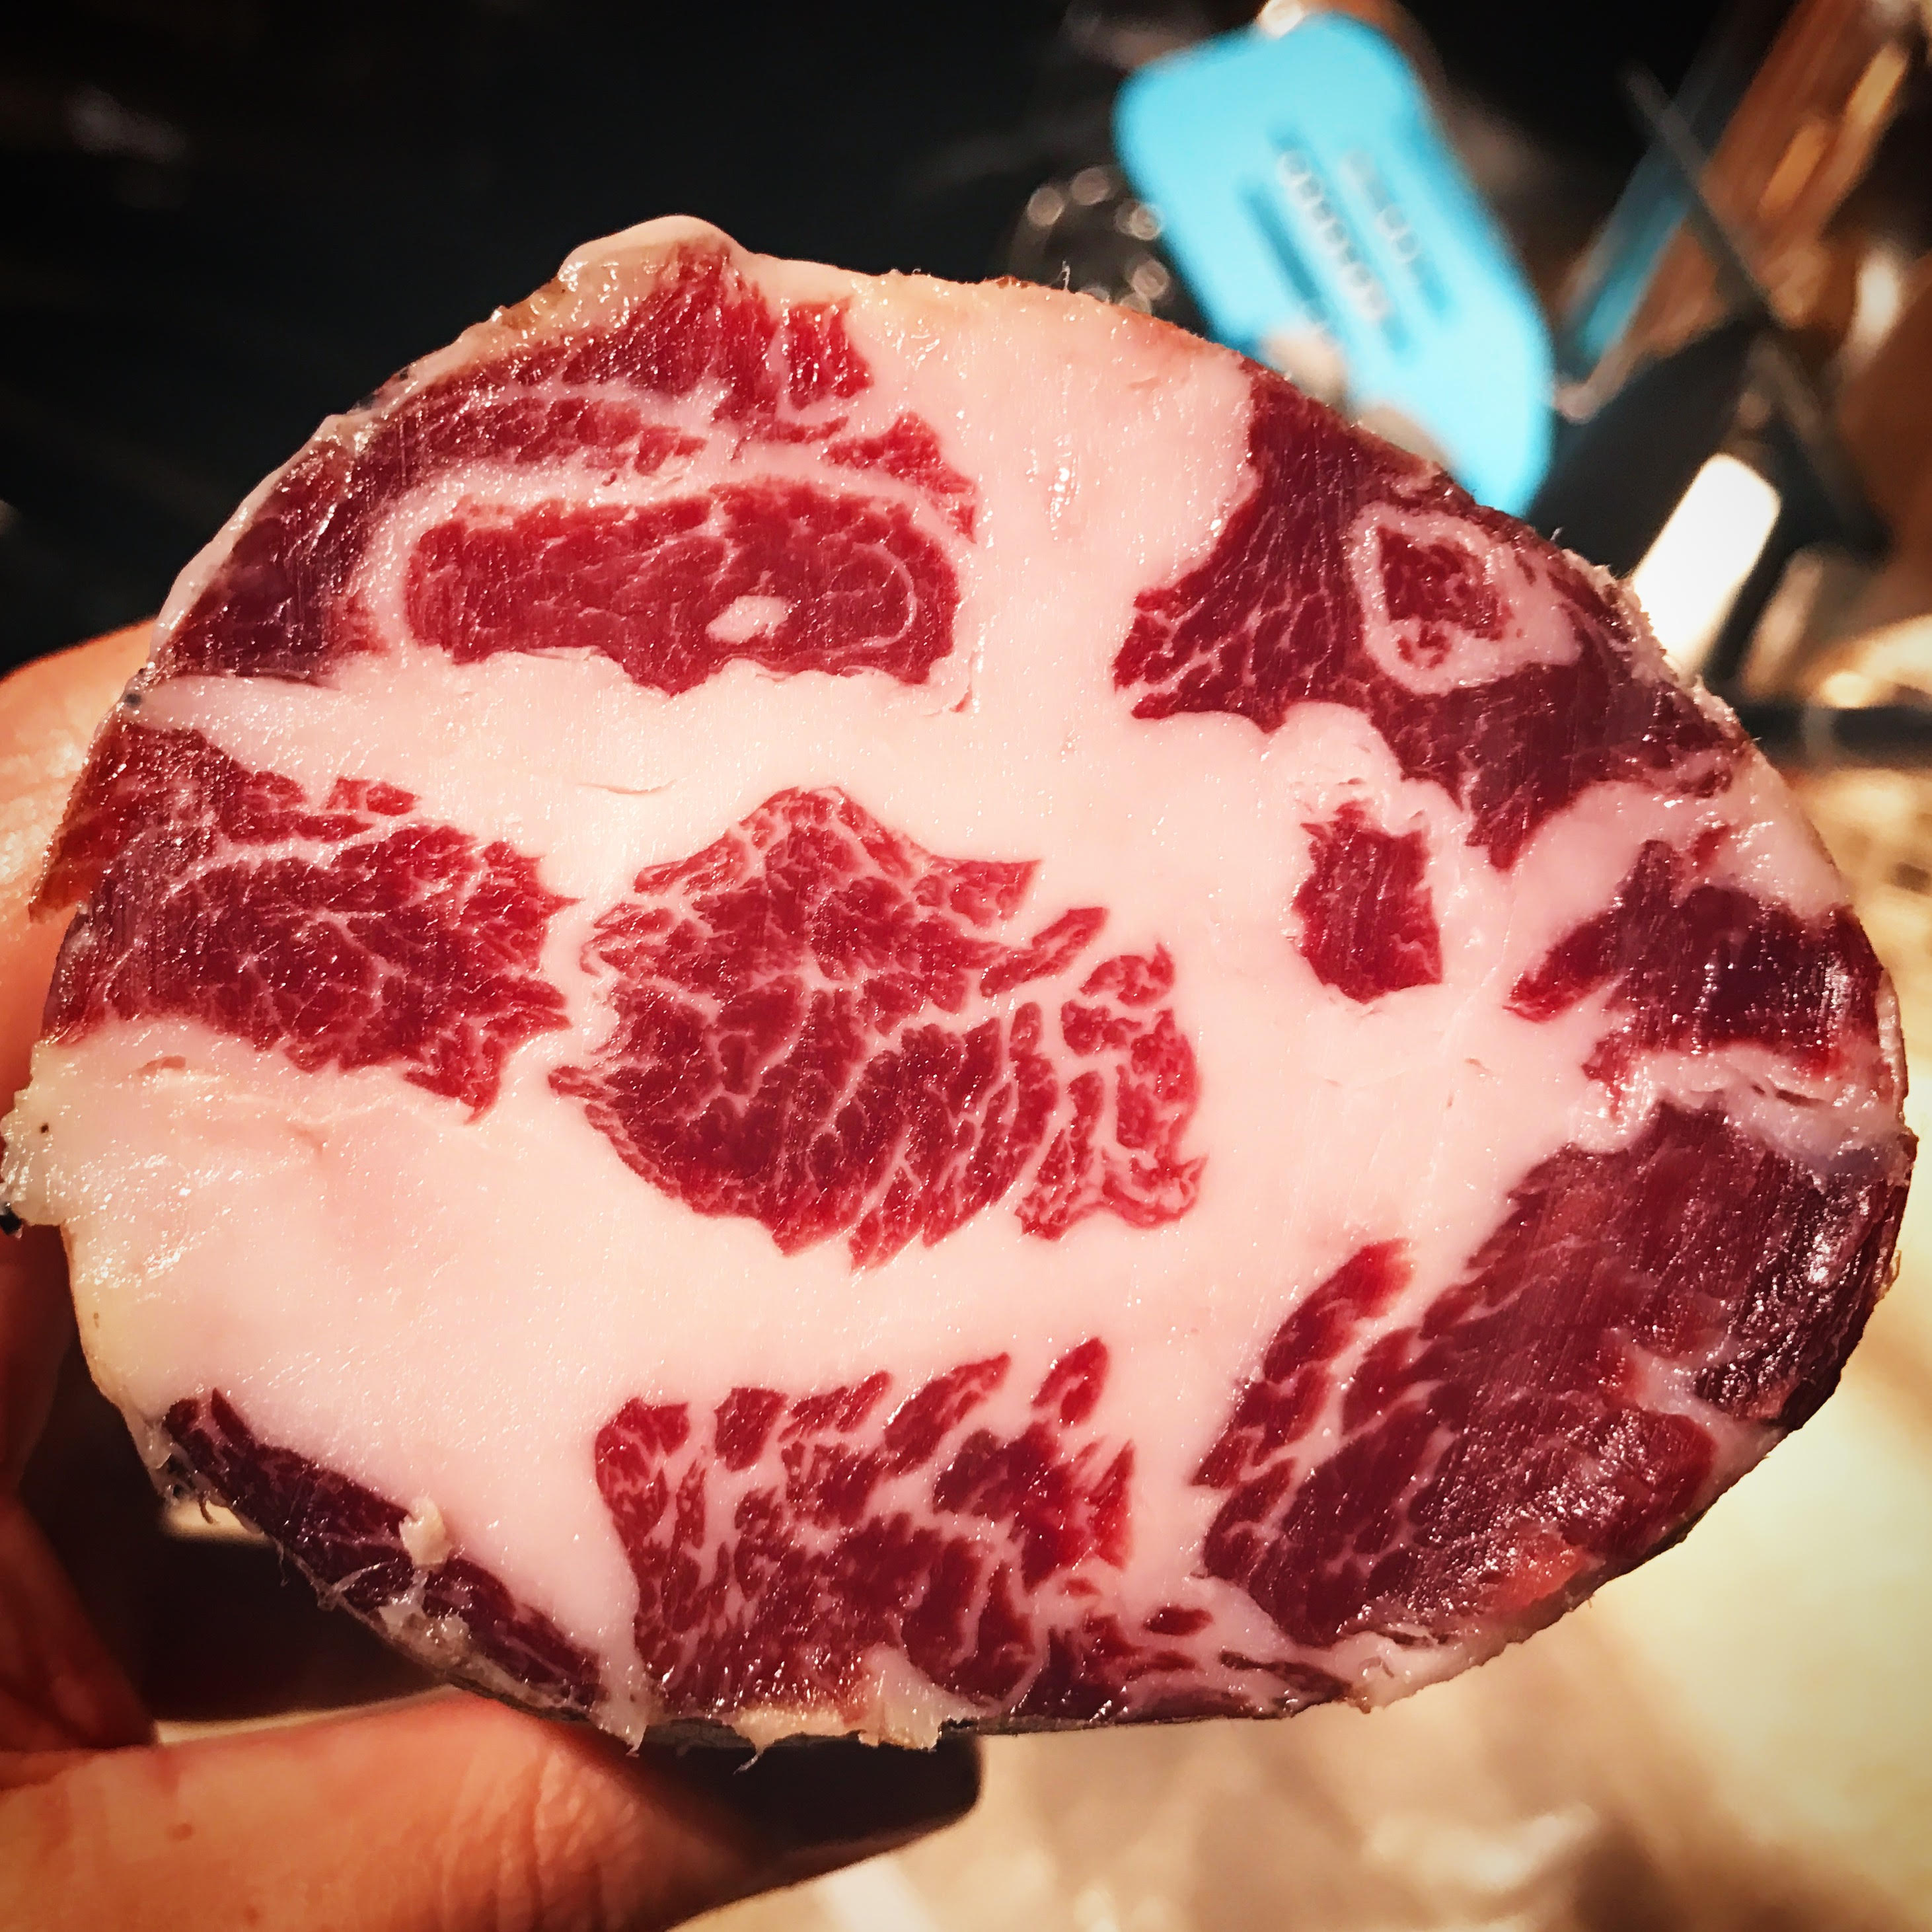
Tasting Phase:
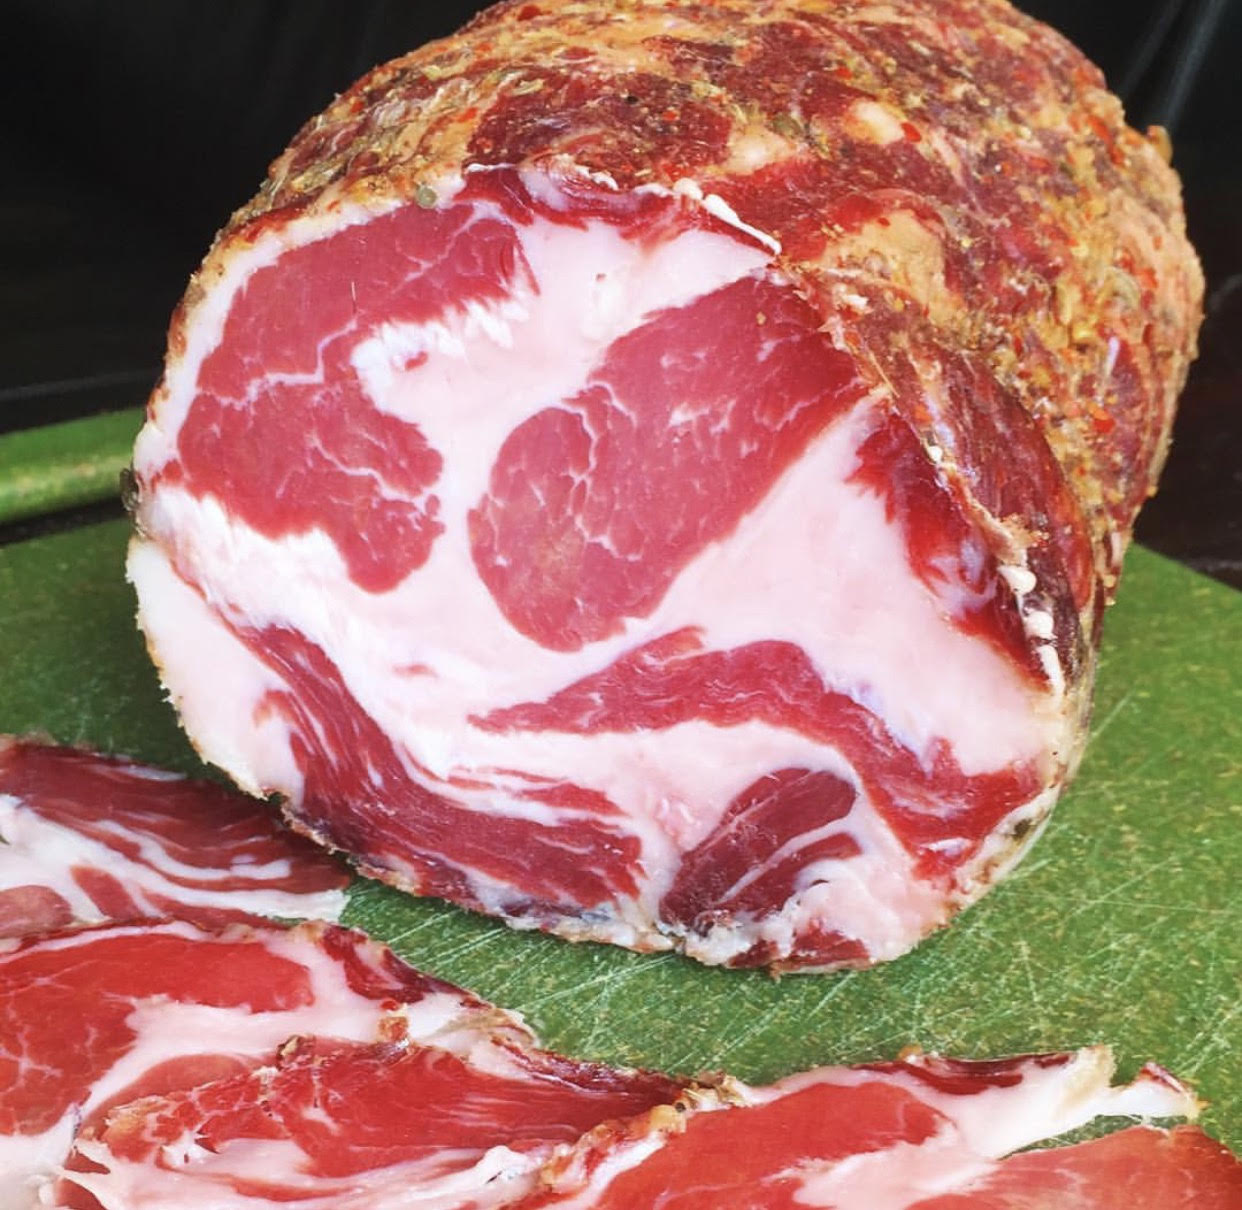
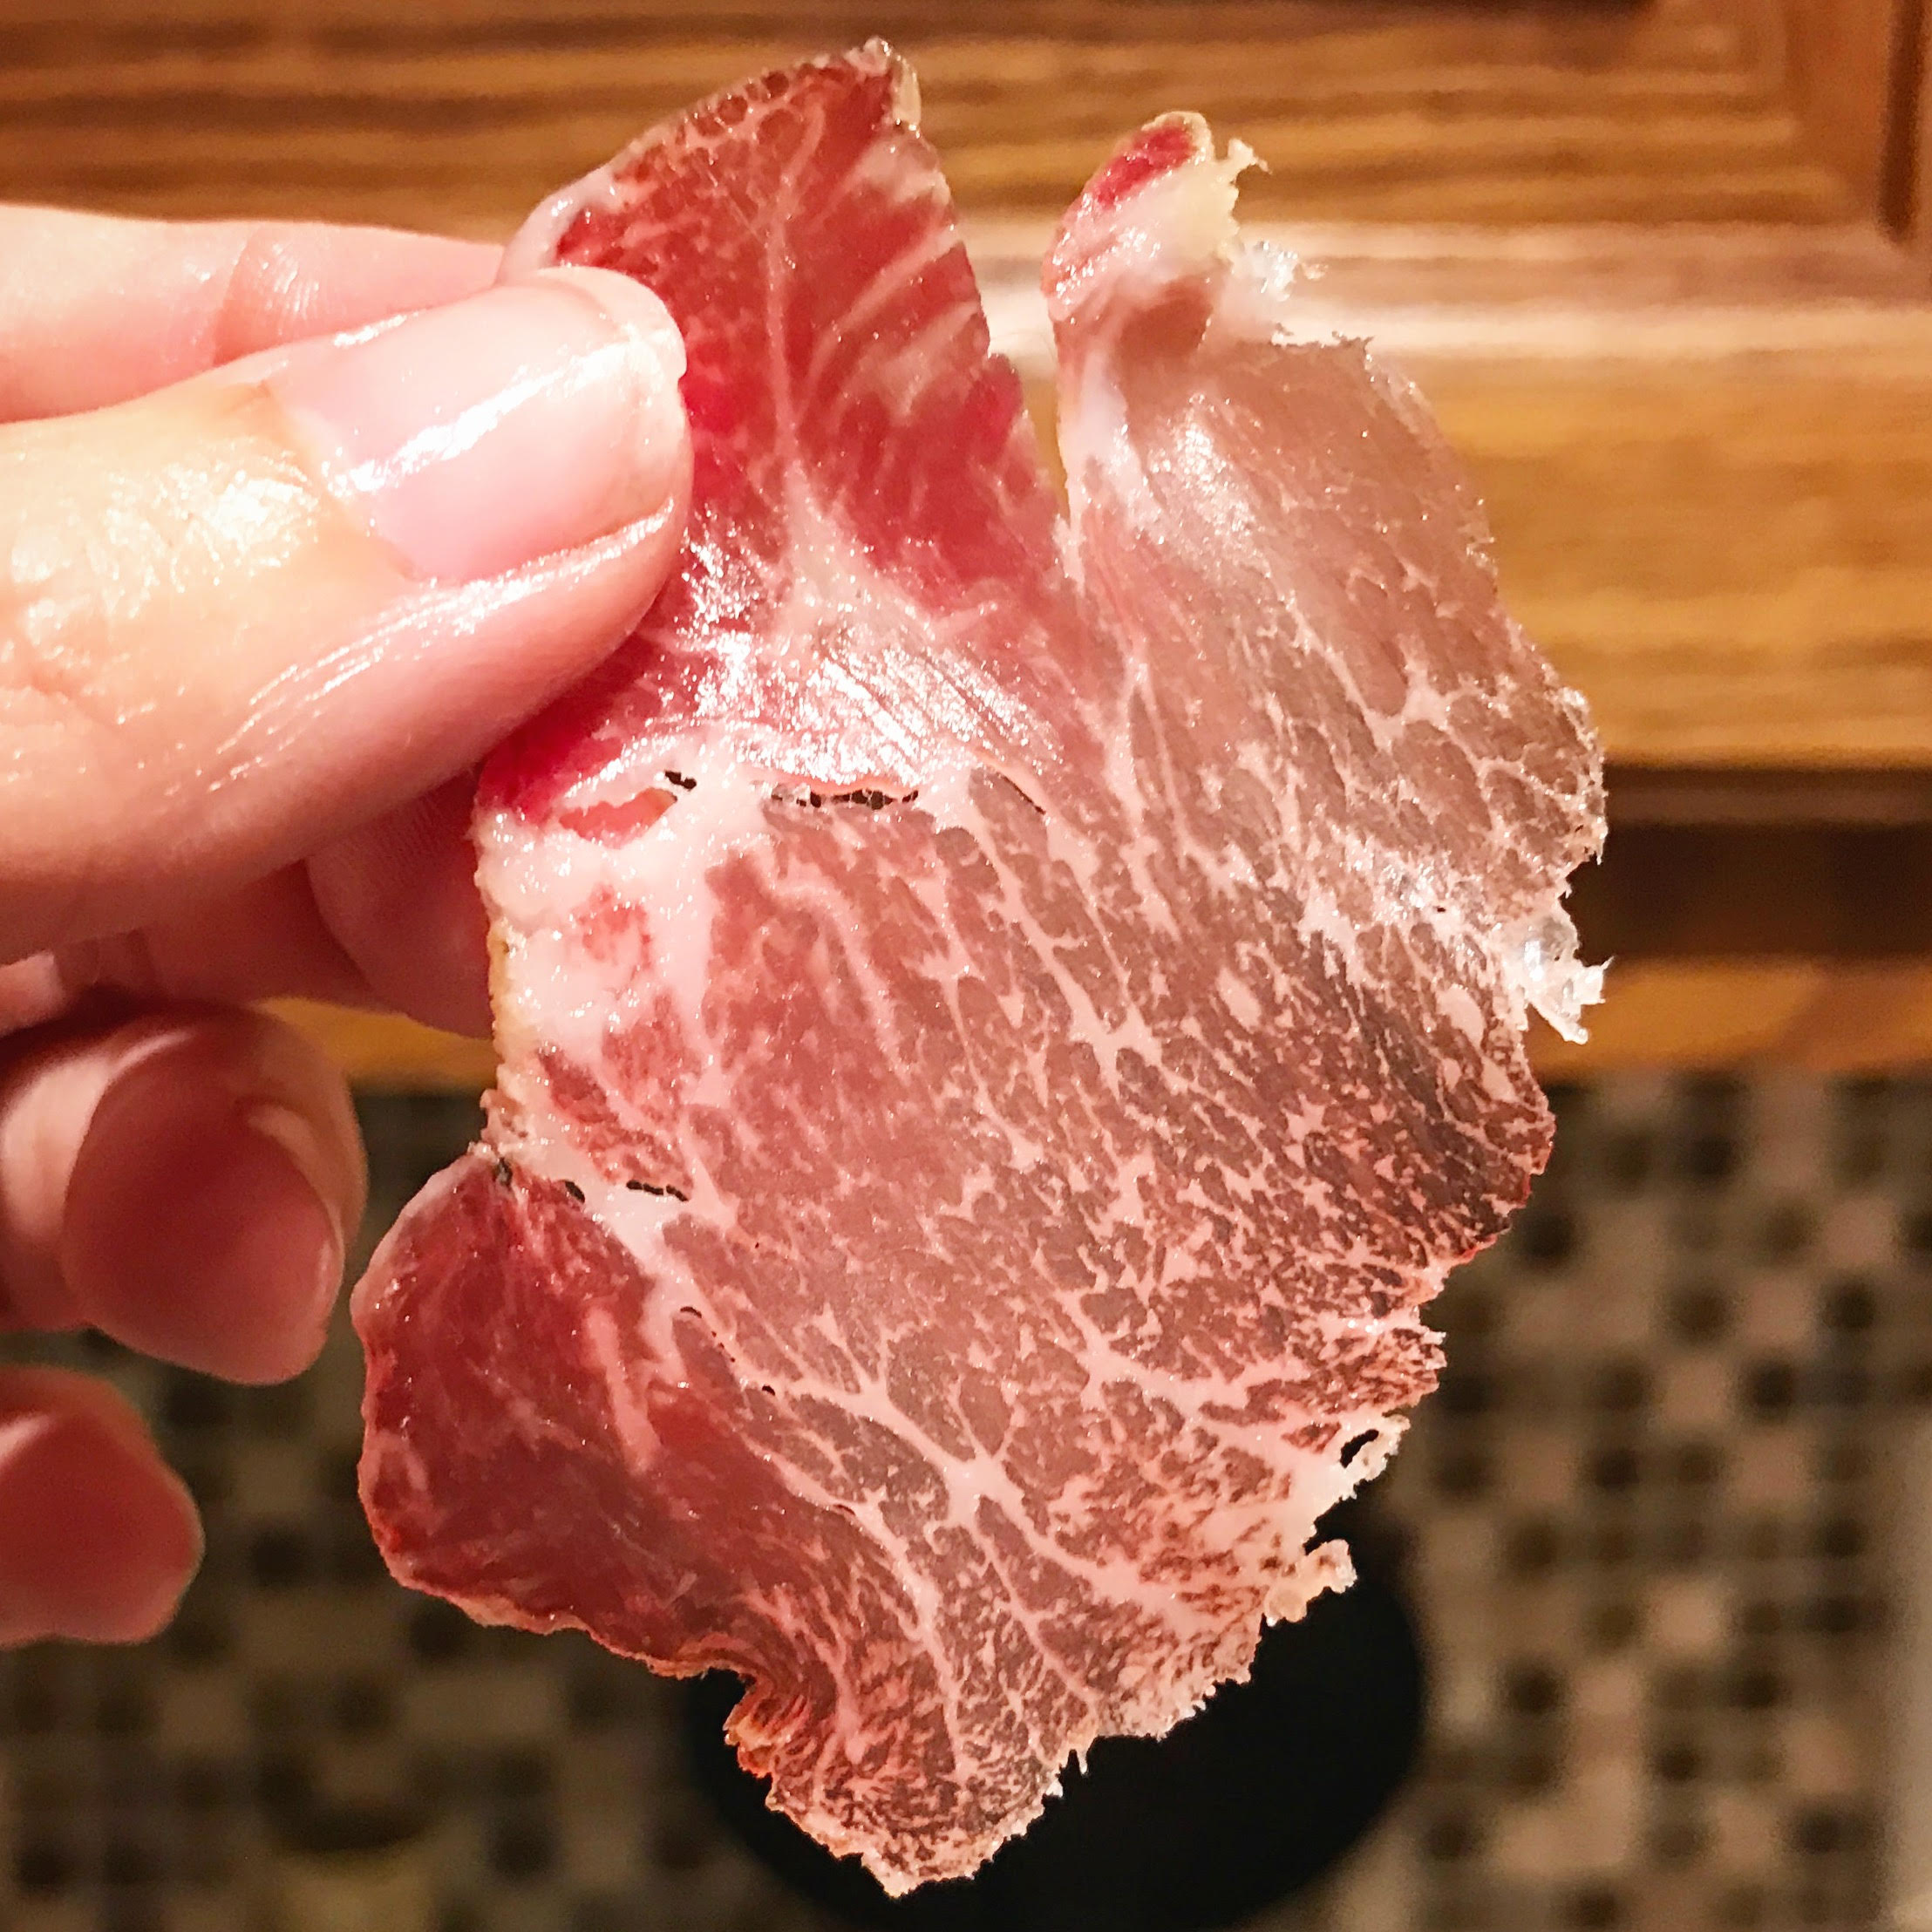
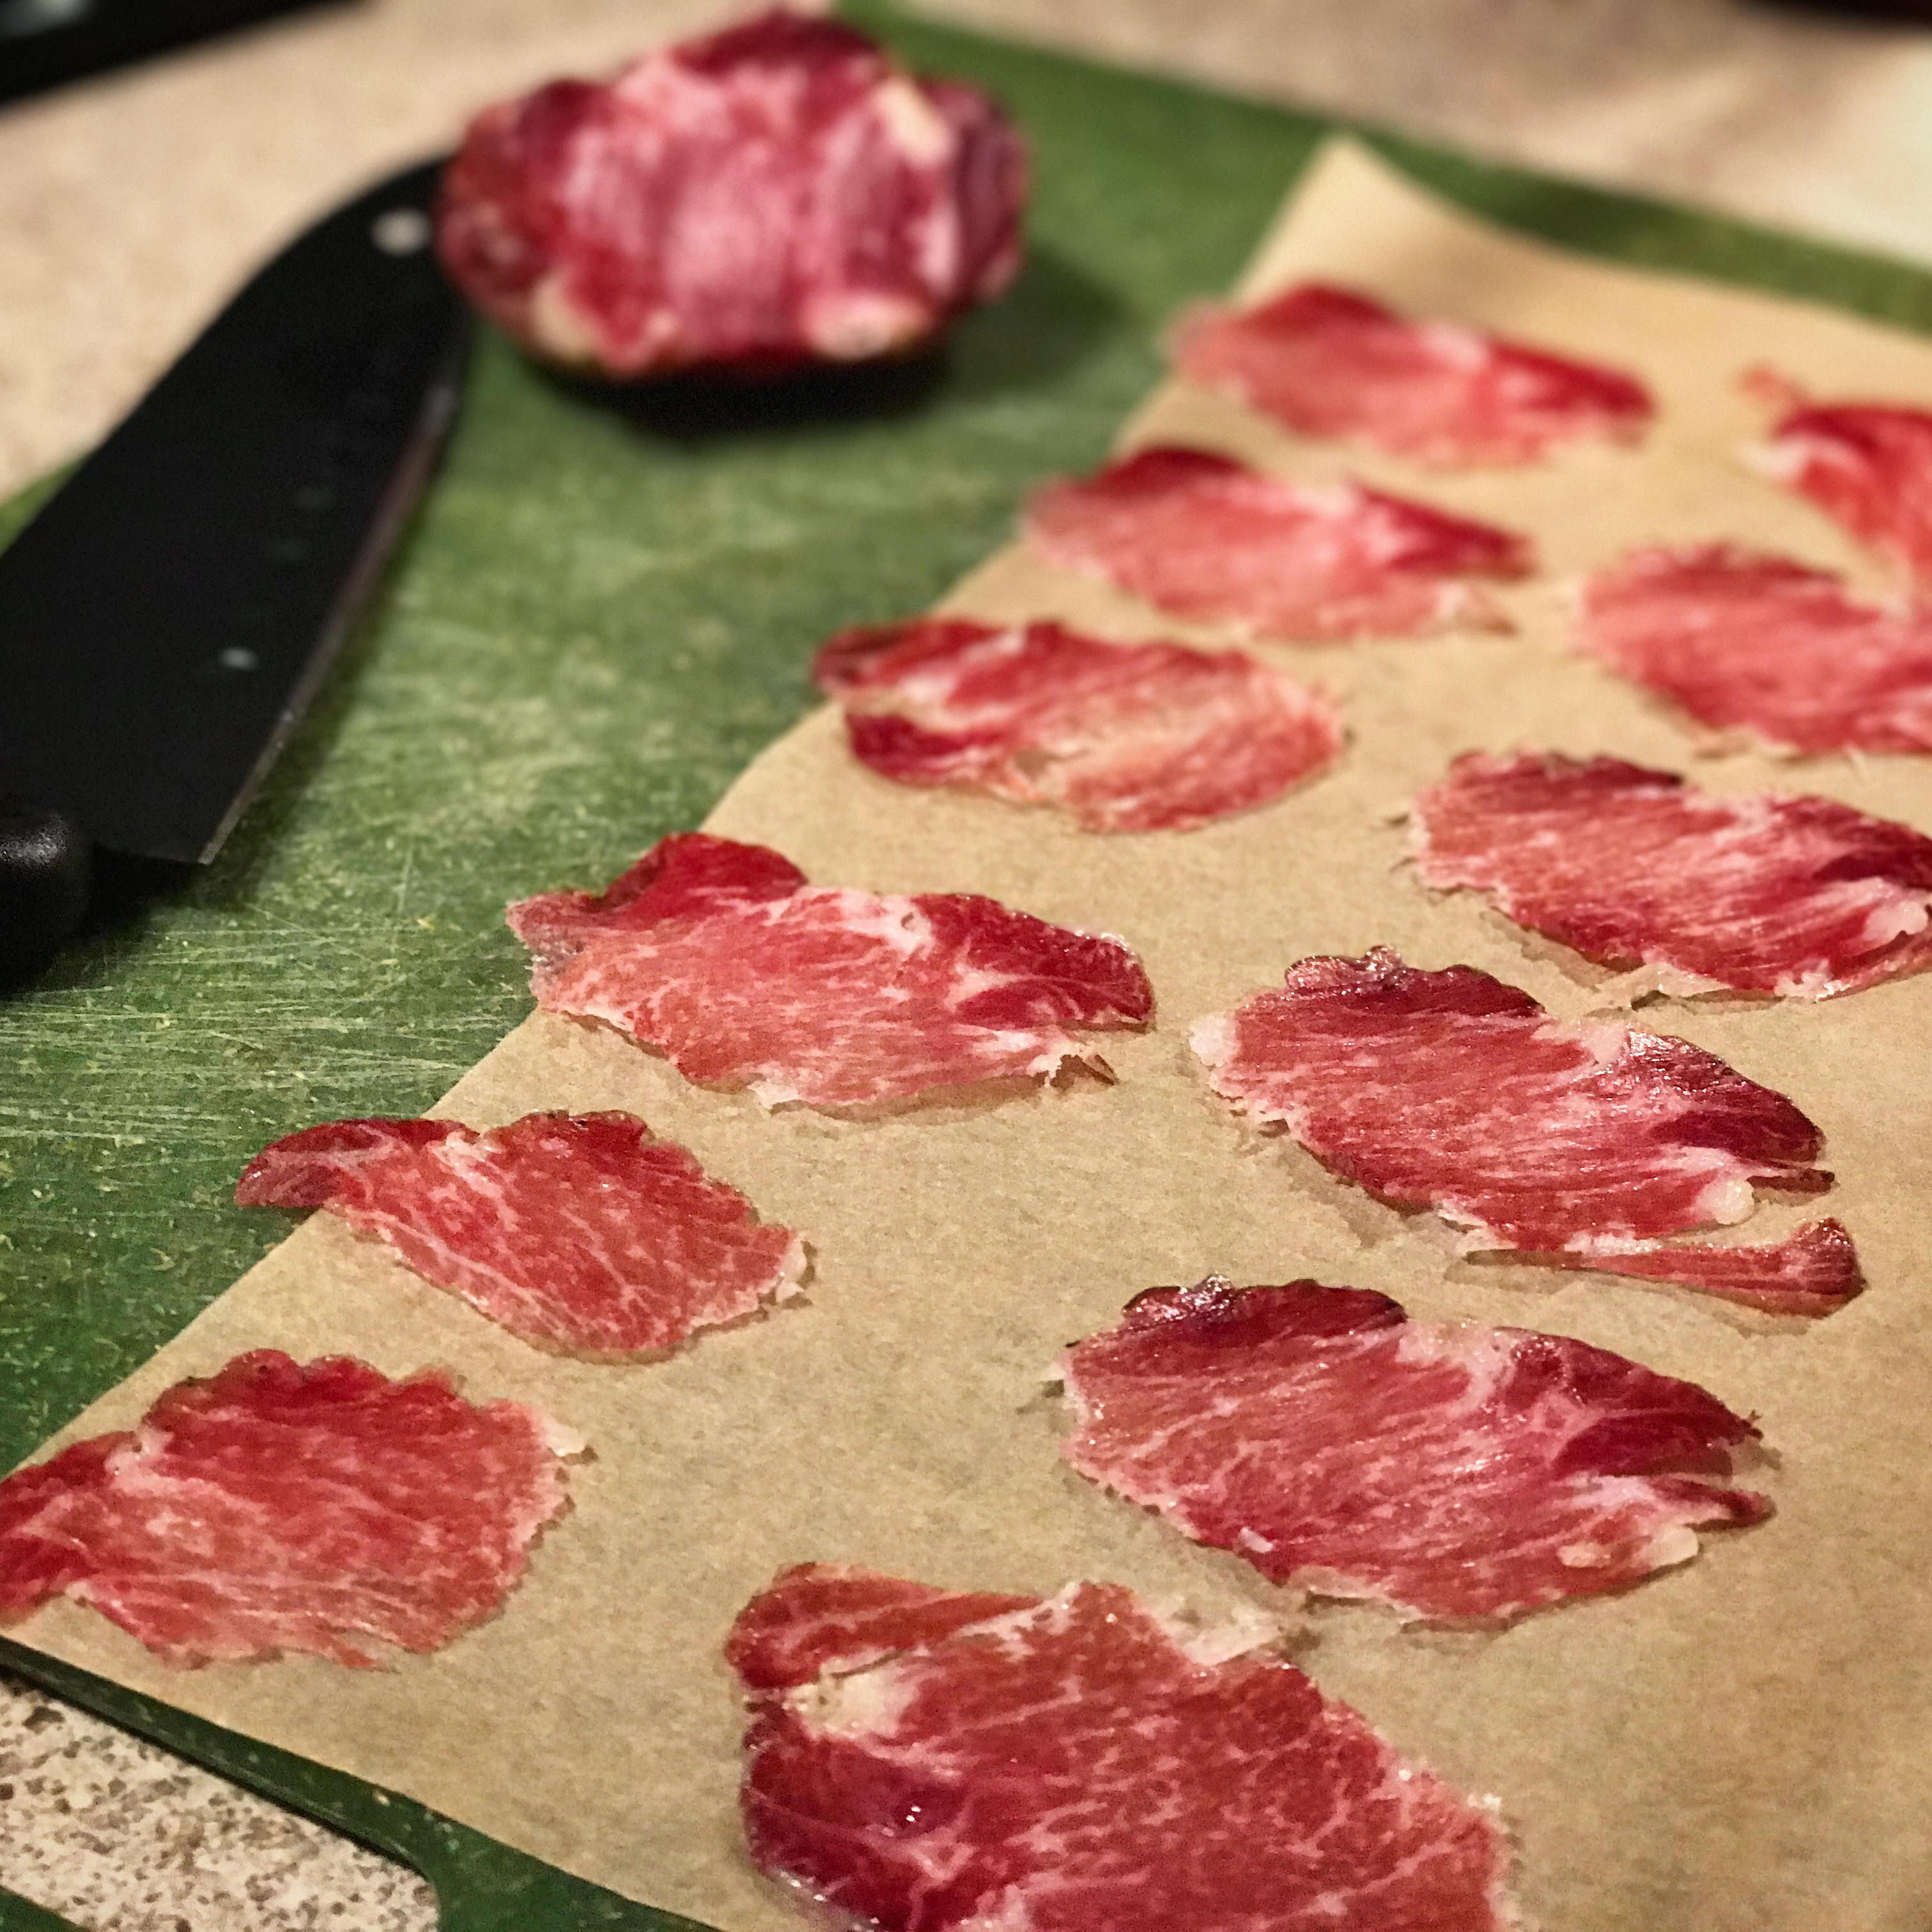
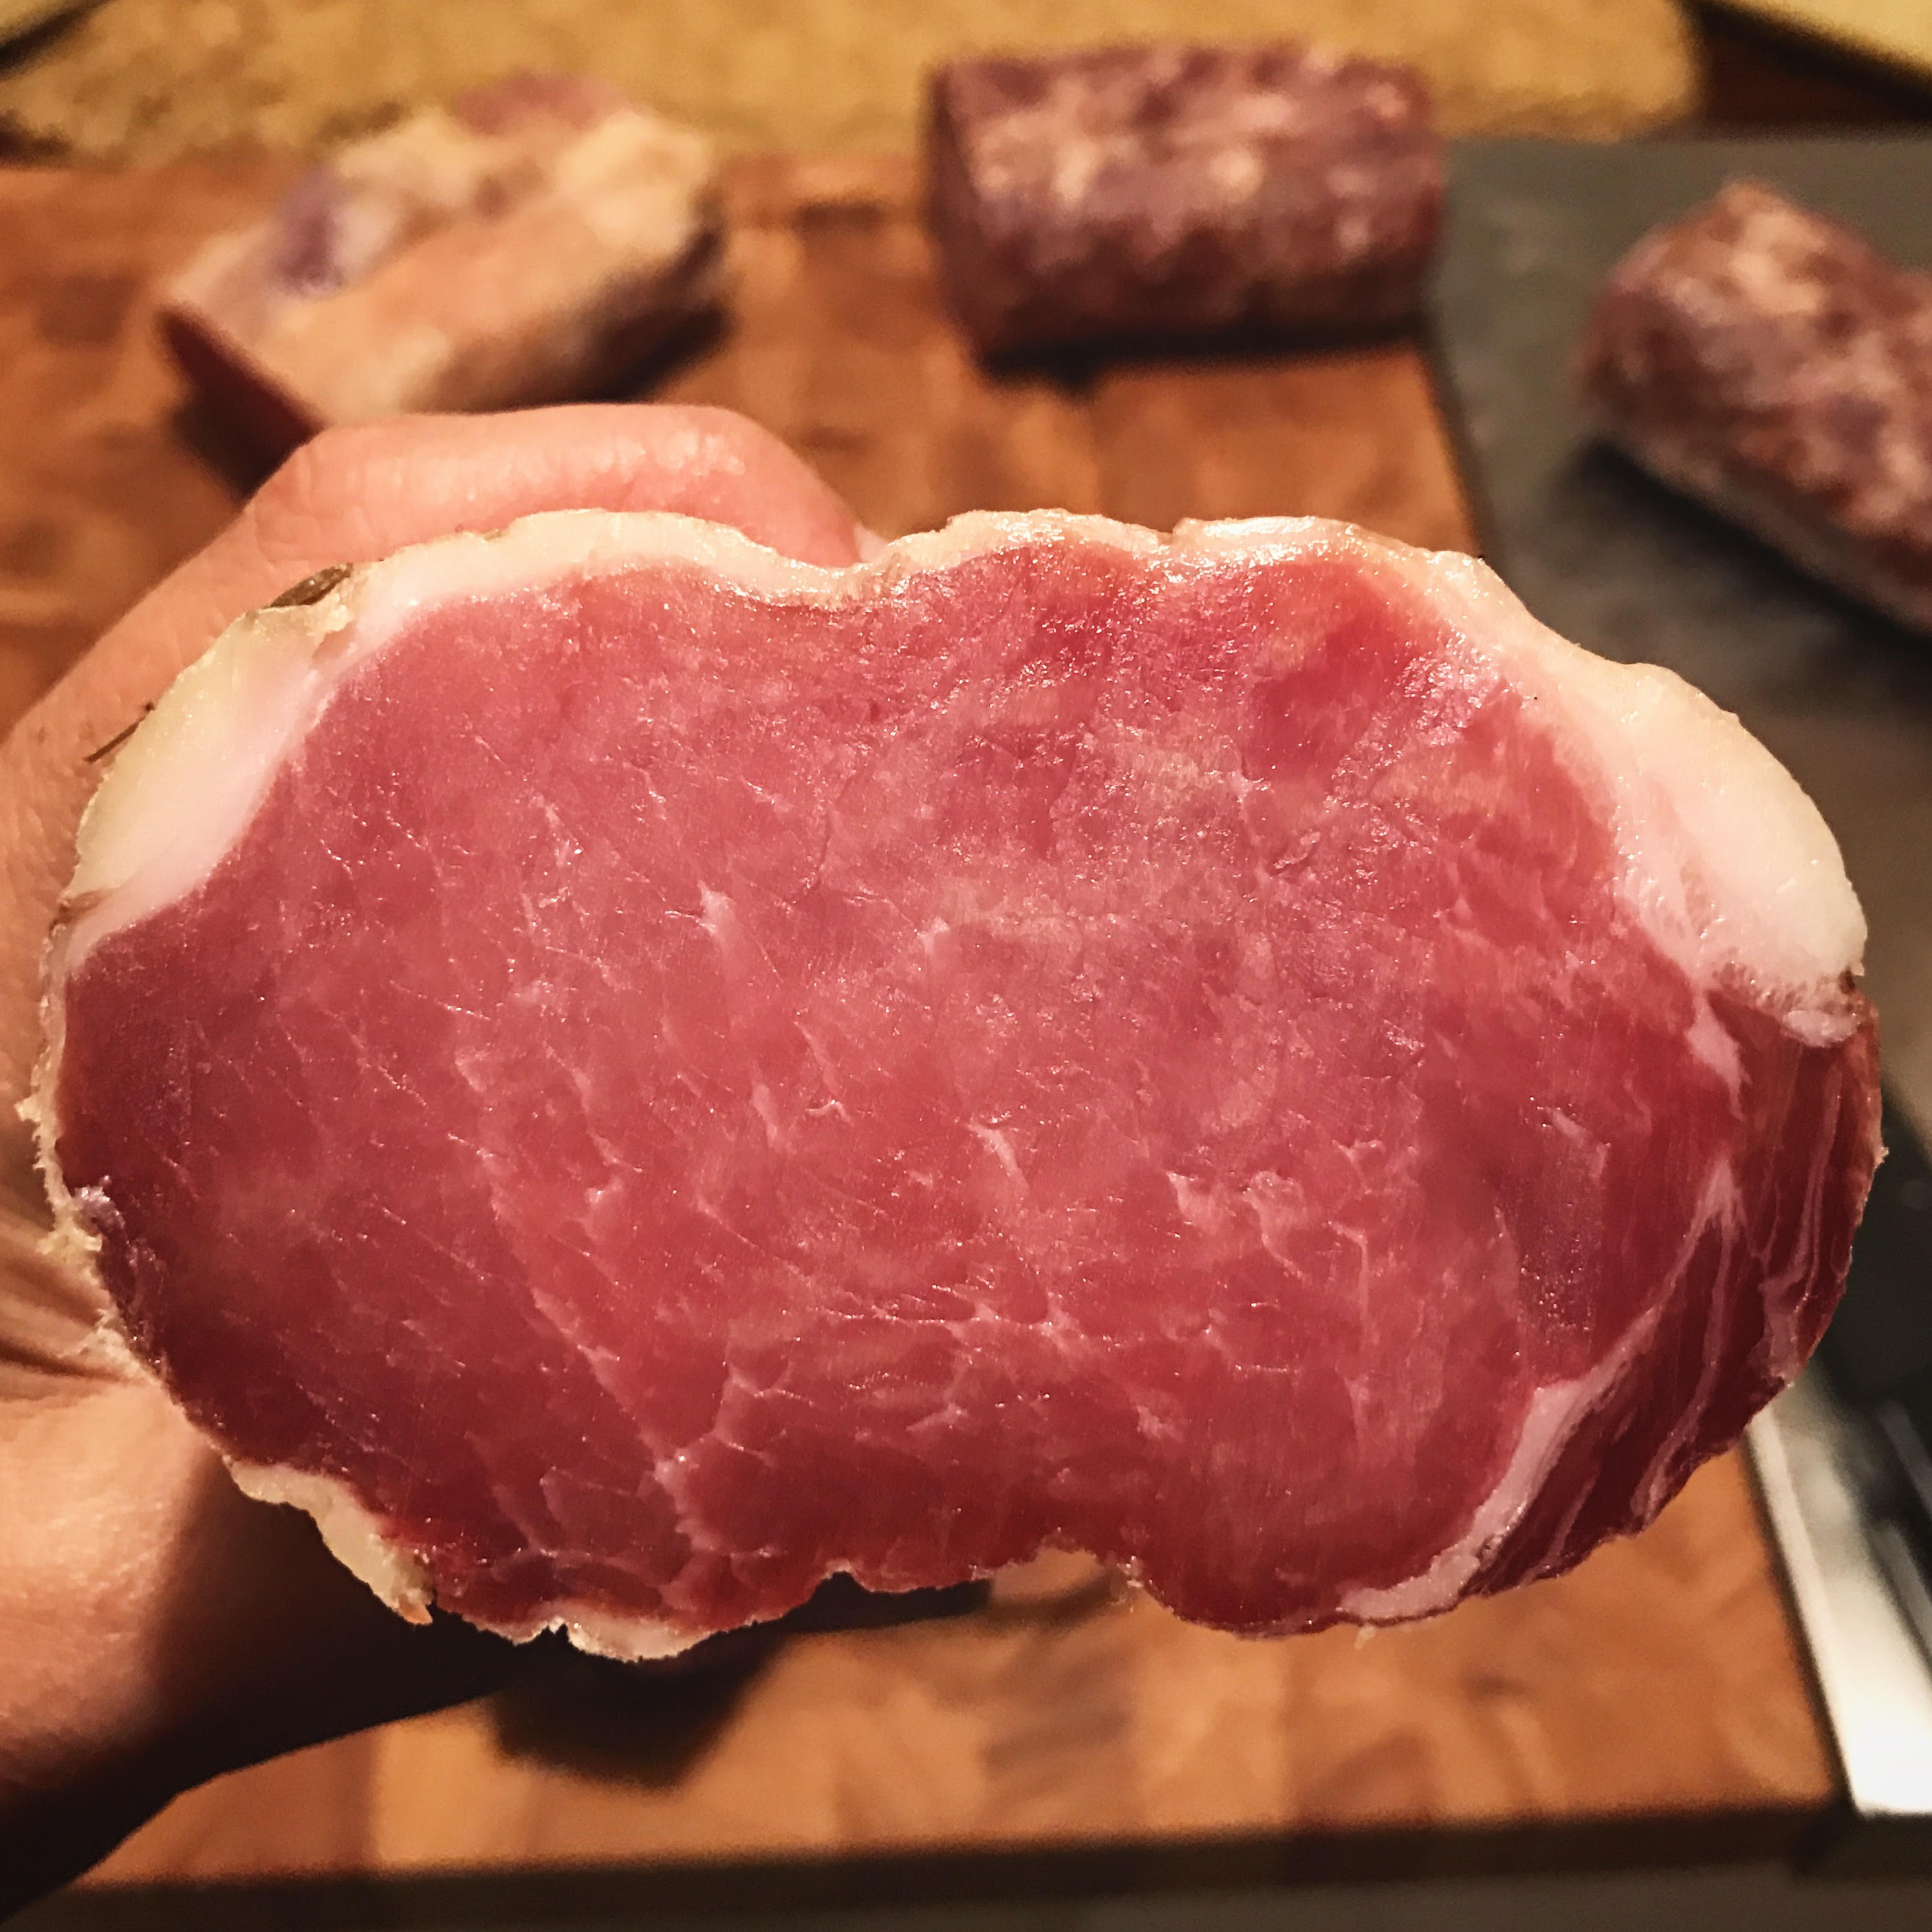
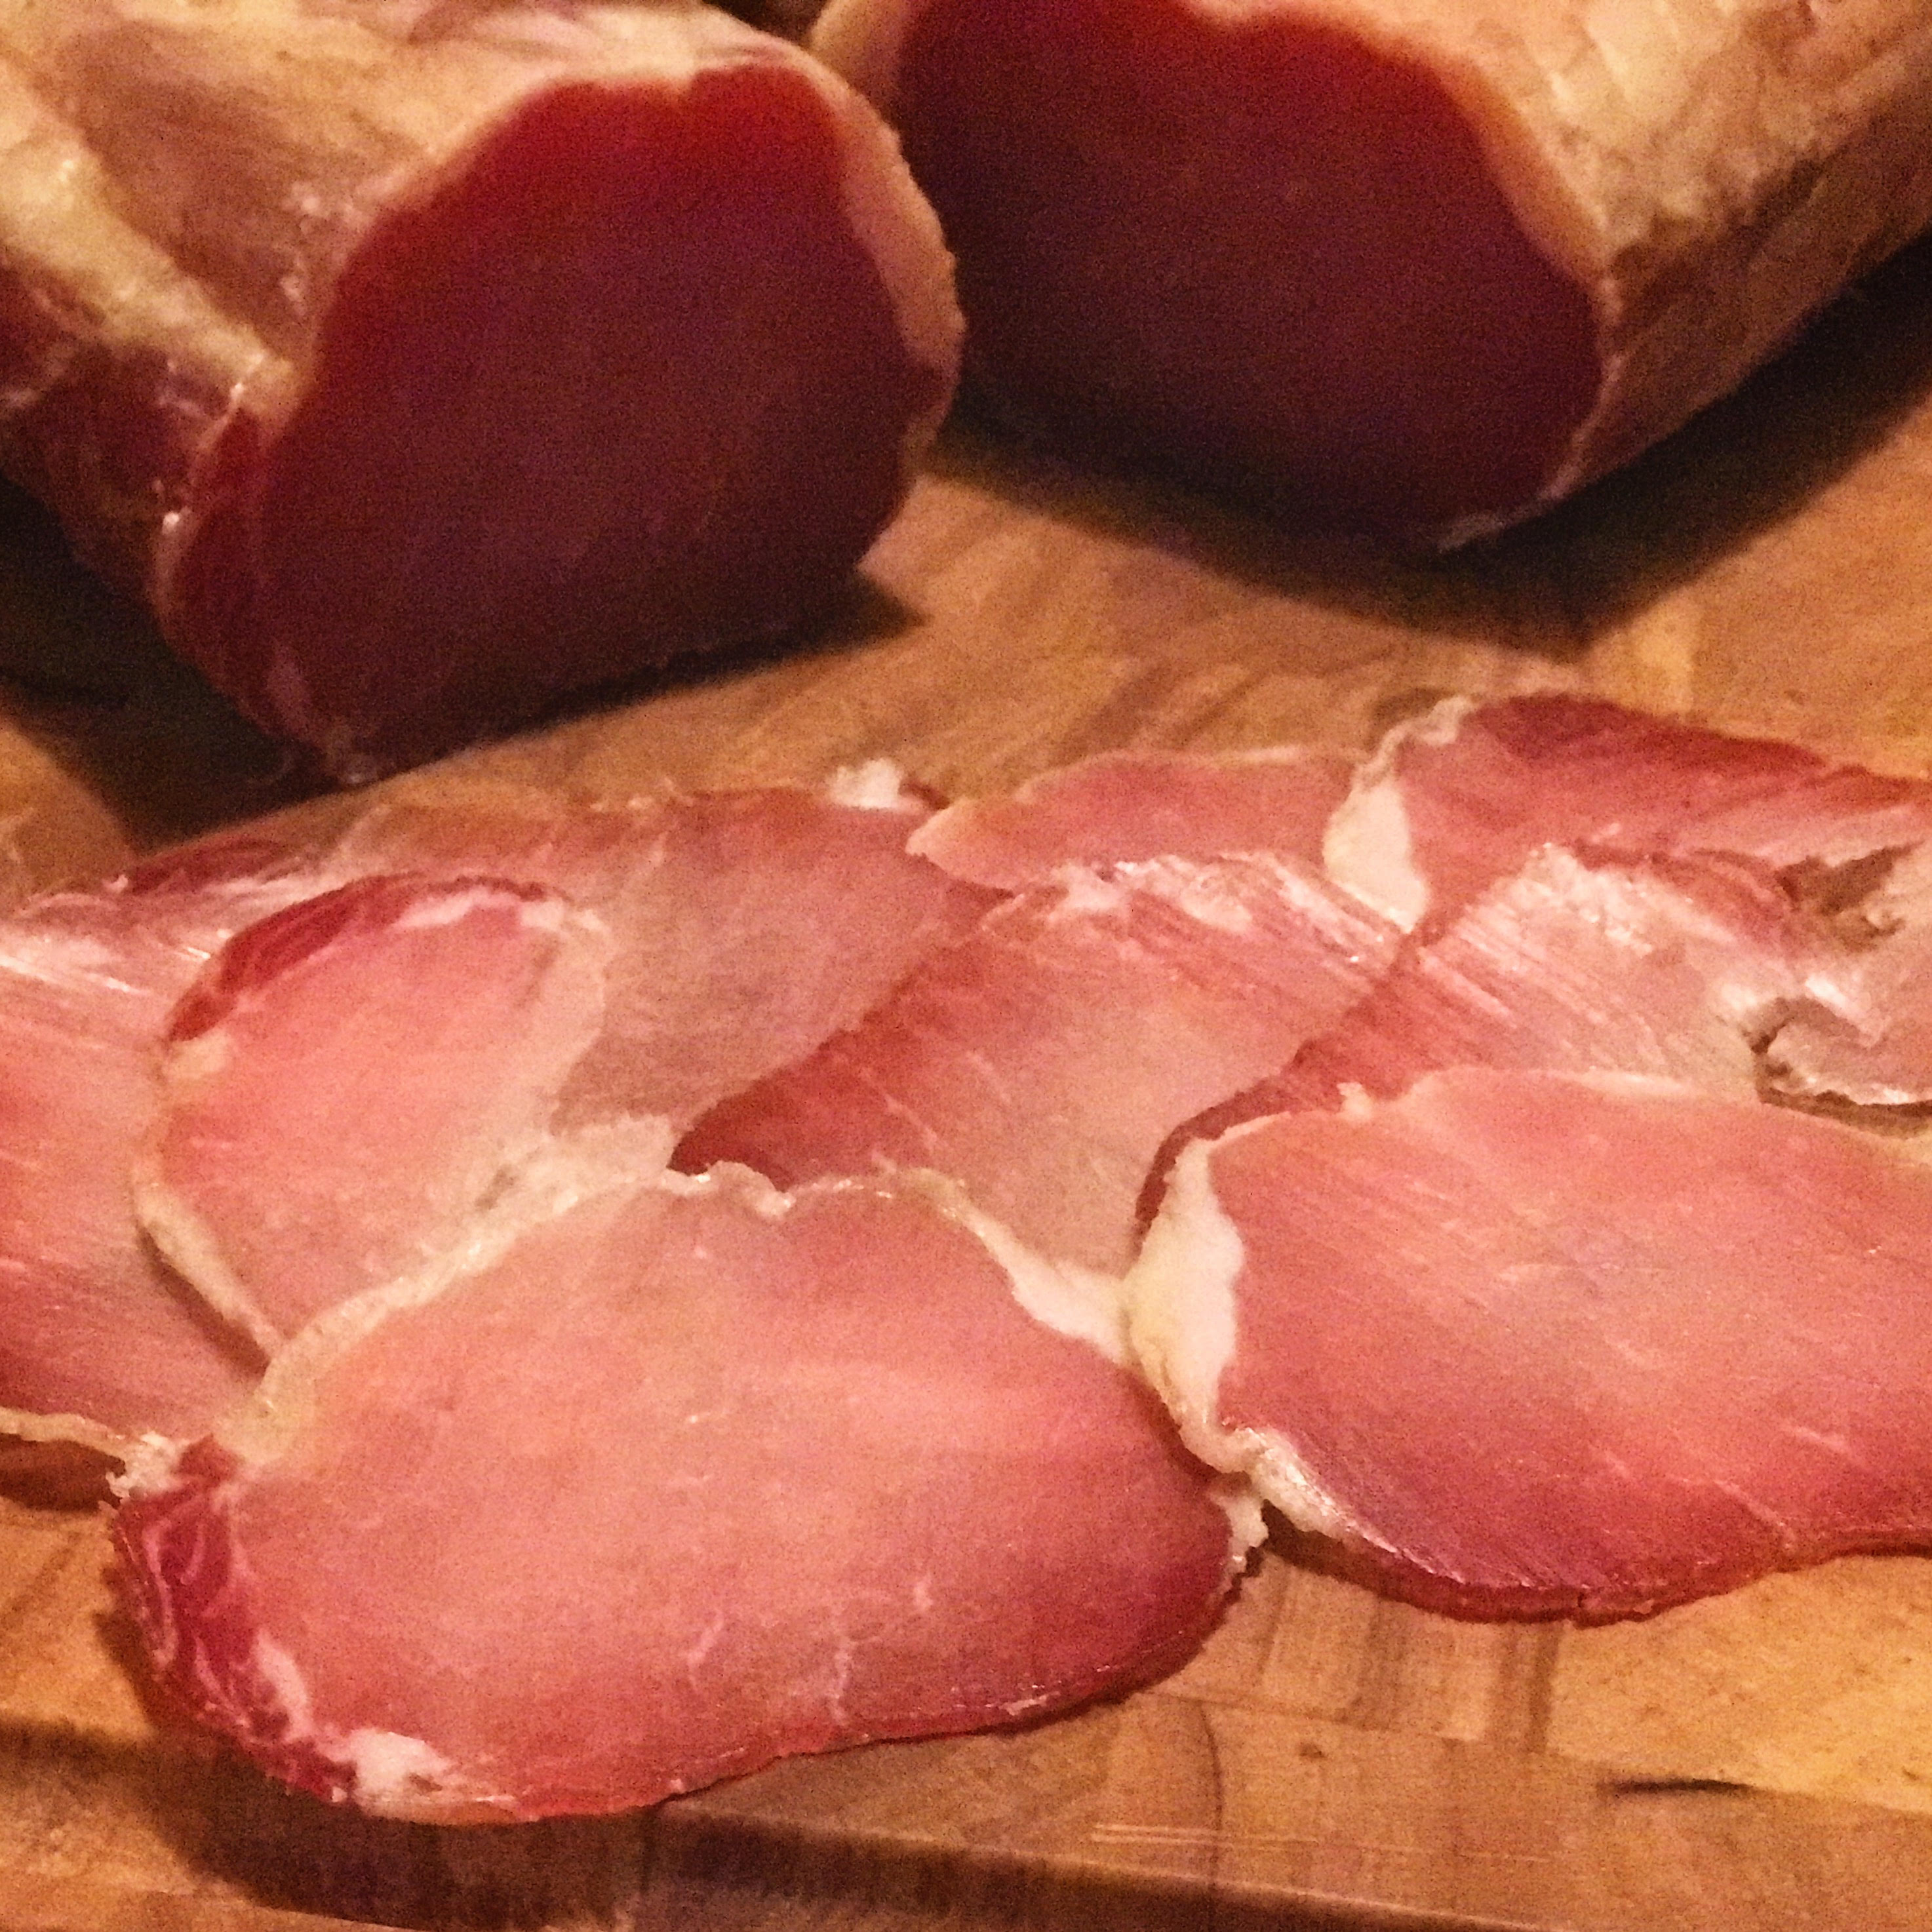
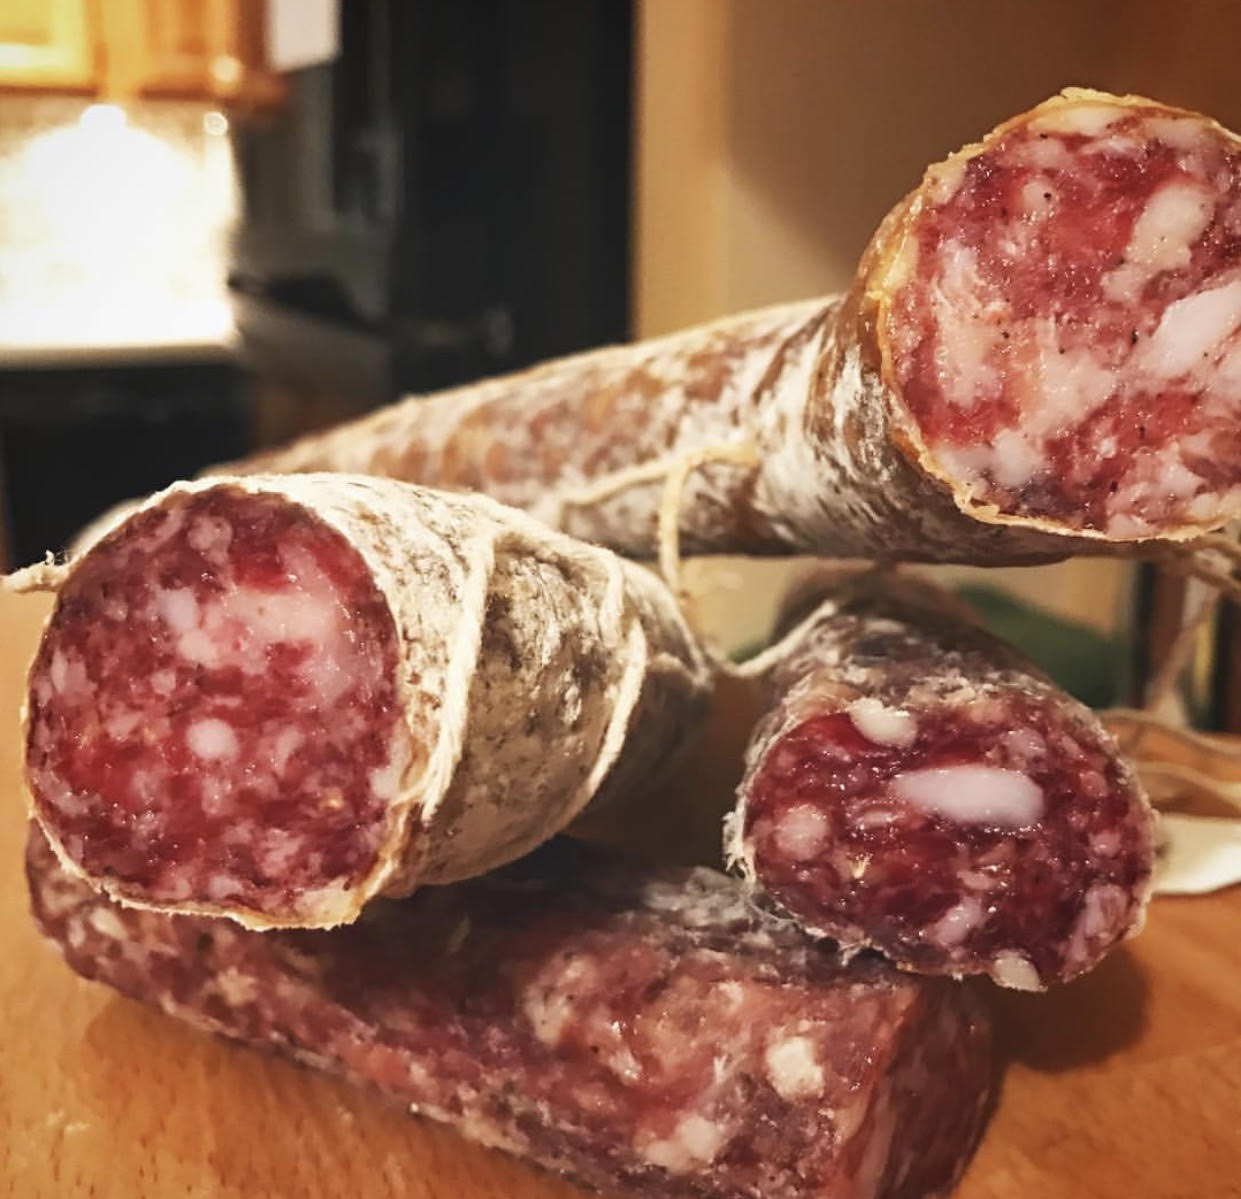
And now, to the best phase of making salami! The taste testing. When the salami have reached 40% weight loss, I pull them from the chamber.
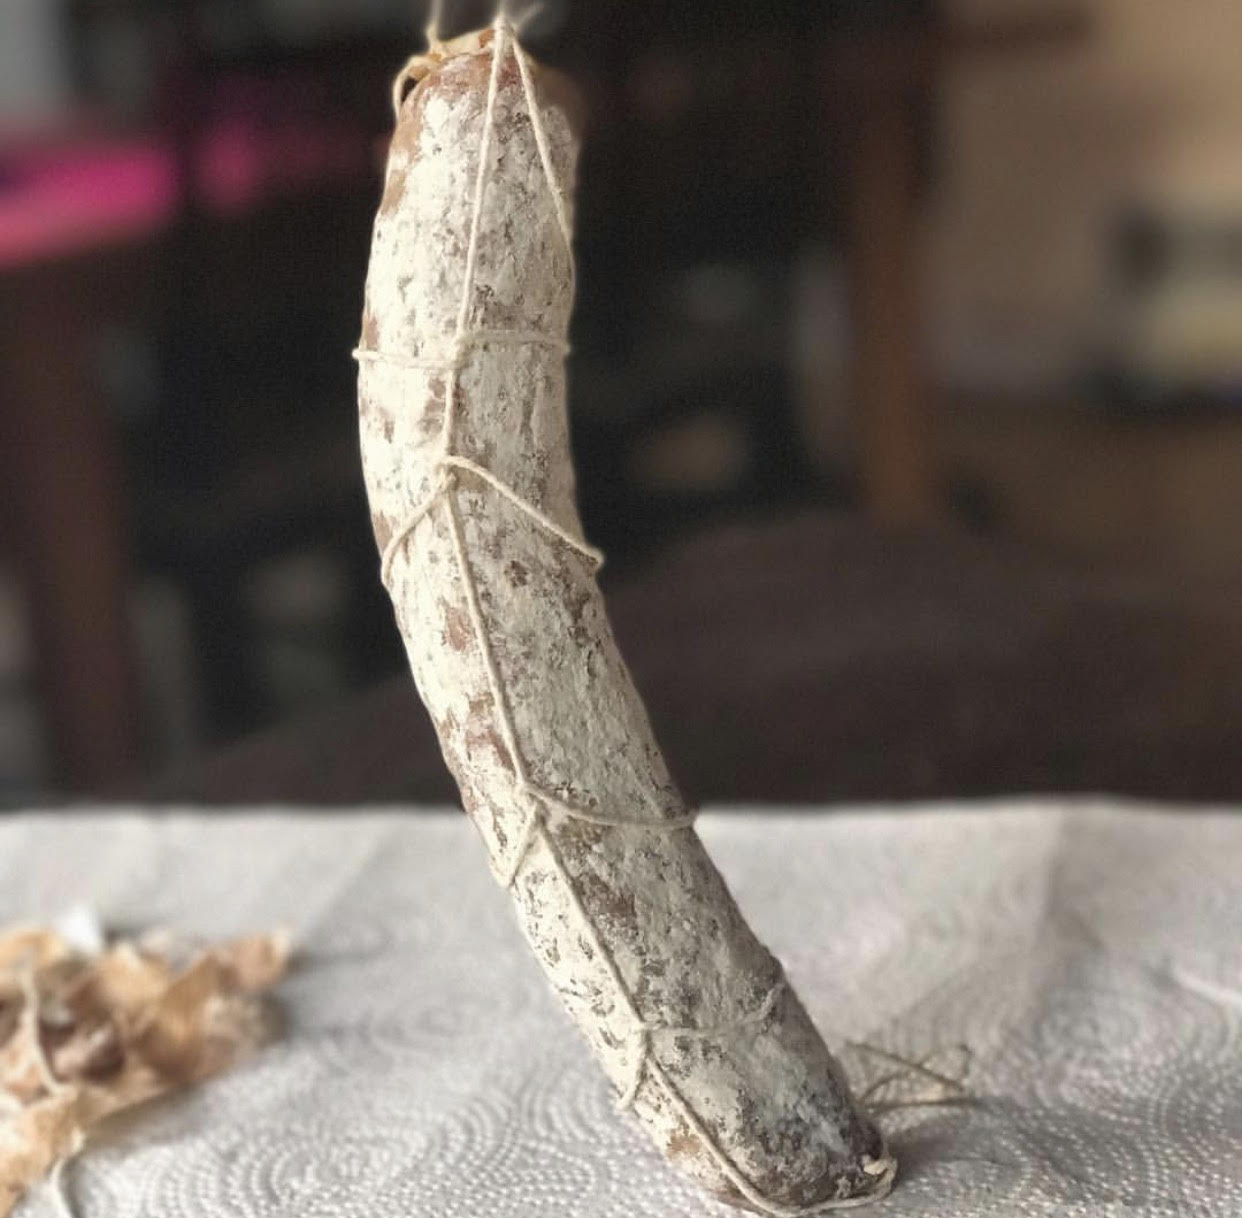
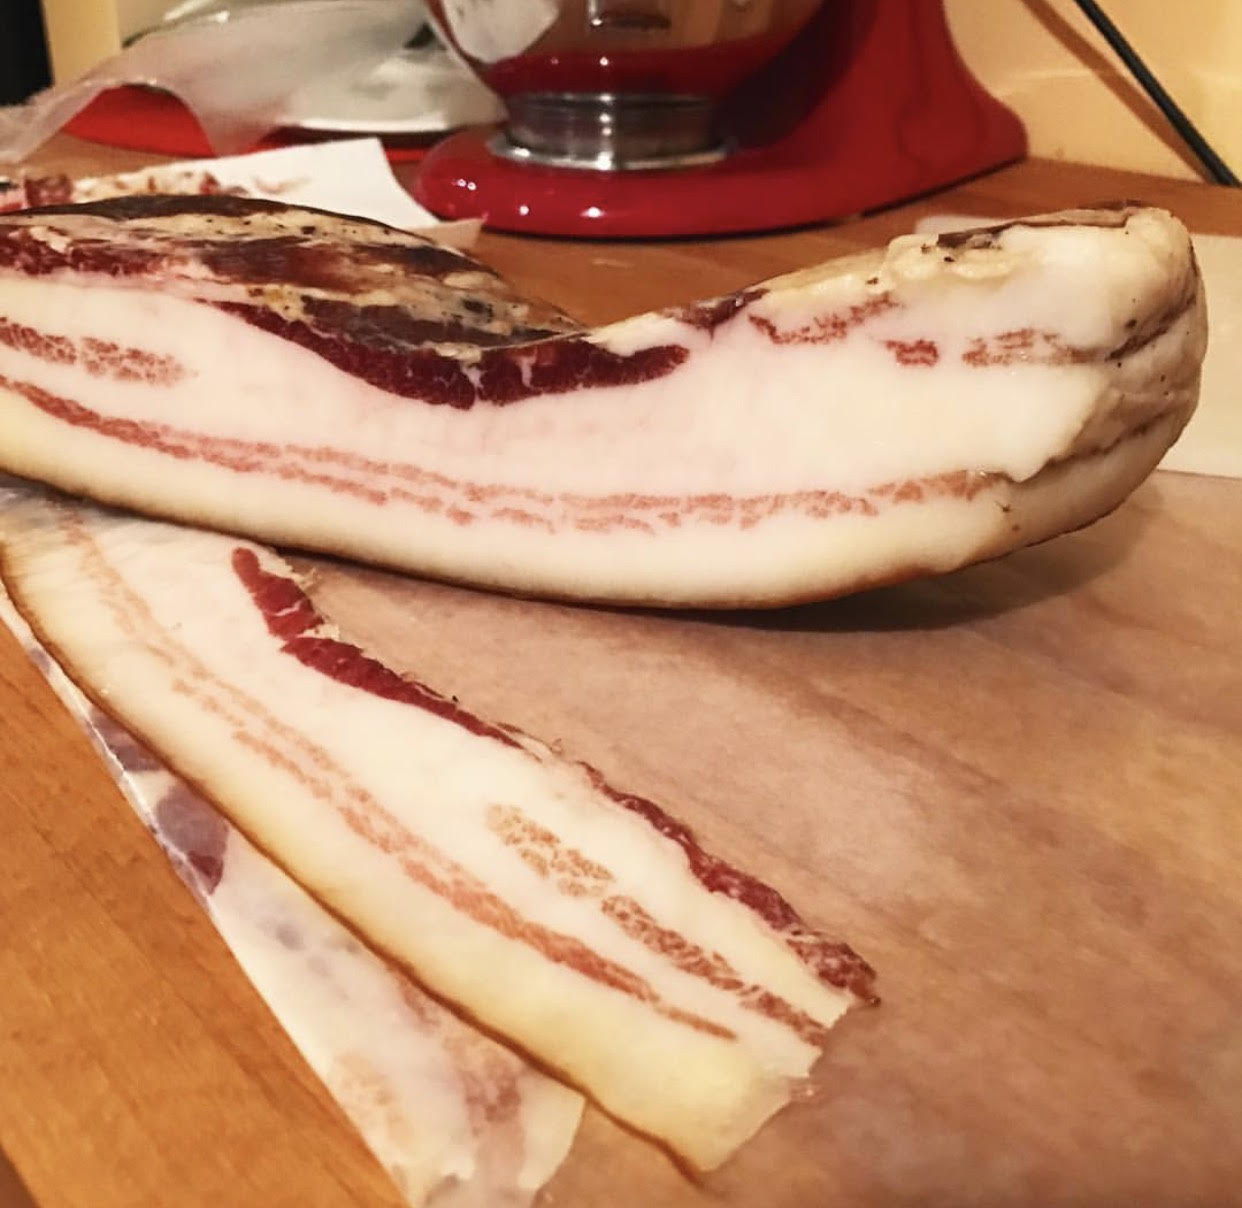
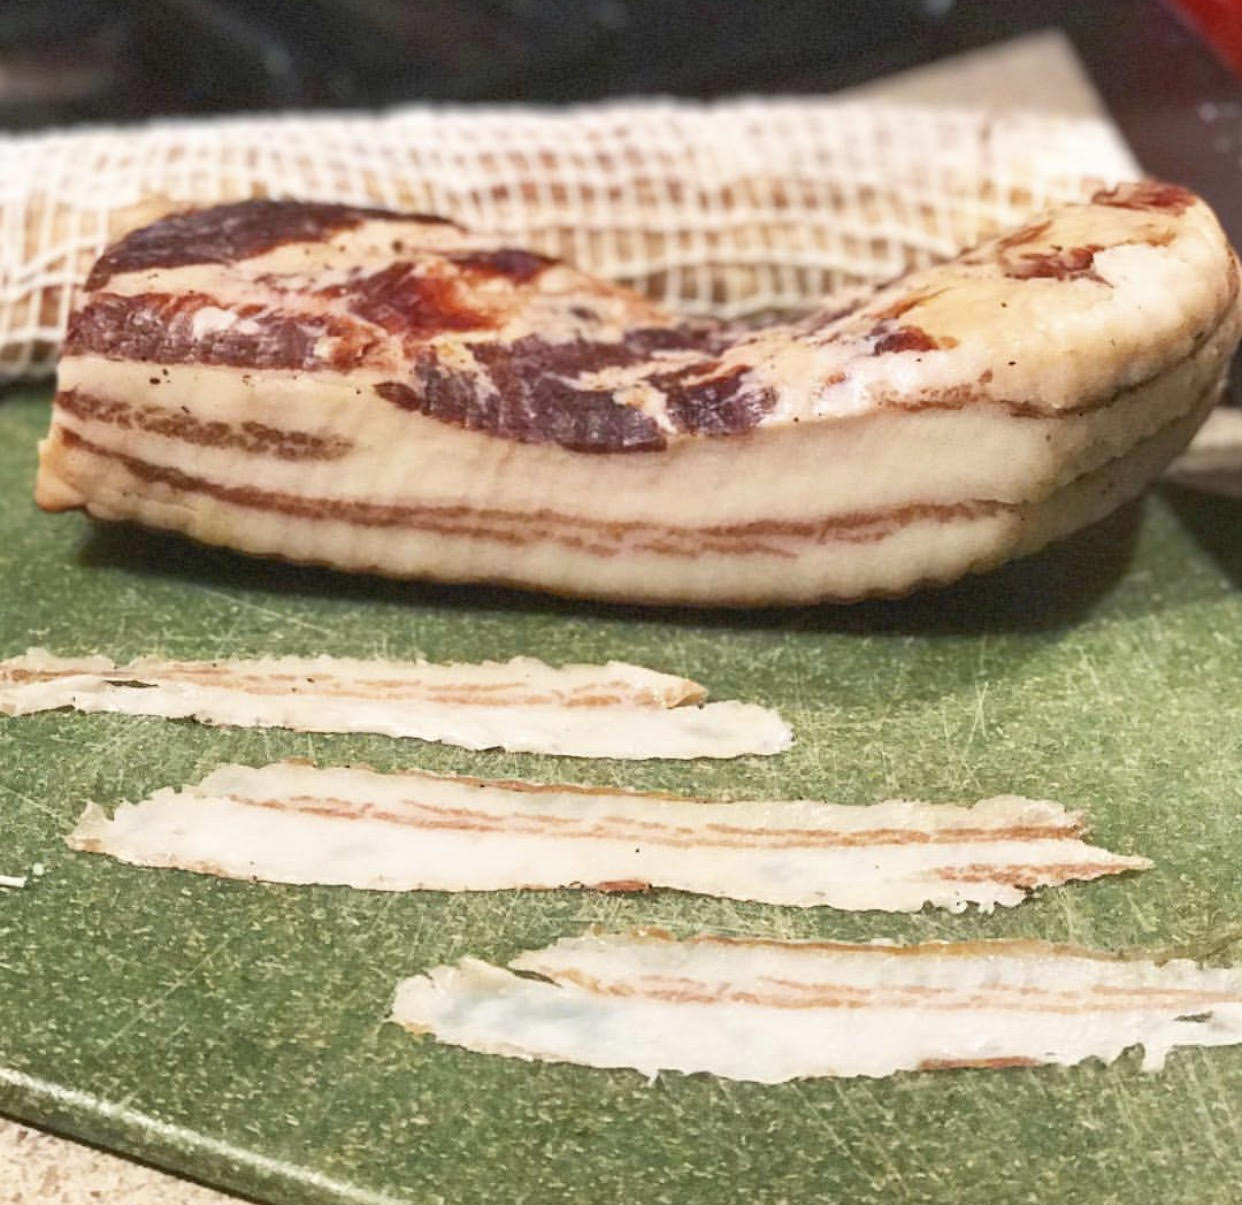
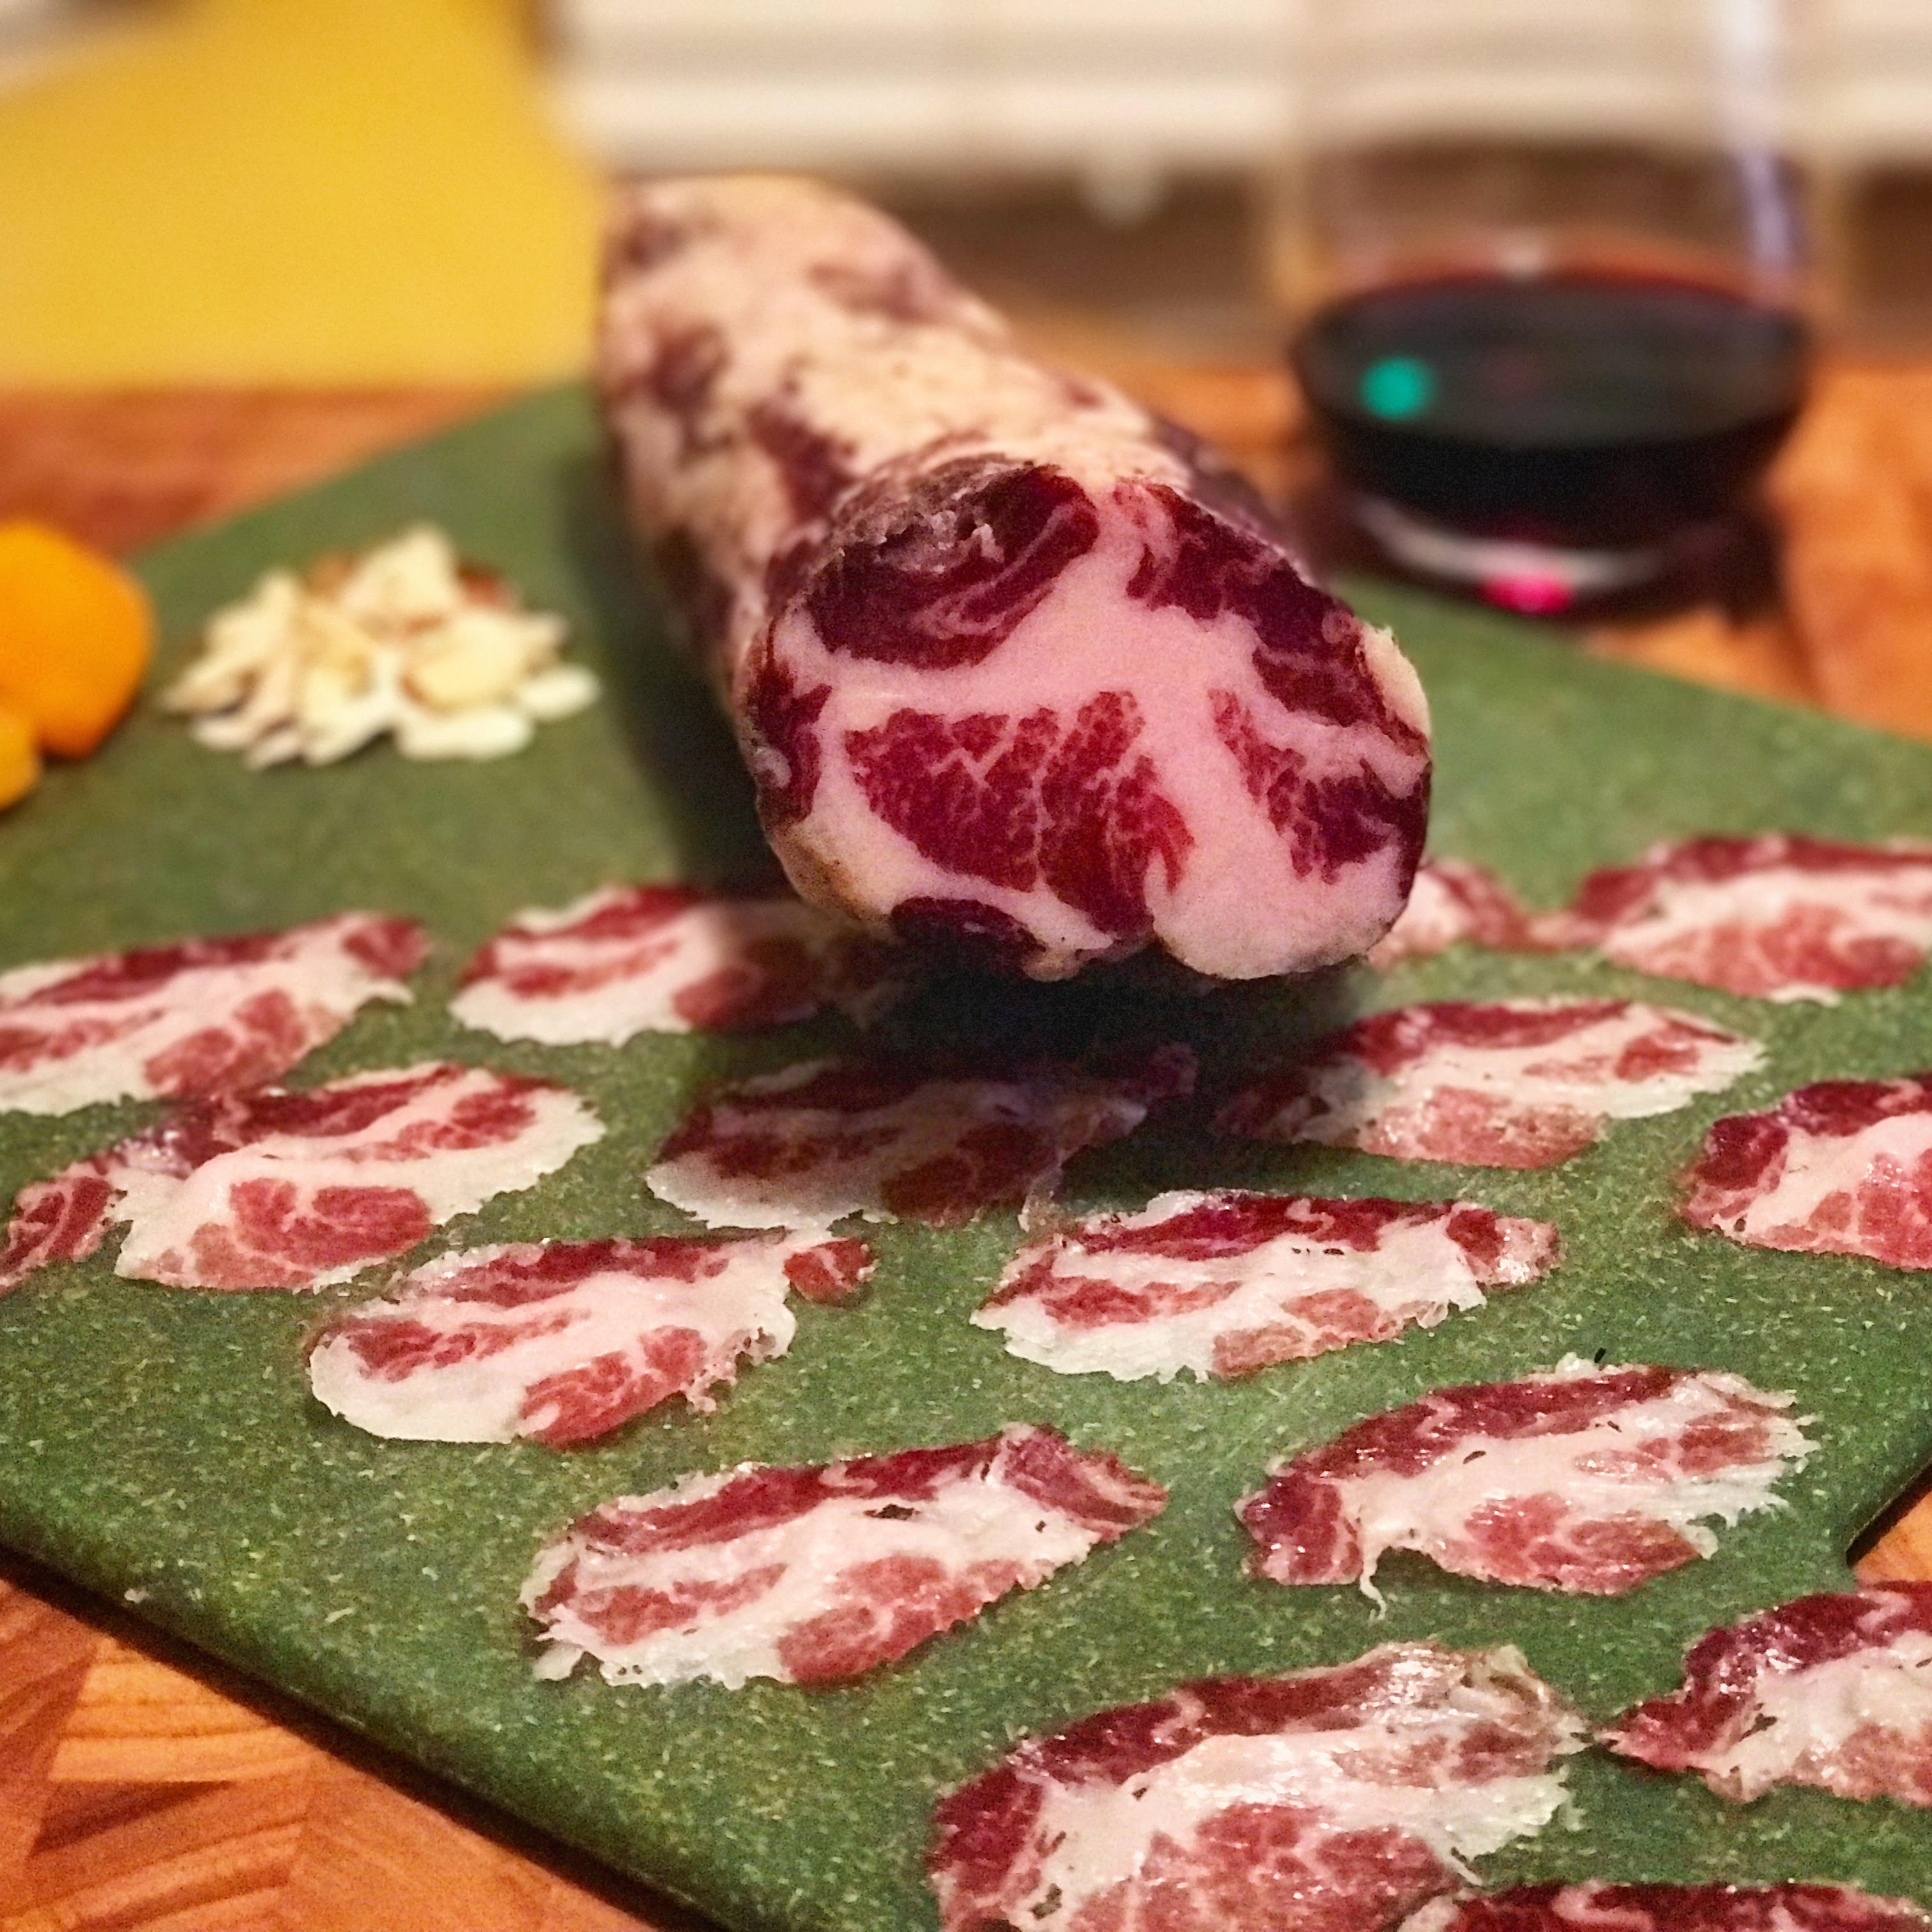
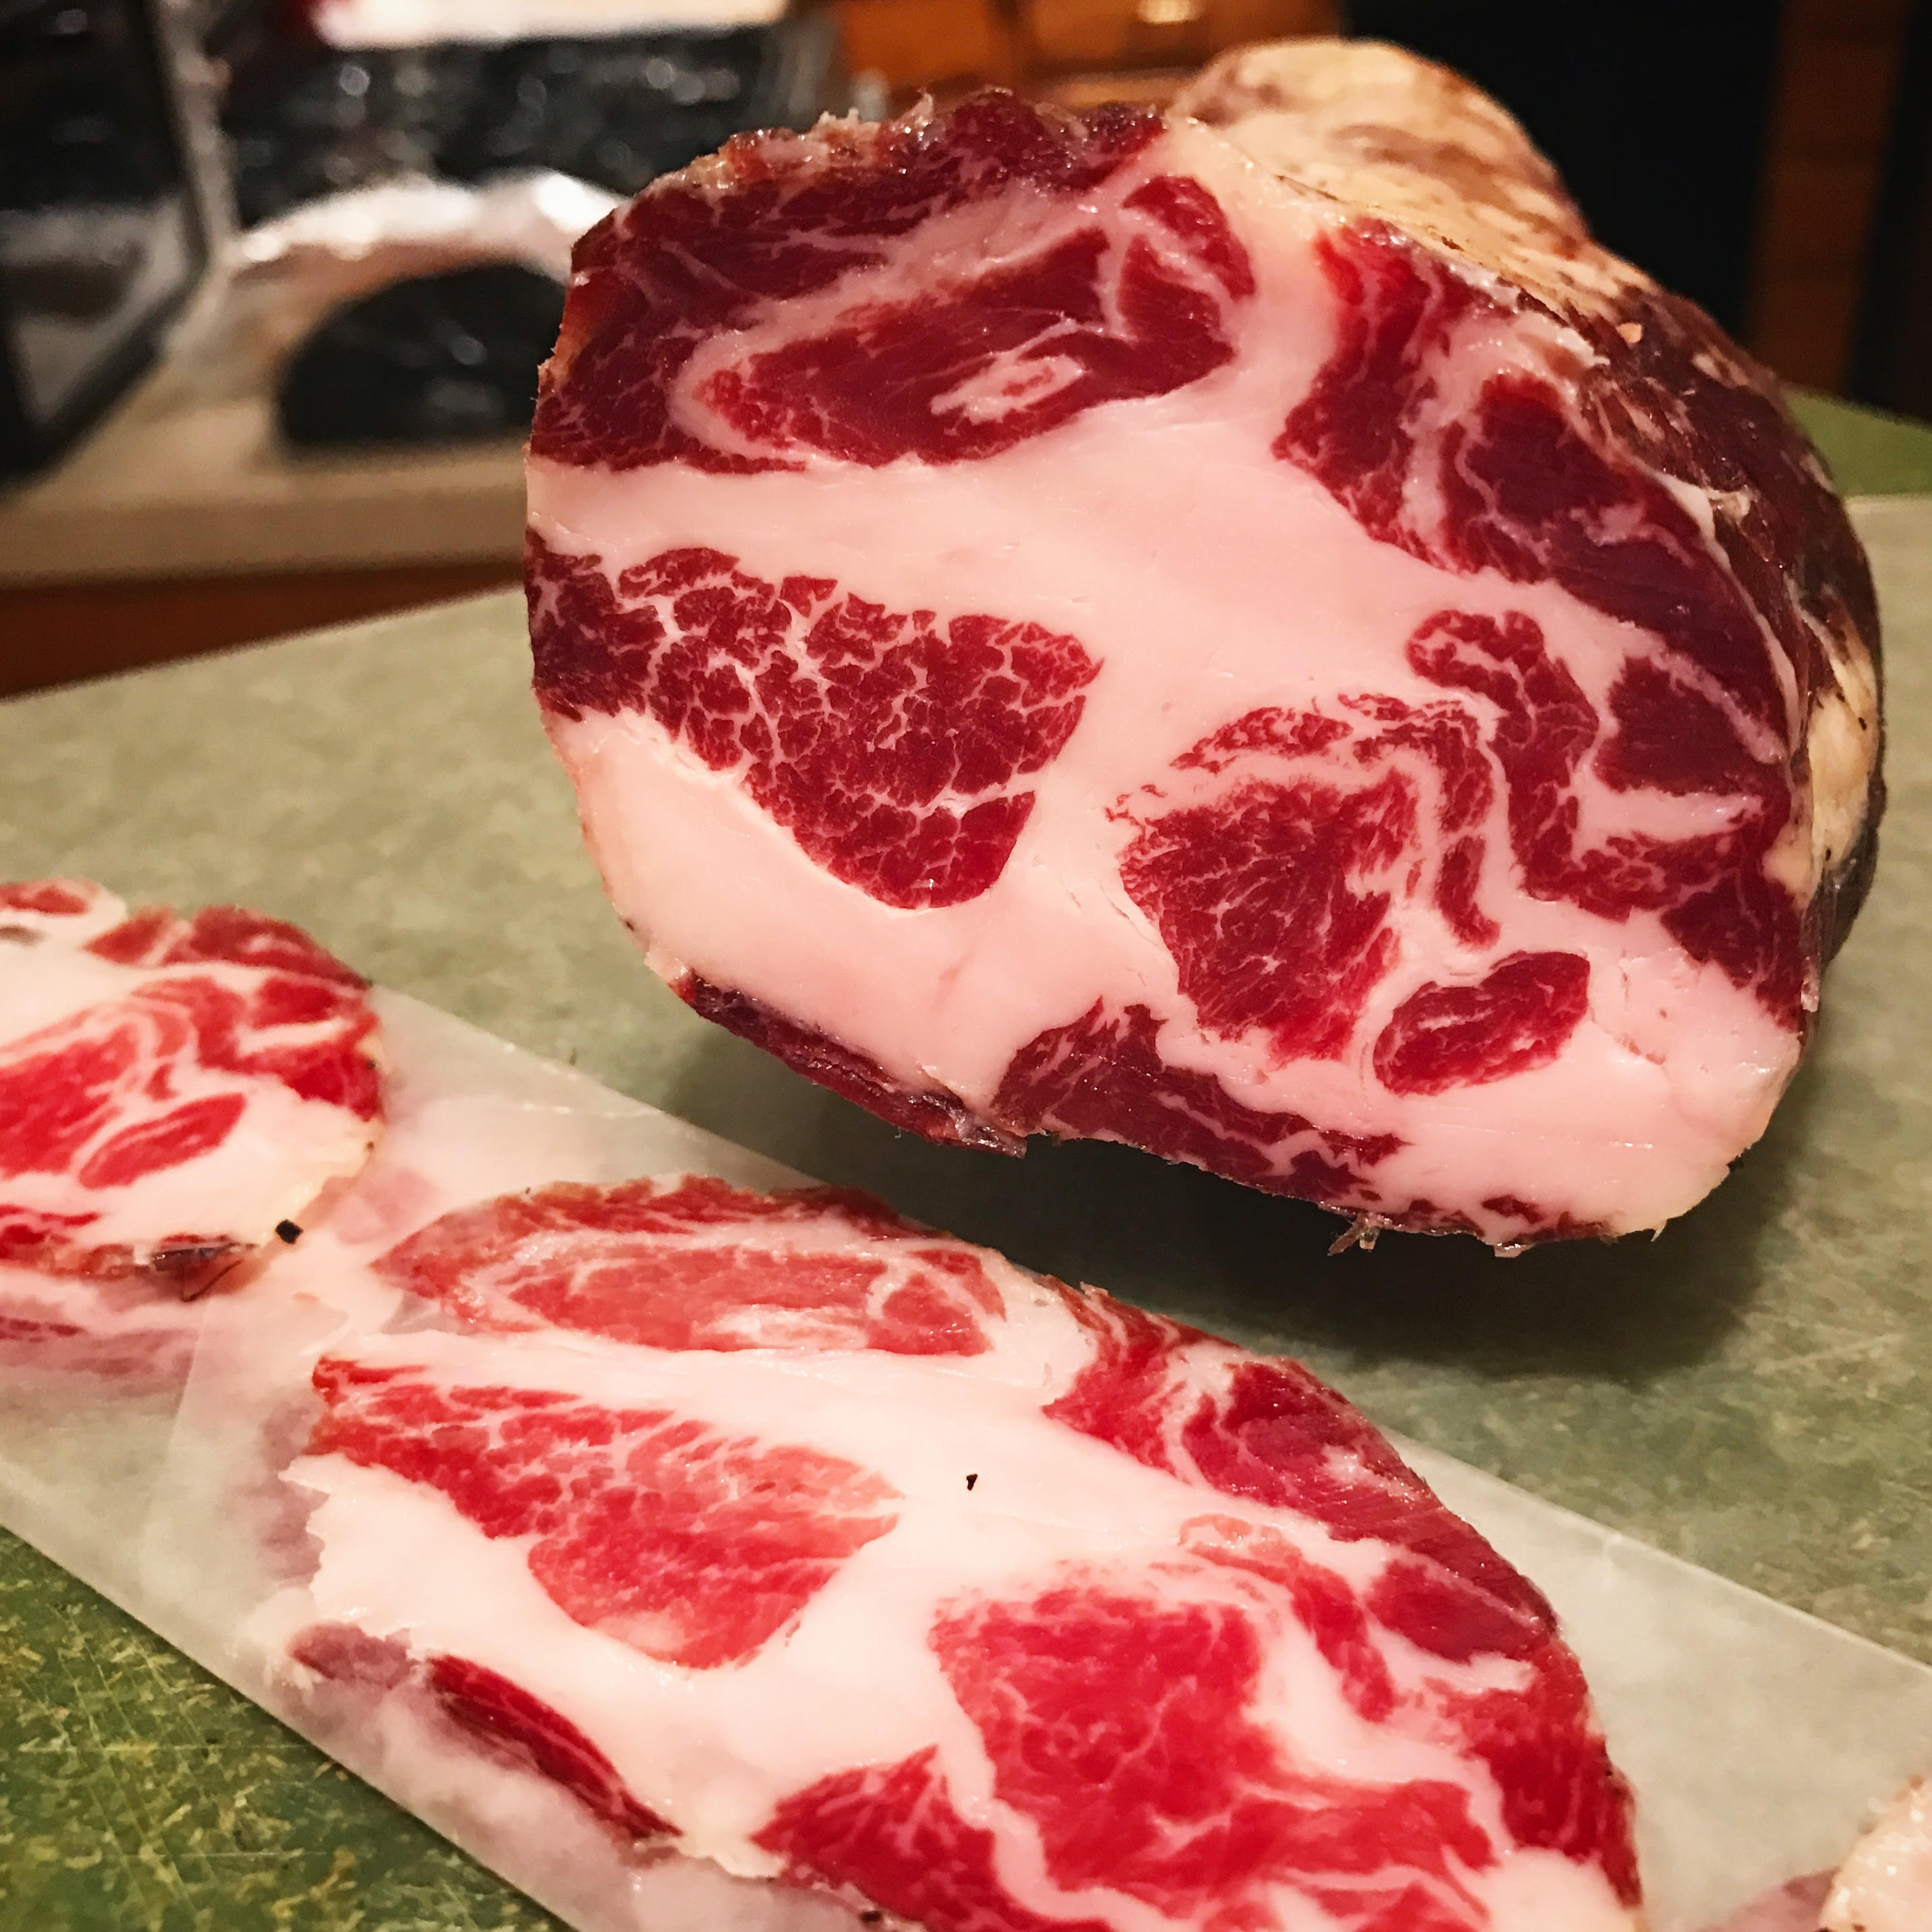
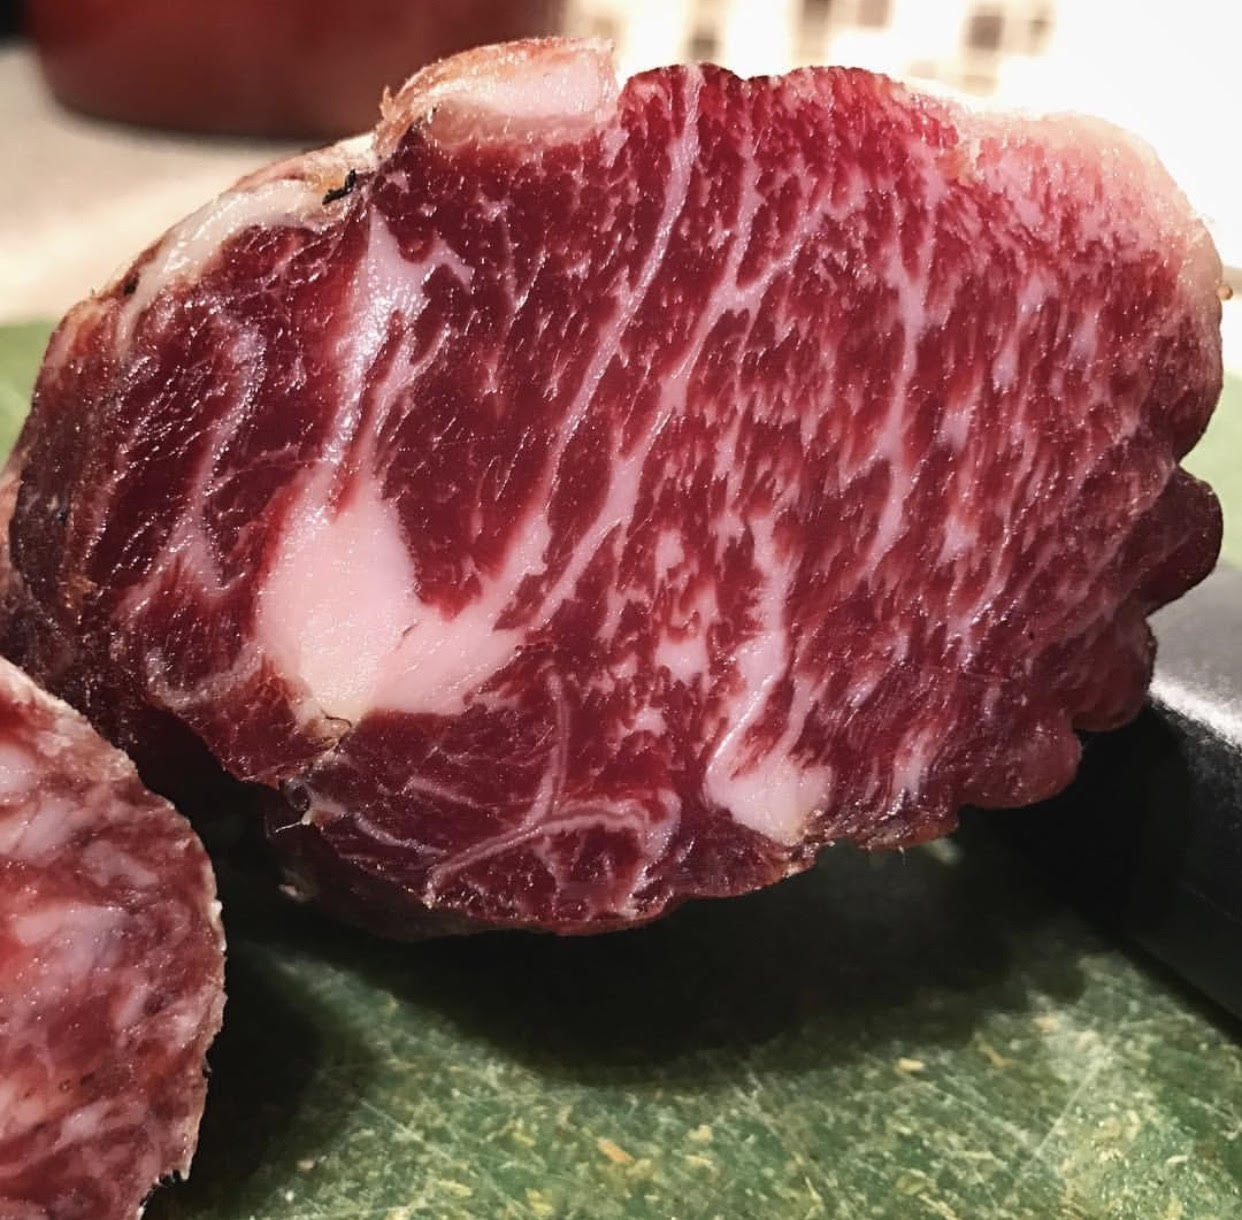
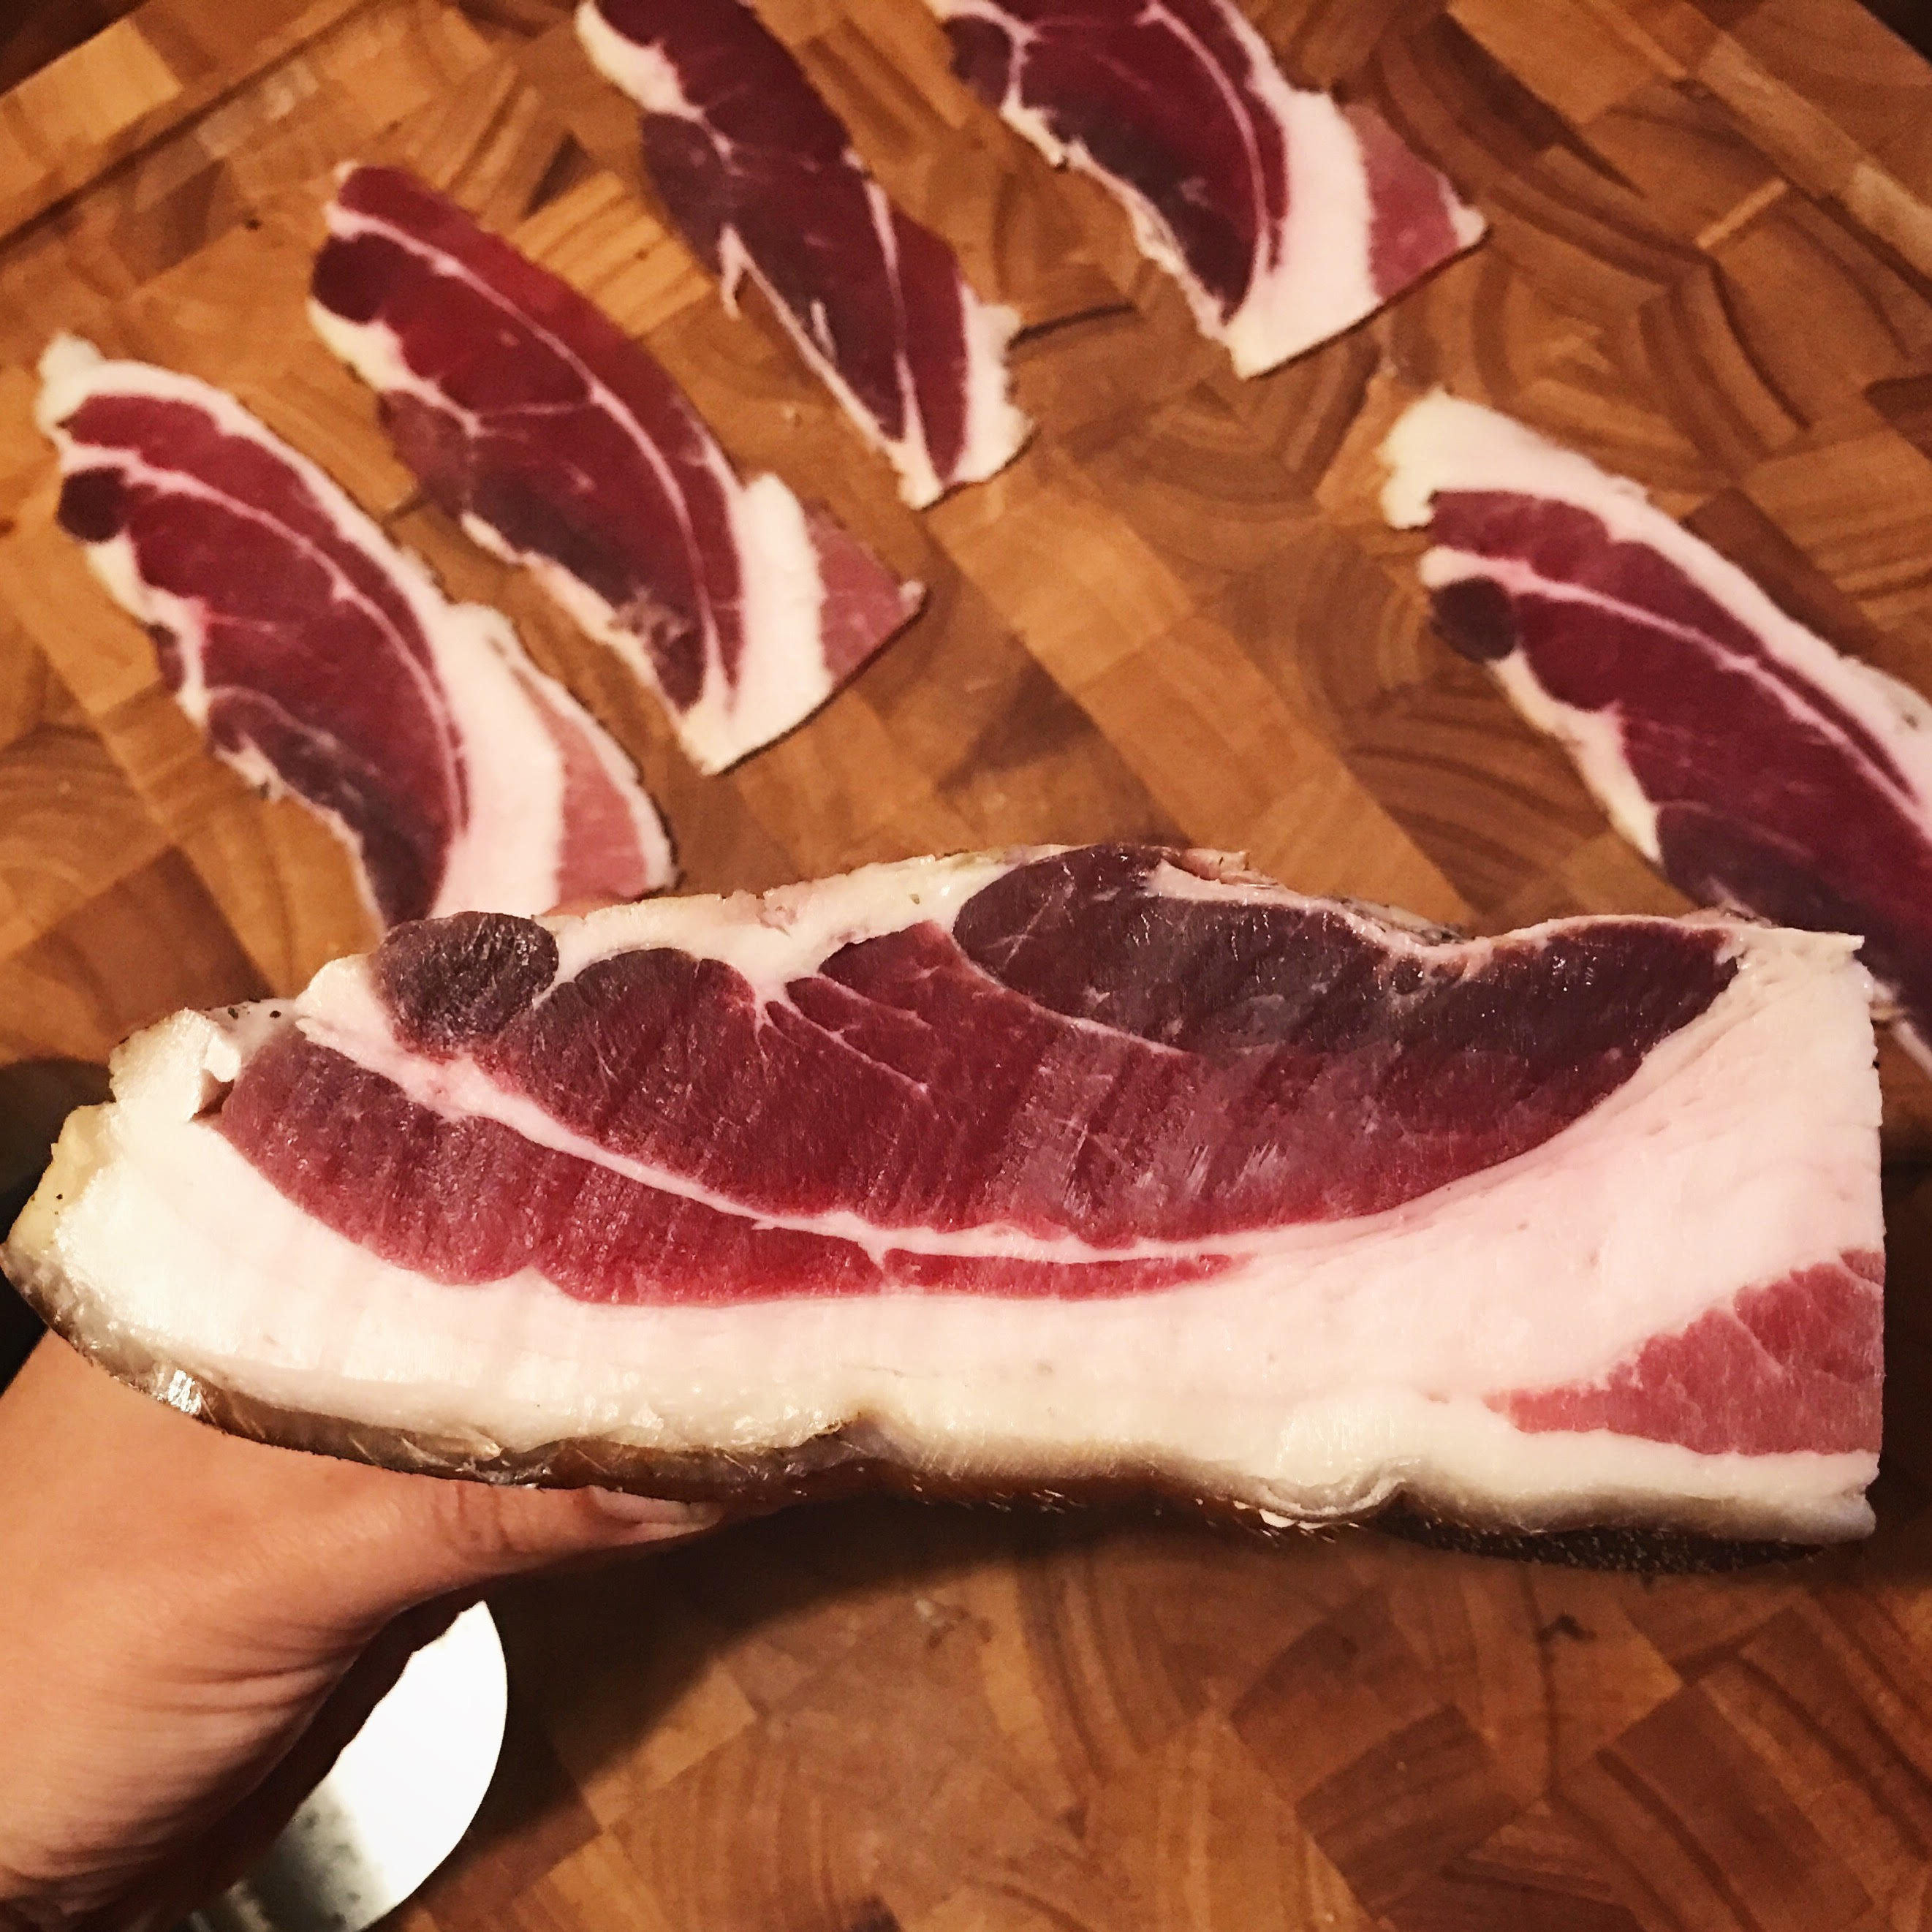
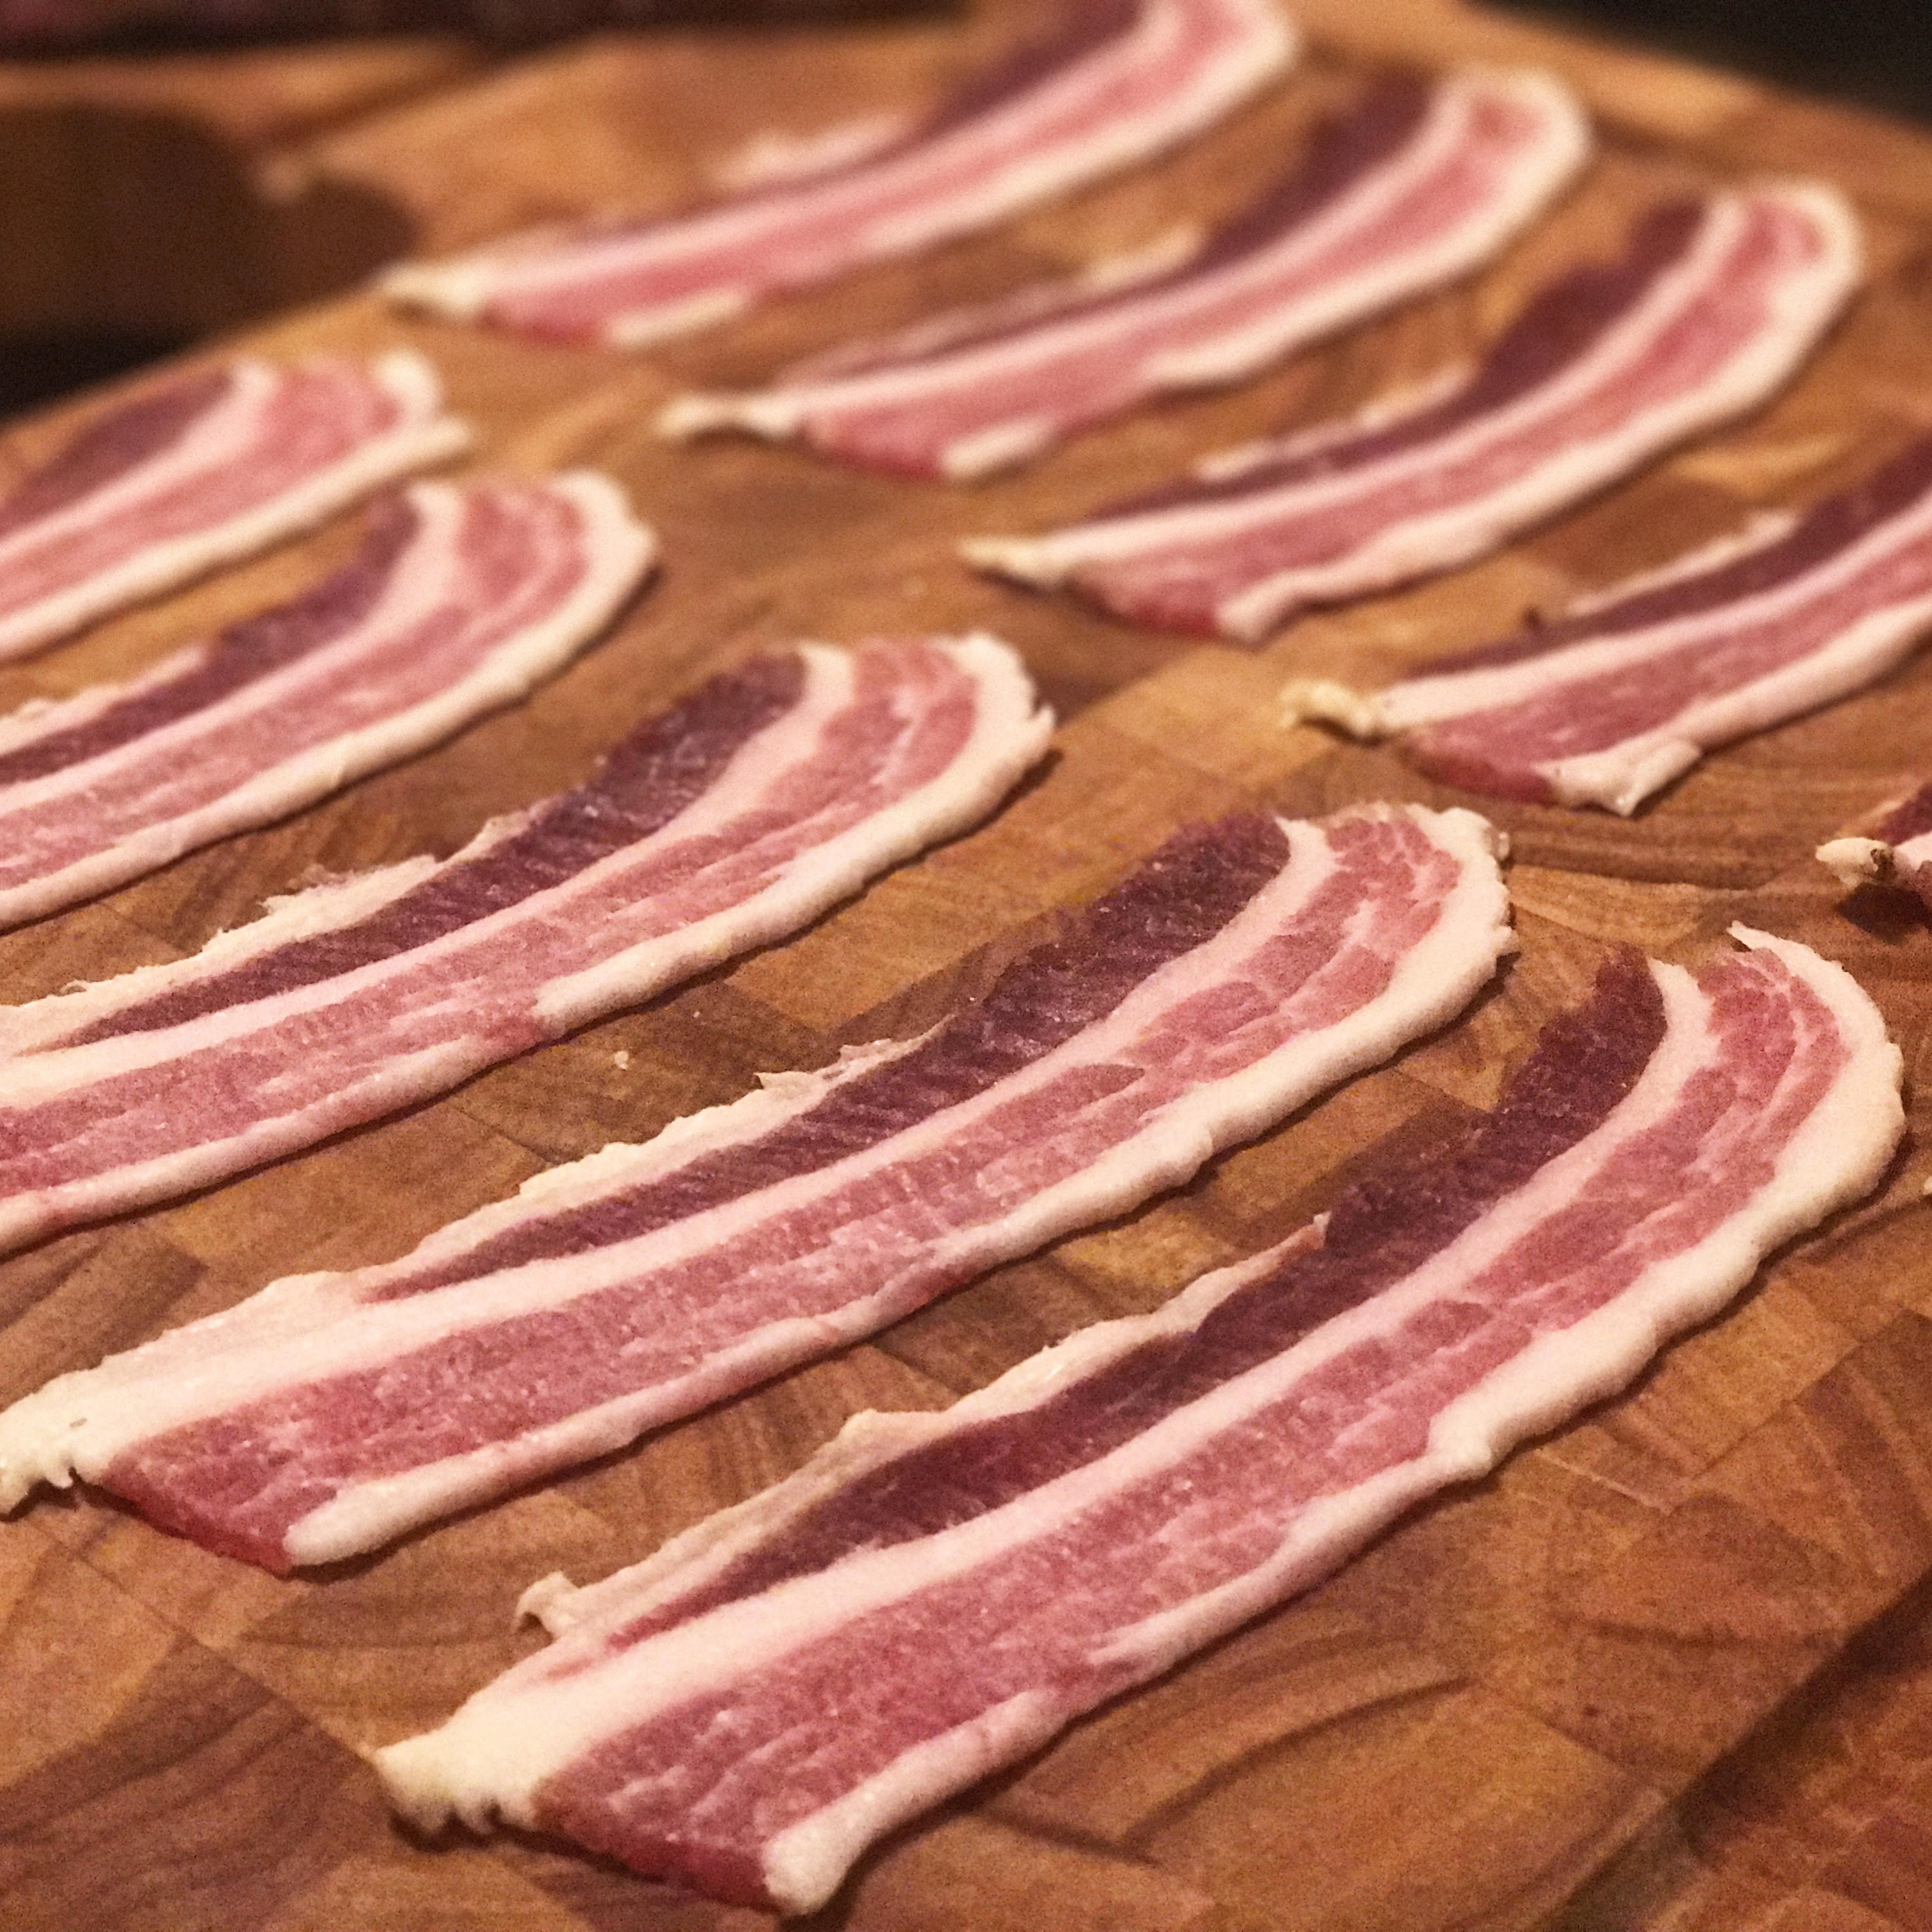
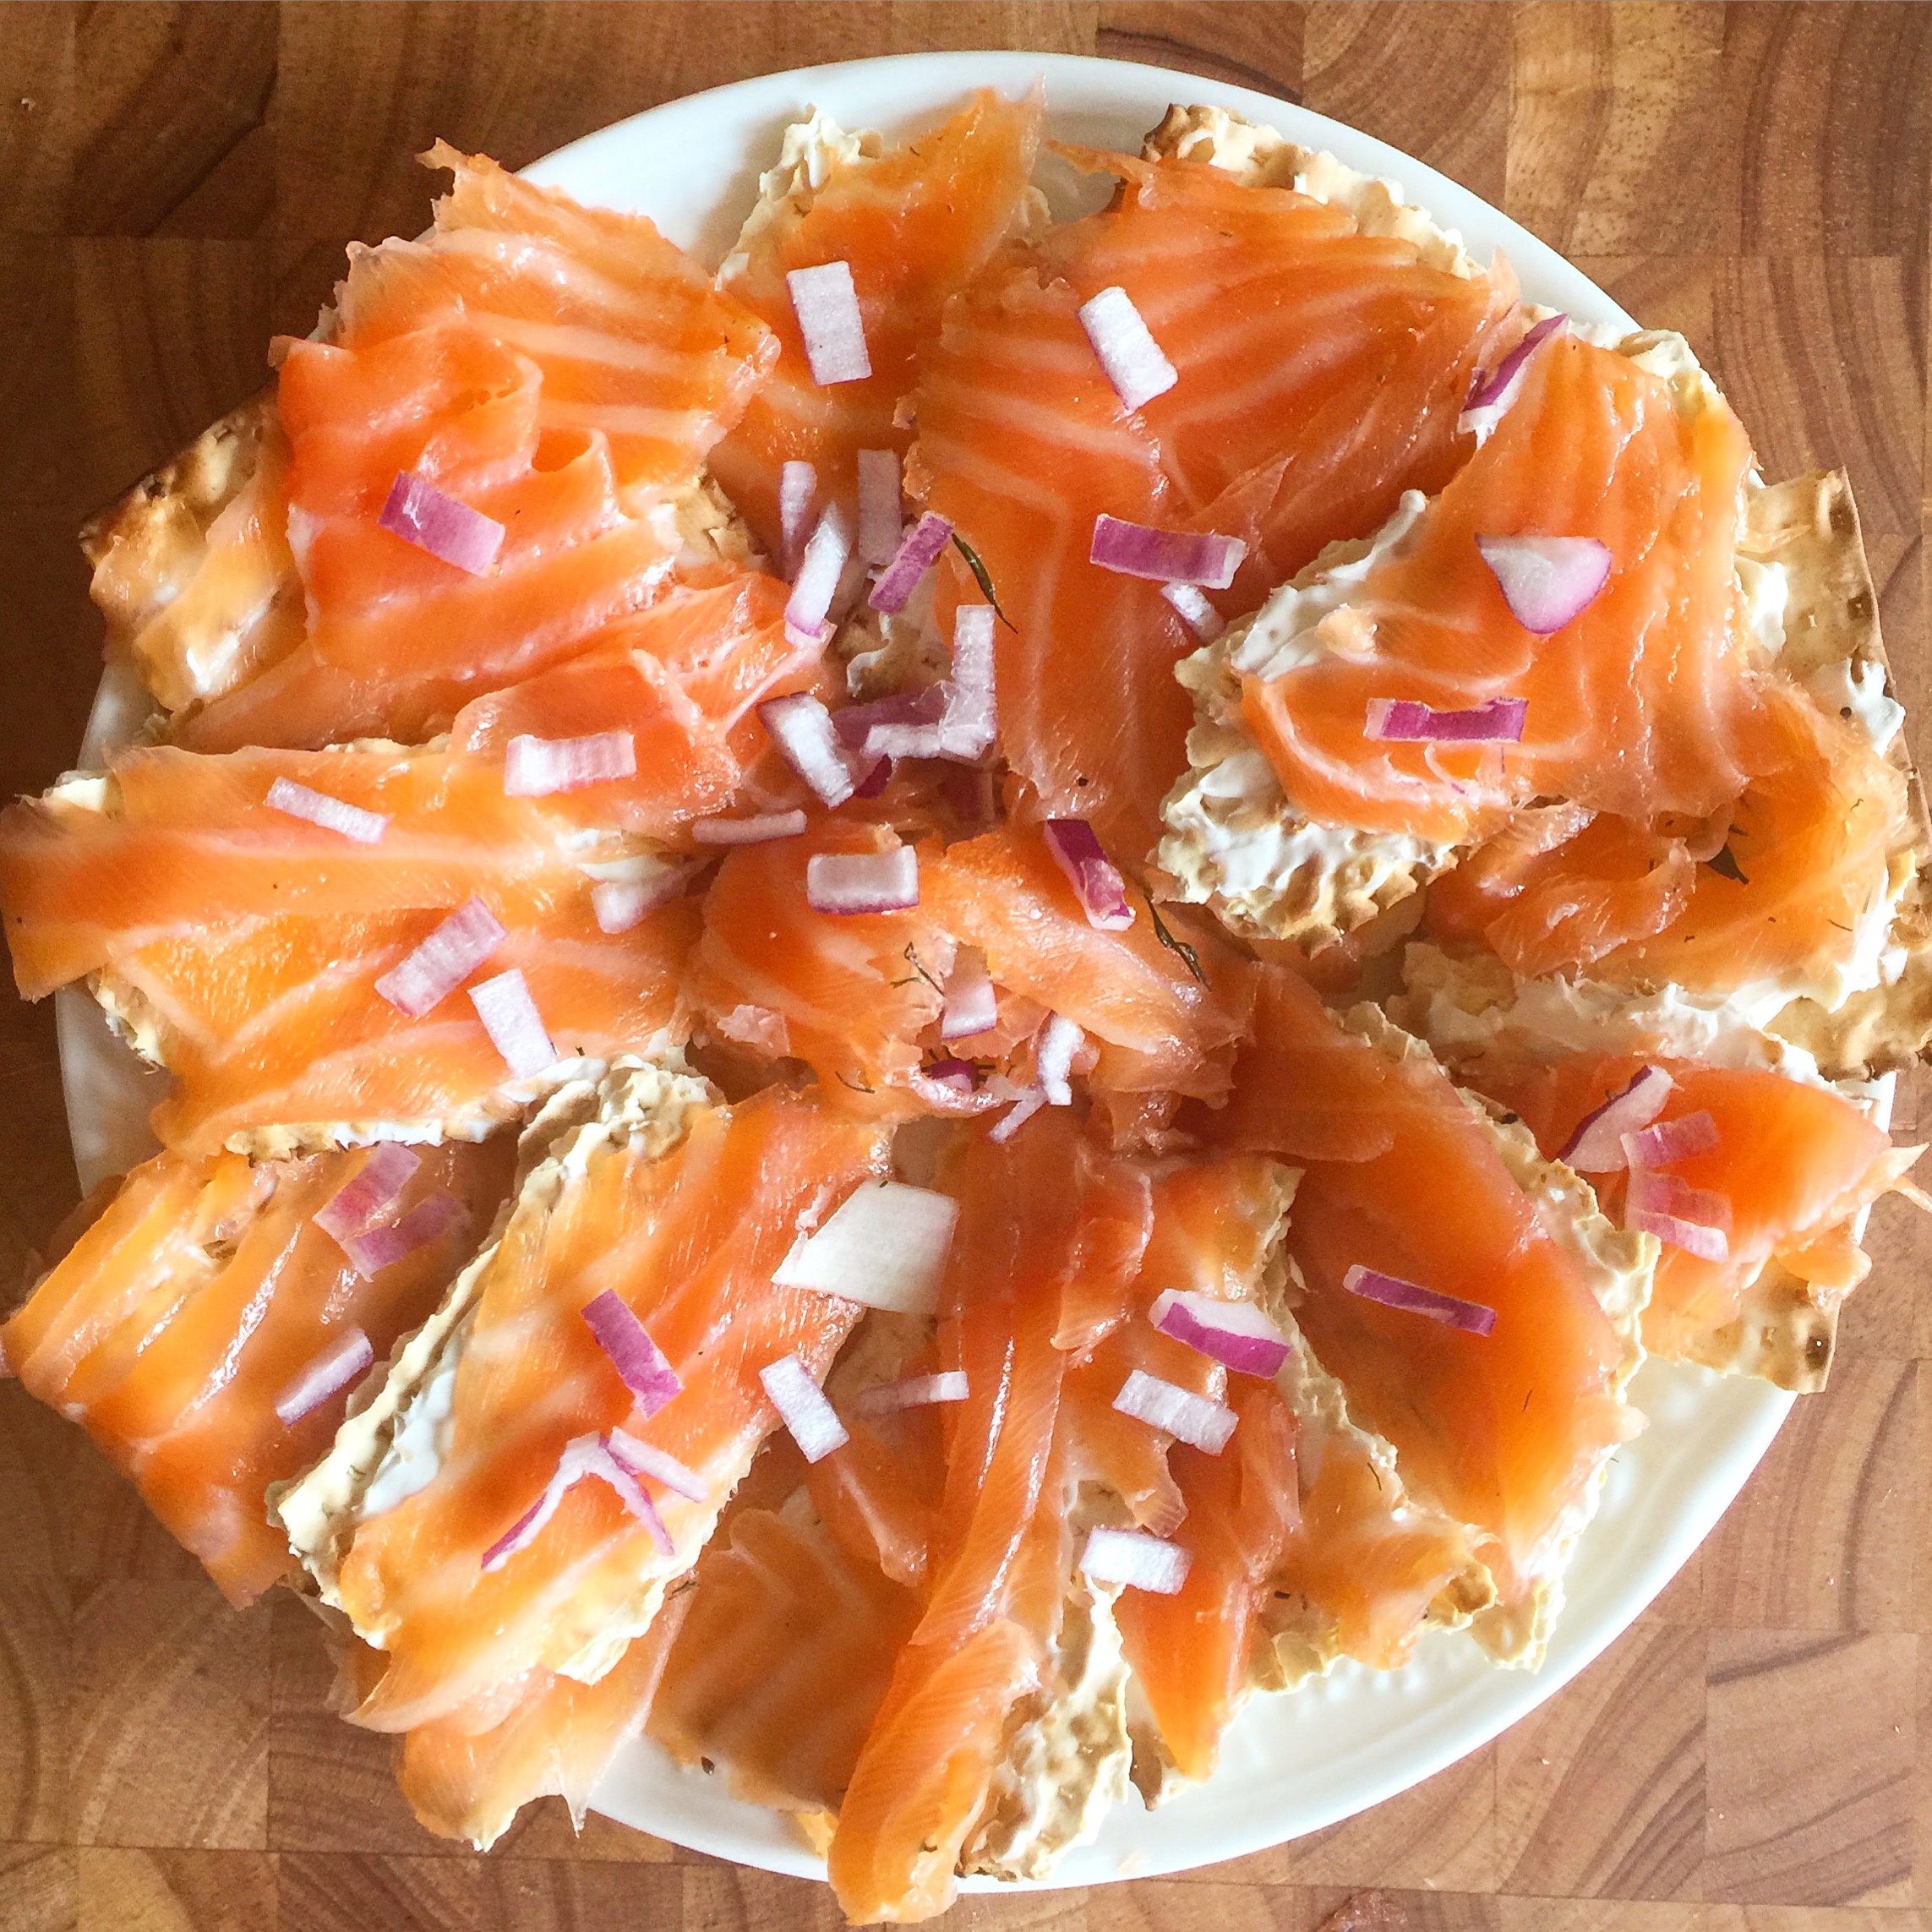
I remove the casing, rinse the down with red wine or vinegar, and slice them on a bias.
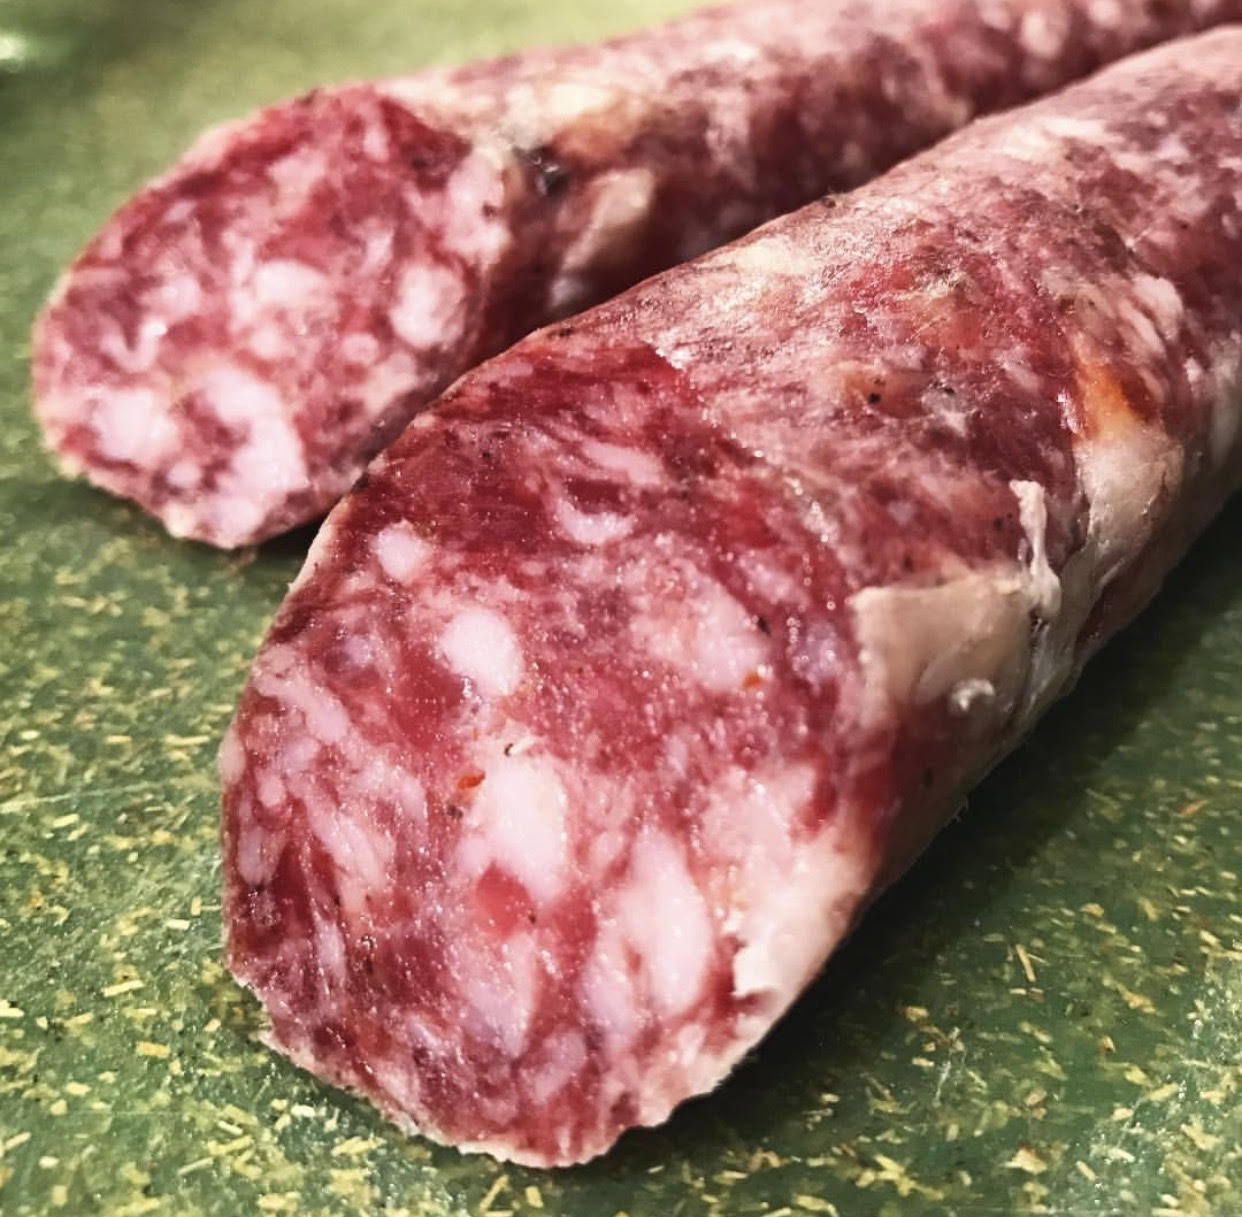
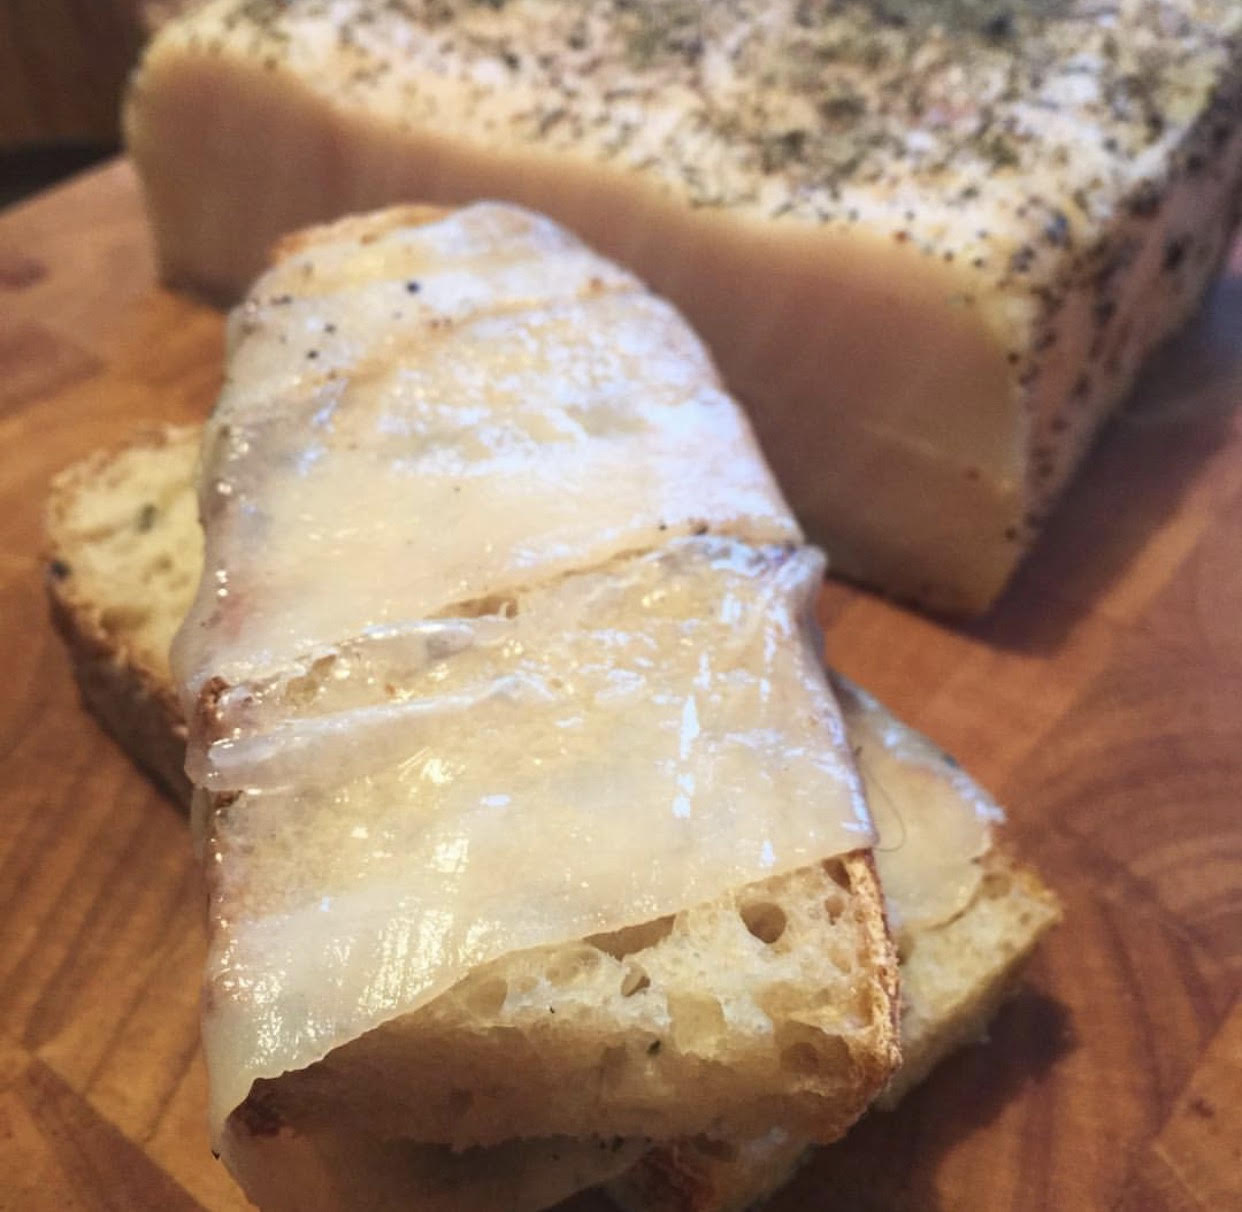
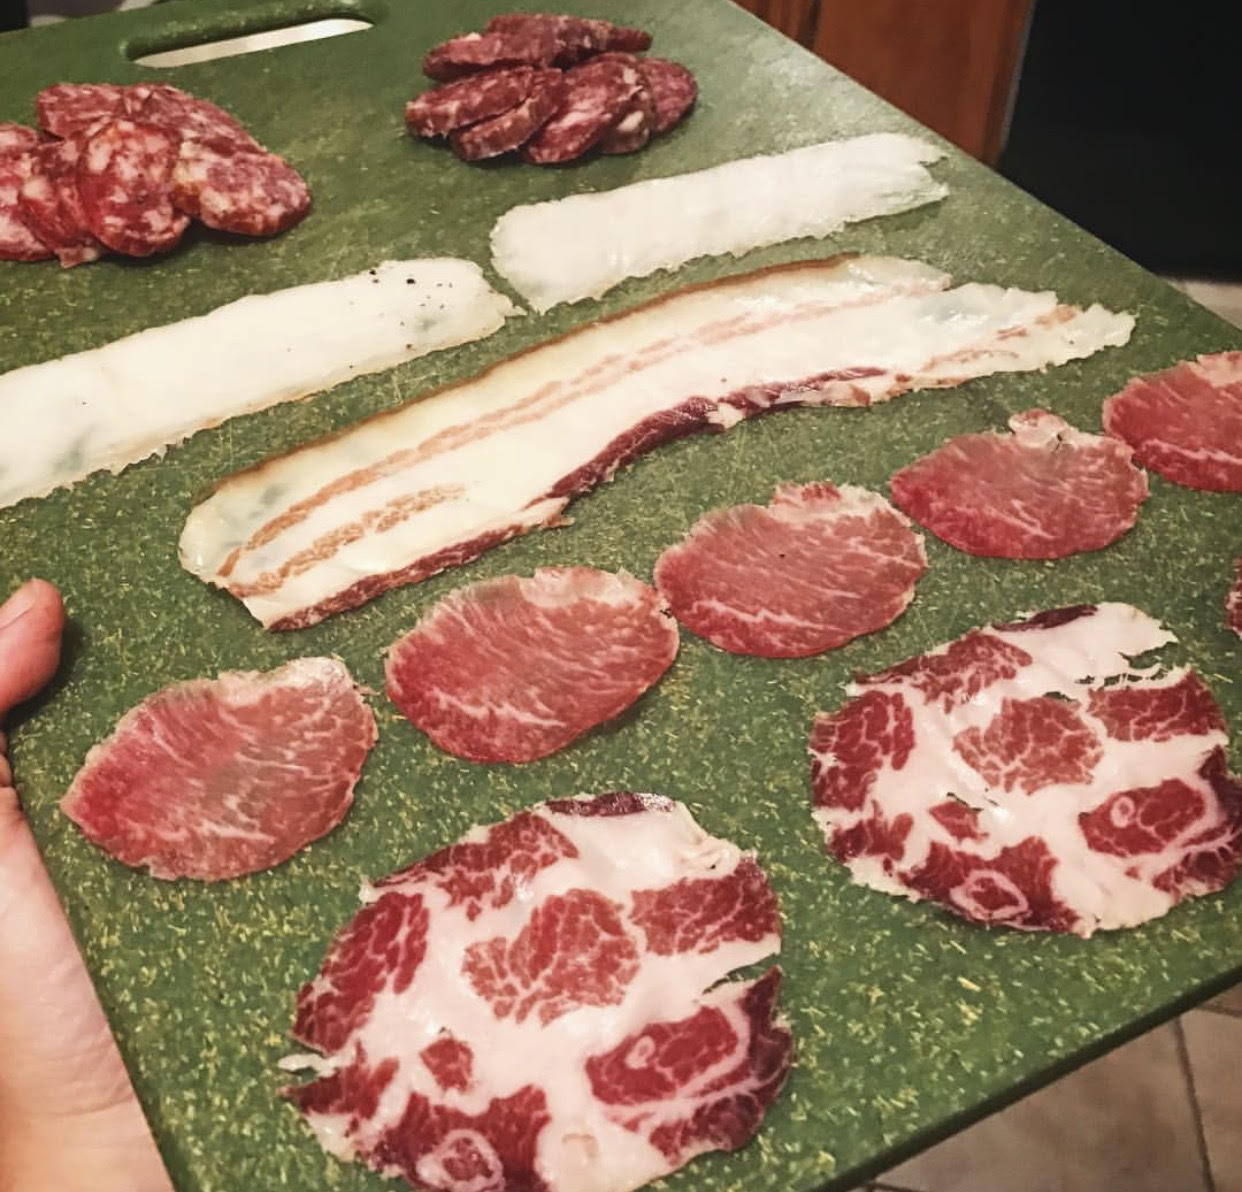
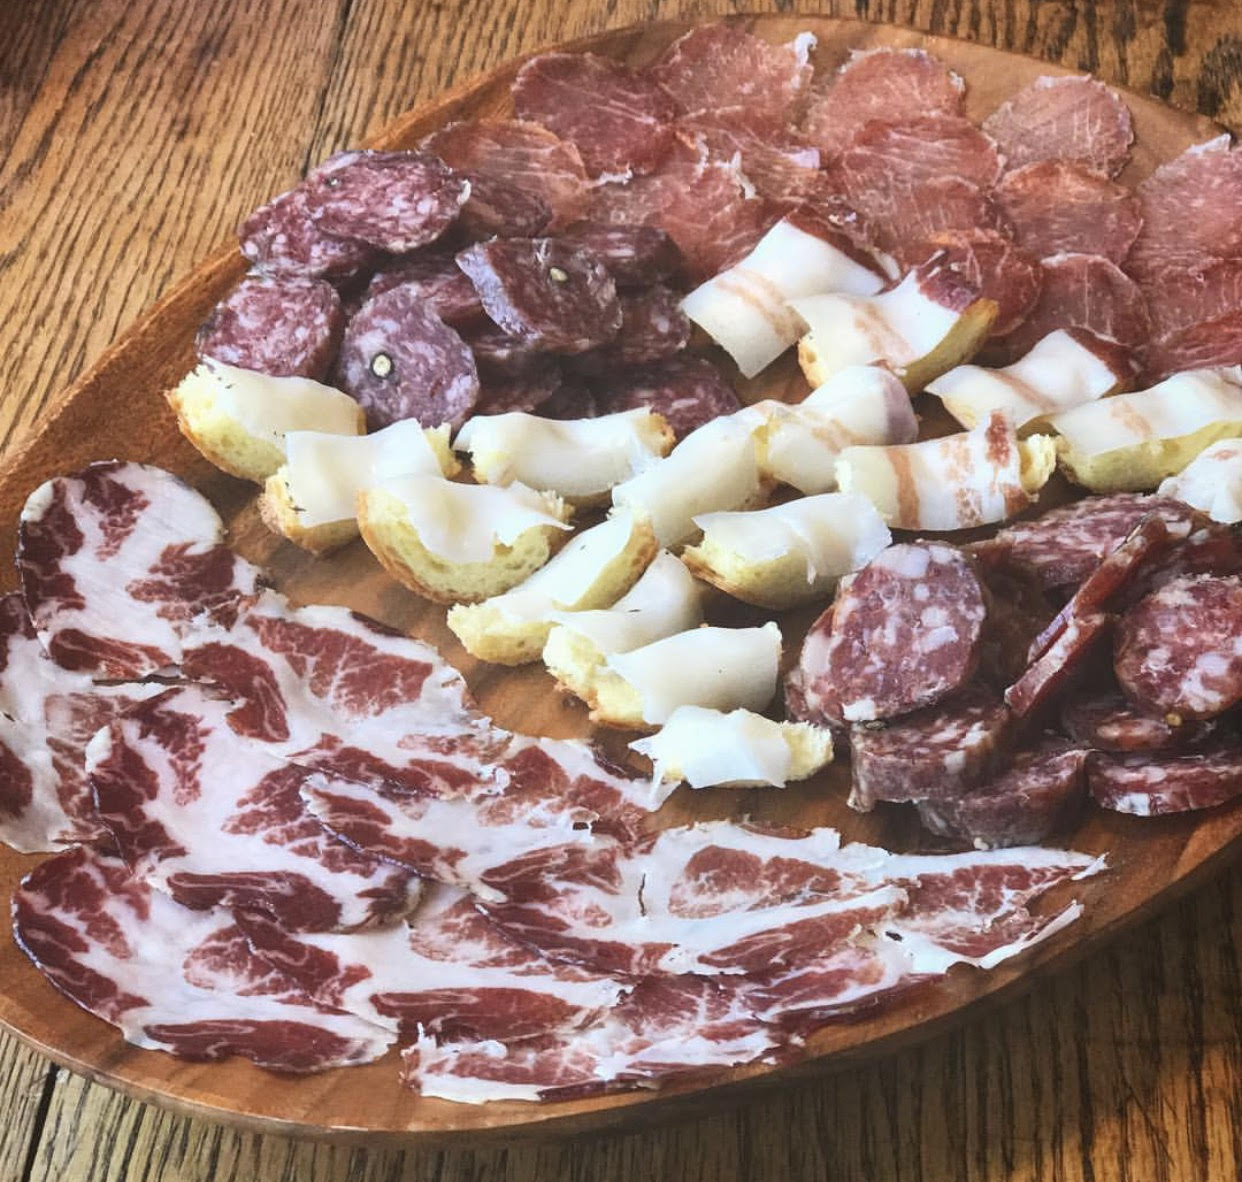
These Italian style salami make a nice addition to a home cured meat platter.

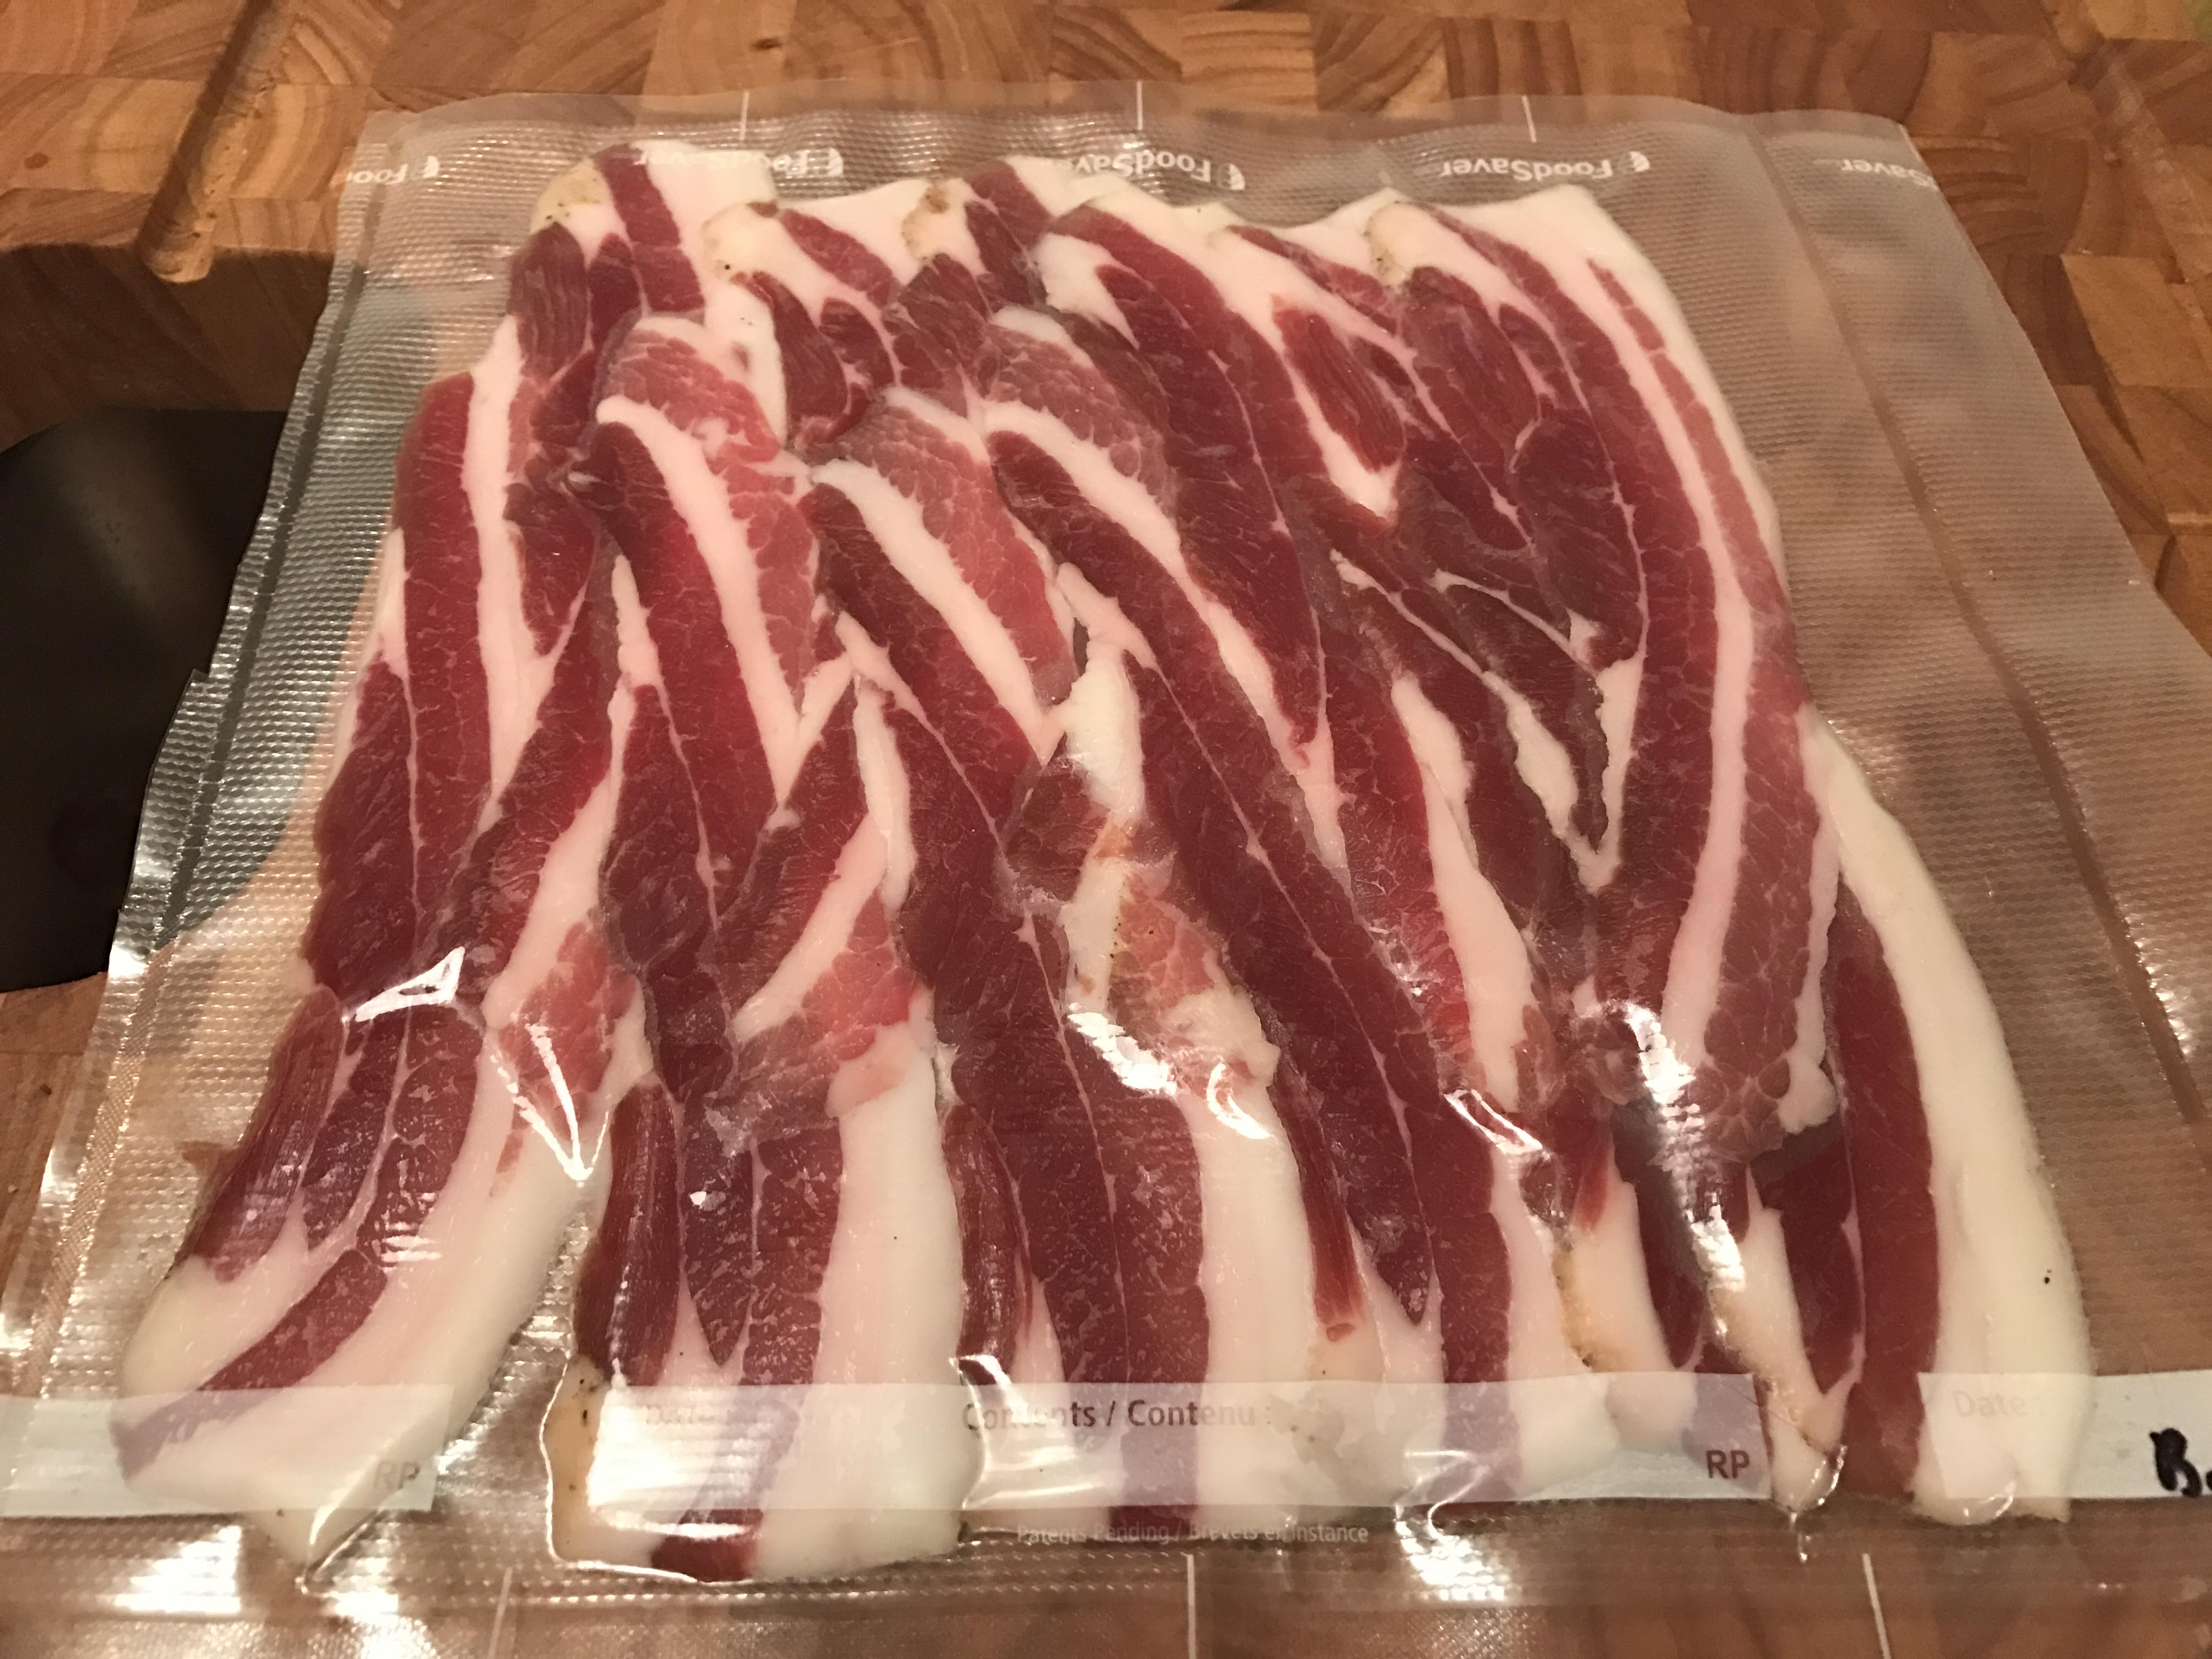
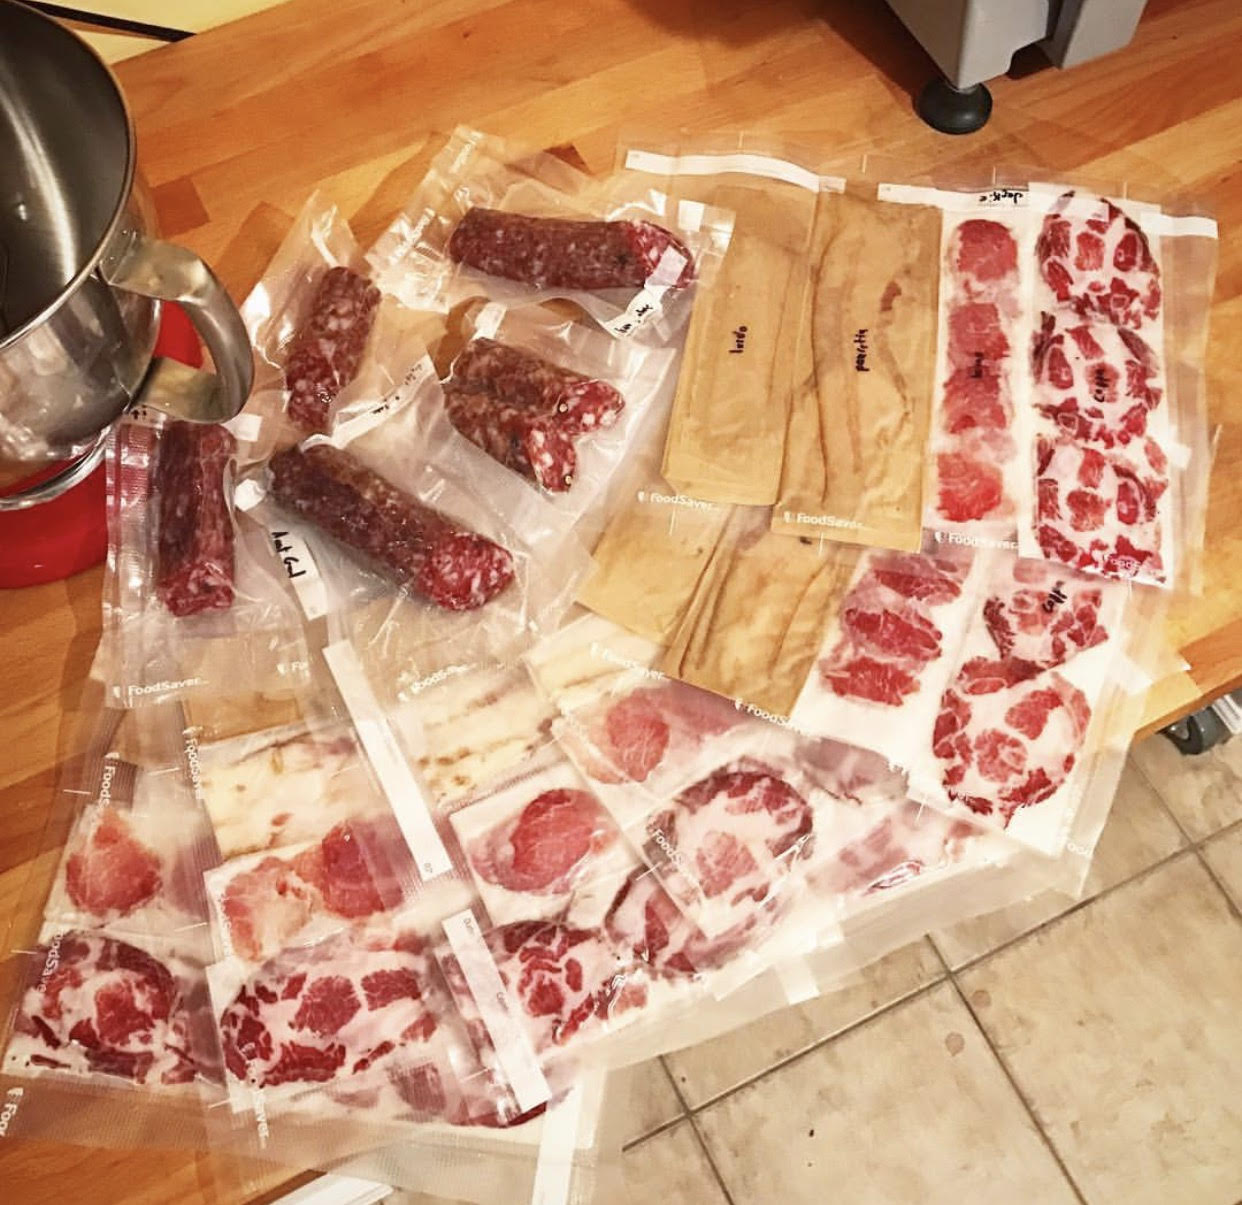
Or packaged up to give to friends and family.
Isn’t it just beautiful?
Smile!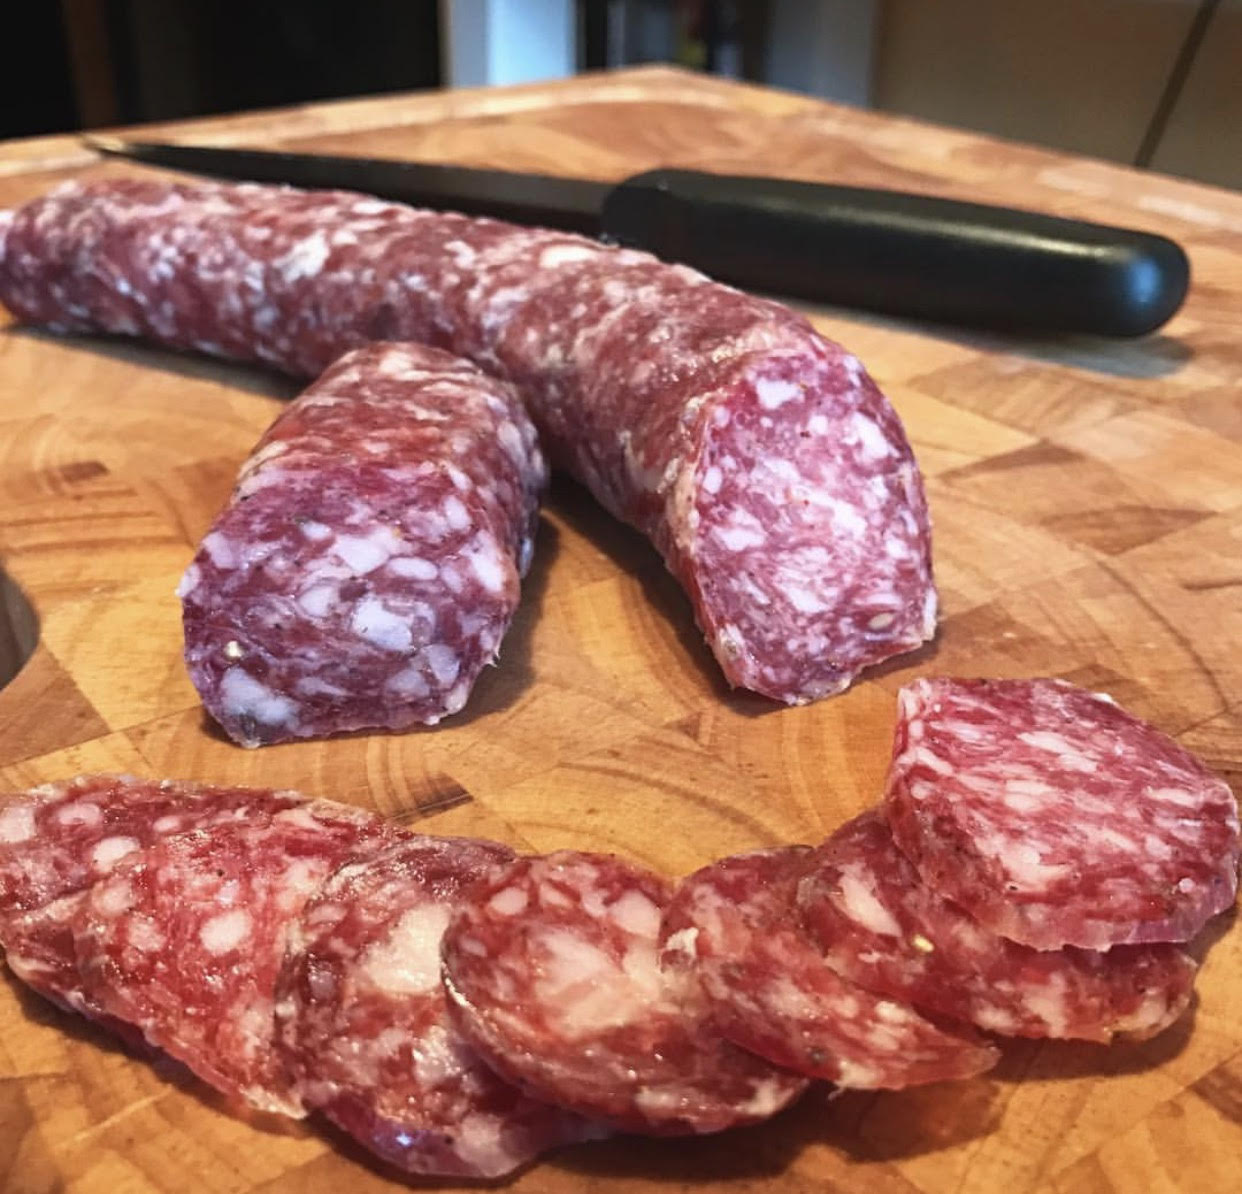
Disclaimer: Meat curing is a hobby that comes with inherent risks. We can all do things to limit this risk by educating ourselves about the process and the utilizing the safest known methods to create our products. This website is for educational purposes only, and all experimentation should be done at each individuals own risk.