The Explorations of a Gastrochemist

...because science can be delicious.

  • Beginner’s Guide
  • Wurst Adventure
  • Charcuterie
  • Preservation
  • Science
  • Molecular Gastronomy
  • All Projects
You are here: Home / All Projects

Duck Salami

March 14, 2016 by AOG 13 Comments

Duck salami, or salami d’anatra, is a project that I had been wanting to tackle for a while. Duck salami itself isn’t easy to find commercially, and even the duck salami that is found in stores and restaurants tends to use pork fat. I was looking to create a pork free product, for those who keep kosher or halal, so I debated a number of different sources for fat, before deciding to do a 100% duck salami.

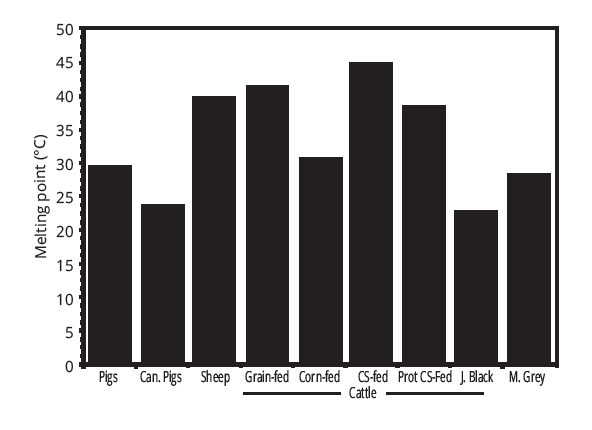
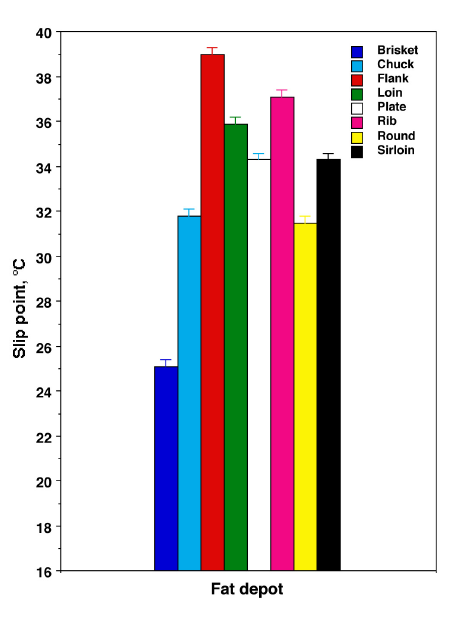
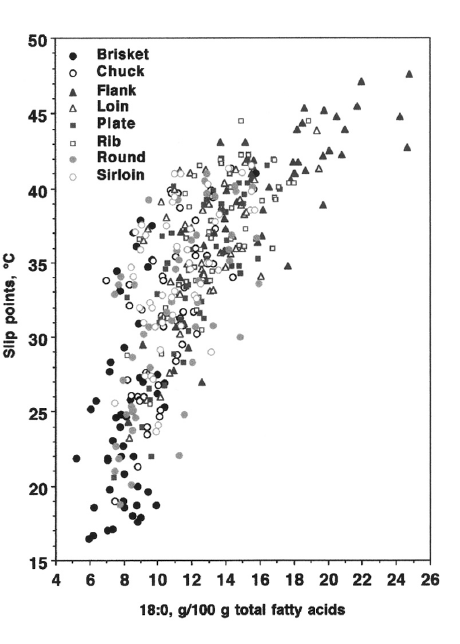
I love duck fat, so the taste of it was a huge pro for me. I also like the way that duck fat melts in your mouth, another pro. My main concern about using duck fat in duck salami was working with the duck fat at room temperature. I have seen a few different values given for the slip melting point of duck fat, but the most consistent value seems to be around 77F/25C. I made sure to do all of my processes at around 70F/21C, worked fast, and I utilized the freezer to make sure everything stayed cold.


Planning Phase:

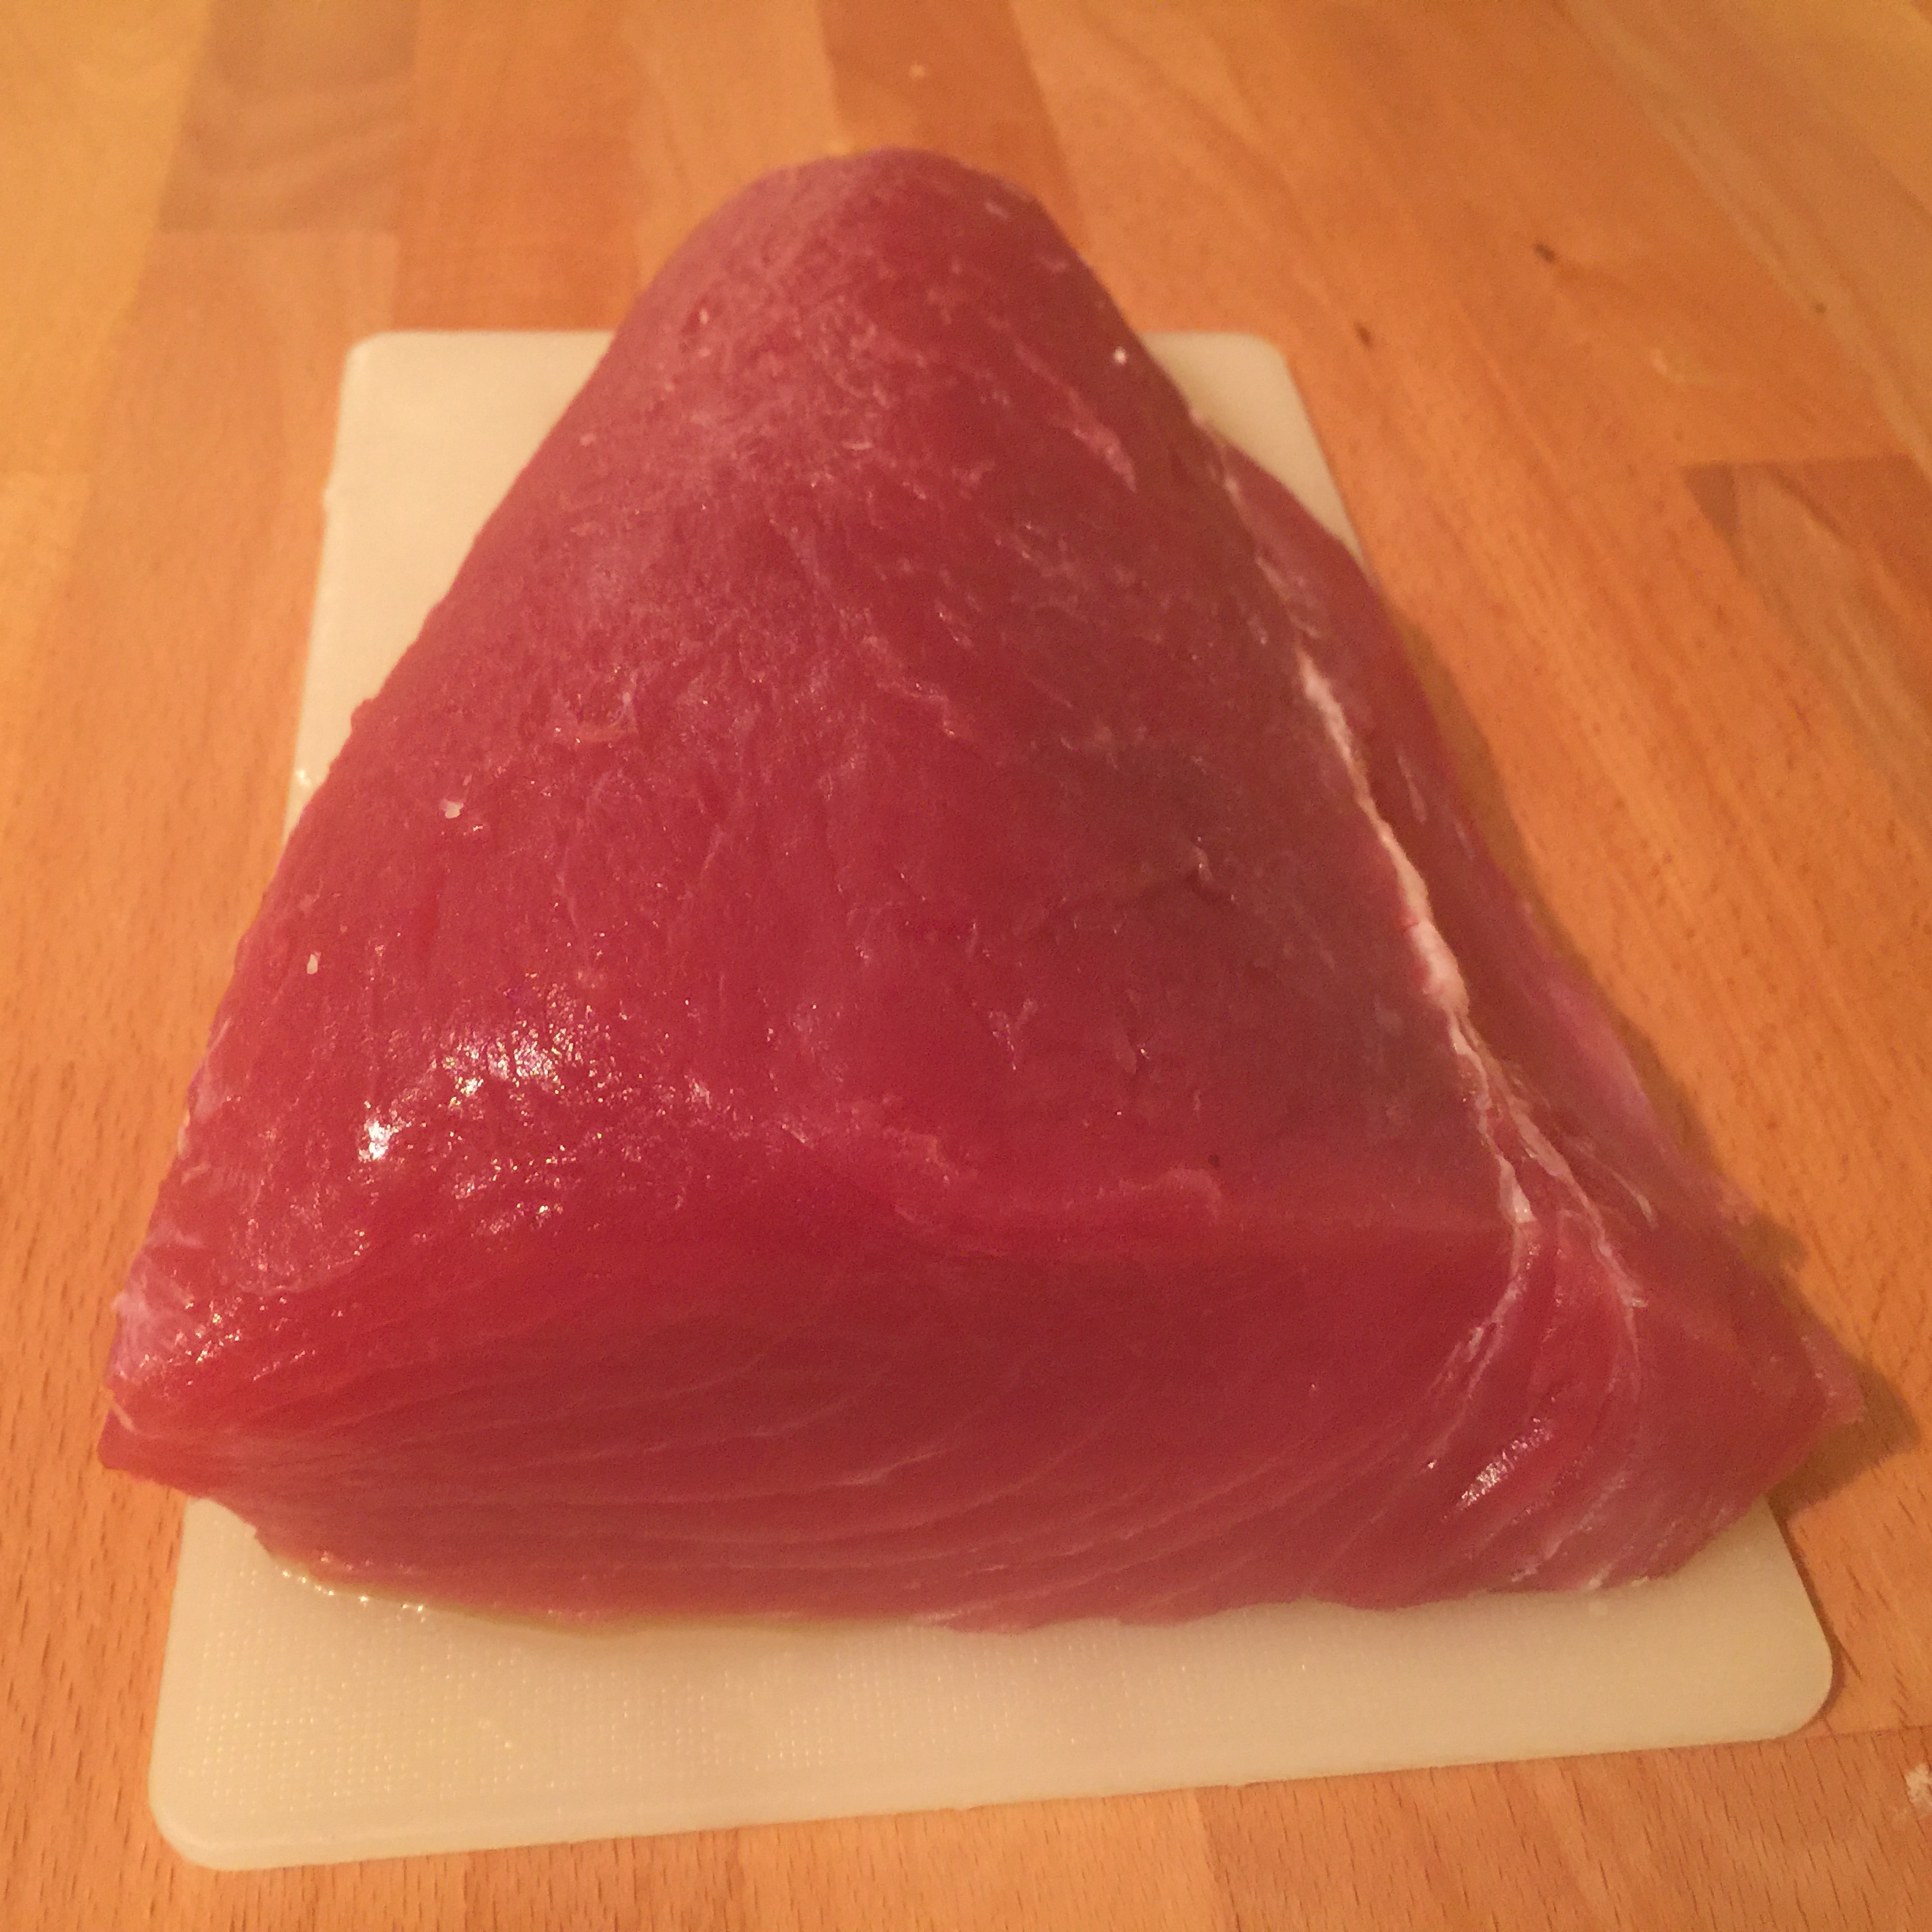
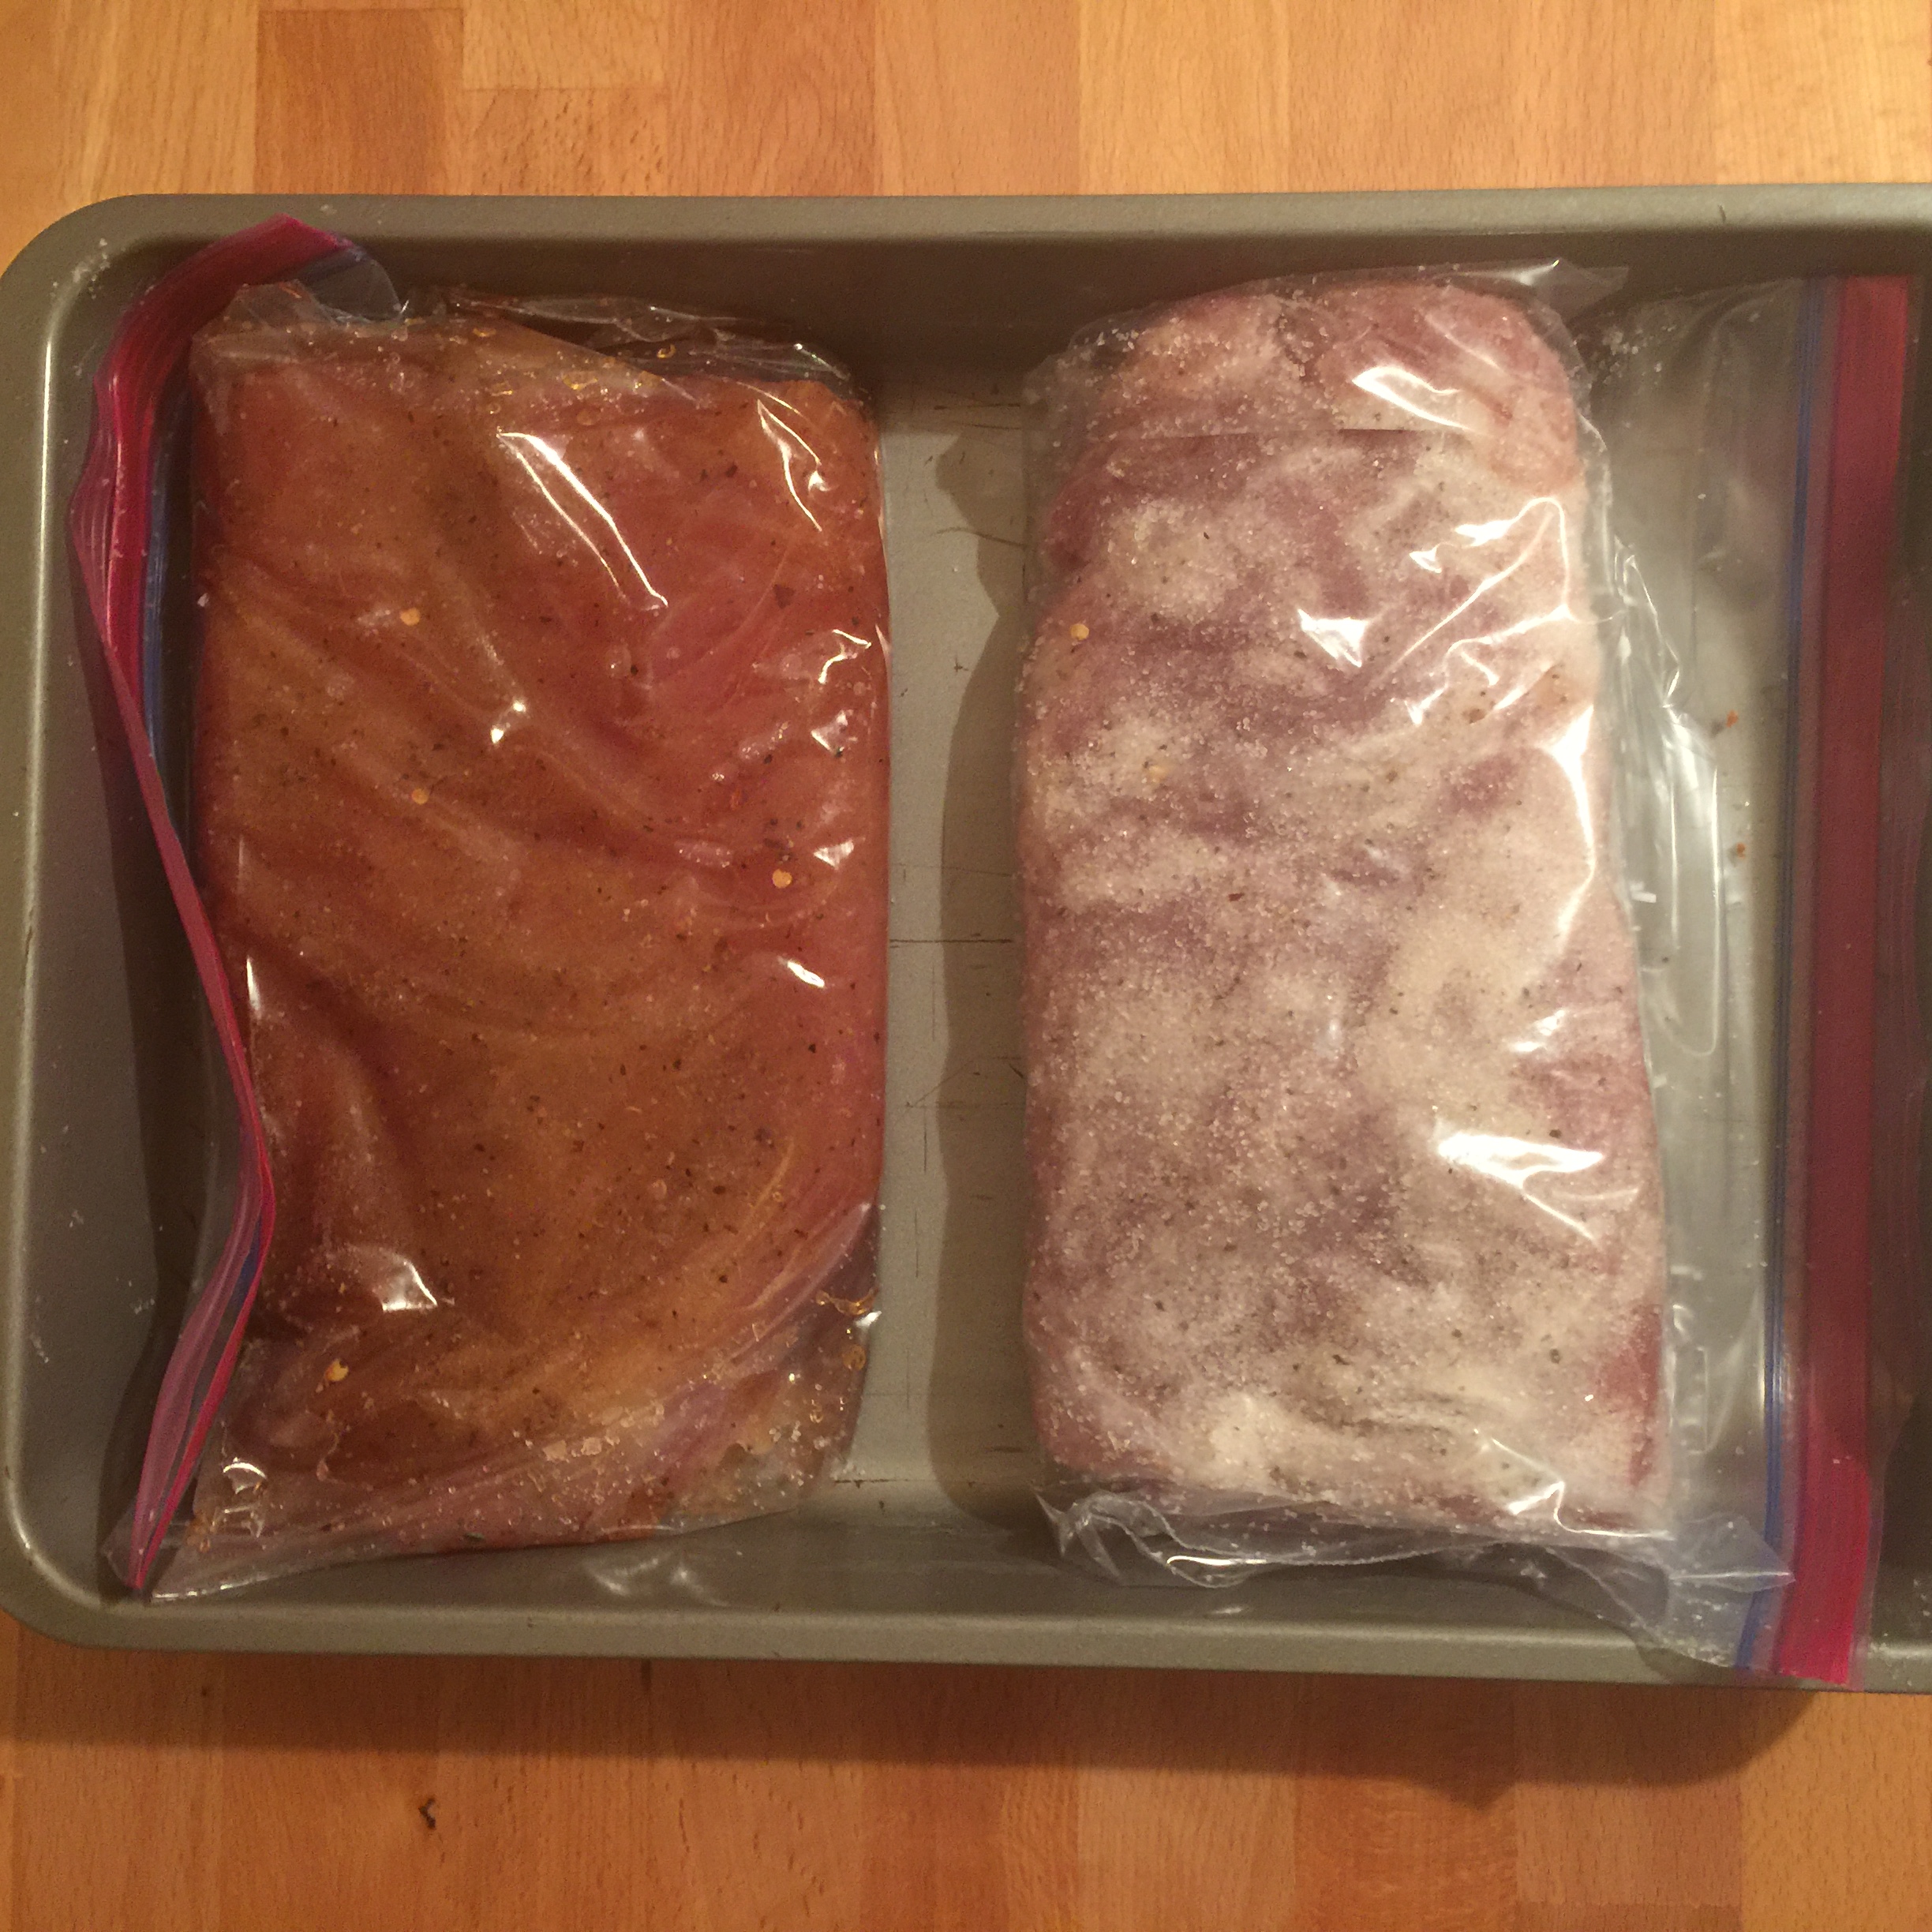
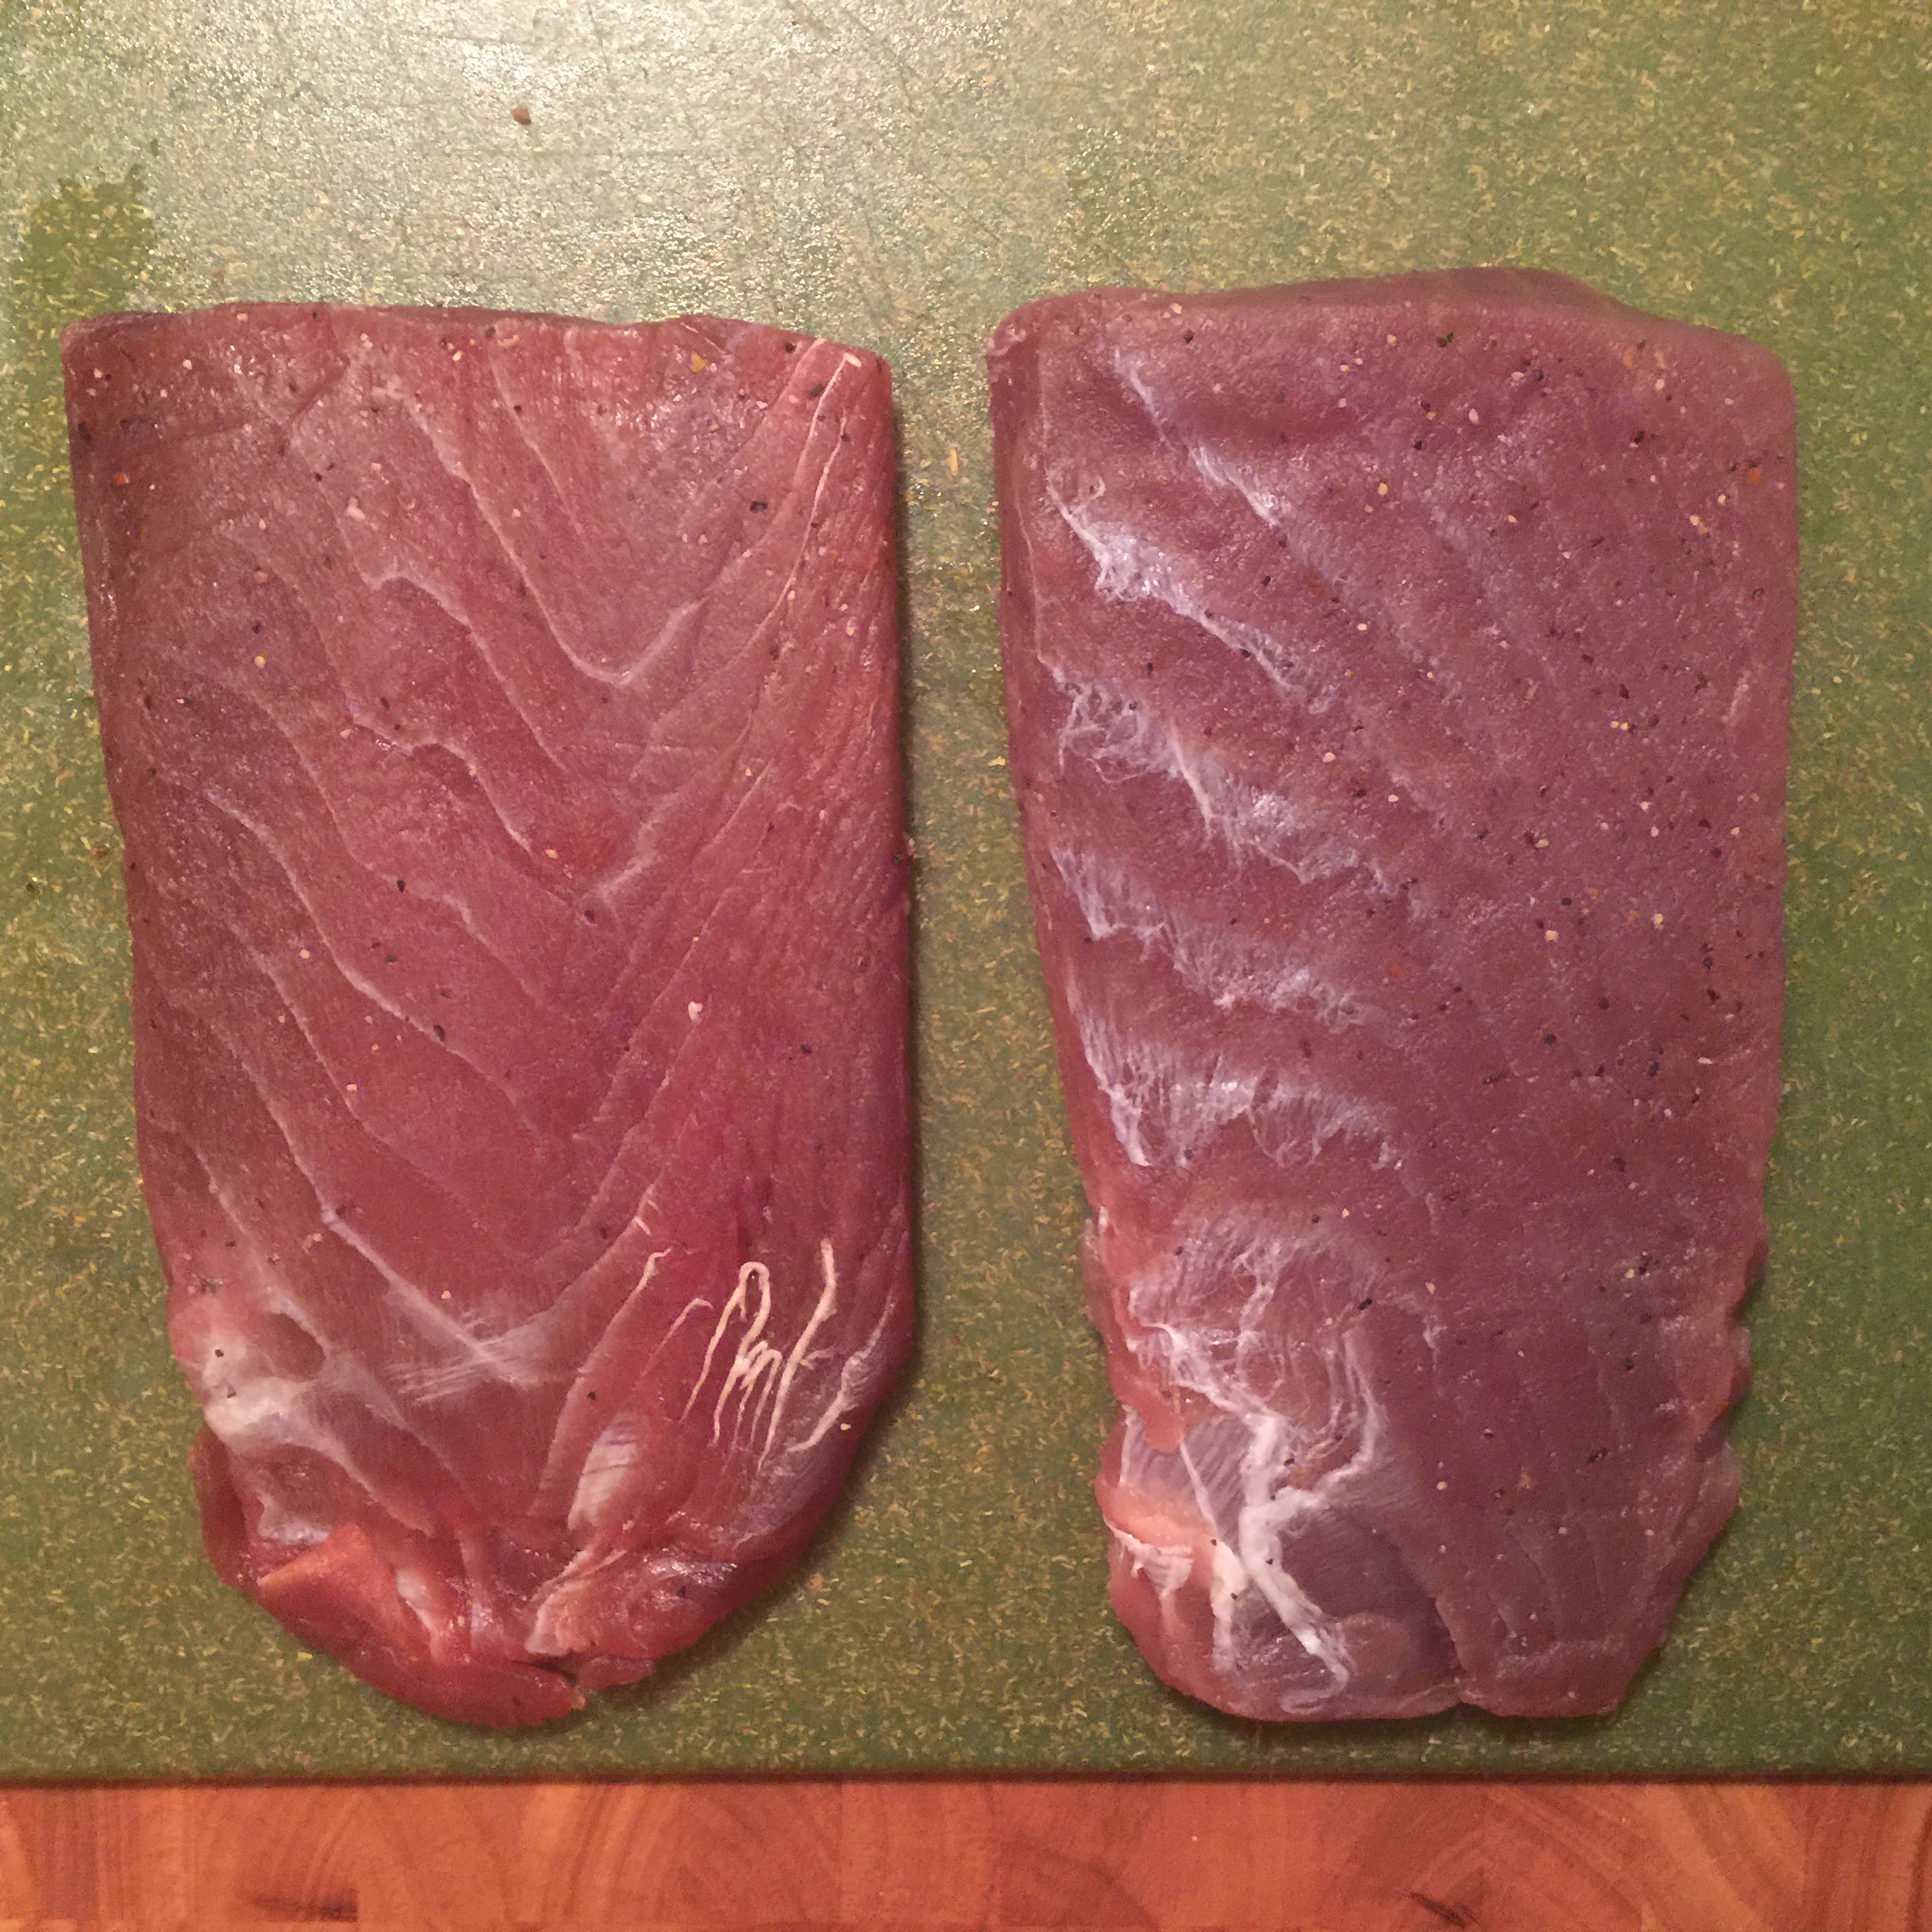
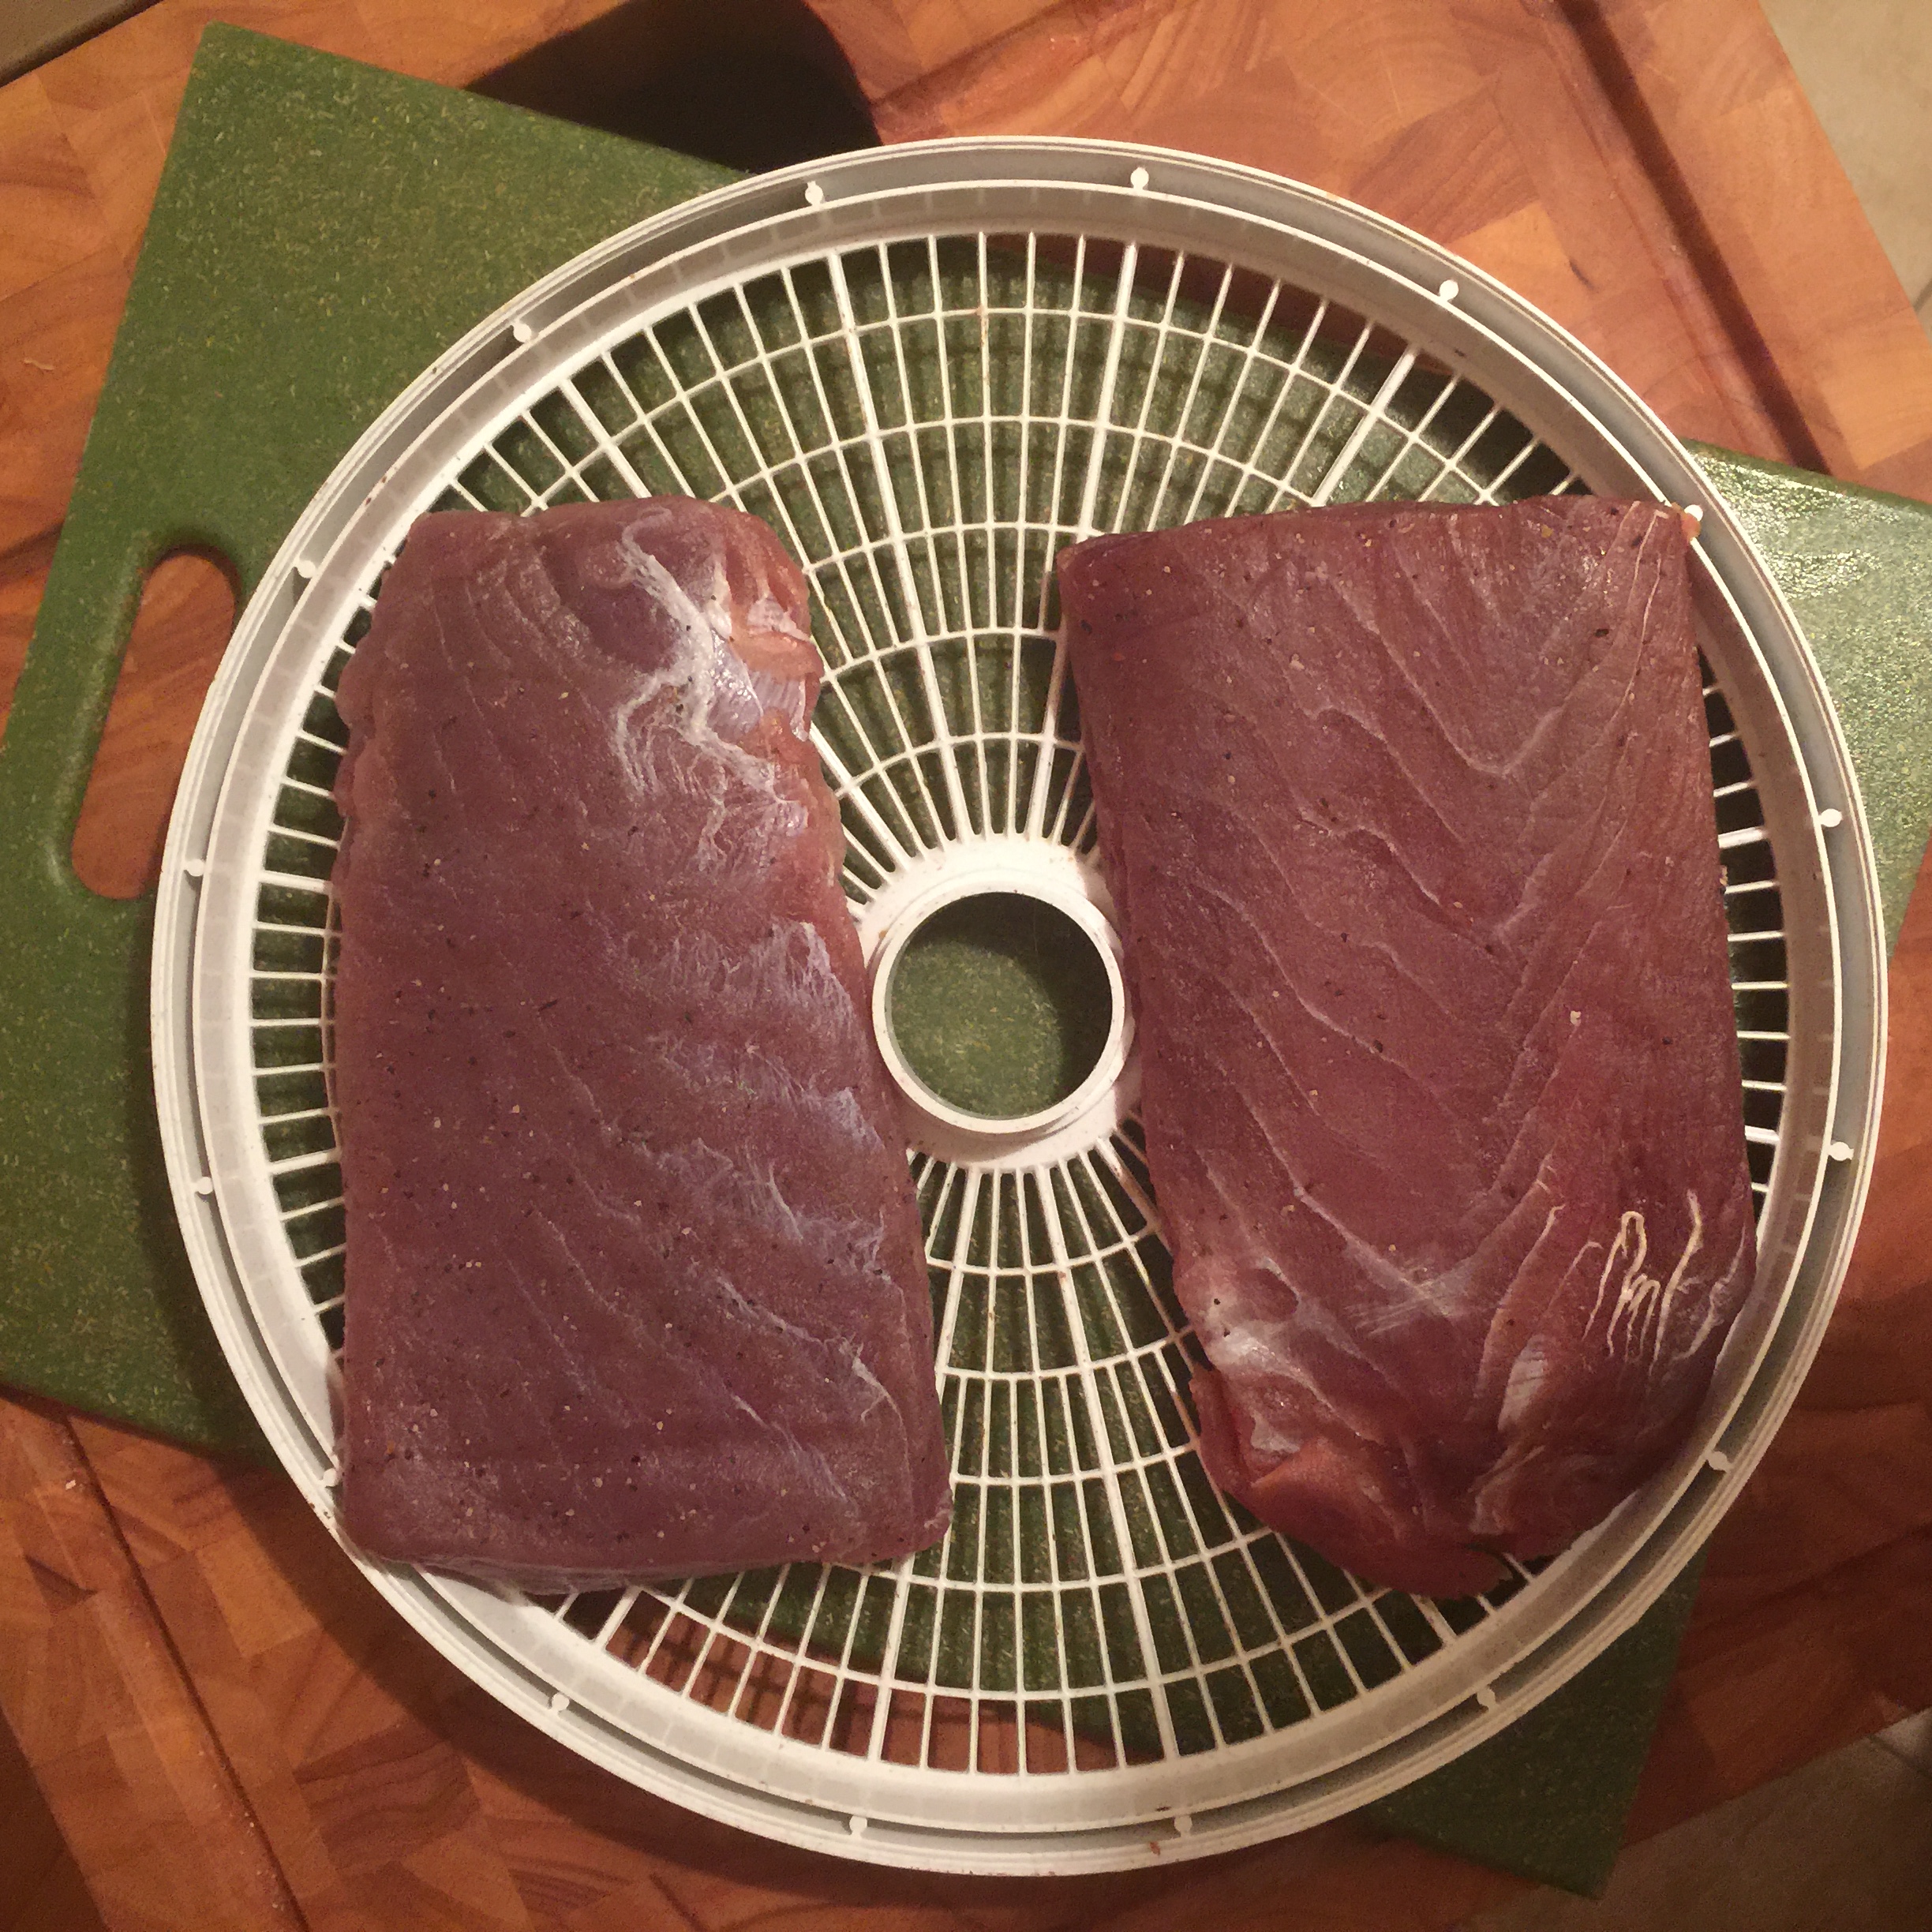
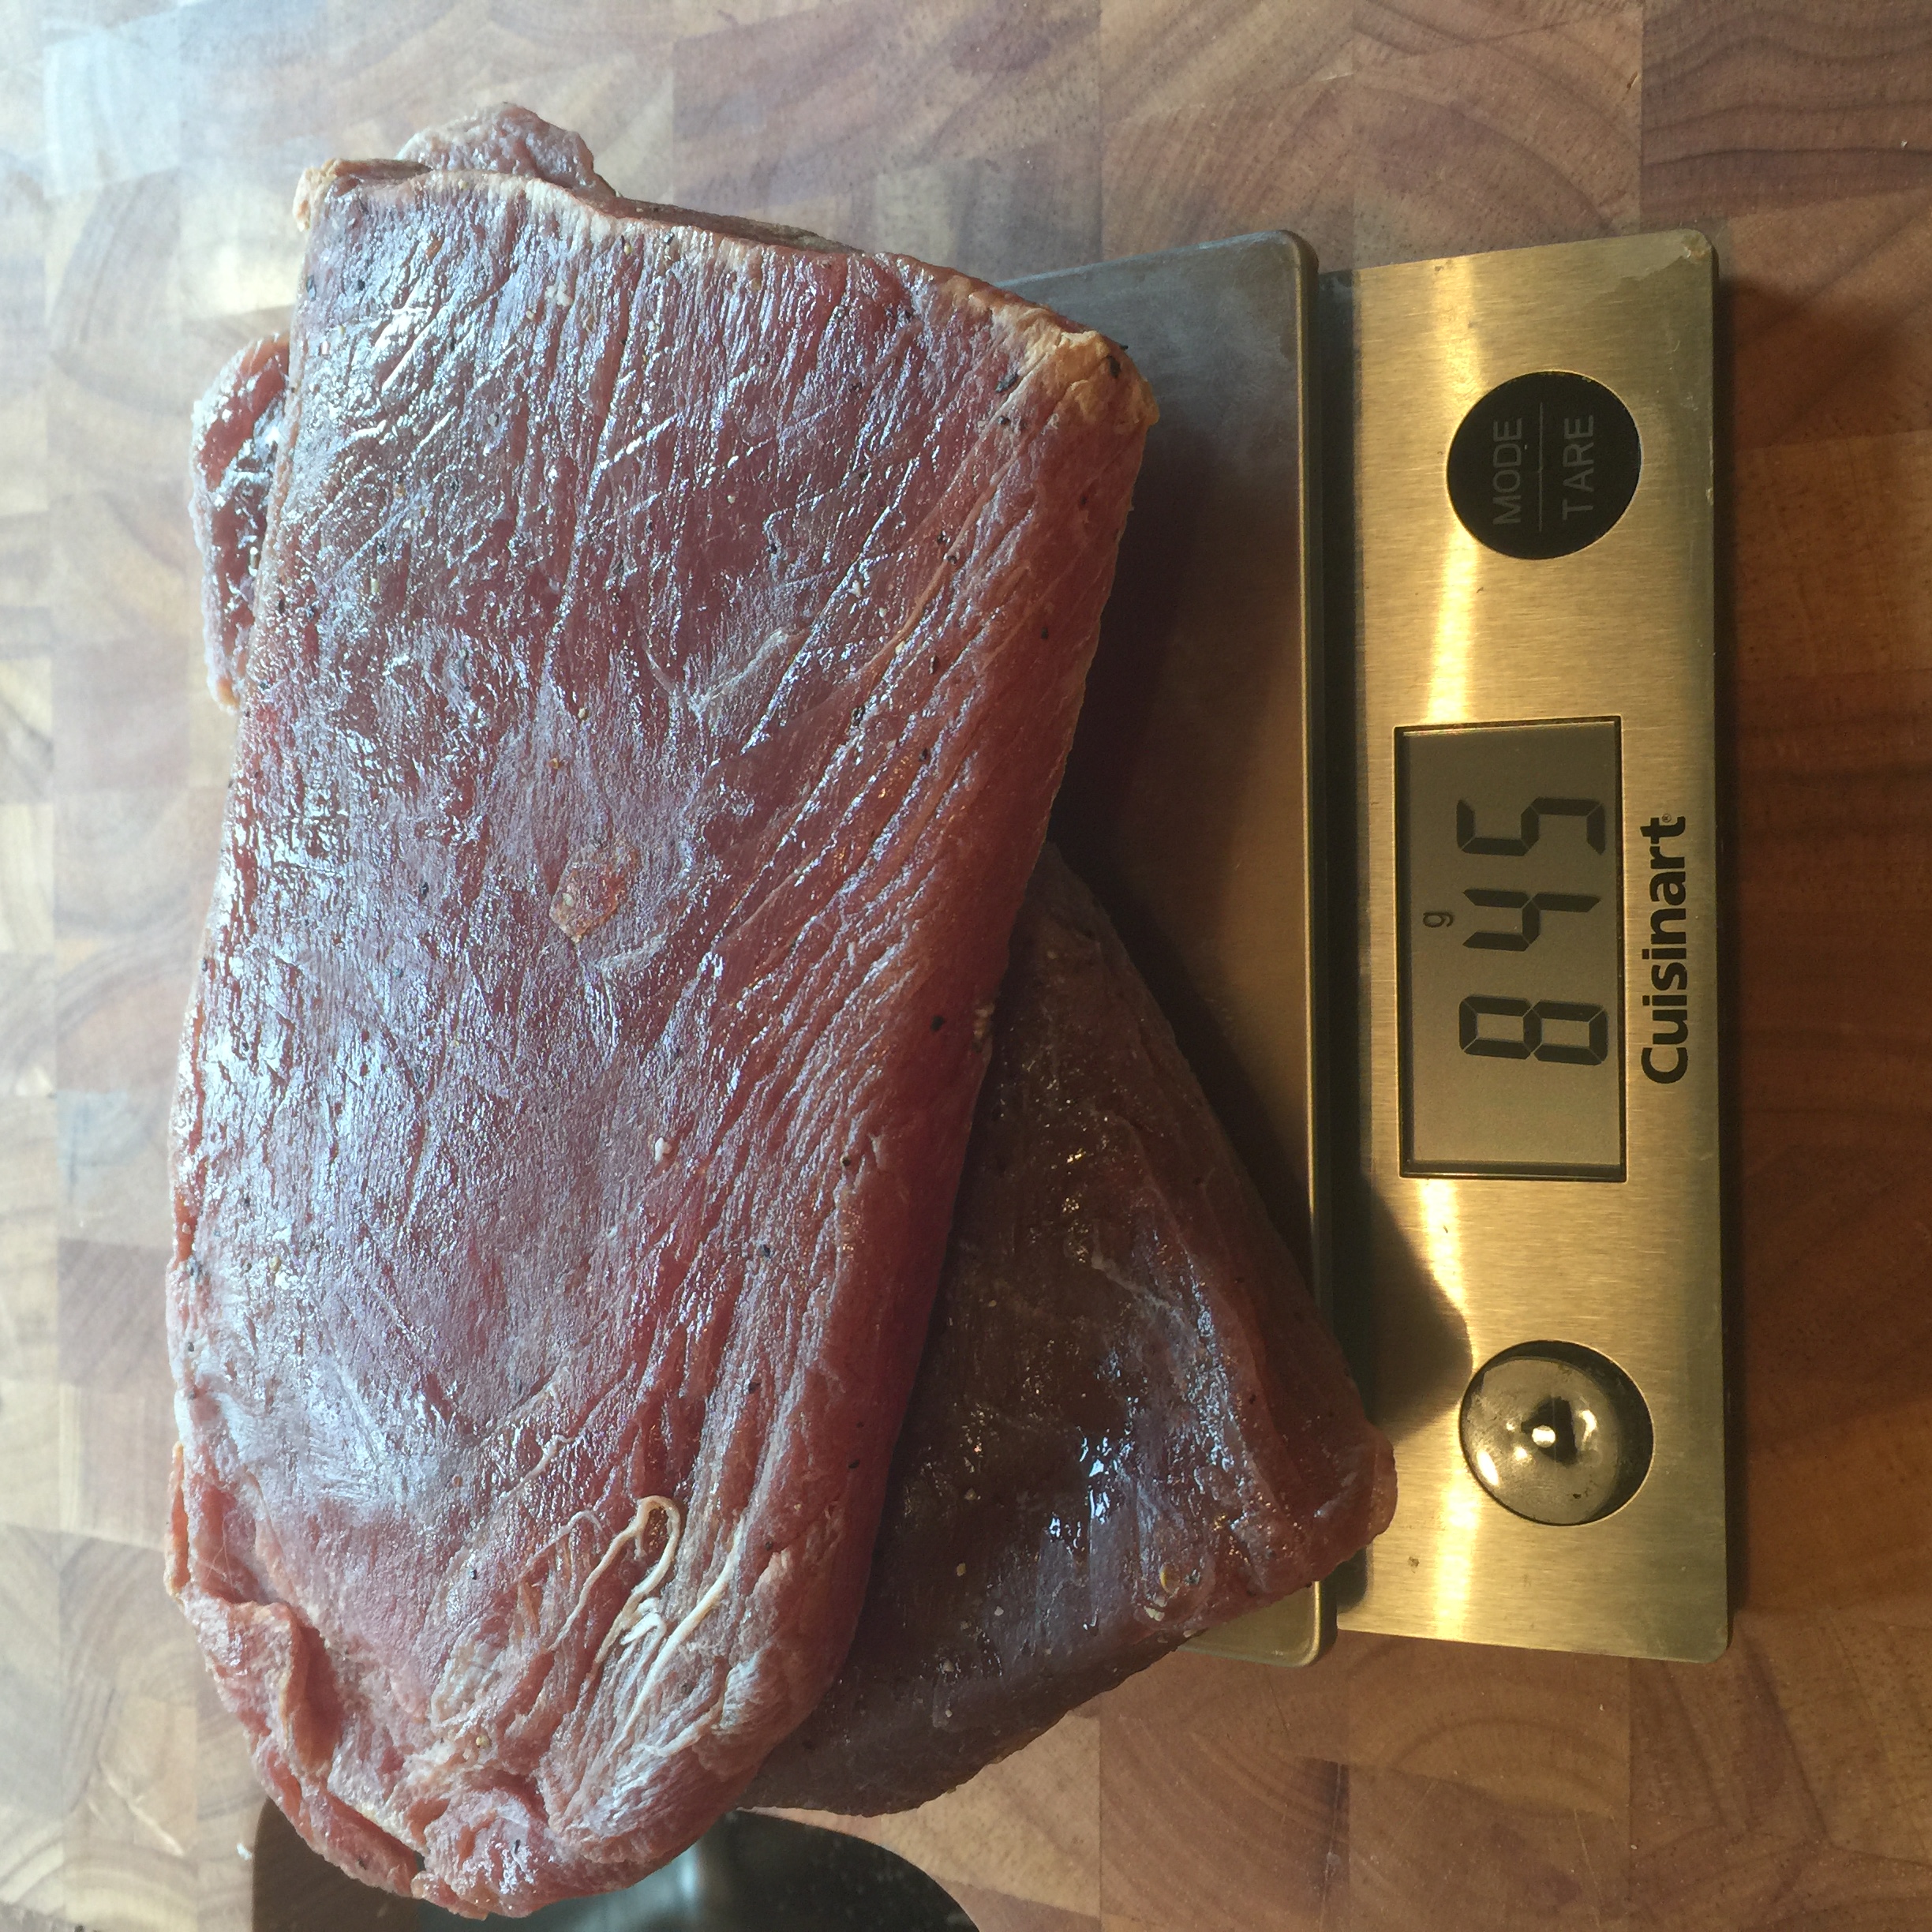
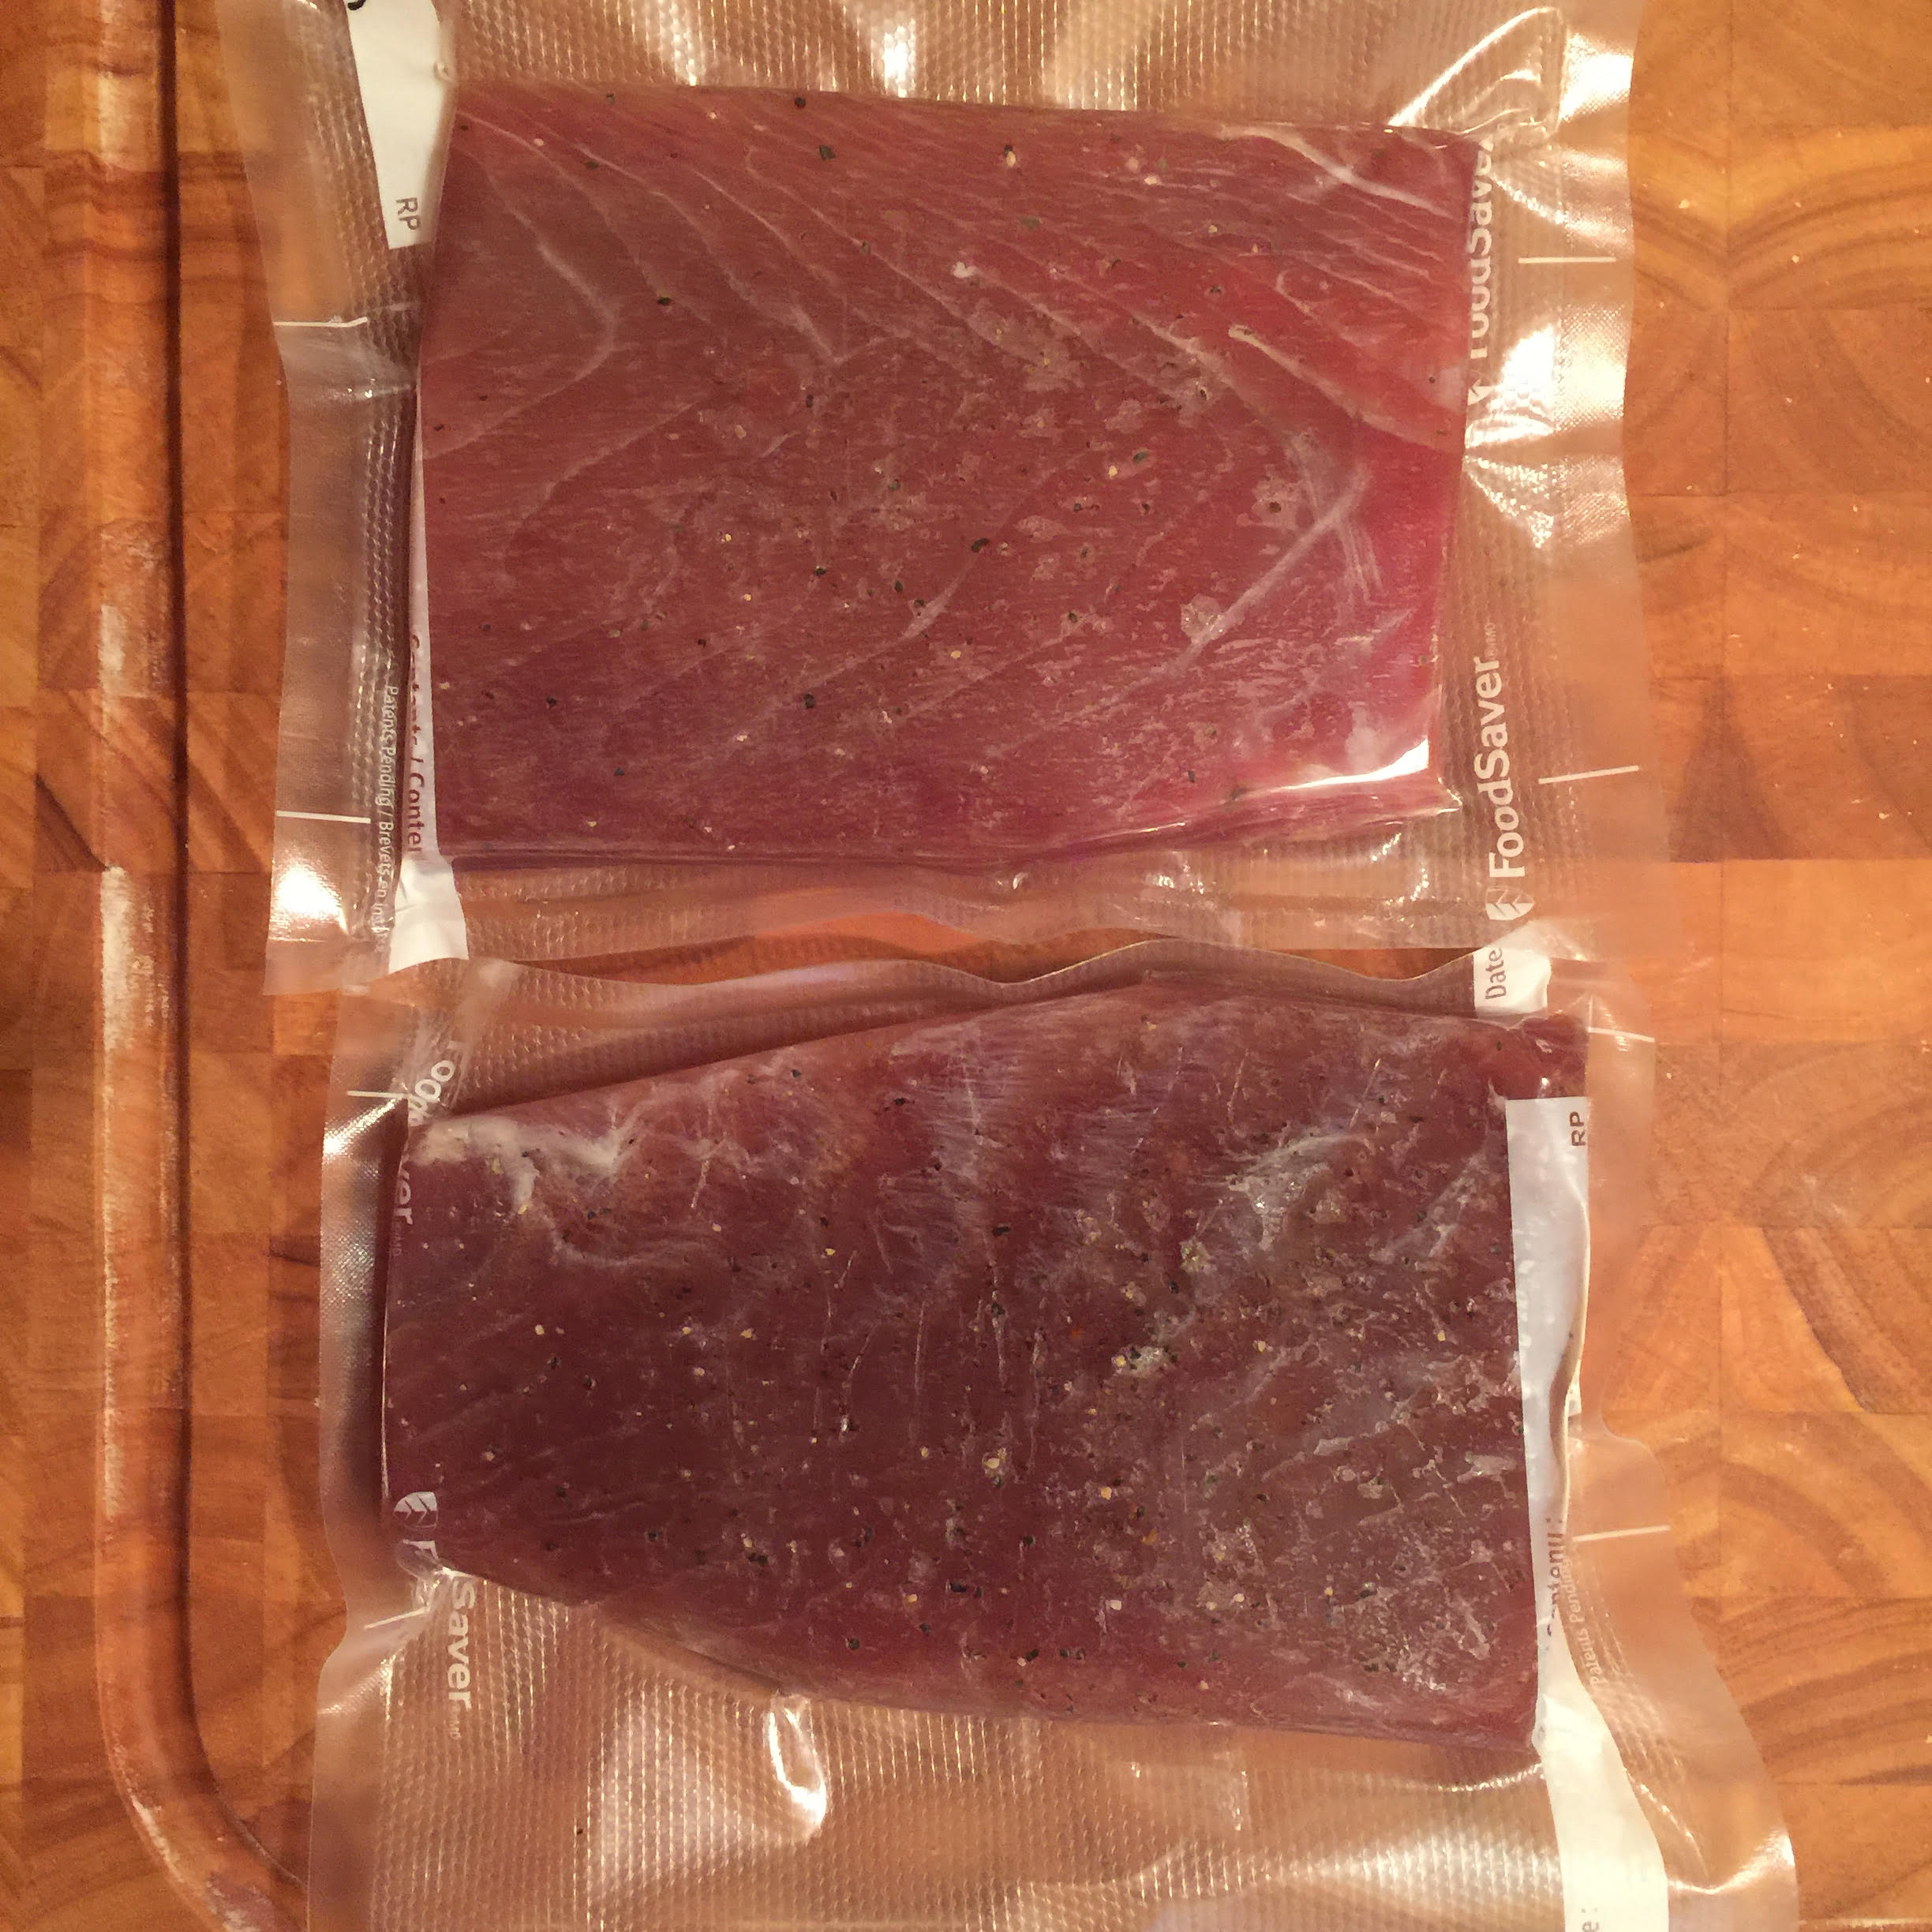
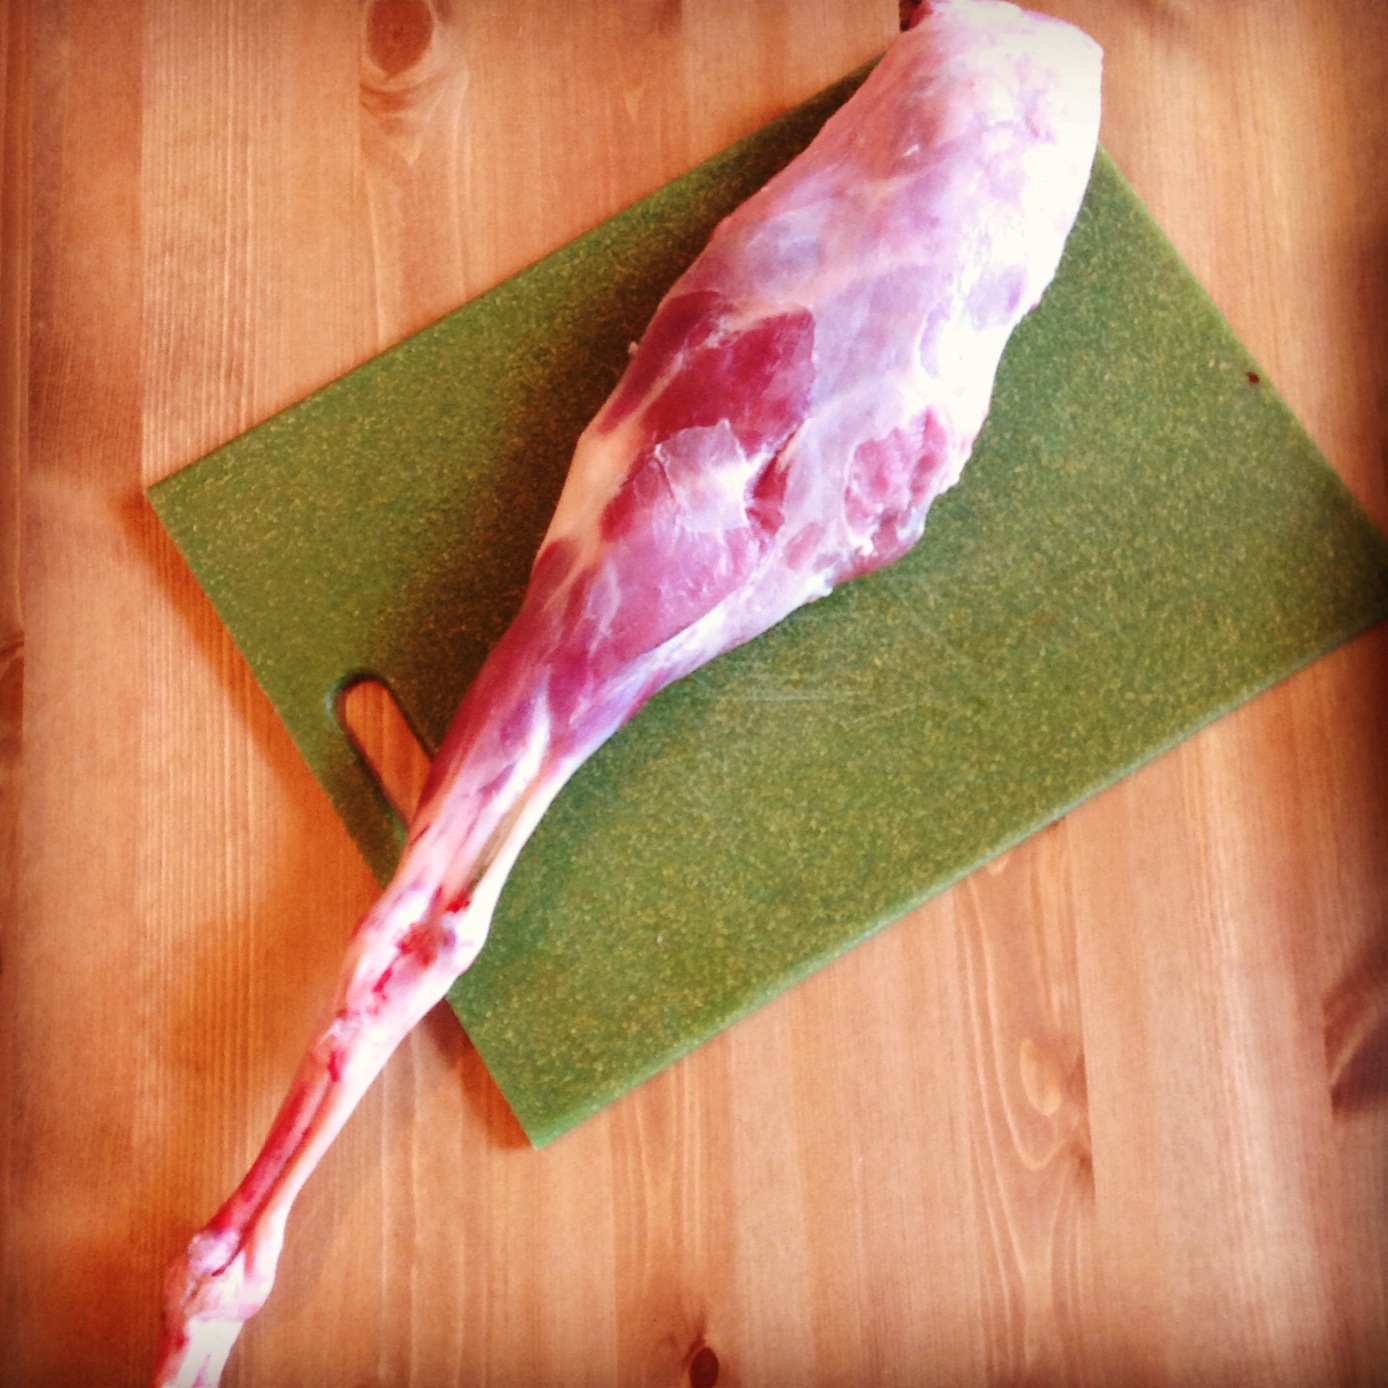
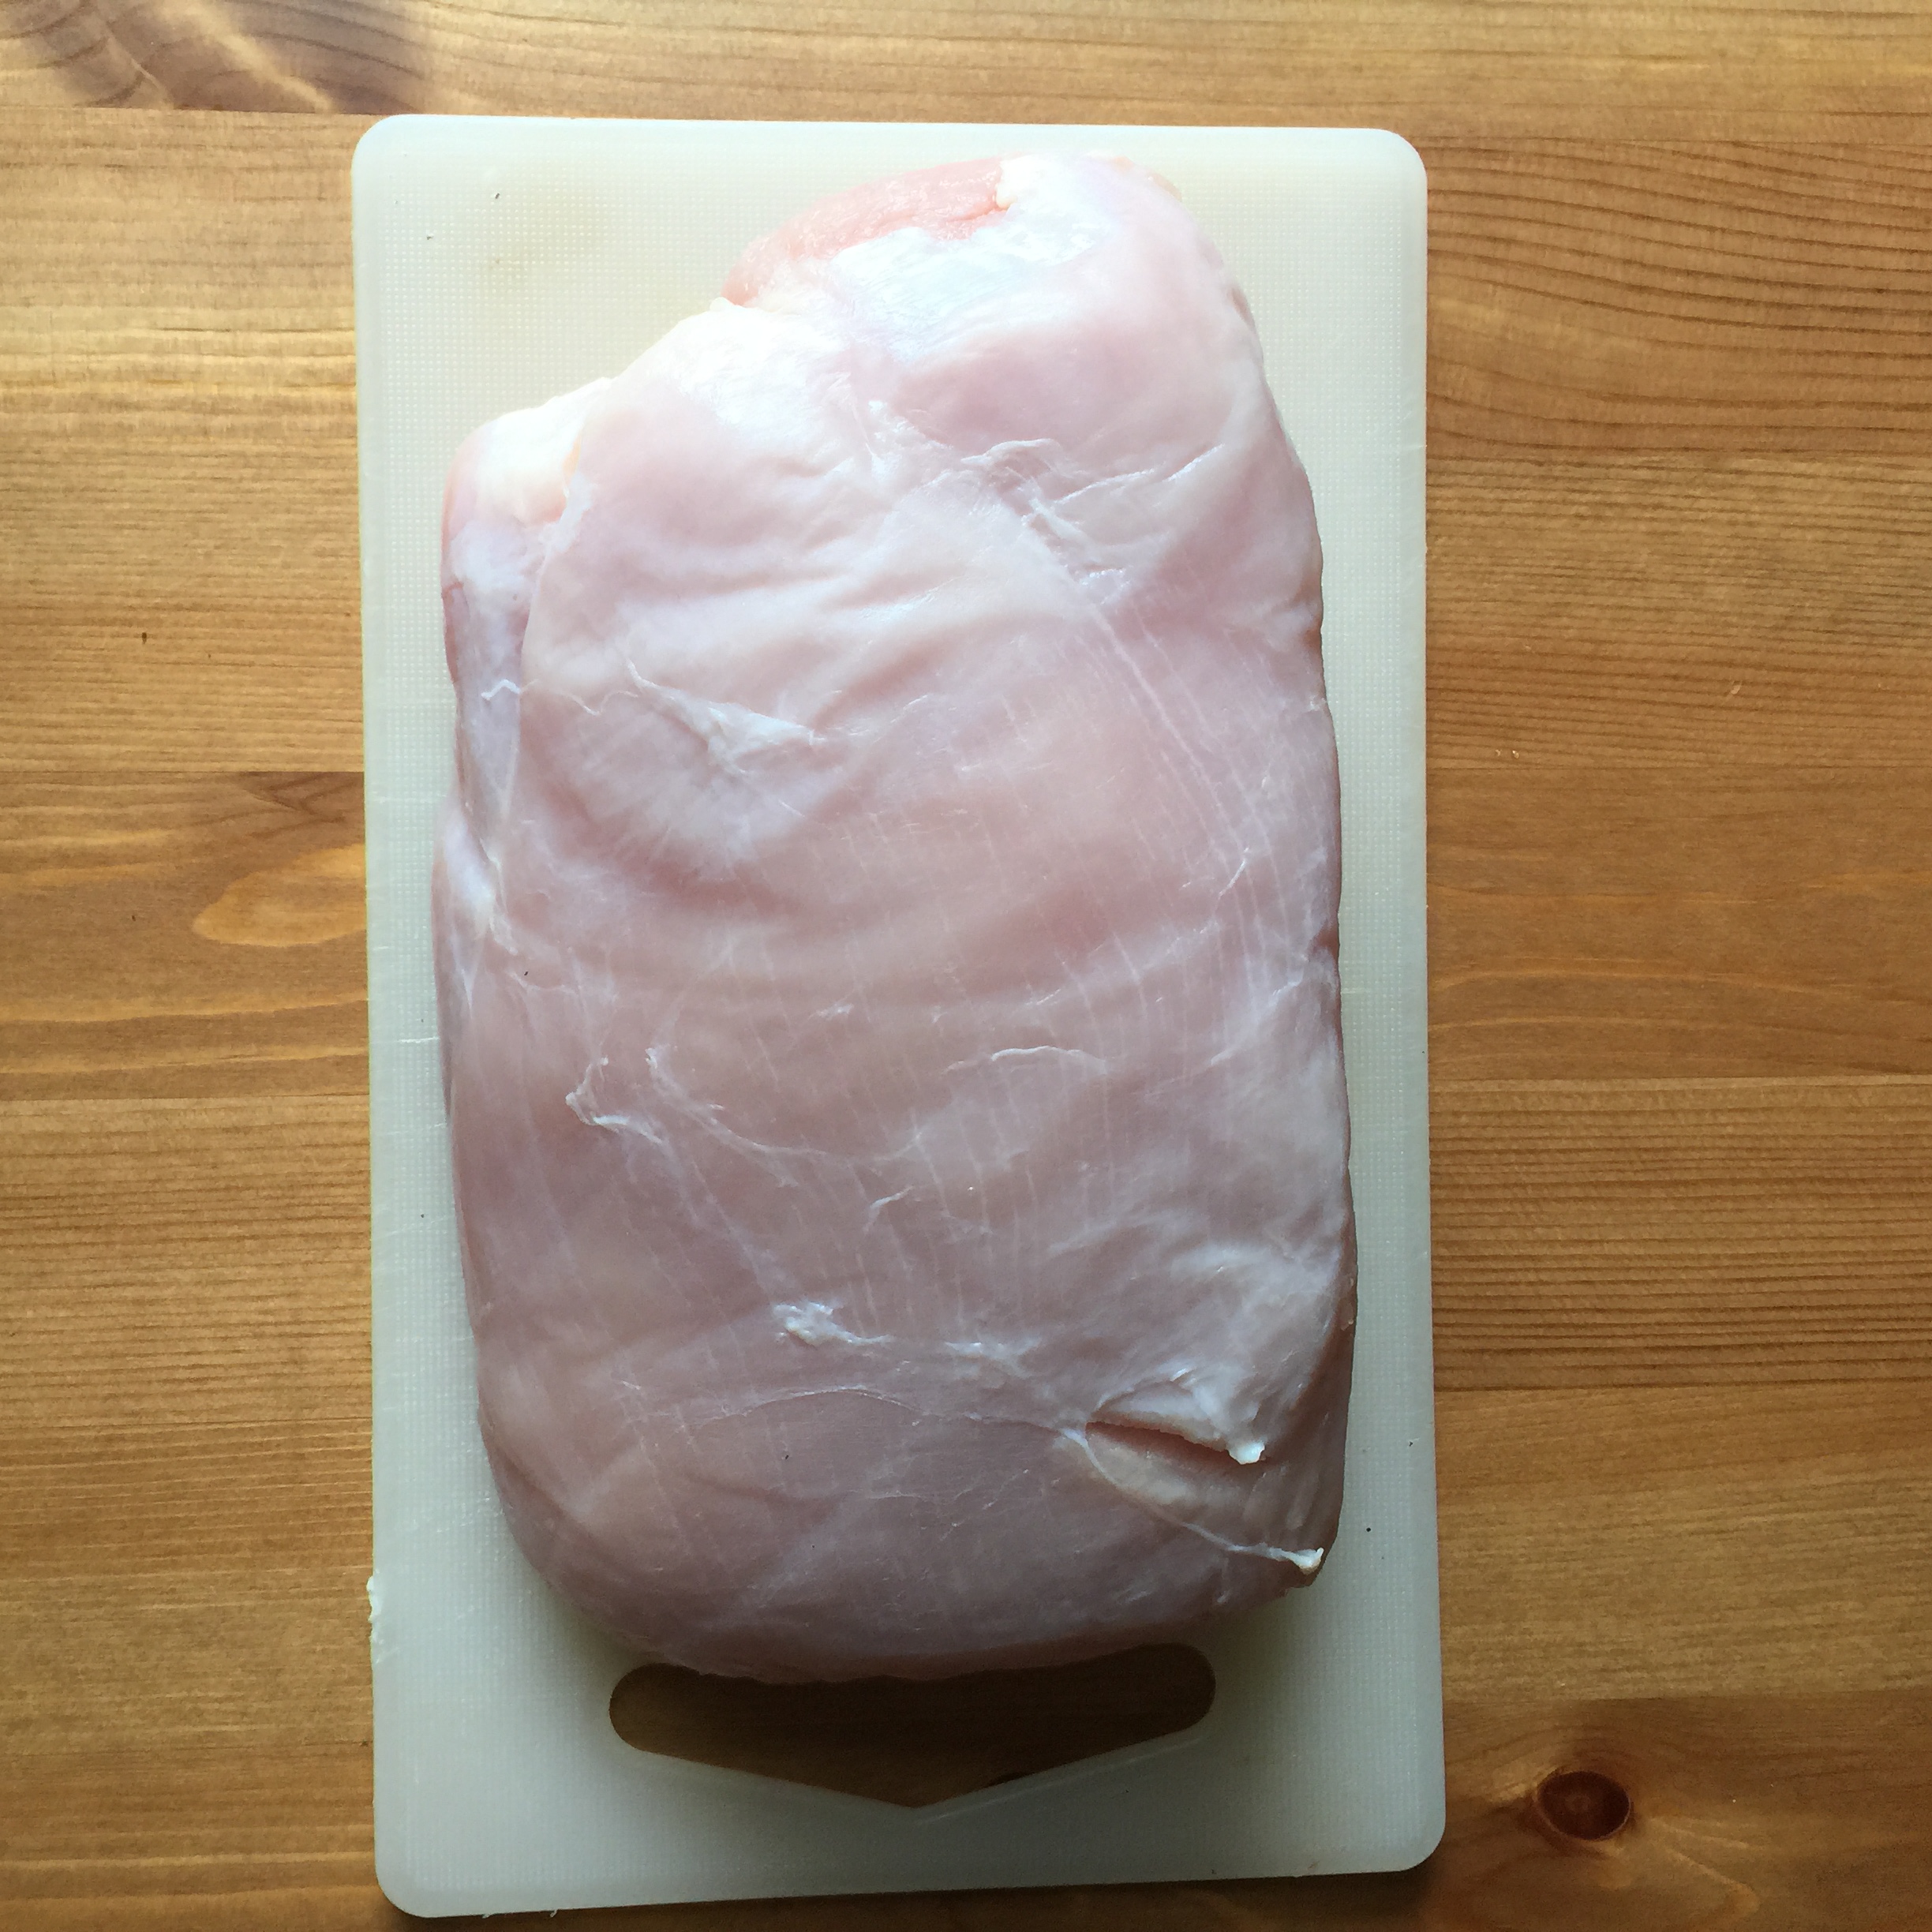
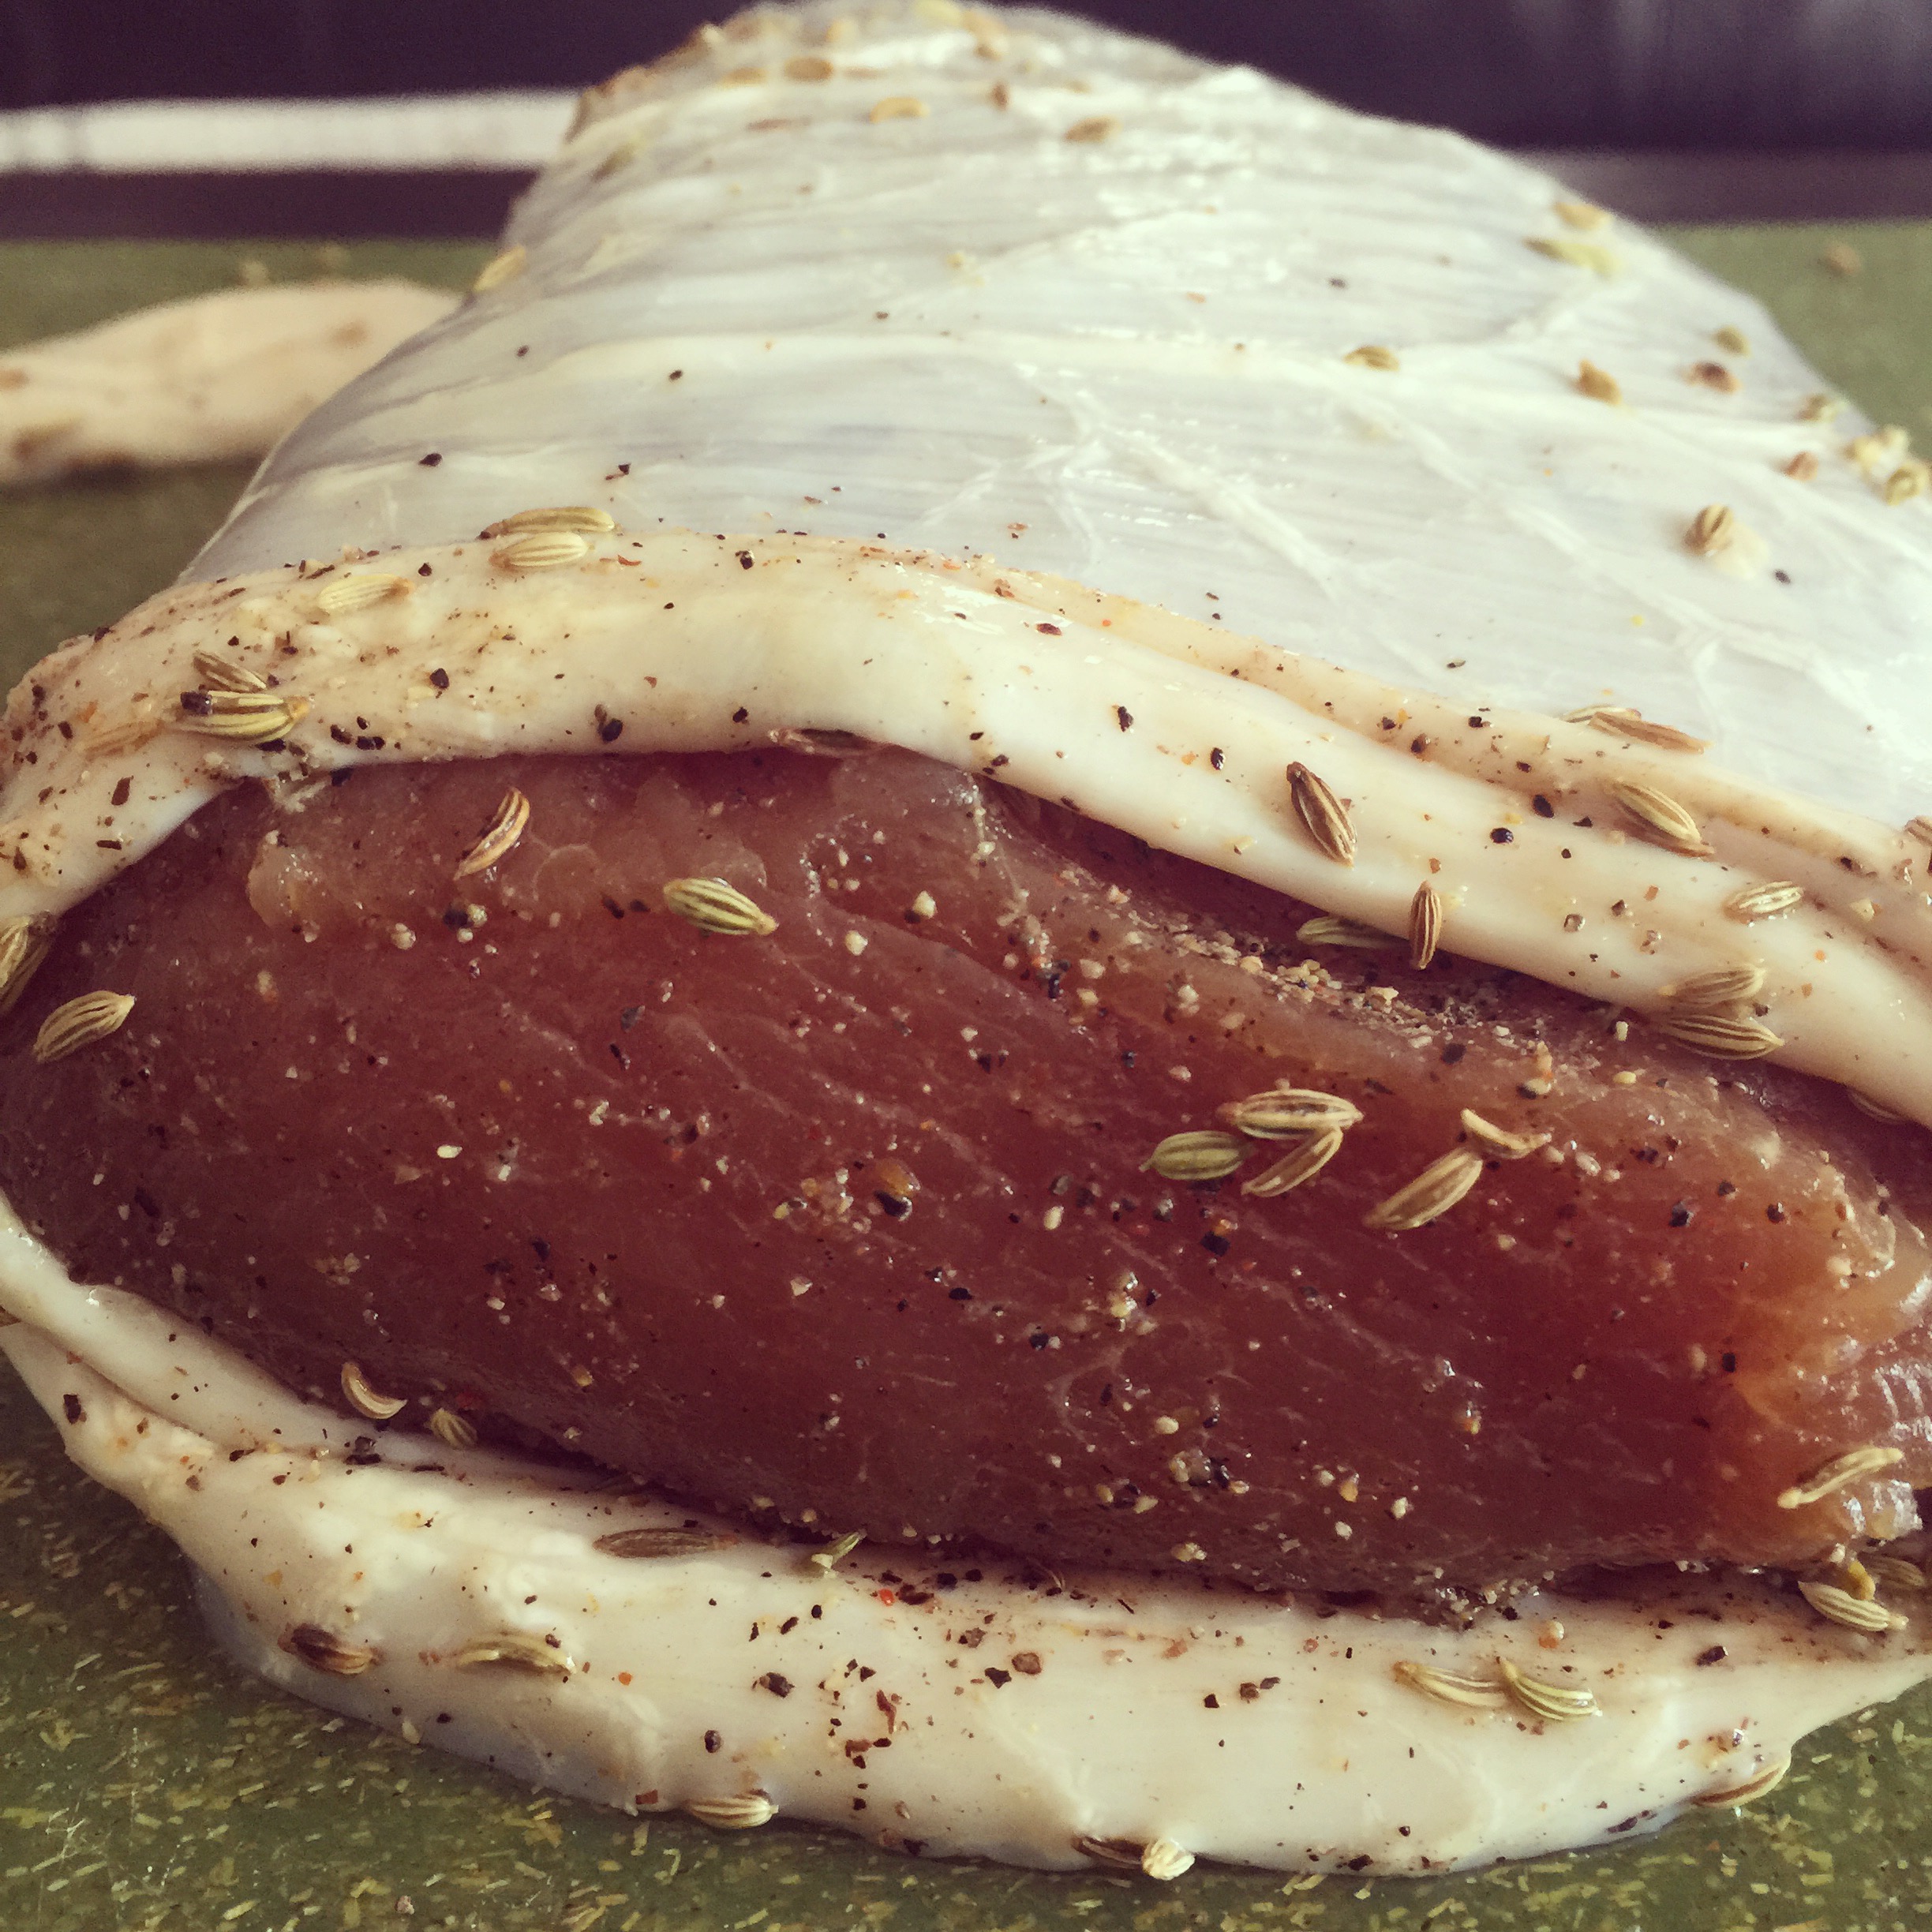
I bought 4 duck breasts to use for this project. Before I started, I put them in the freezer for an hour or so to get them nice and cold. I cut the fat away from the meat, and I weighed the meat and the fat separately. Ideally there would be a 70% meat to 30% fat ratio, mine was close enough to that, so I just worked with what I had. I decided to try two different cures, one spicy using calabrese peperconcini and one in the style of duck l’orange.

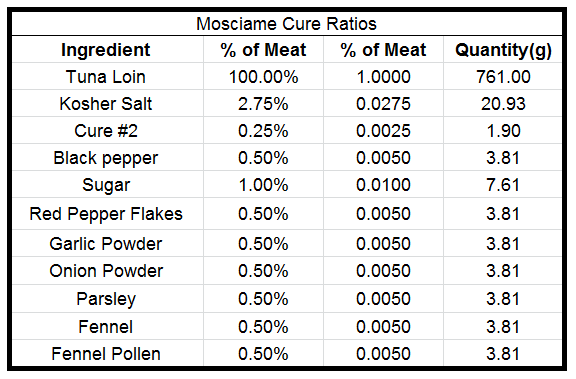
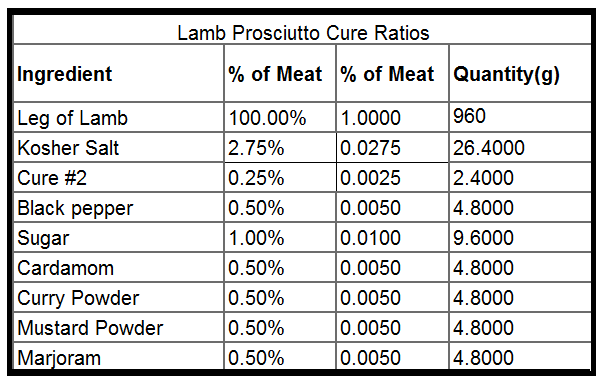
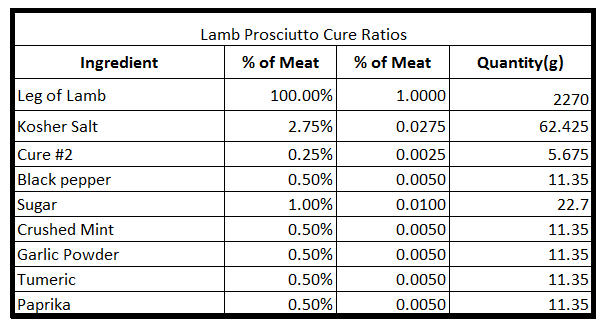
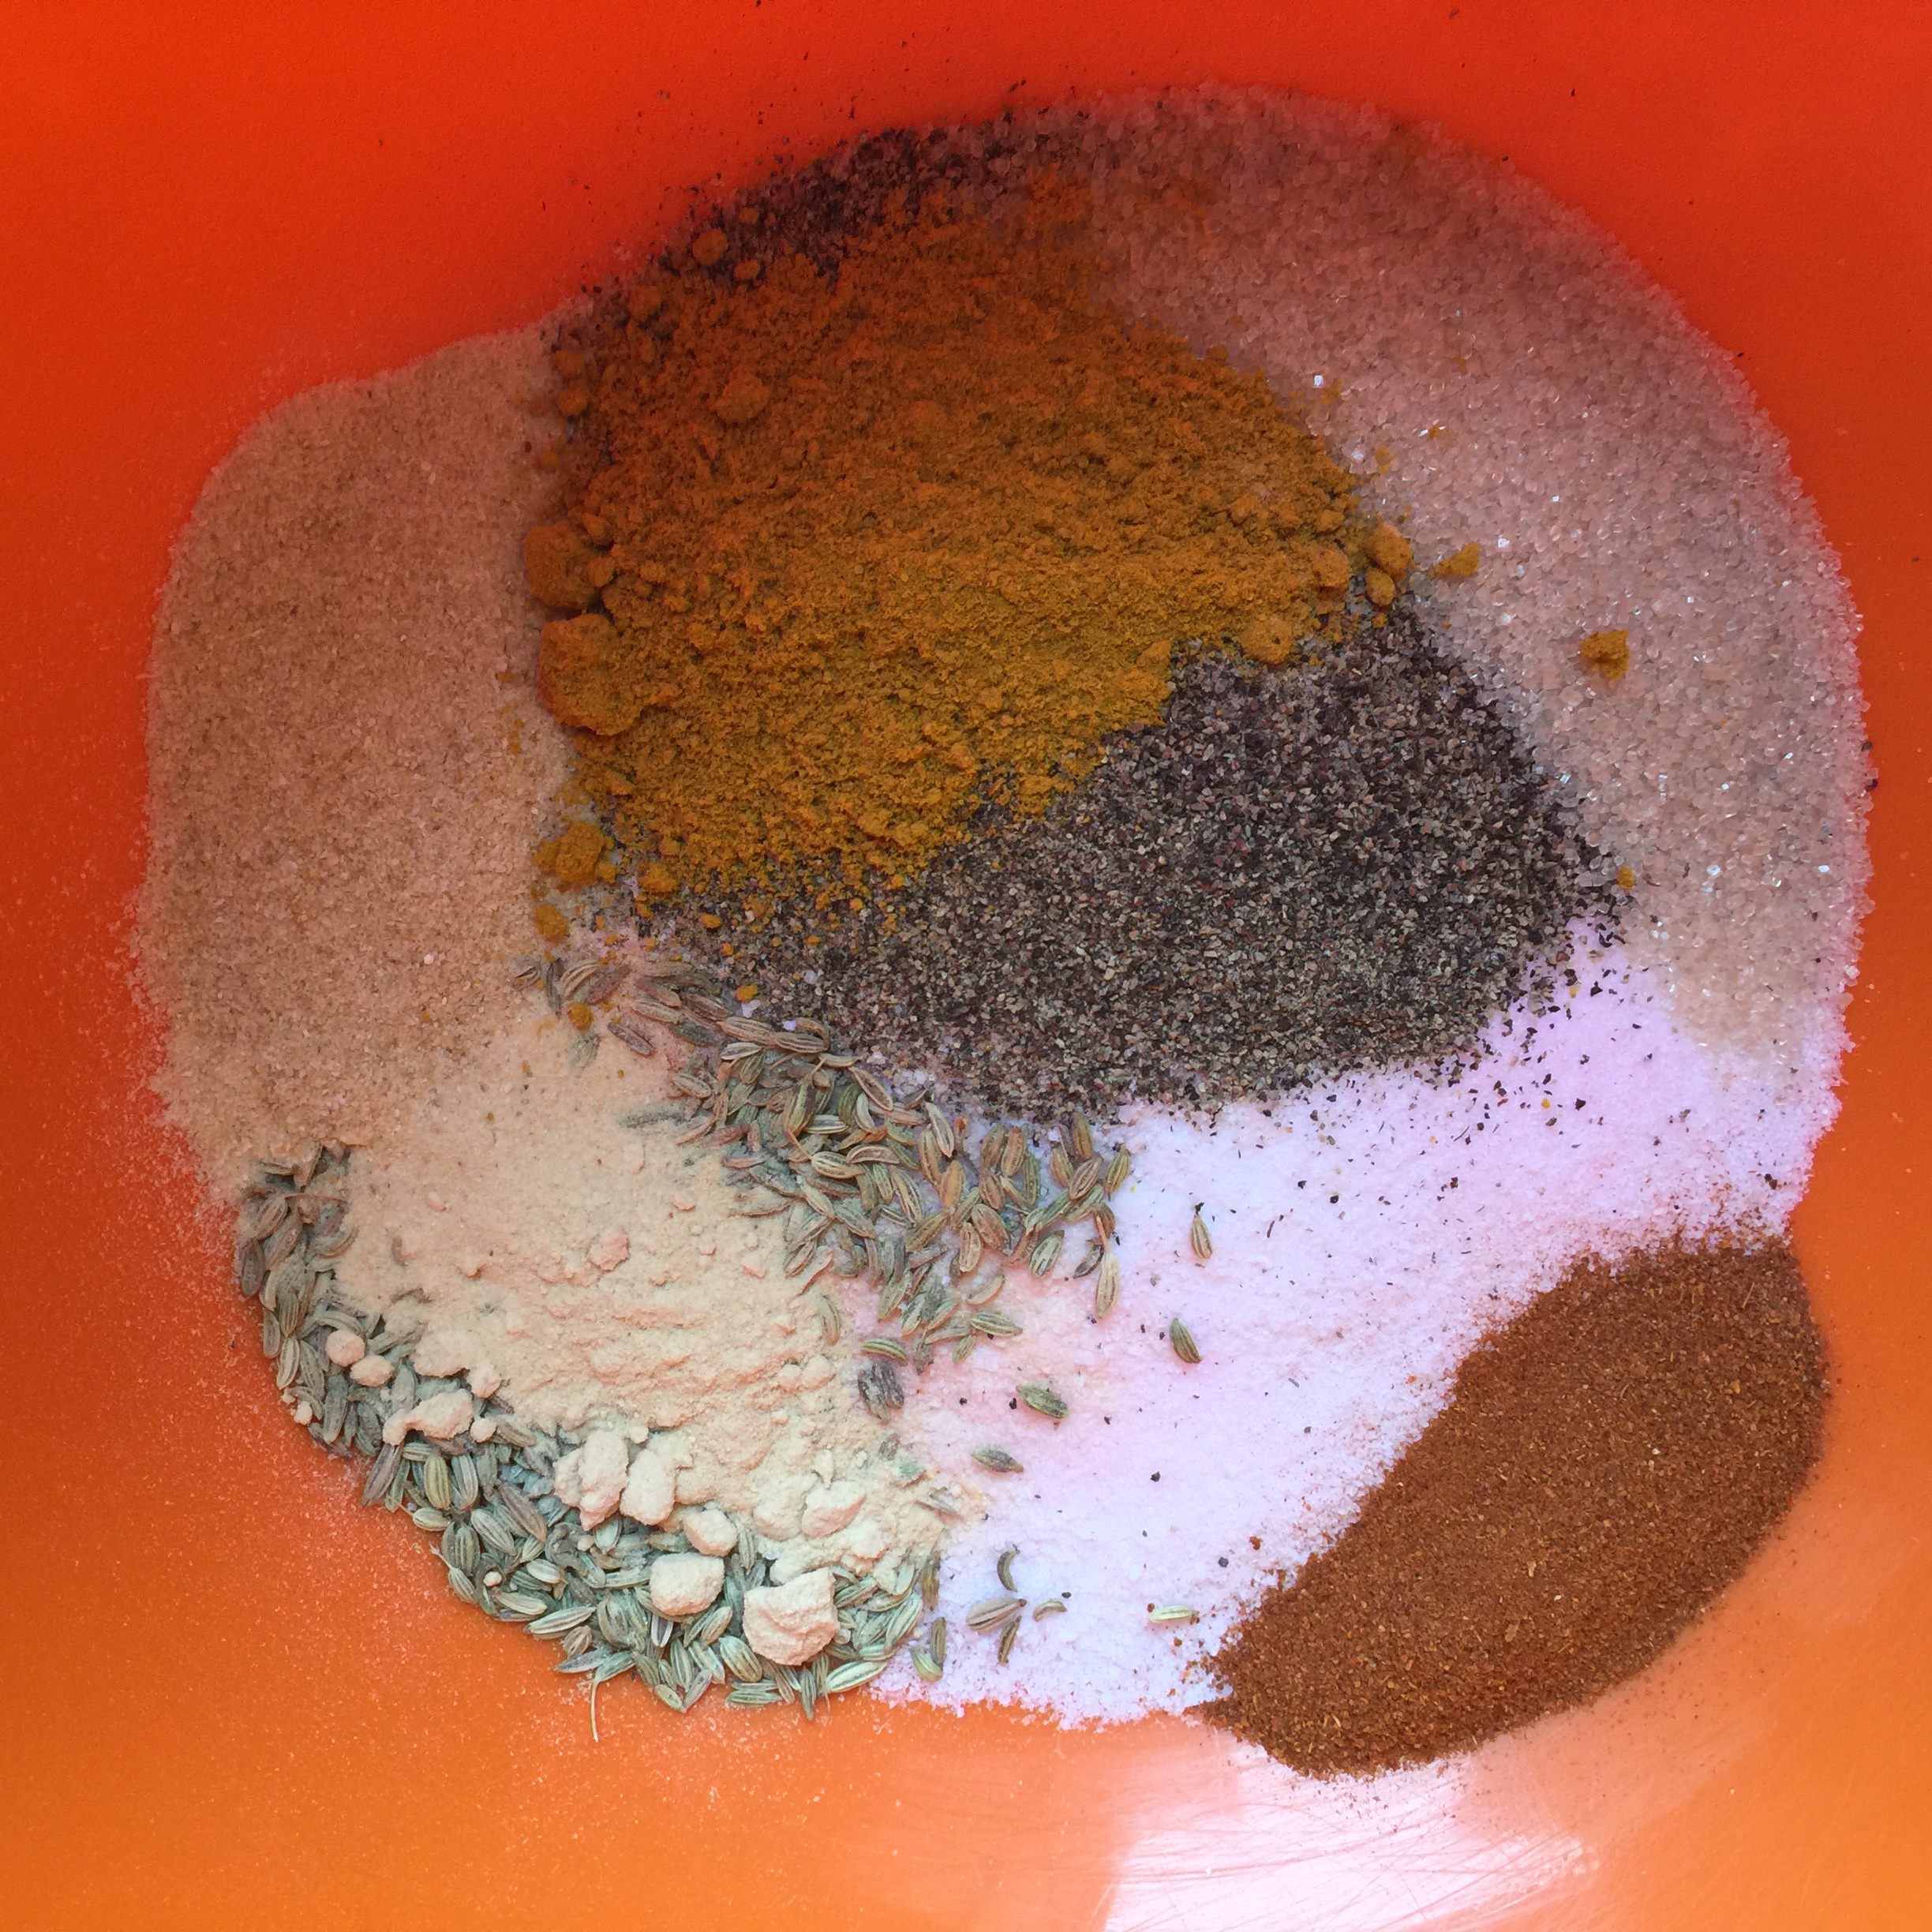
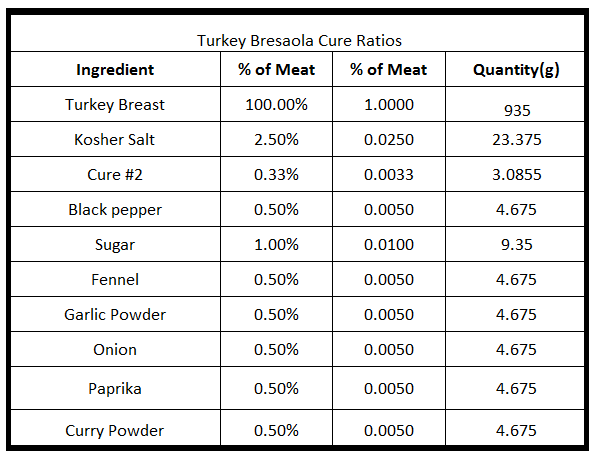
Below are the cure ratios I used:

image image(1)
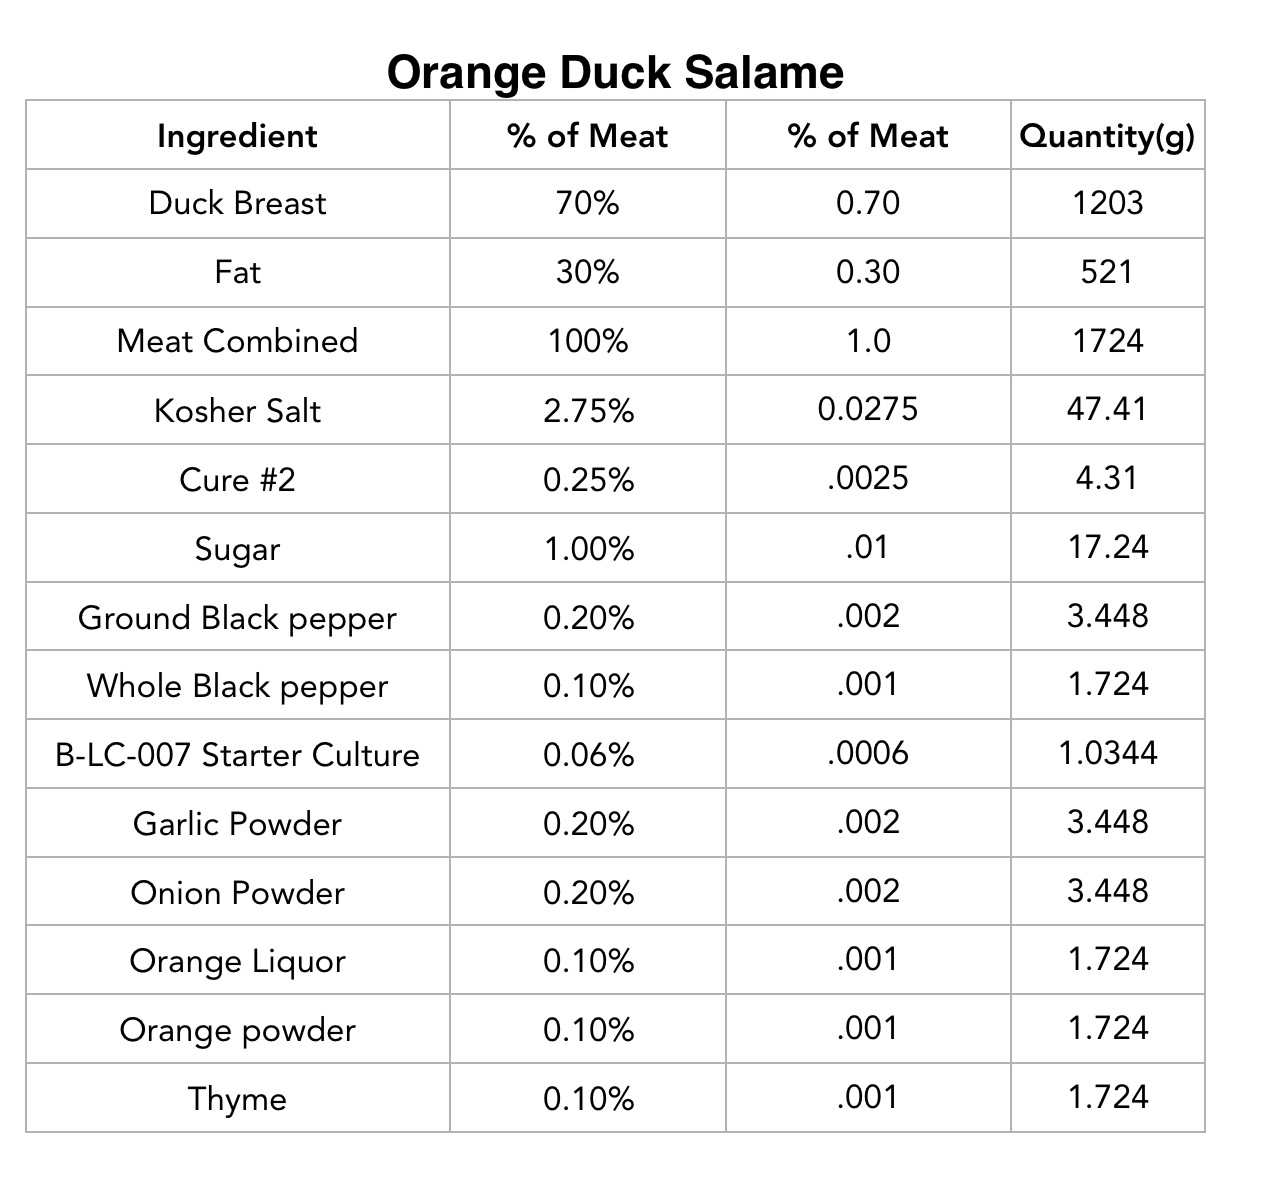
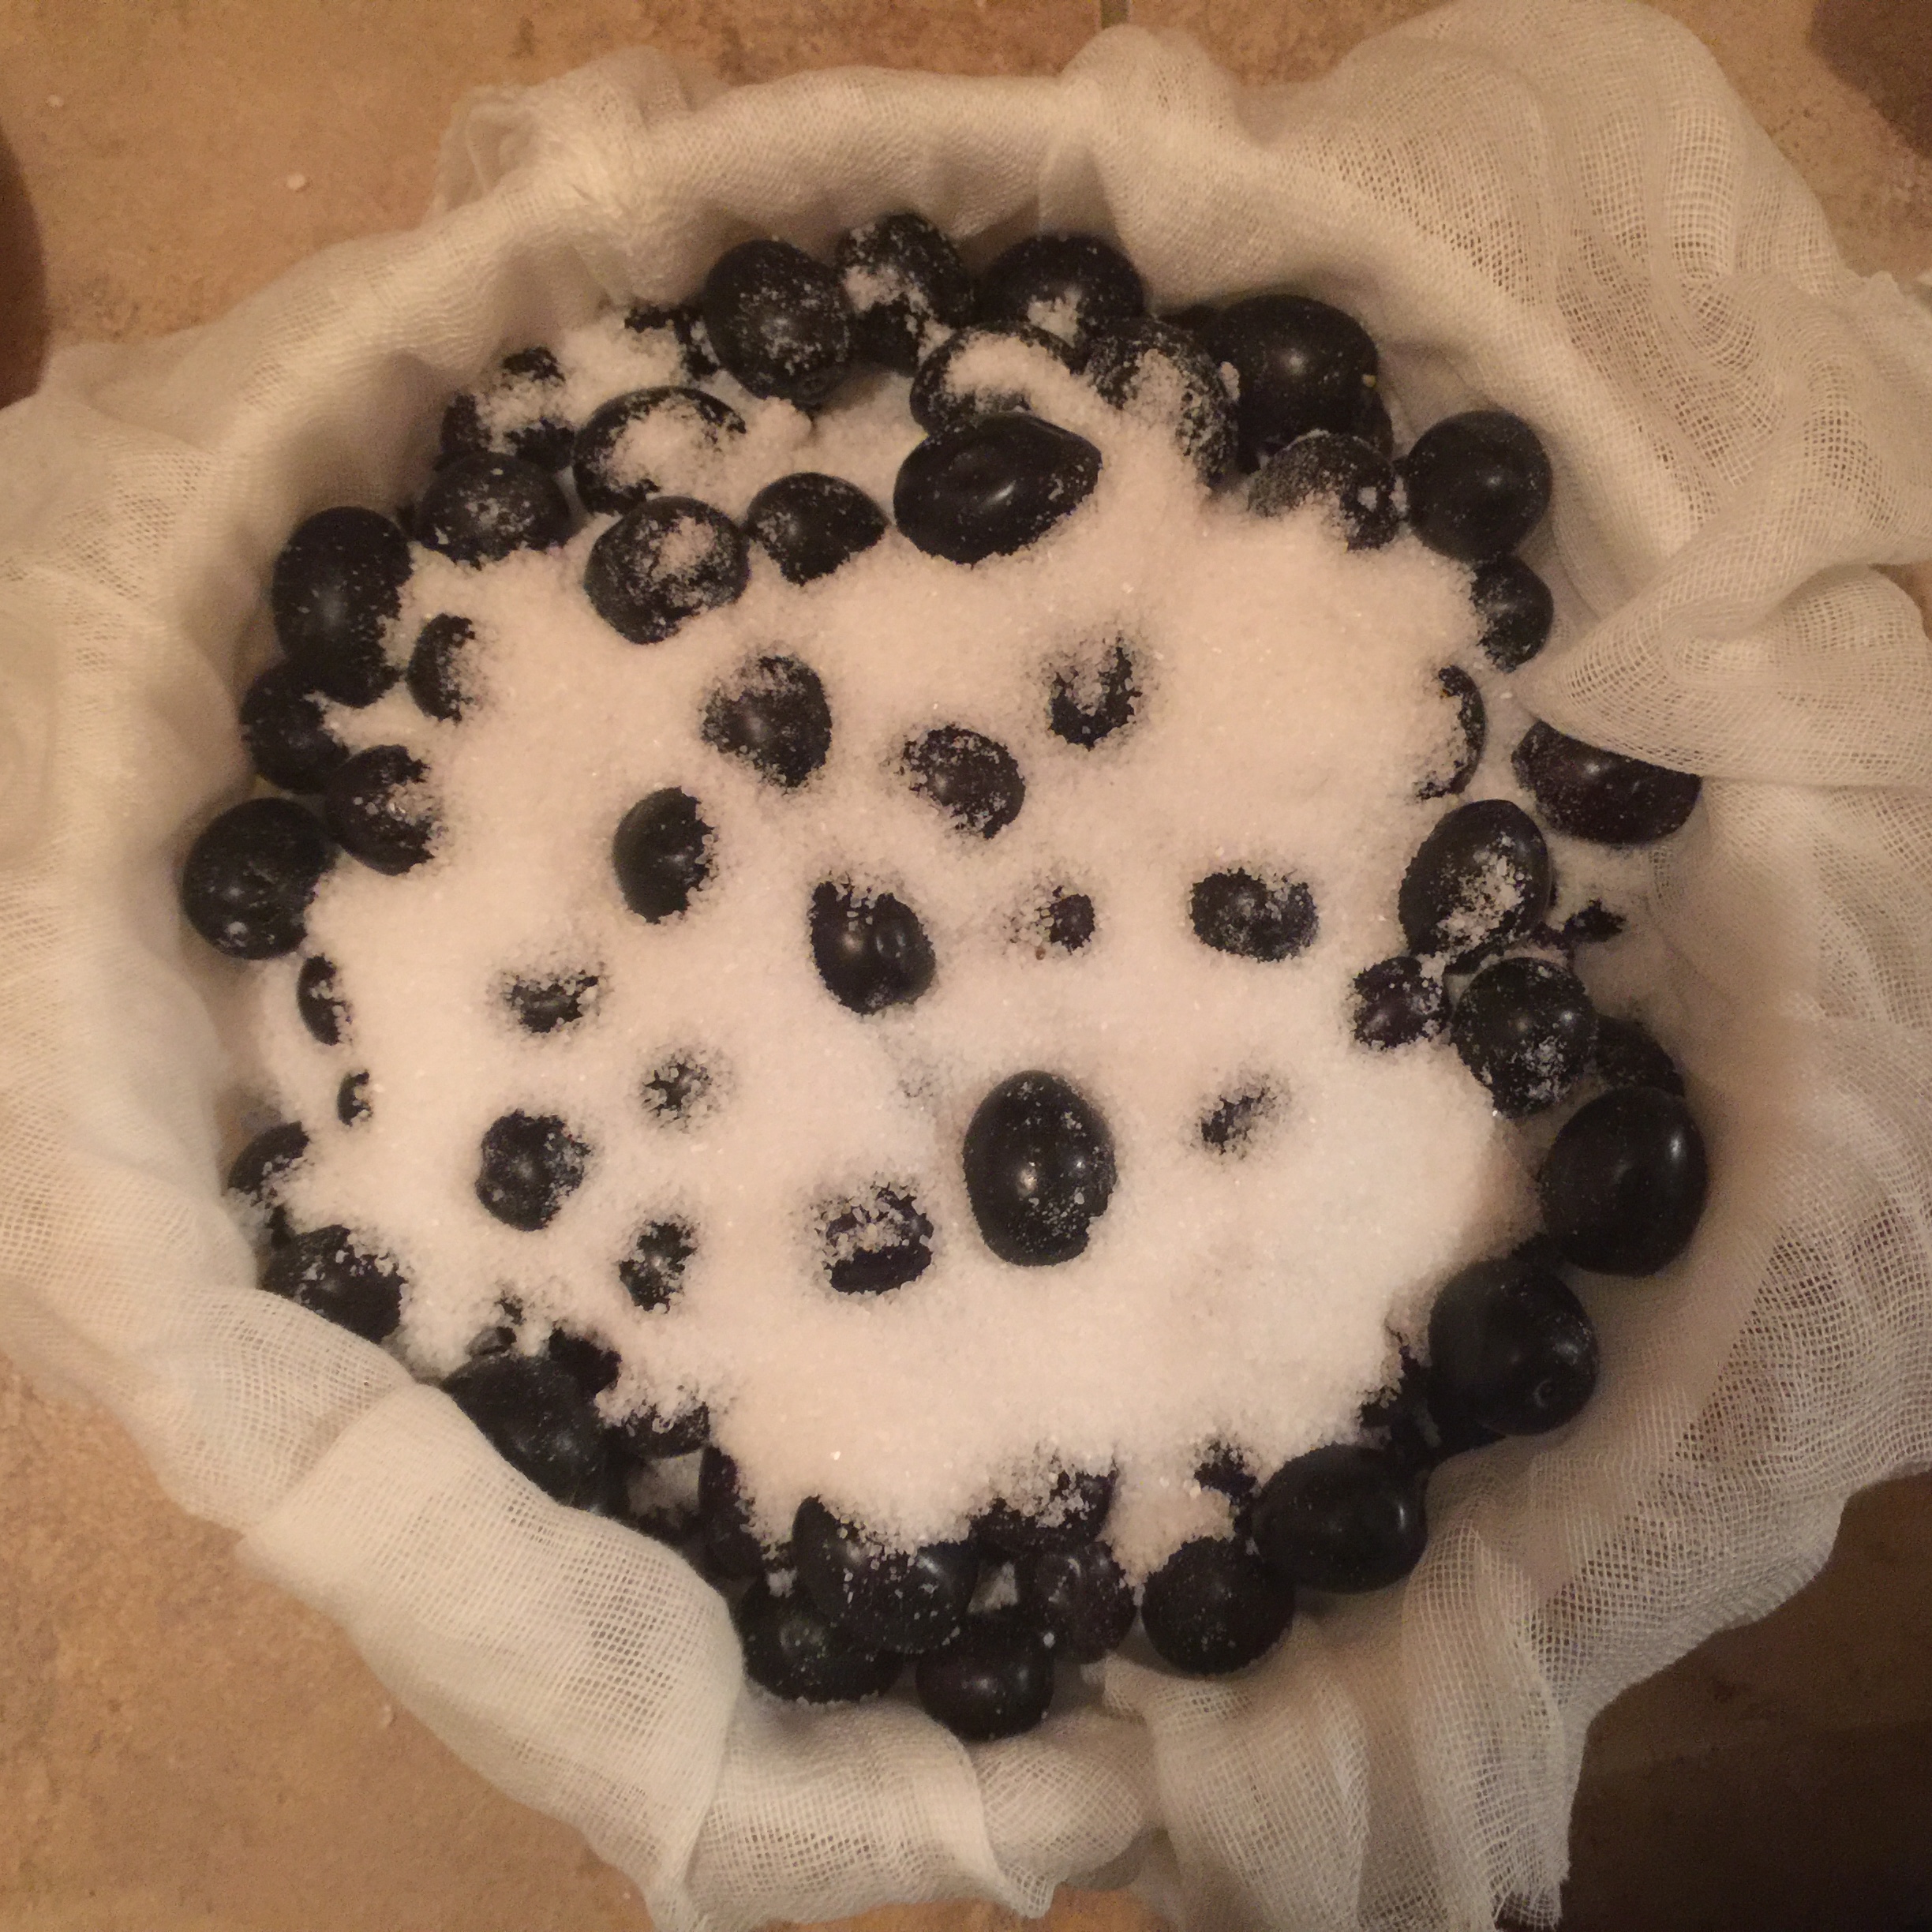
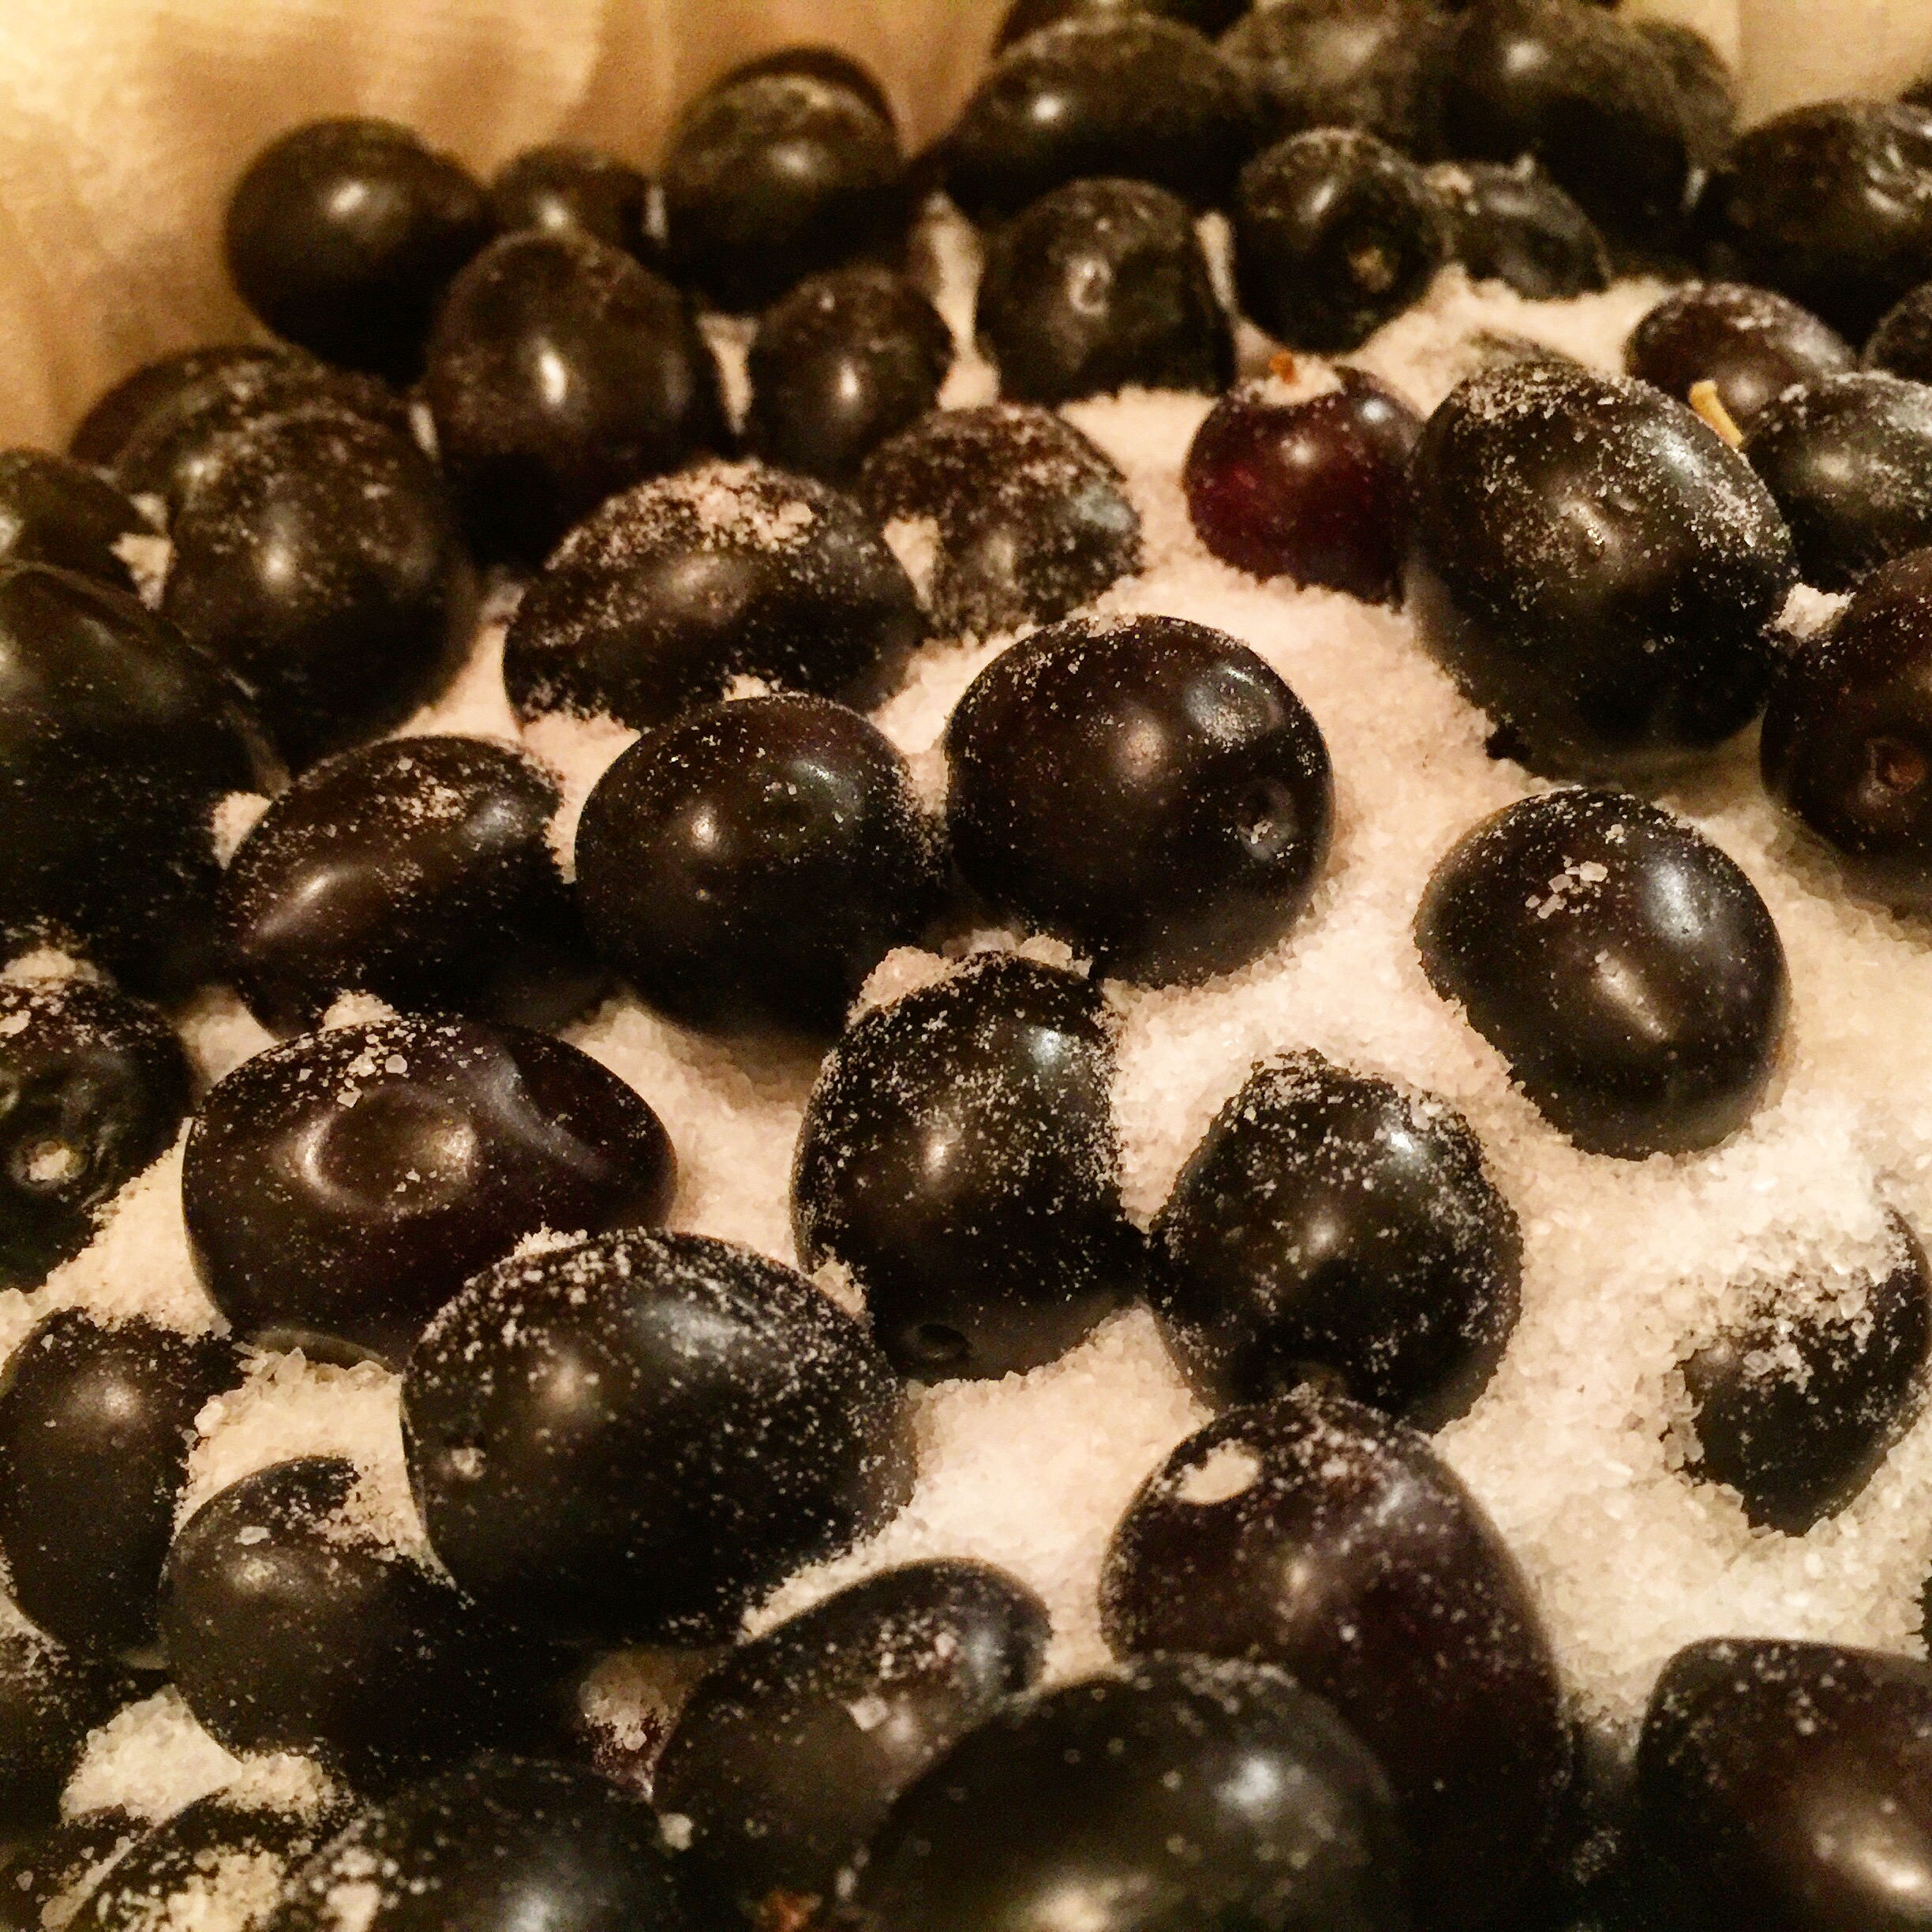
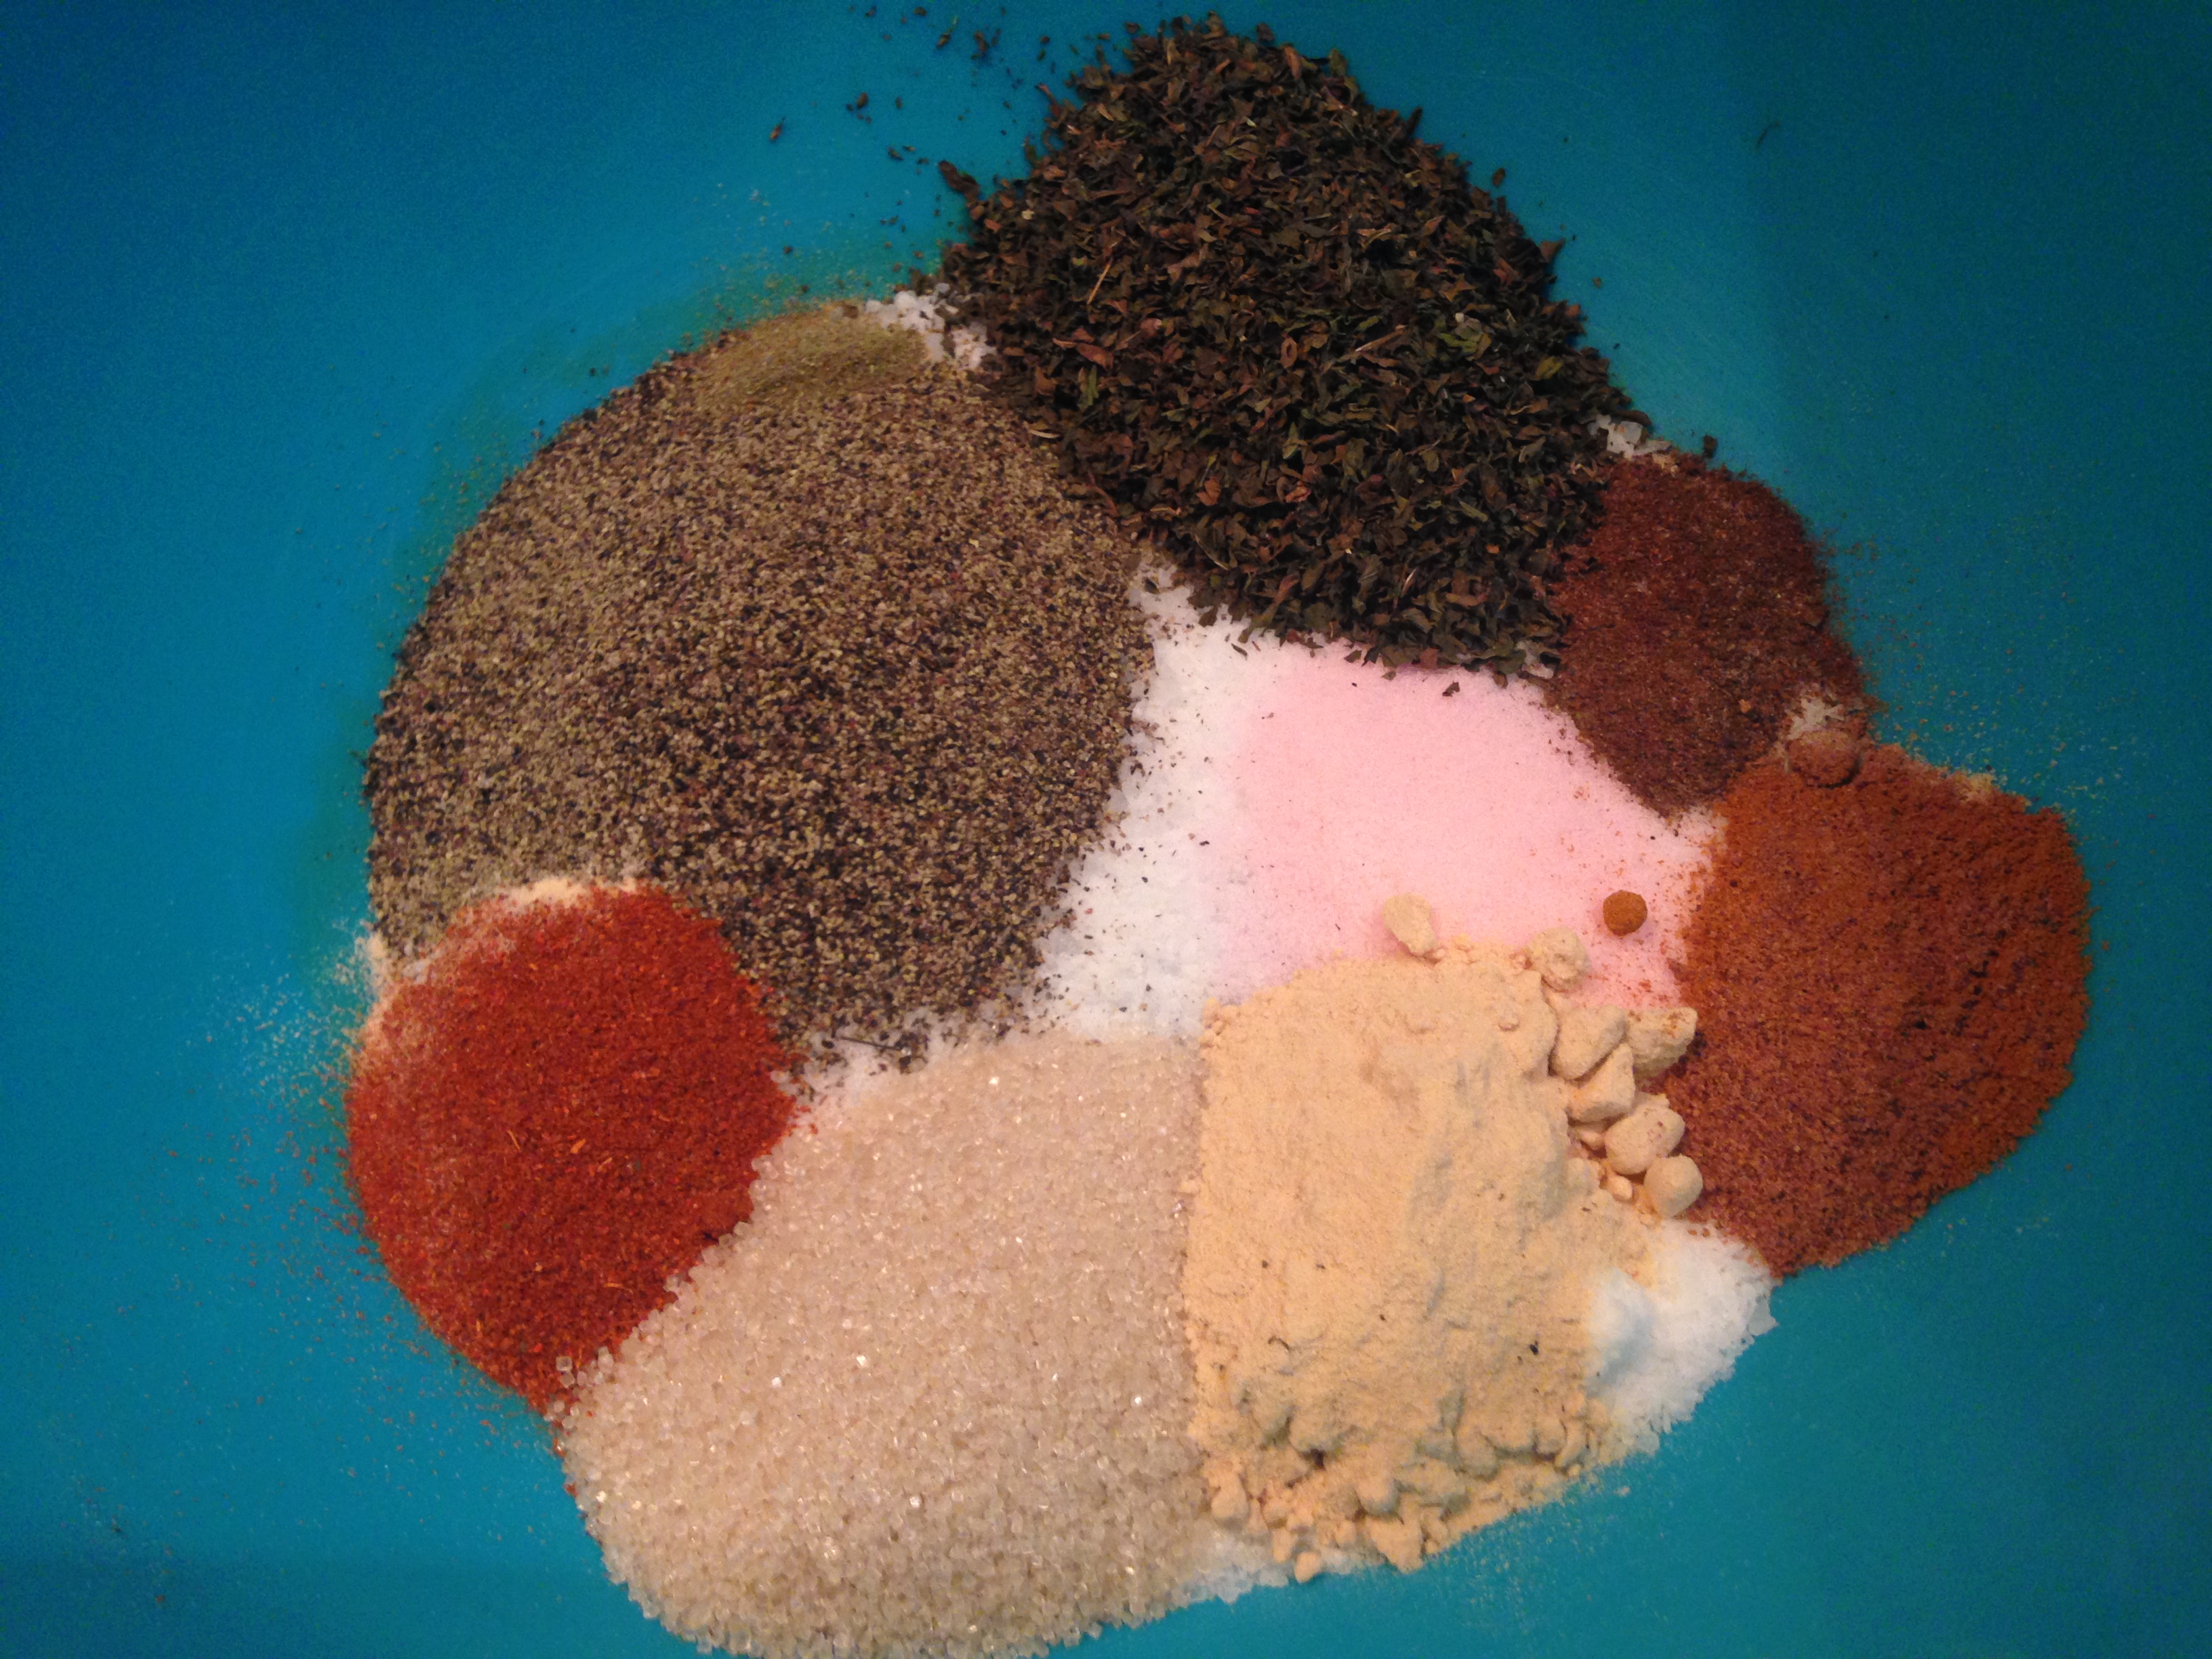
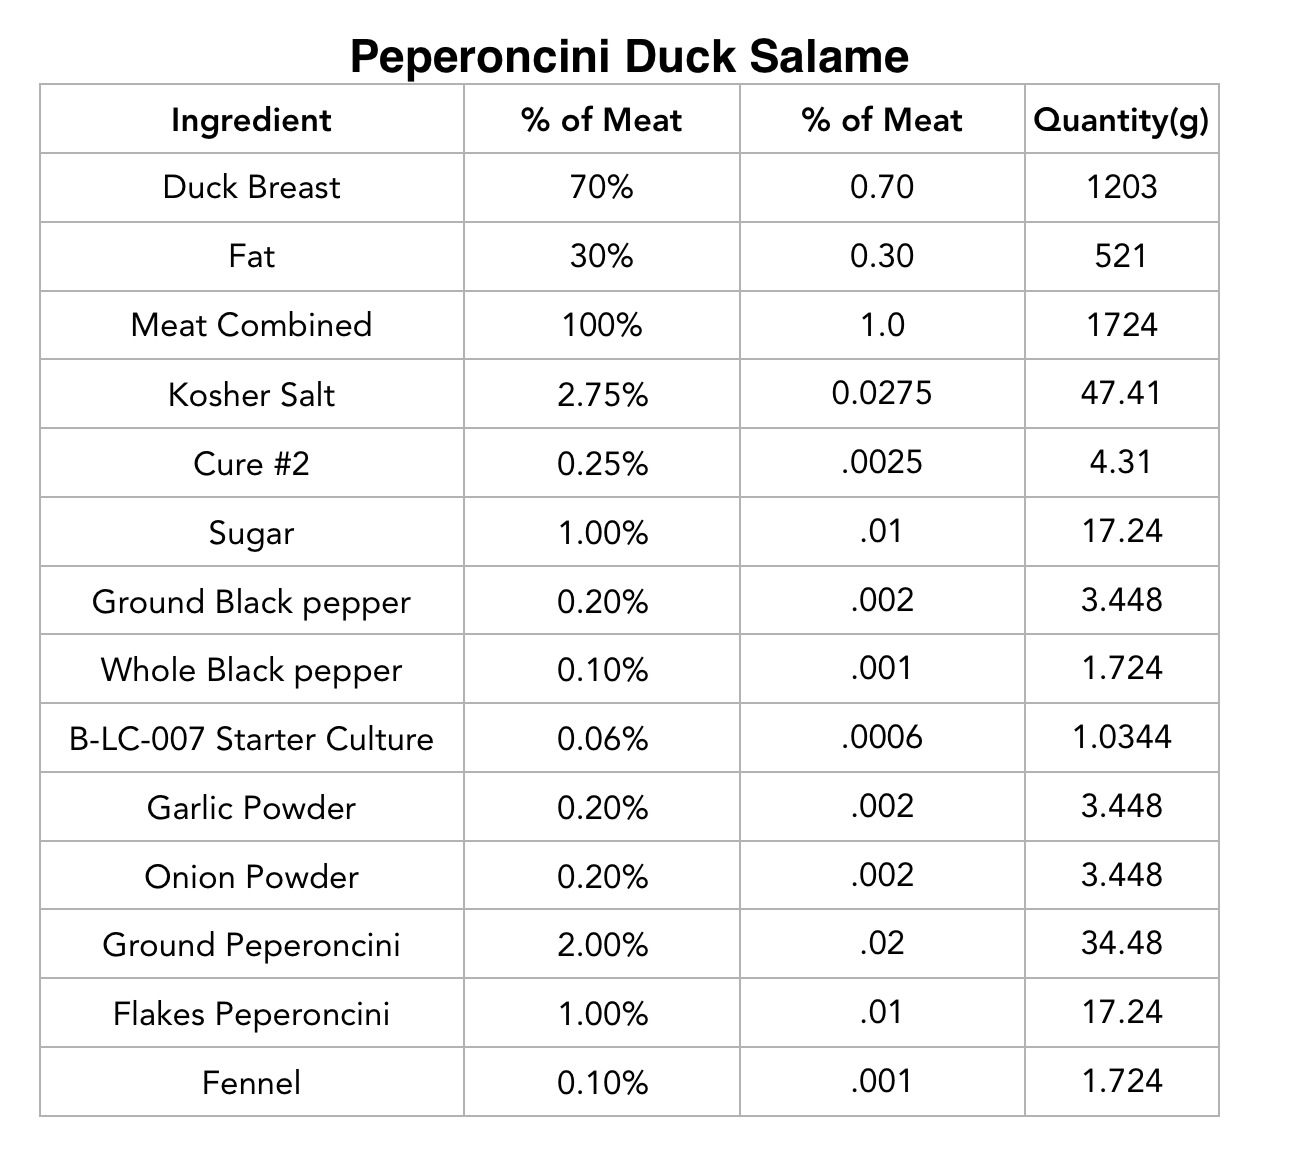
I weighed everything necessary for the cure, and mixed it altogether (with the exception of the starter culture).
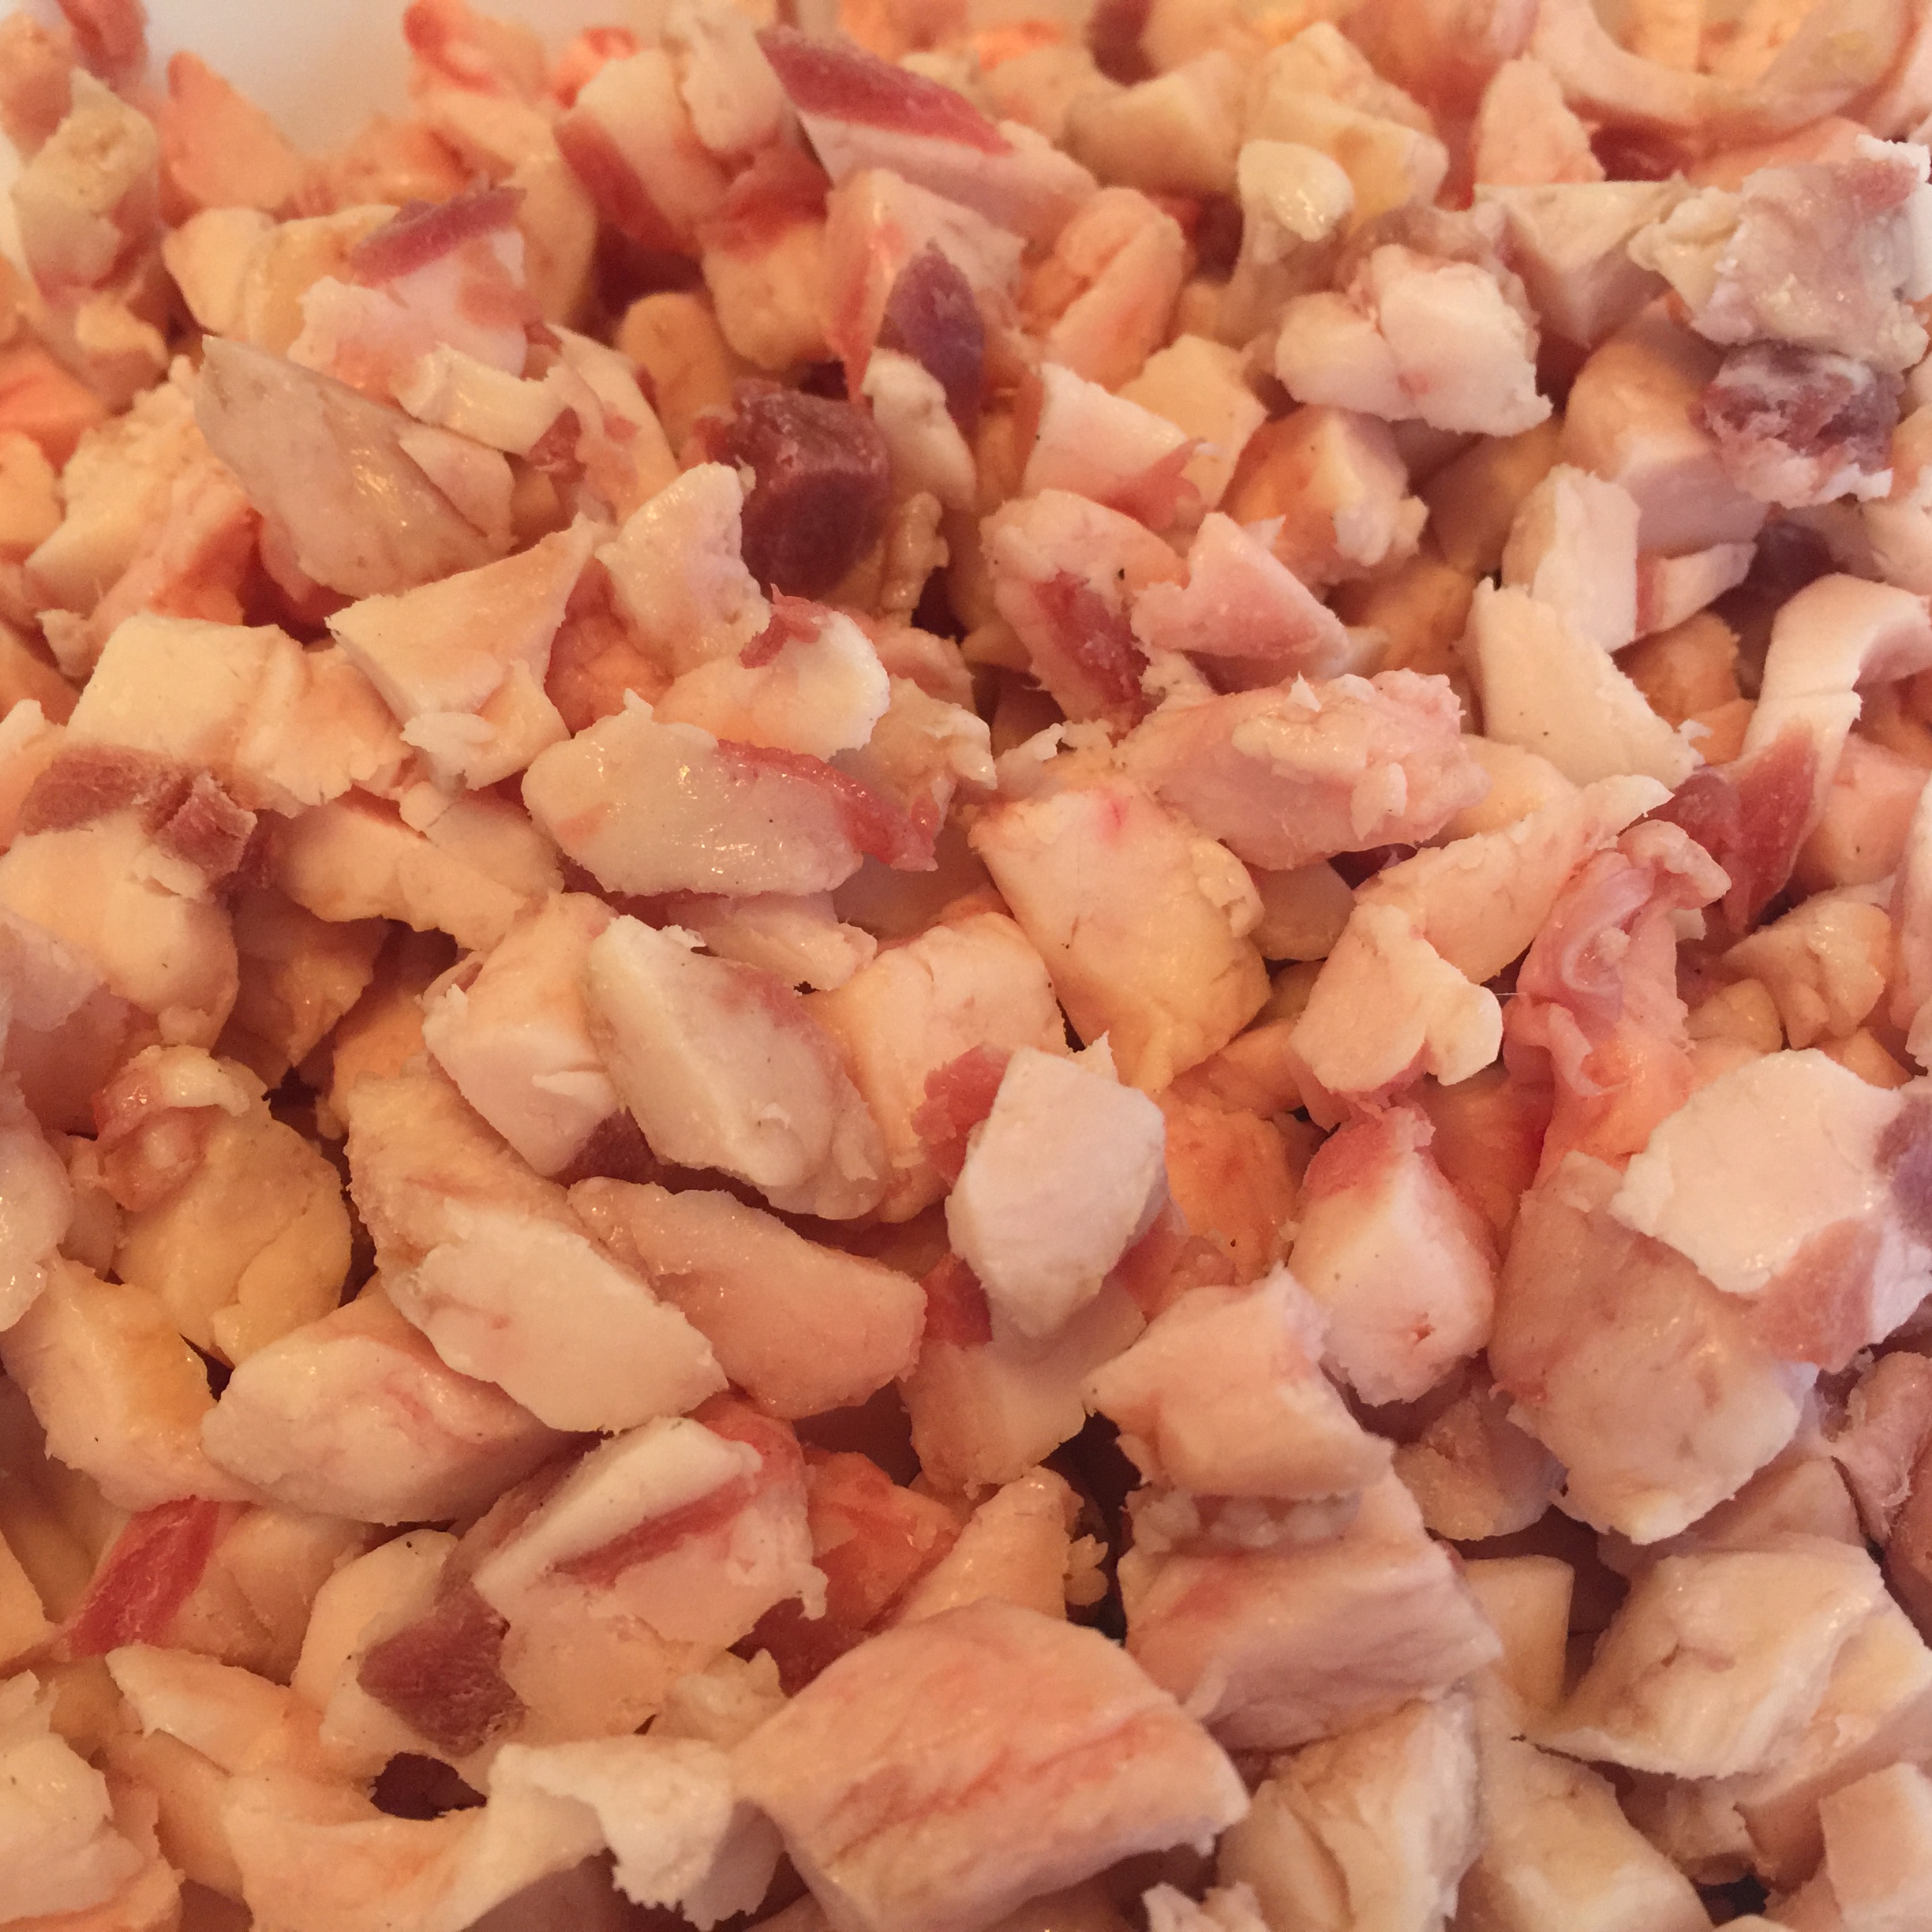

Meat Cubing Phase:

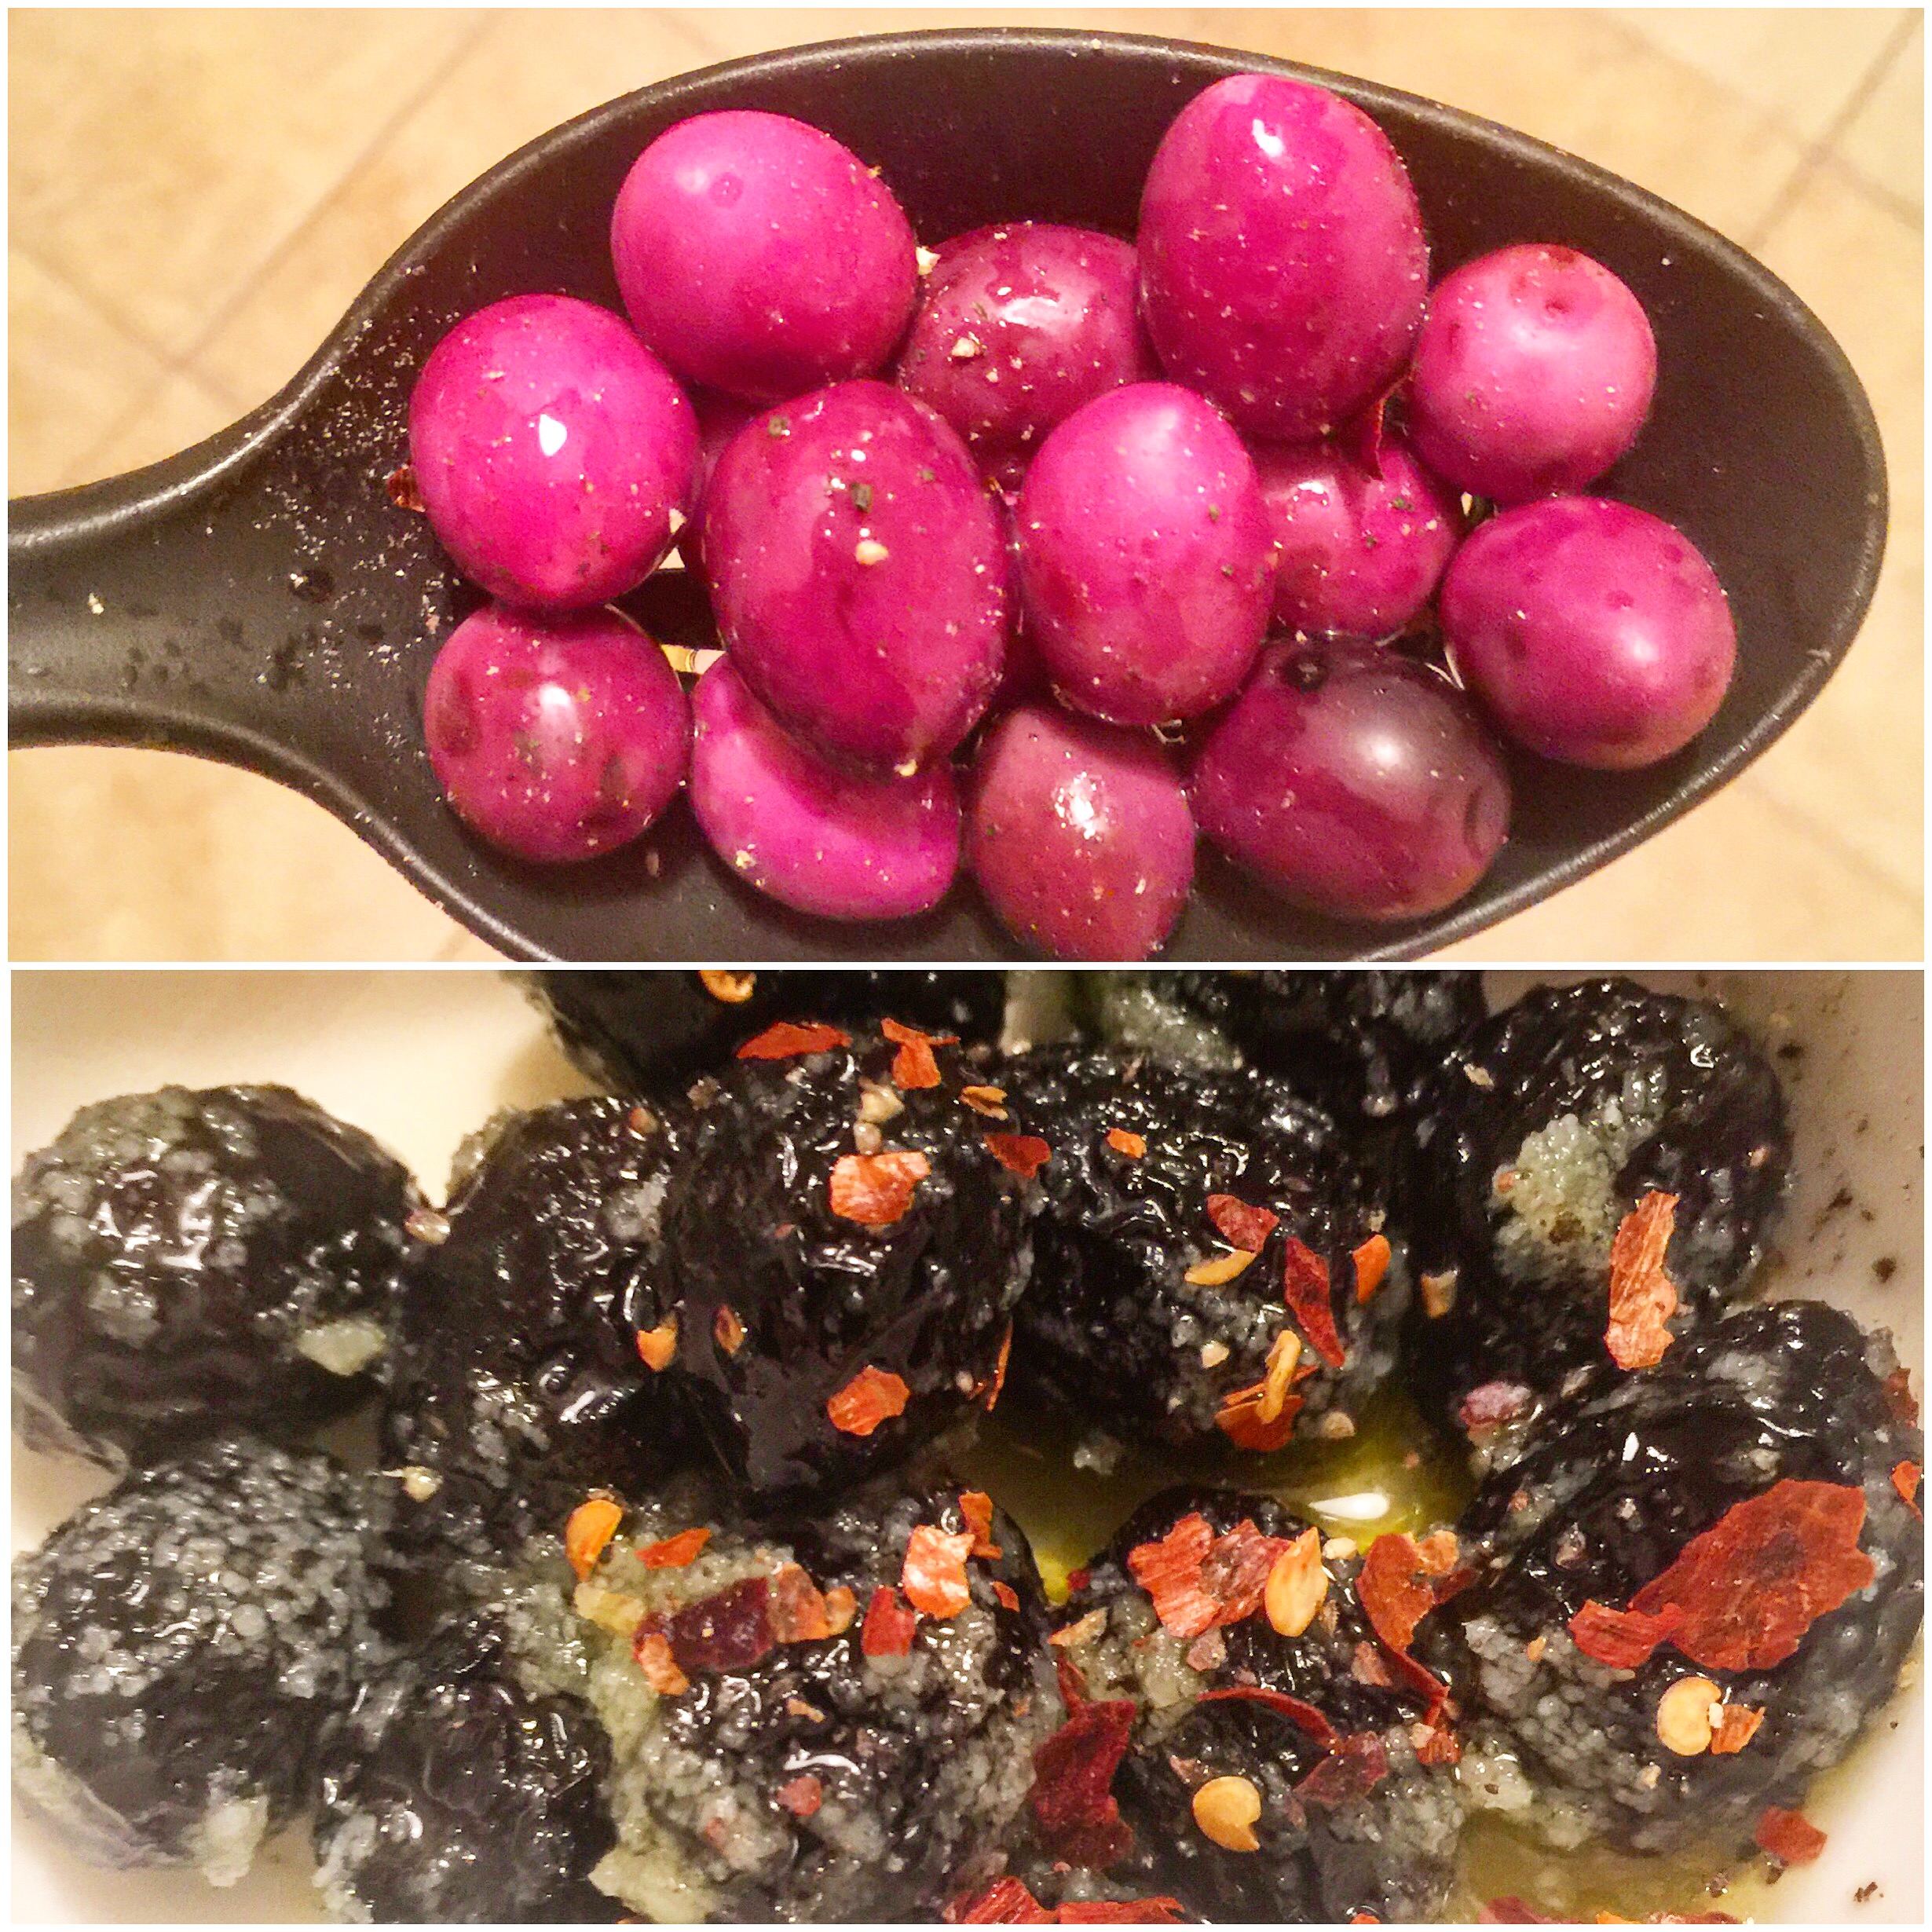
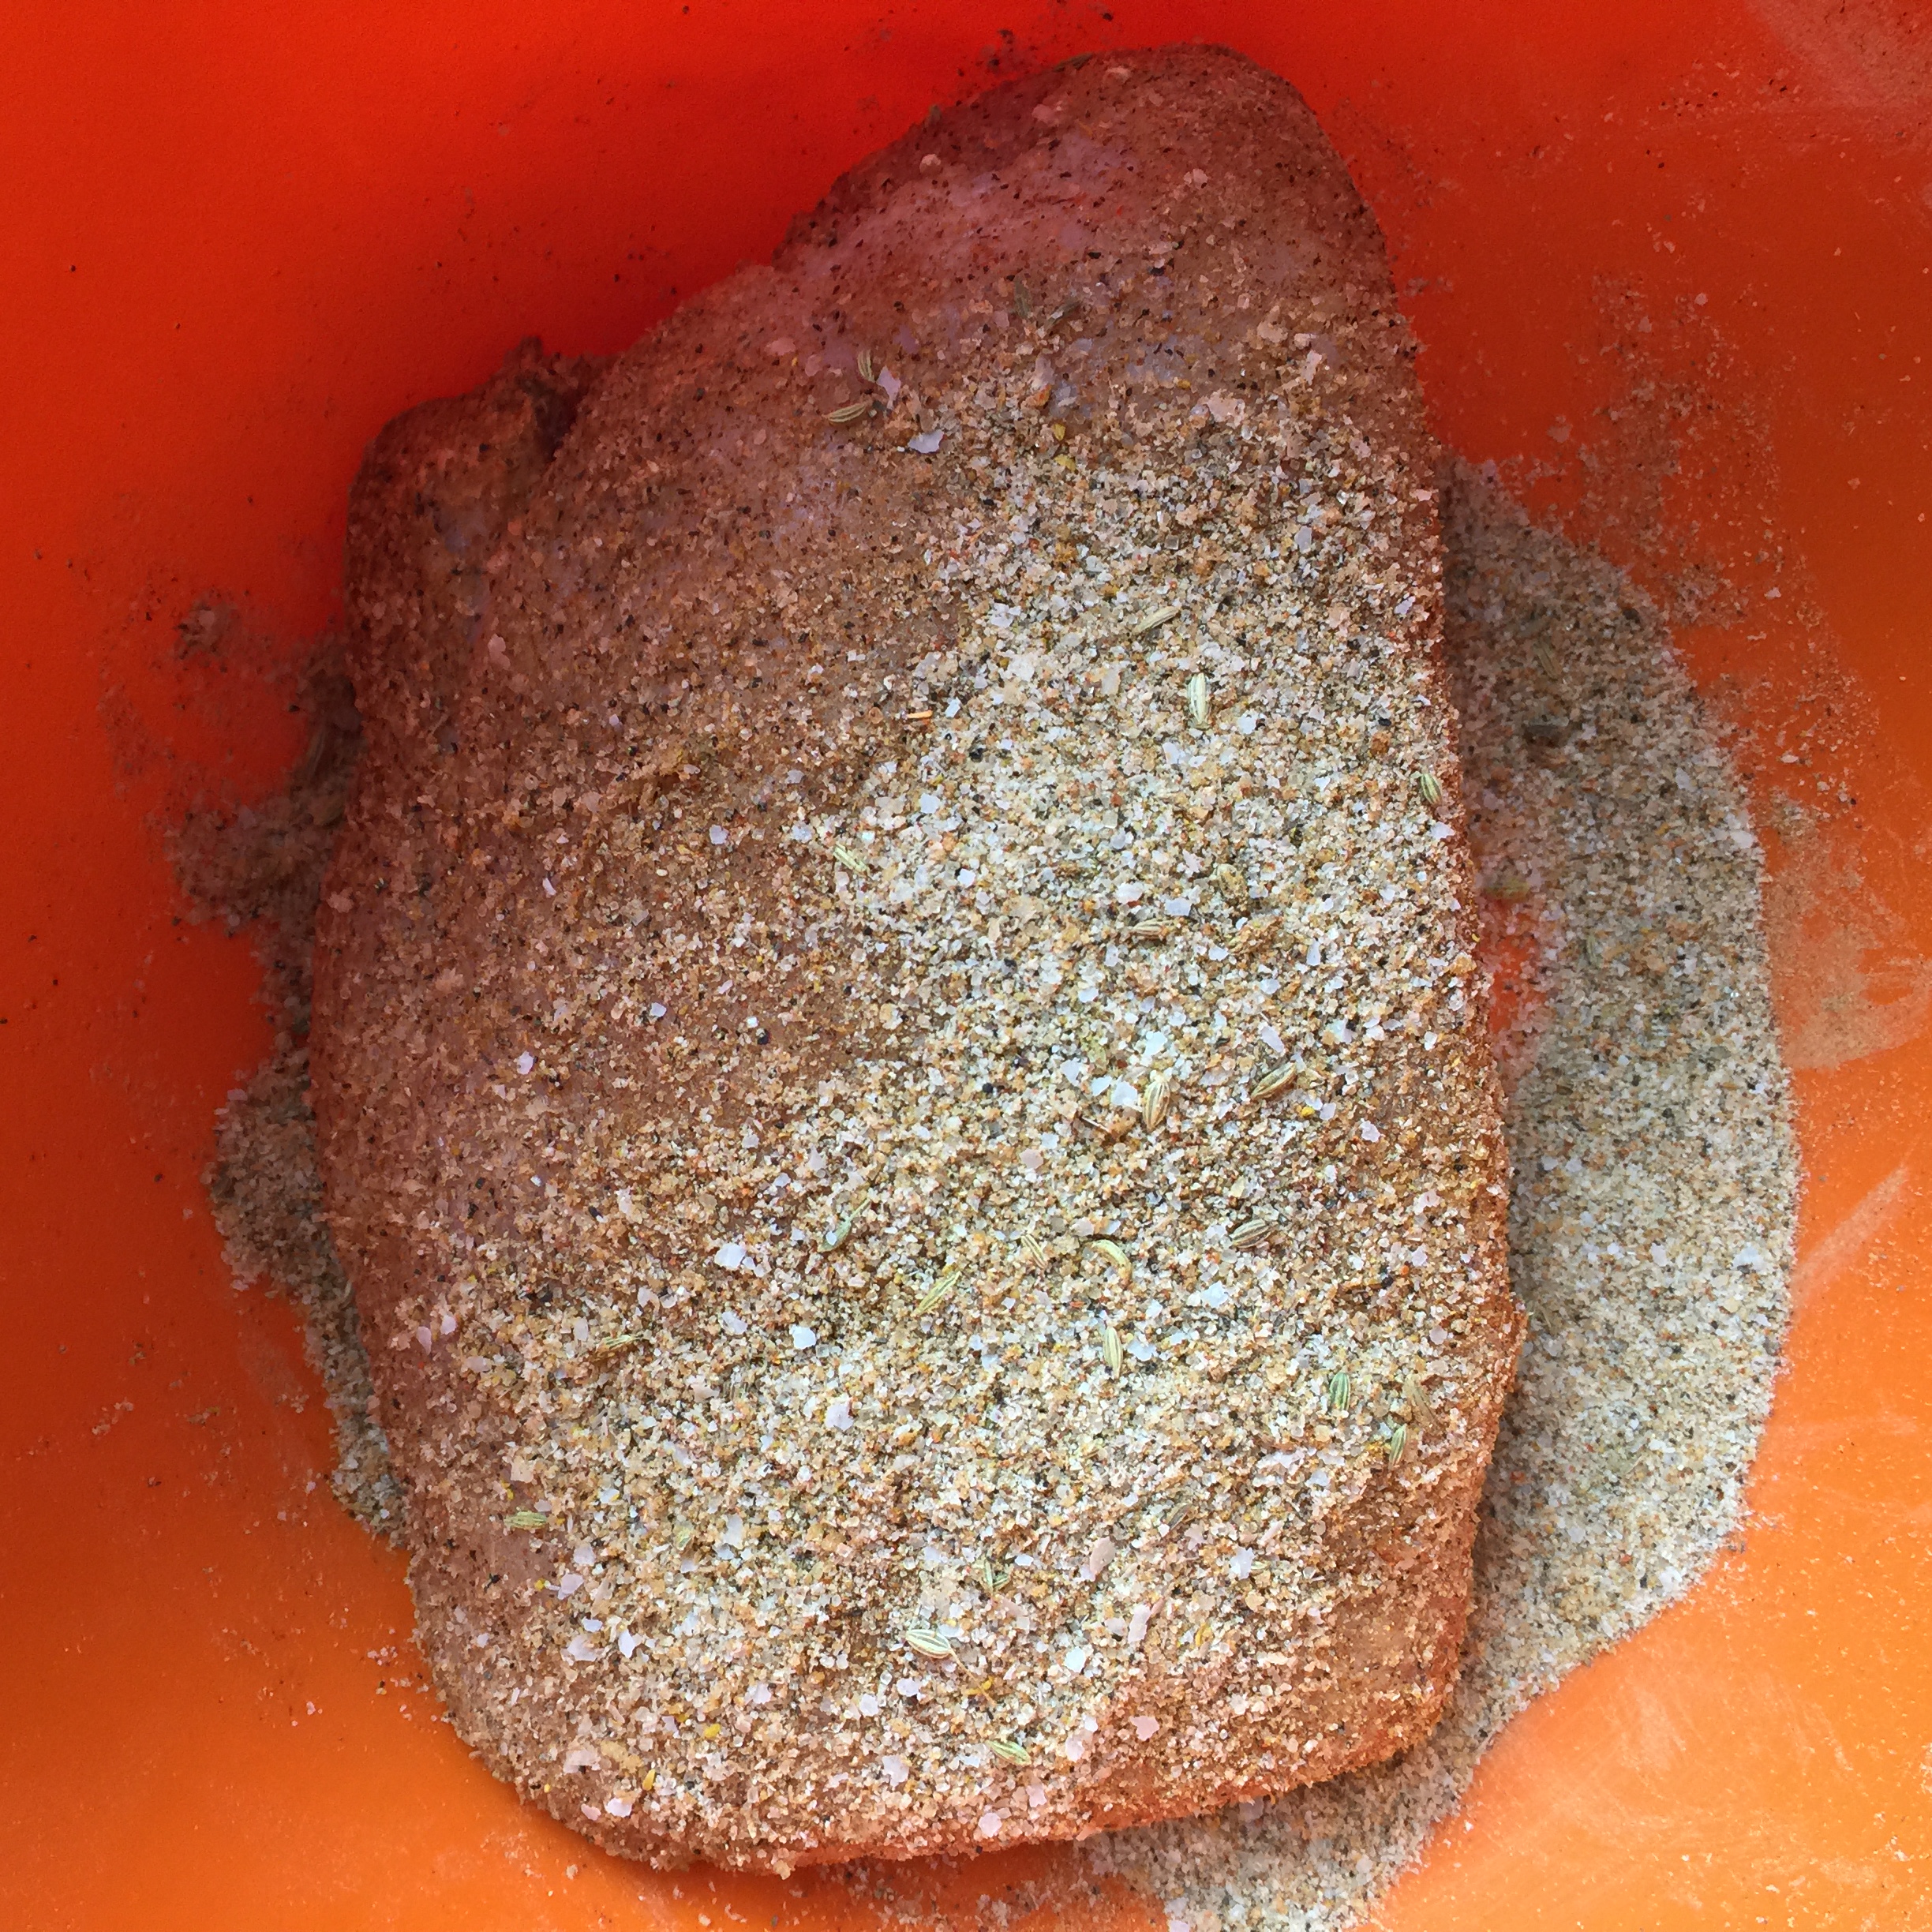
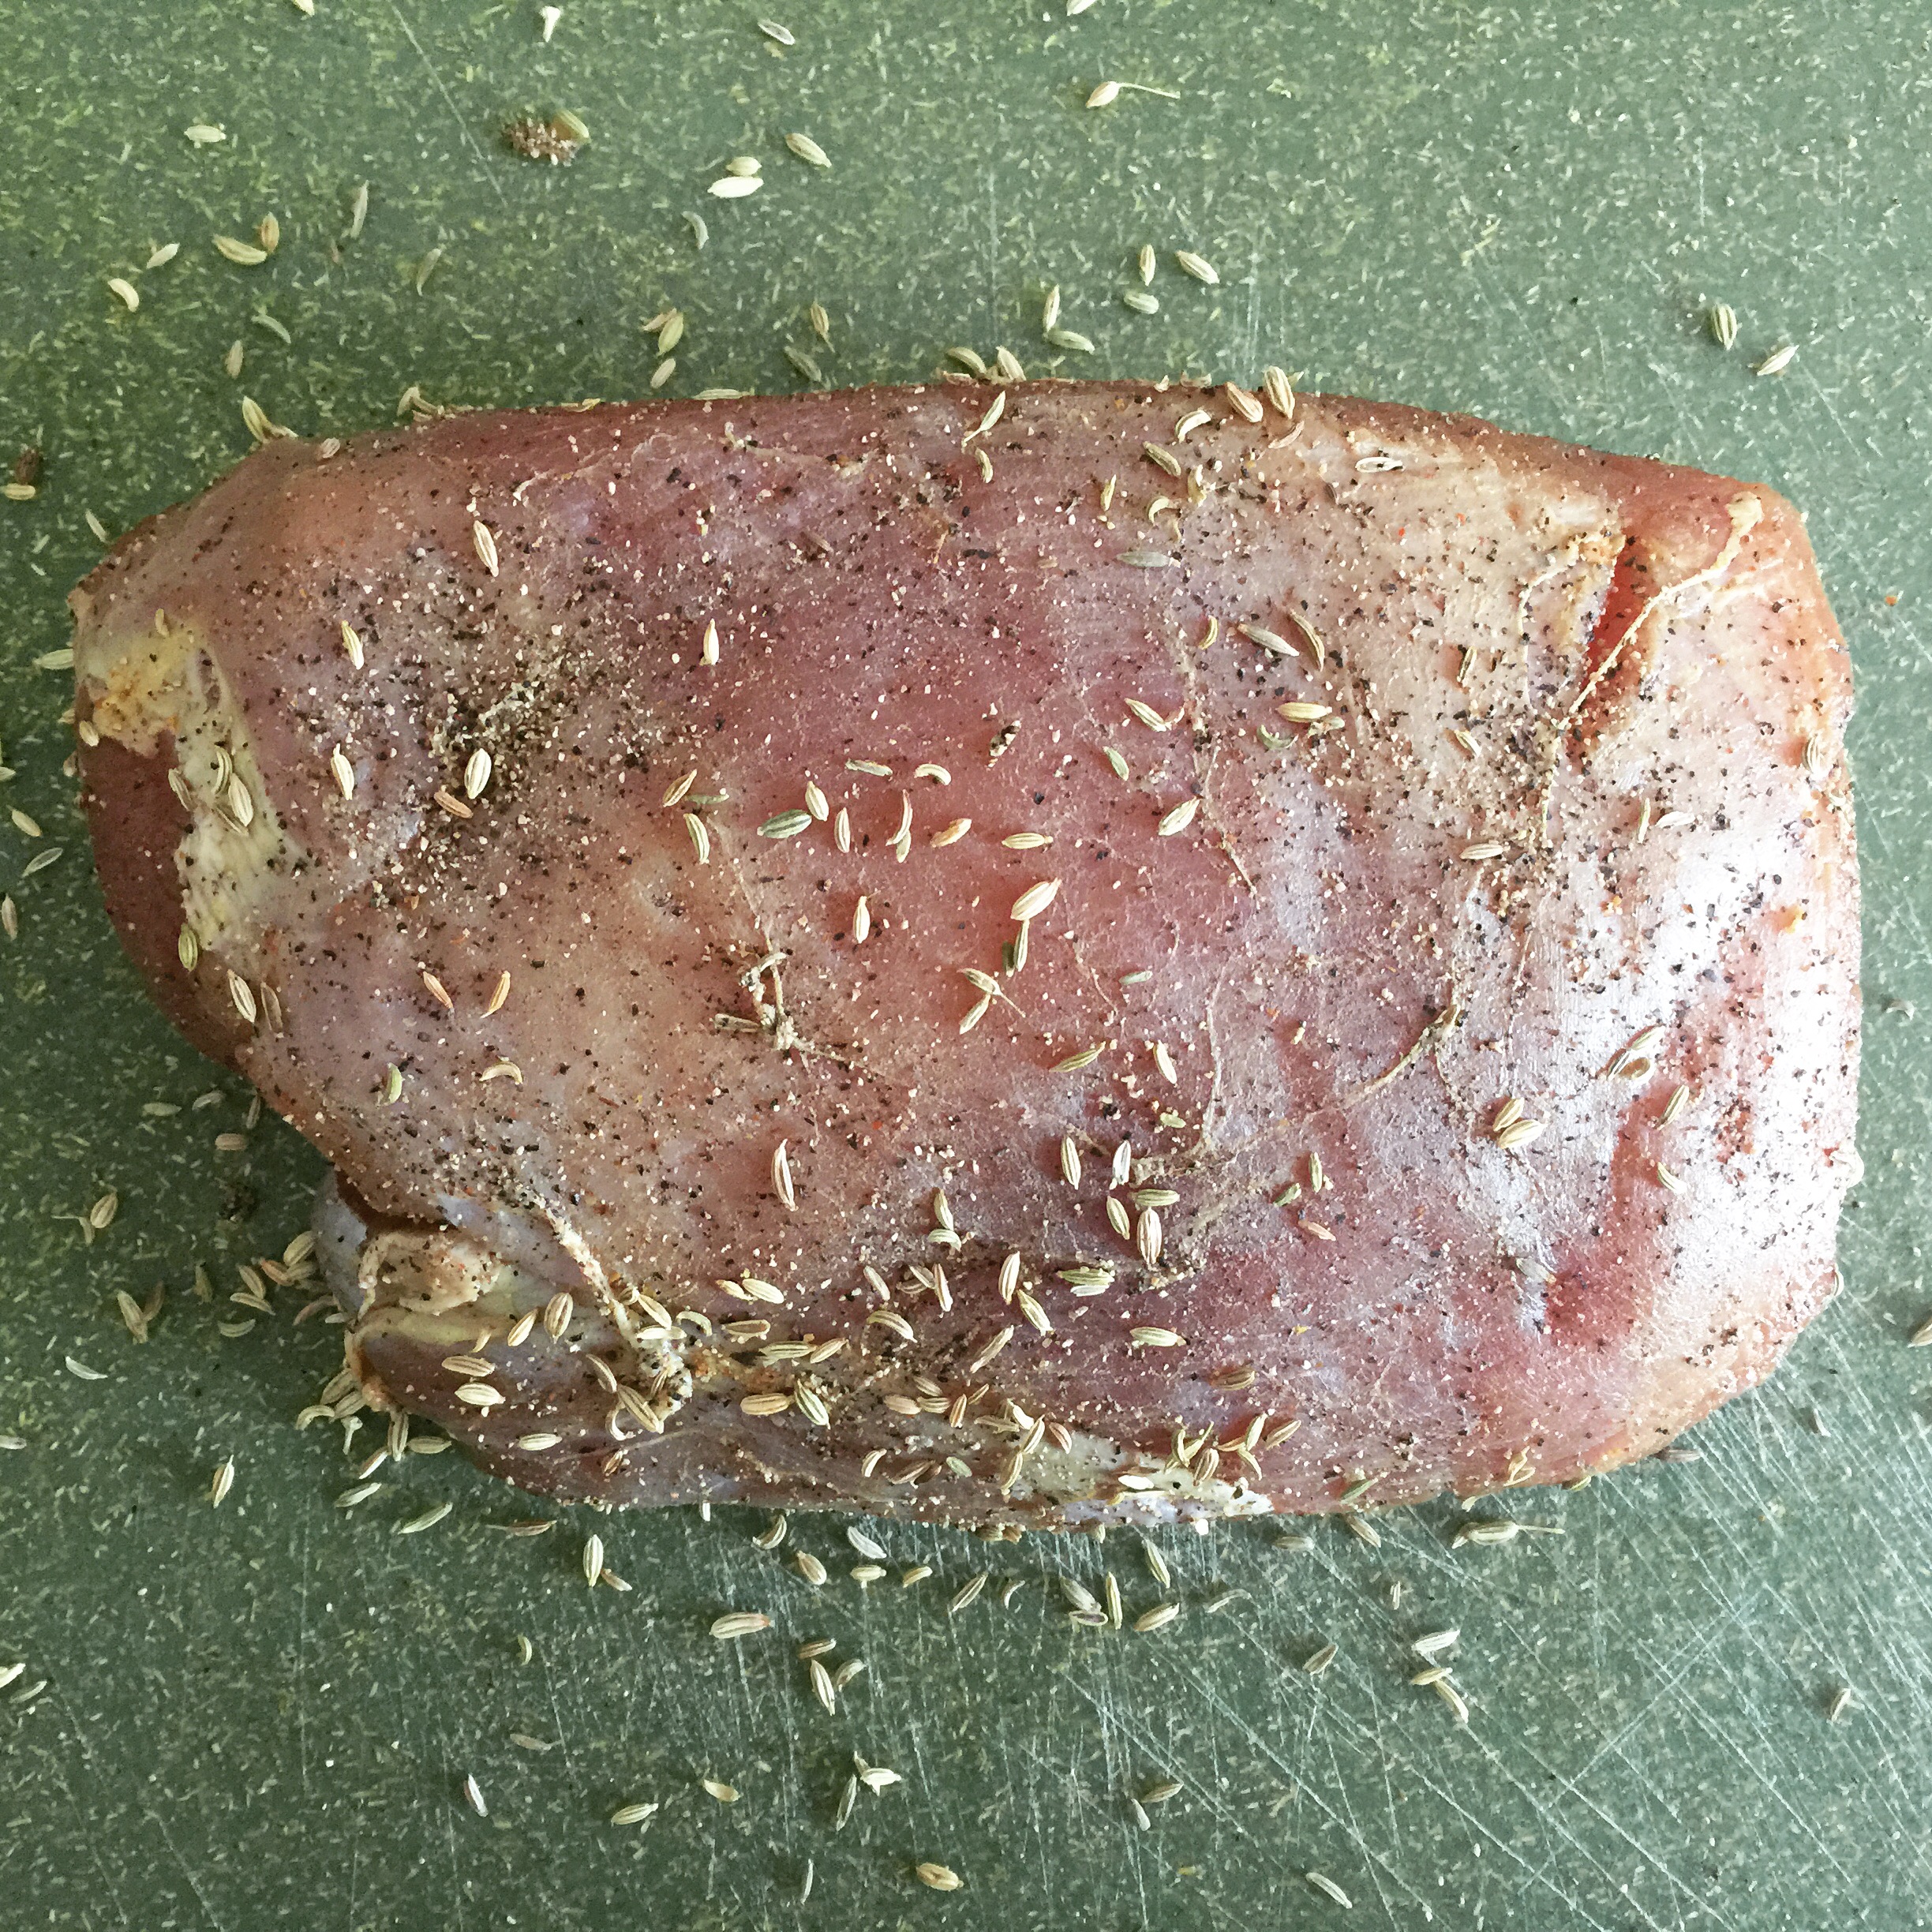
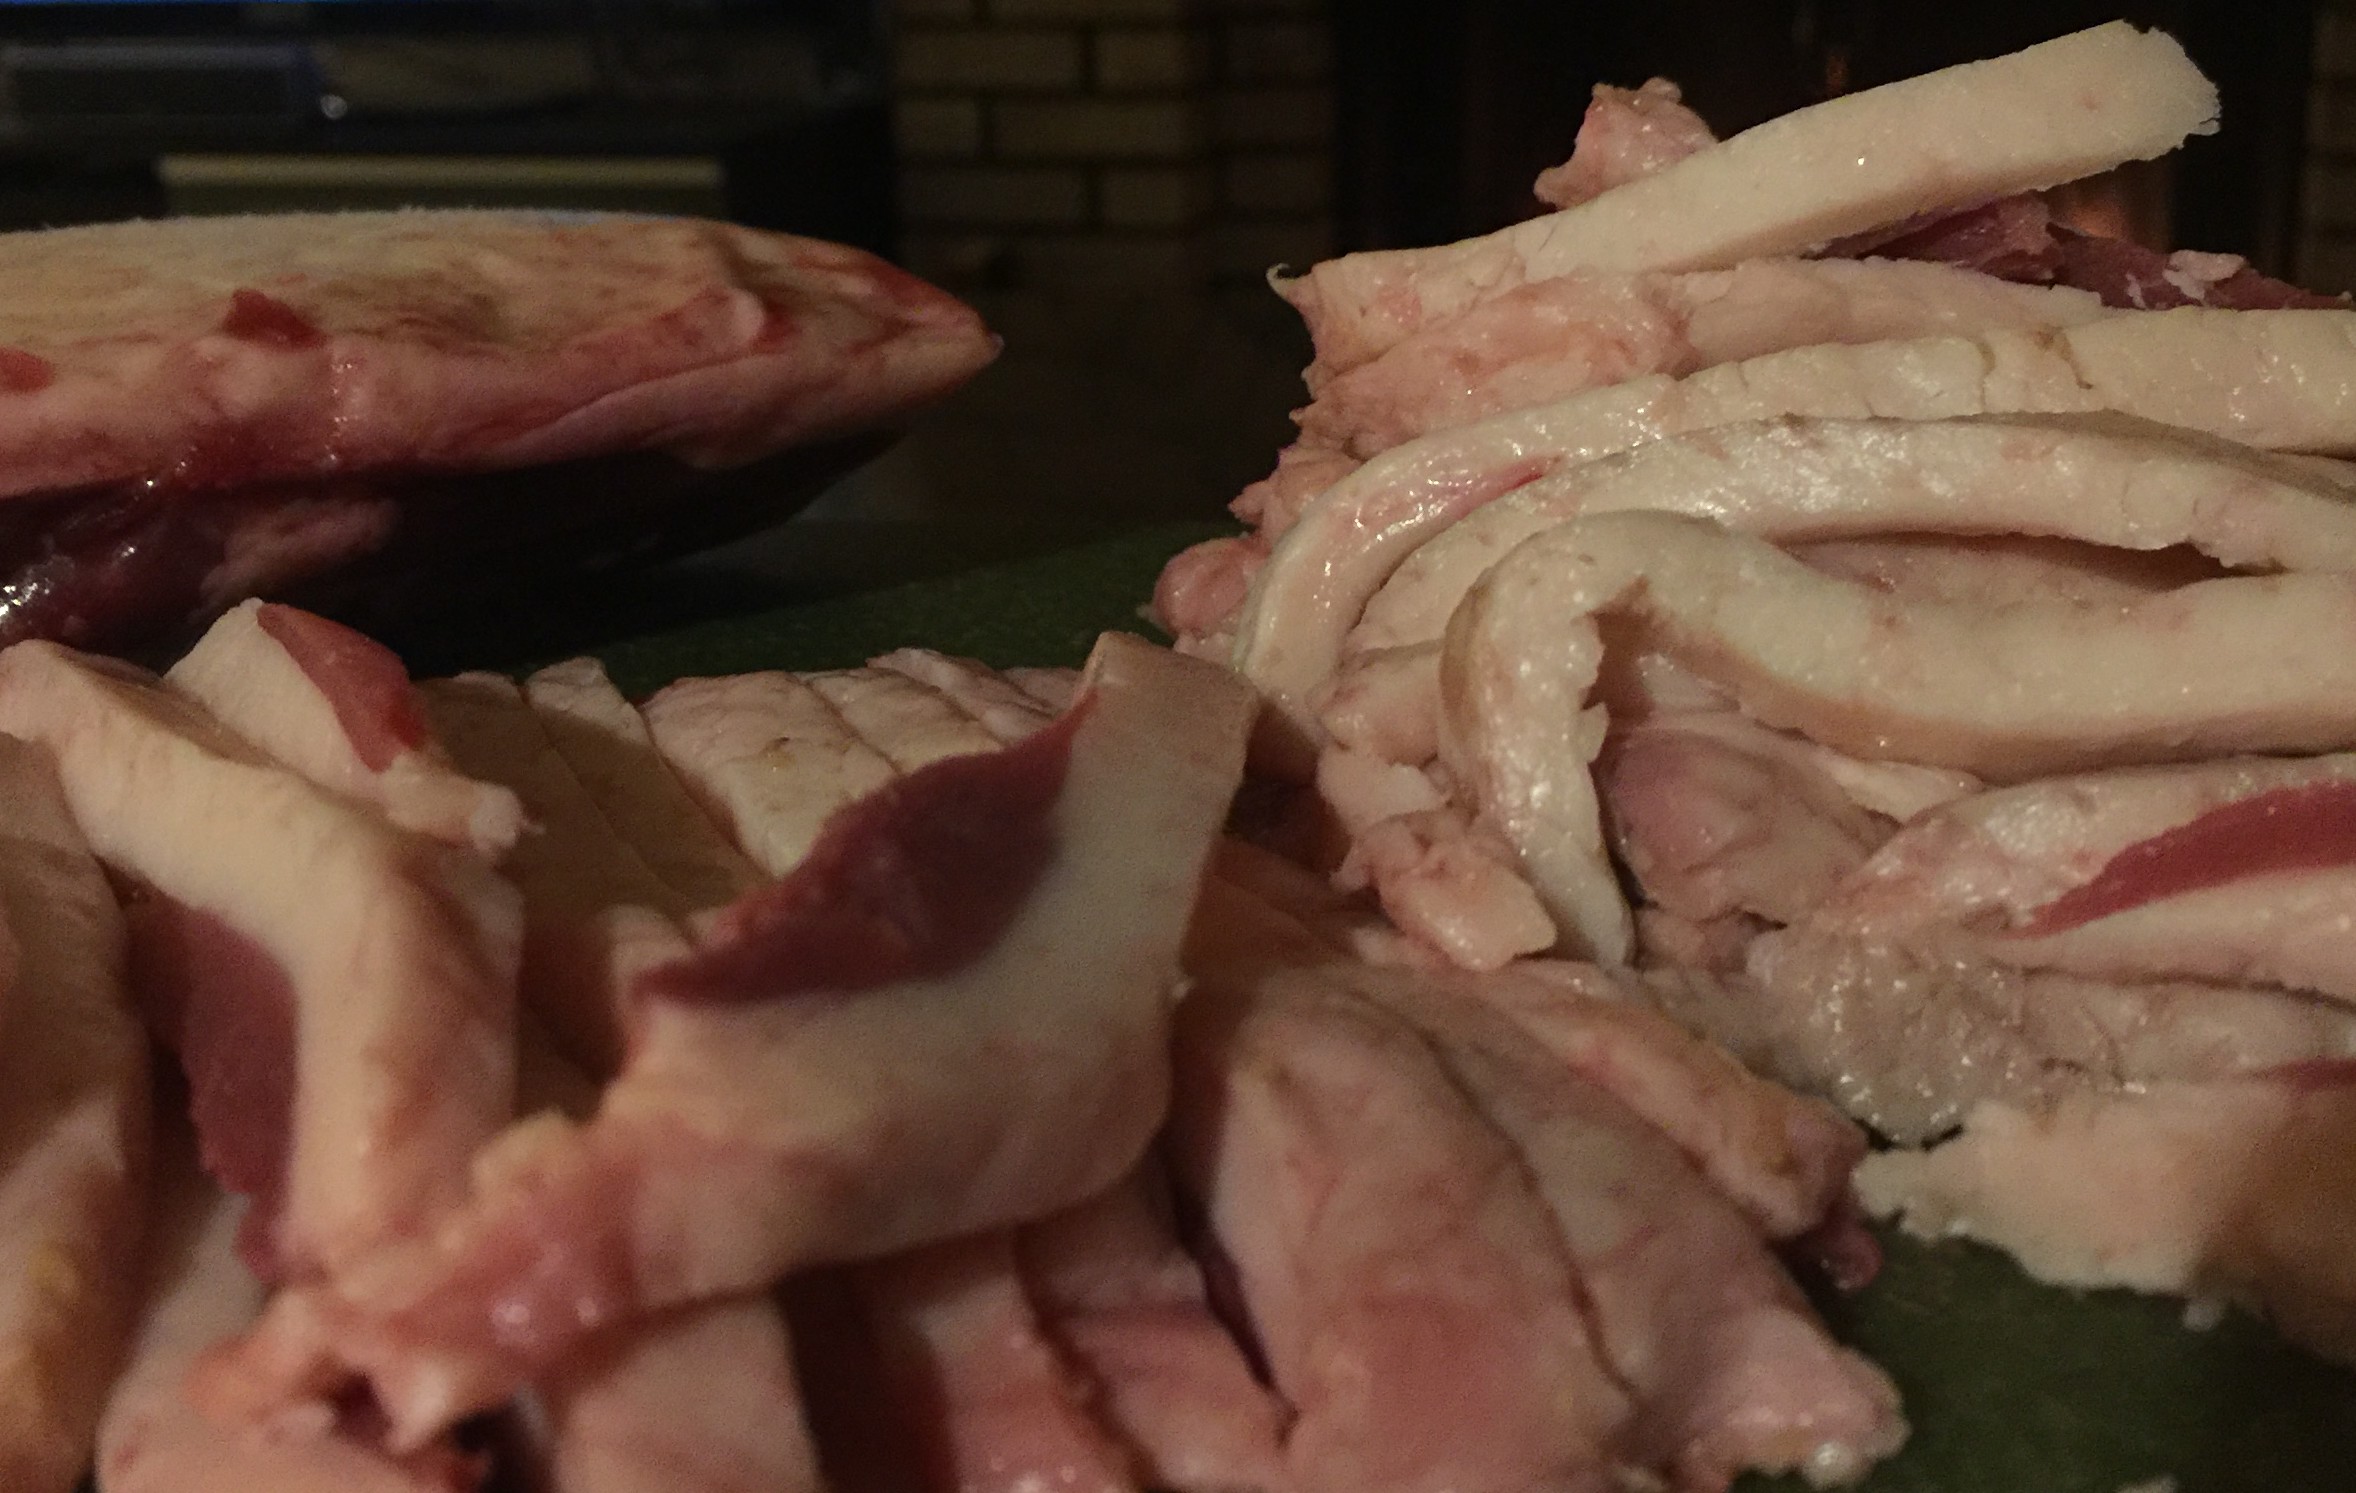
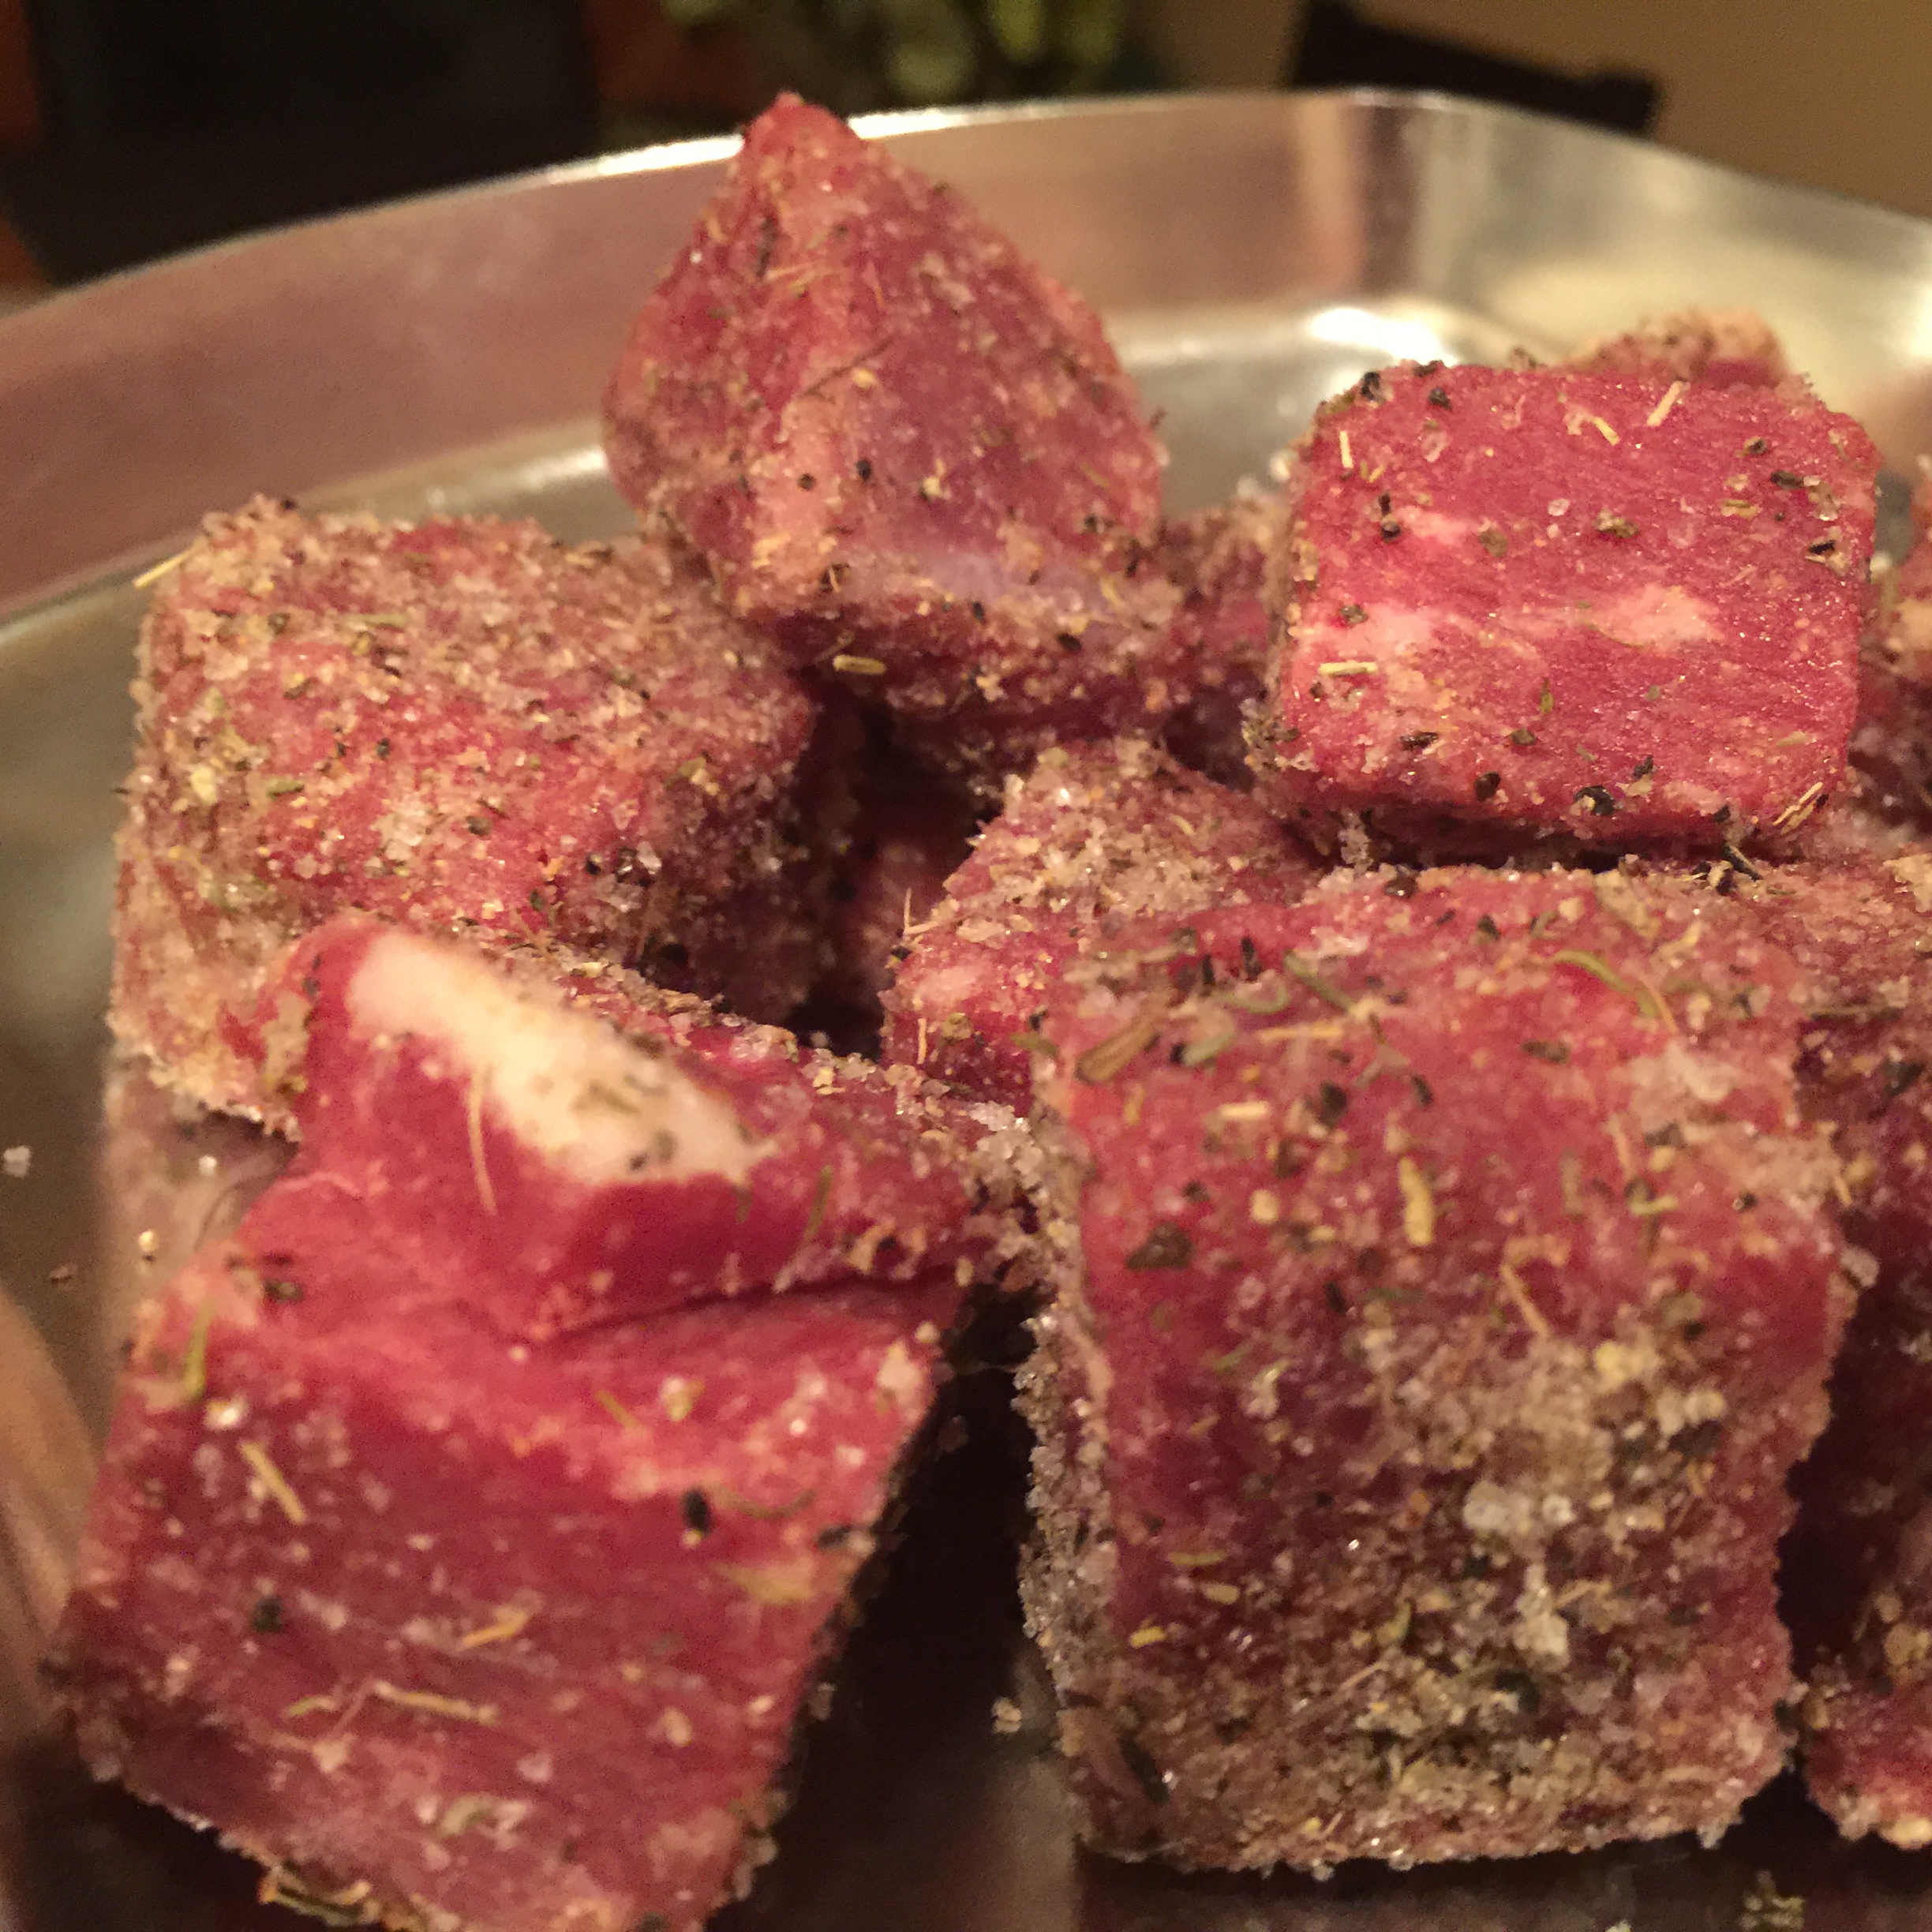
After I weighed all of the meat, fat, and cure spices, I was ready to move on. I cubed both the fat and the meat and kept them separate.

In this case, I mixed the cure with the cubed meat. I don’t always do this; sometimes I wait to mix the cure with the ground meat. I haven’t assessed which method is best yet, and both have worked for me.


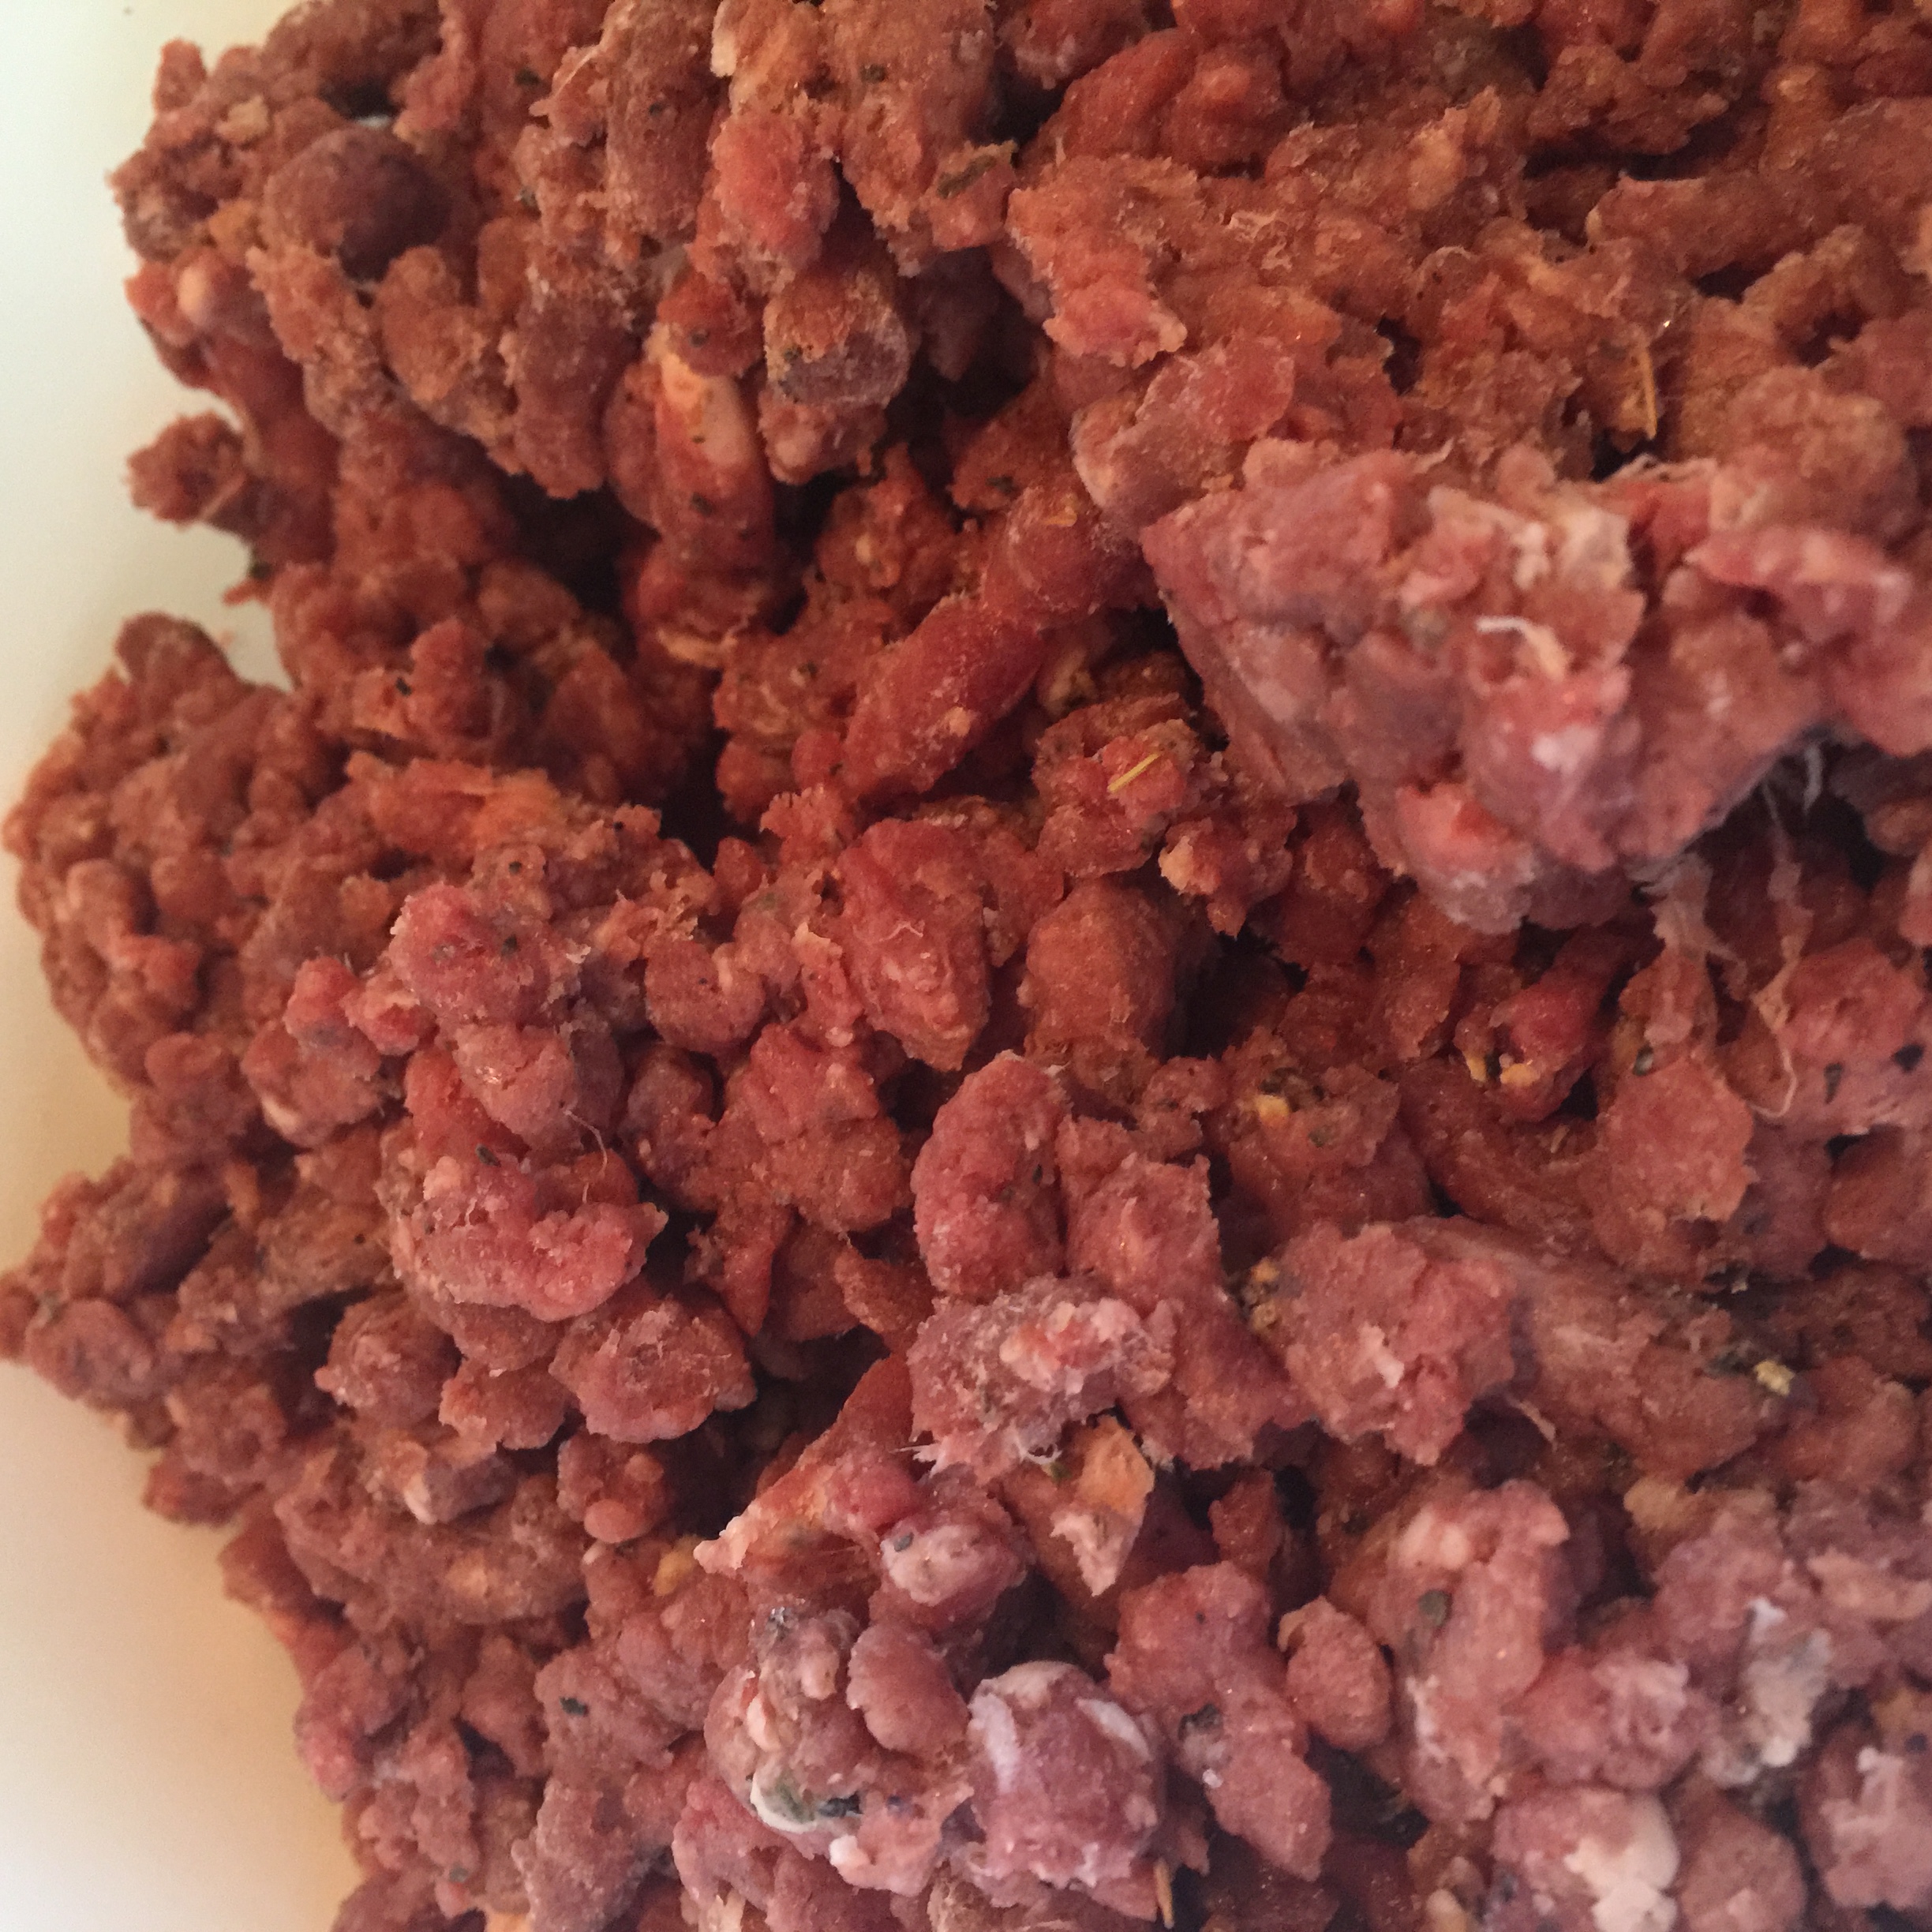
Meat Grinding Phase:

After I cubed the meat, I put it back in the freezer to let it get colder again. After an hour or so, I was ready to grind the meat. I had decided to use a course ground on the duck meat, and hand cut the duck fat in order to avoid smearing.

image(7)

image(11)

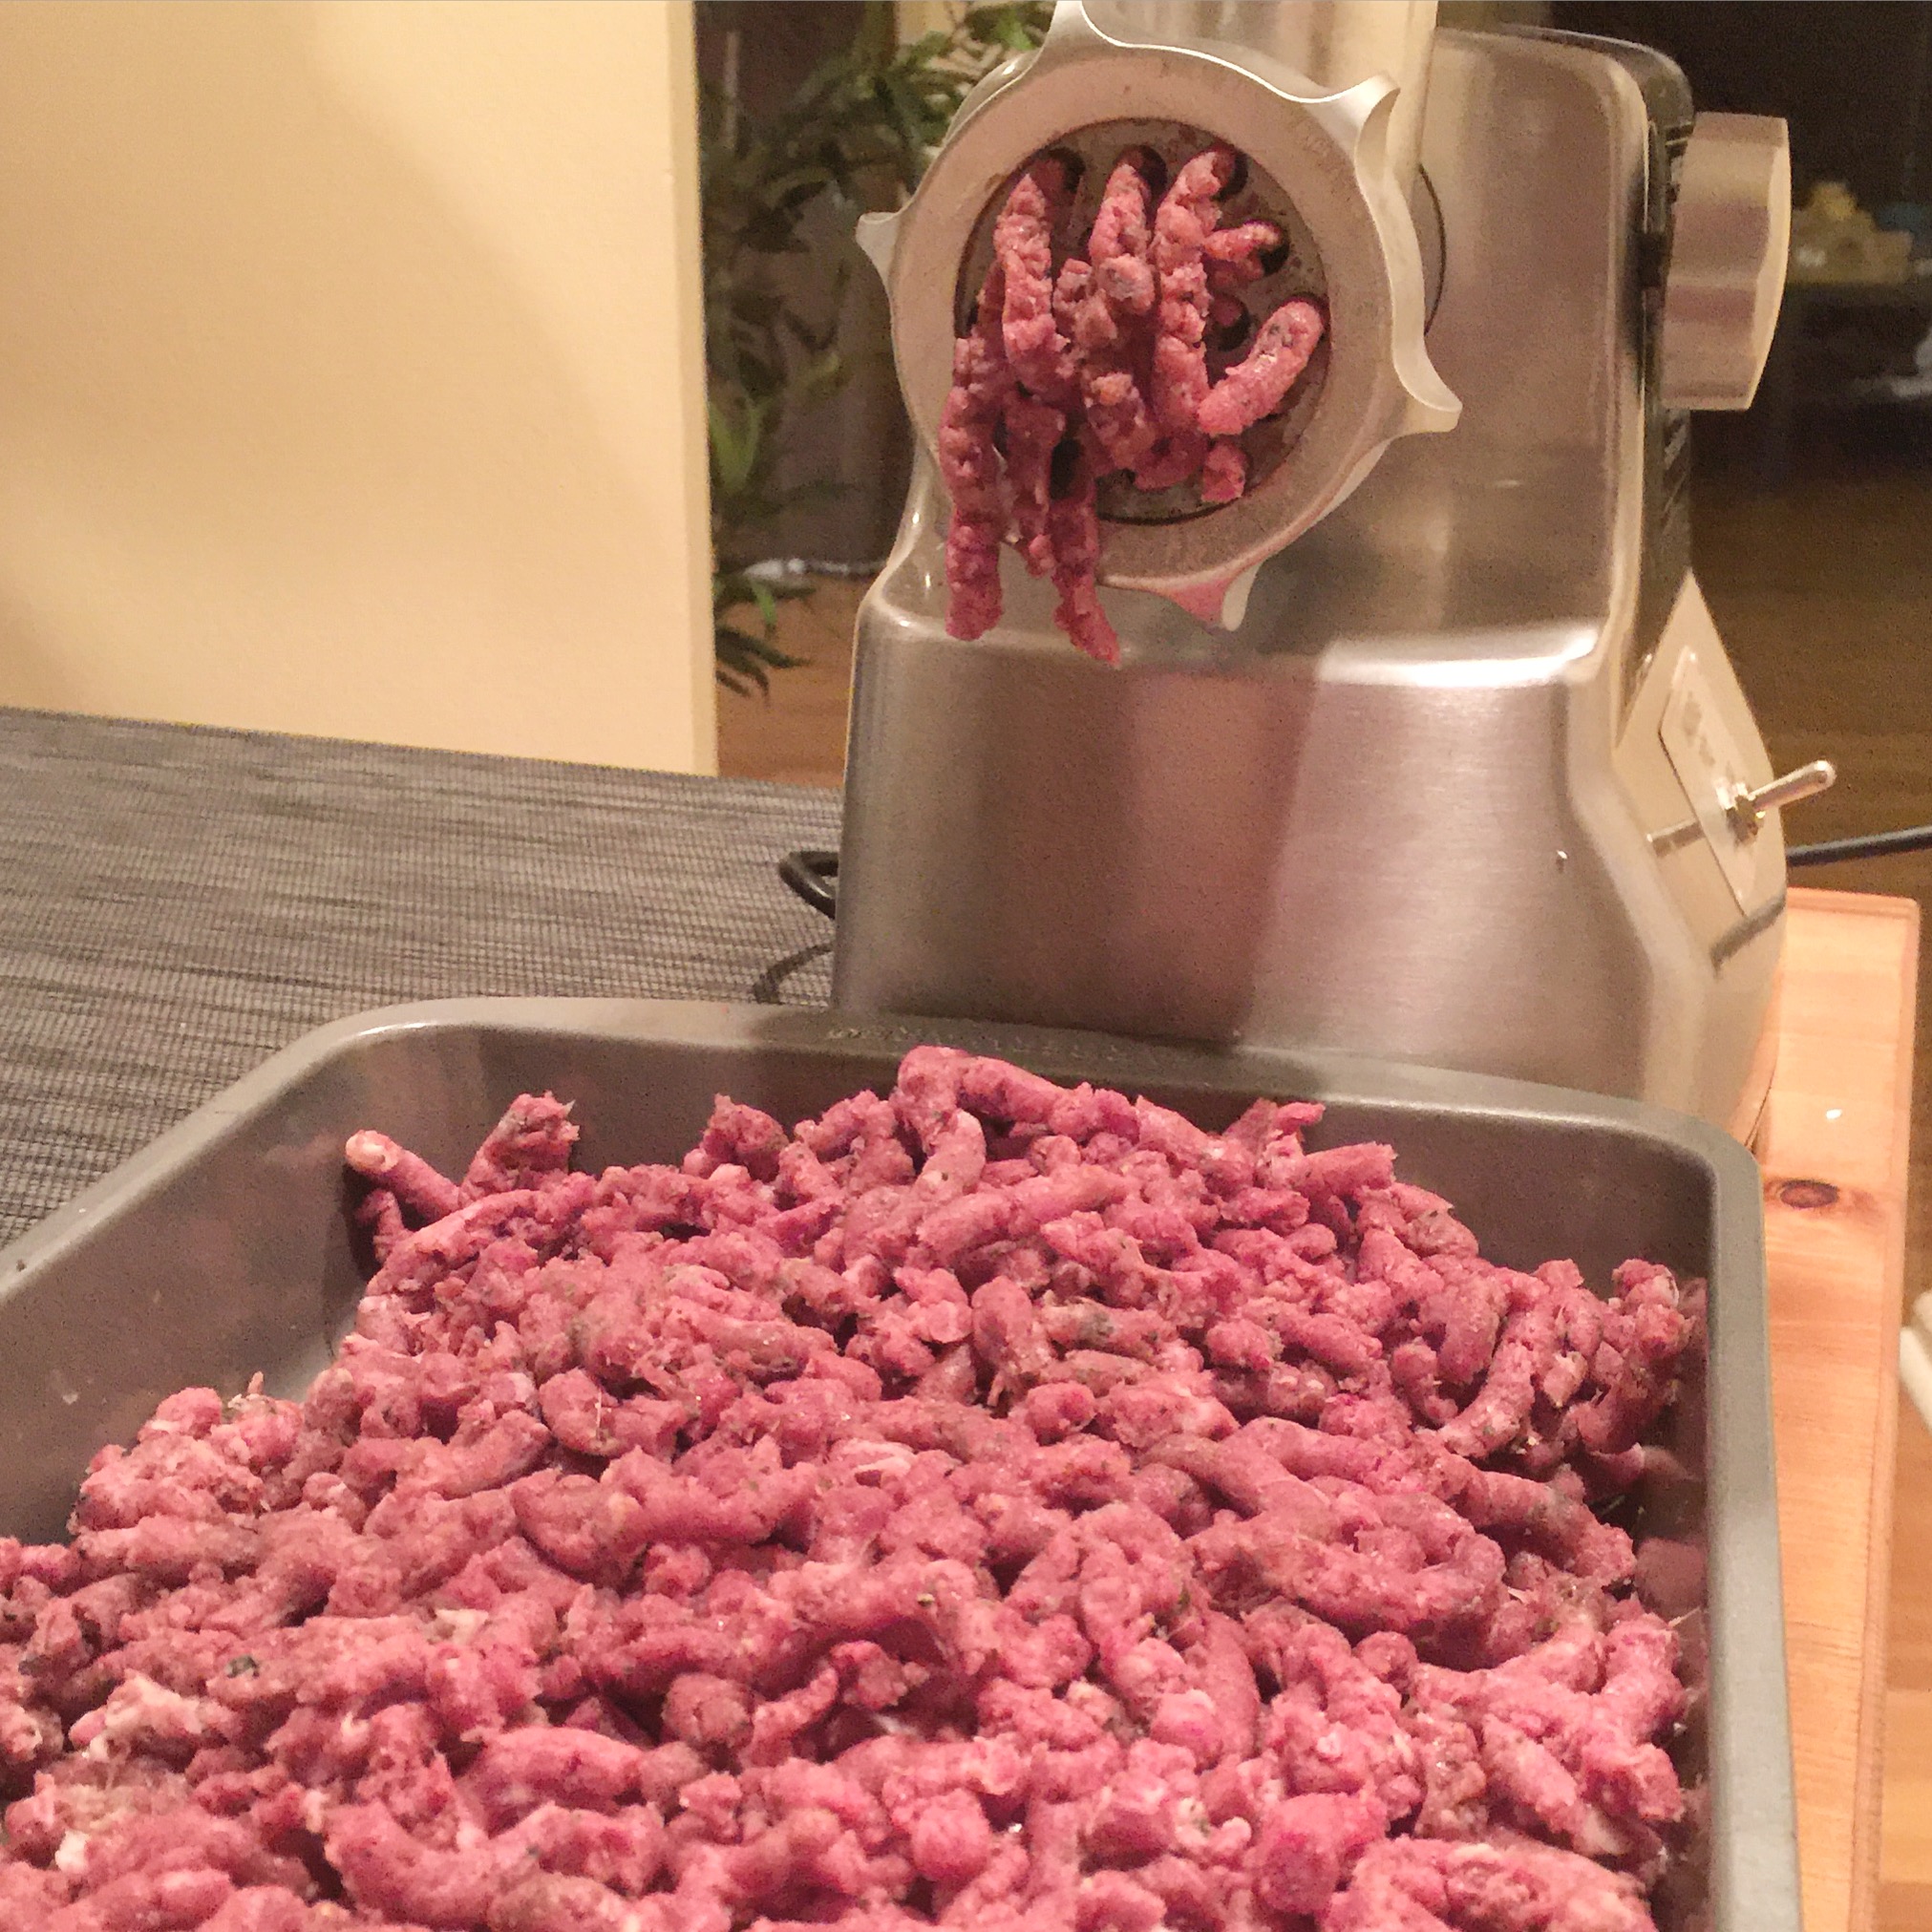
I ran the meat through the meat grinder, and collected it into a bowl at the end. At this point, I had course ground duck meat and hand cut fat.

image(3)

image(2)

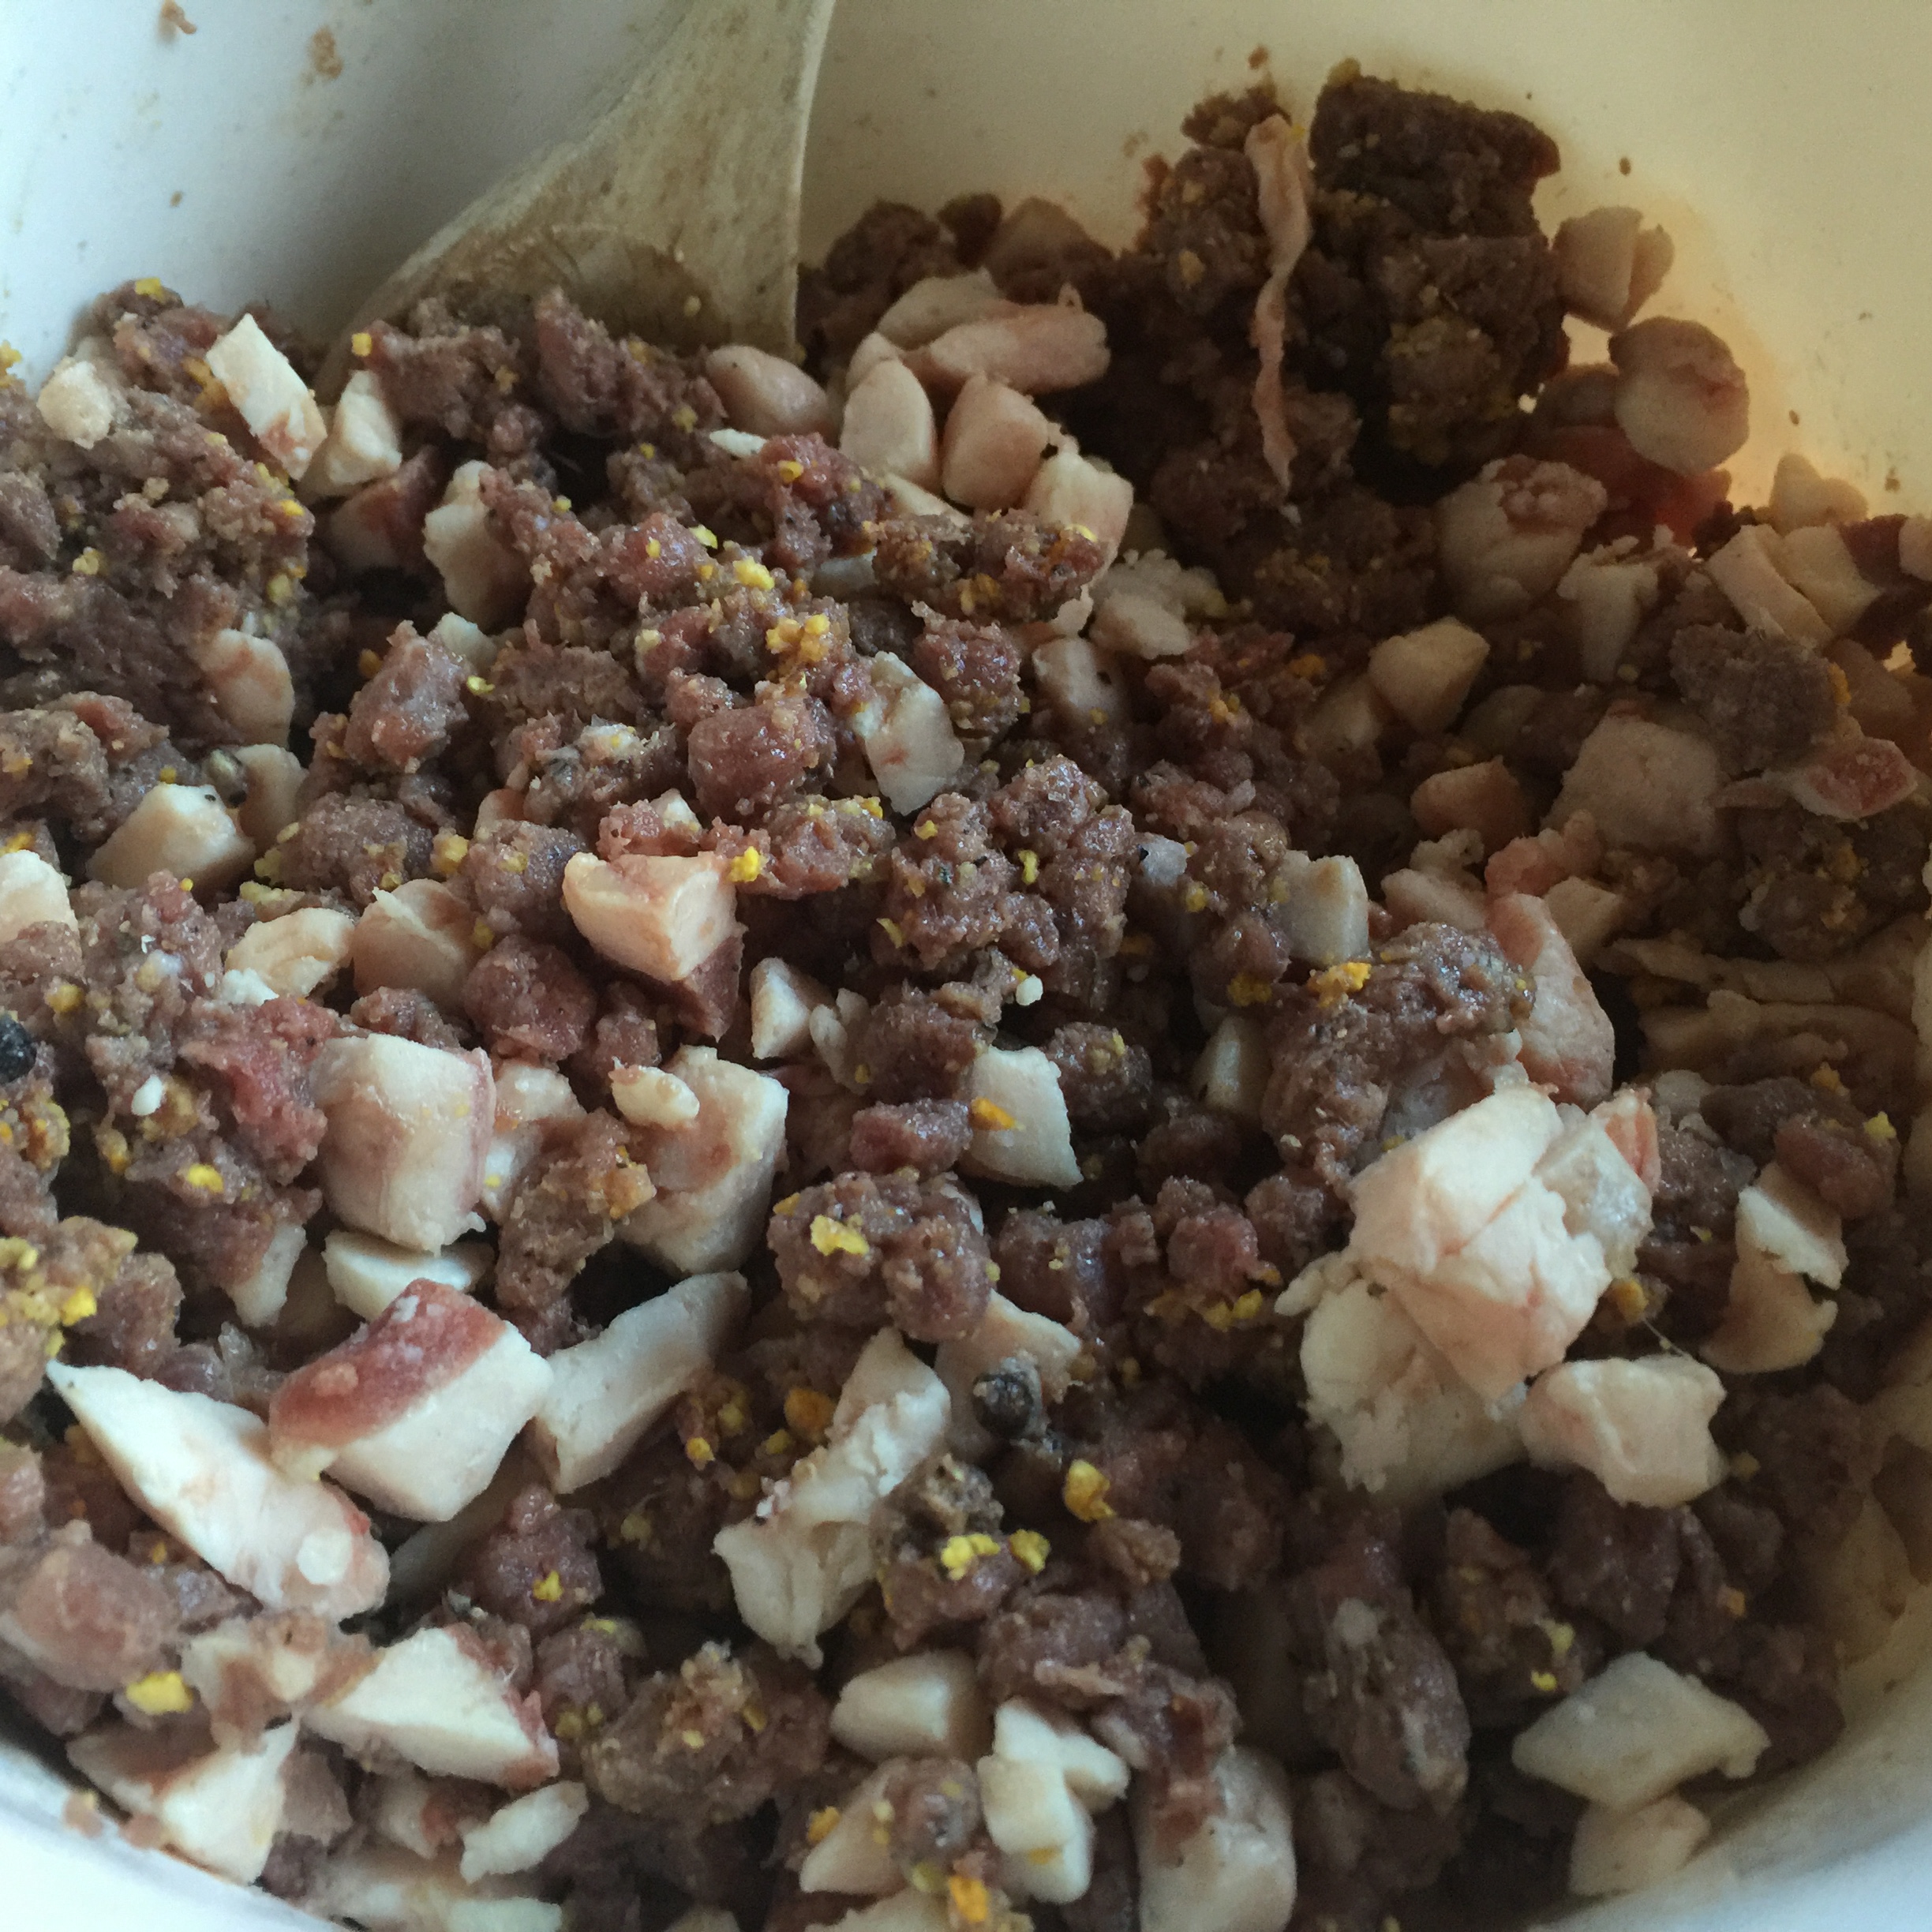
I mixed this with the fat that was hand cut. I also dissolved the starter culture in a minimal amount of water and mixed it with the ground meat, hand cut fat, and spice cure.

If you are in need of a break, this is a good point to stop. You can freeze the mixture overnight, and get started again if the morning if need be.


Meat Stuffing Phase:

Once you have your ground meat/fat/cure/spice mixture it is time to stuff it into casings. I used to use the grinder to stuff my salami, but I have since moved to a dedicated stuffer and it is awesome.

image(4)

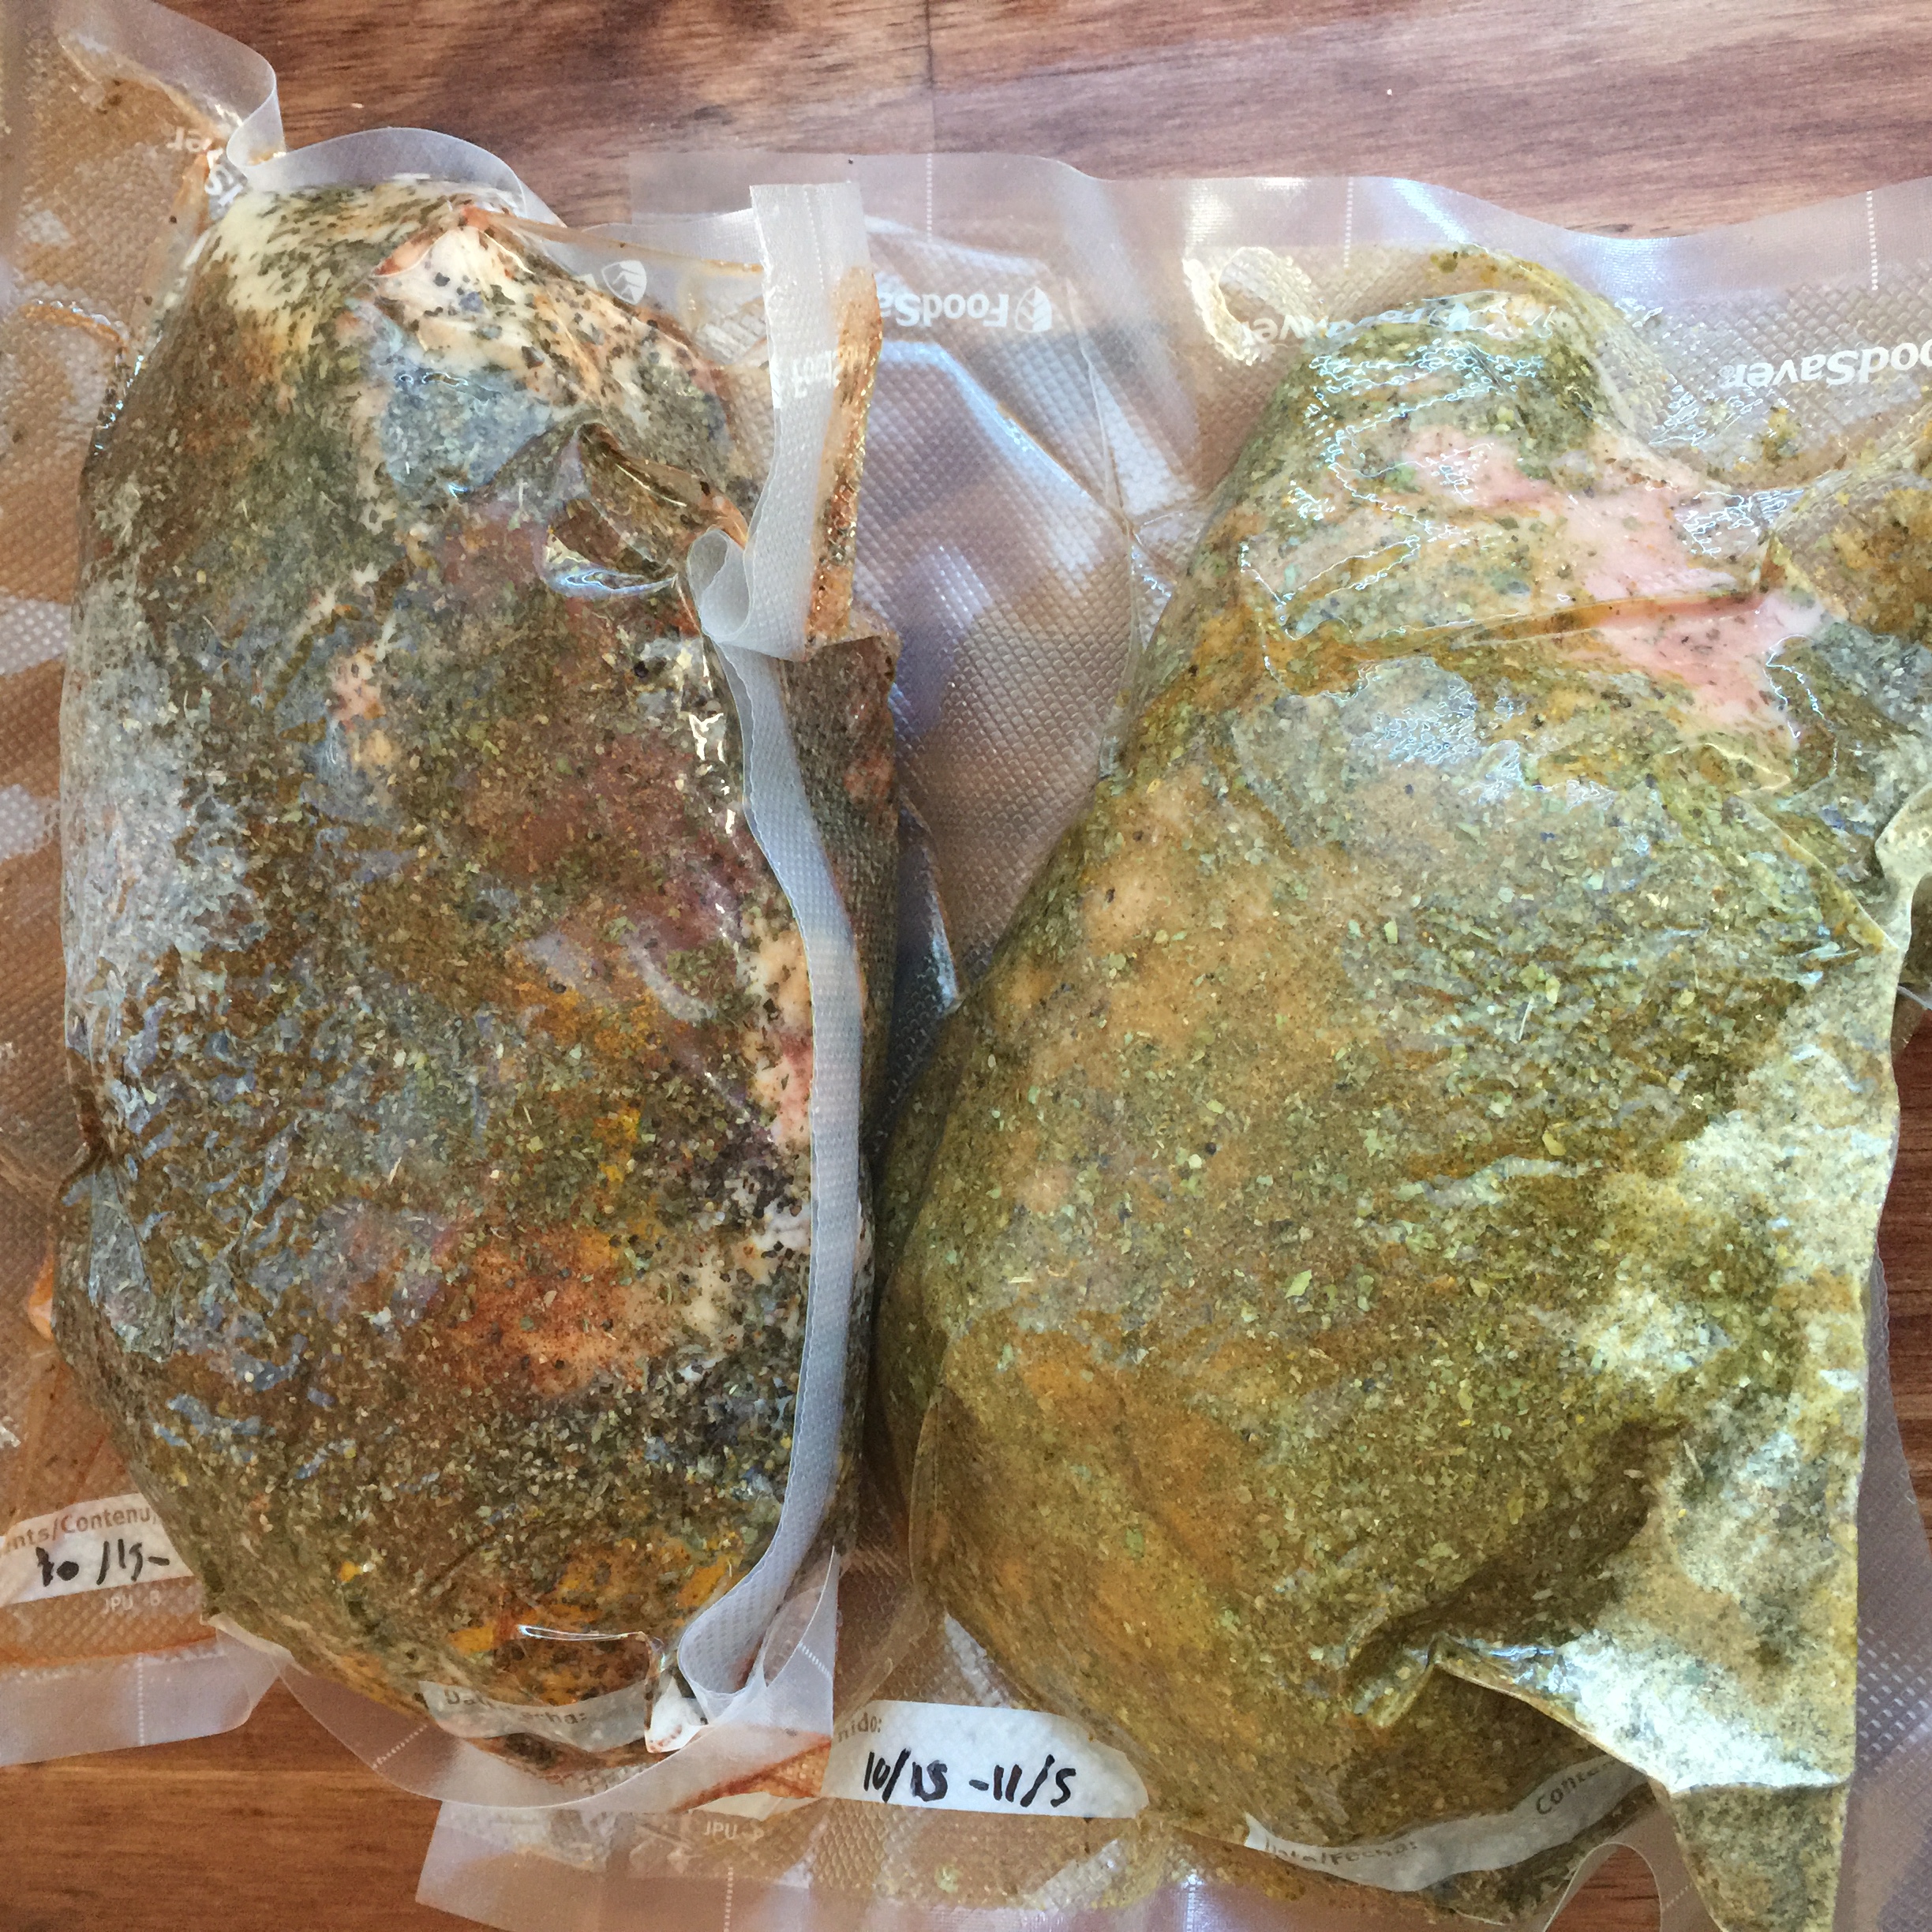
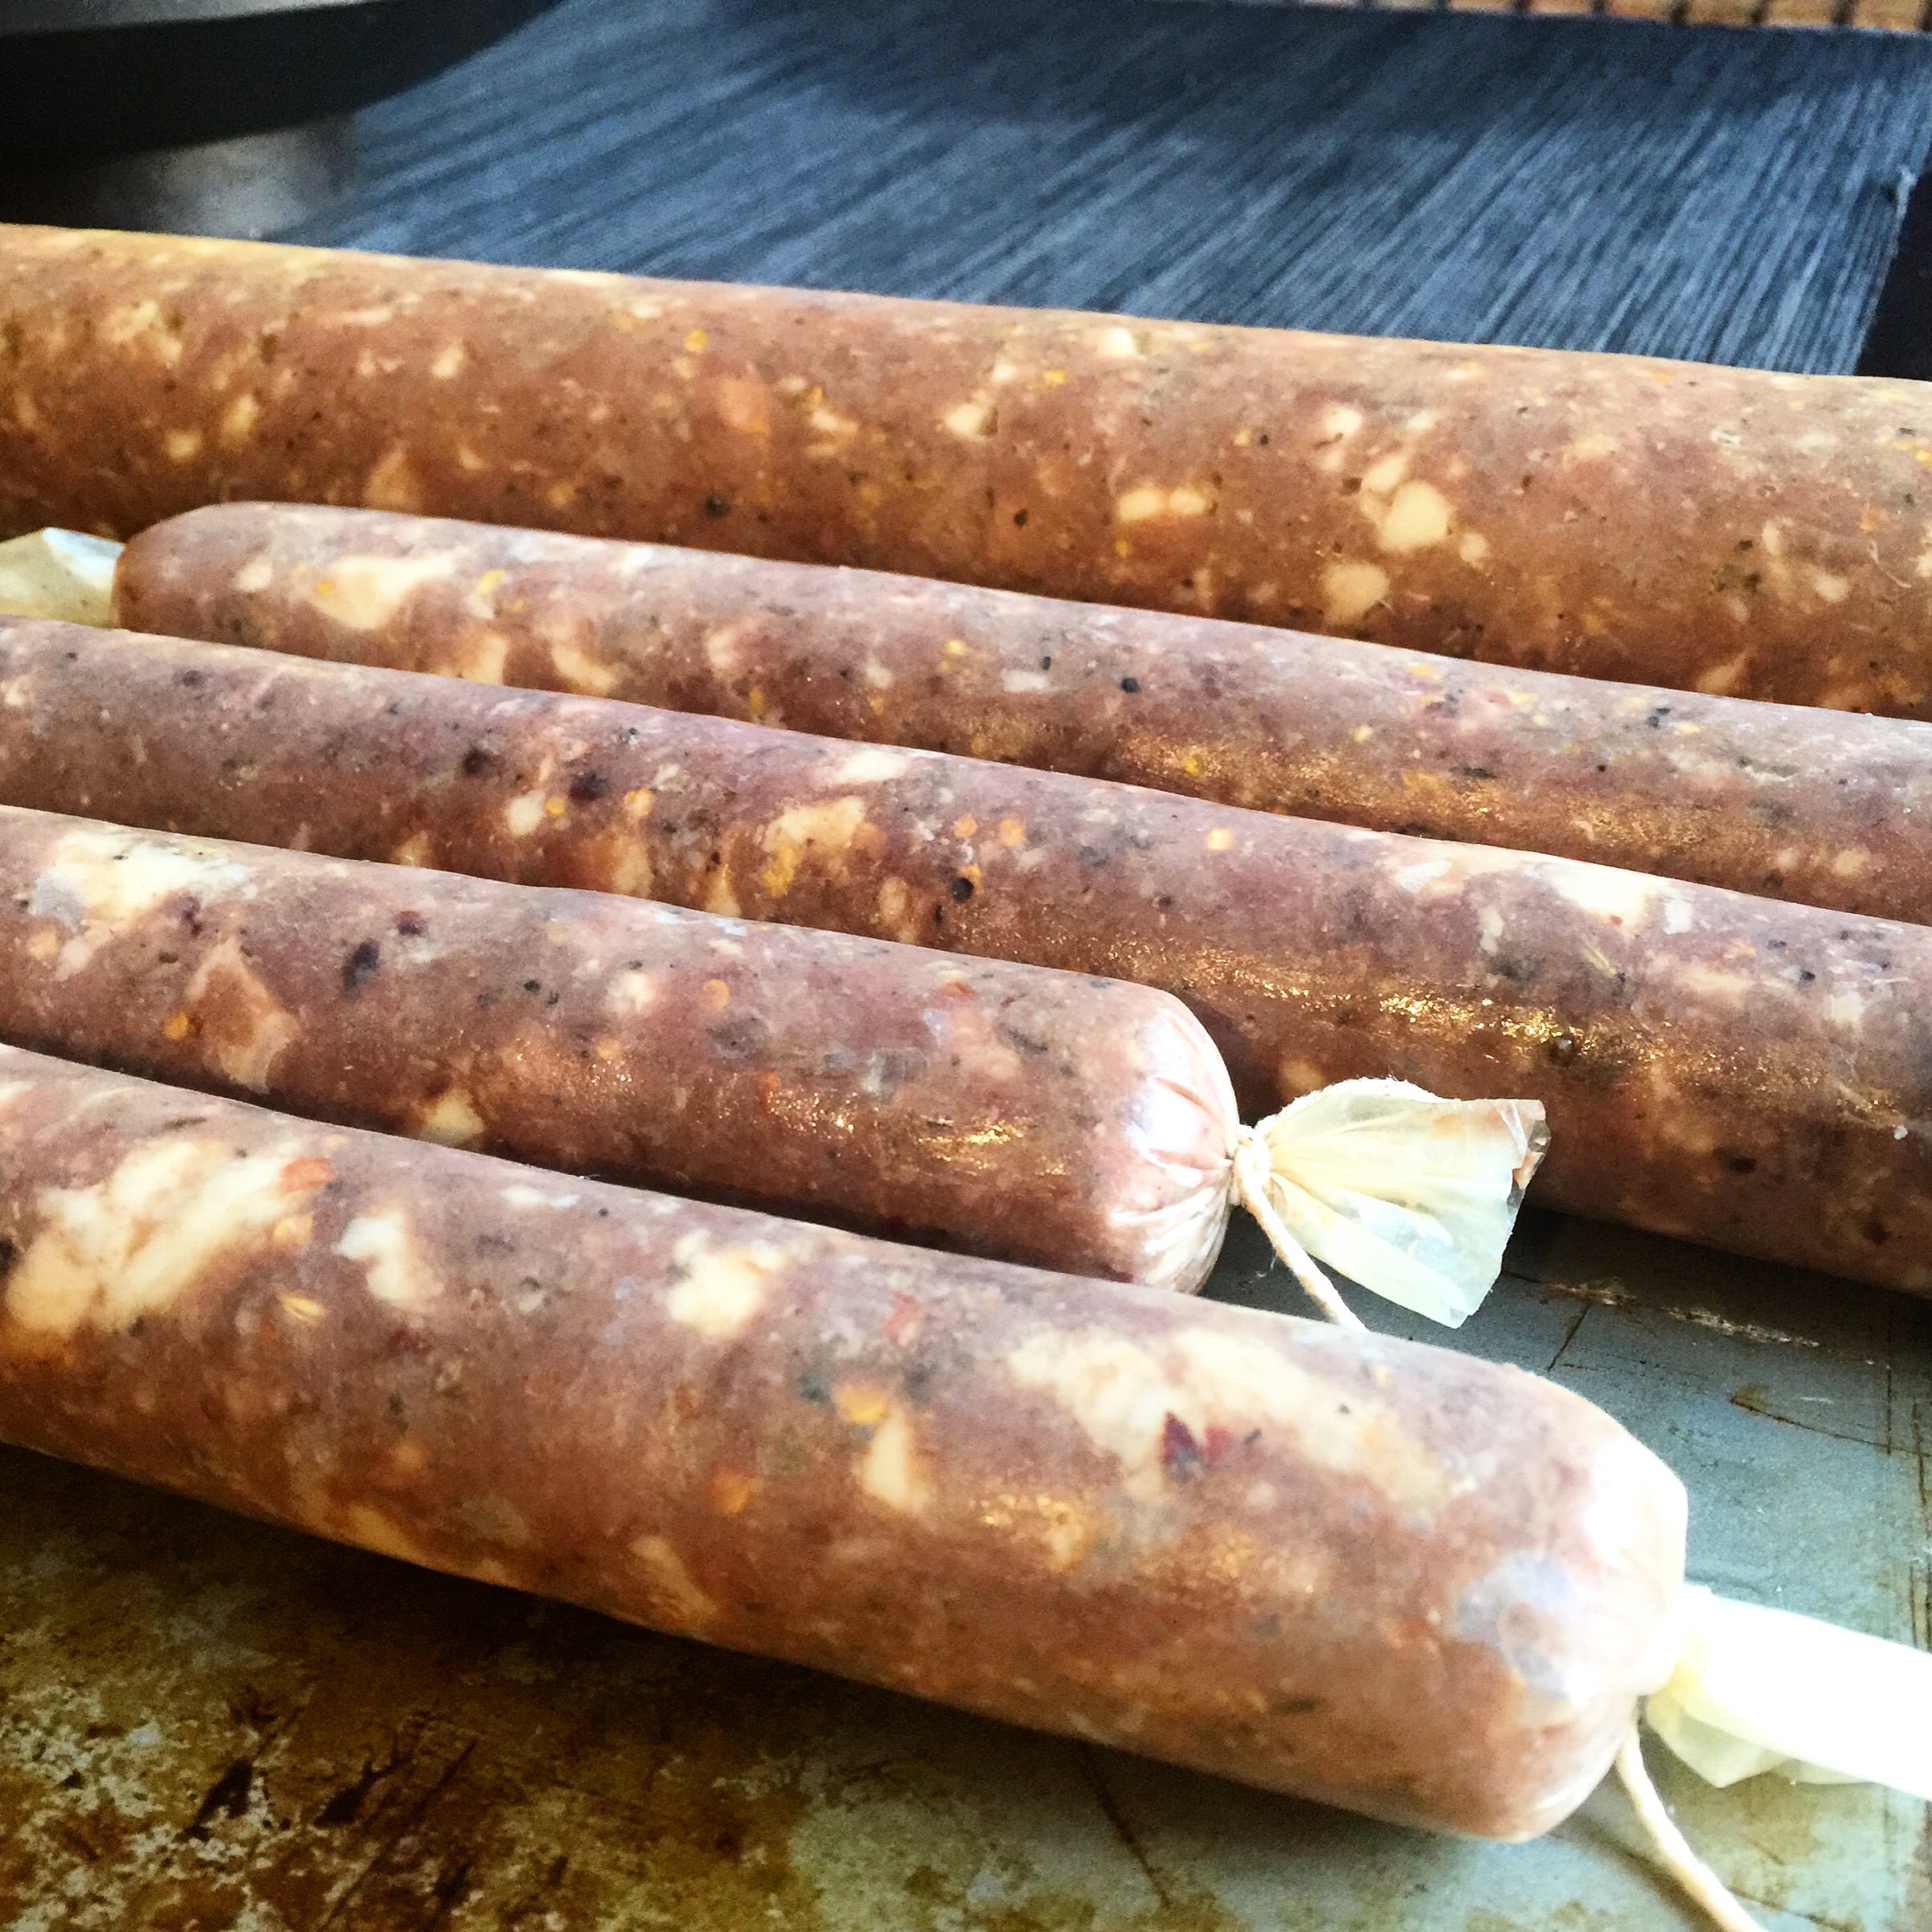
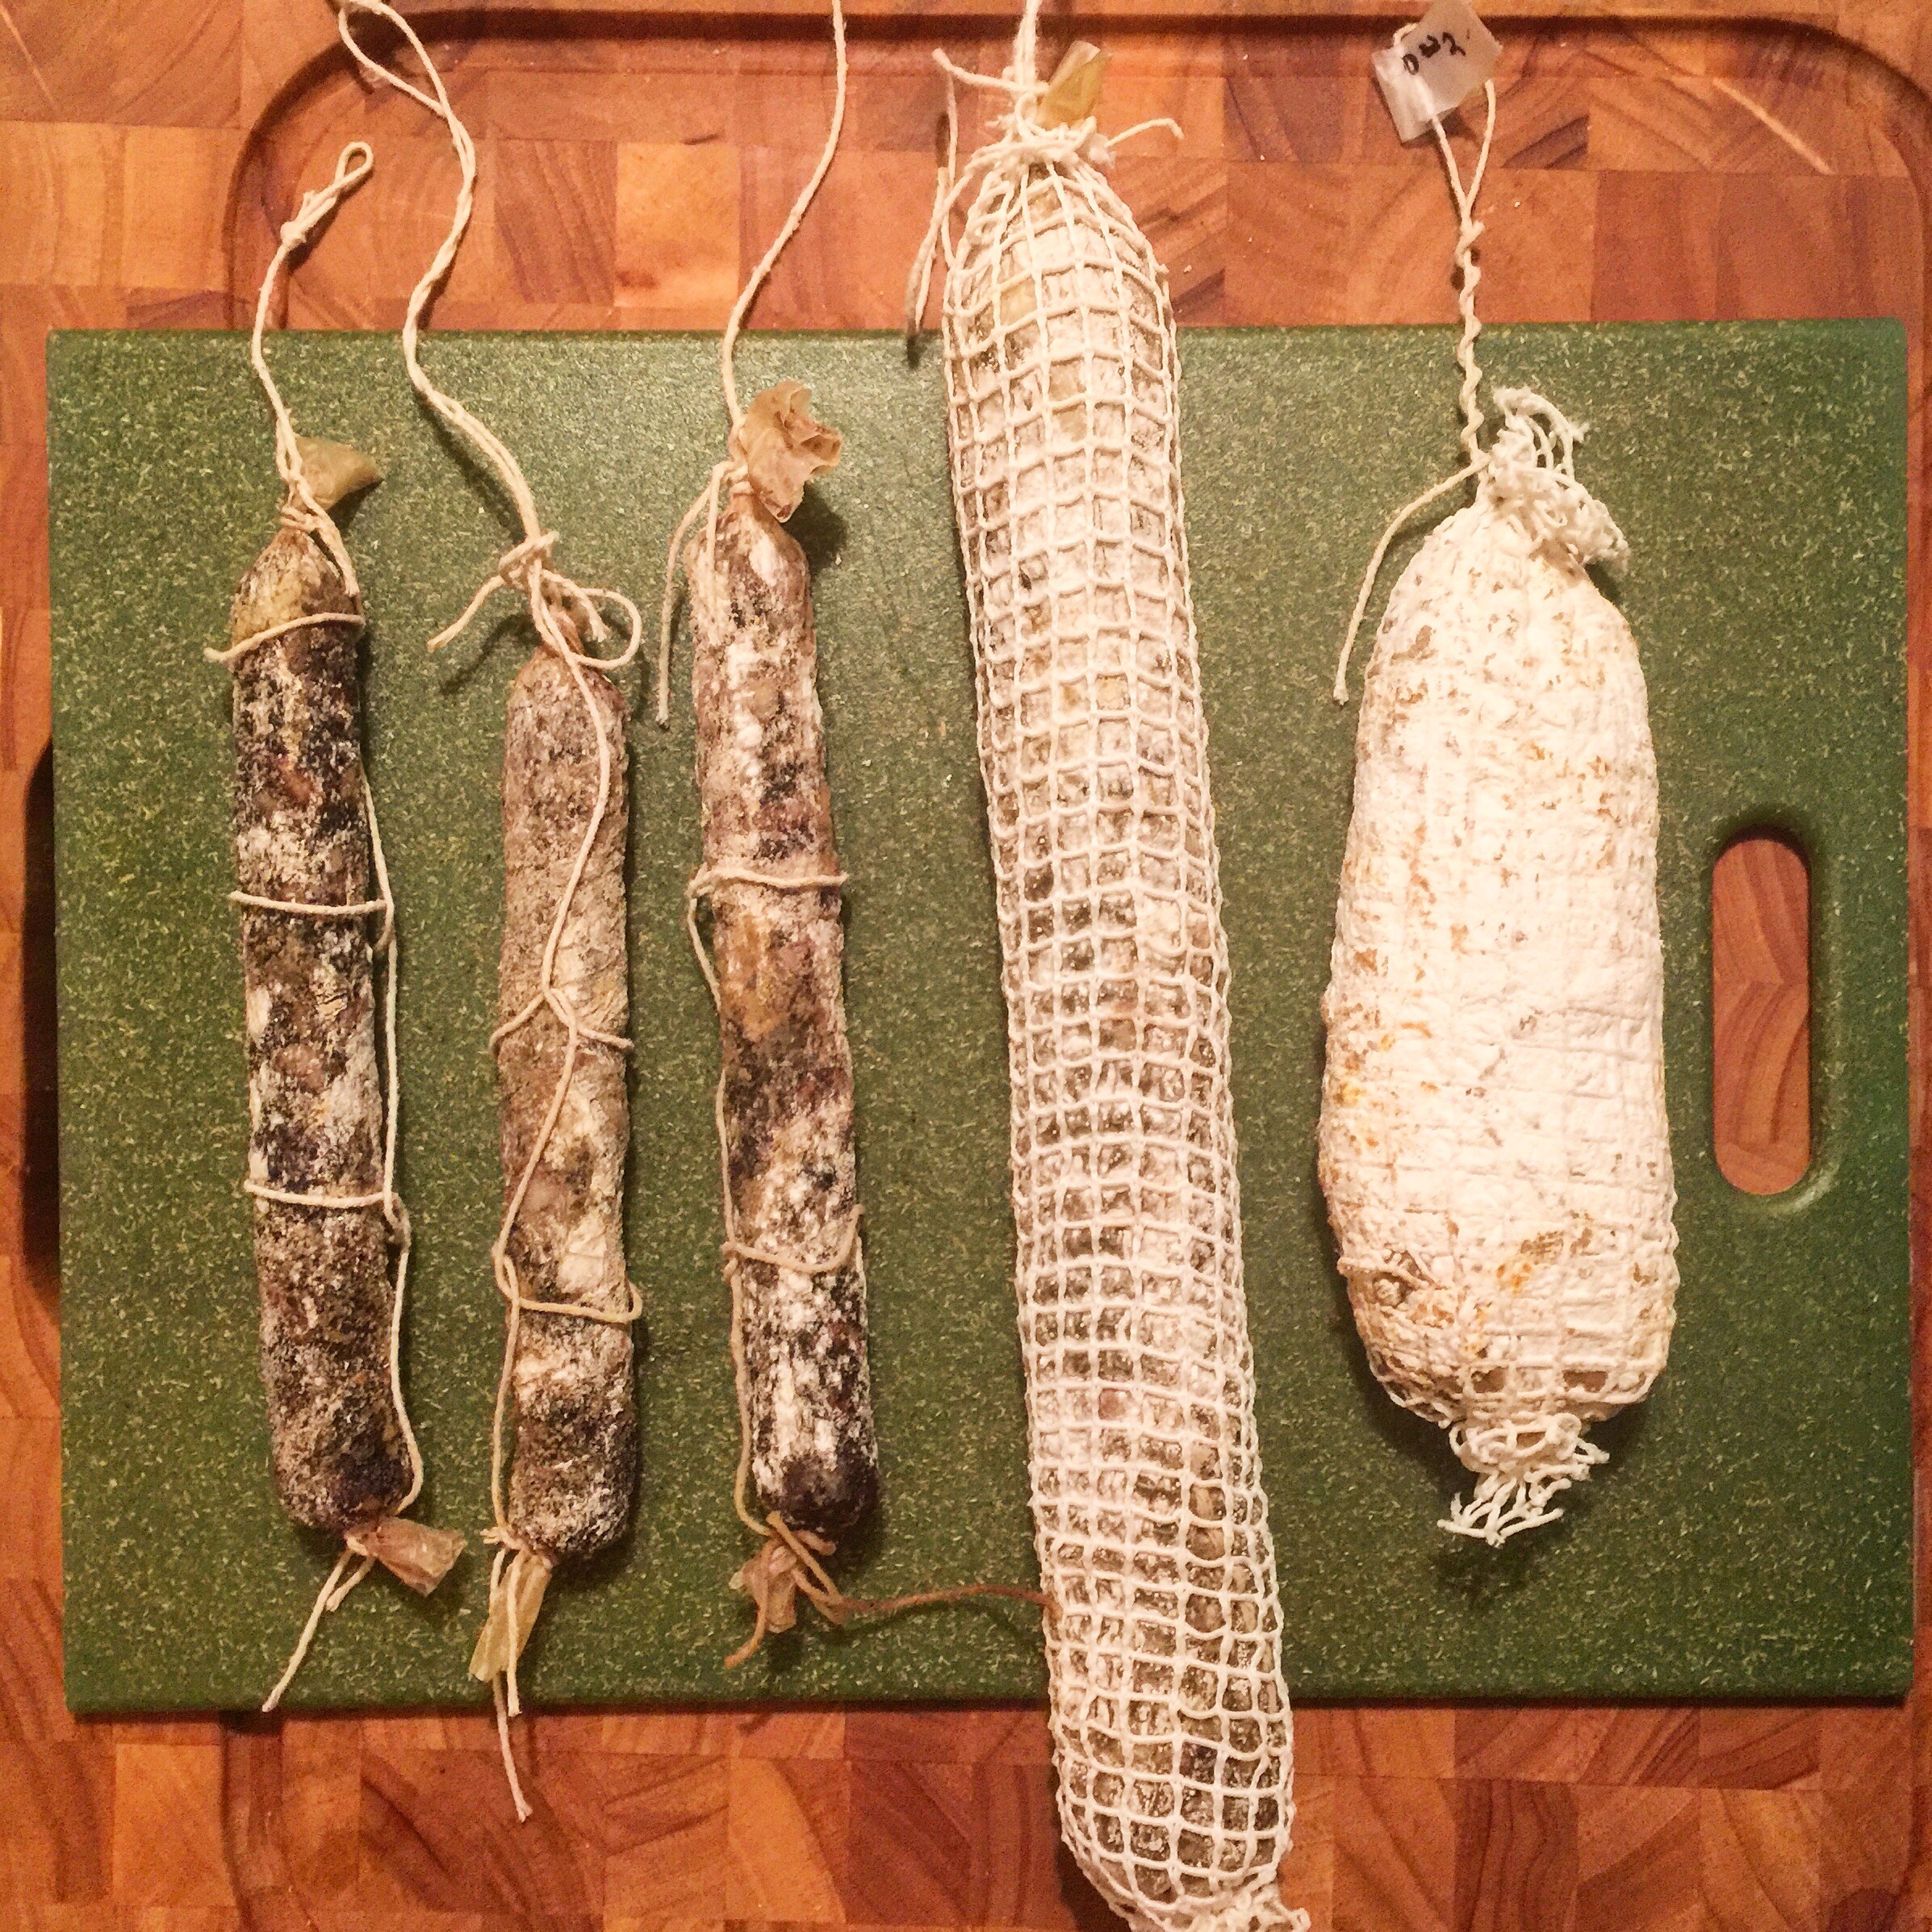
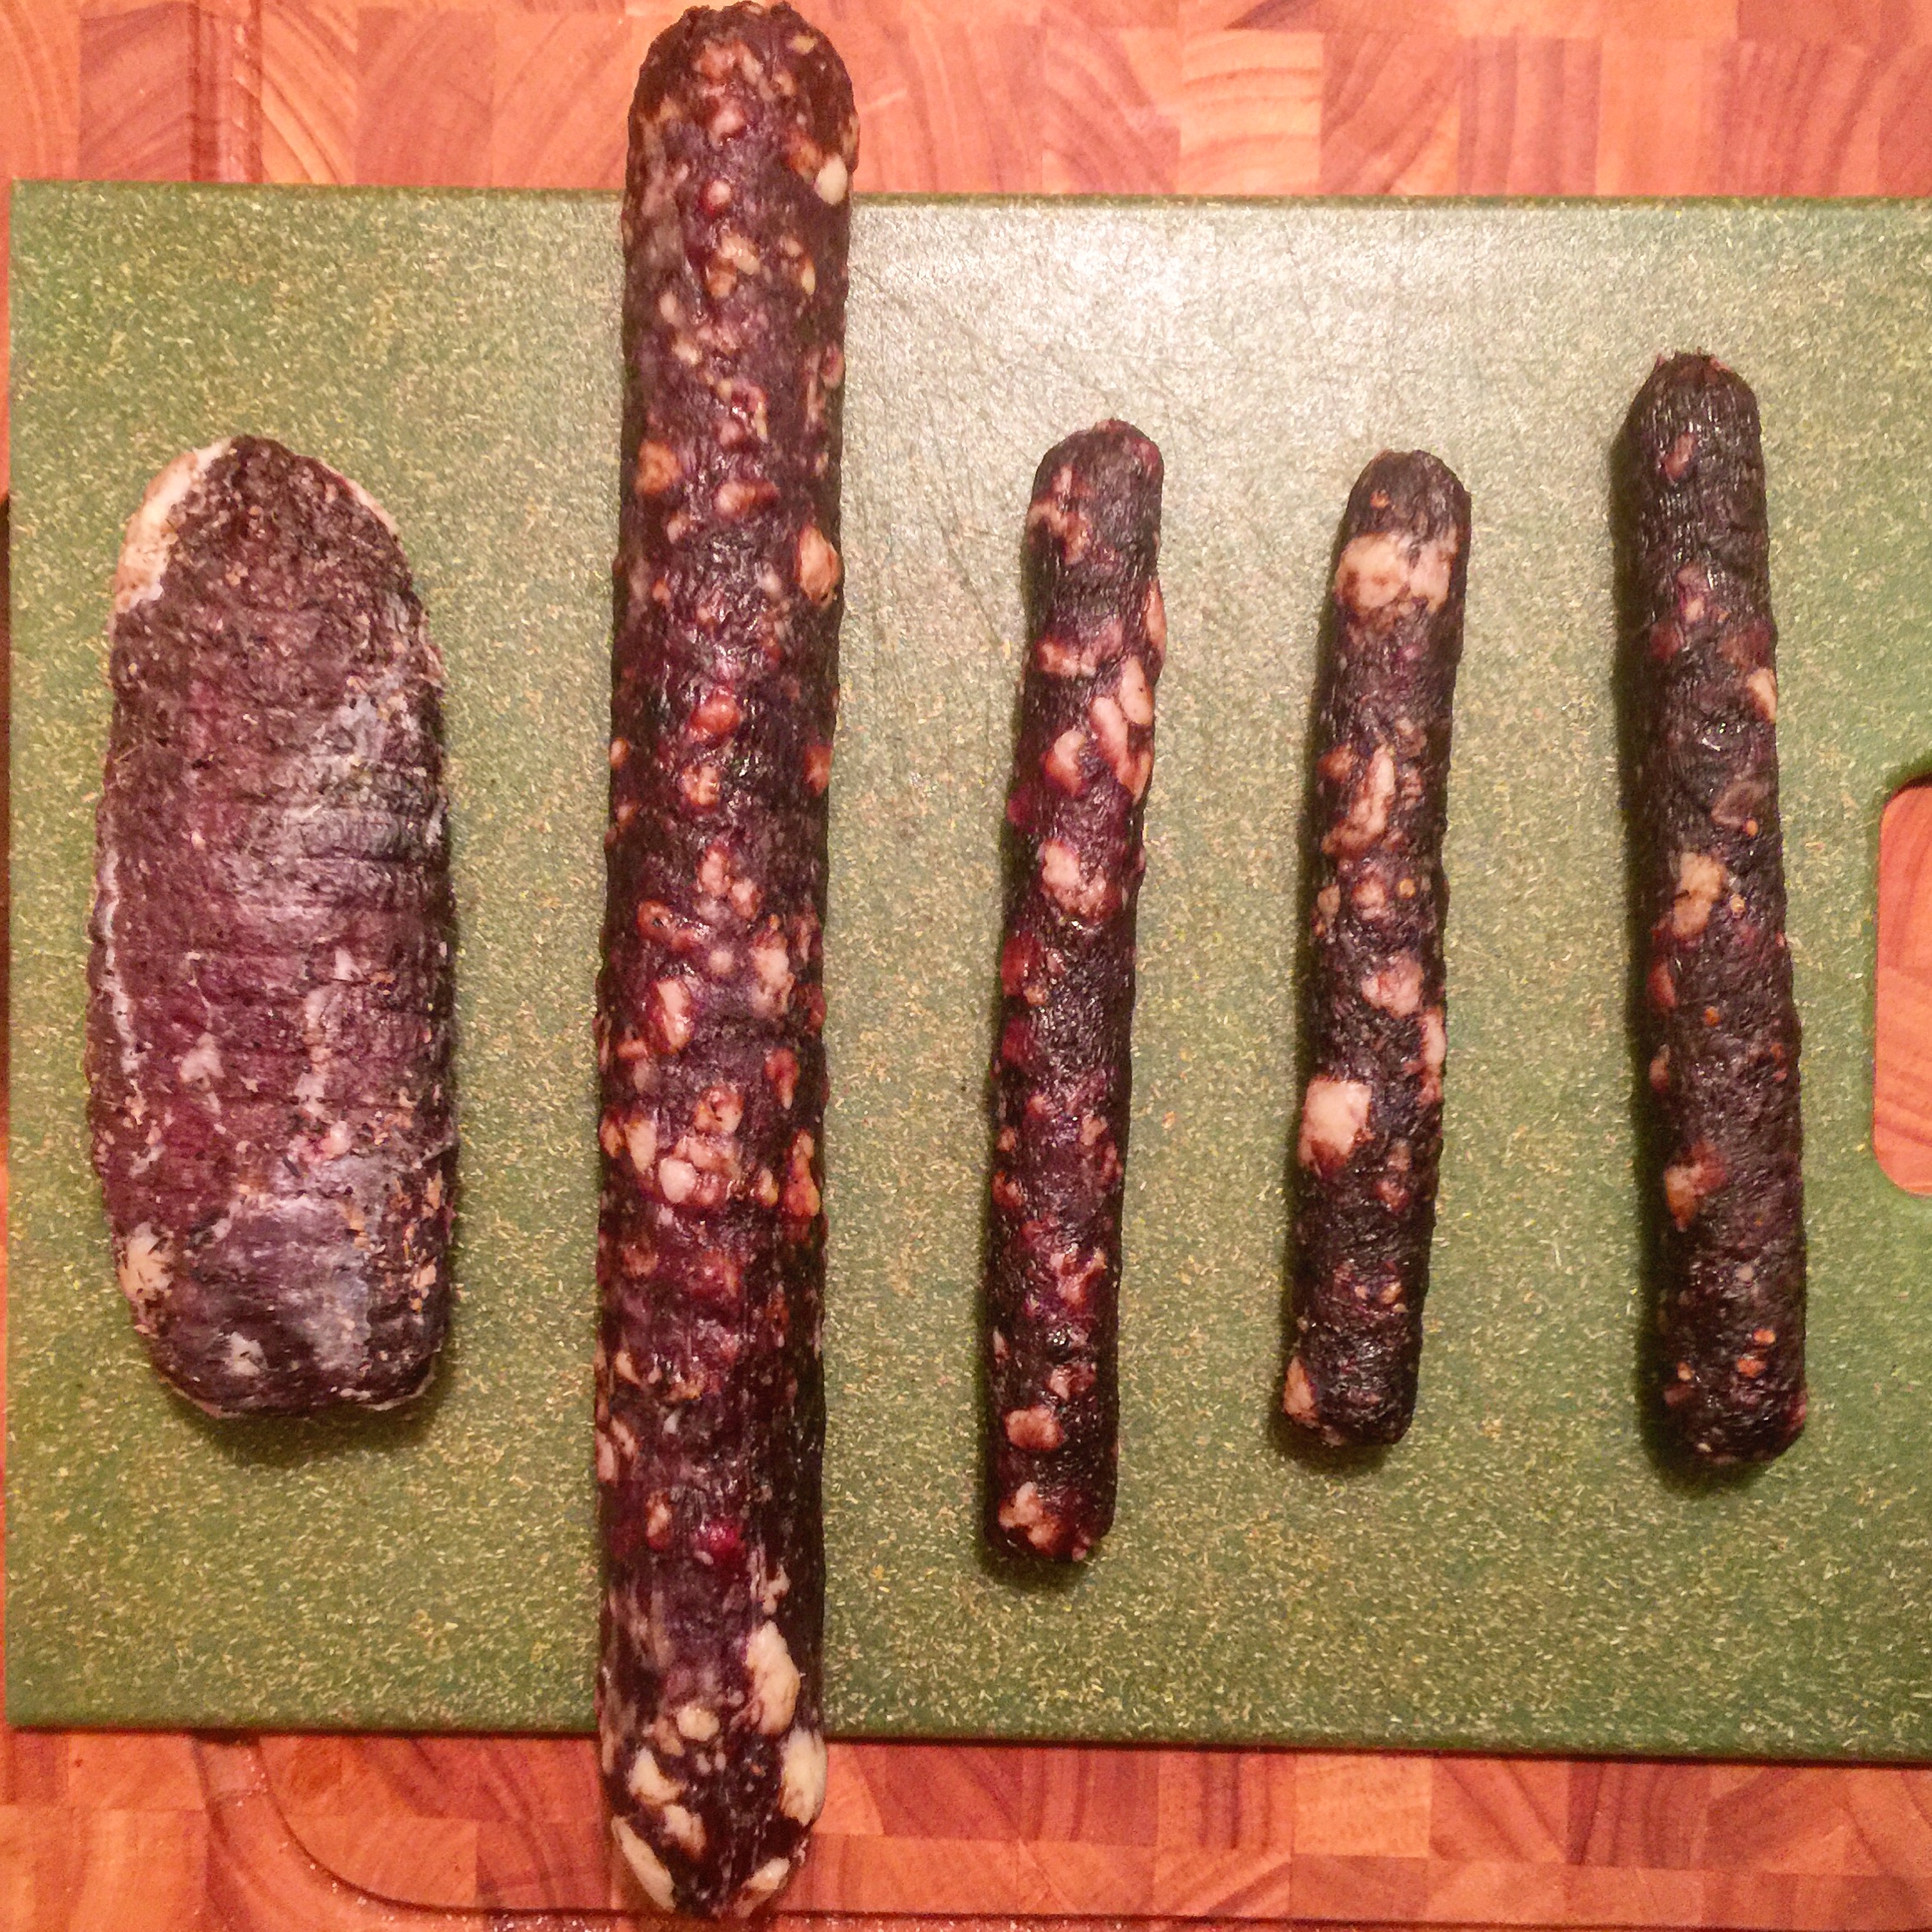
I only had one wide diameter casing left, and a bunch of small ones. I decided to make the duck l’orange into a larger duck salame, and the spicy calabrese duck salami into numerous smaller duck salami. I soaked the casings to get them ready to use.

I made sure to mix the ingredients together thoroughly. I put the mixture into the stuffer, and got out as much air as possible.

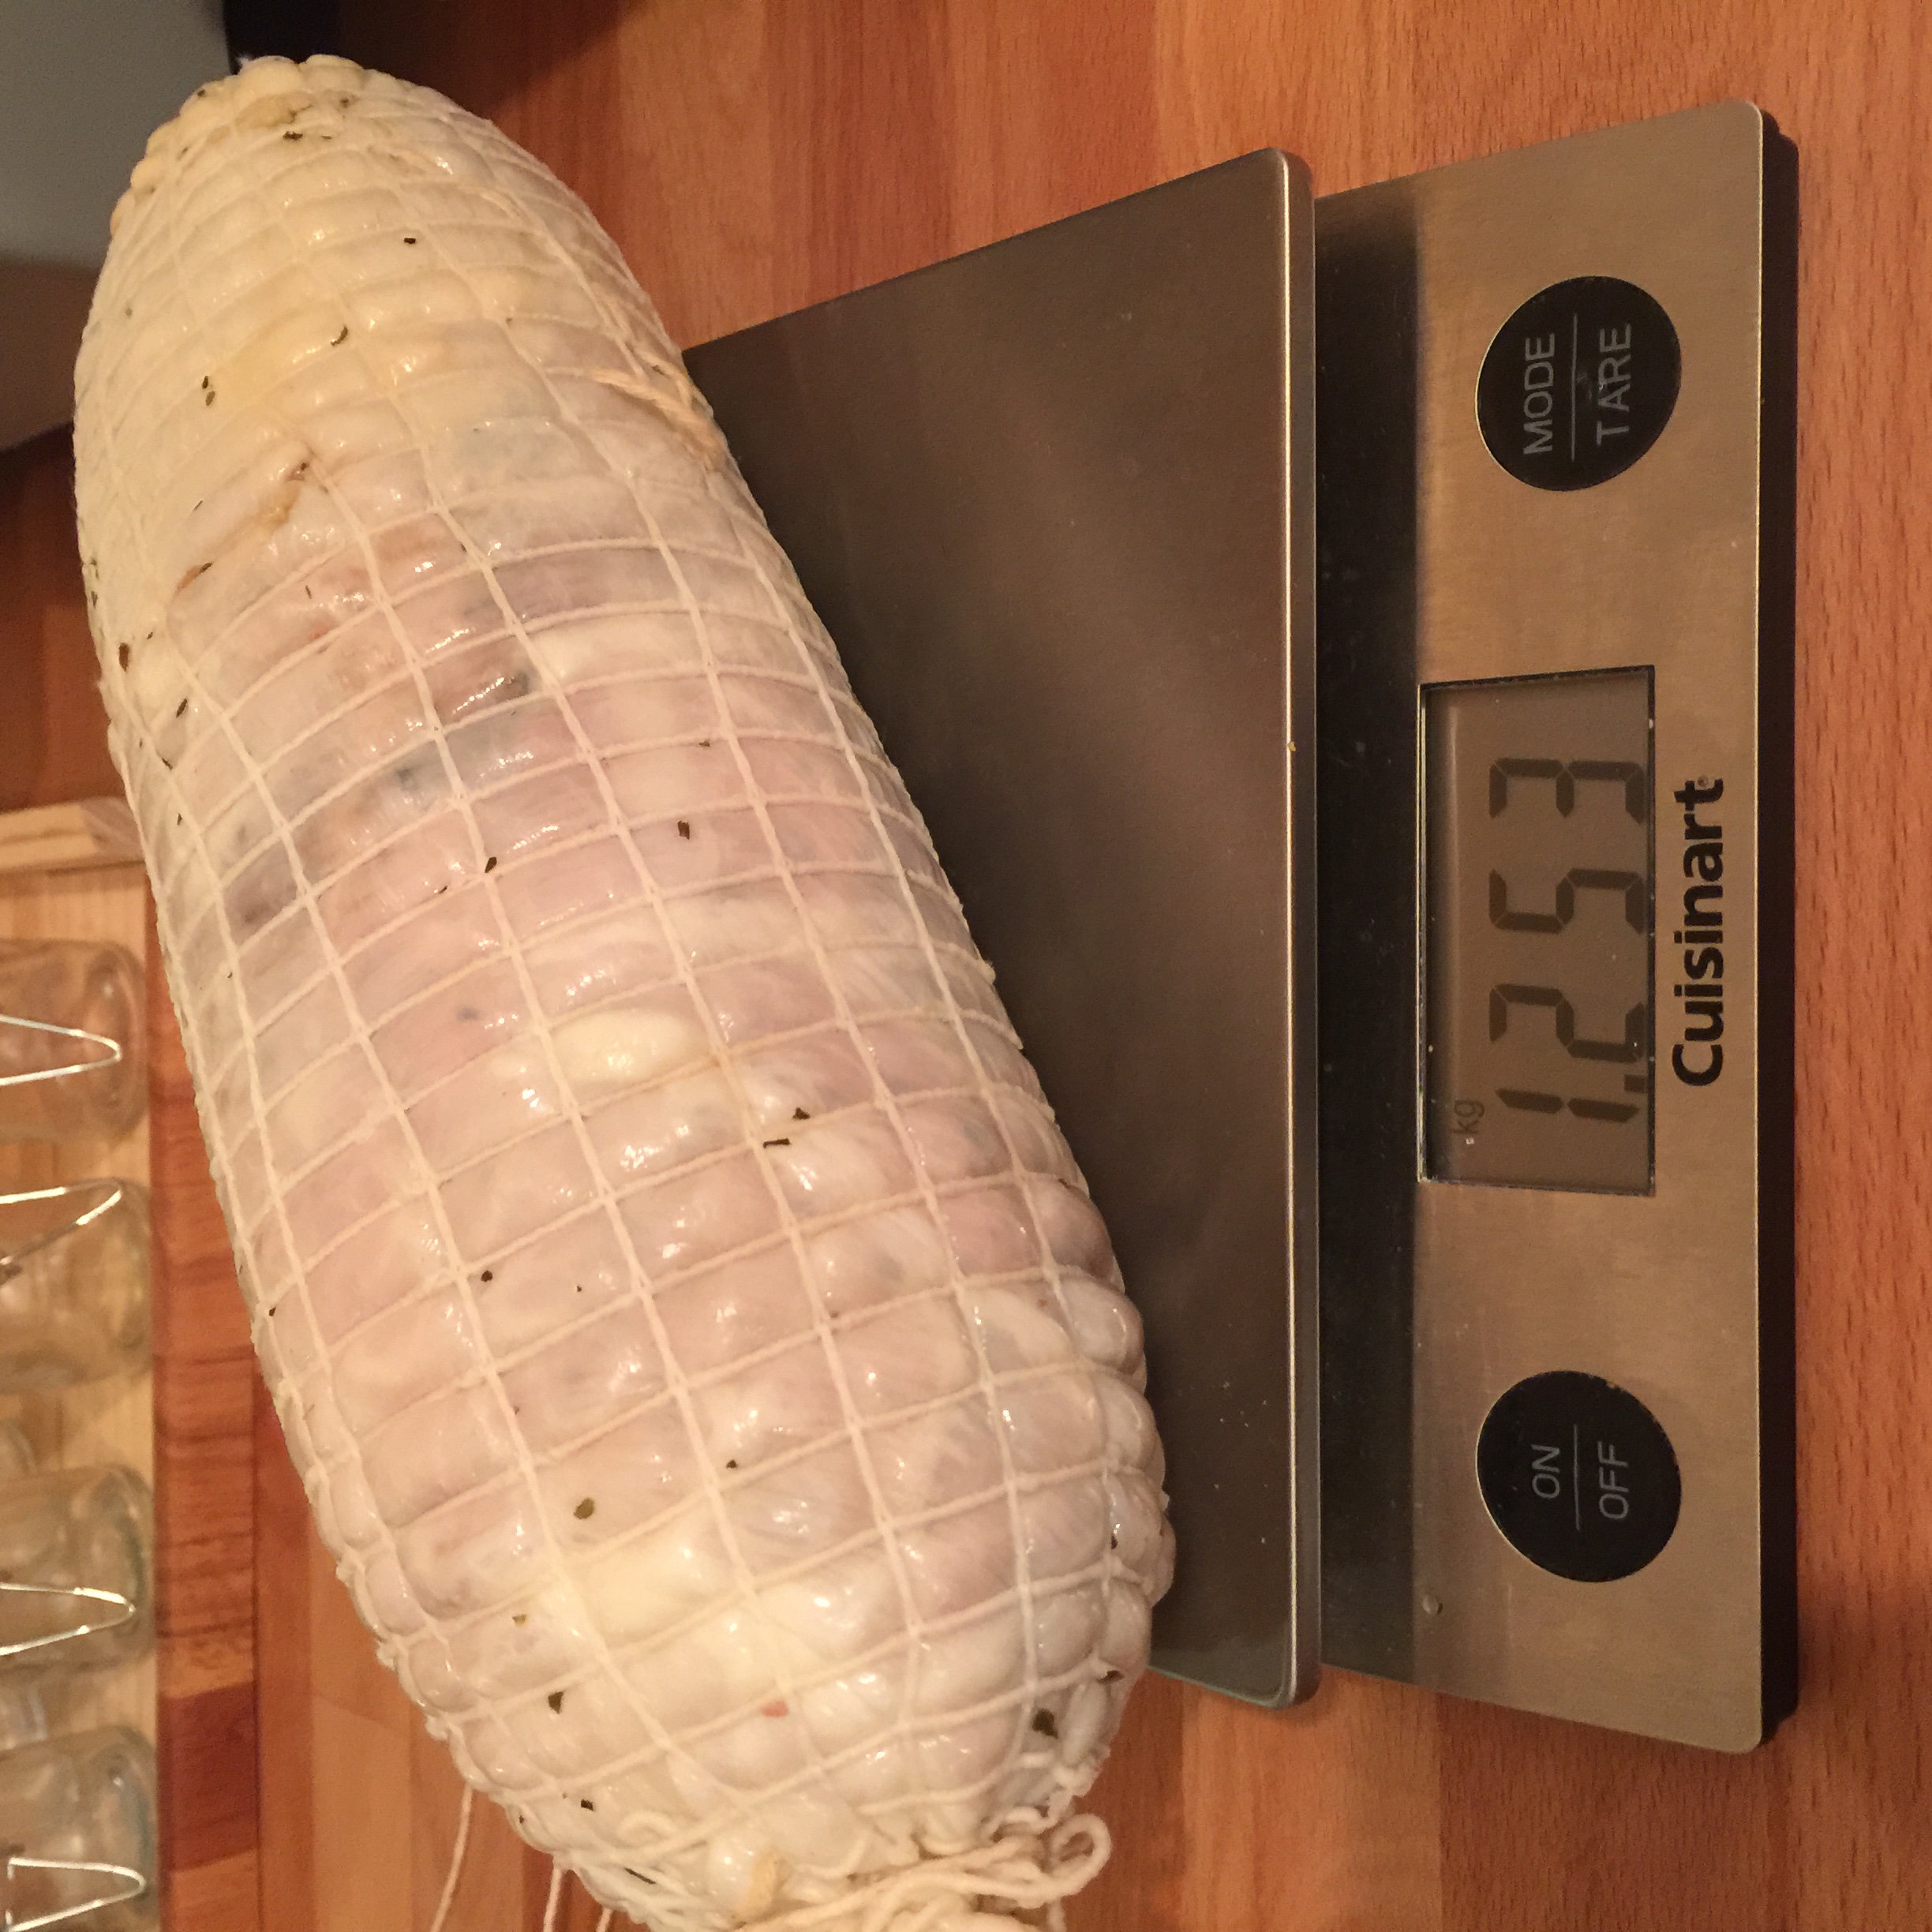
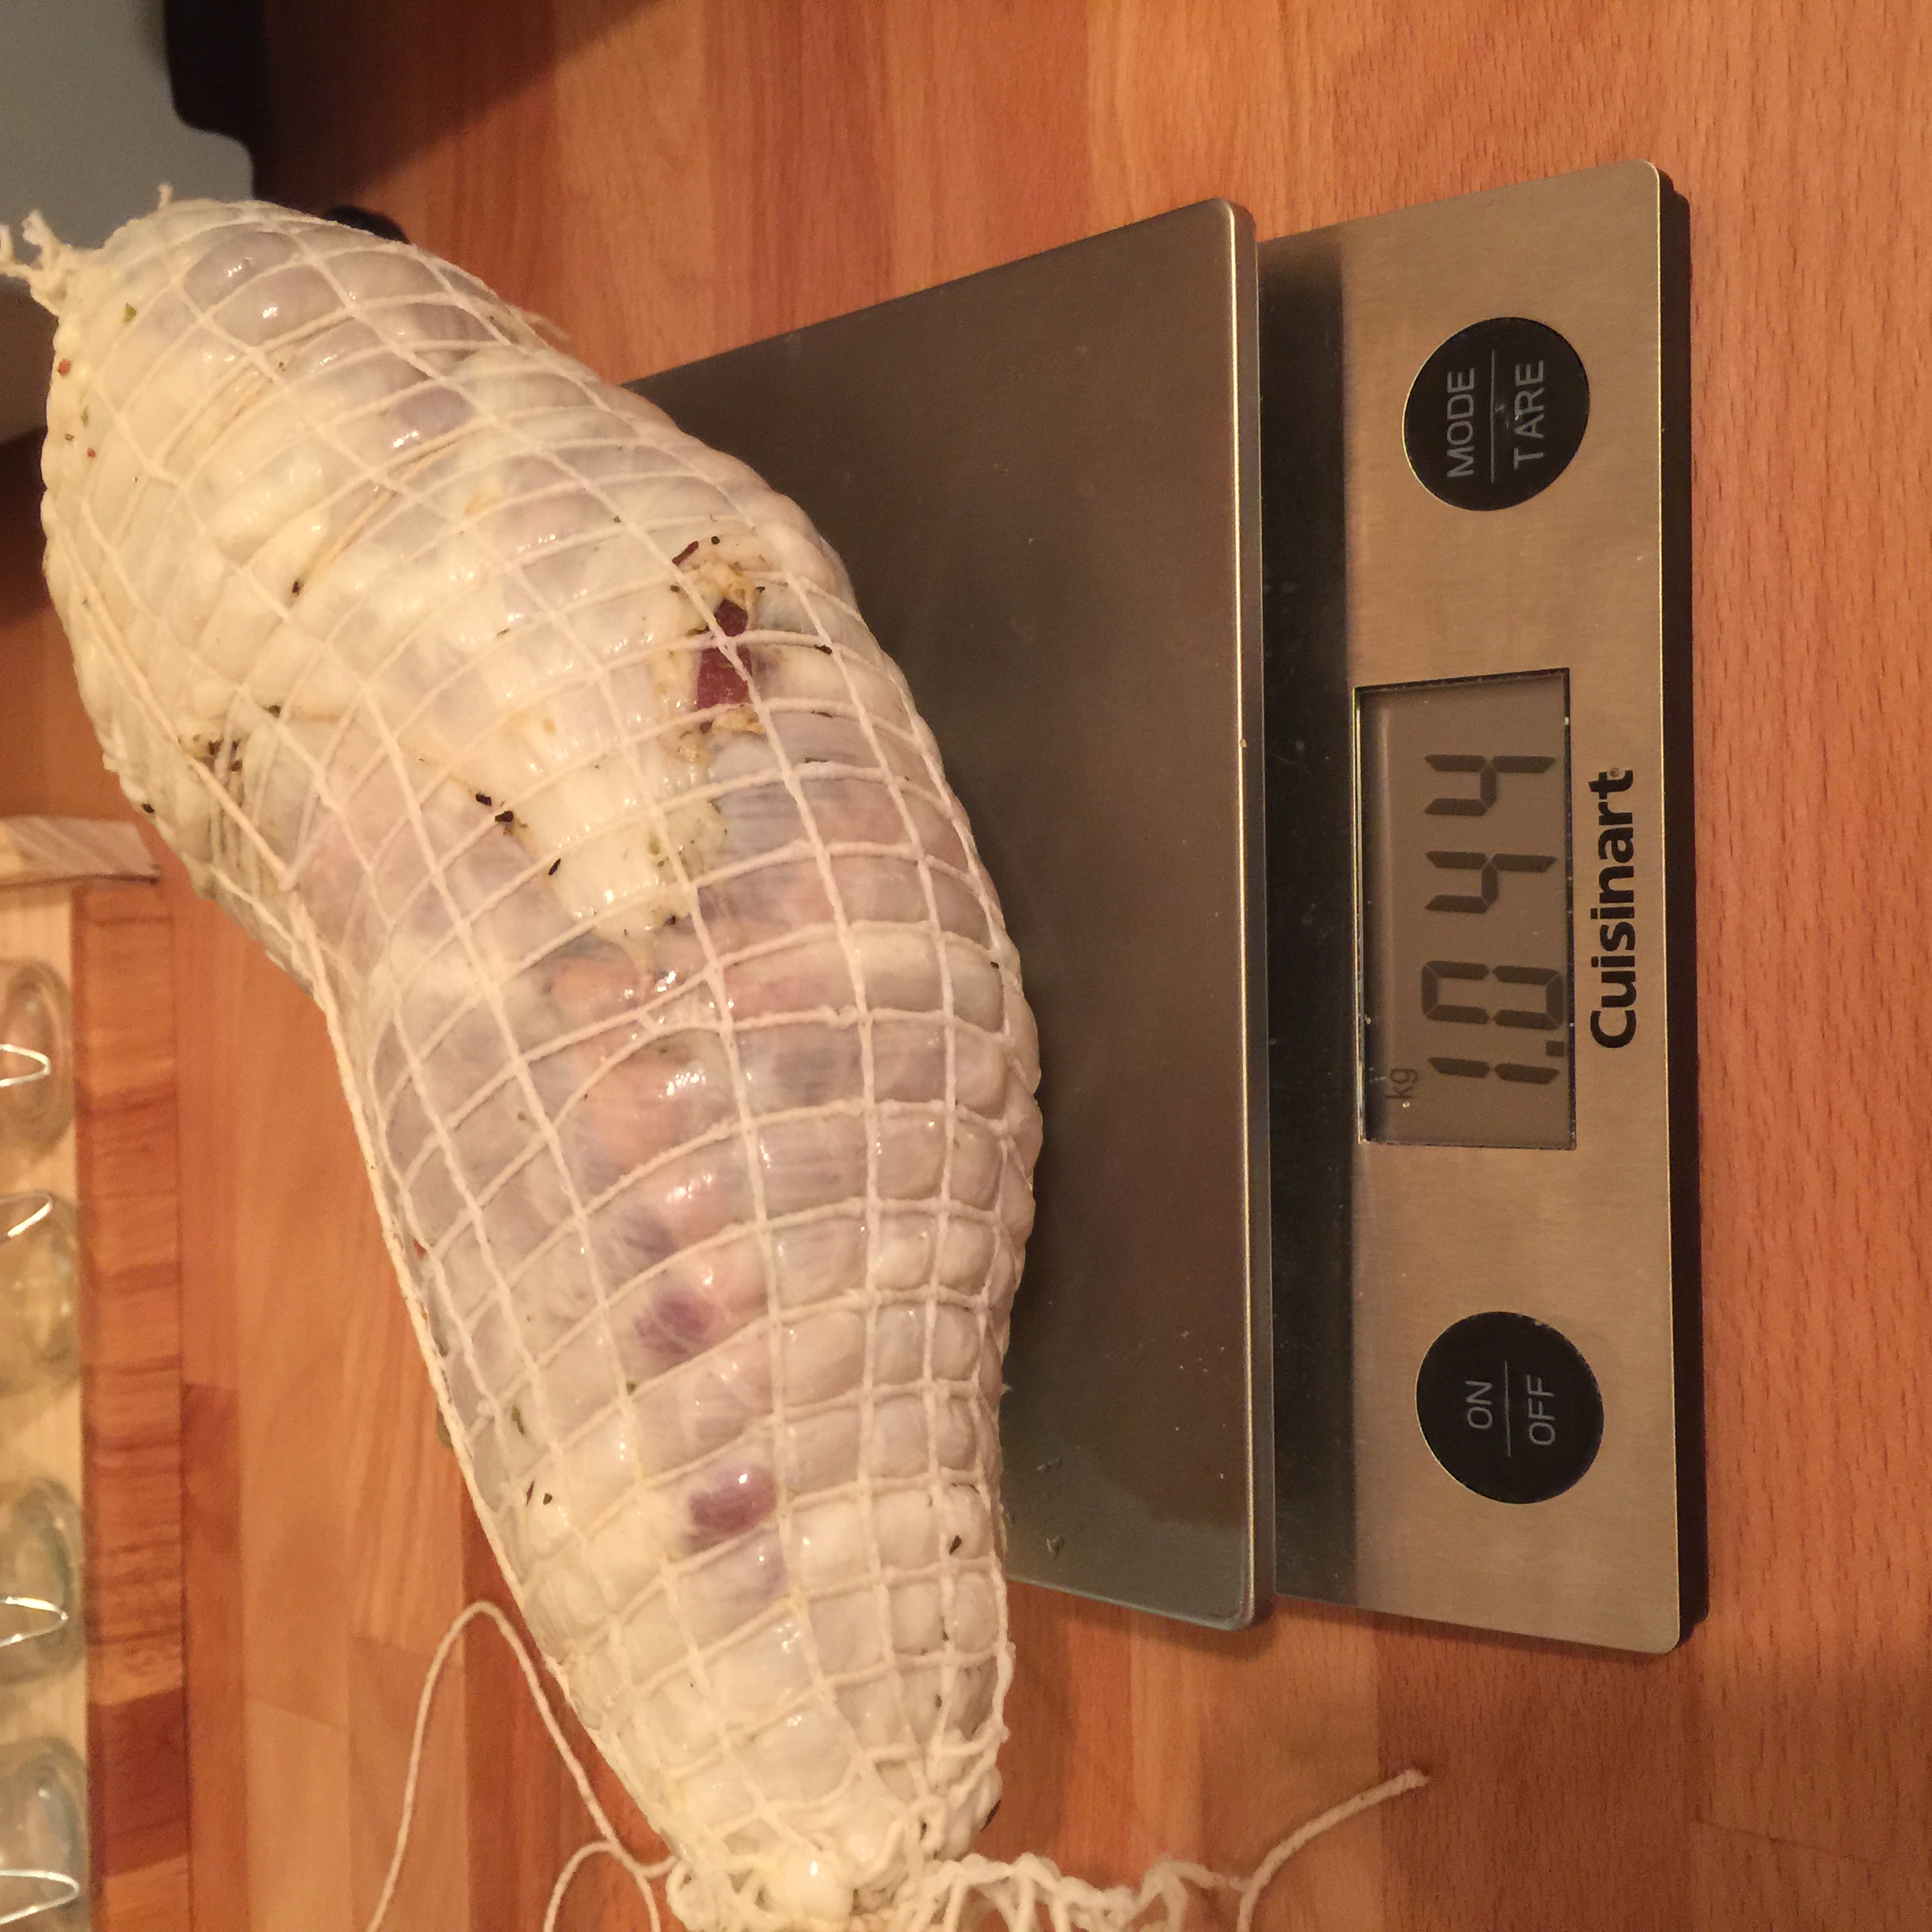
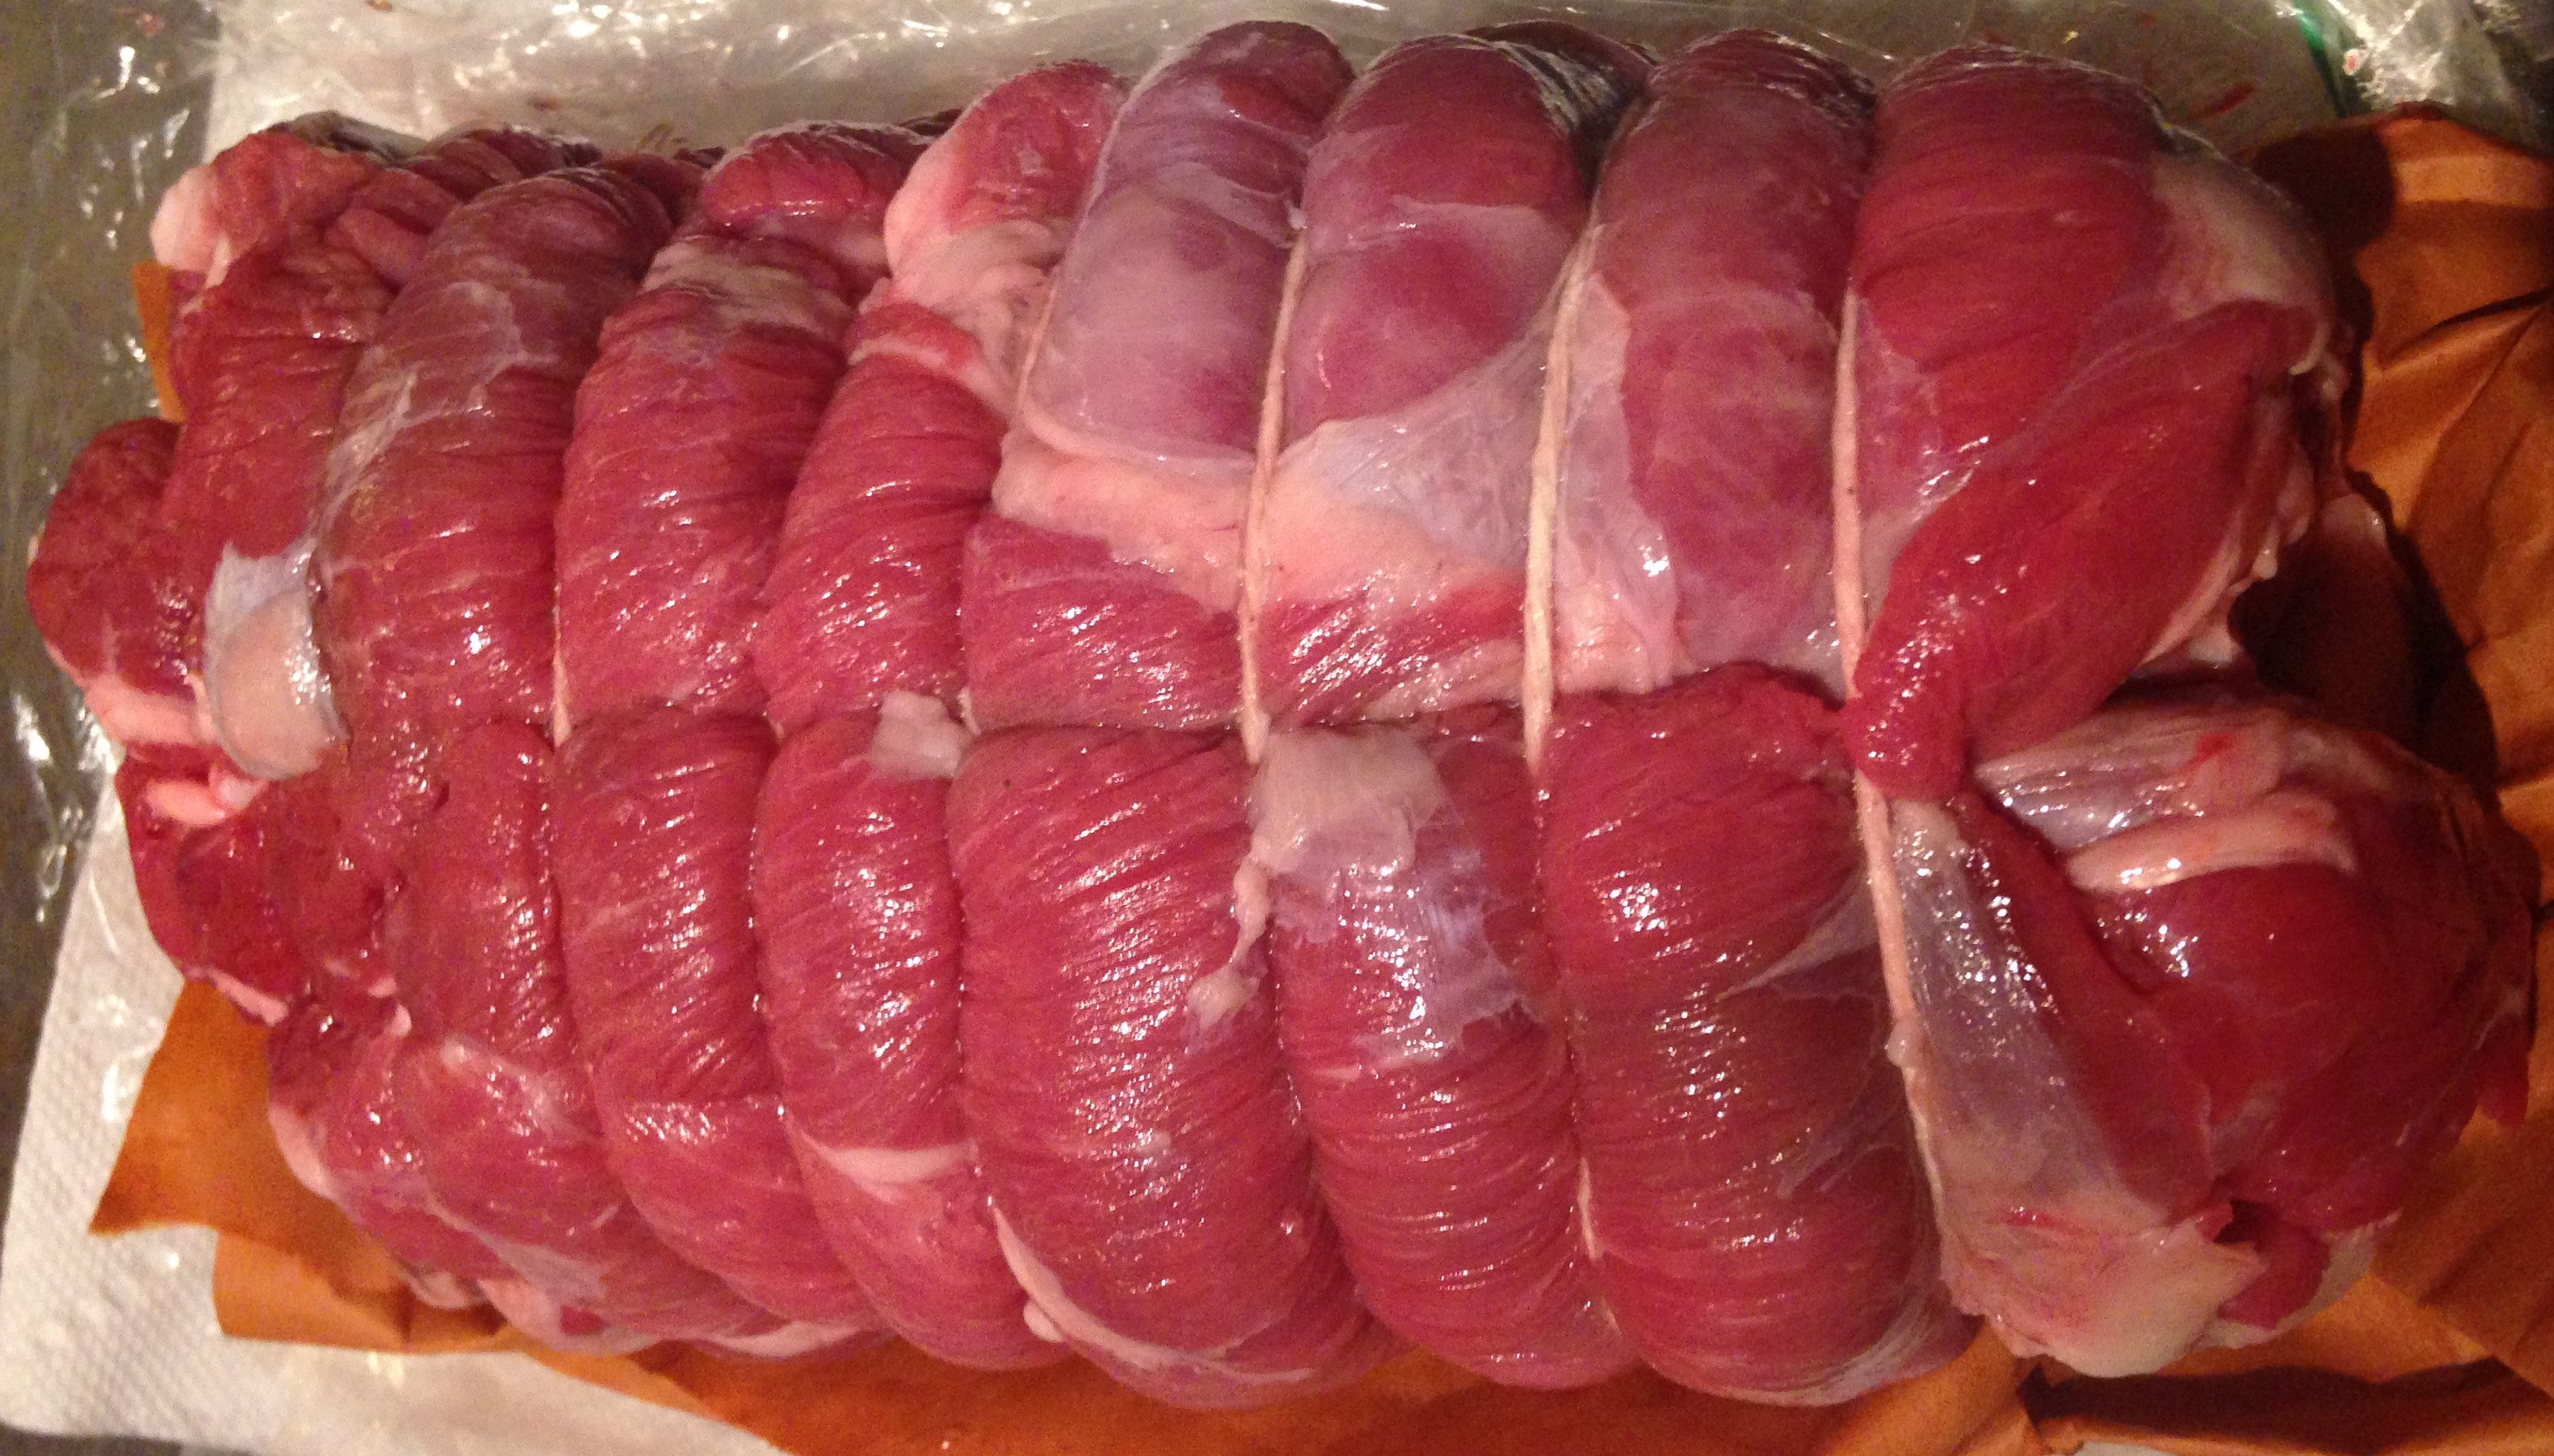
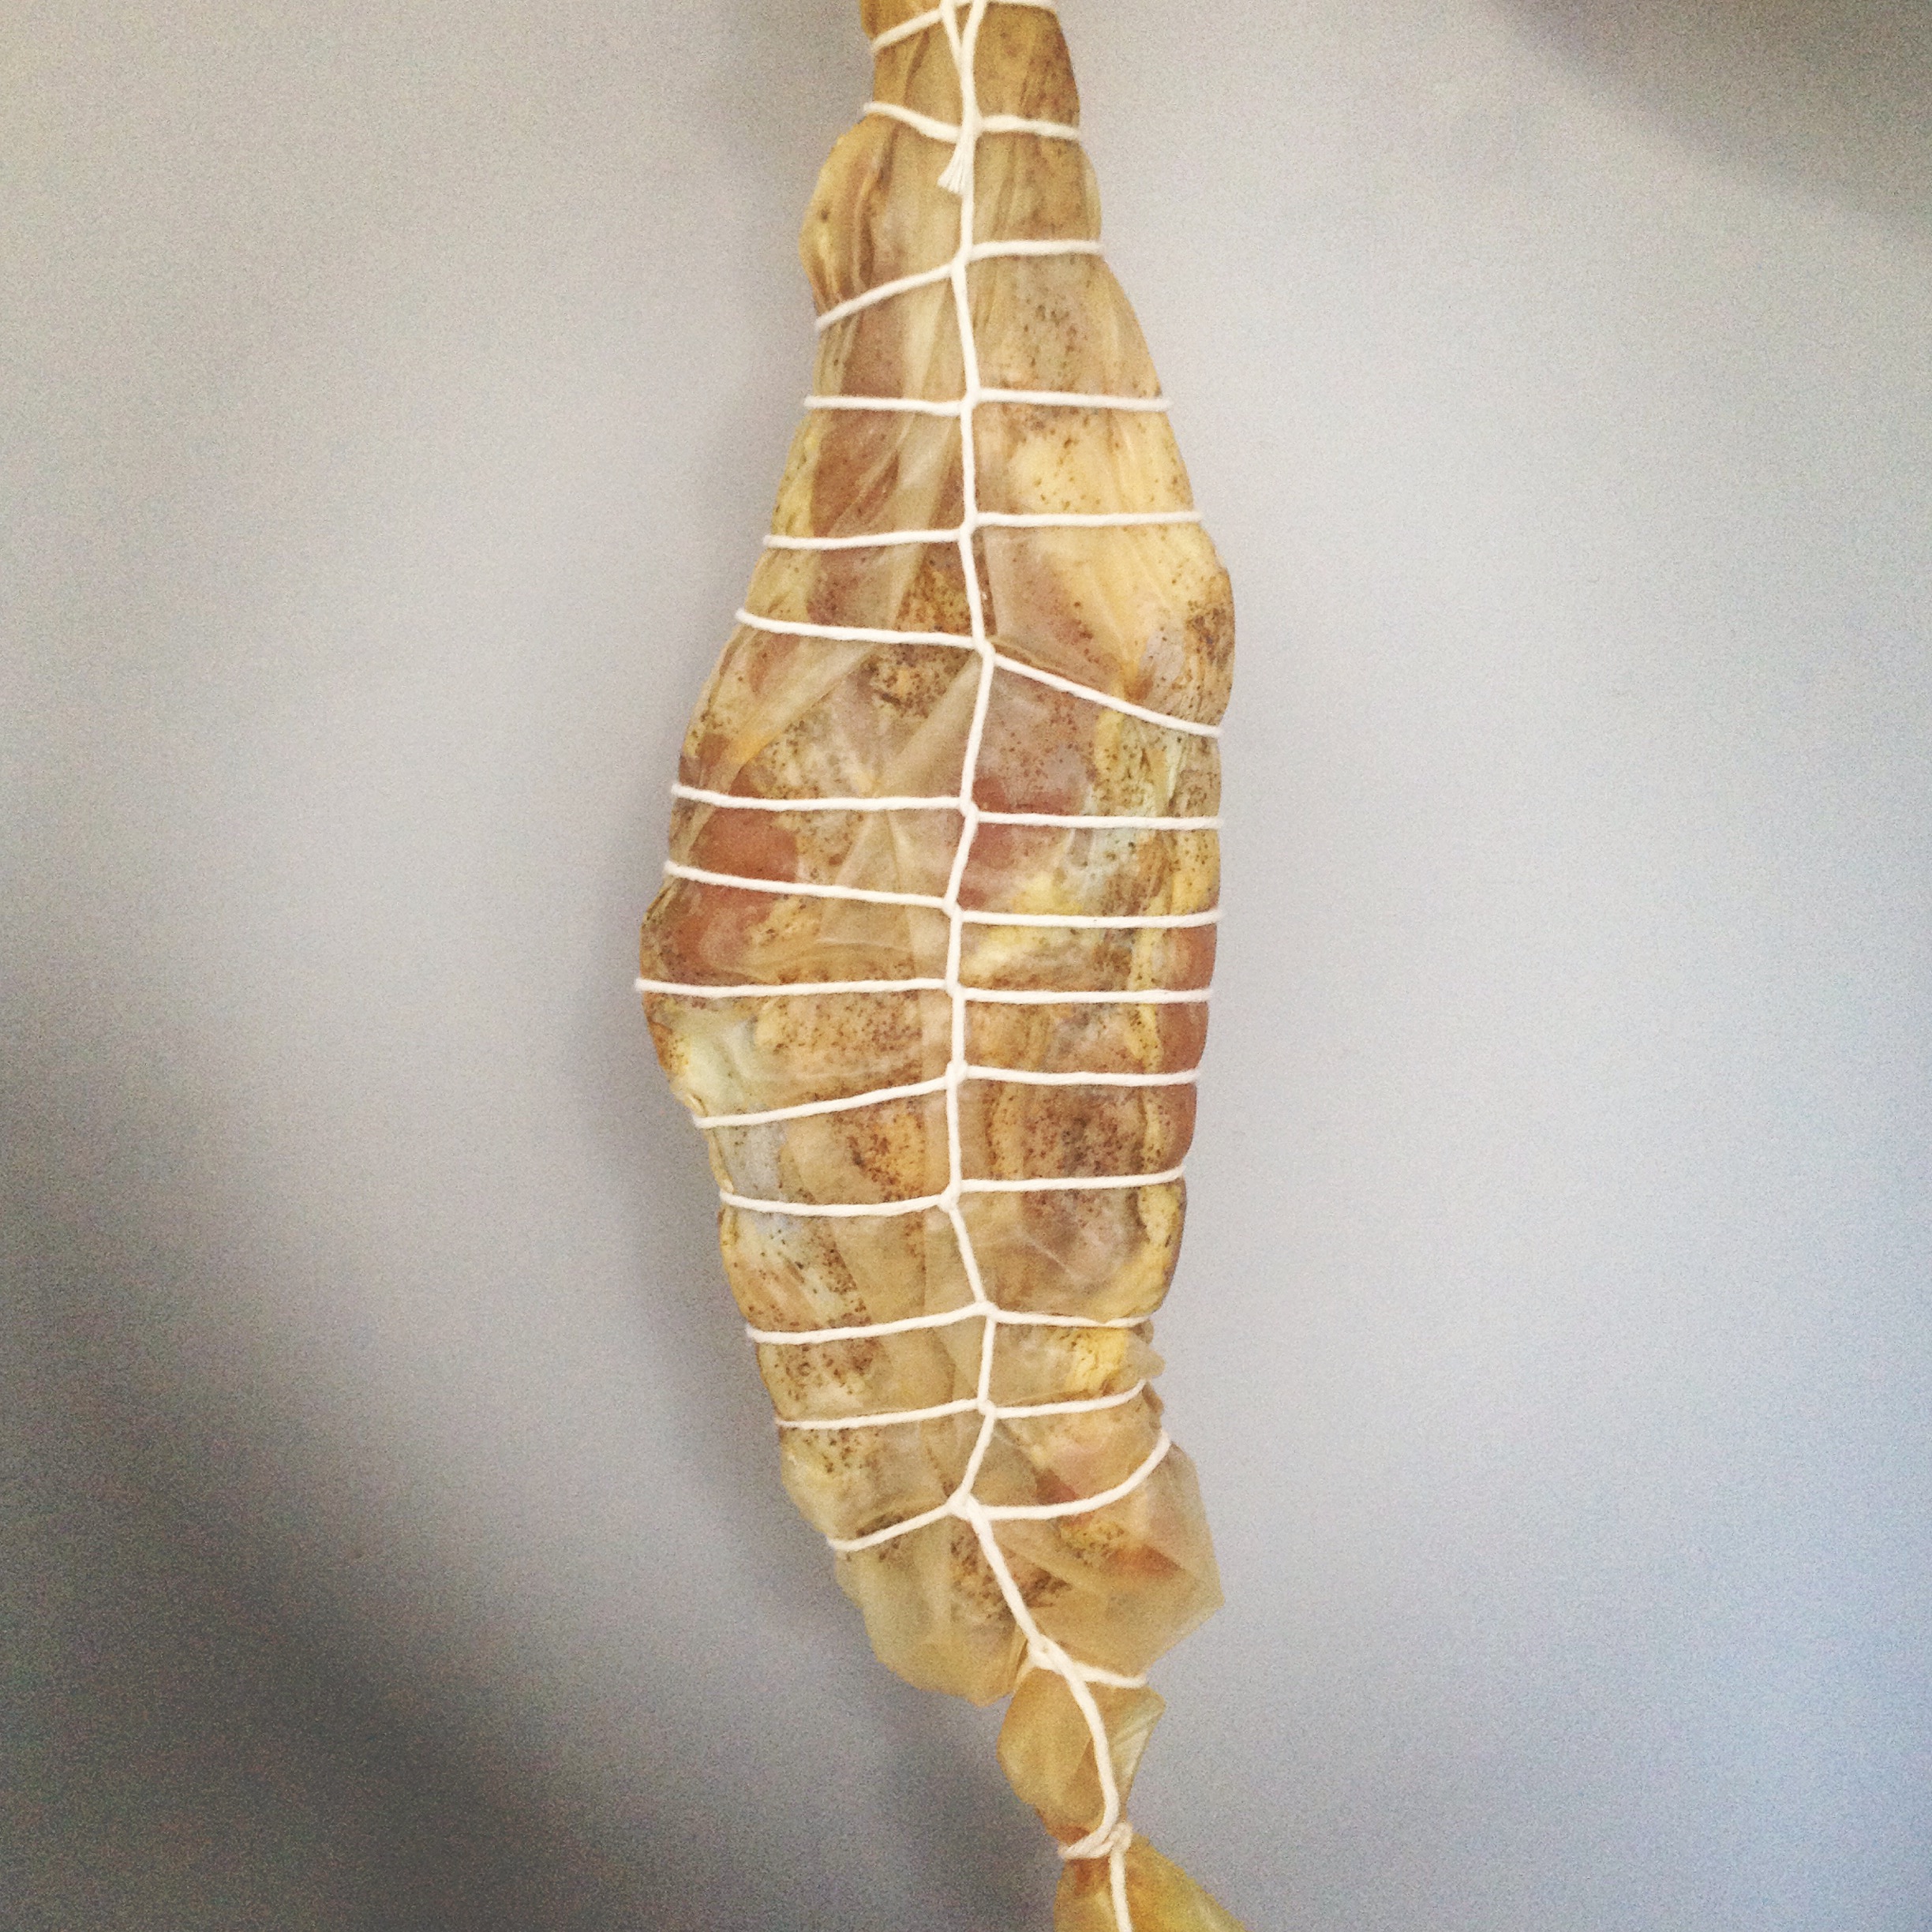
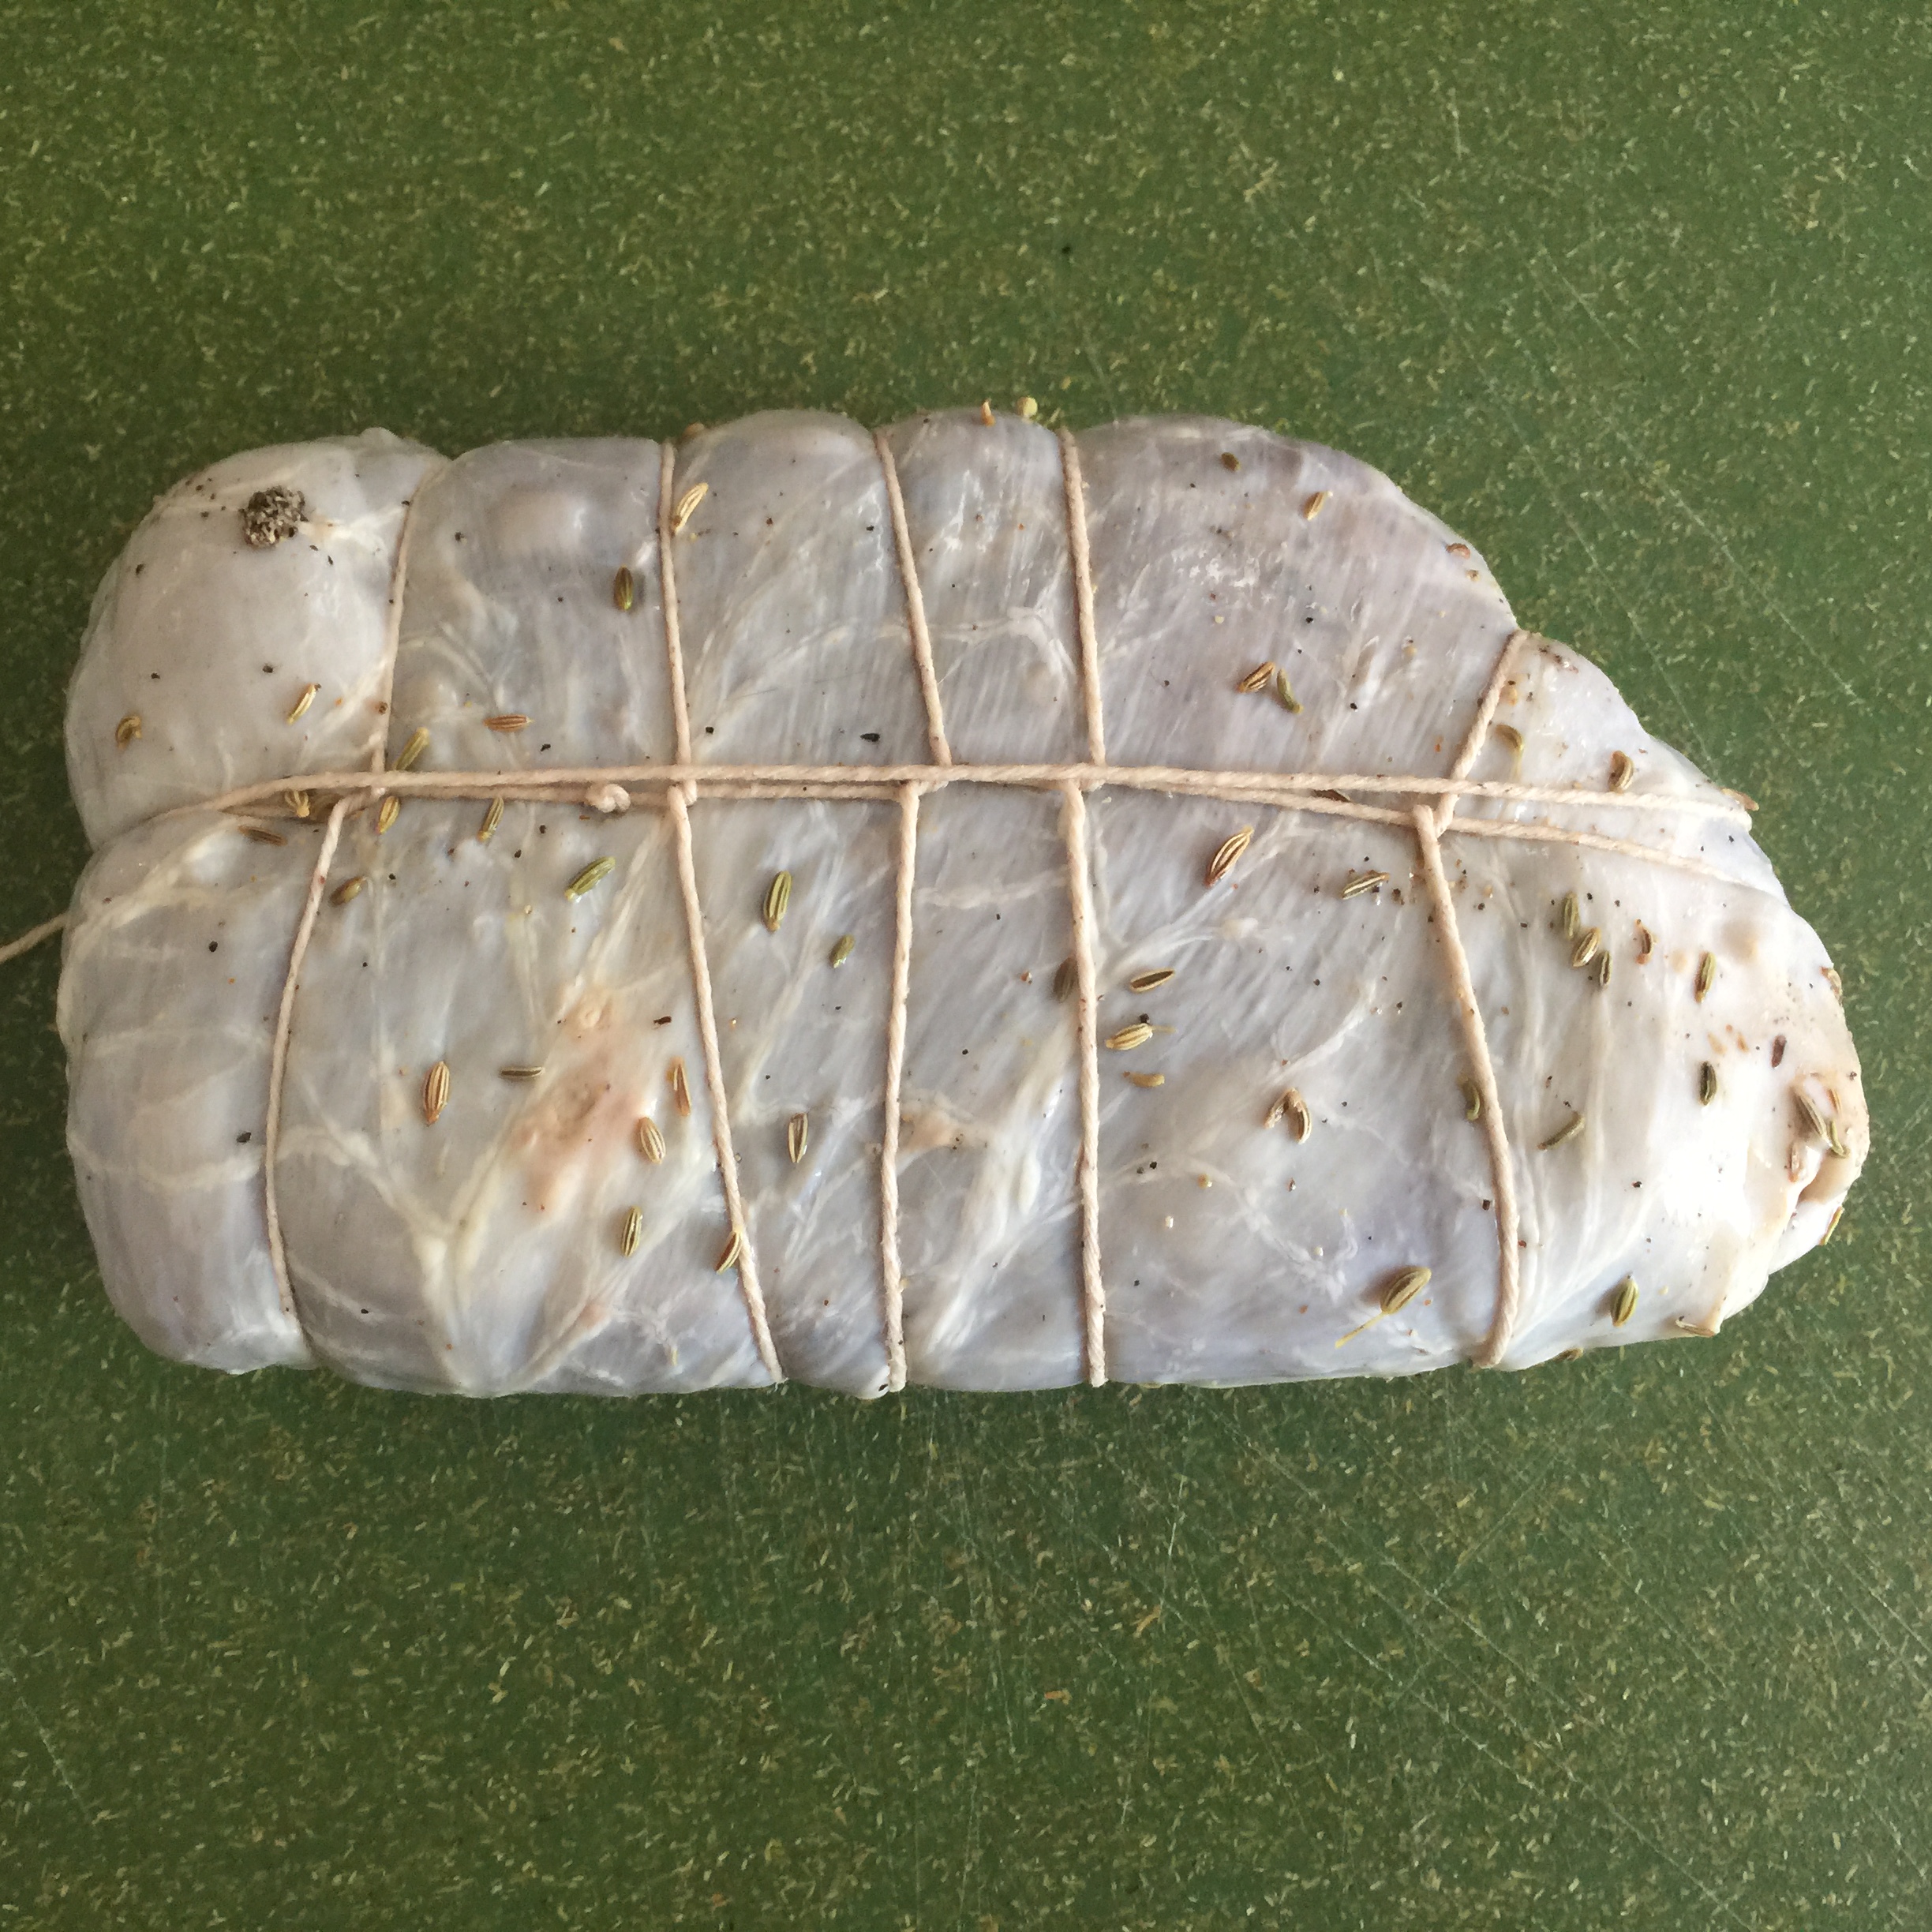
At this point, I picked the casing, tied off one end, and gathered the rest of the casing, pushing it down around the stuffing horn.

I used one hand to steady the casing around the stuffing horn, and another to crank the stuffer. When the salami reached my desired size, I twisted the casing and used butcher string to keep the separation.image(140)

I continued this process until I finished stuffing all of the duck salami mixture. I used a toothpick, to puncture any air holes in the salami at this point.


Fermentation Phase:

Temperature: 75ᵒF/23-24C

Humidity: 80-90% RH (strain dependent)

Time: 48-72 hours (until pH drops to at least 5.3)

Once all the salami was stuffed into casings, it was time to allow the meat to ferment. This is the stage I was most worried about when thinking about using duck fat. Luckily, the starter culture I was using had a relatively low fermentation temperature, and I made sure the temperature didn’t rise about 75 F/23-24C in the fermentation chamber.

At this point, I sprayed the salami with Bactoferm 600, a commercially available form of penicillium nalgiovense.

image(18)

I have attempted to track the fermentation stage using pH monitoring before, but I don’t always do that. This time, I tracked the fermentation stage just by time. After 3 days, I moved on to the drying phase.
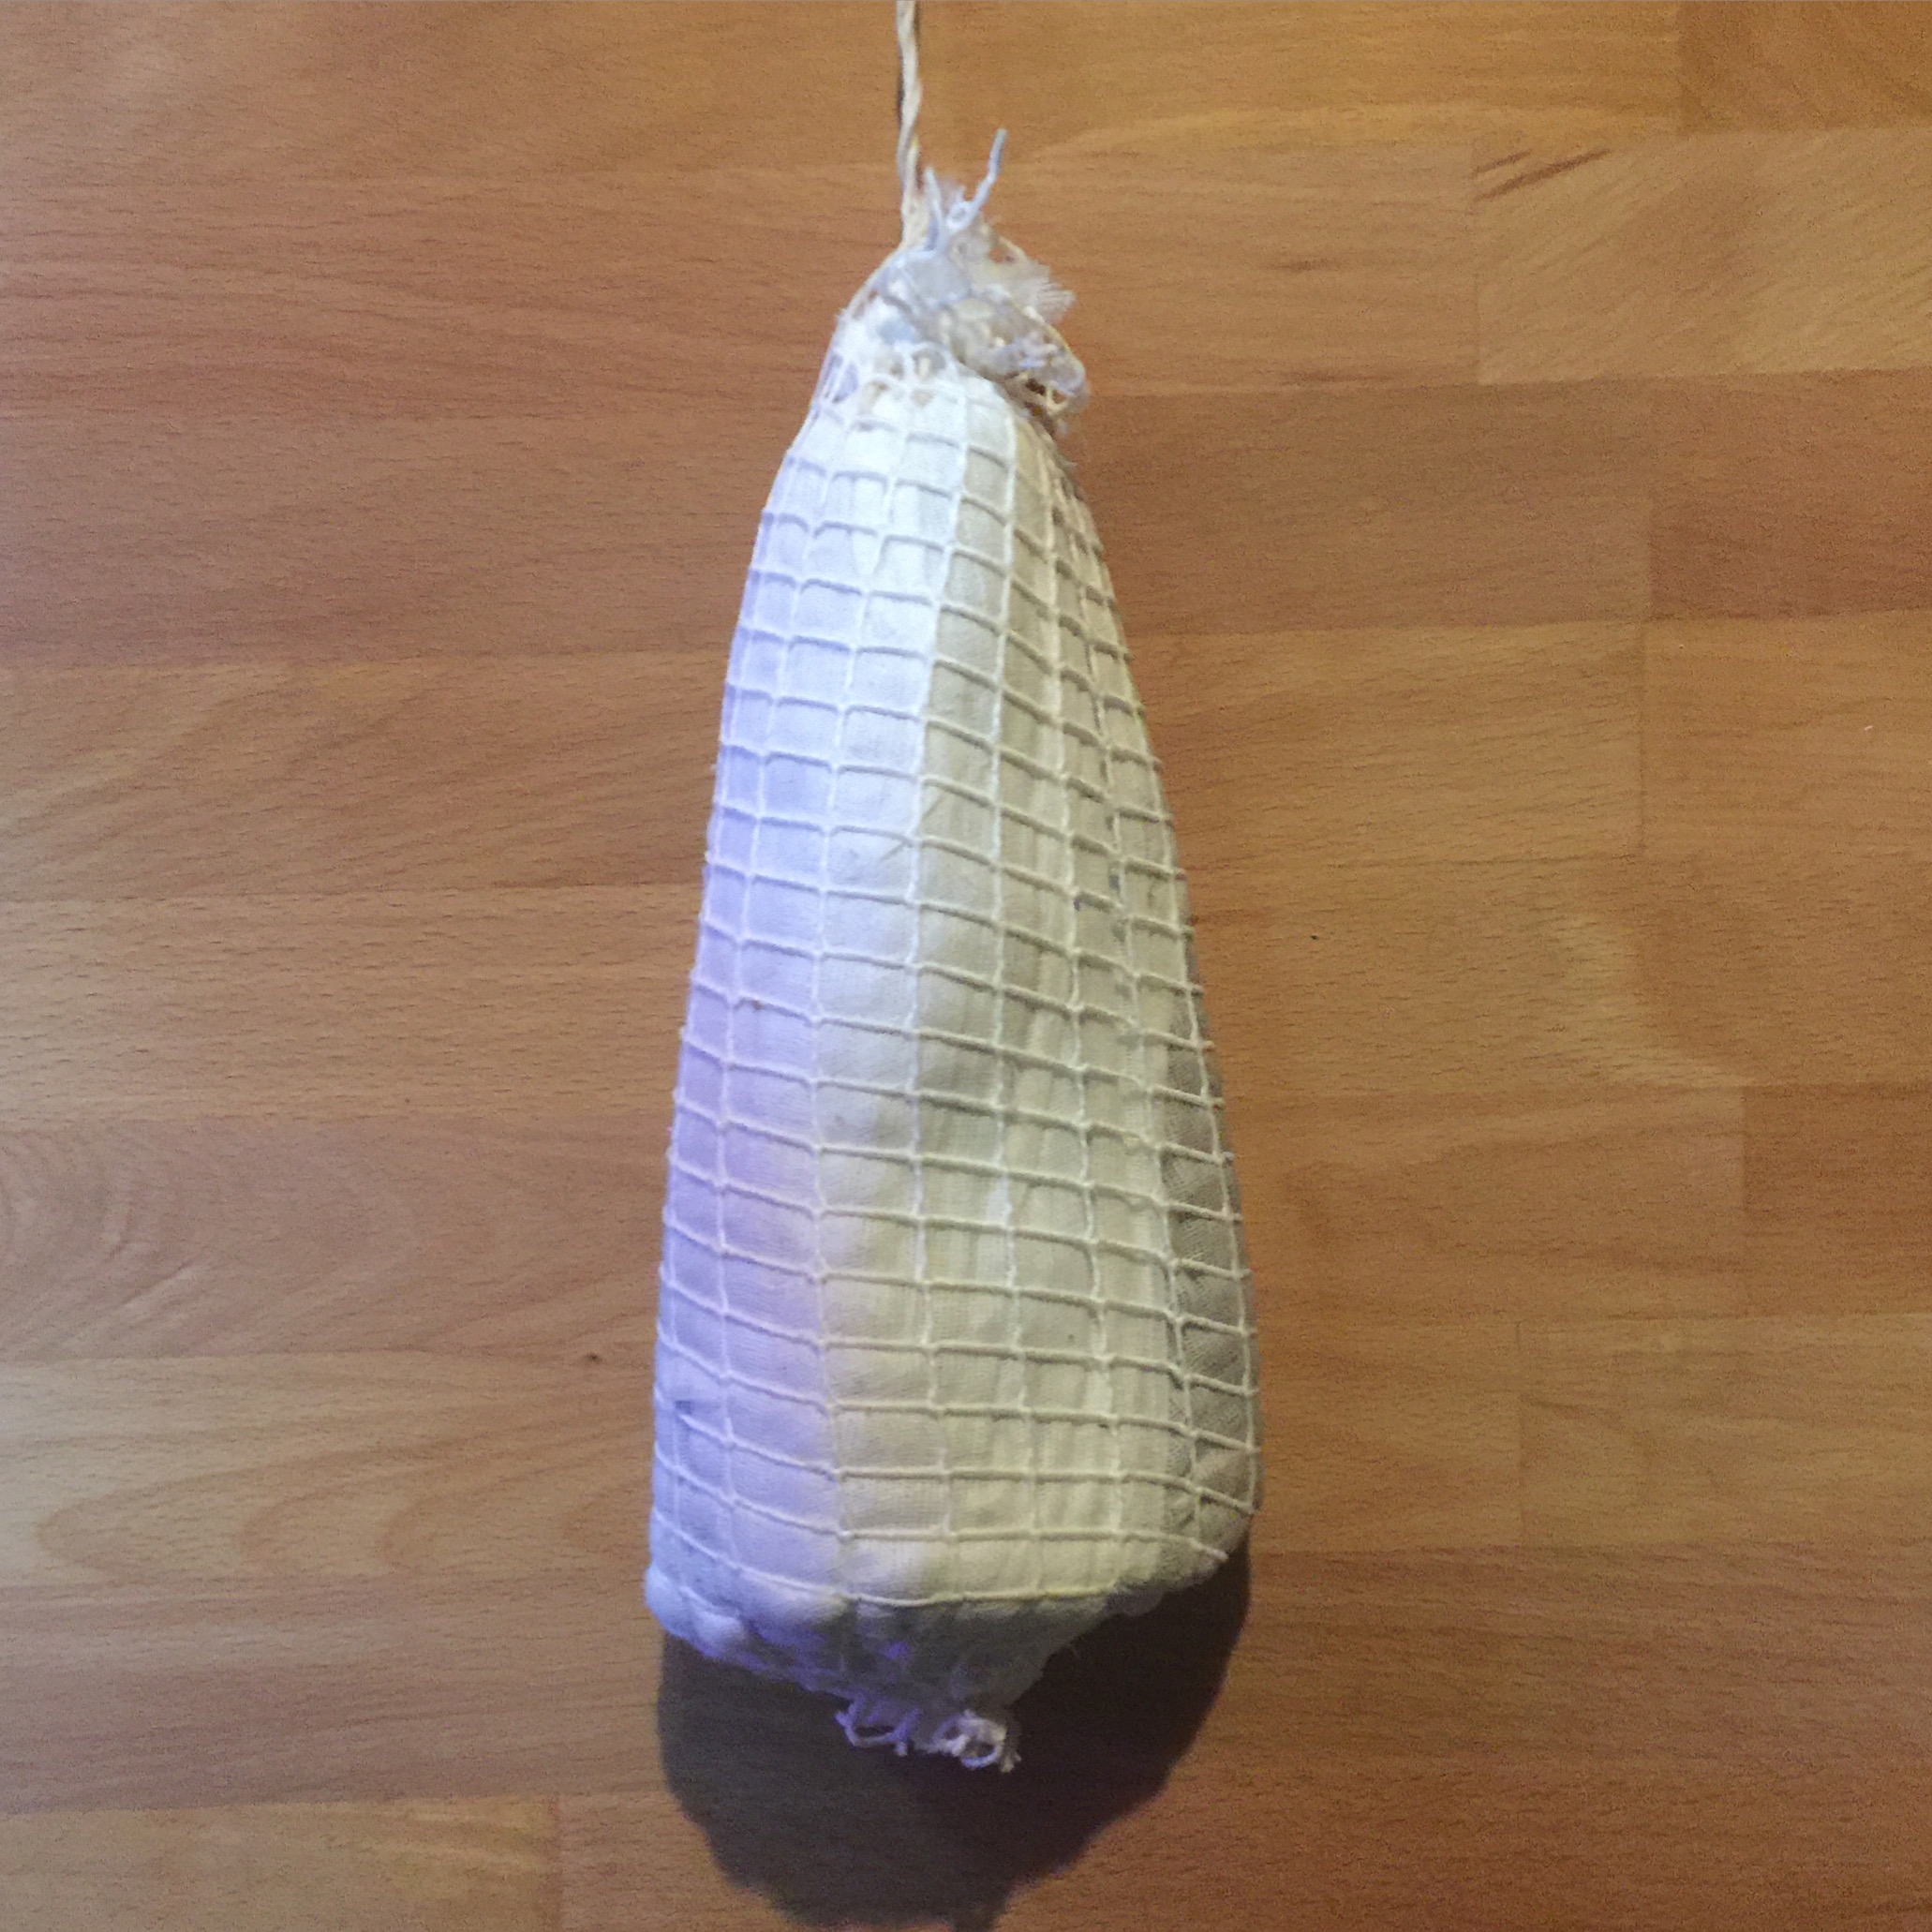
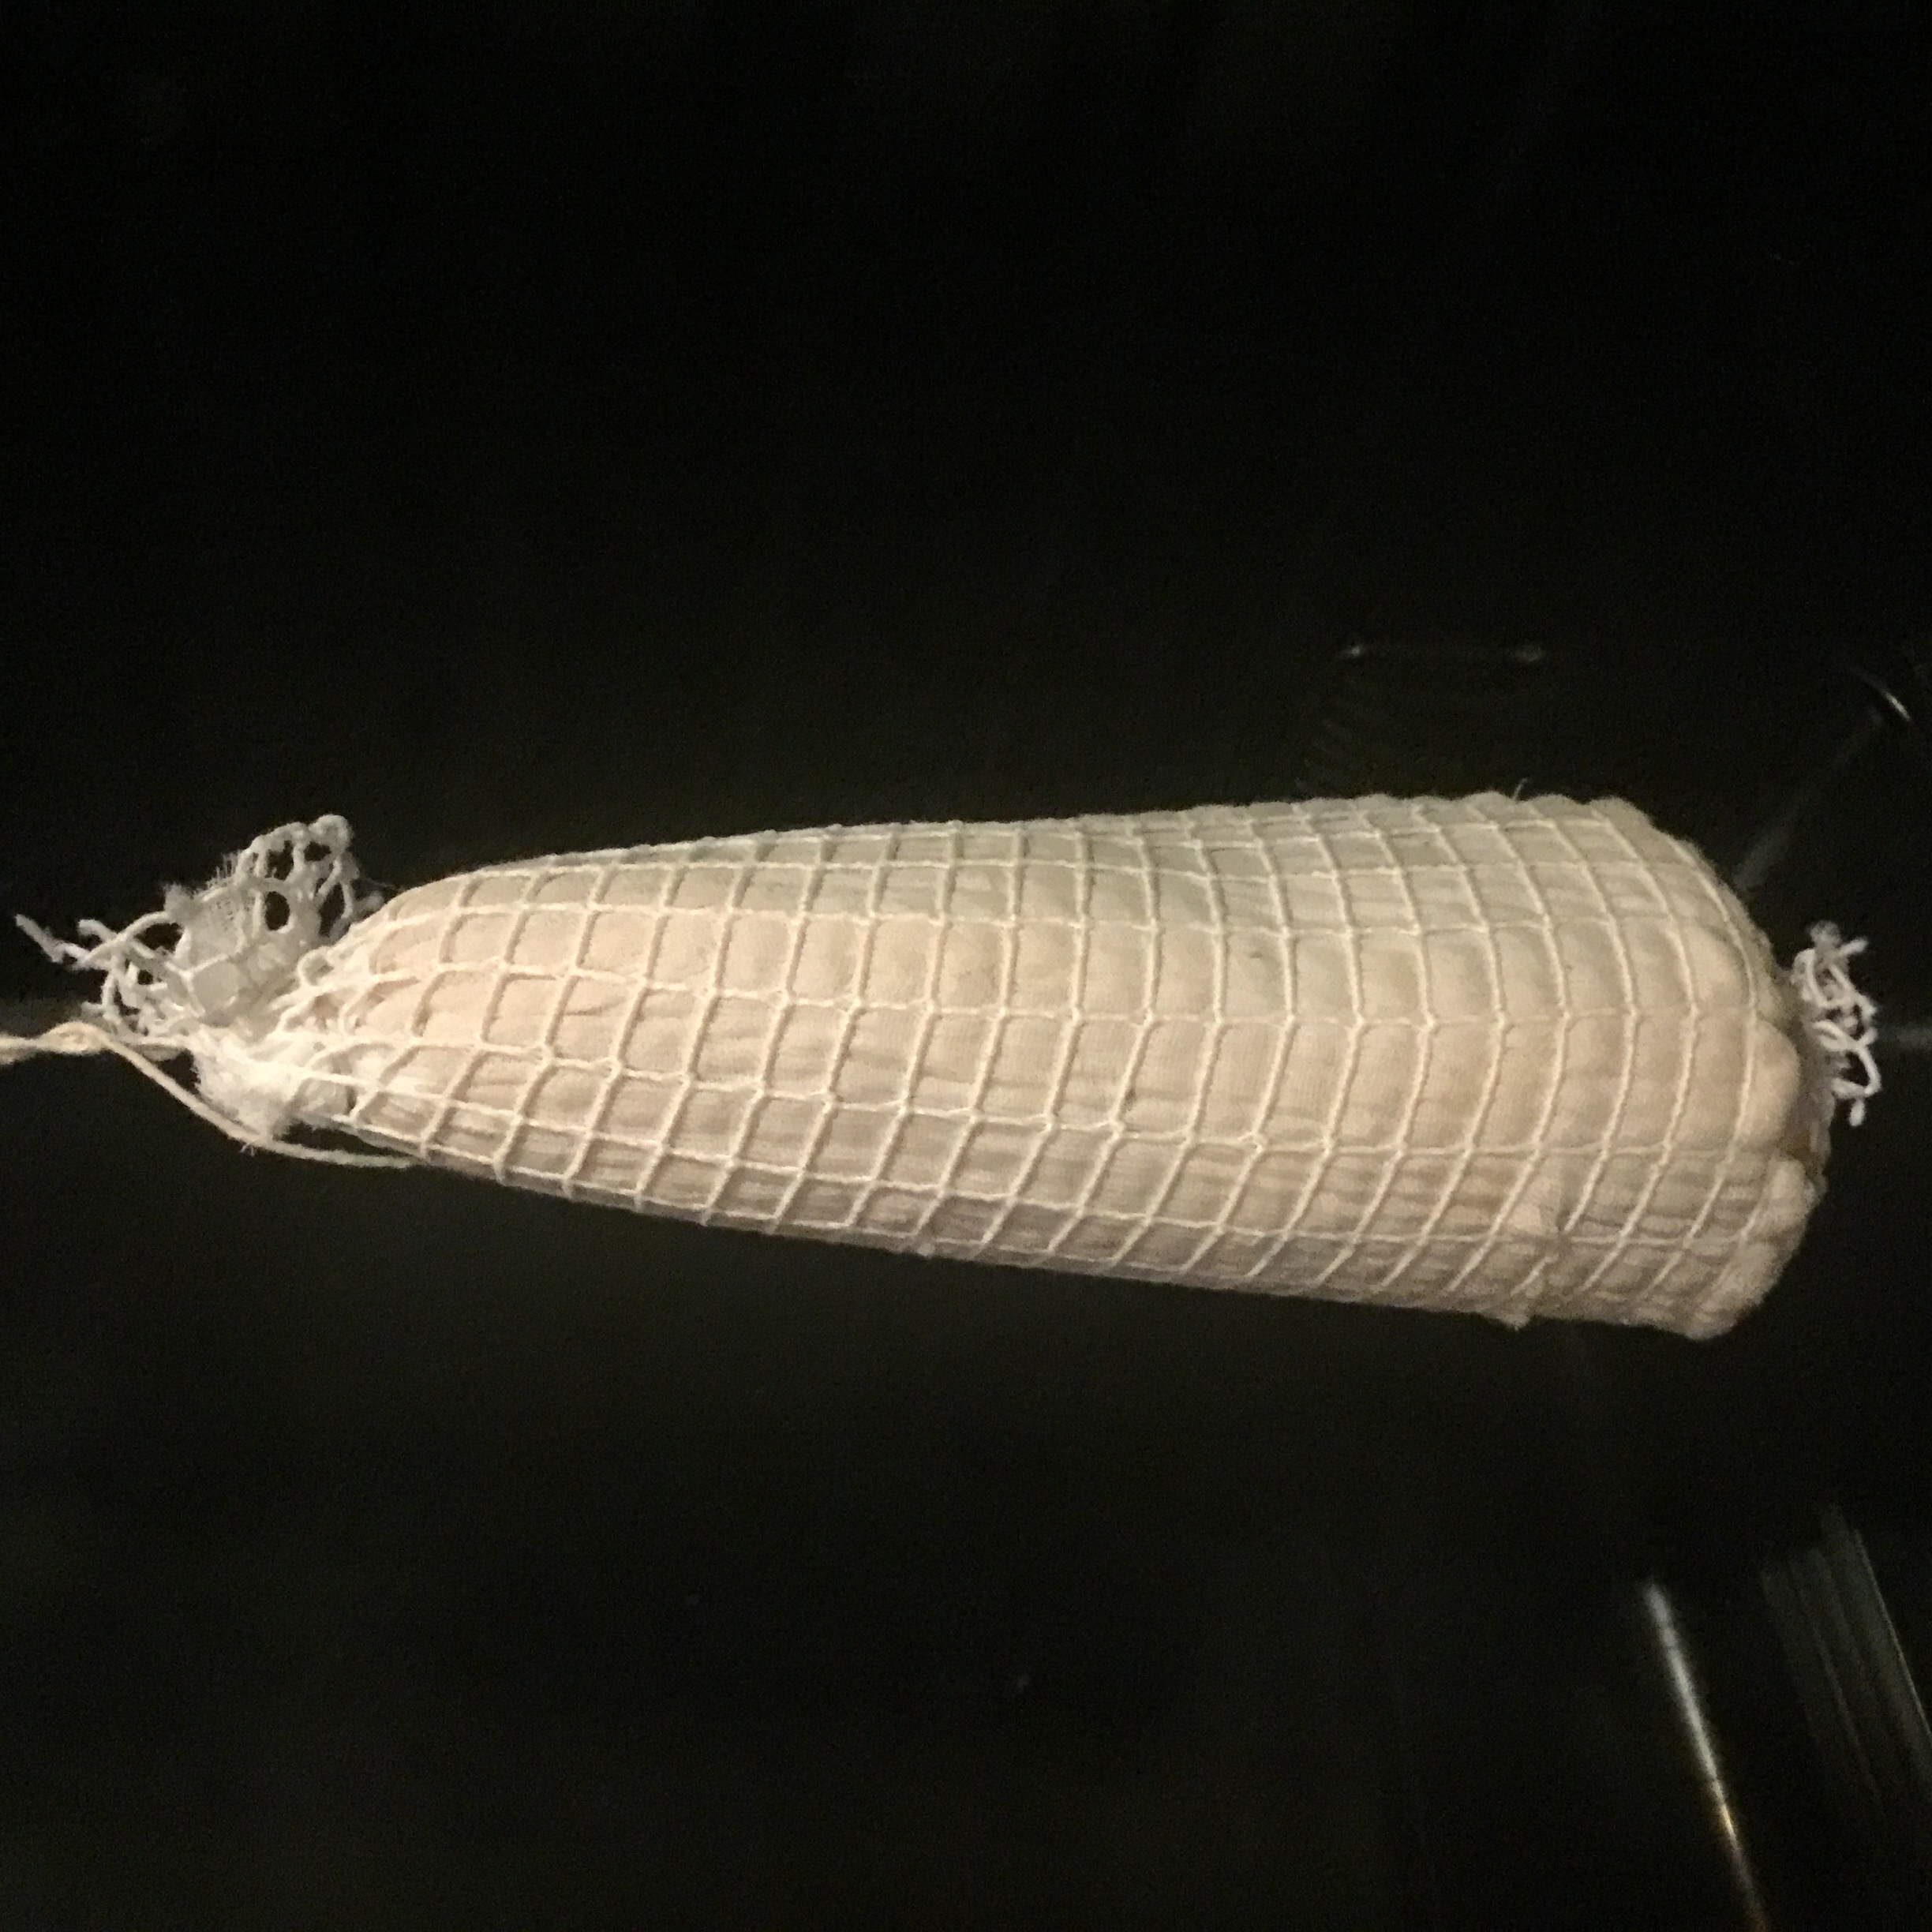
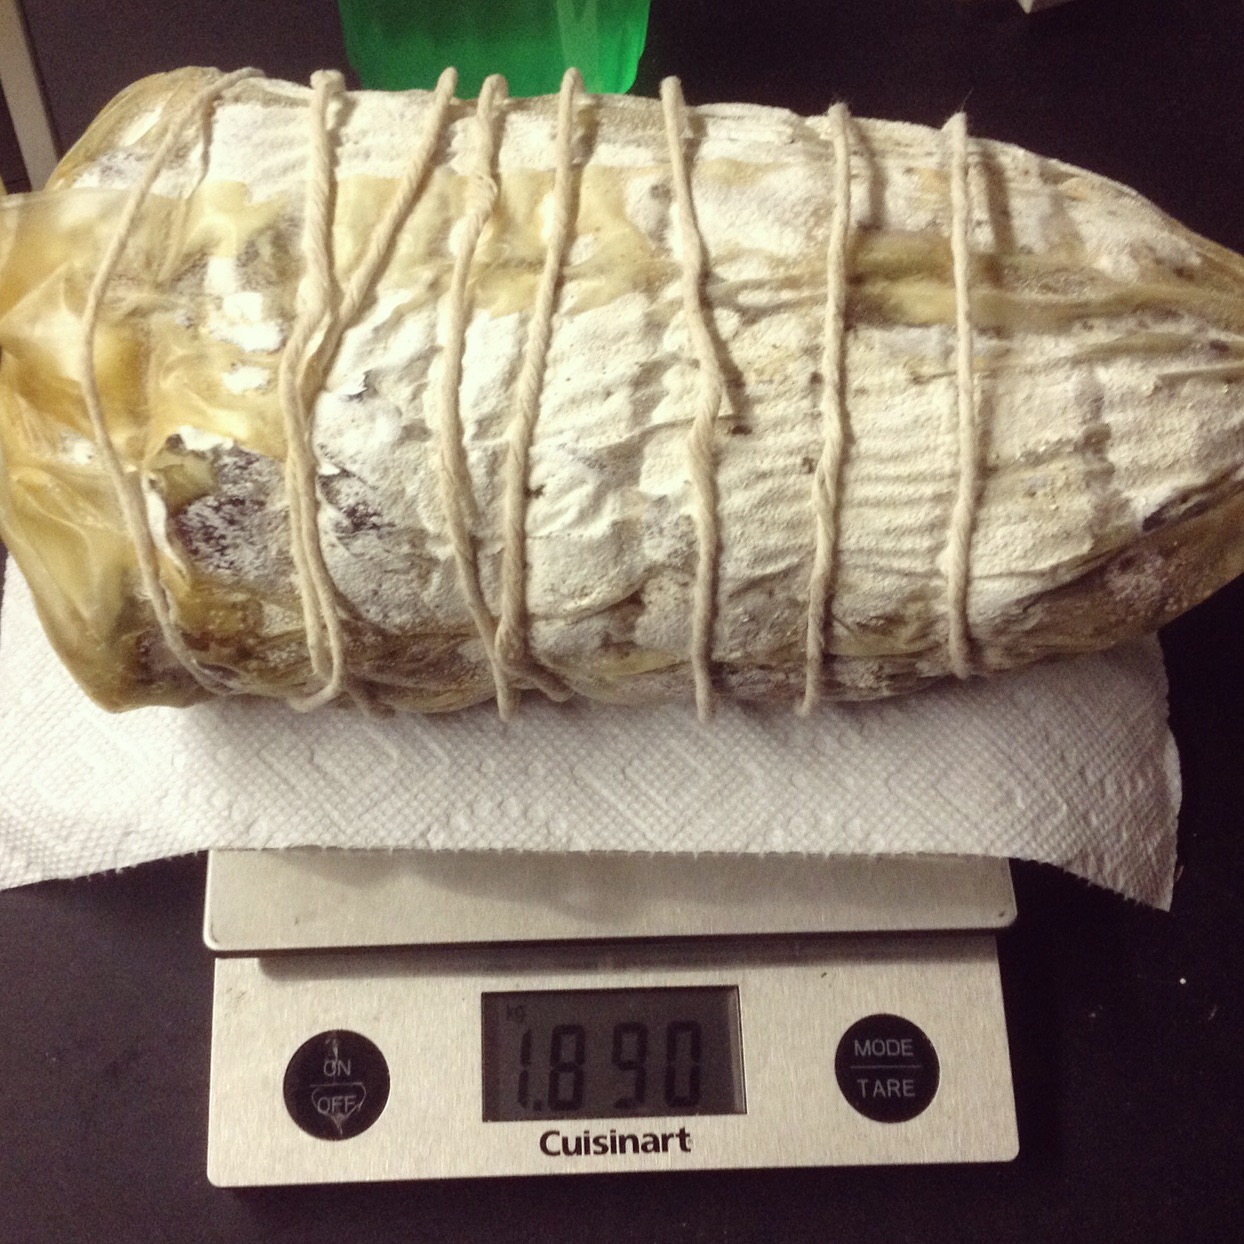
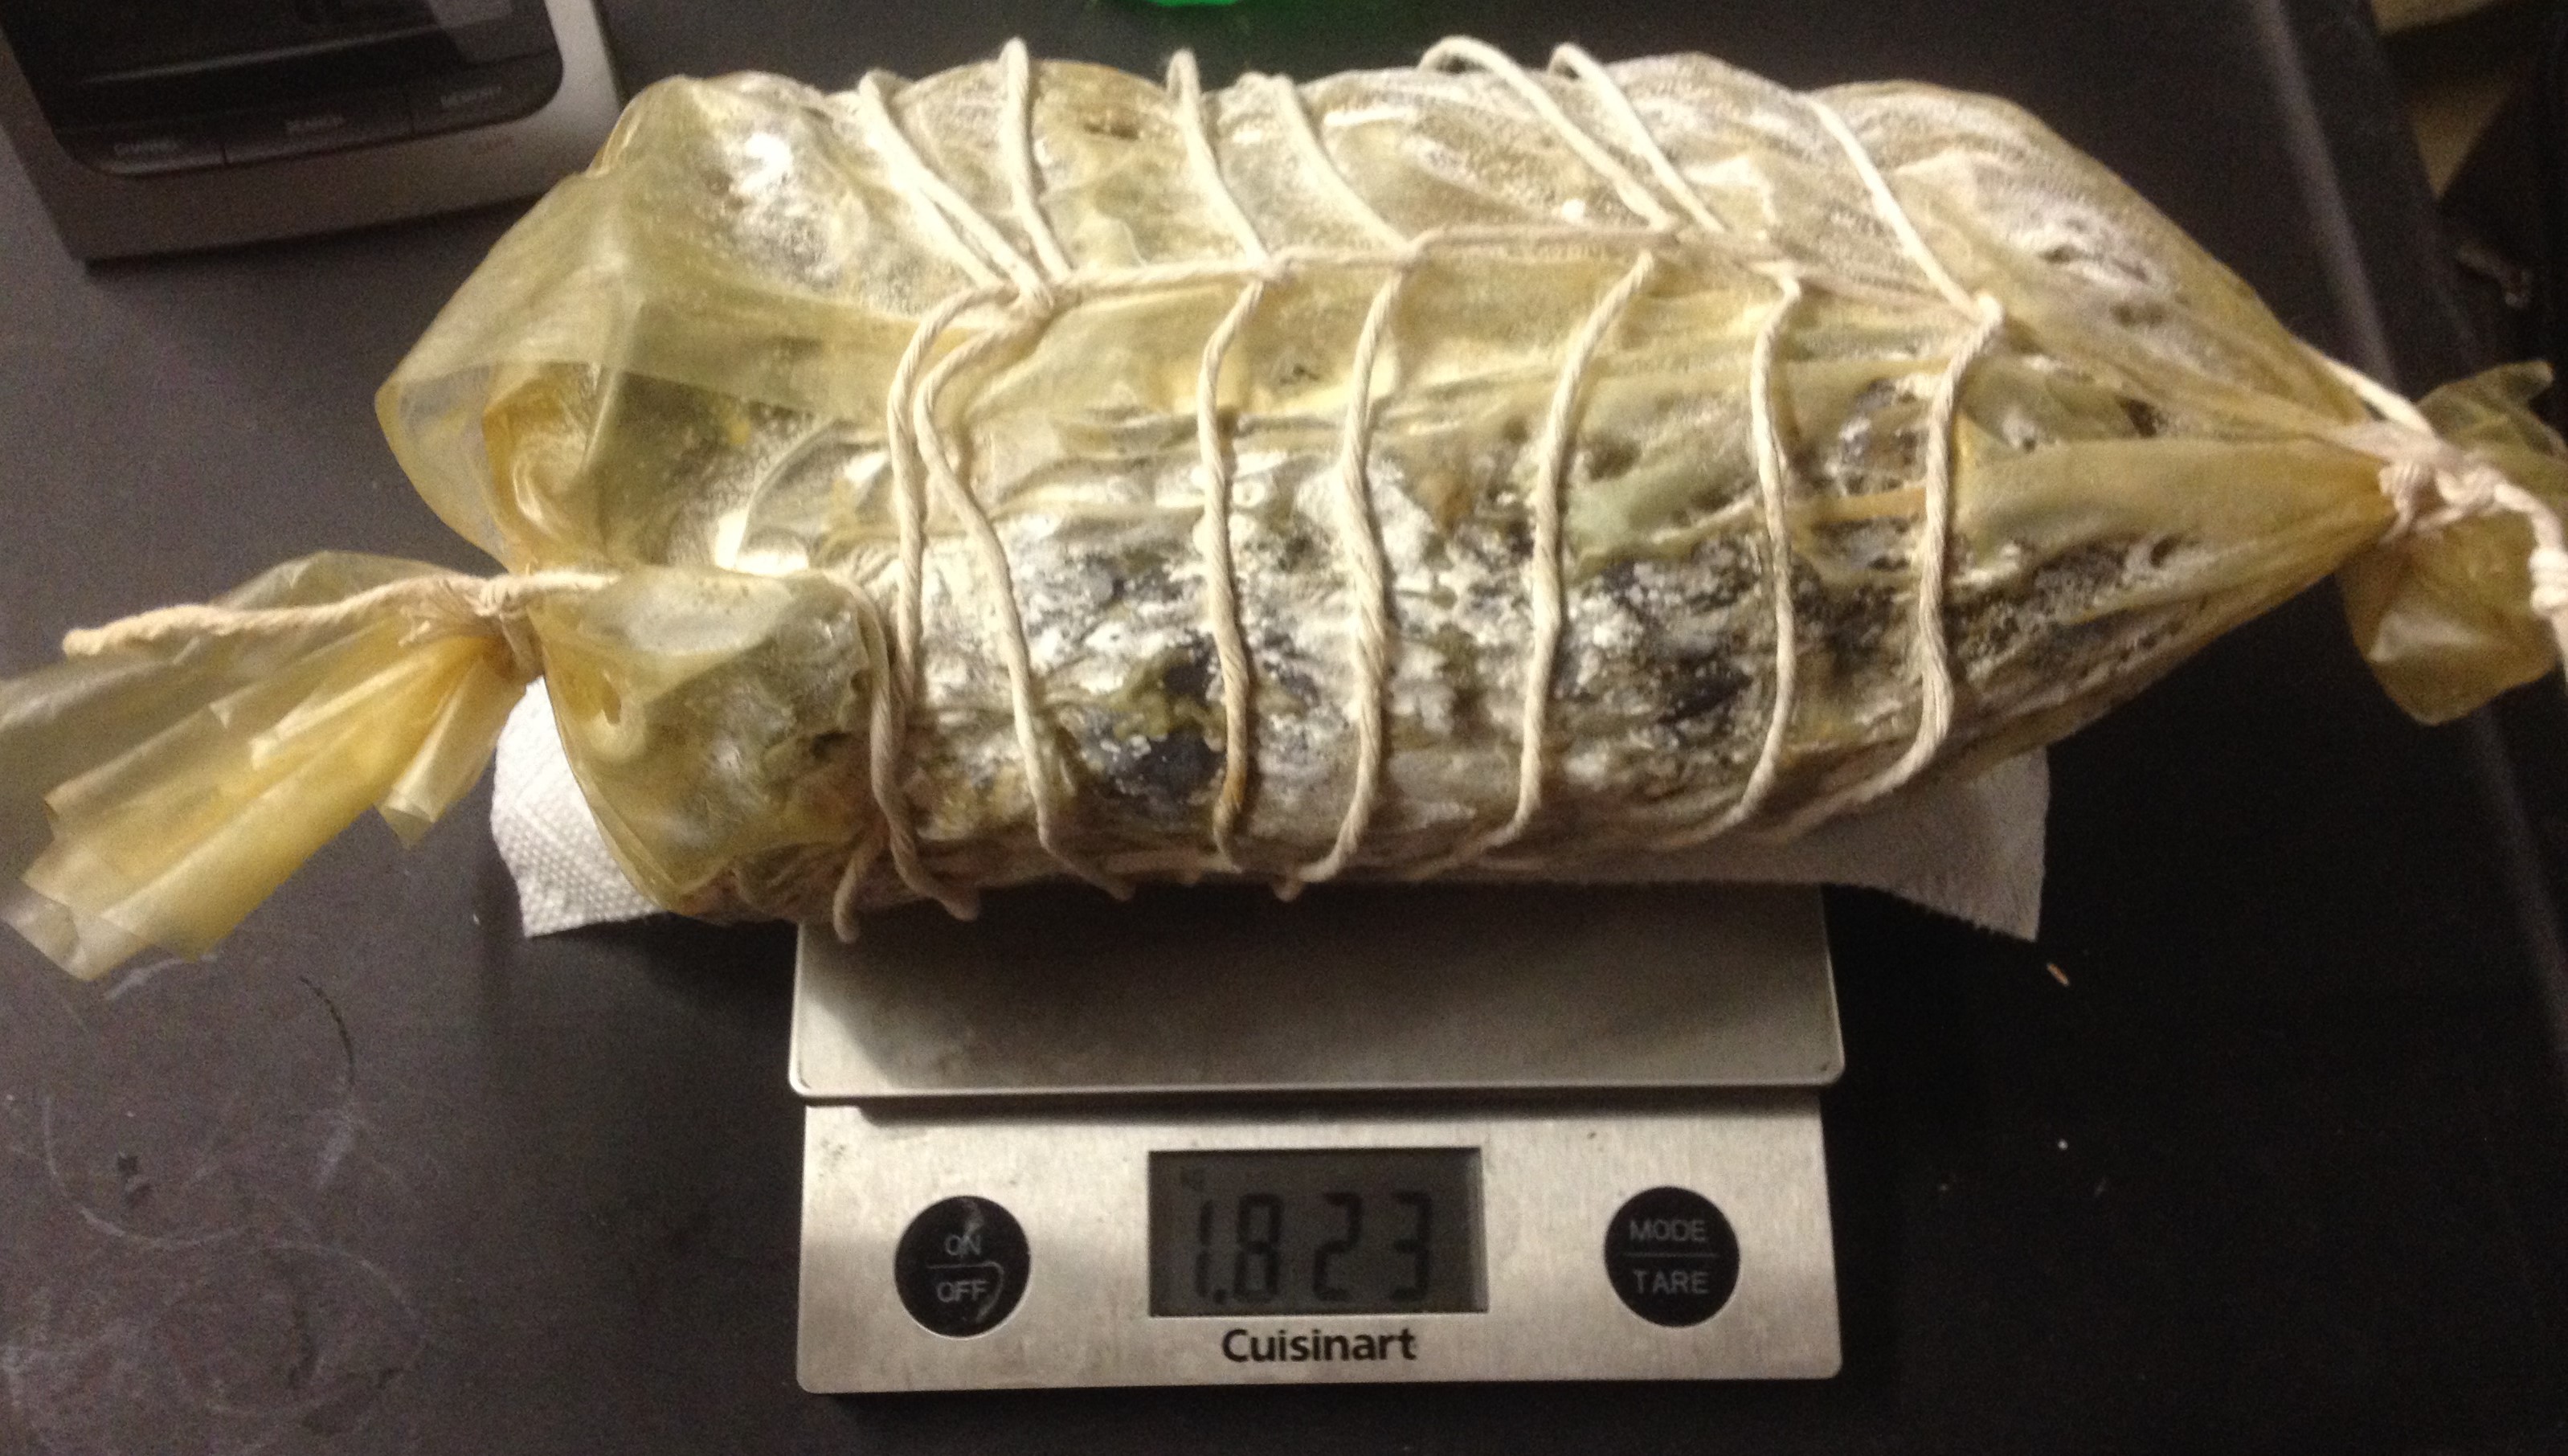
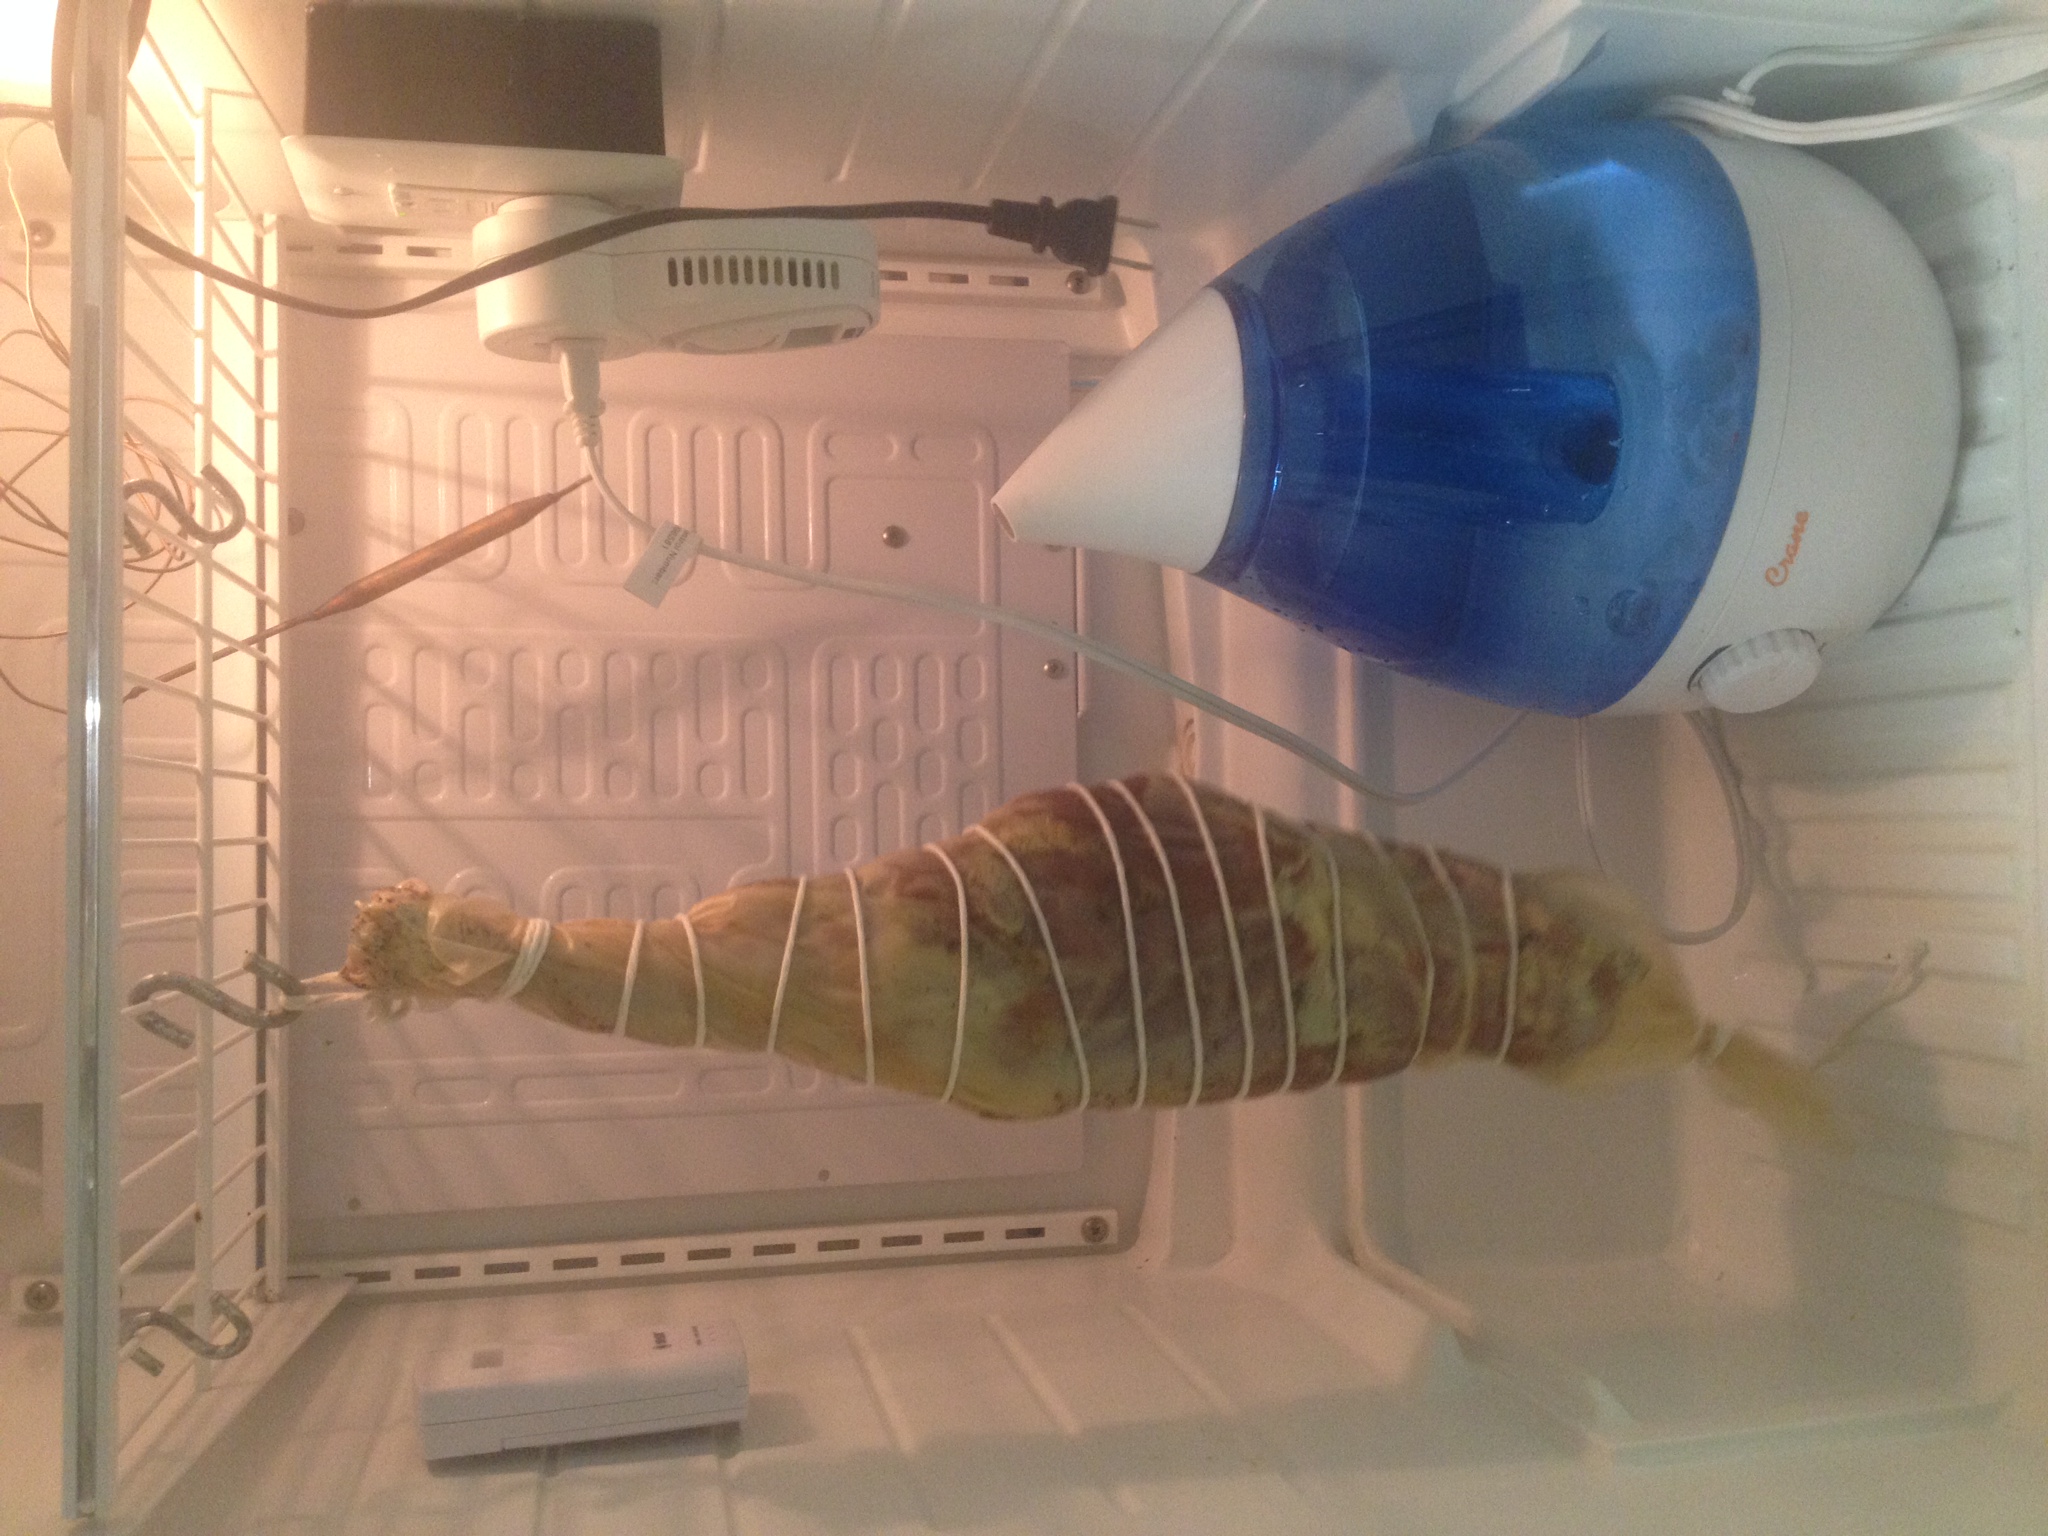
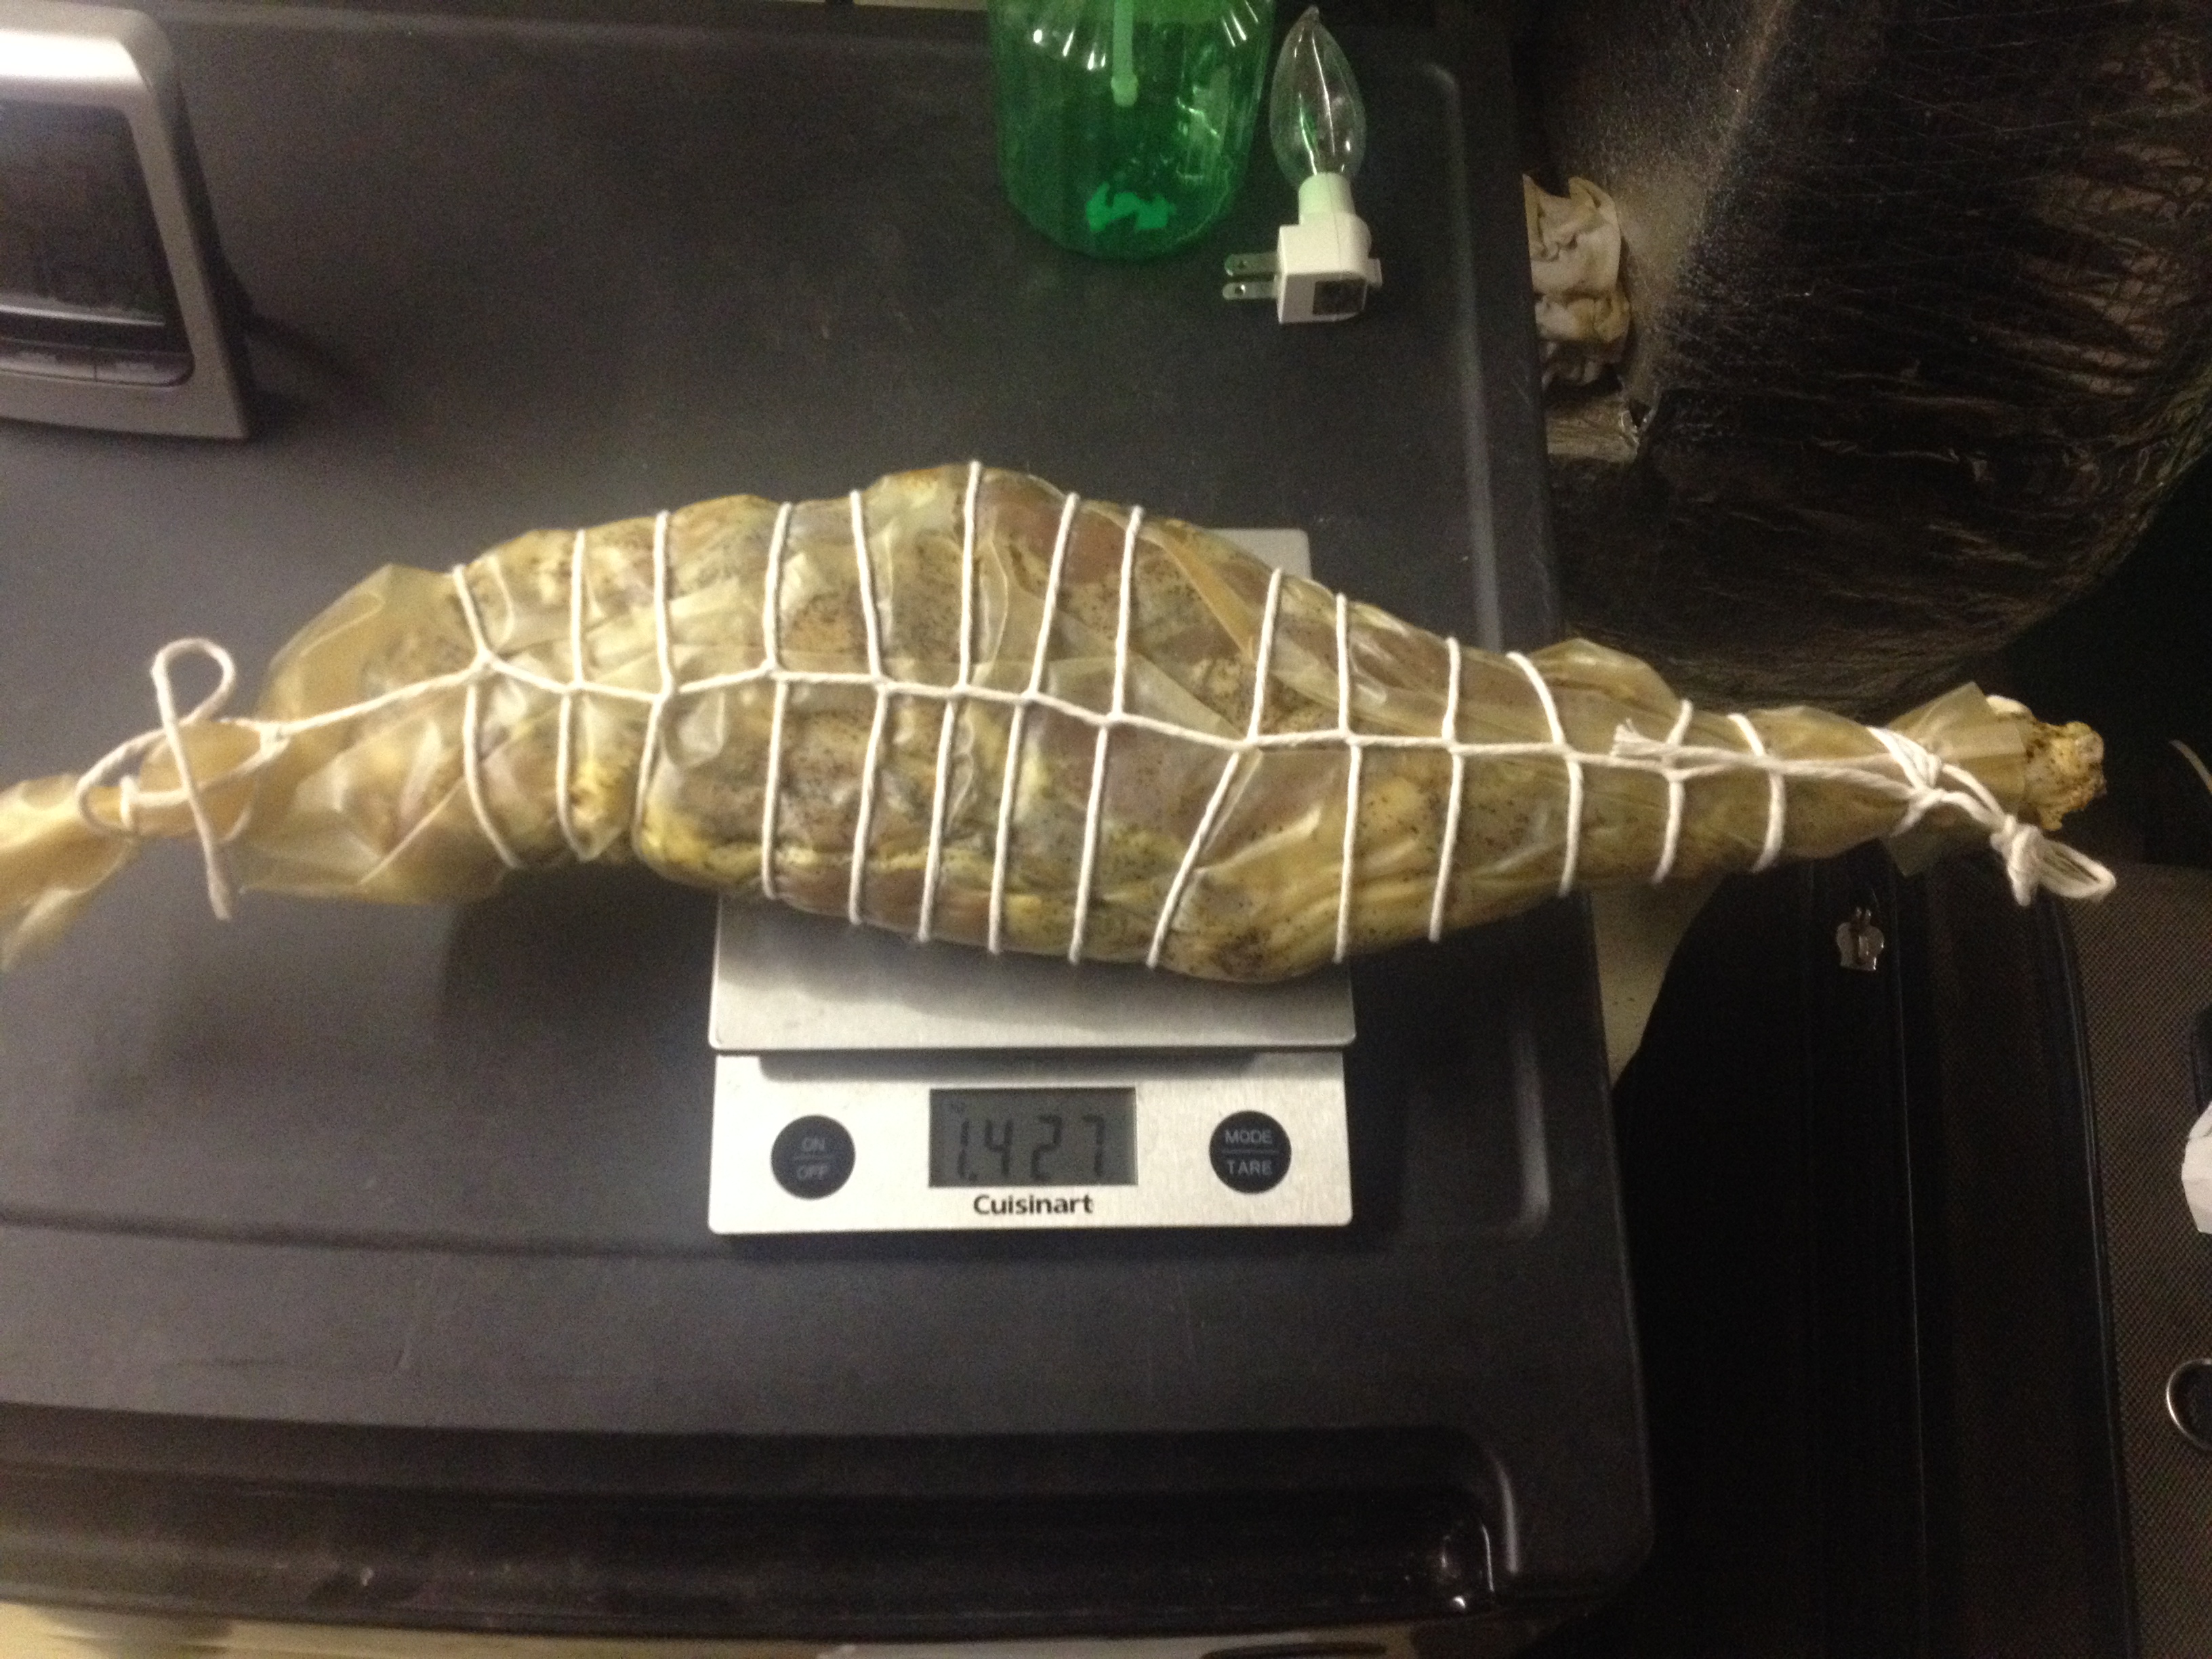
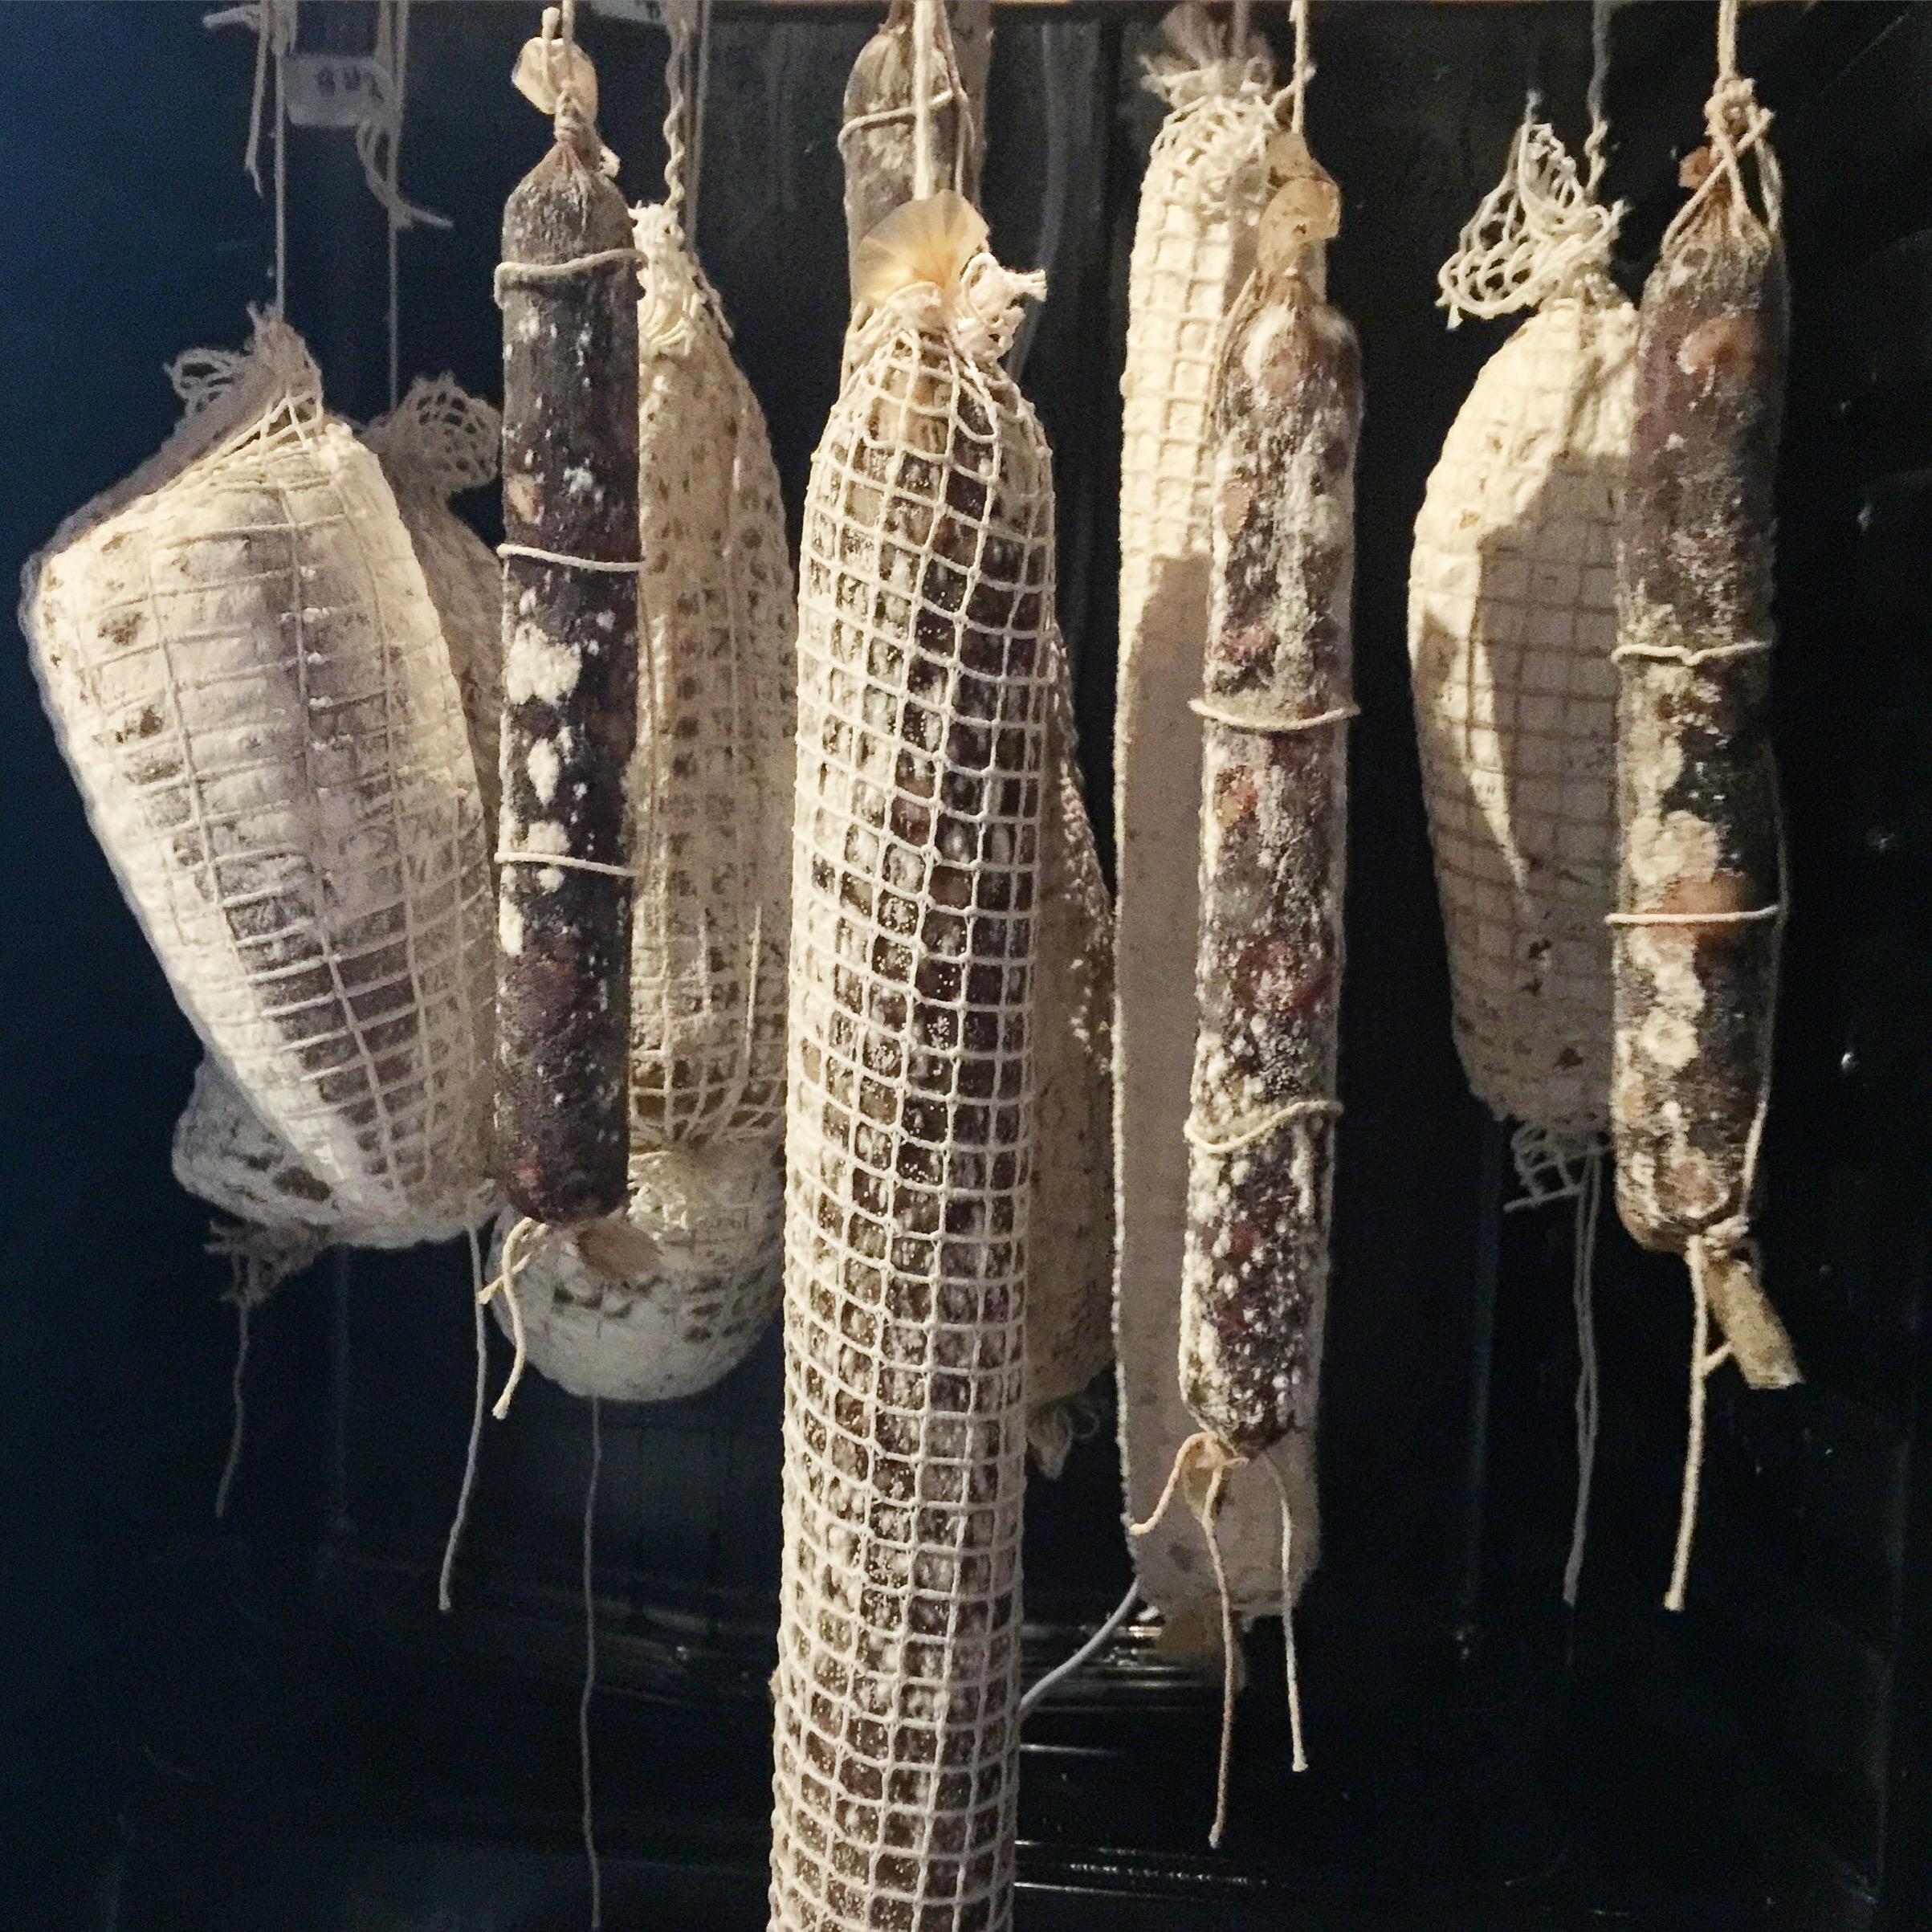

Drying Phase:

Temperature: 54F/12C

Humidity: 70% RH

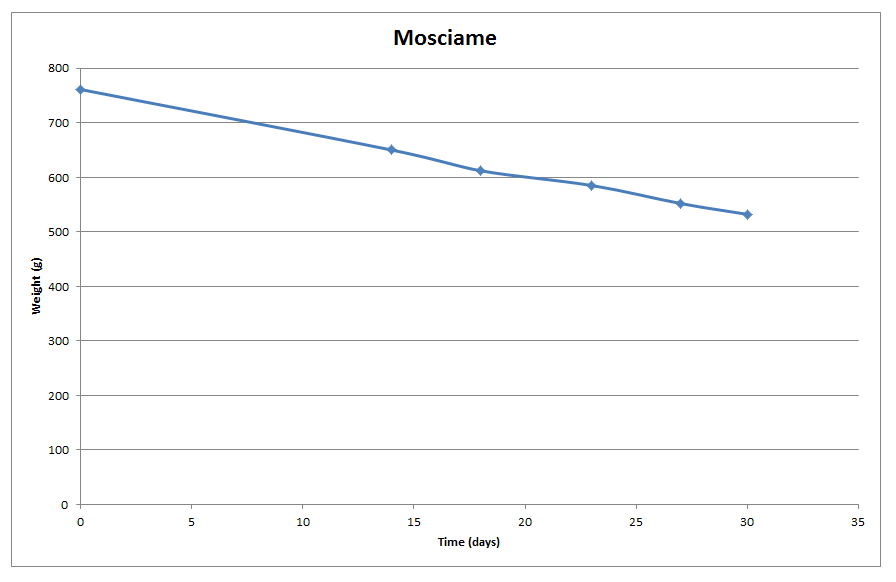
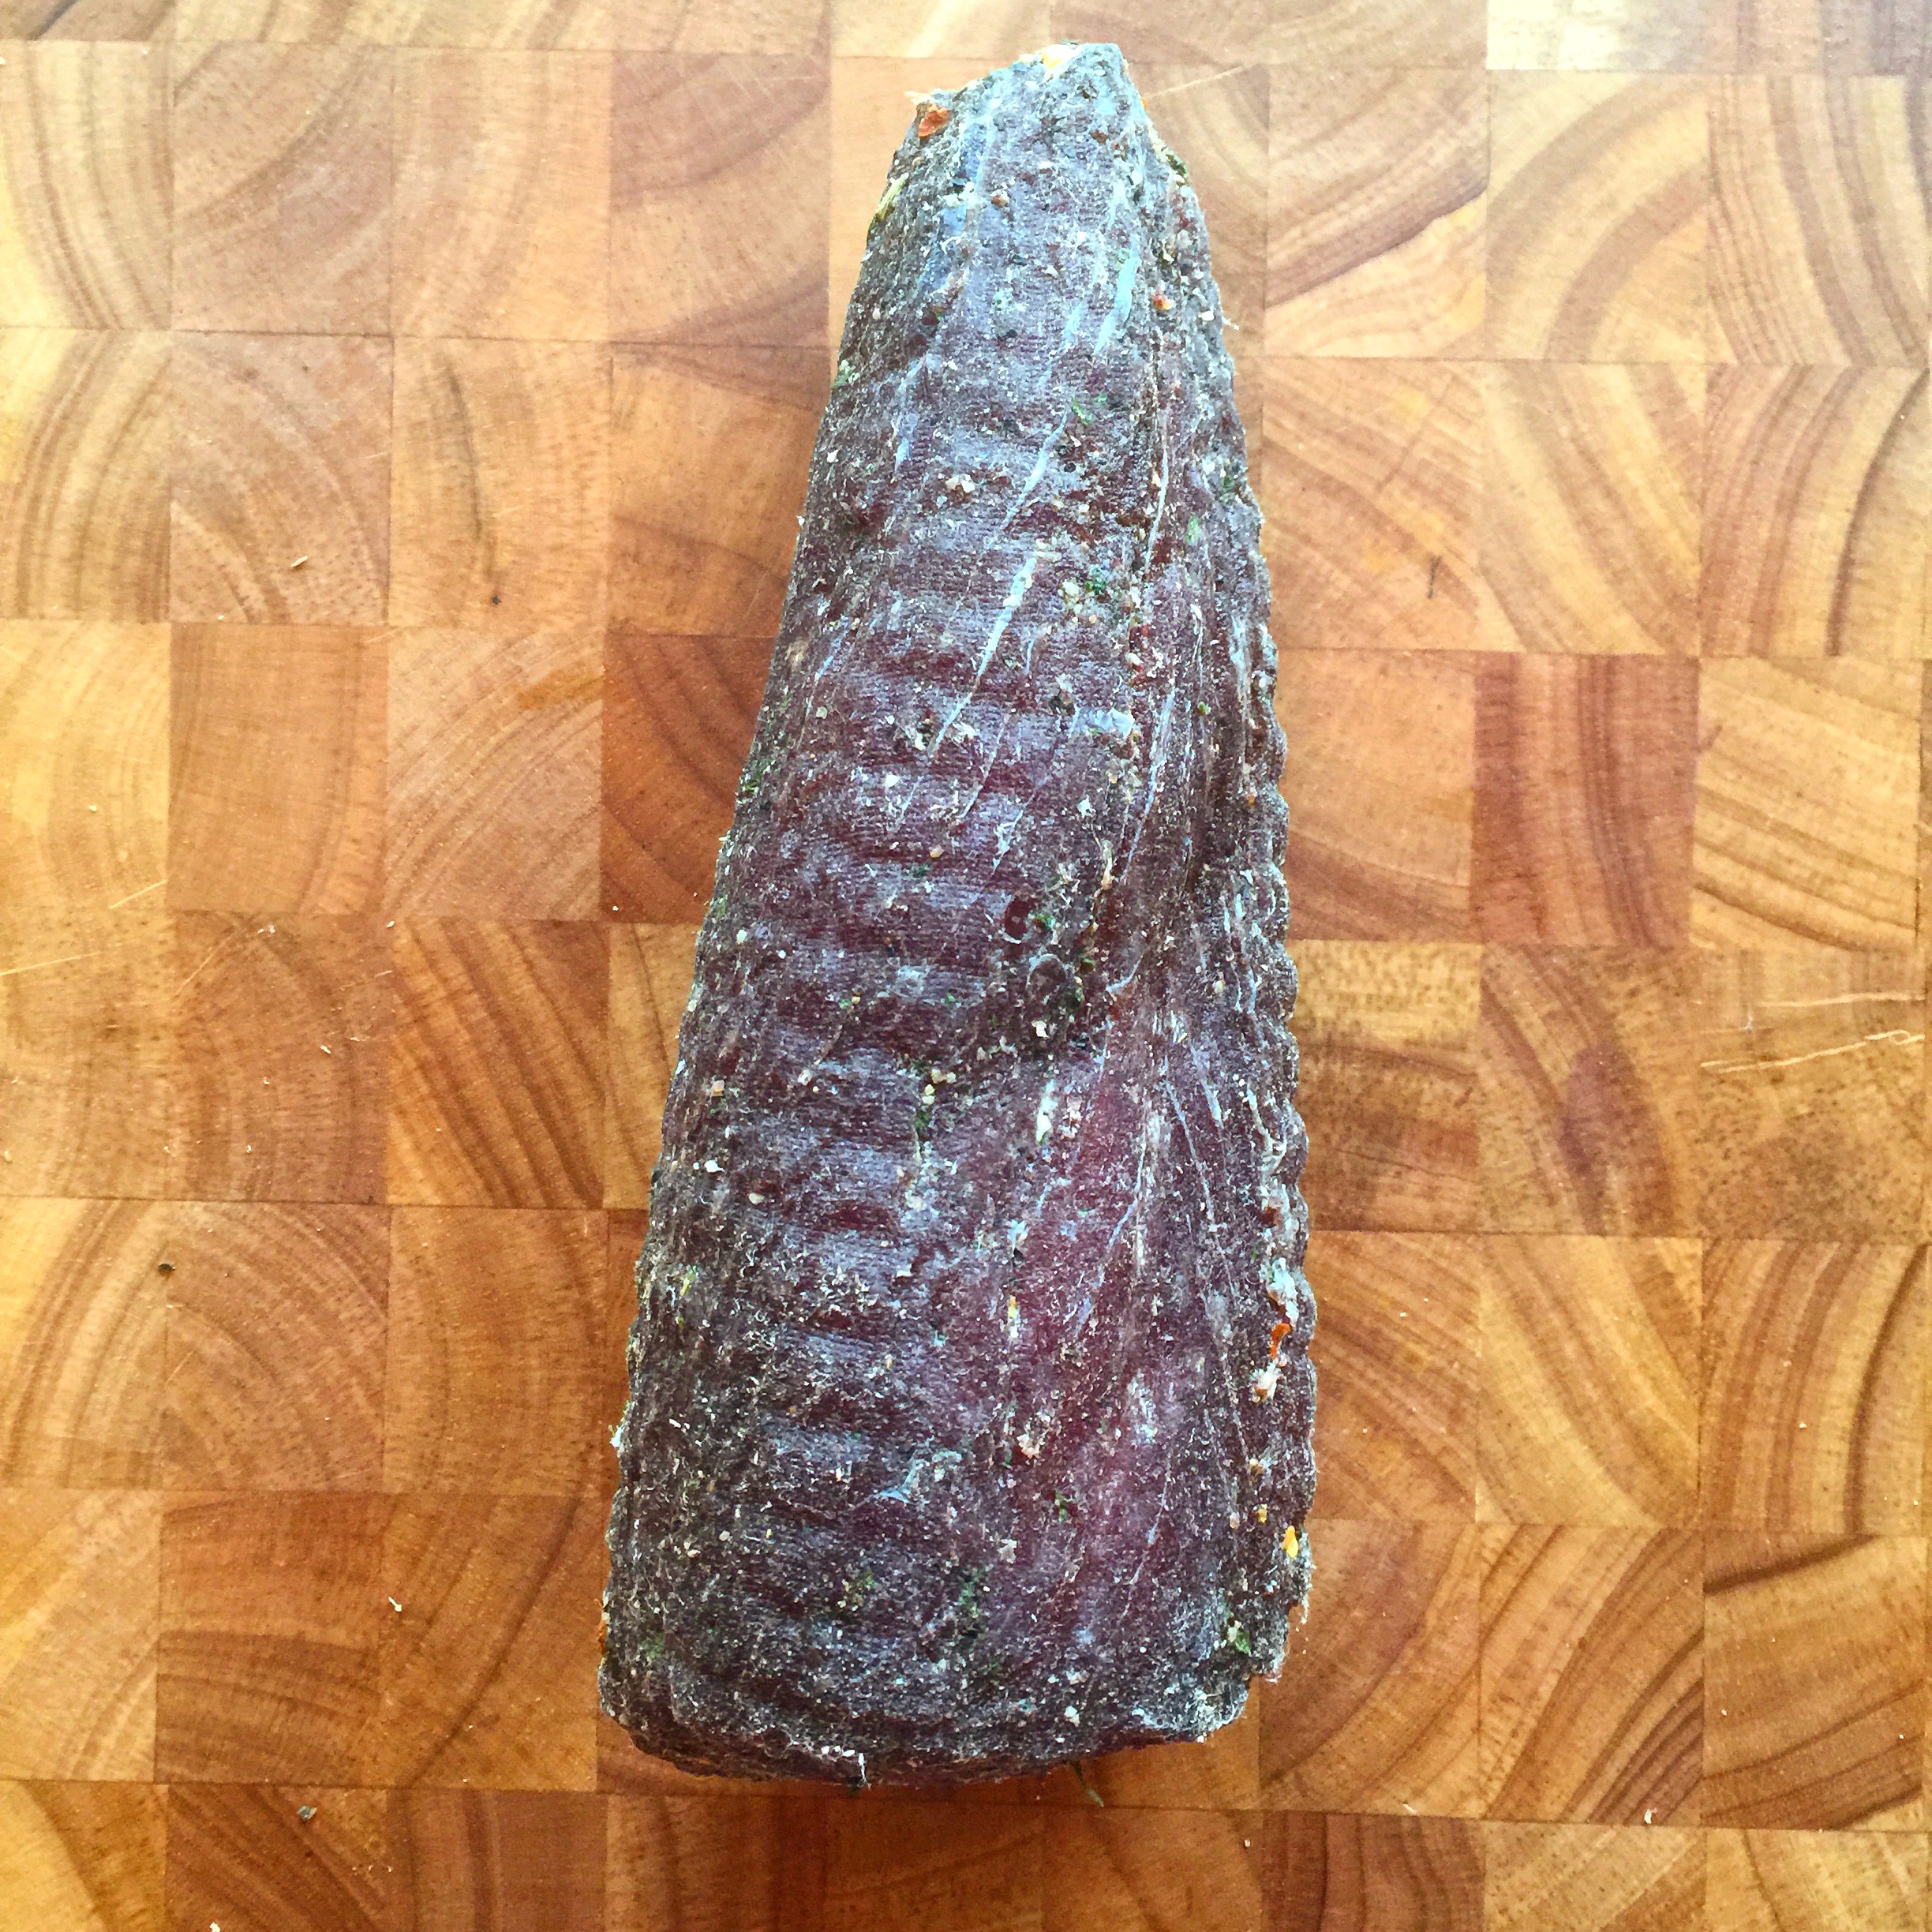
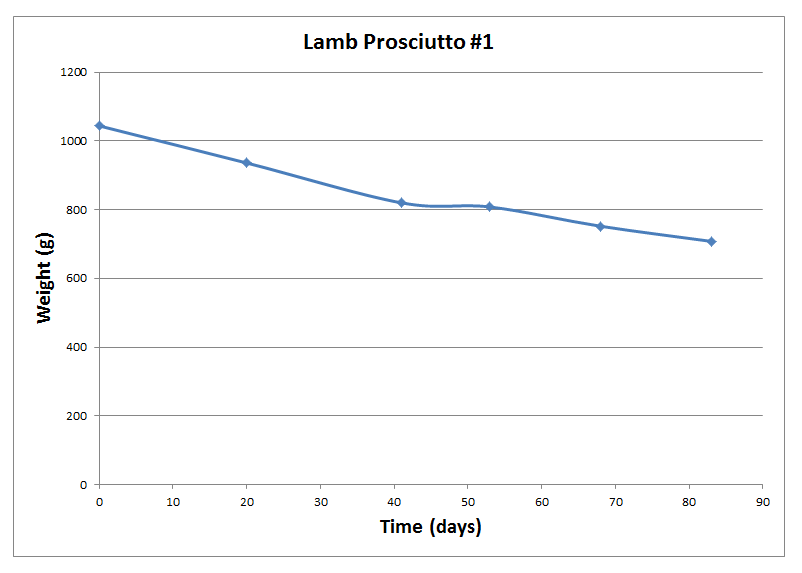
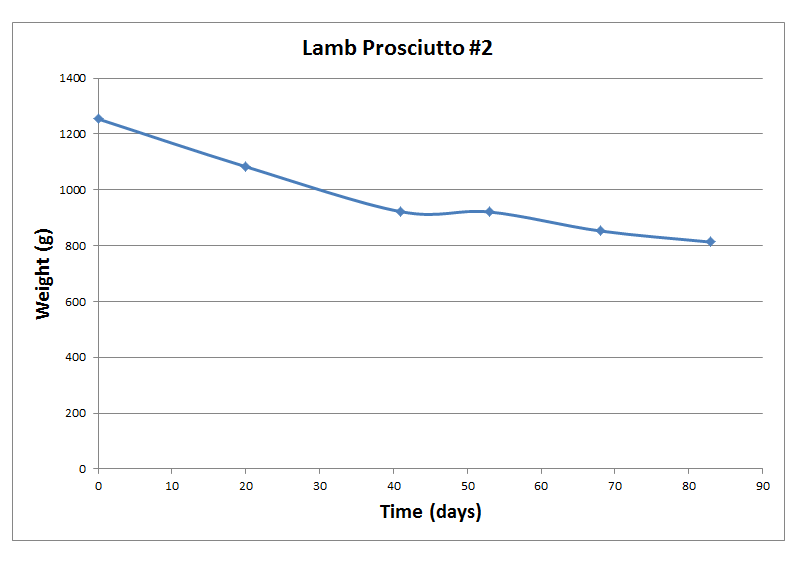
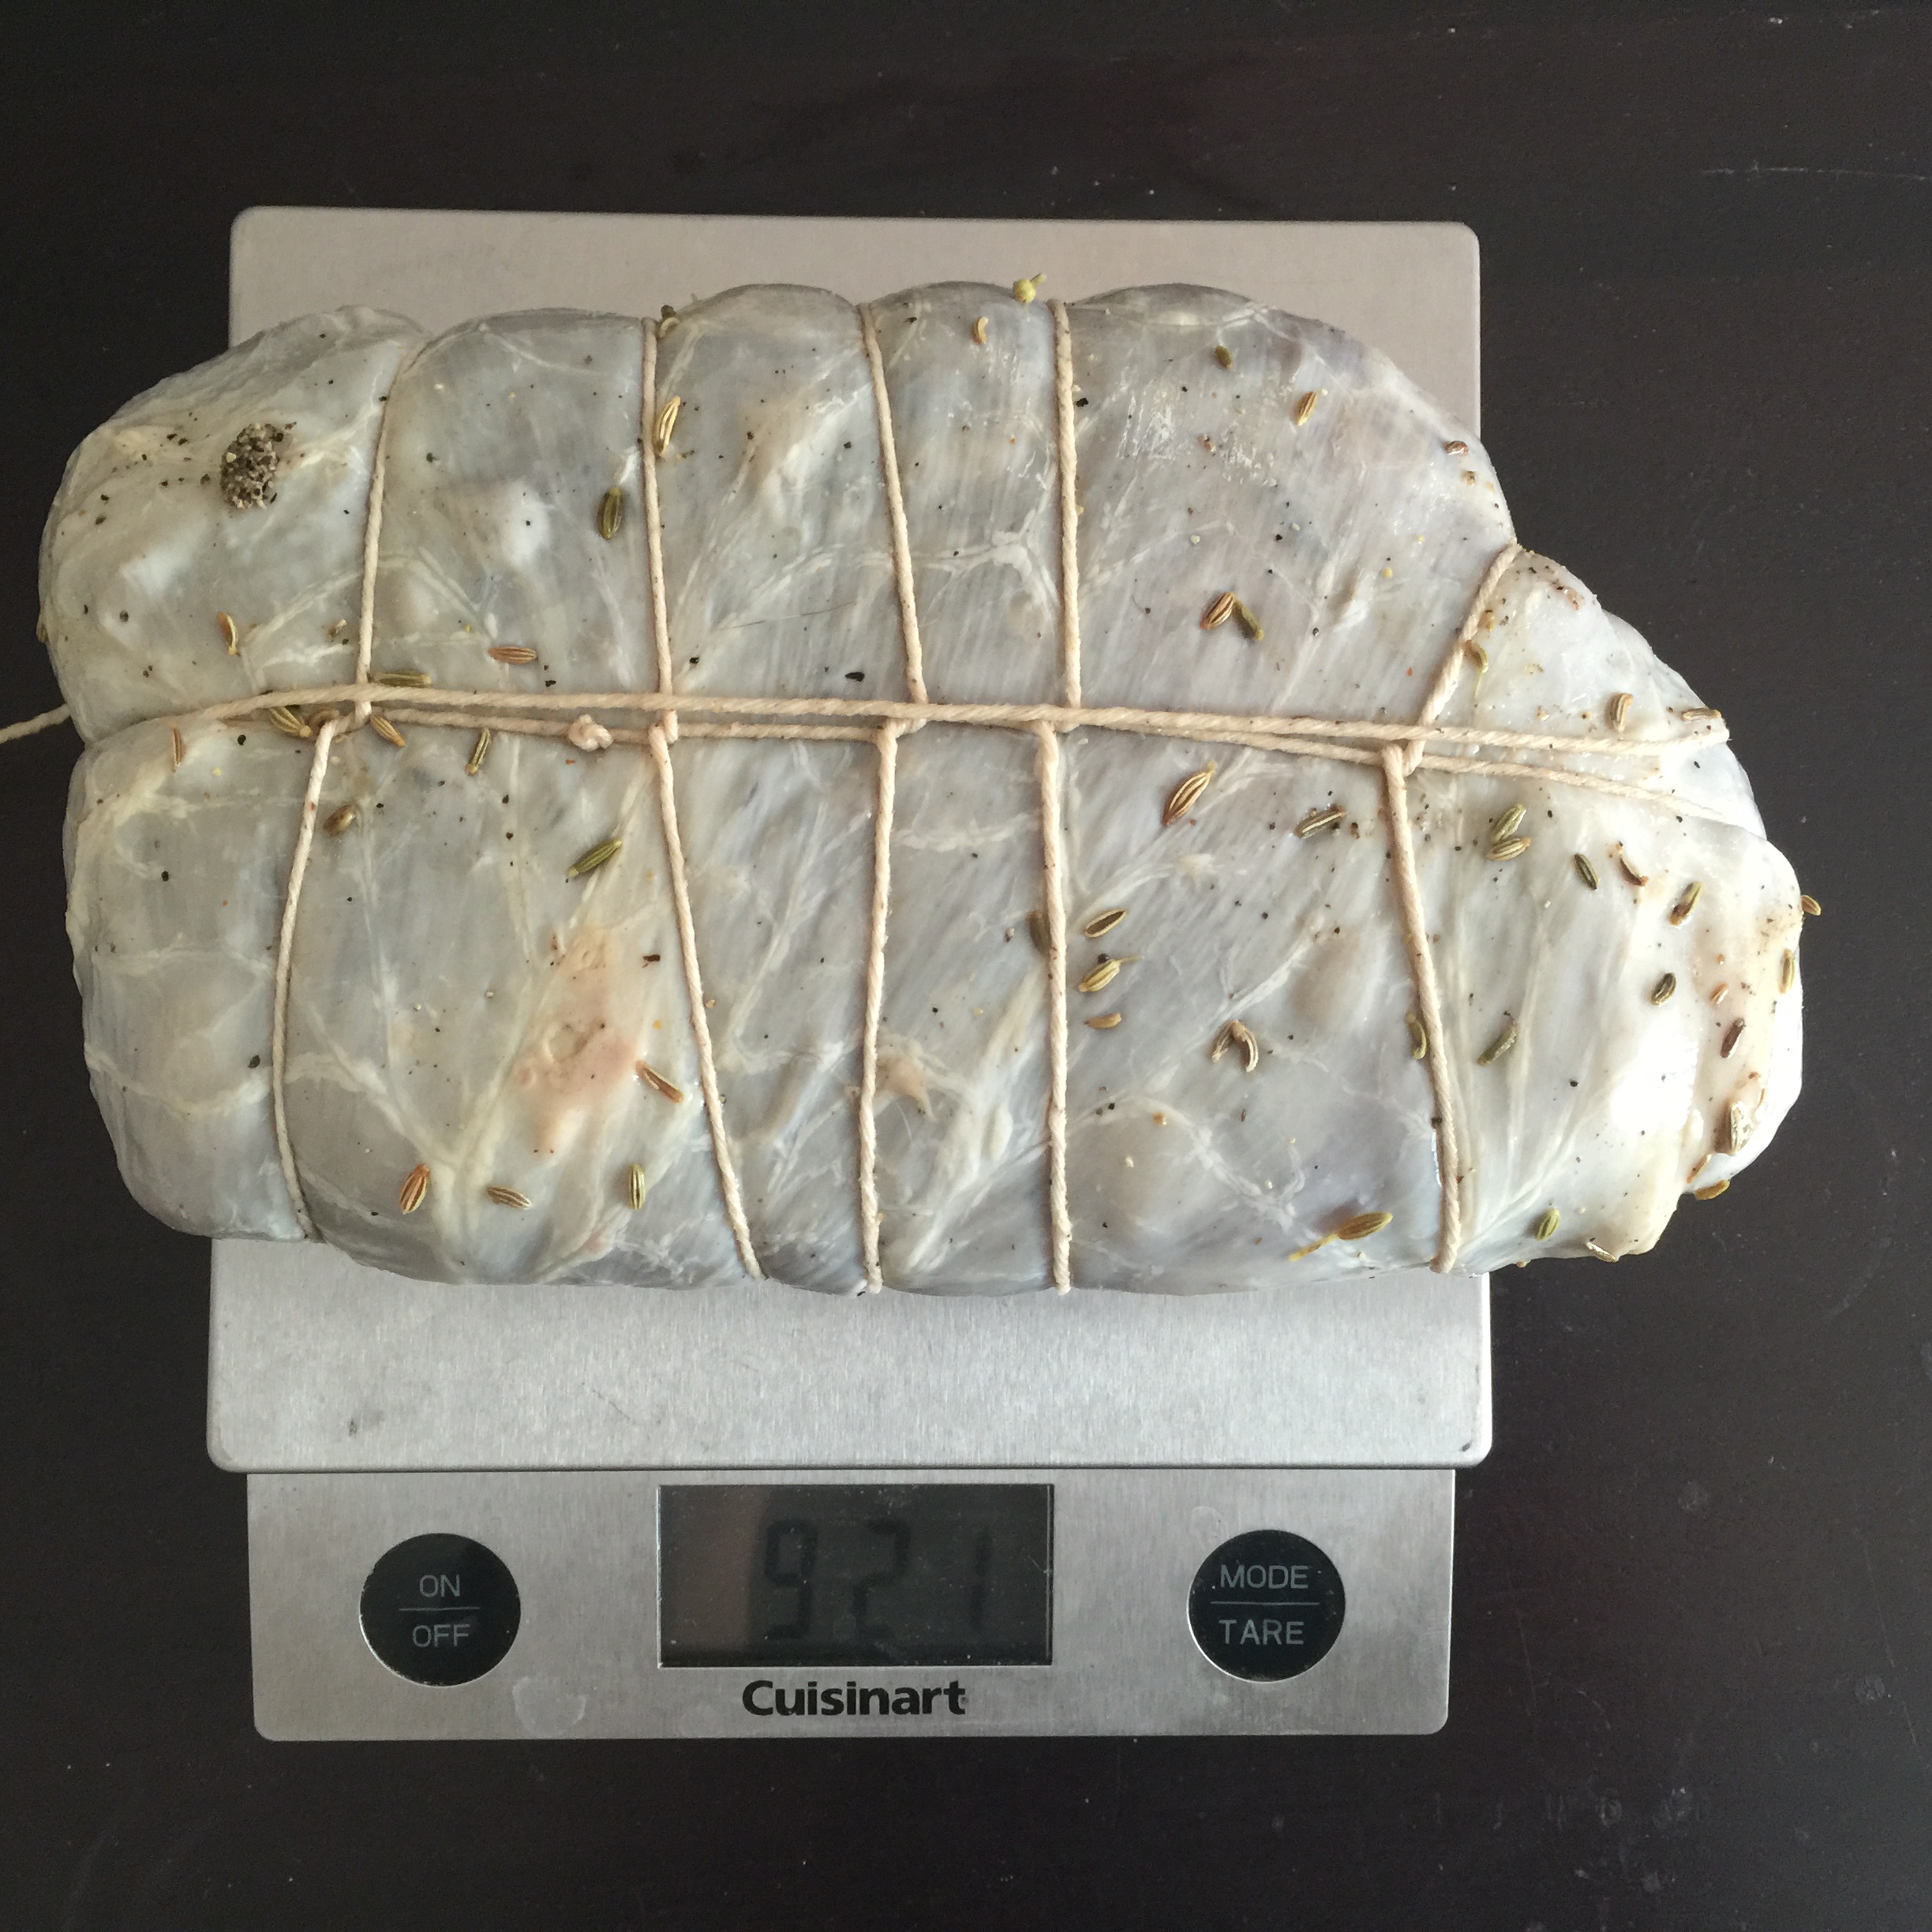
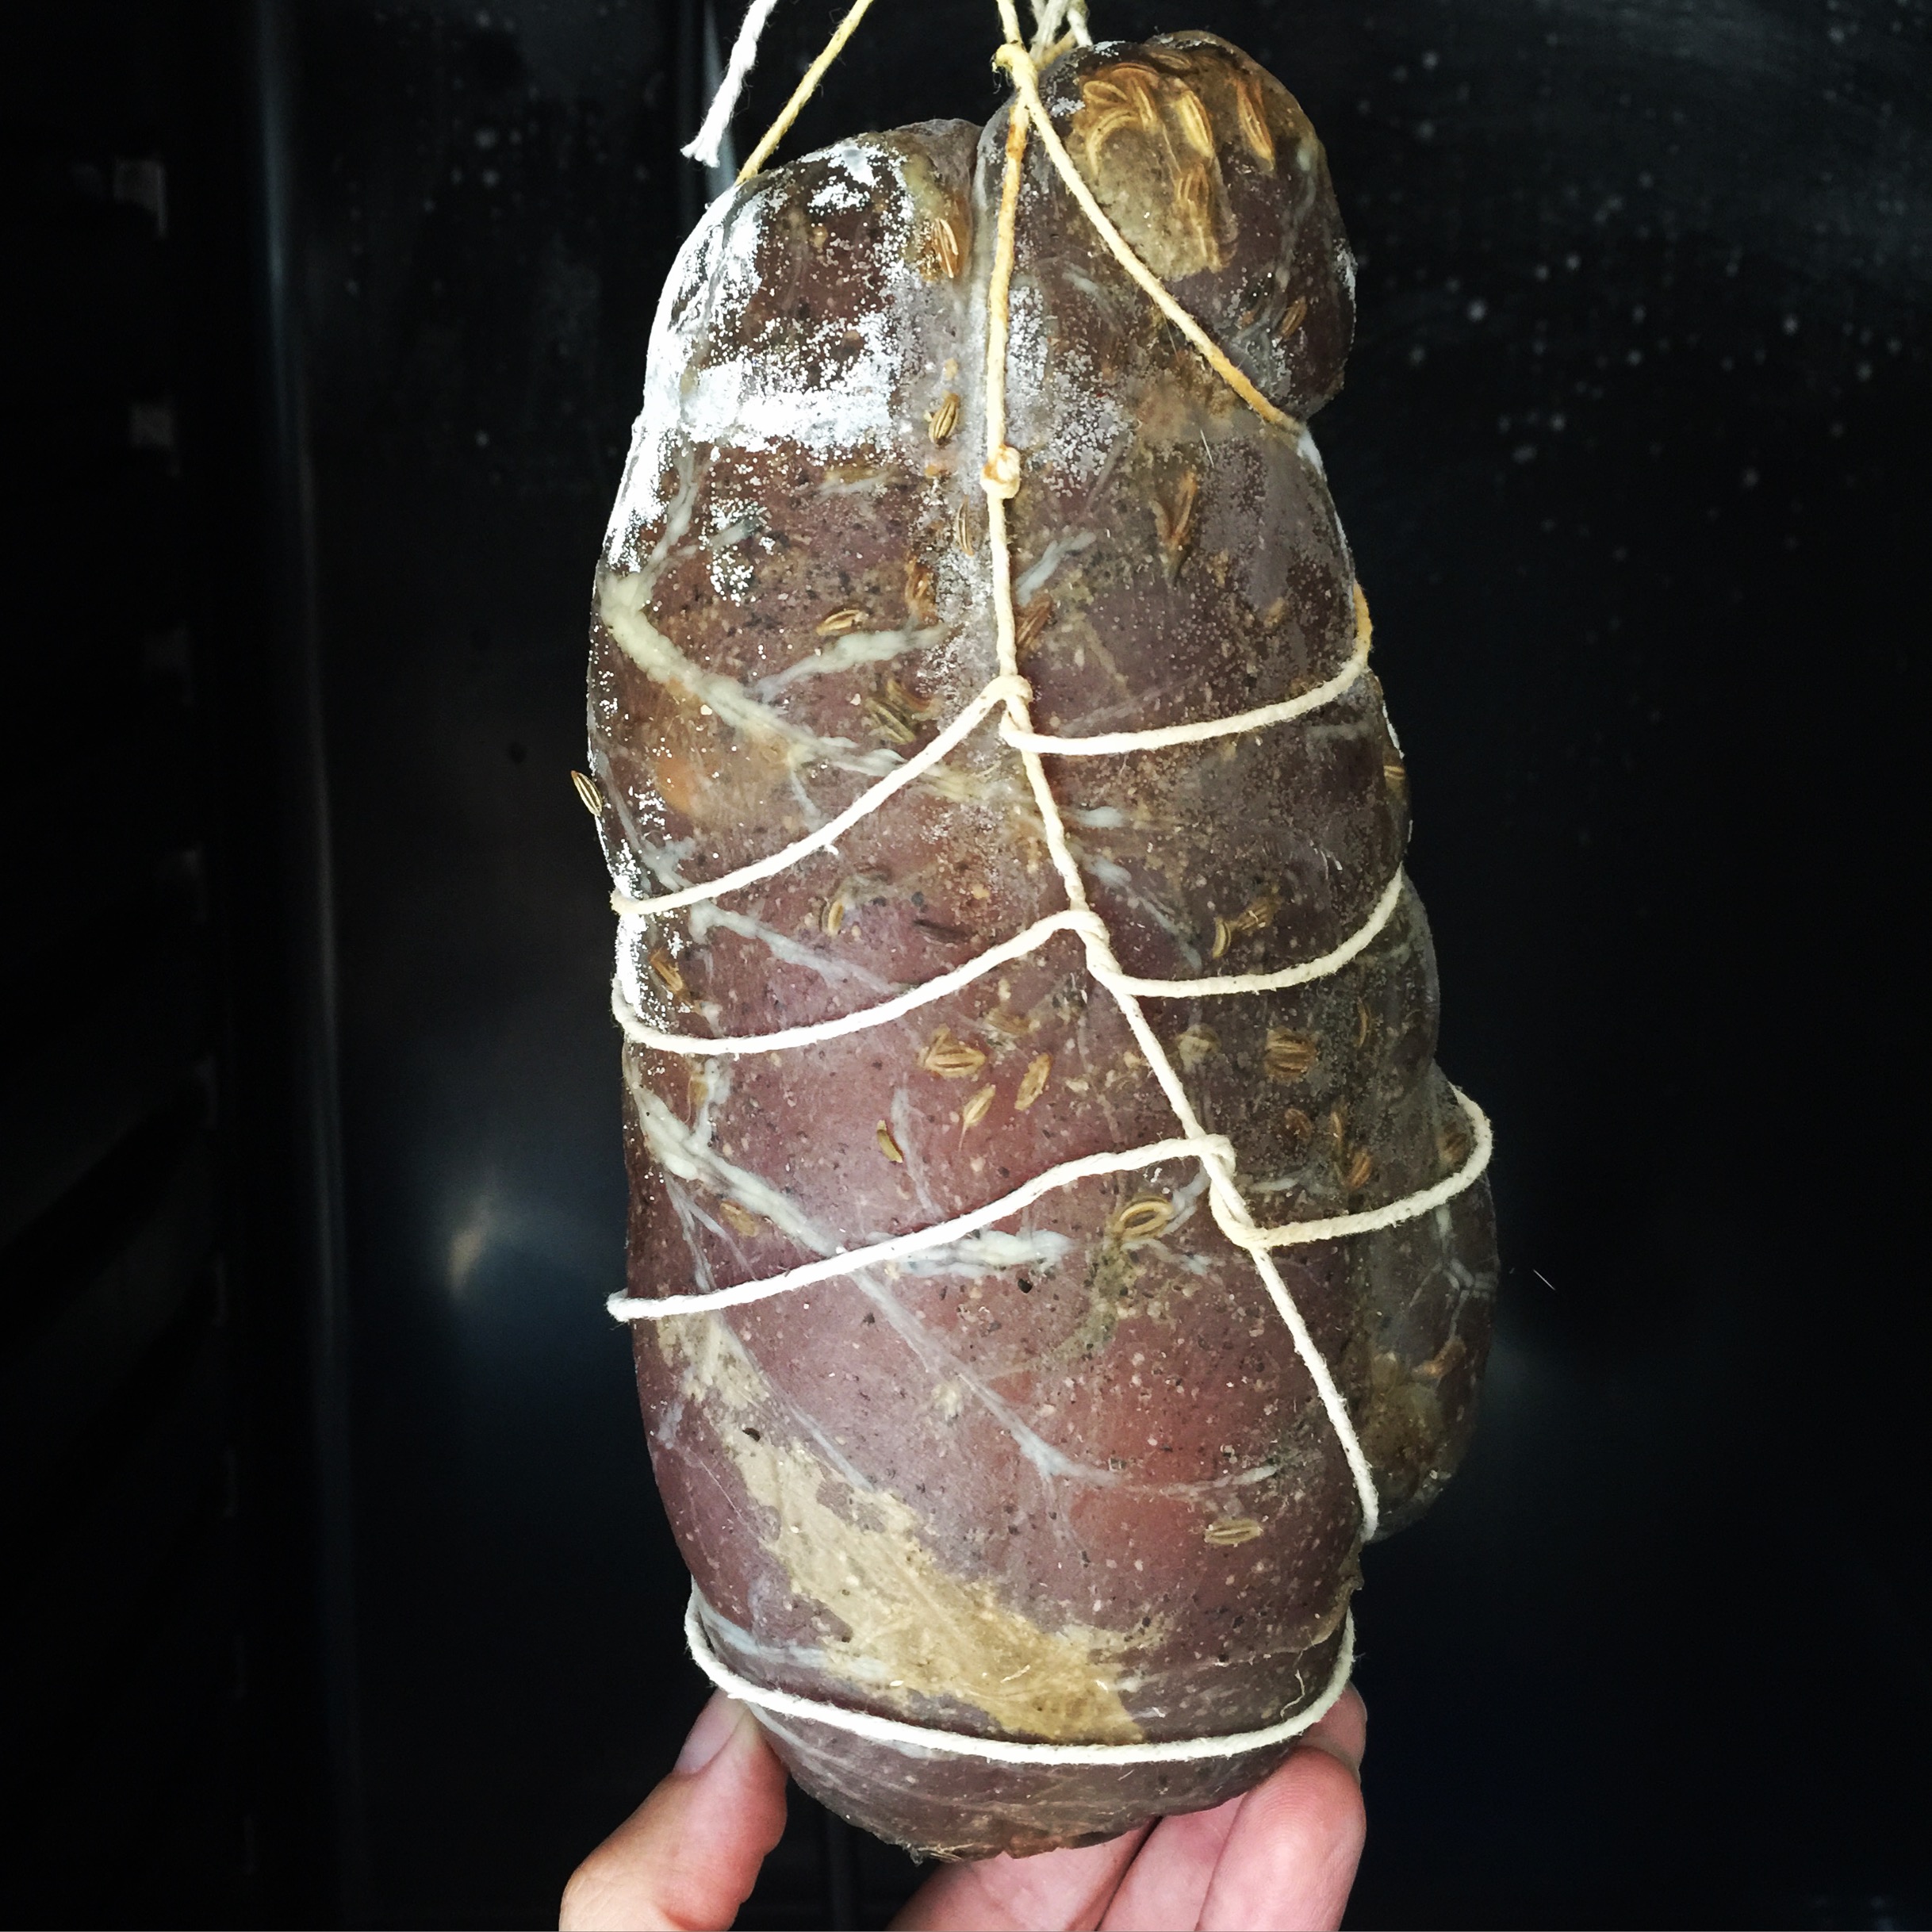
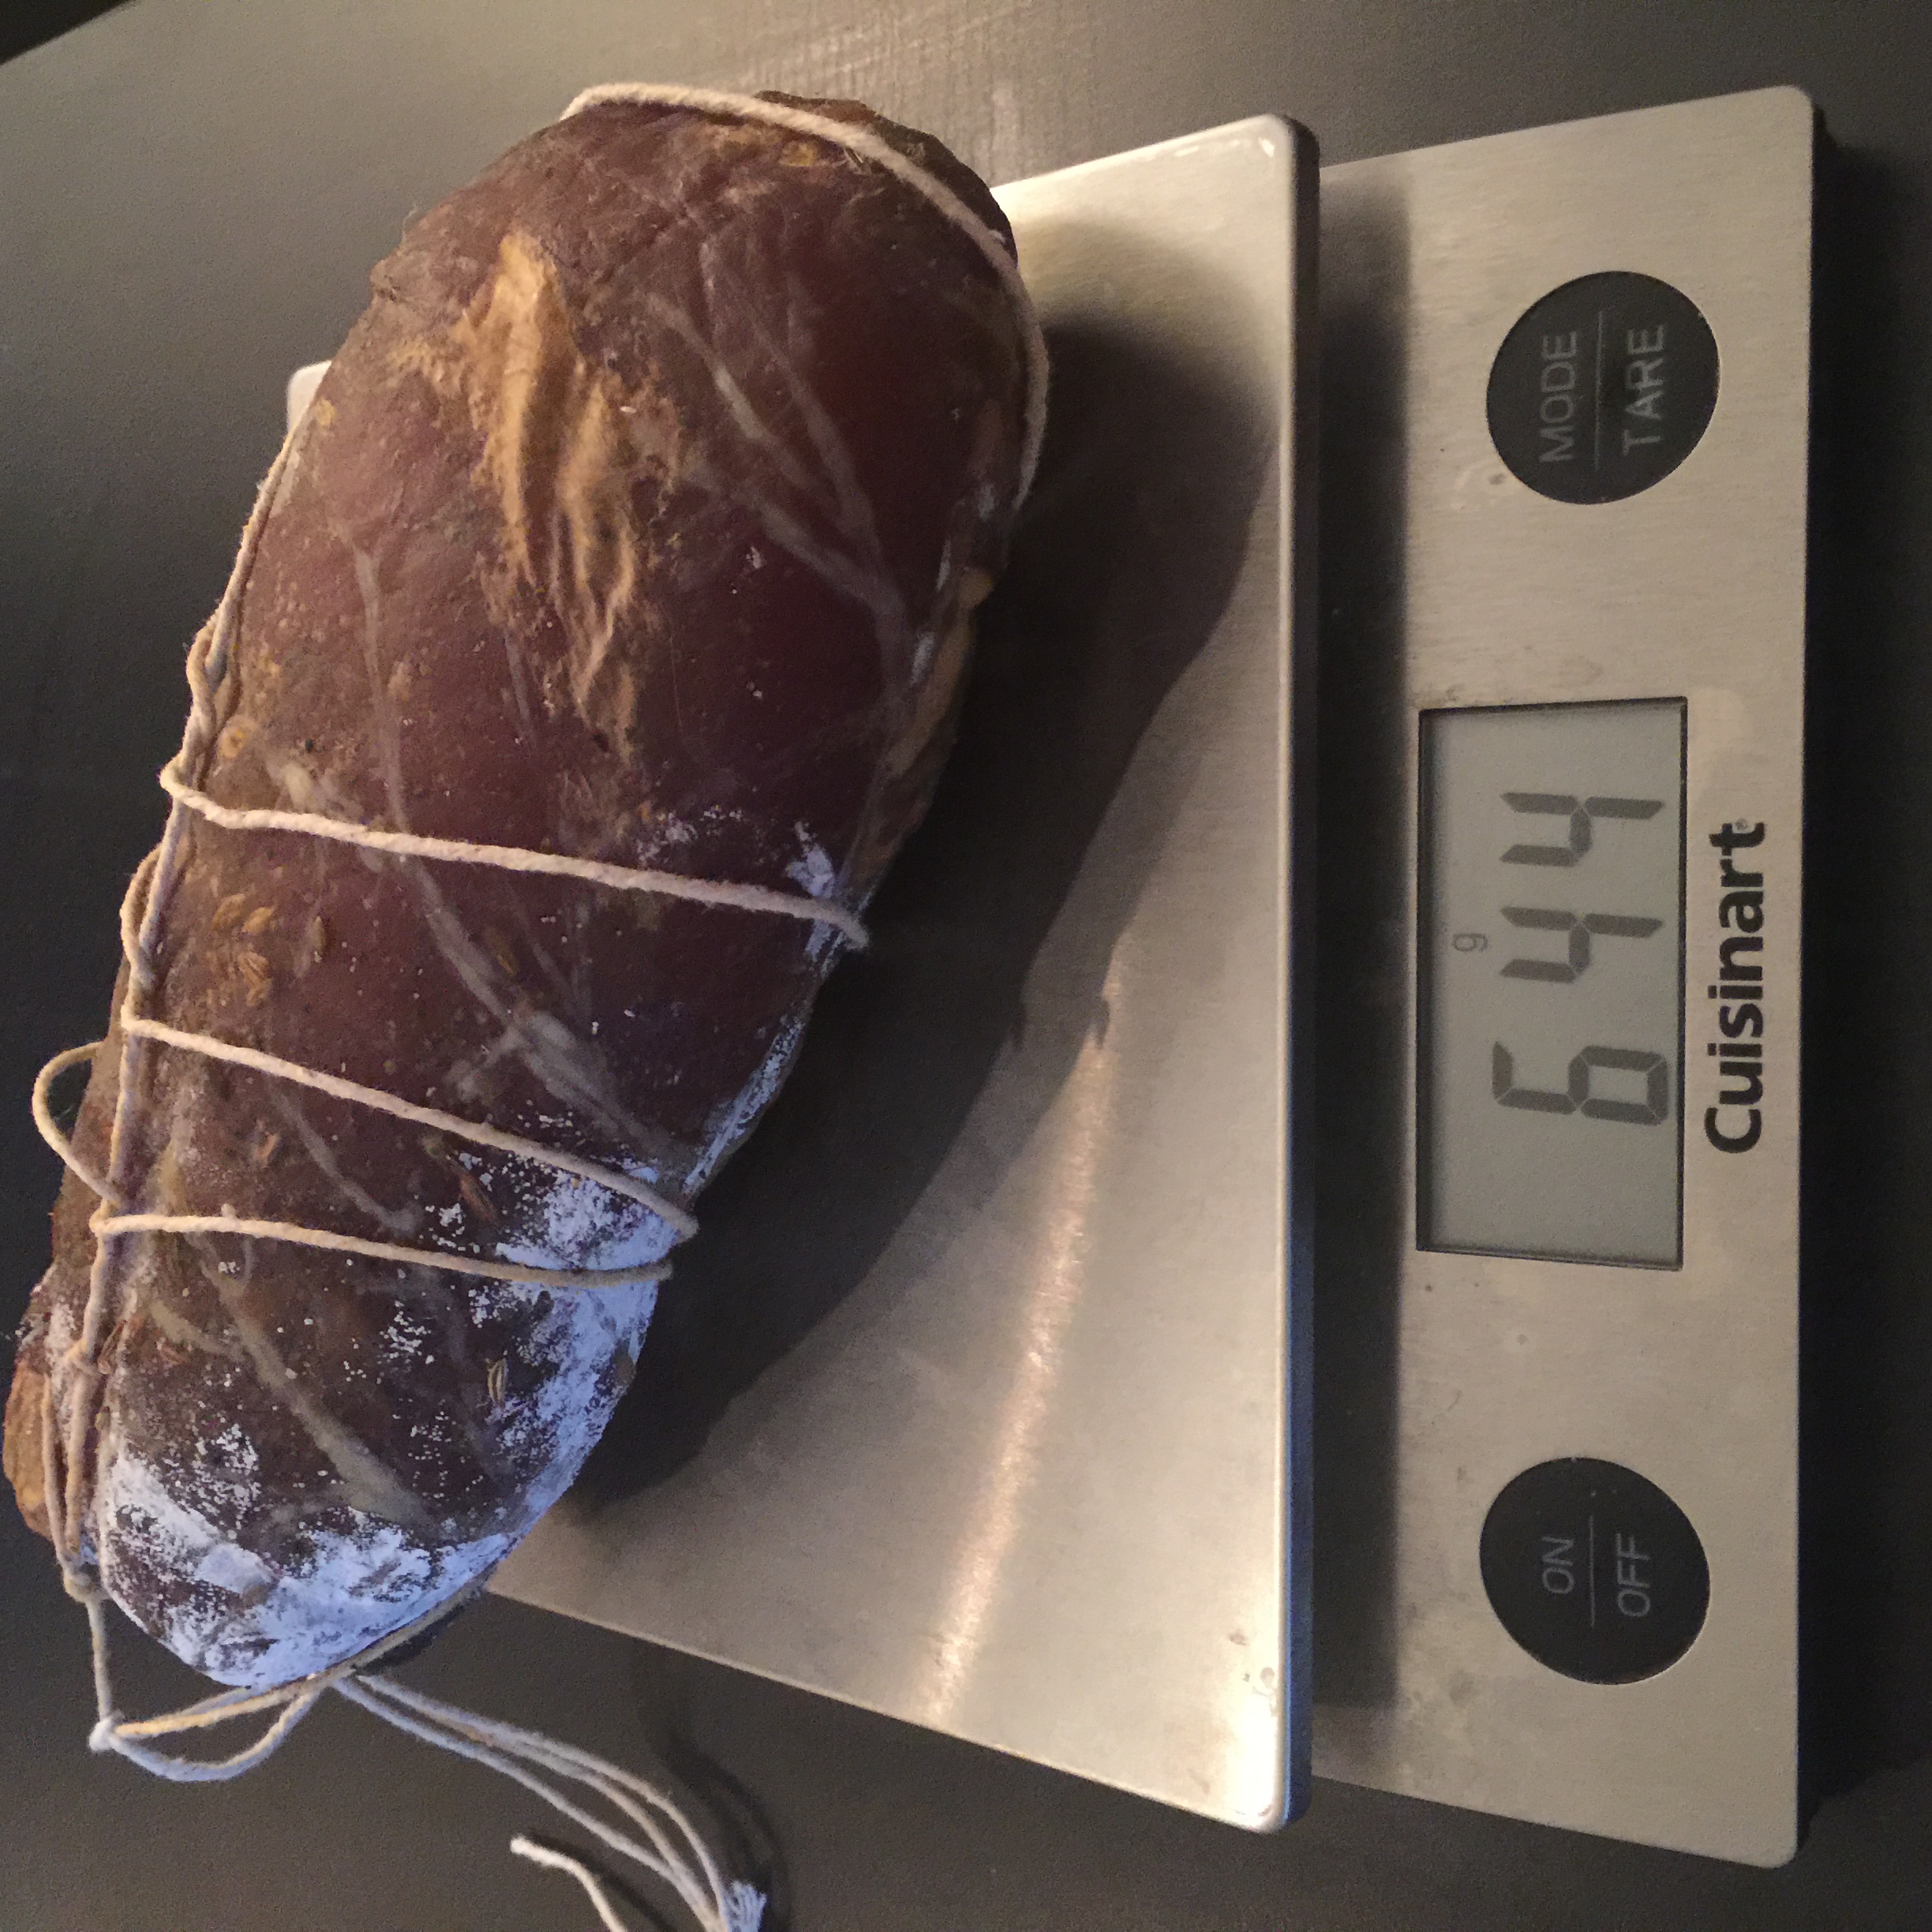
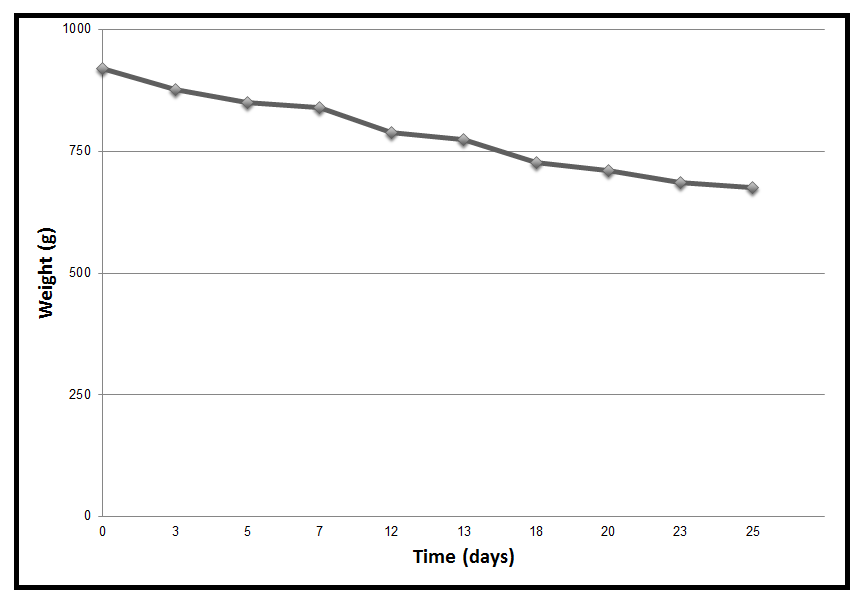
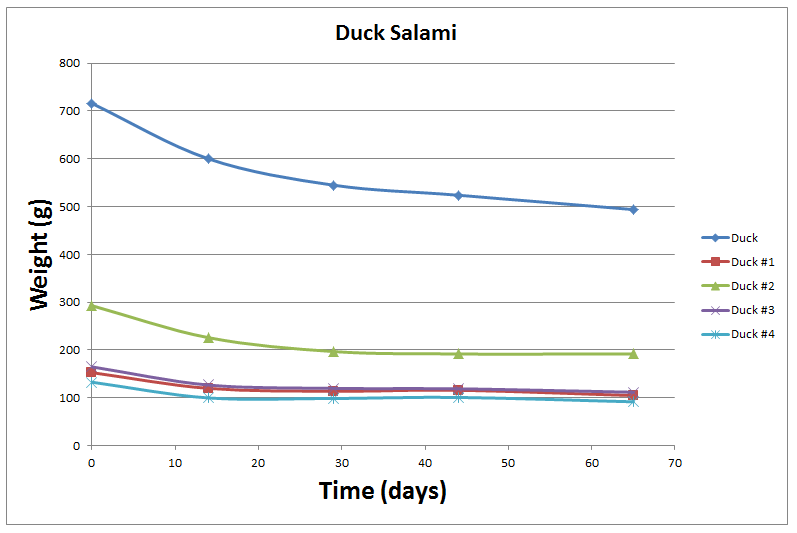
For the drying phase, I set the chamber to its usual settings (55F/70-80% RH). The salami was allowed to dry over time. Usually I allow my salami to go to 40% weight loss, but these plateaued at around 35% weight loss. I attribute this to the higher fat content of these salami. Regardless, they were pulled at around 35% weight loss.

image(20)

Duck Salami Weight Loss


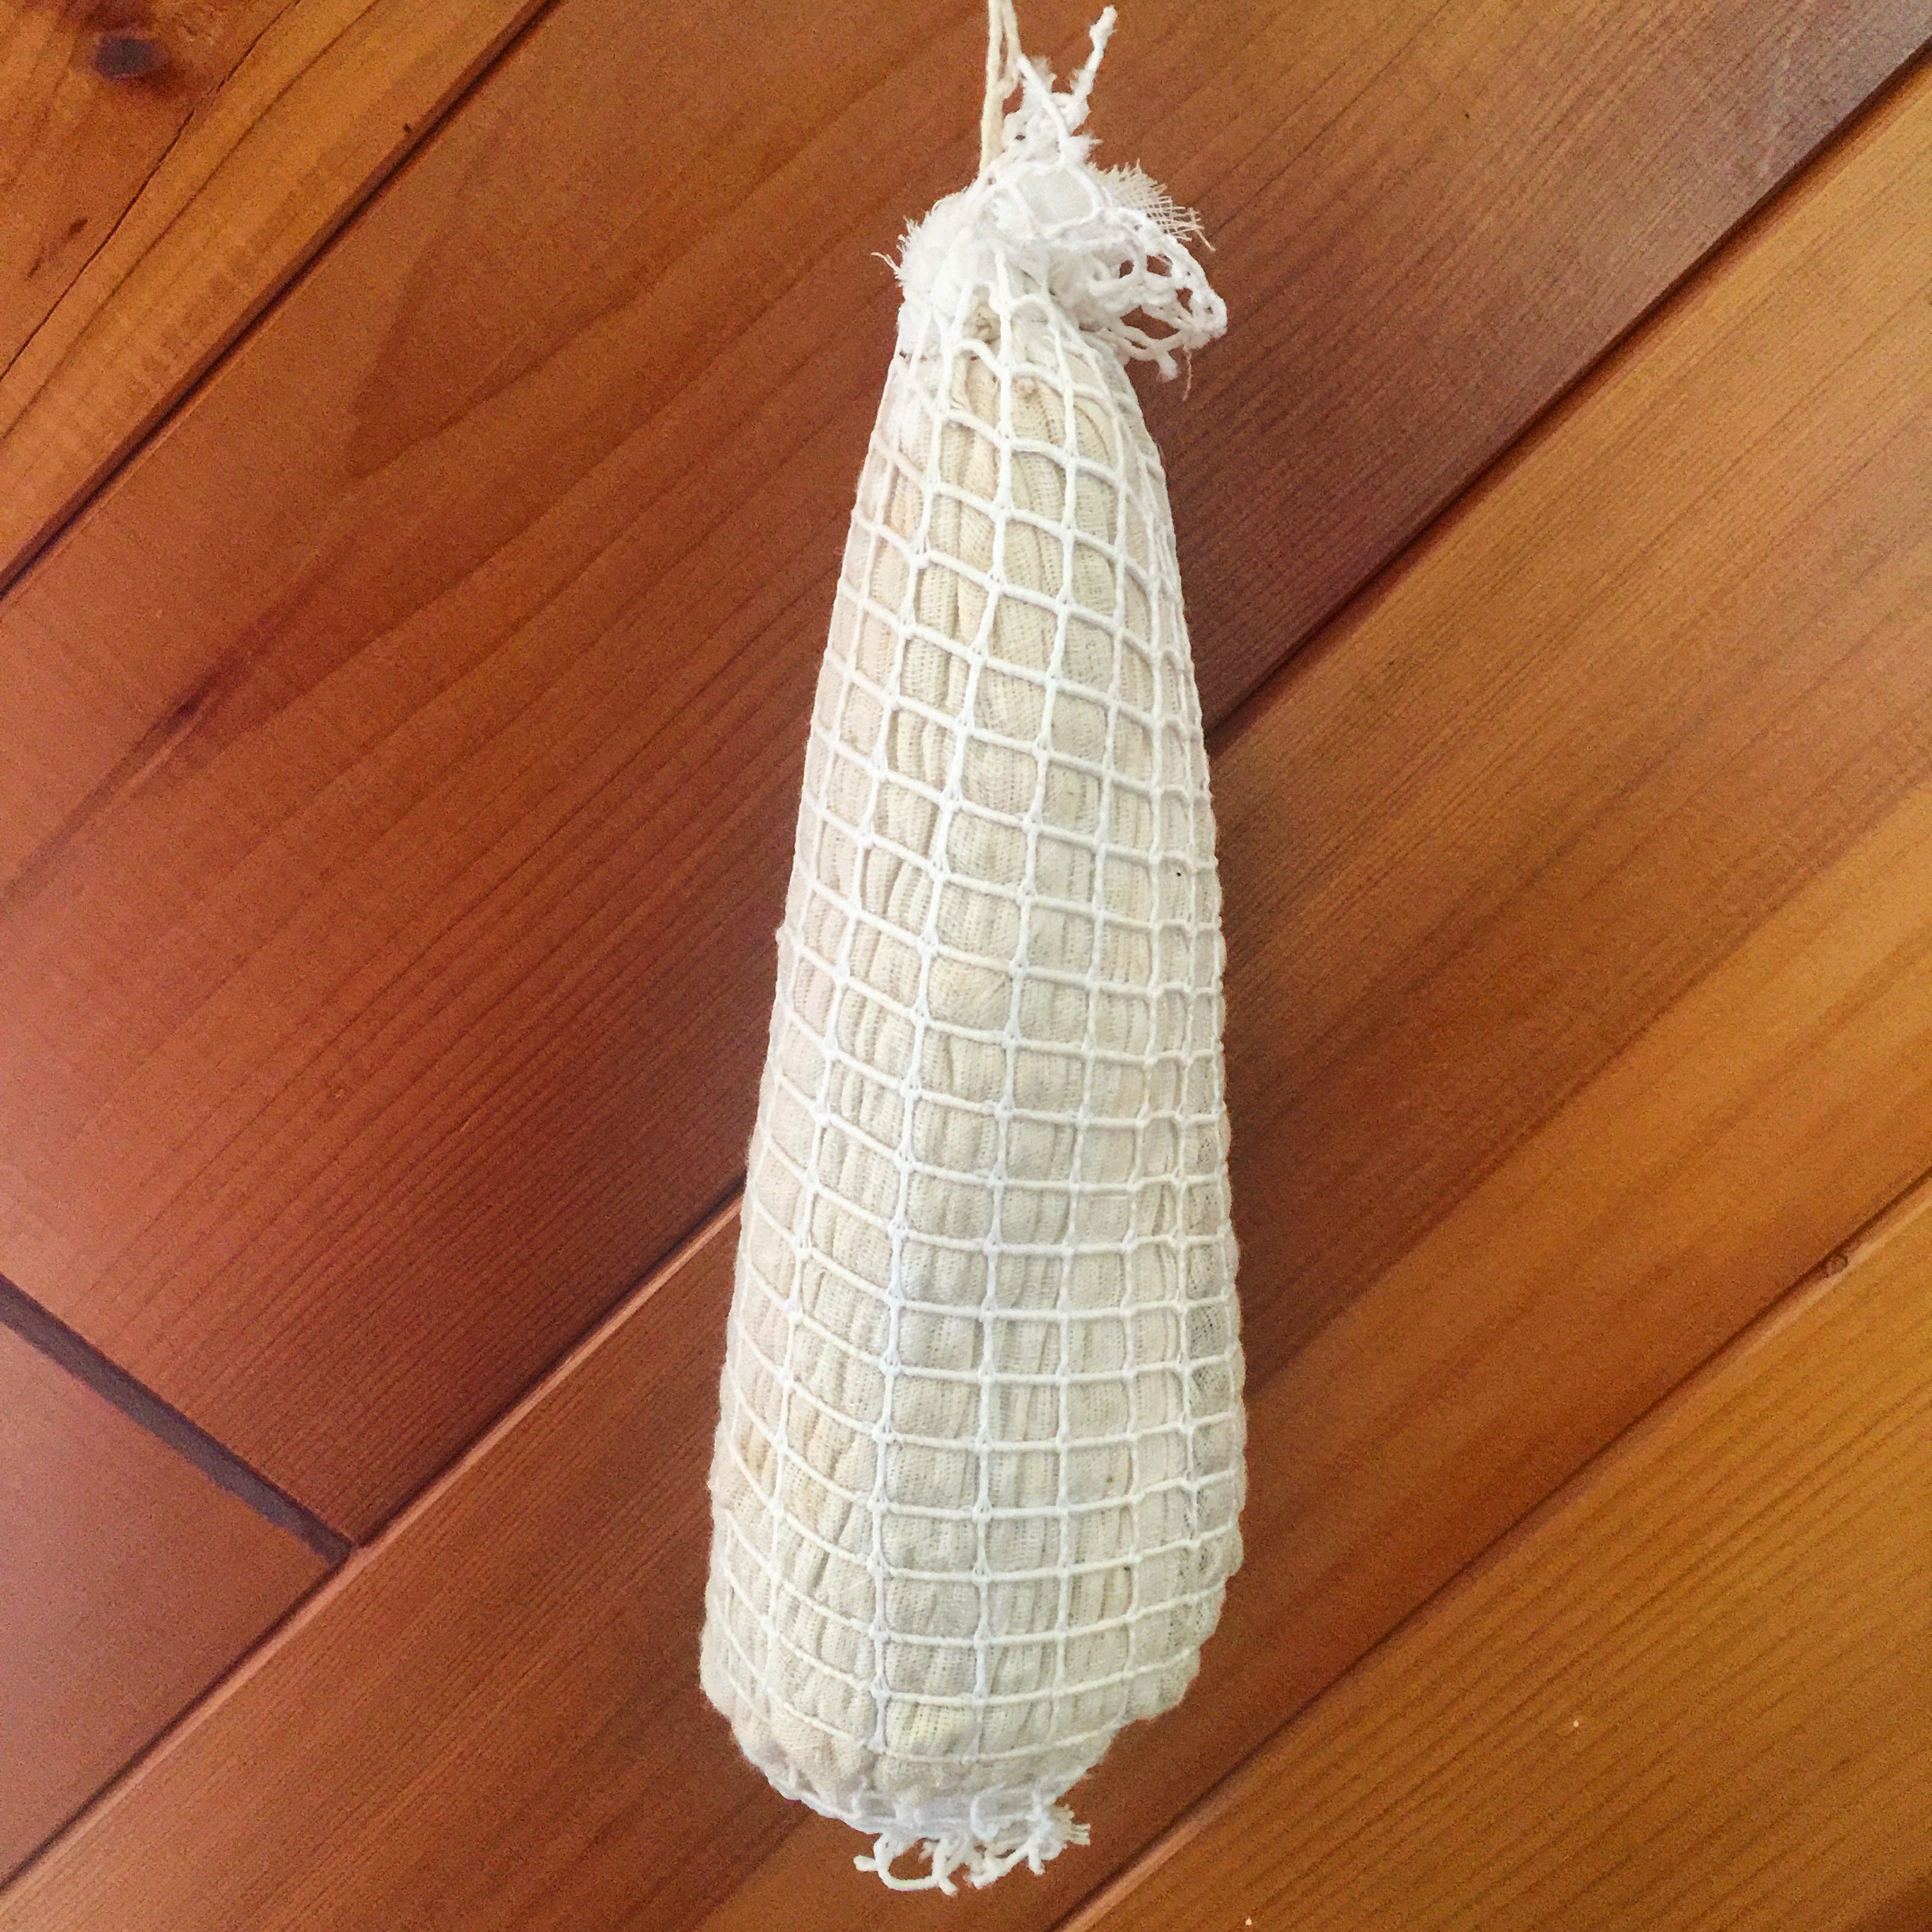
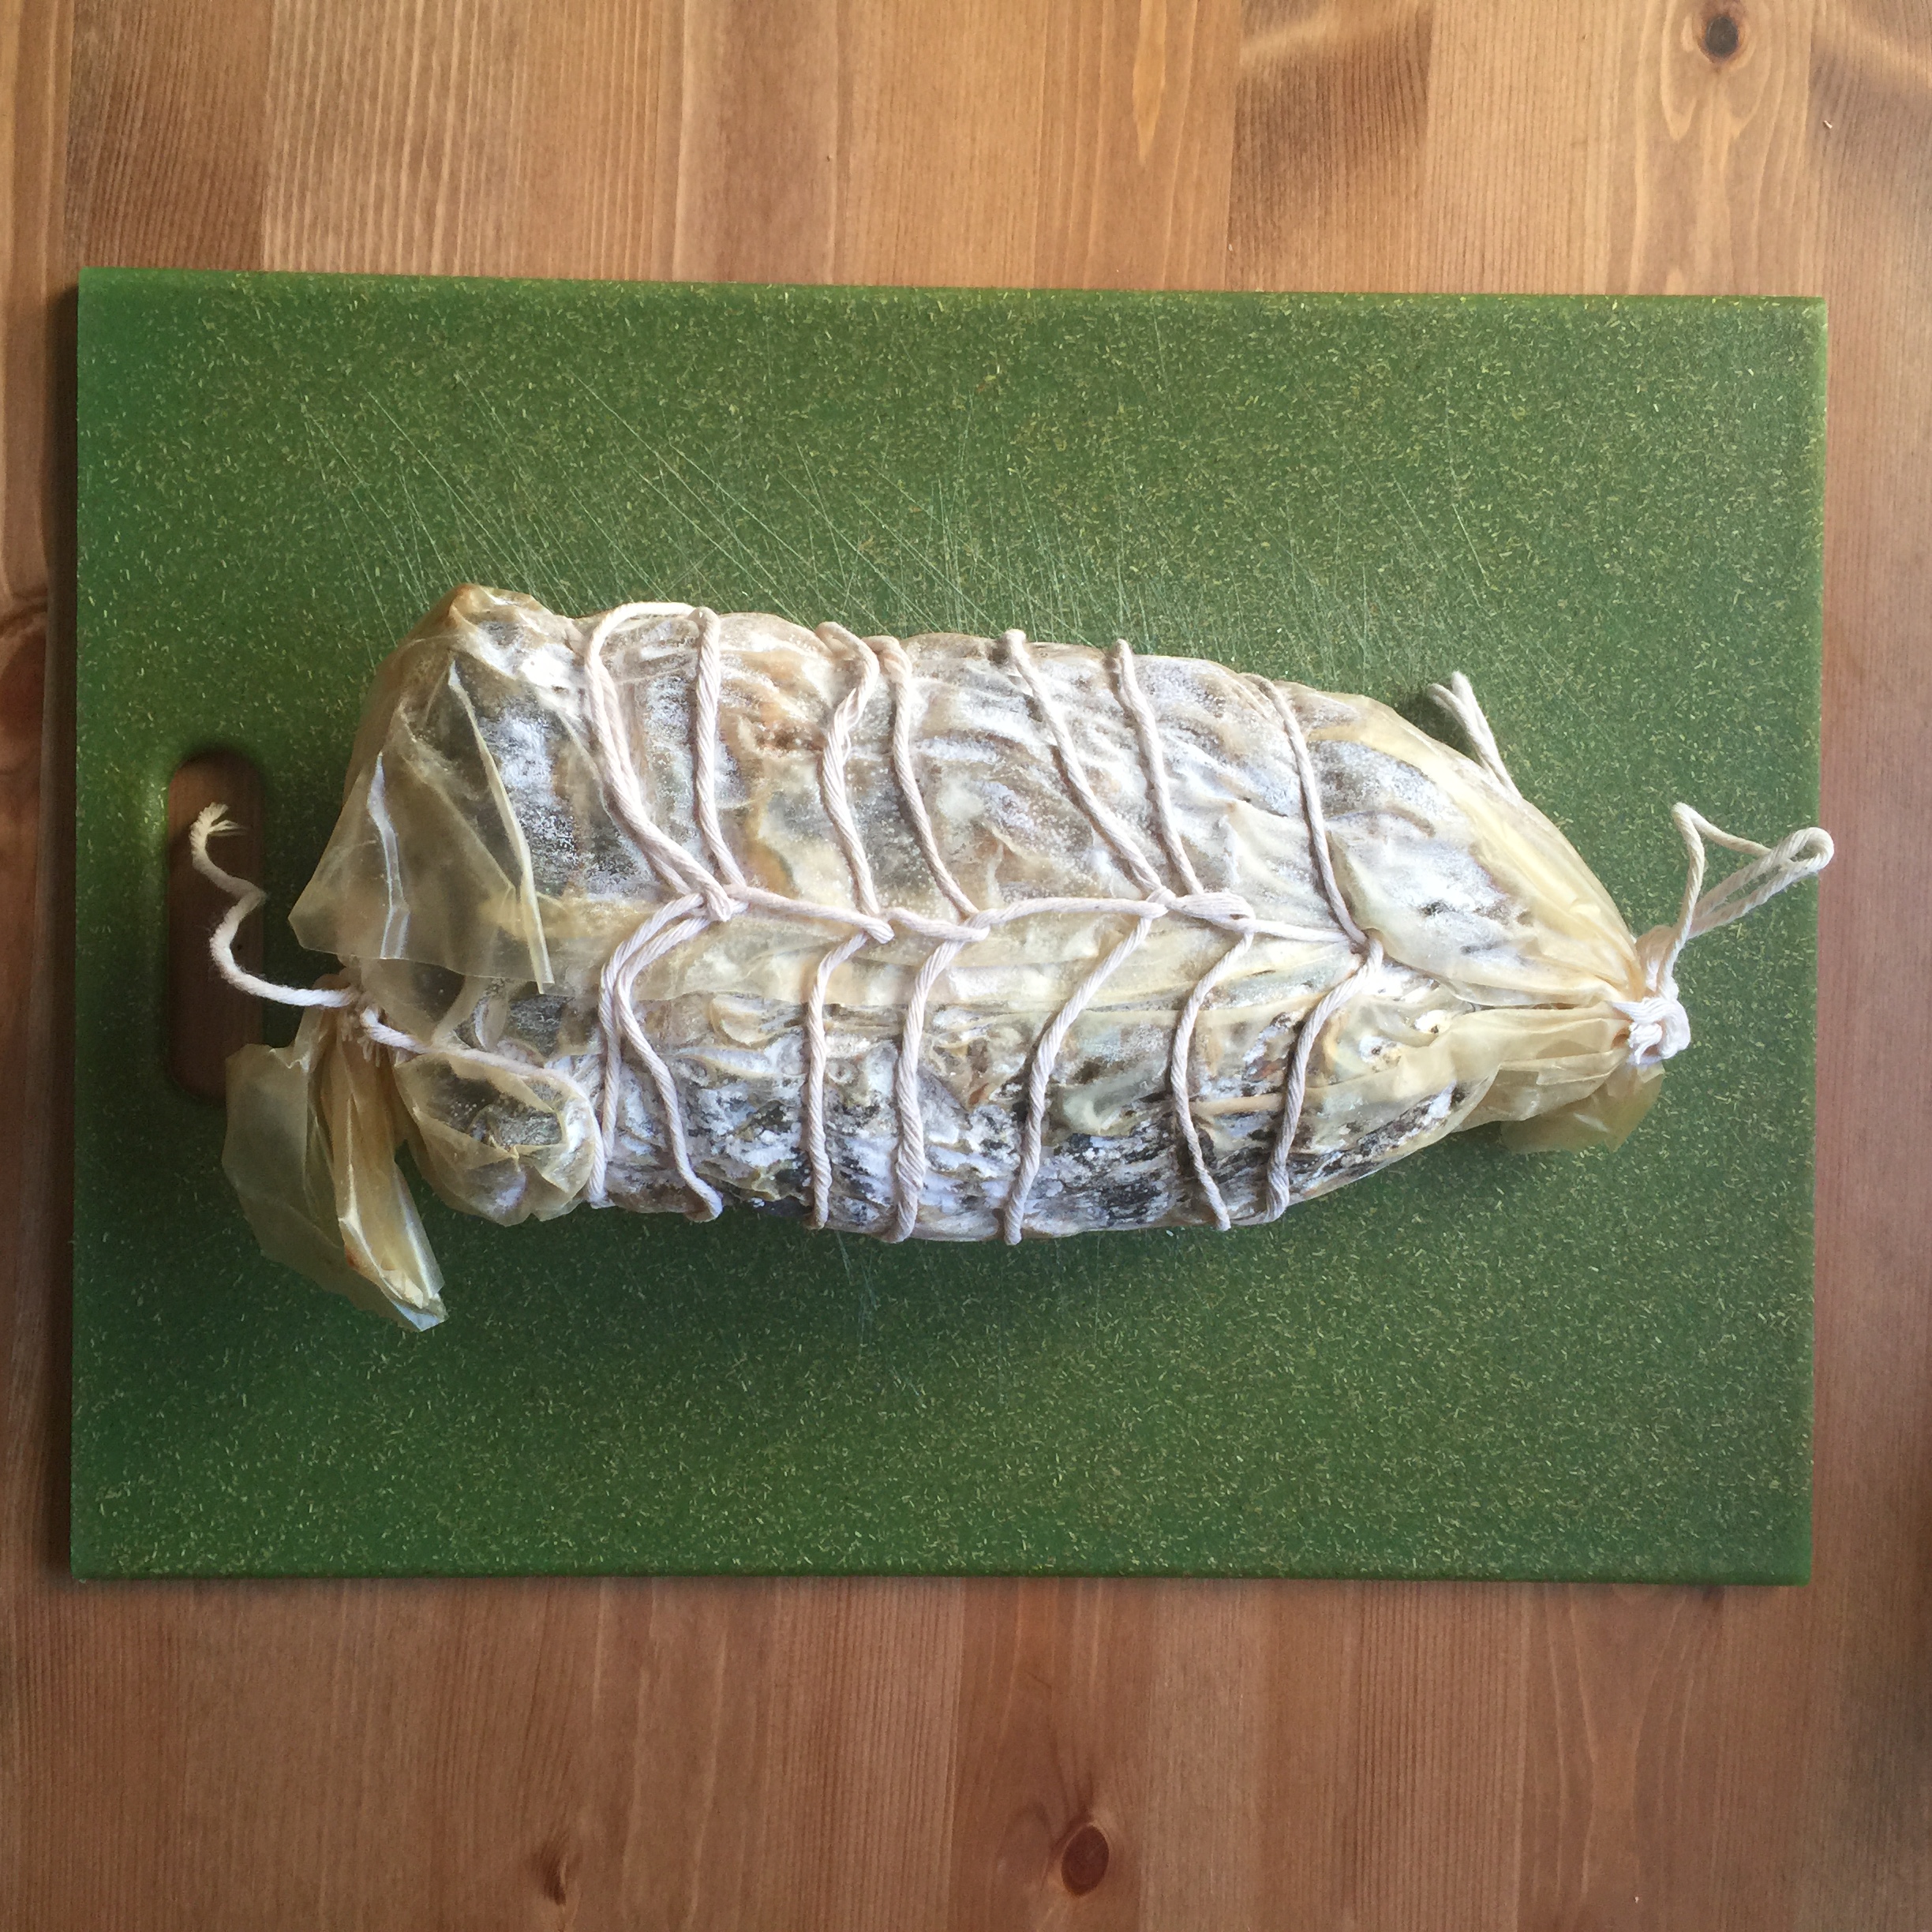
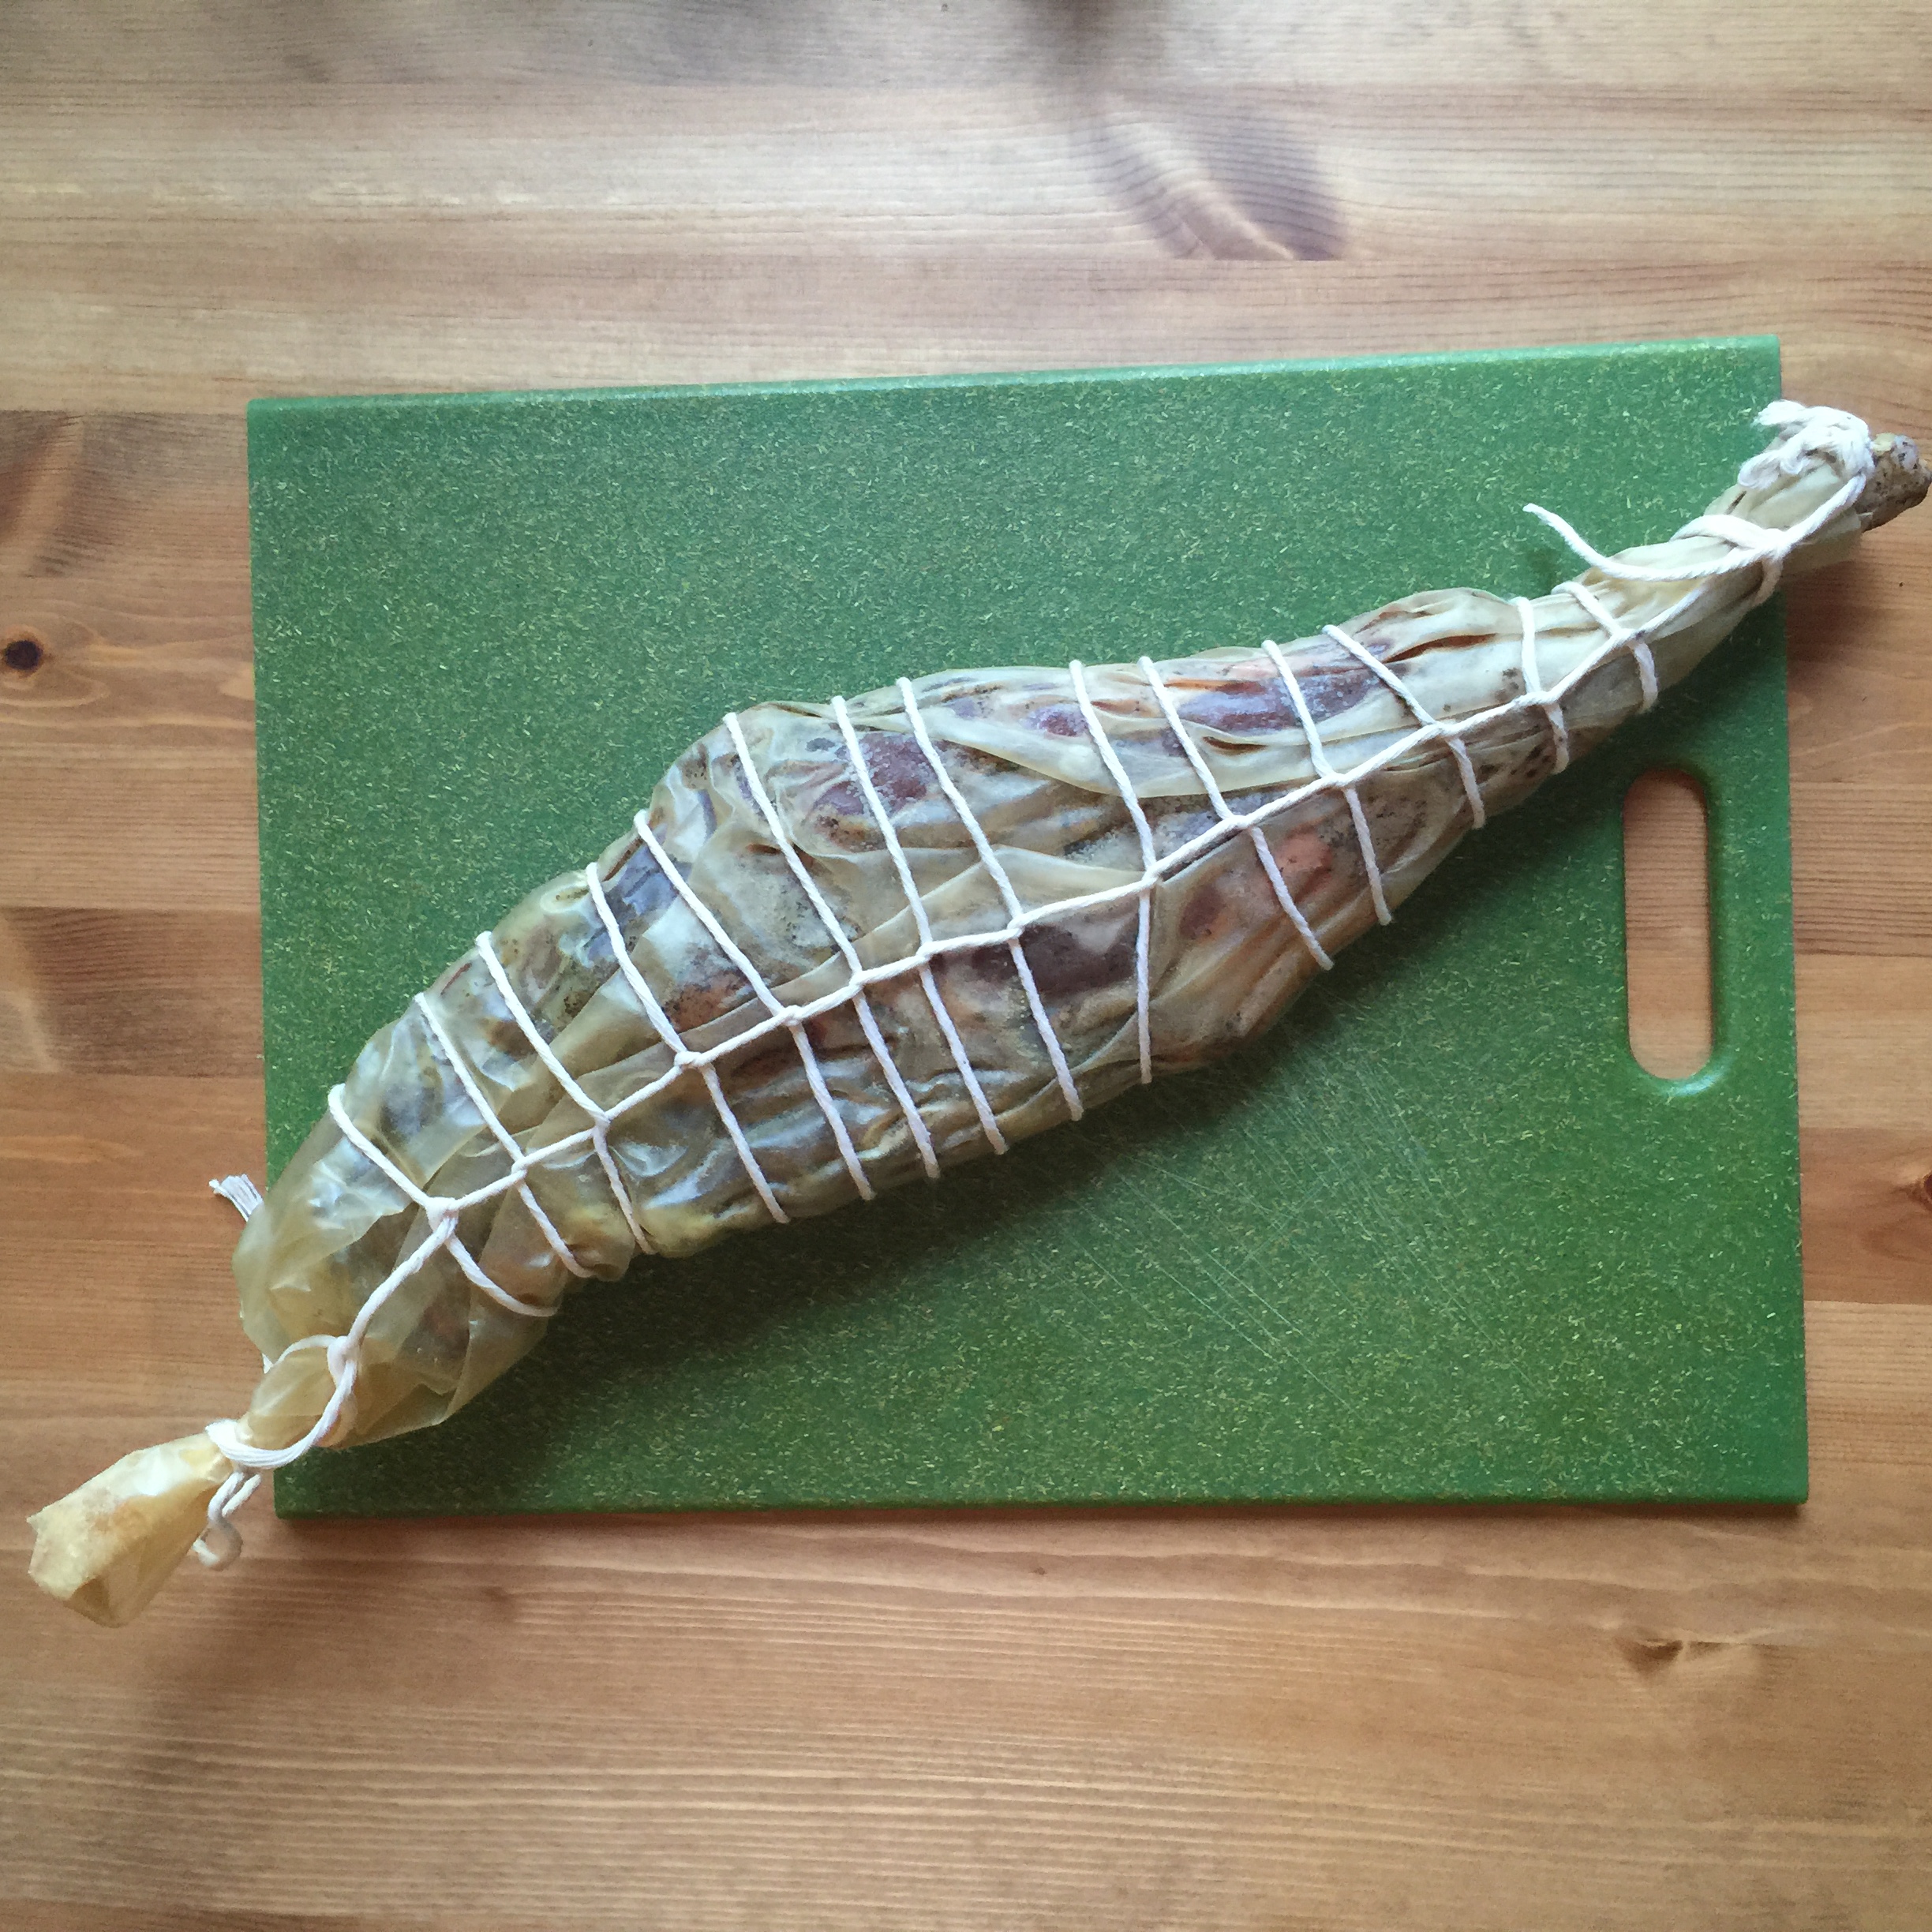
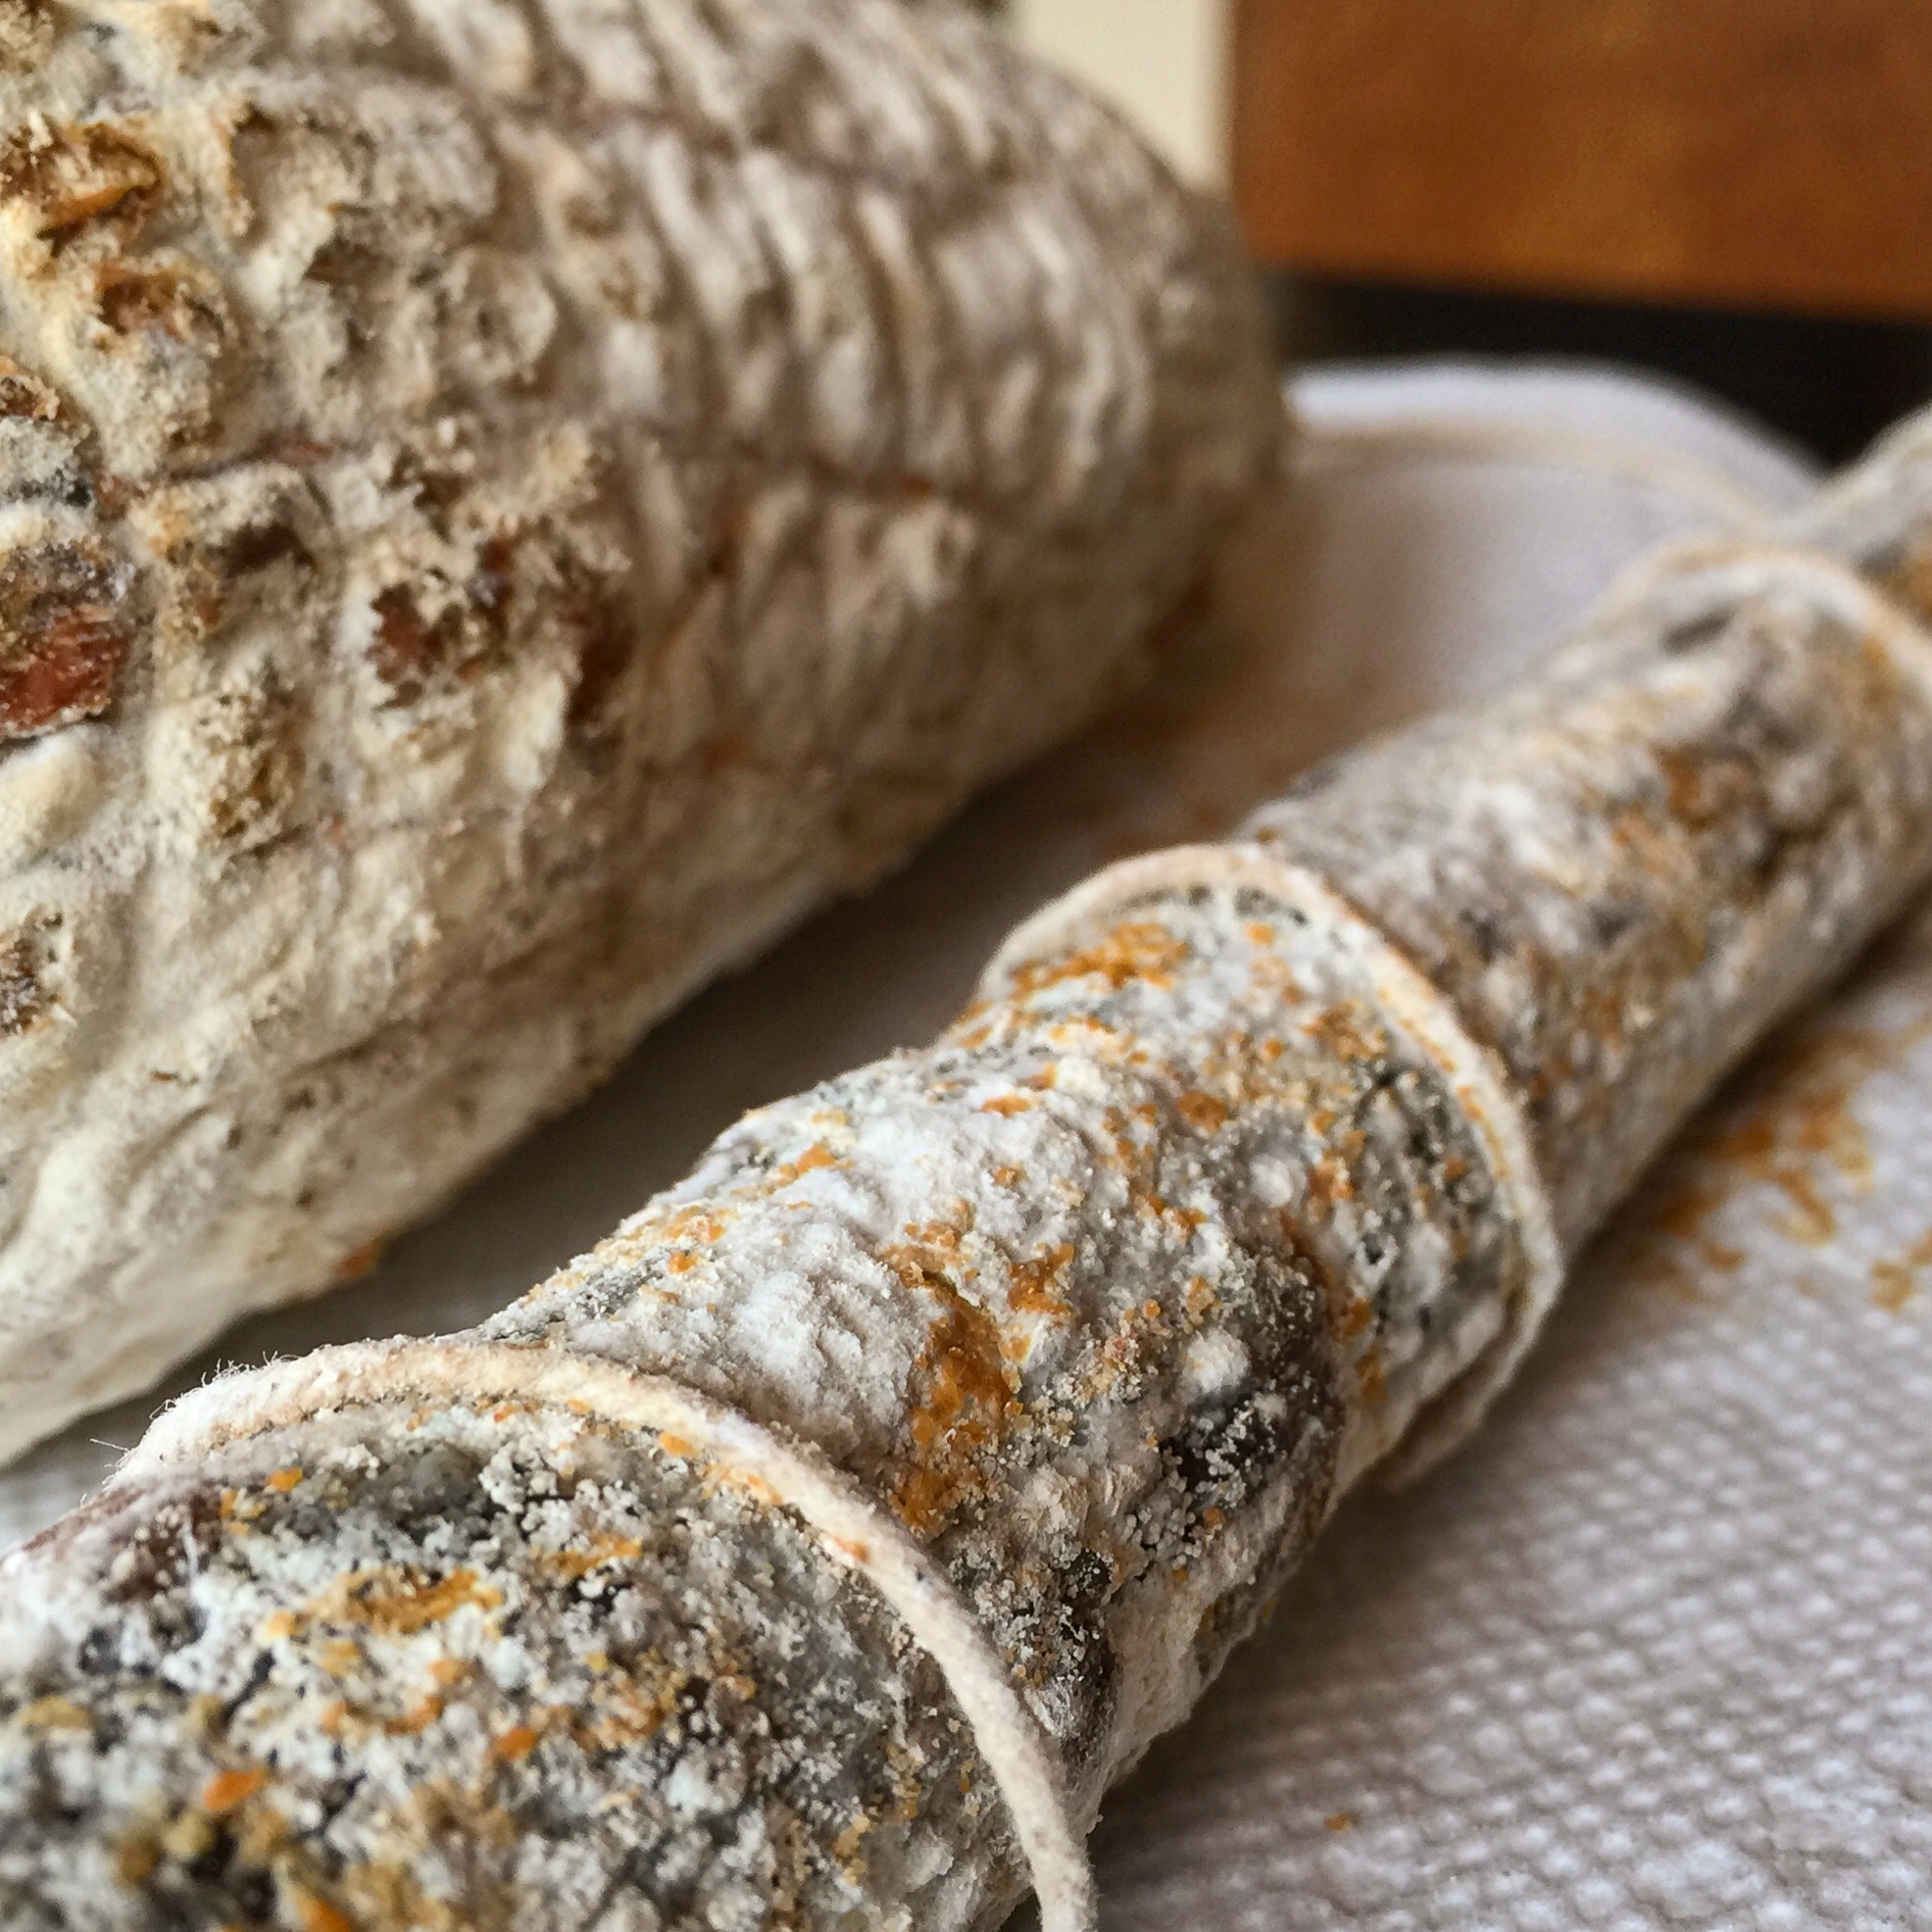
Initial Tasting Phase:

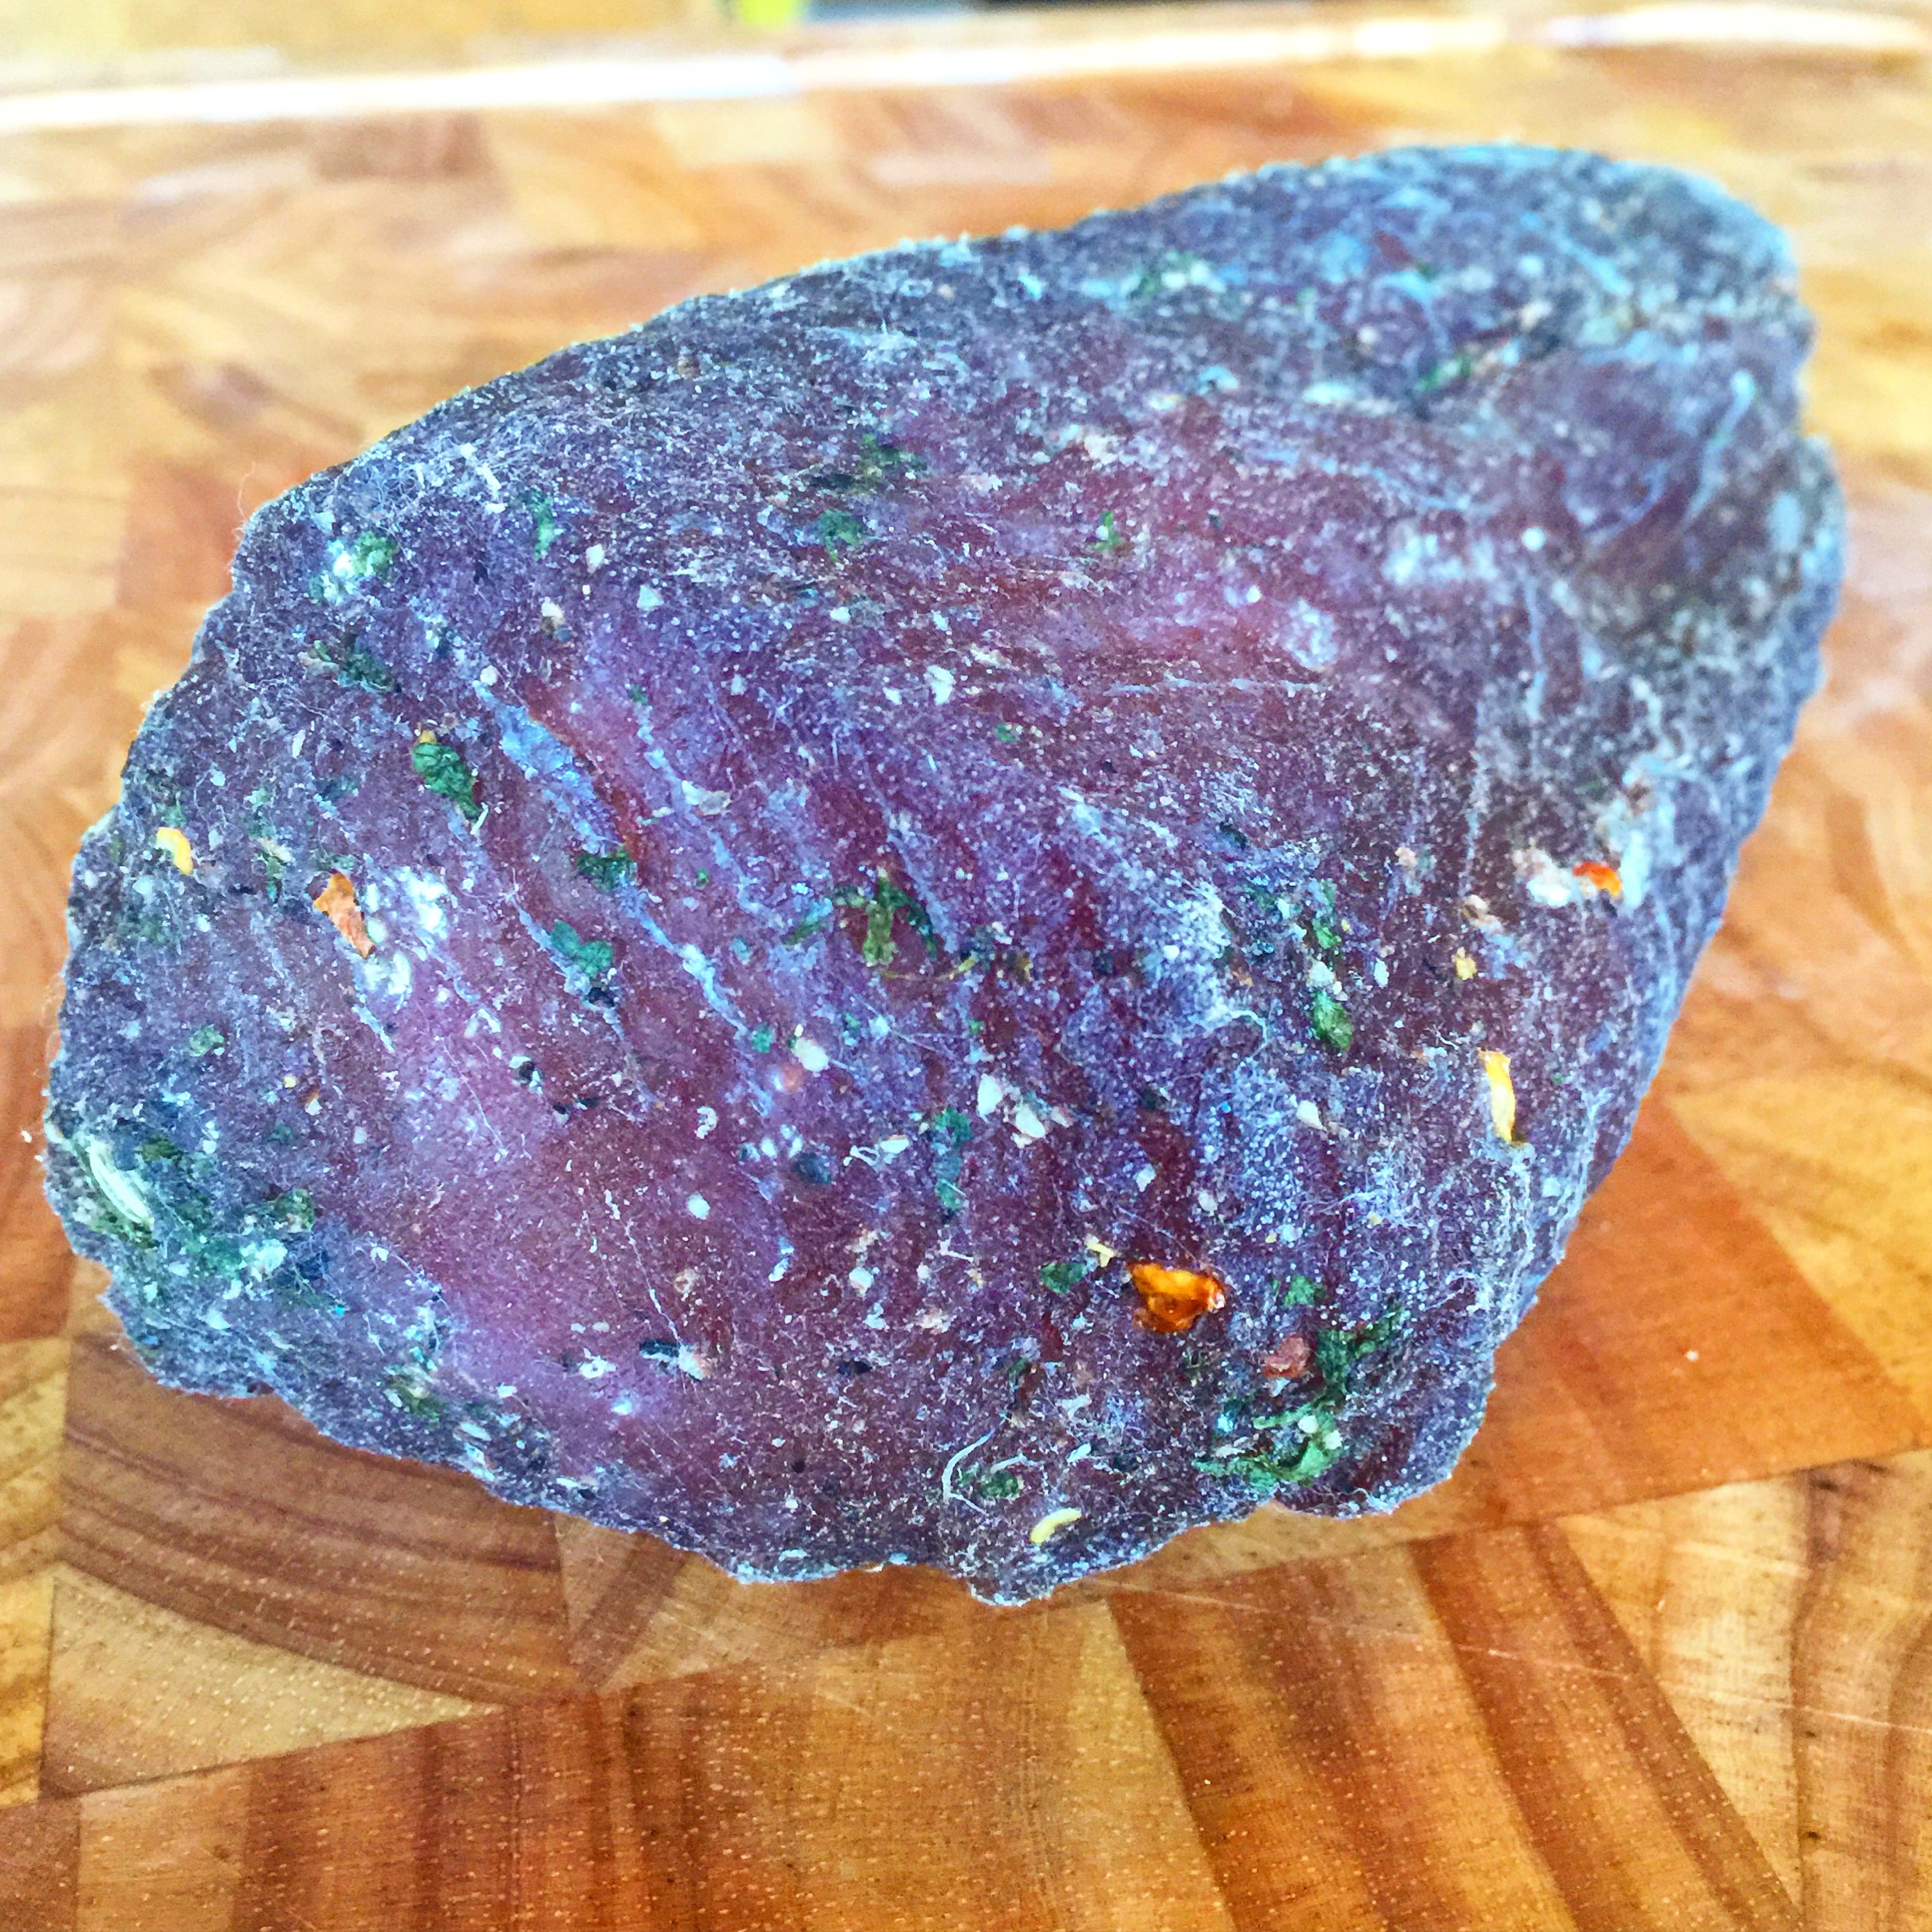
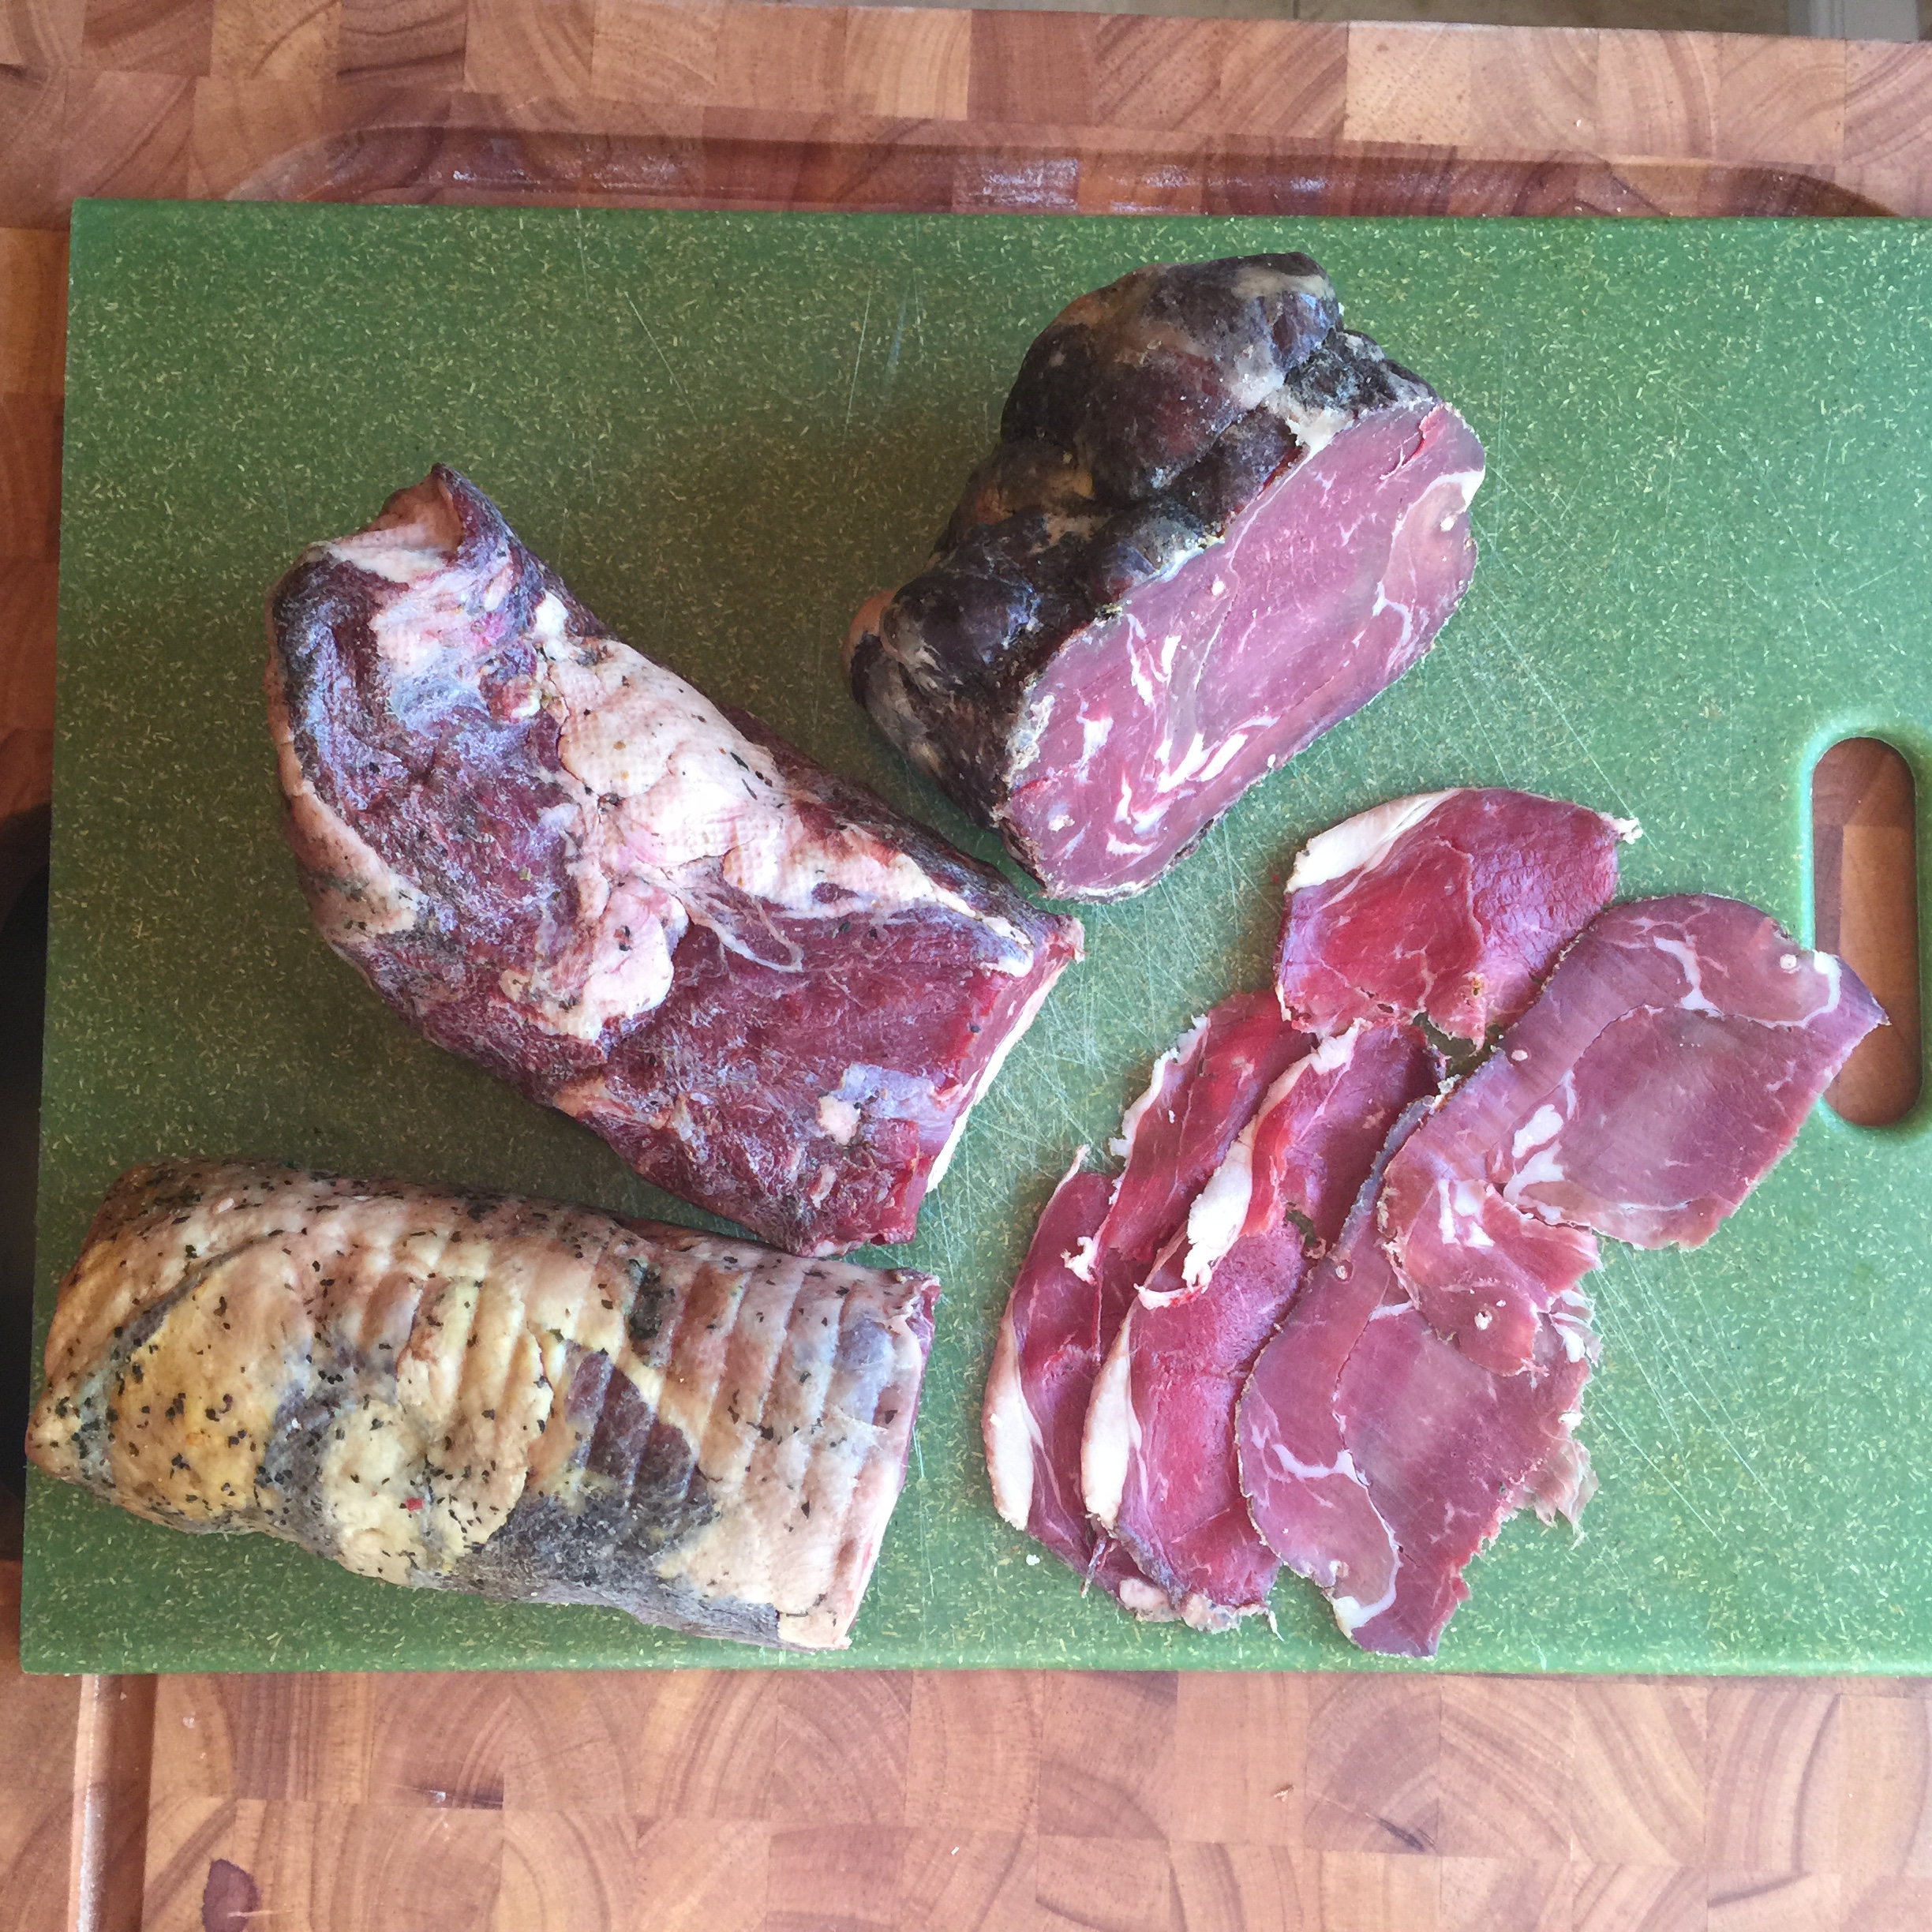
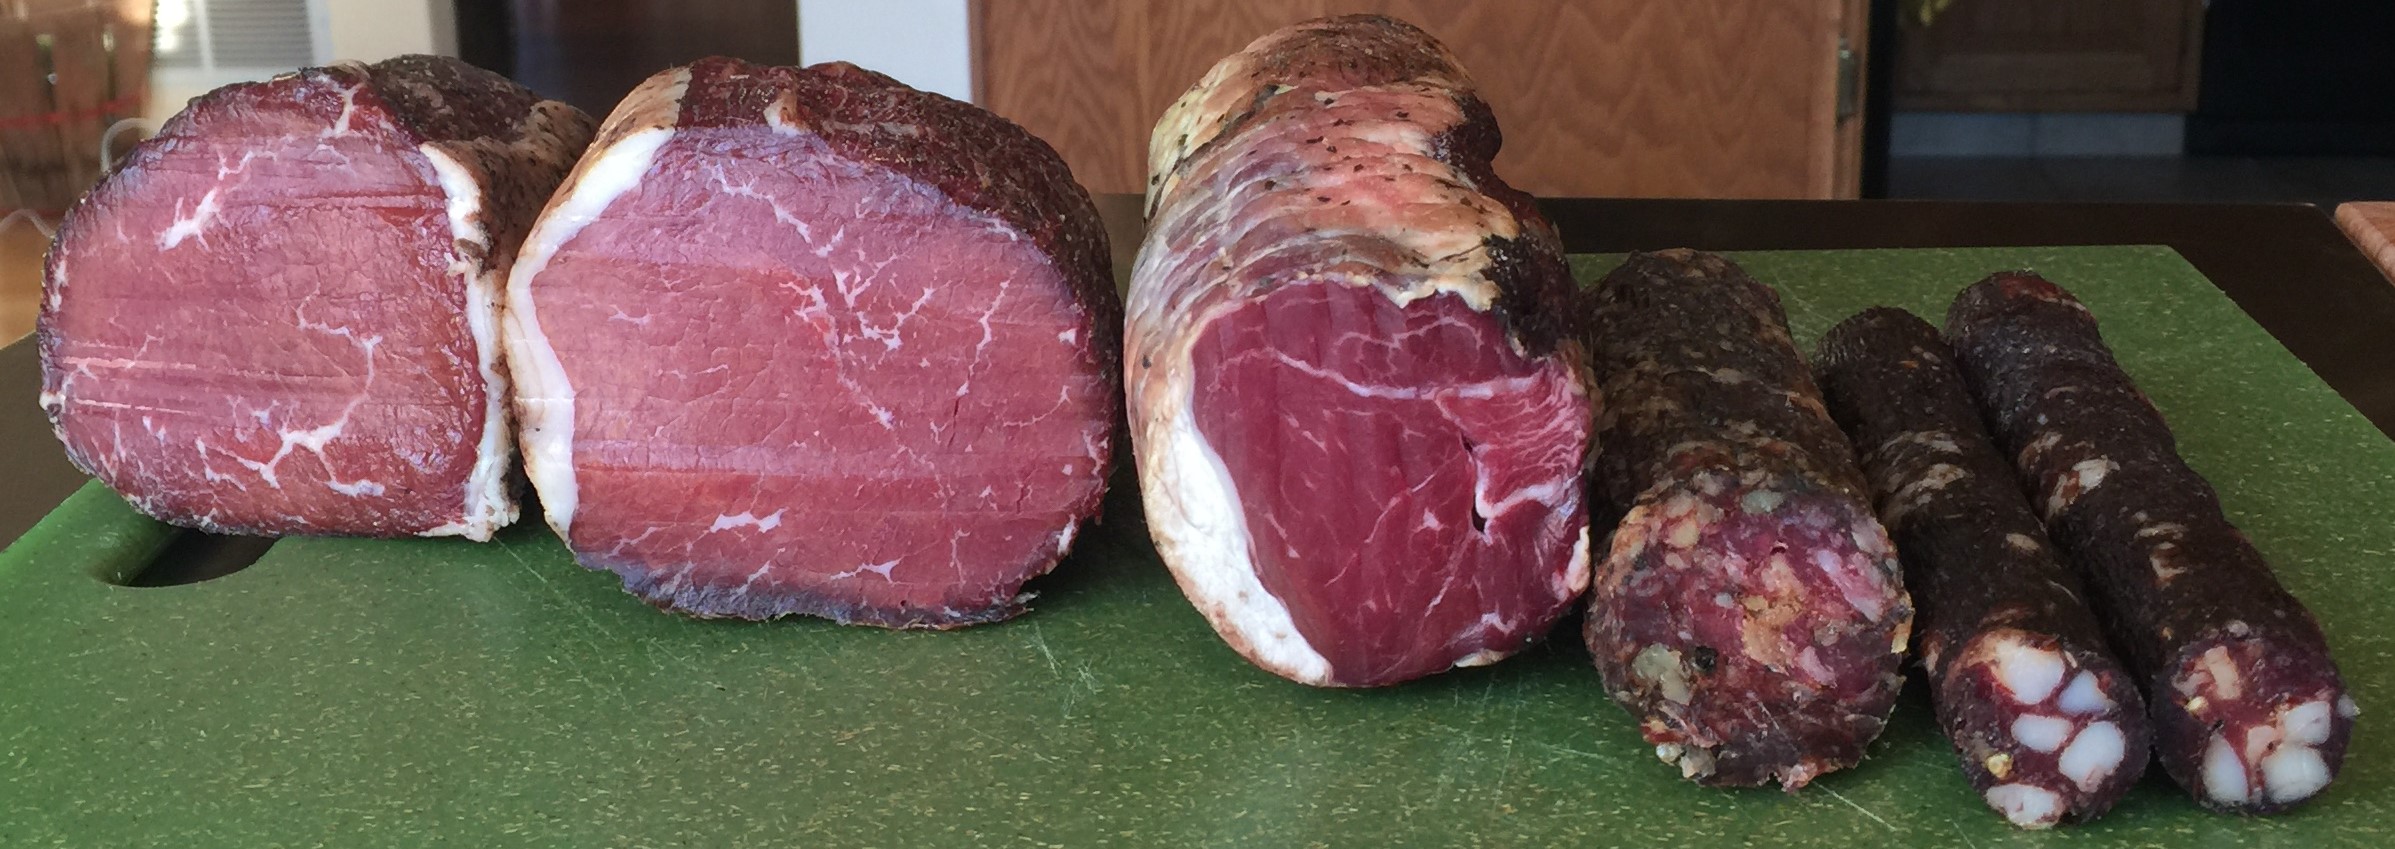
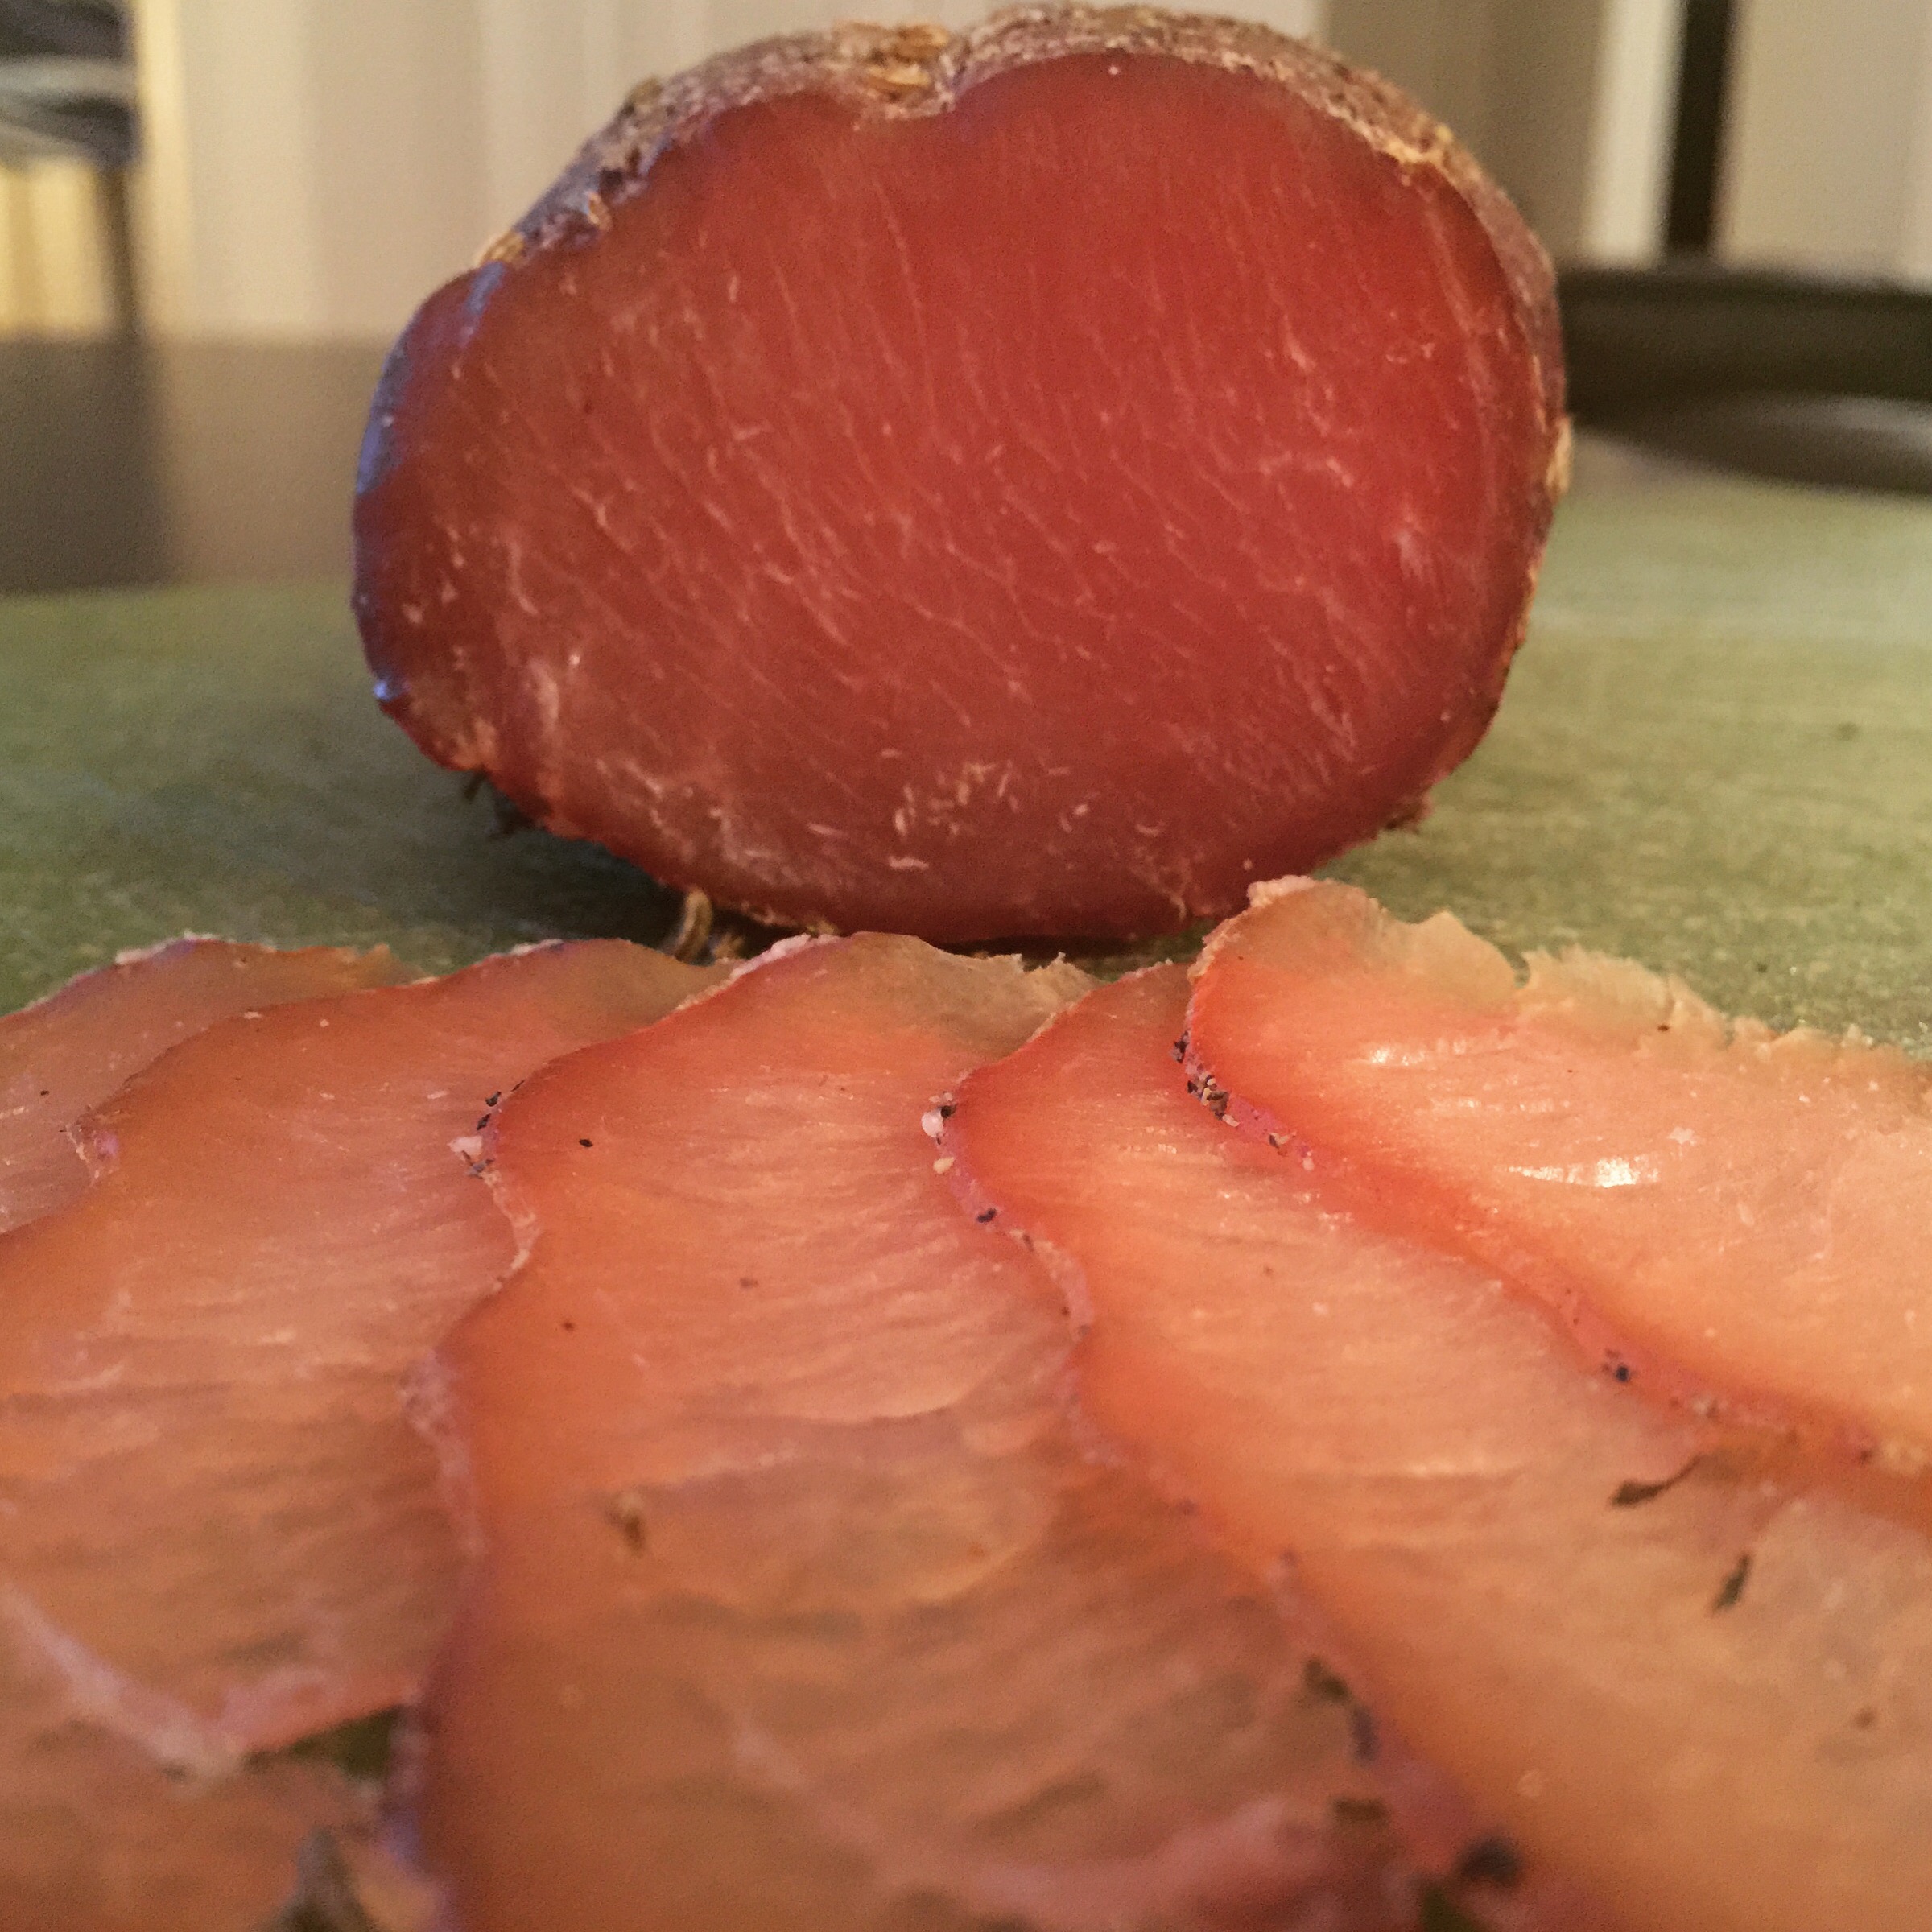
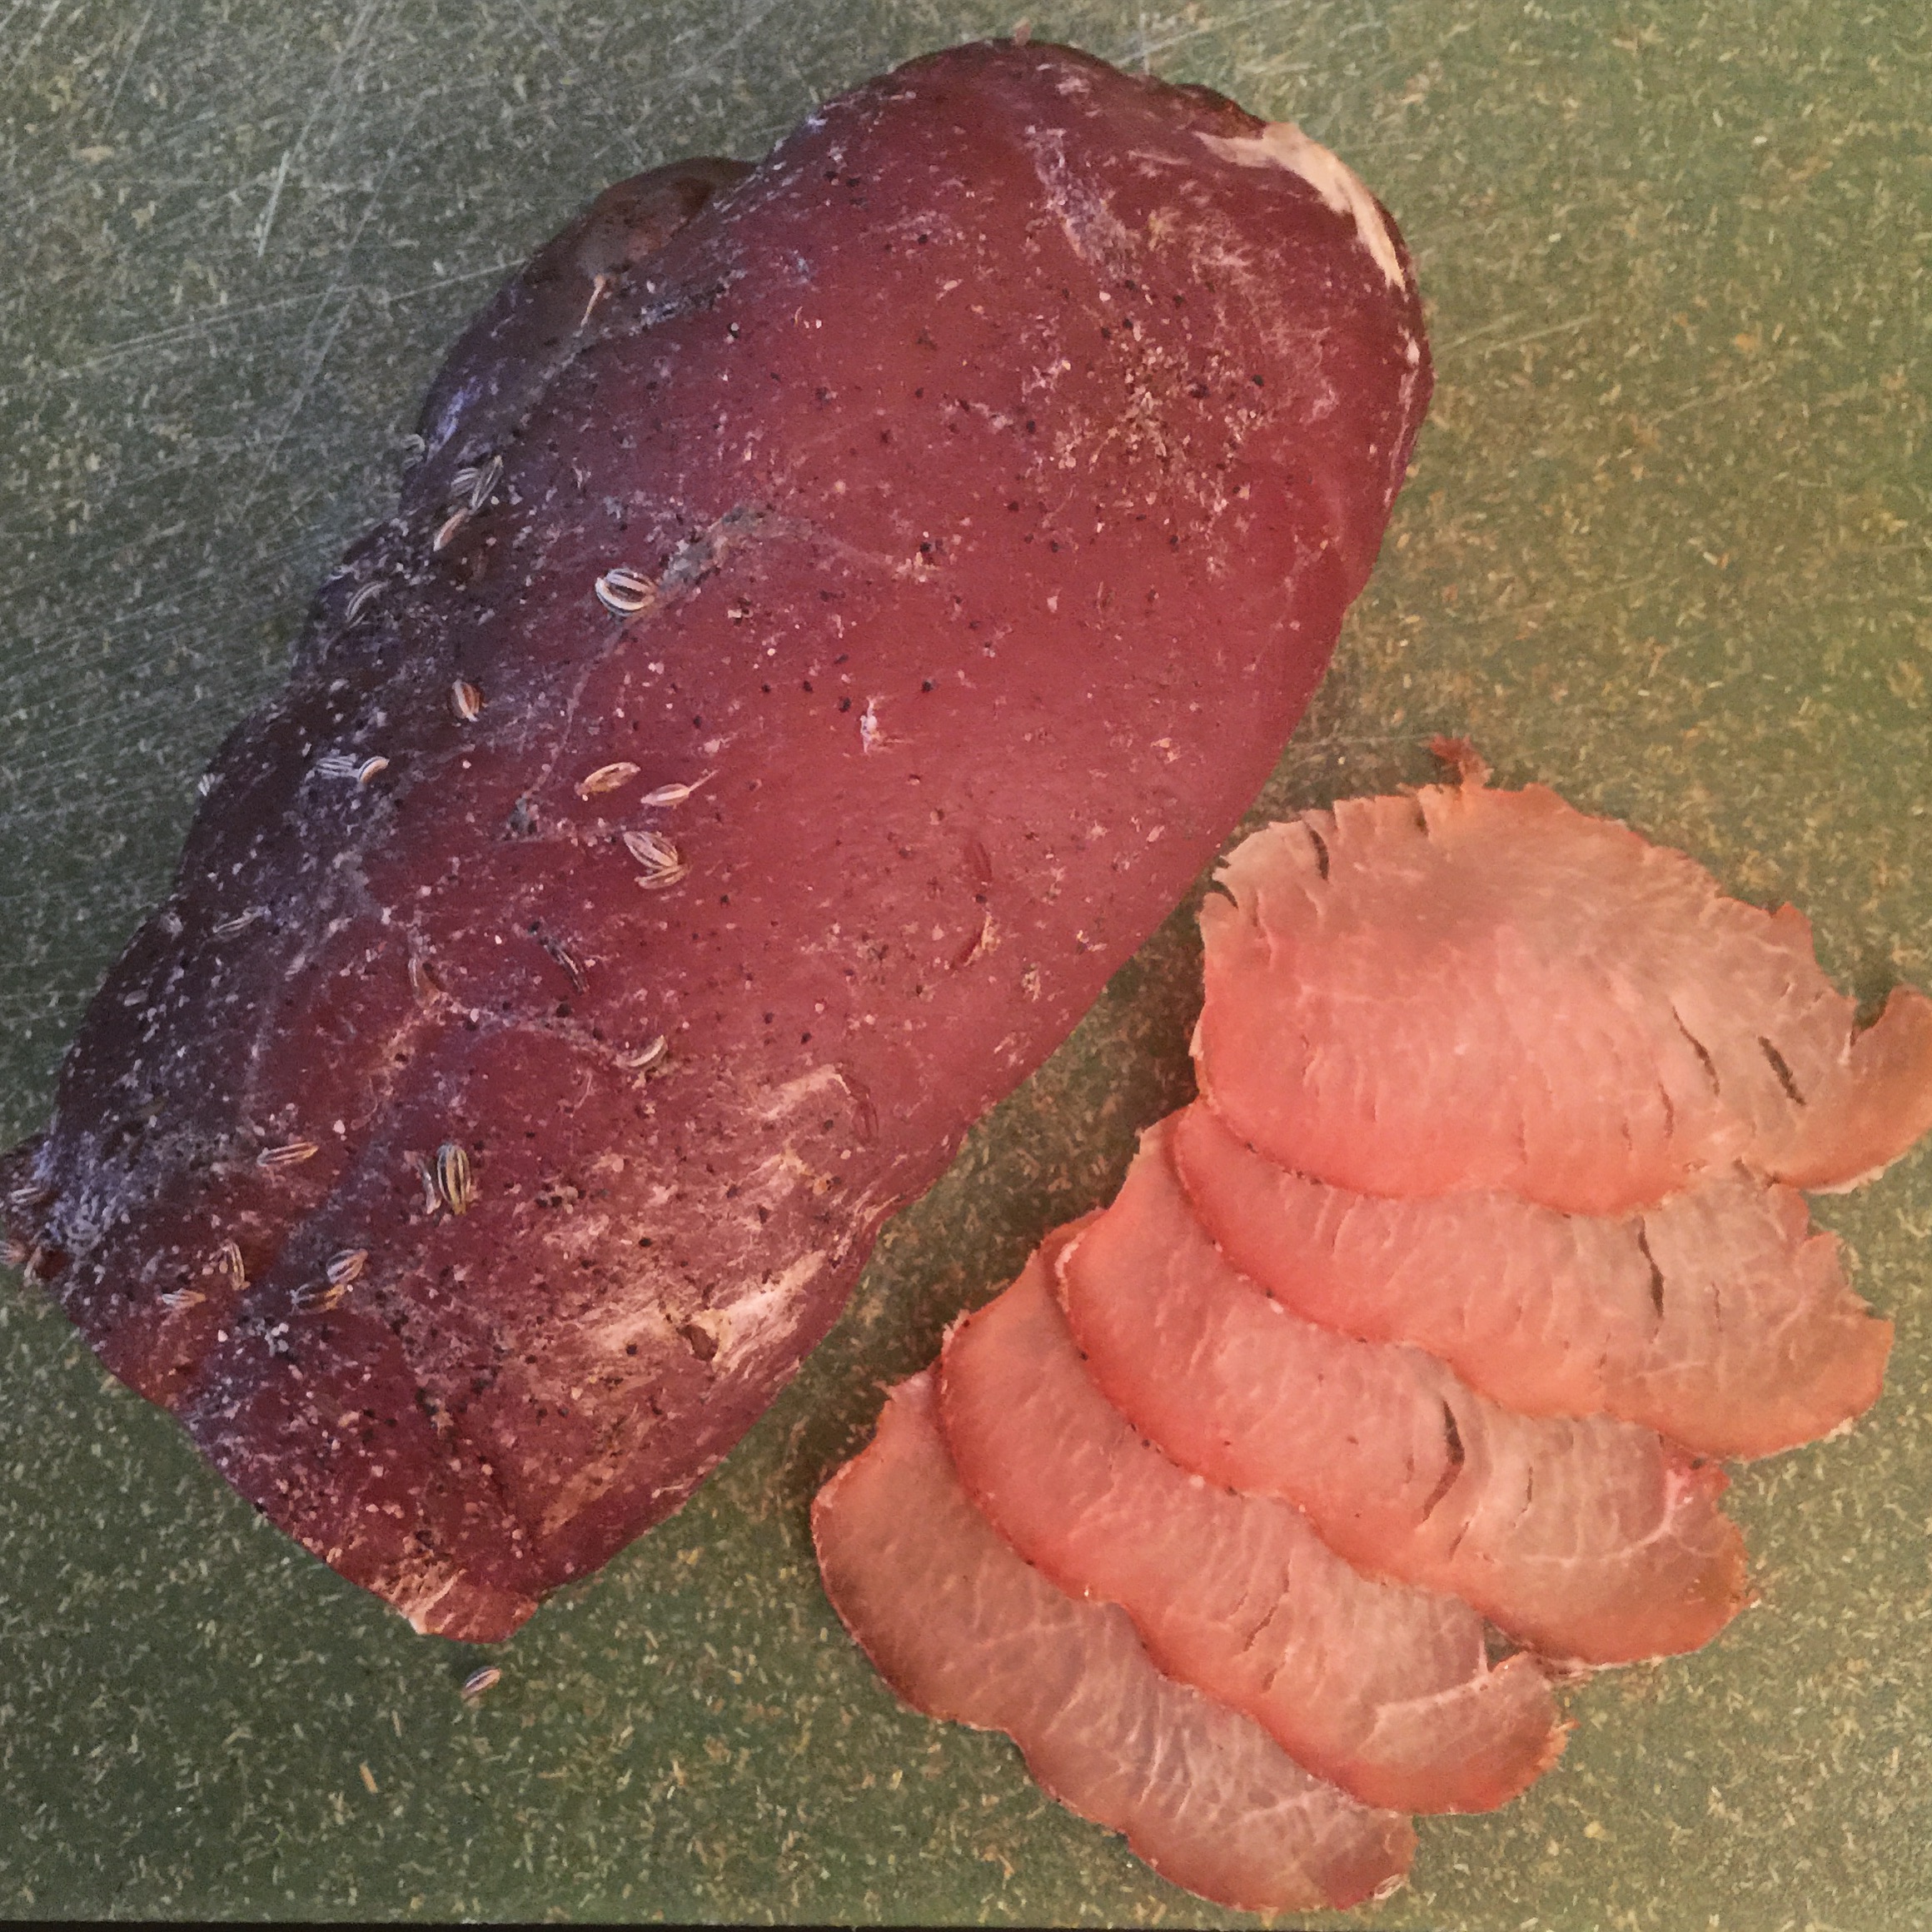
After the duck salami weight loss plateaued, I pulled them from the chamber.

image(26)

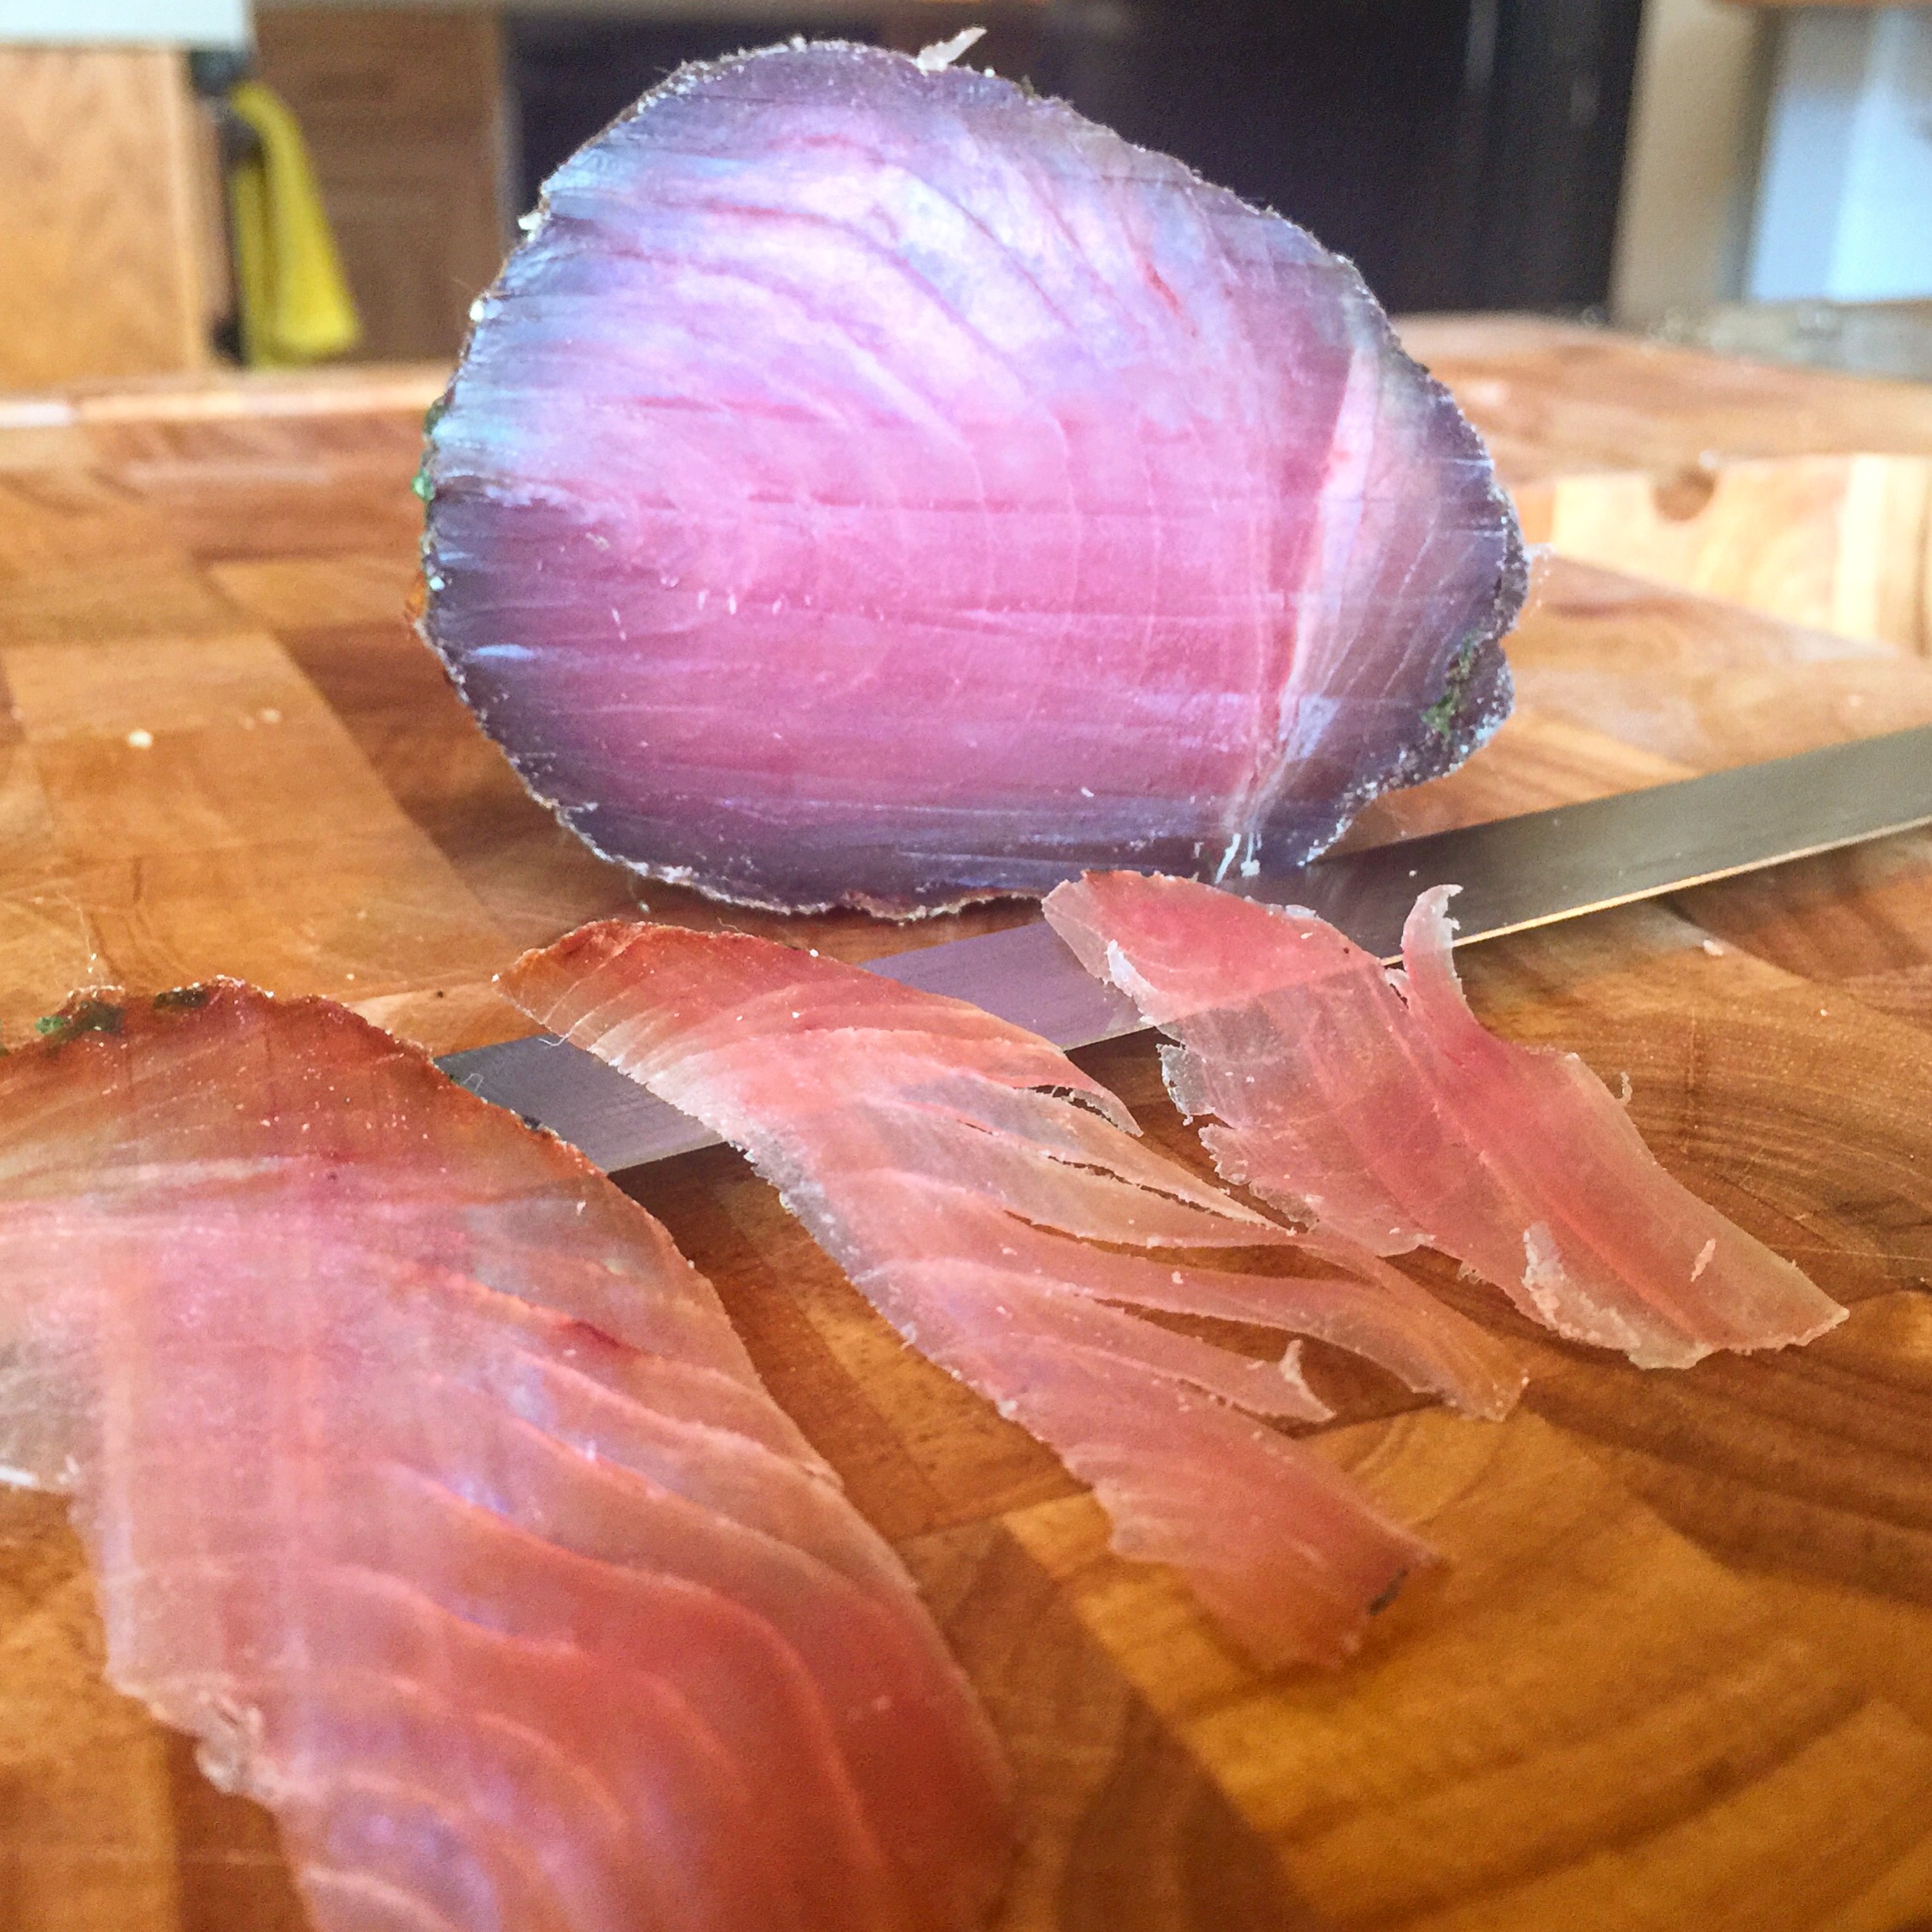
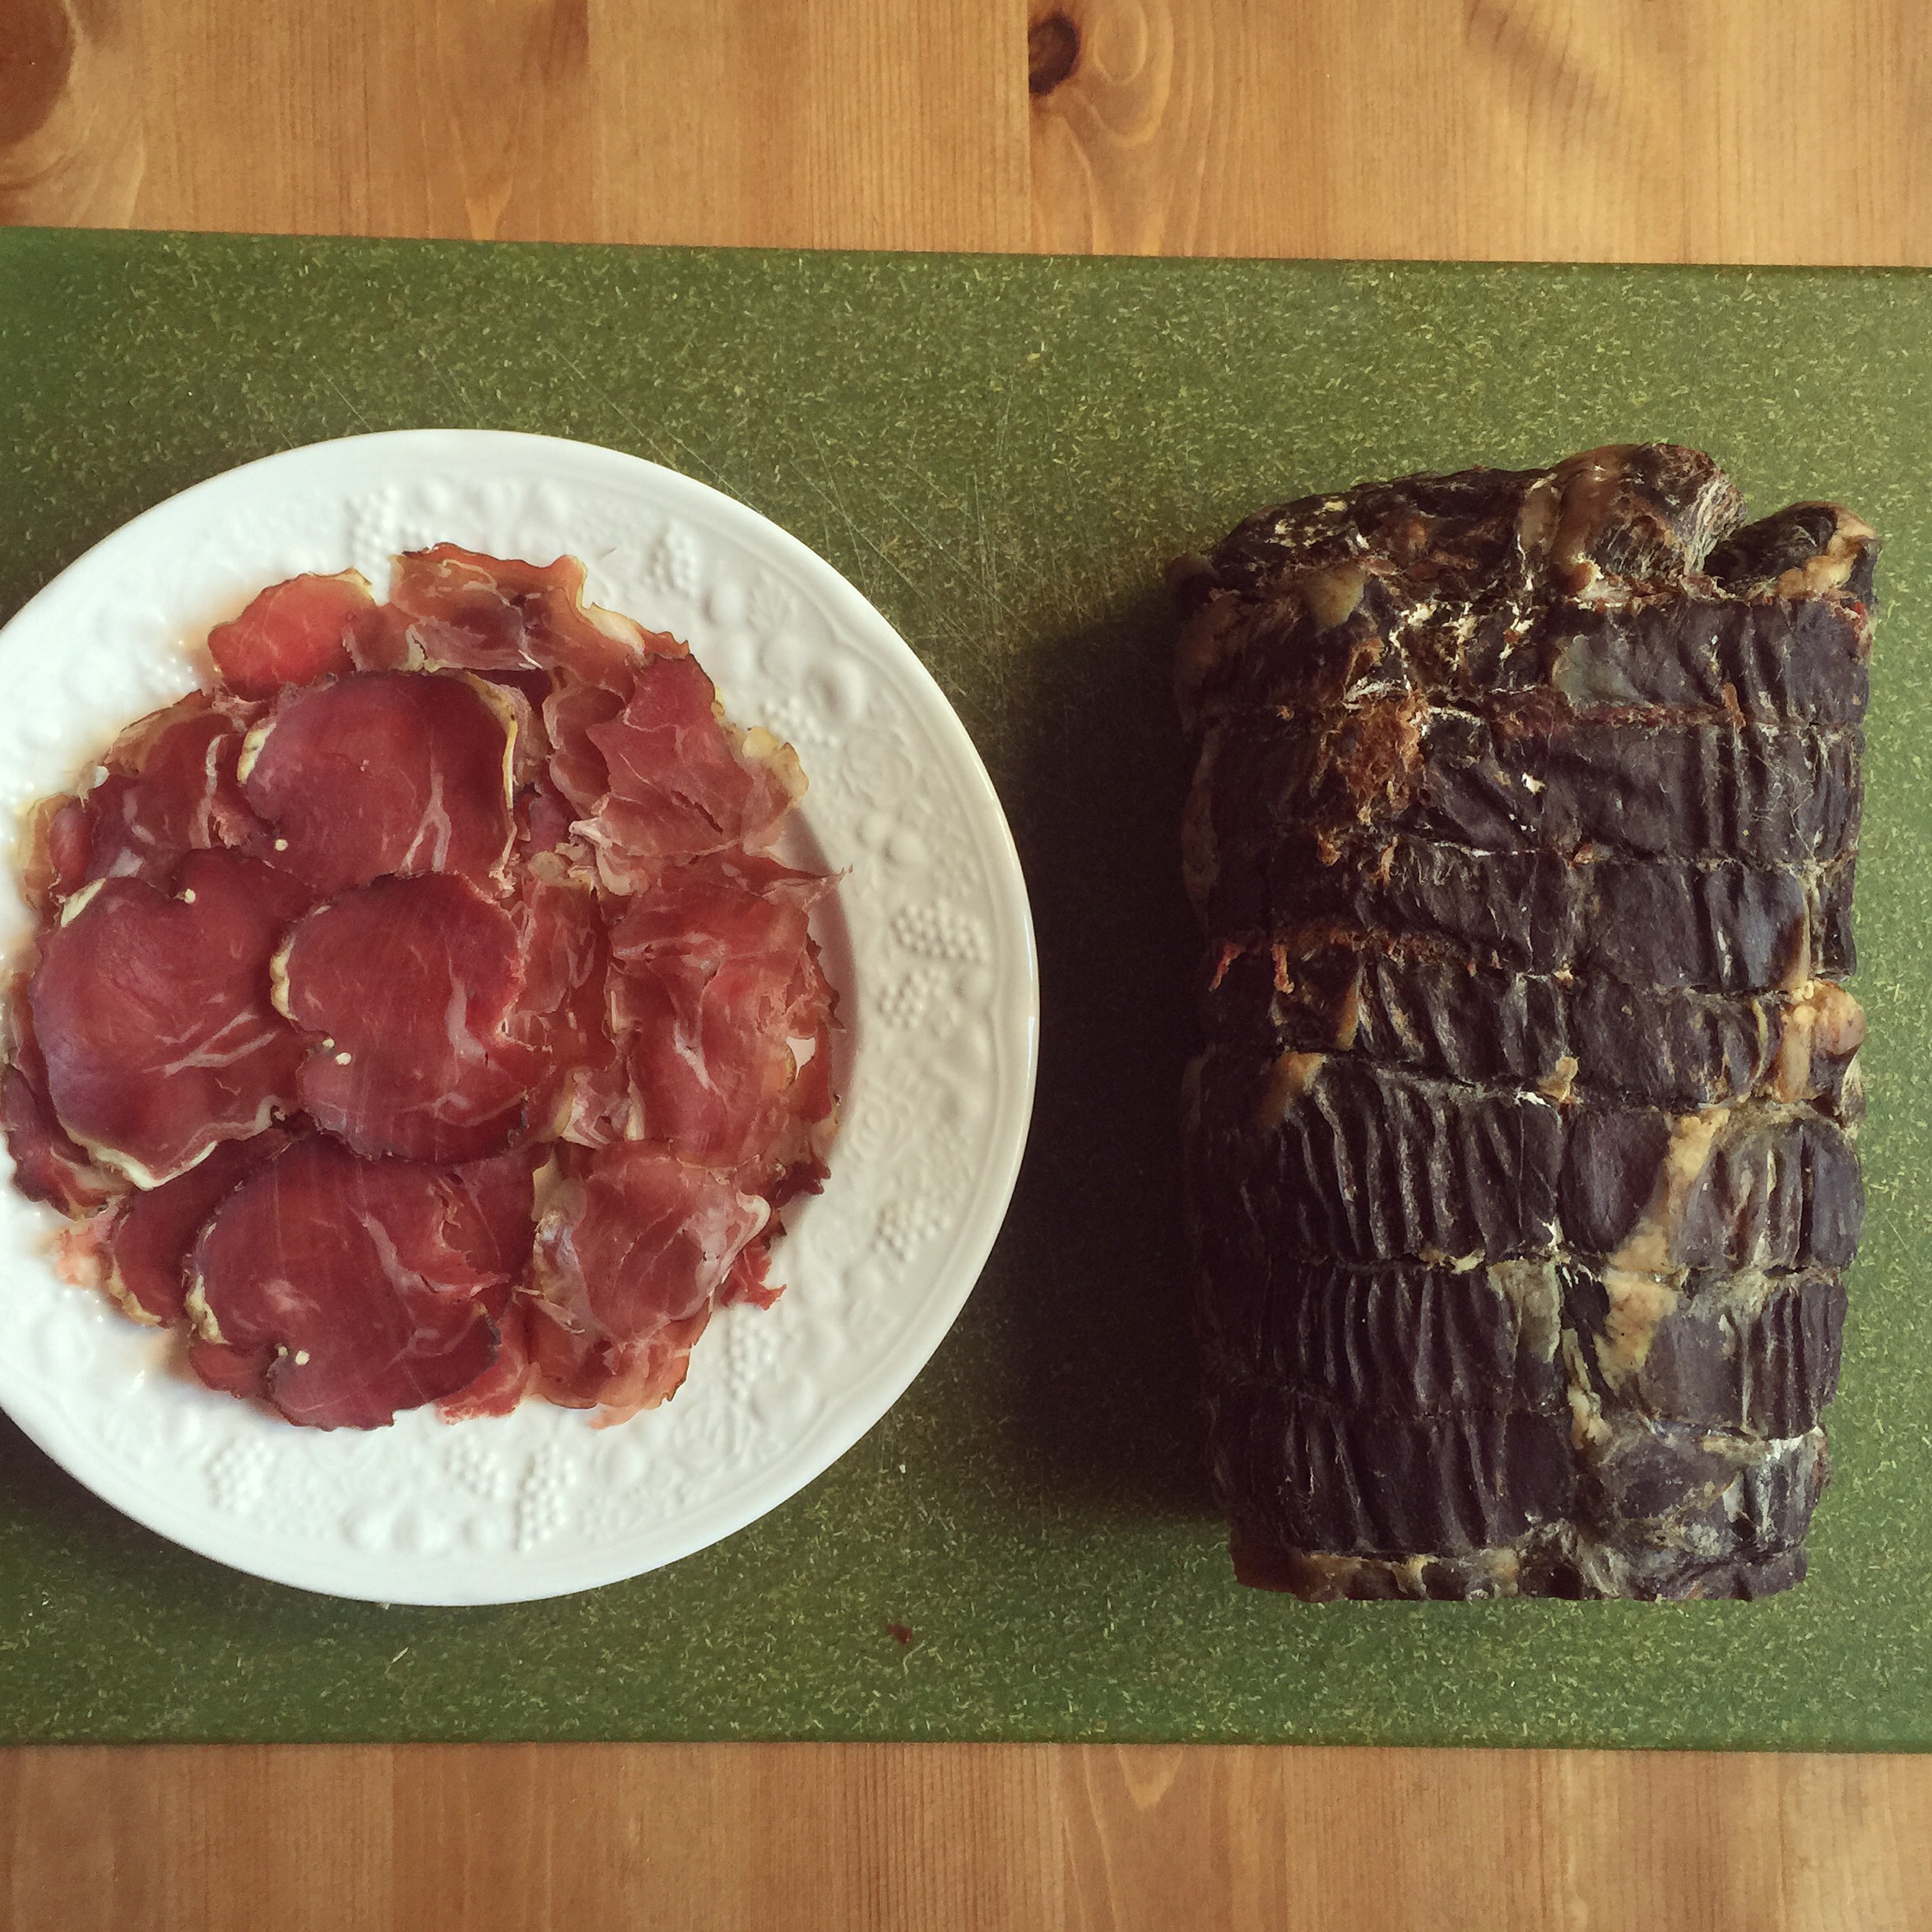
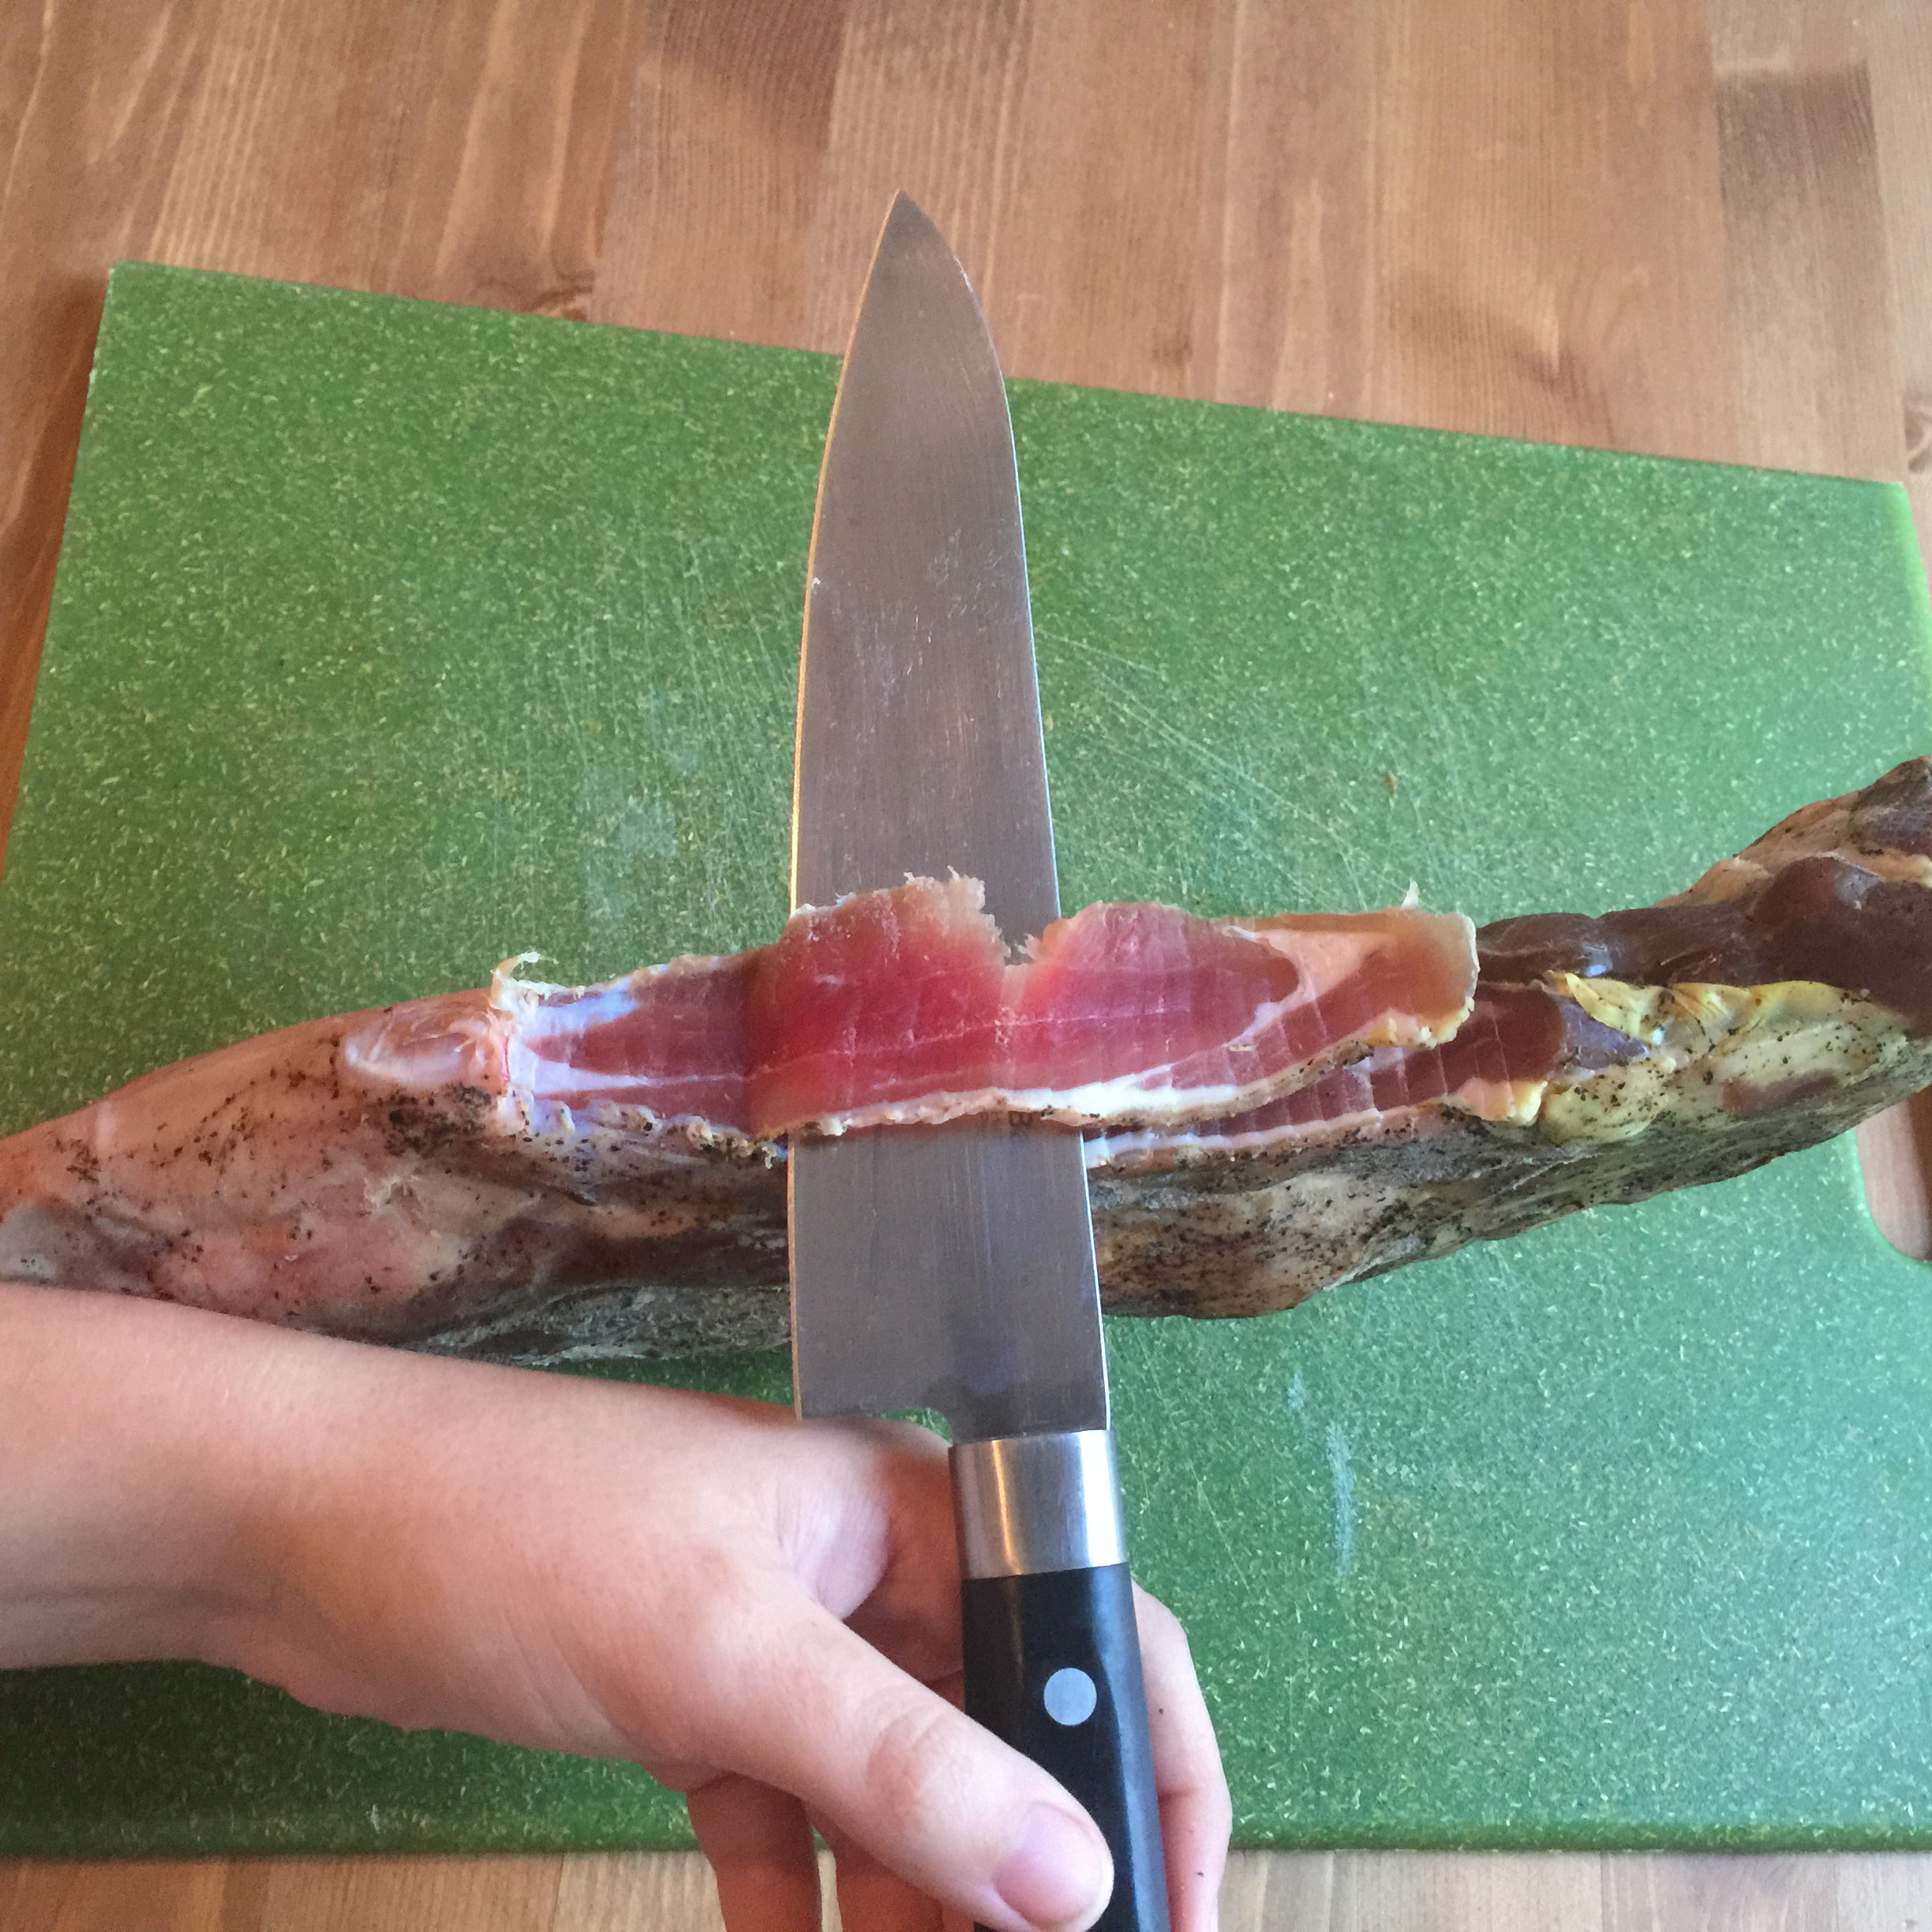
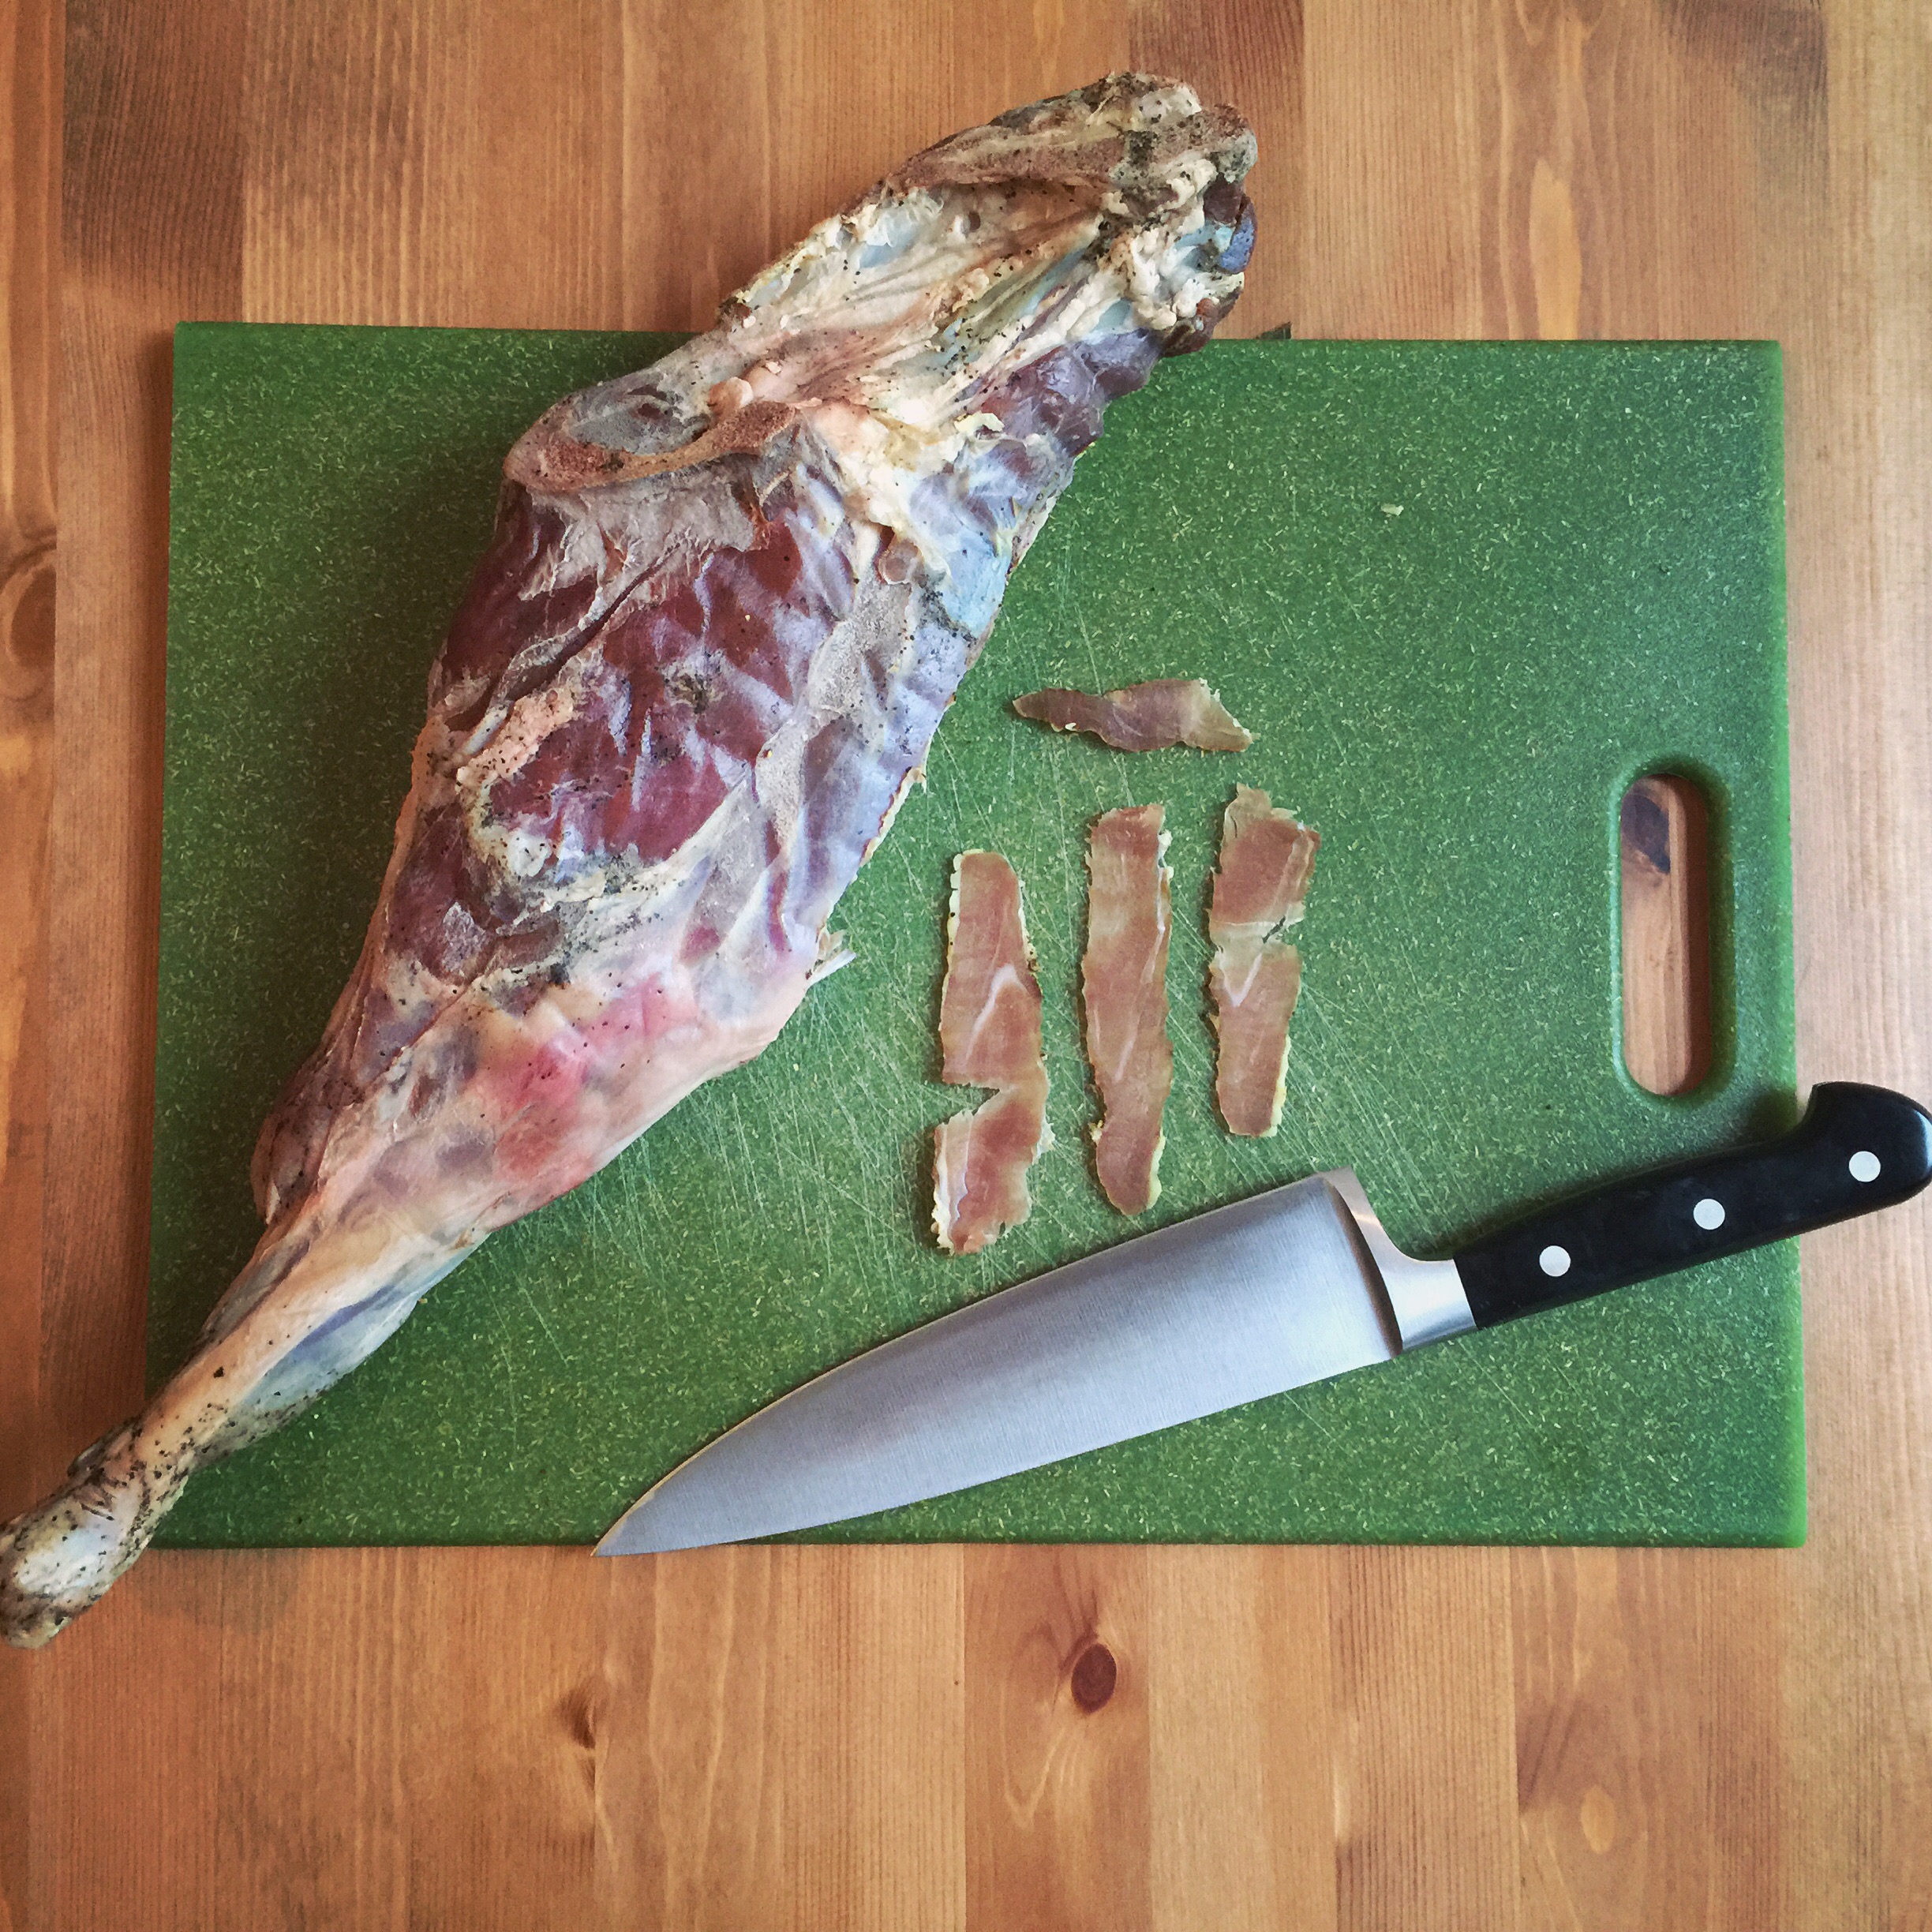
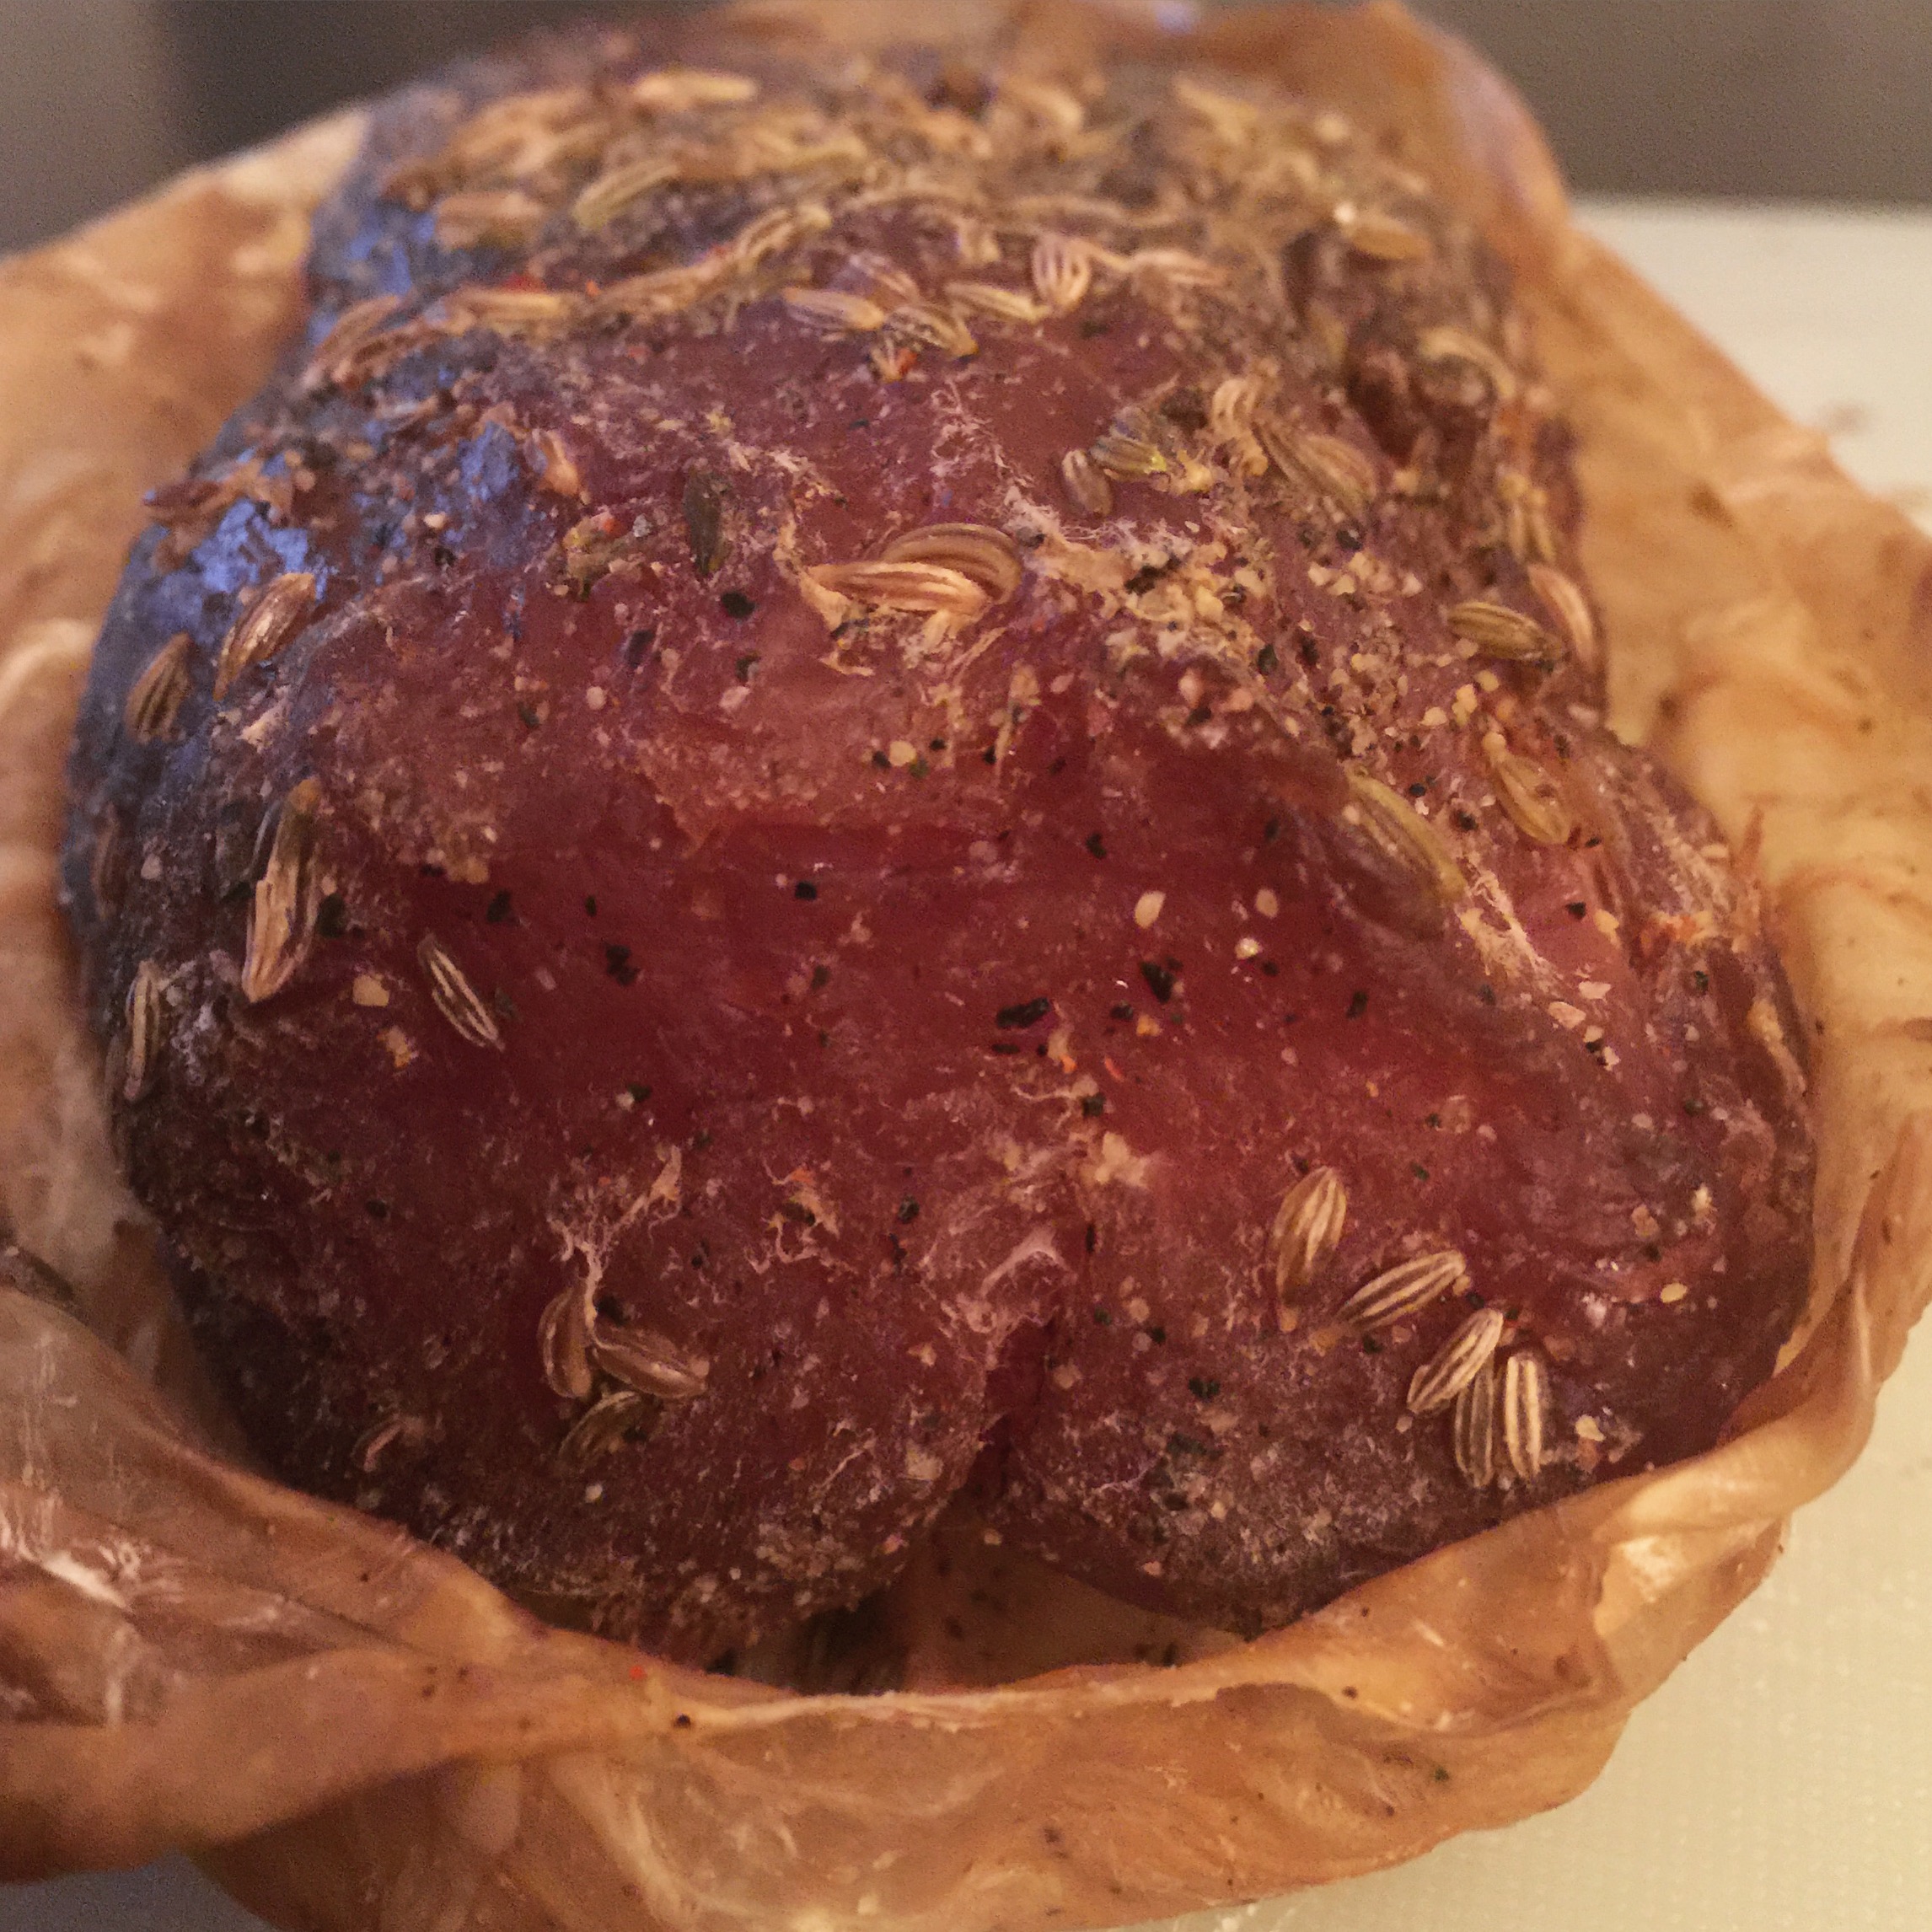
After I pulled the duck salami, I removed the casing, and wiped them down with white vinegar. I patted them dry after this.

image(30)

image(34)

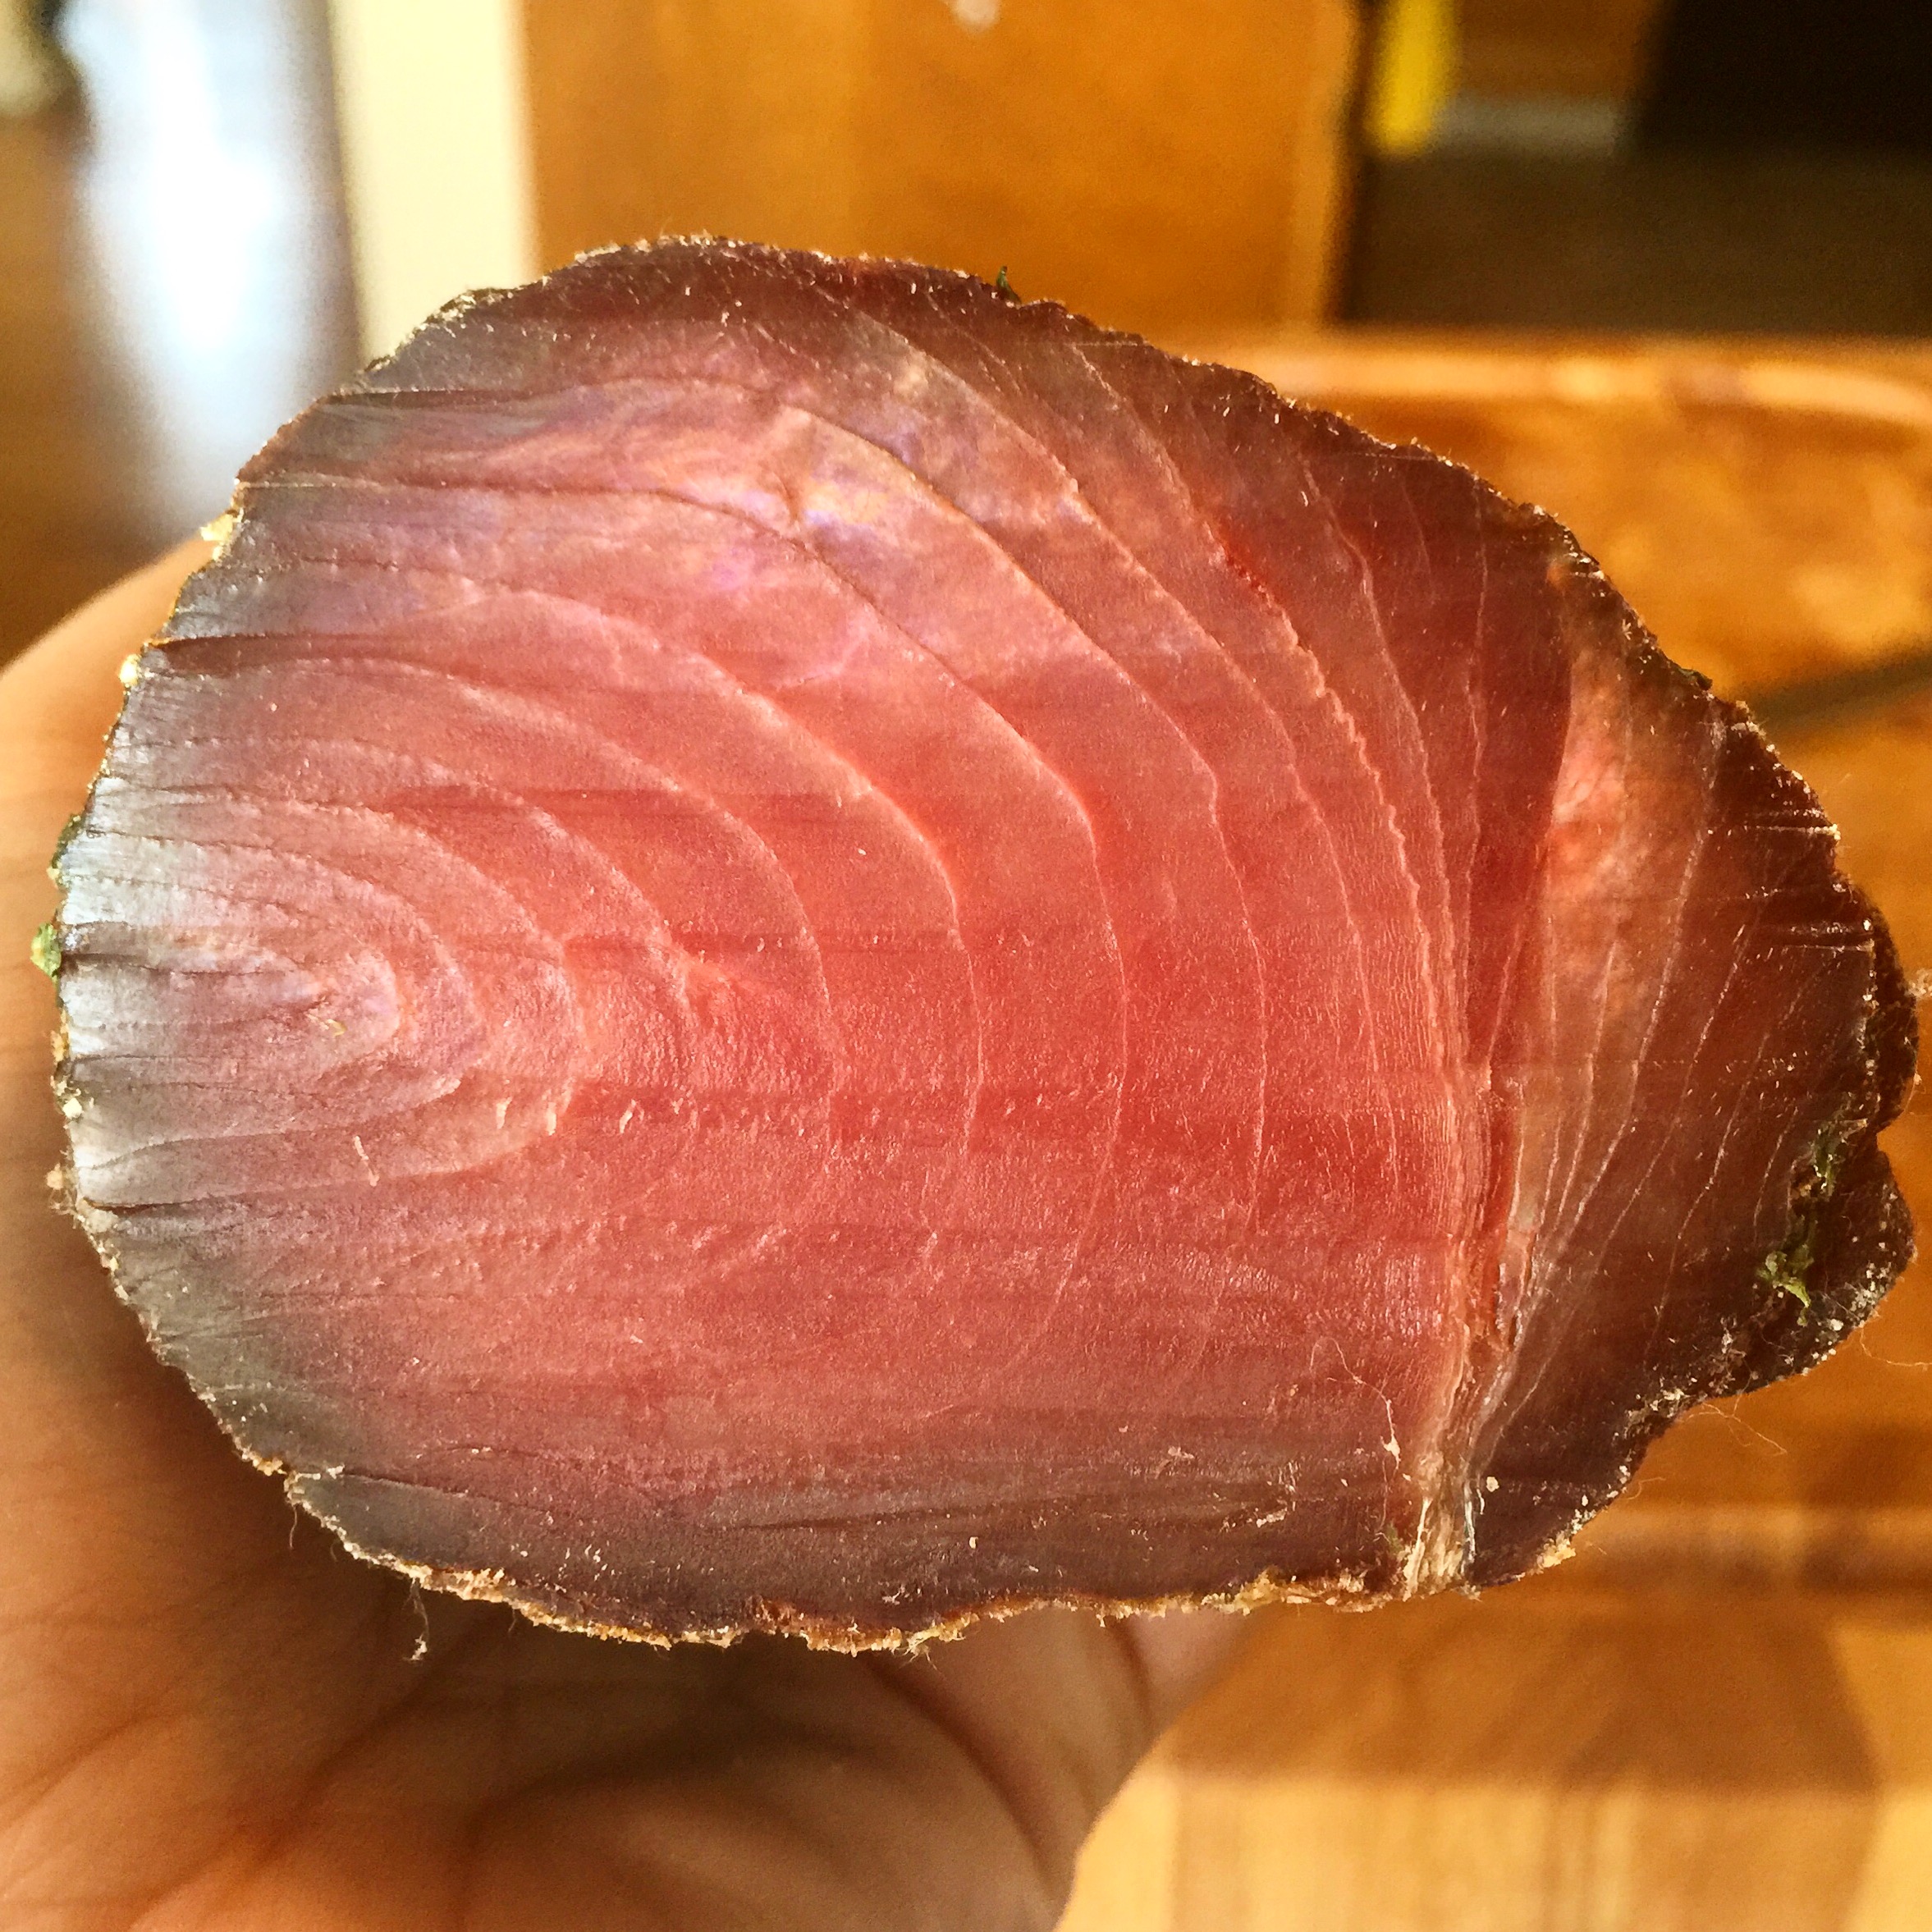
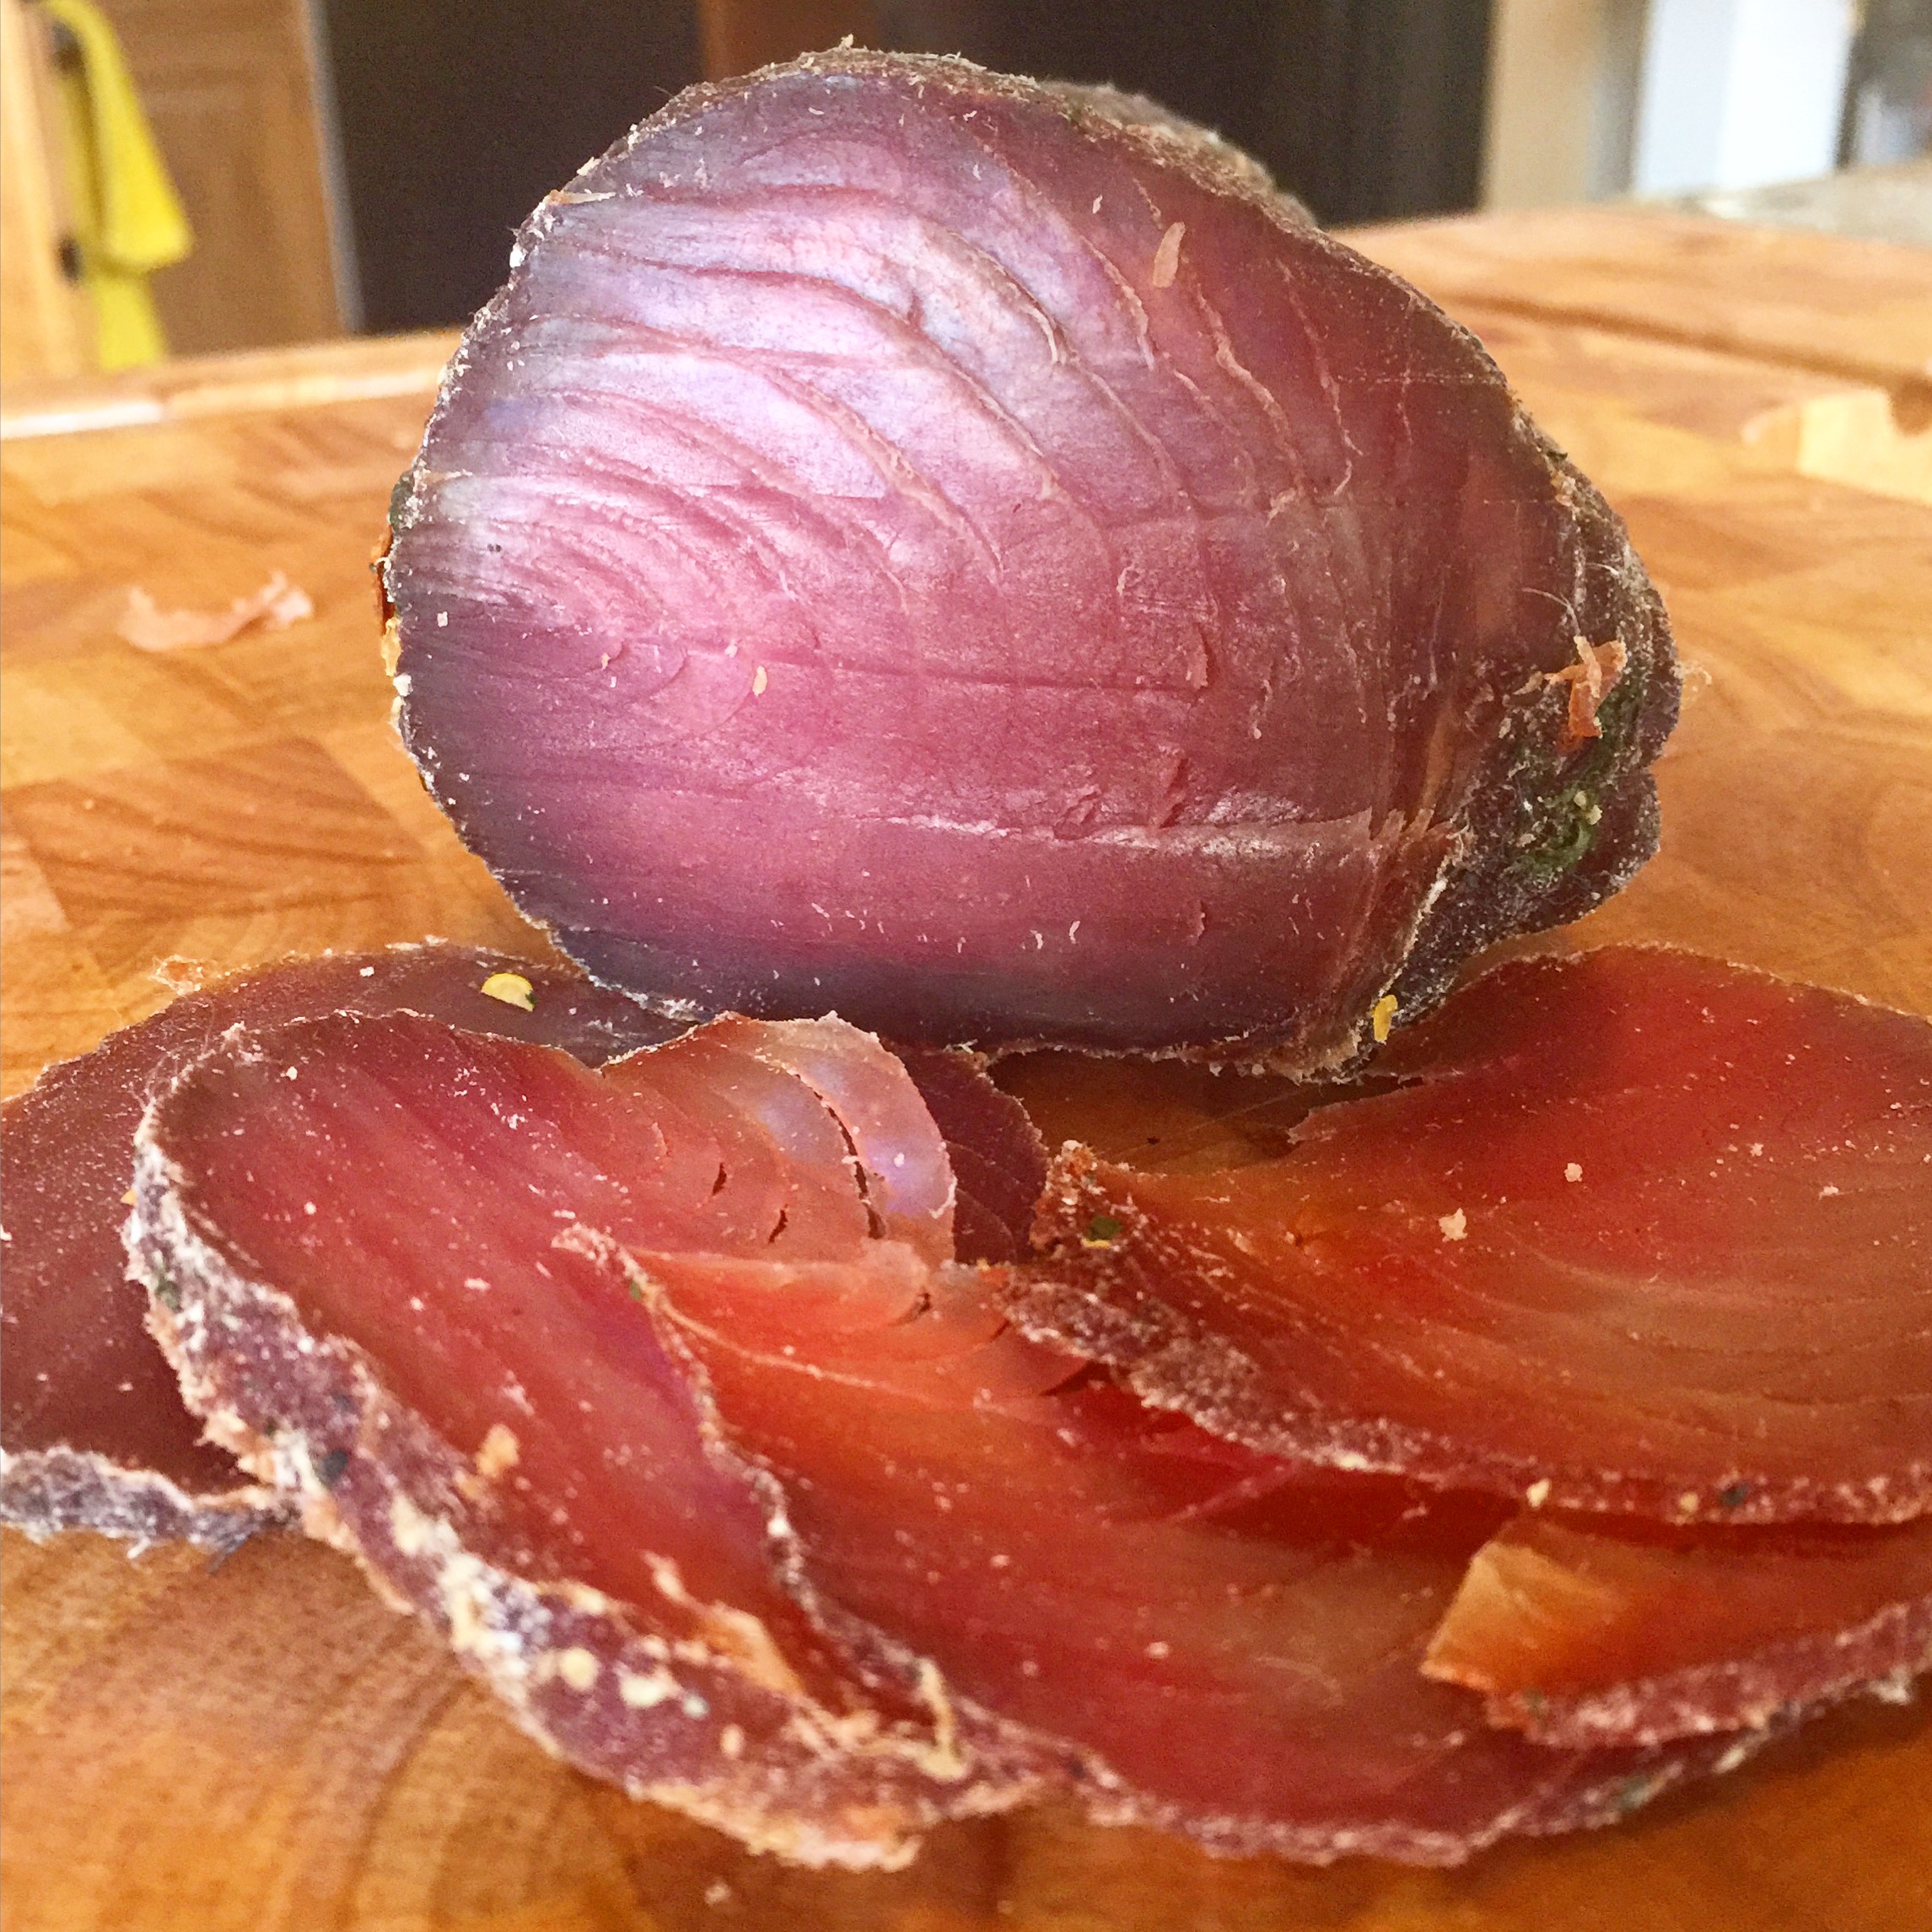
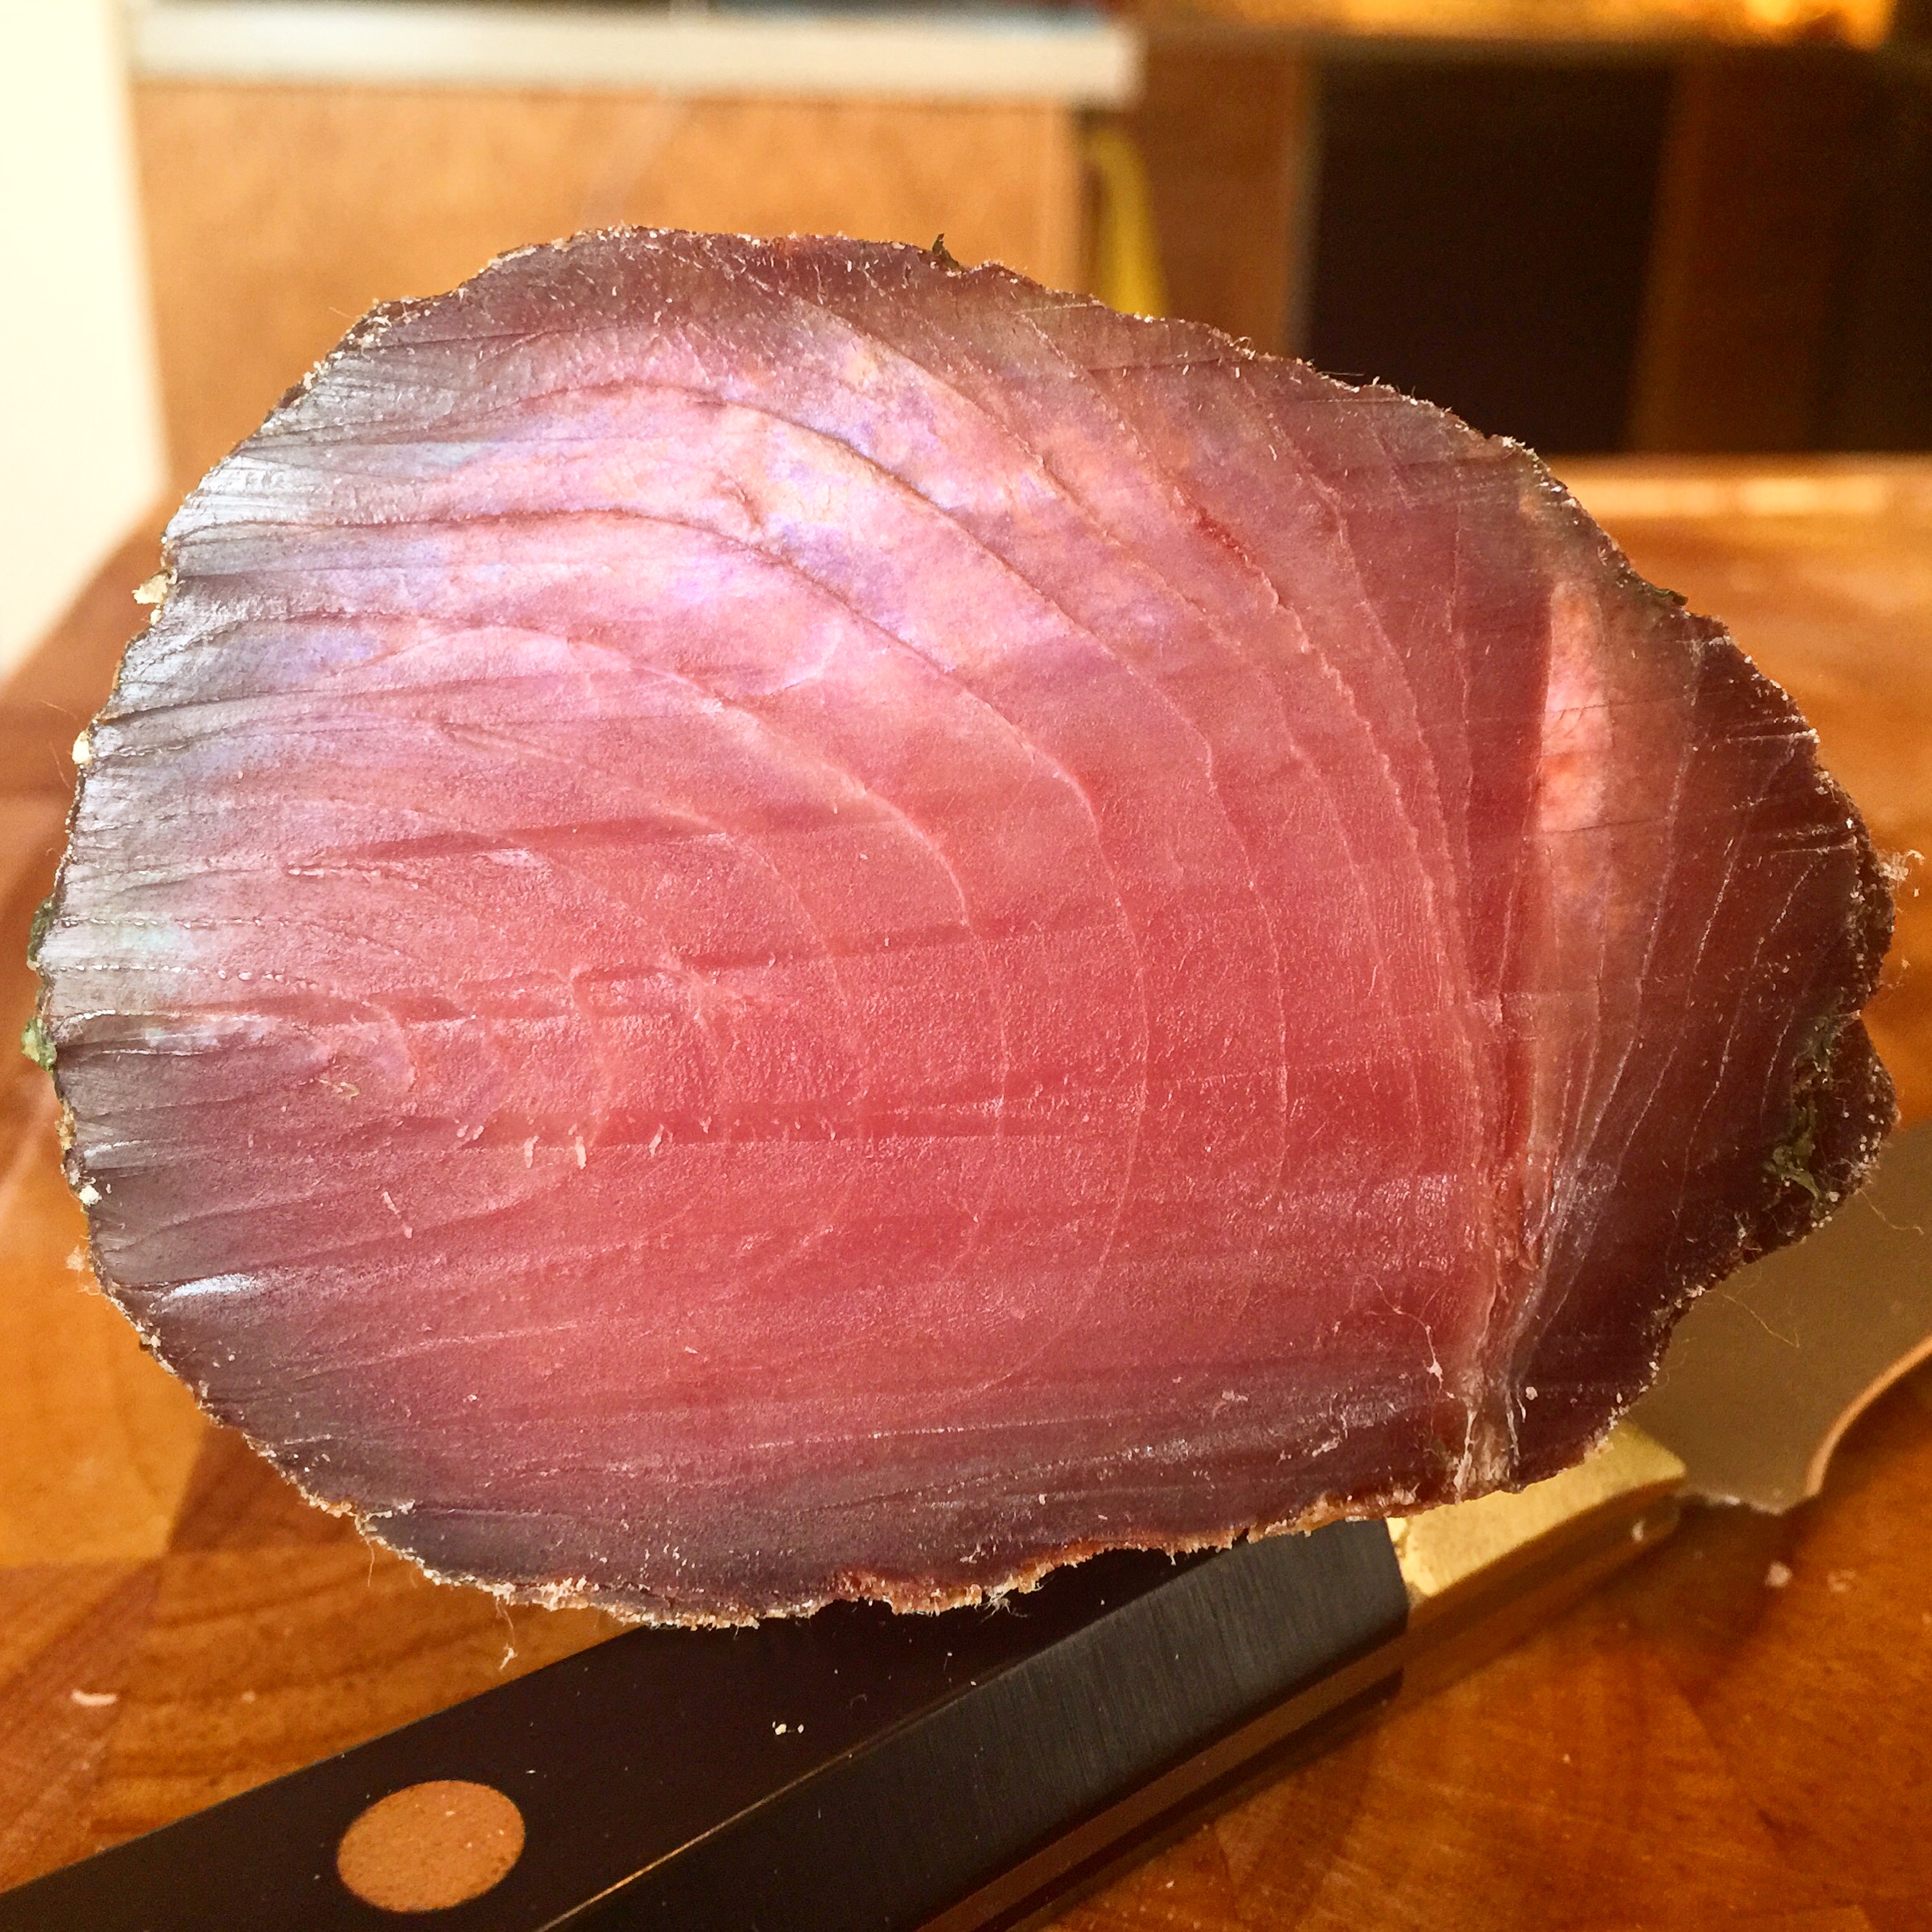
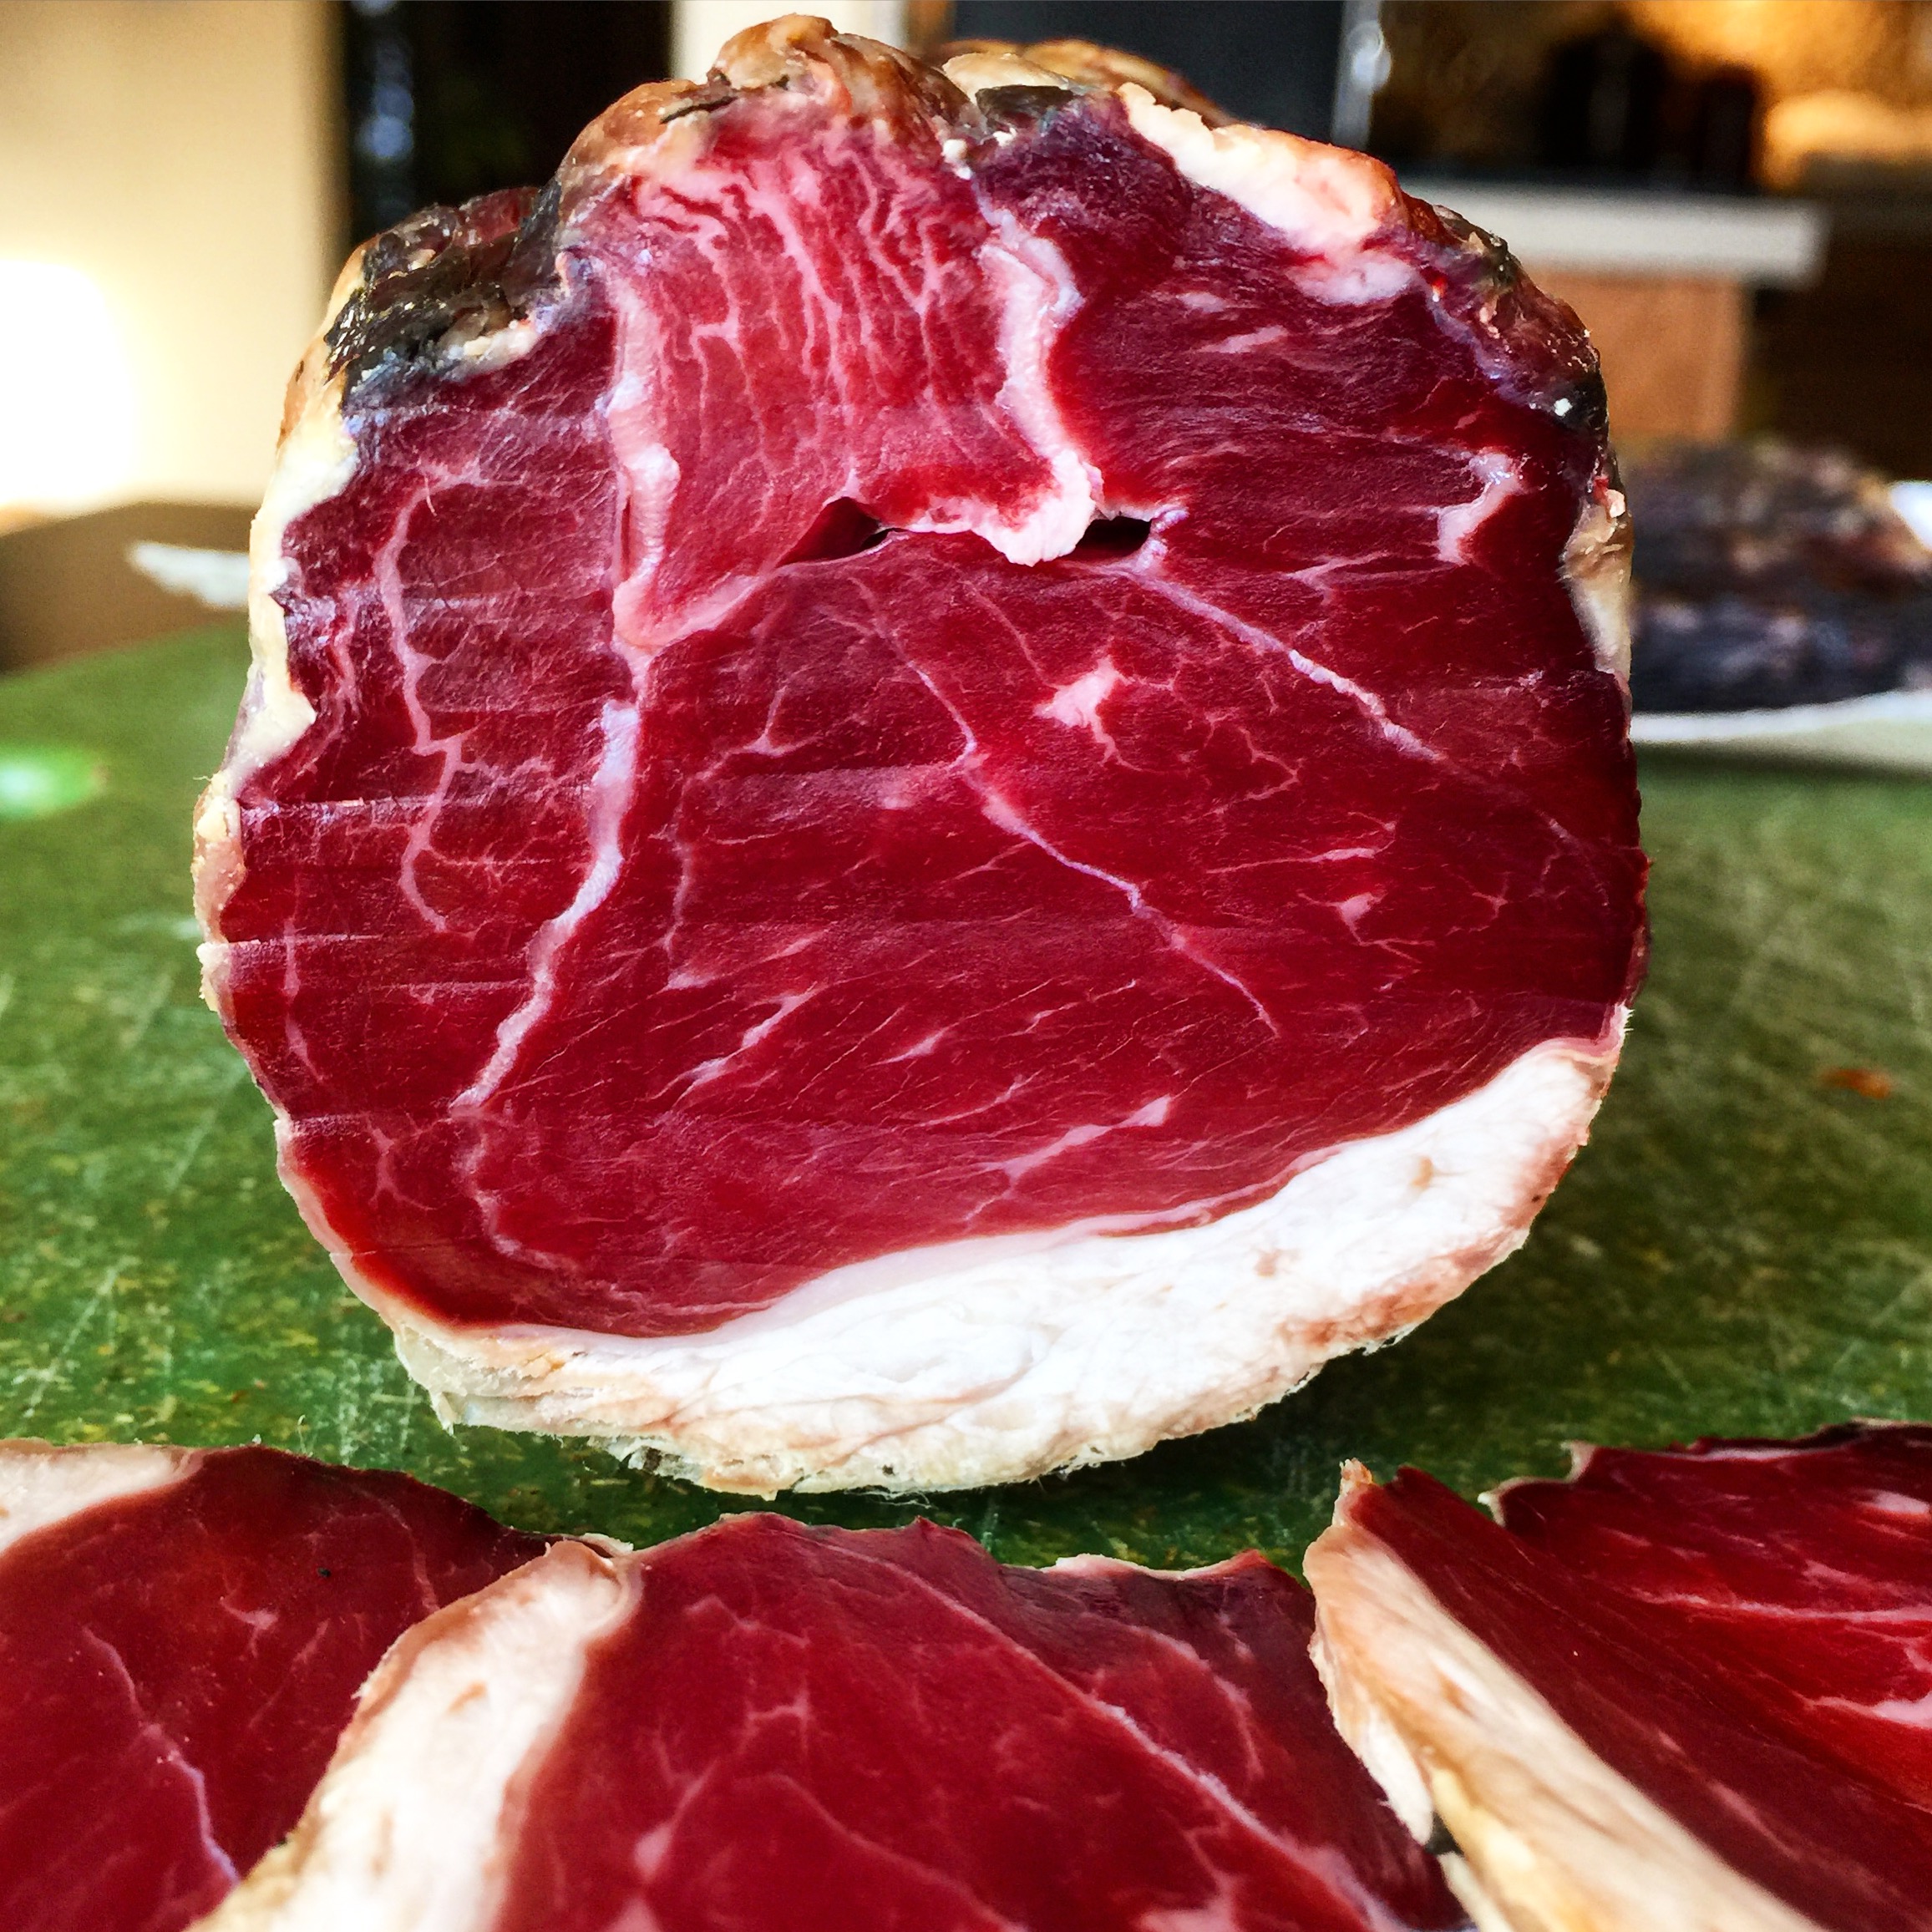
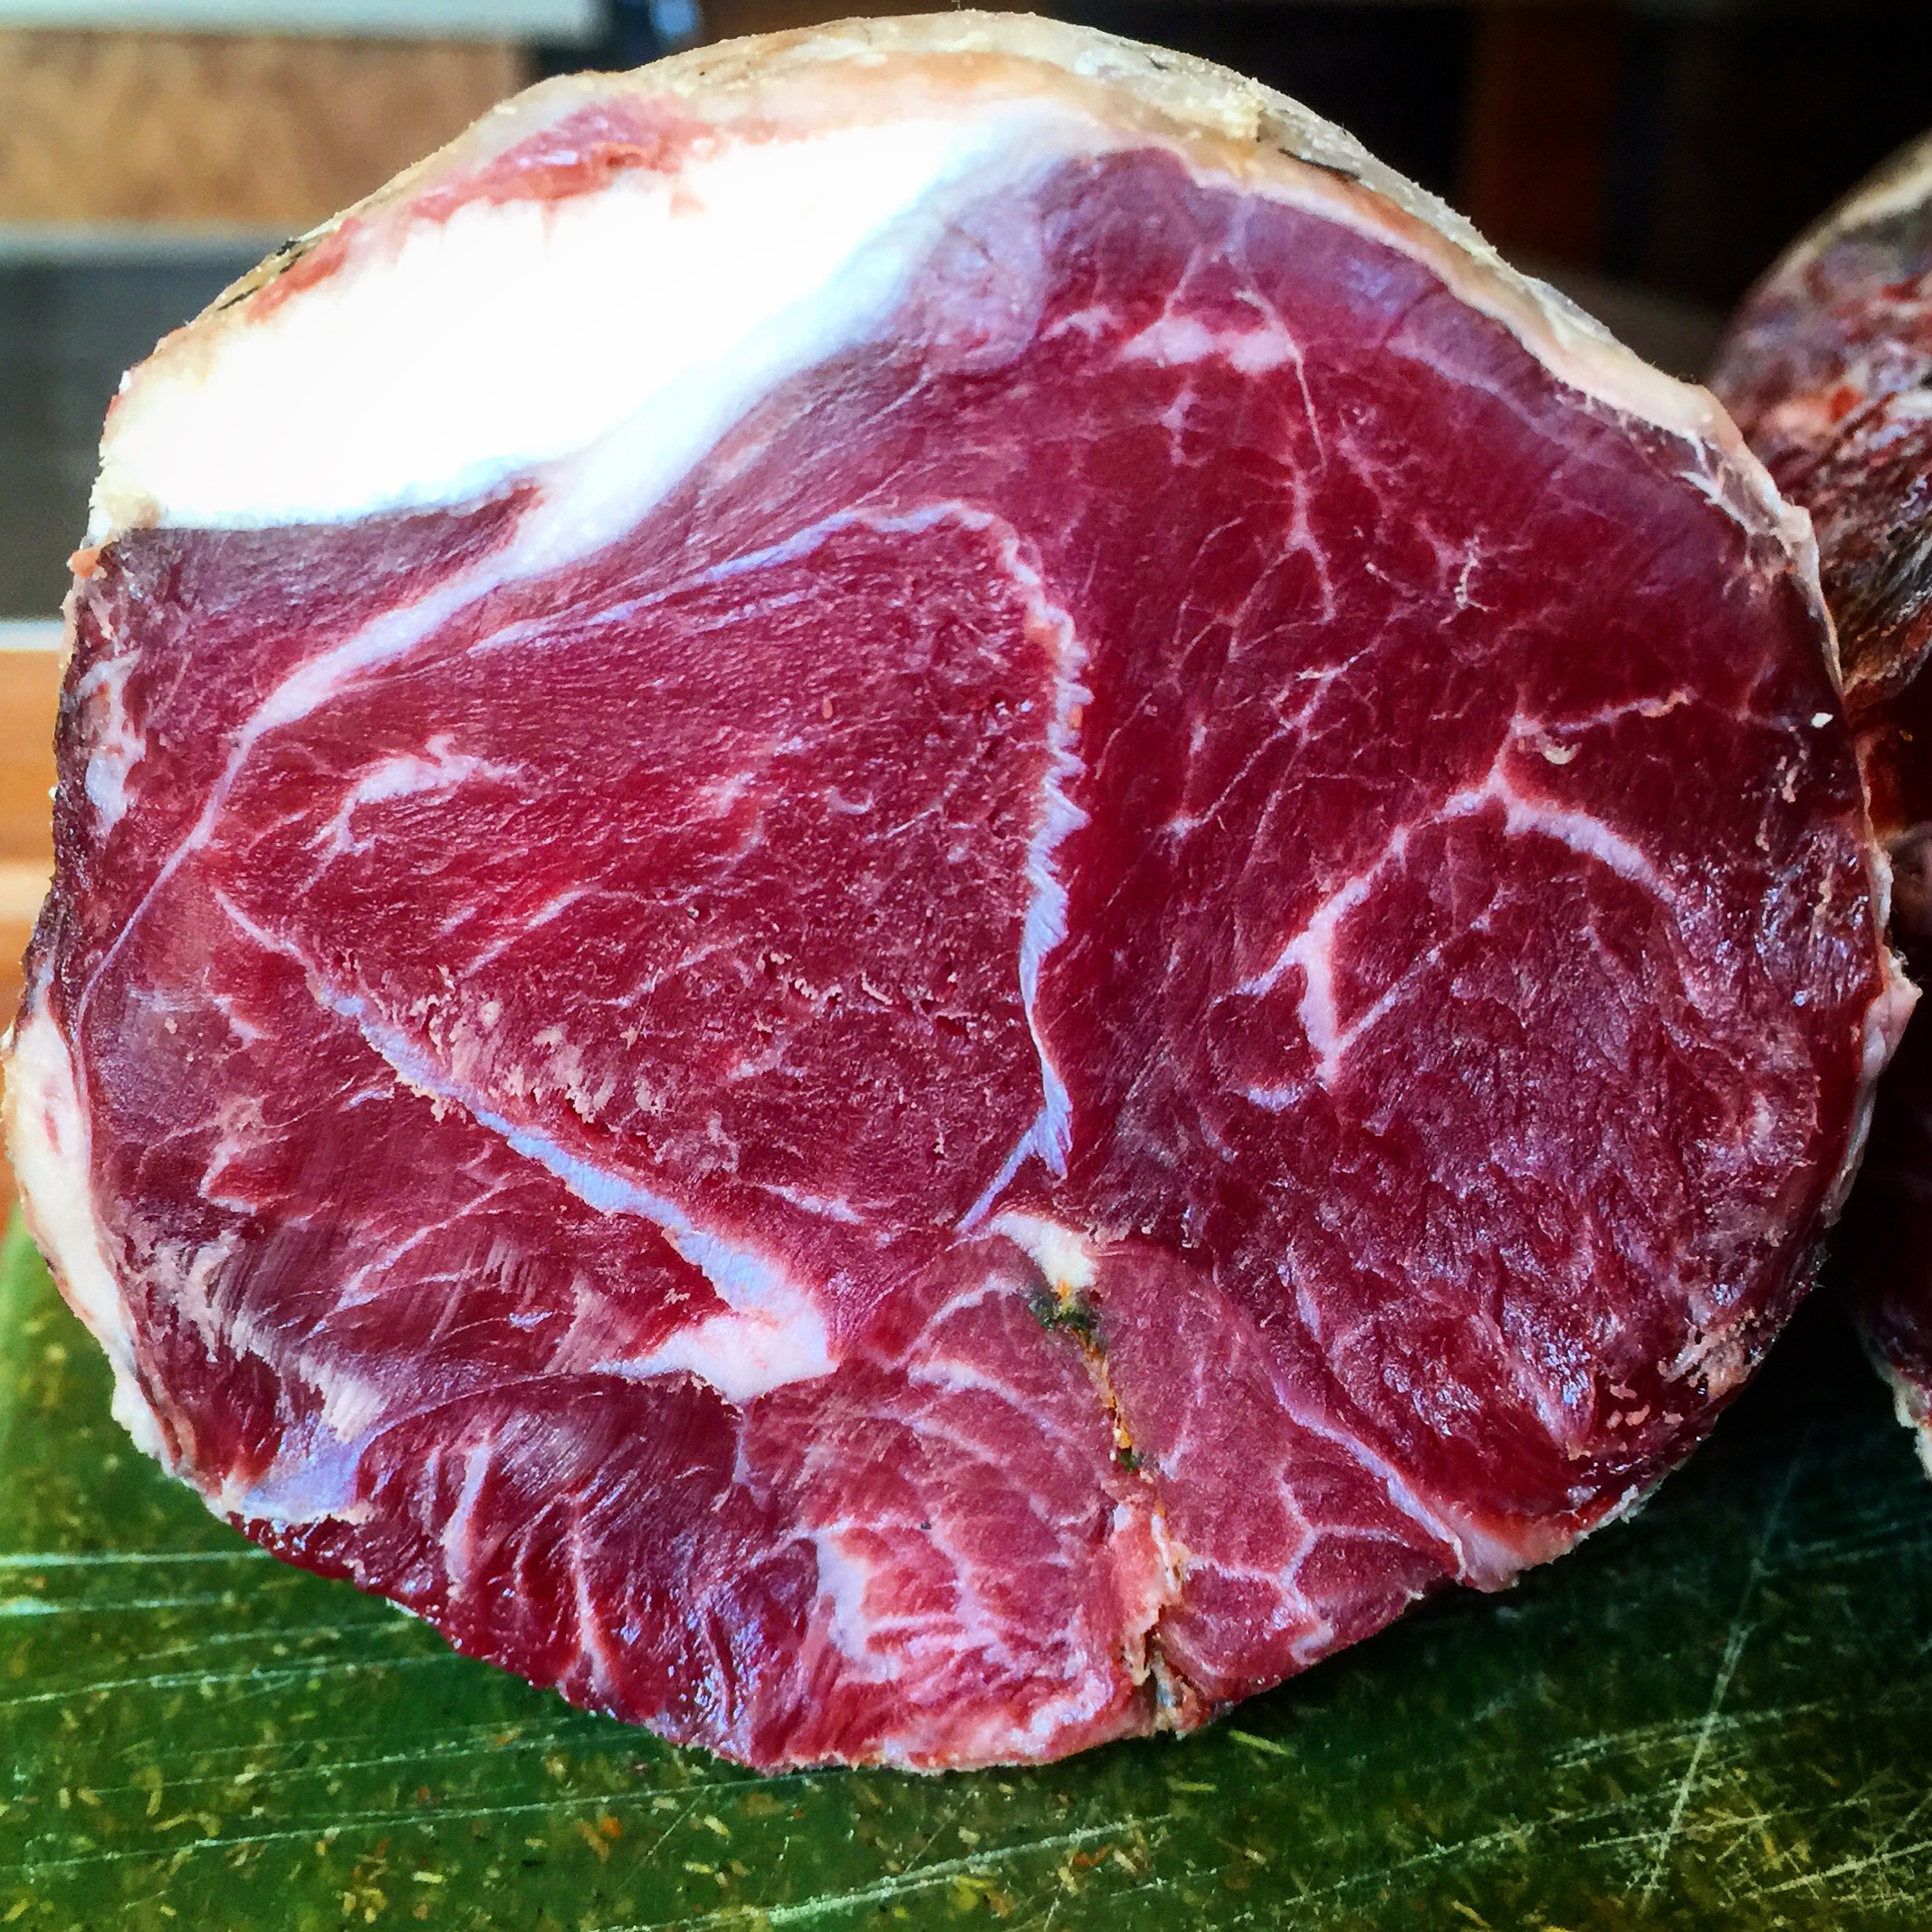
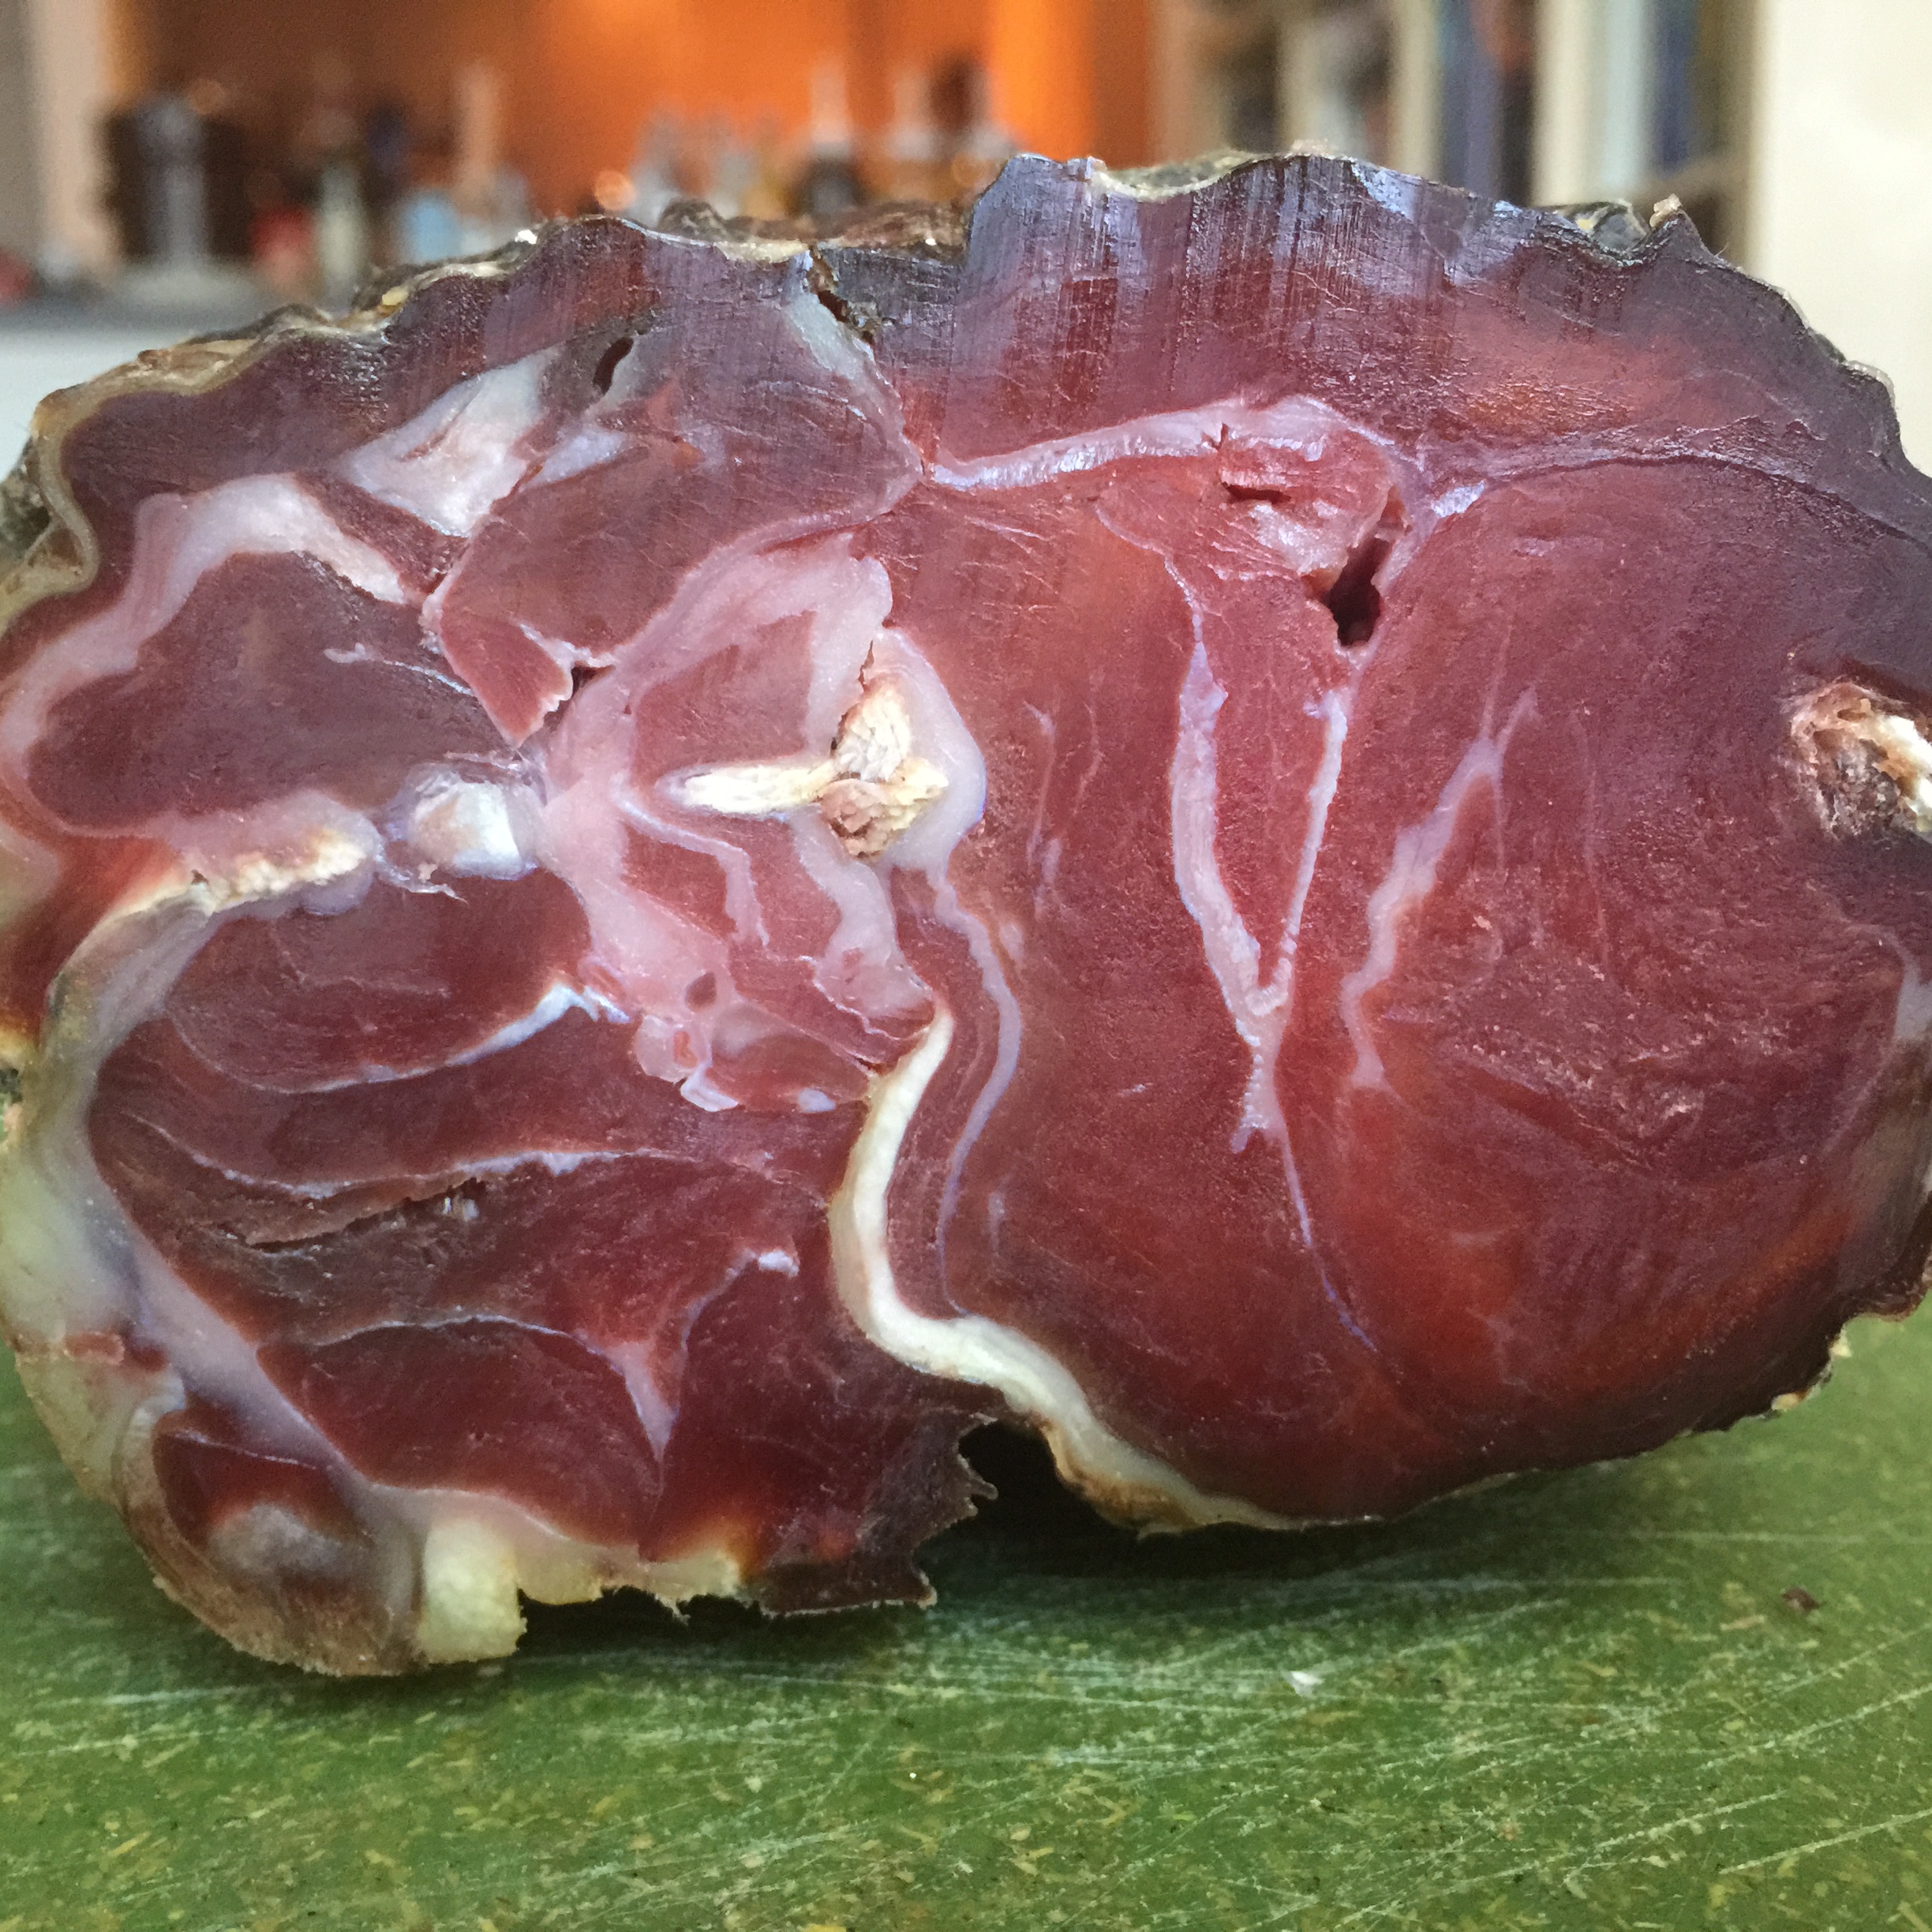
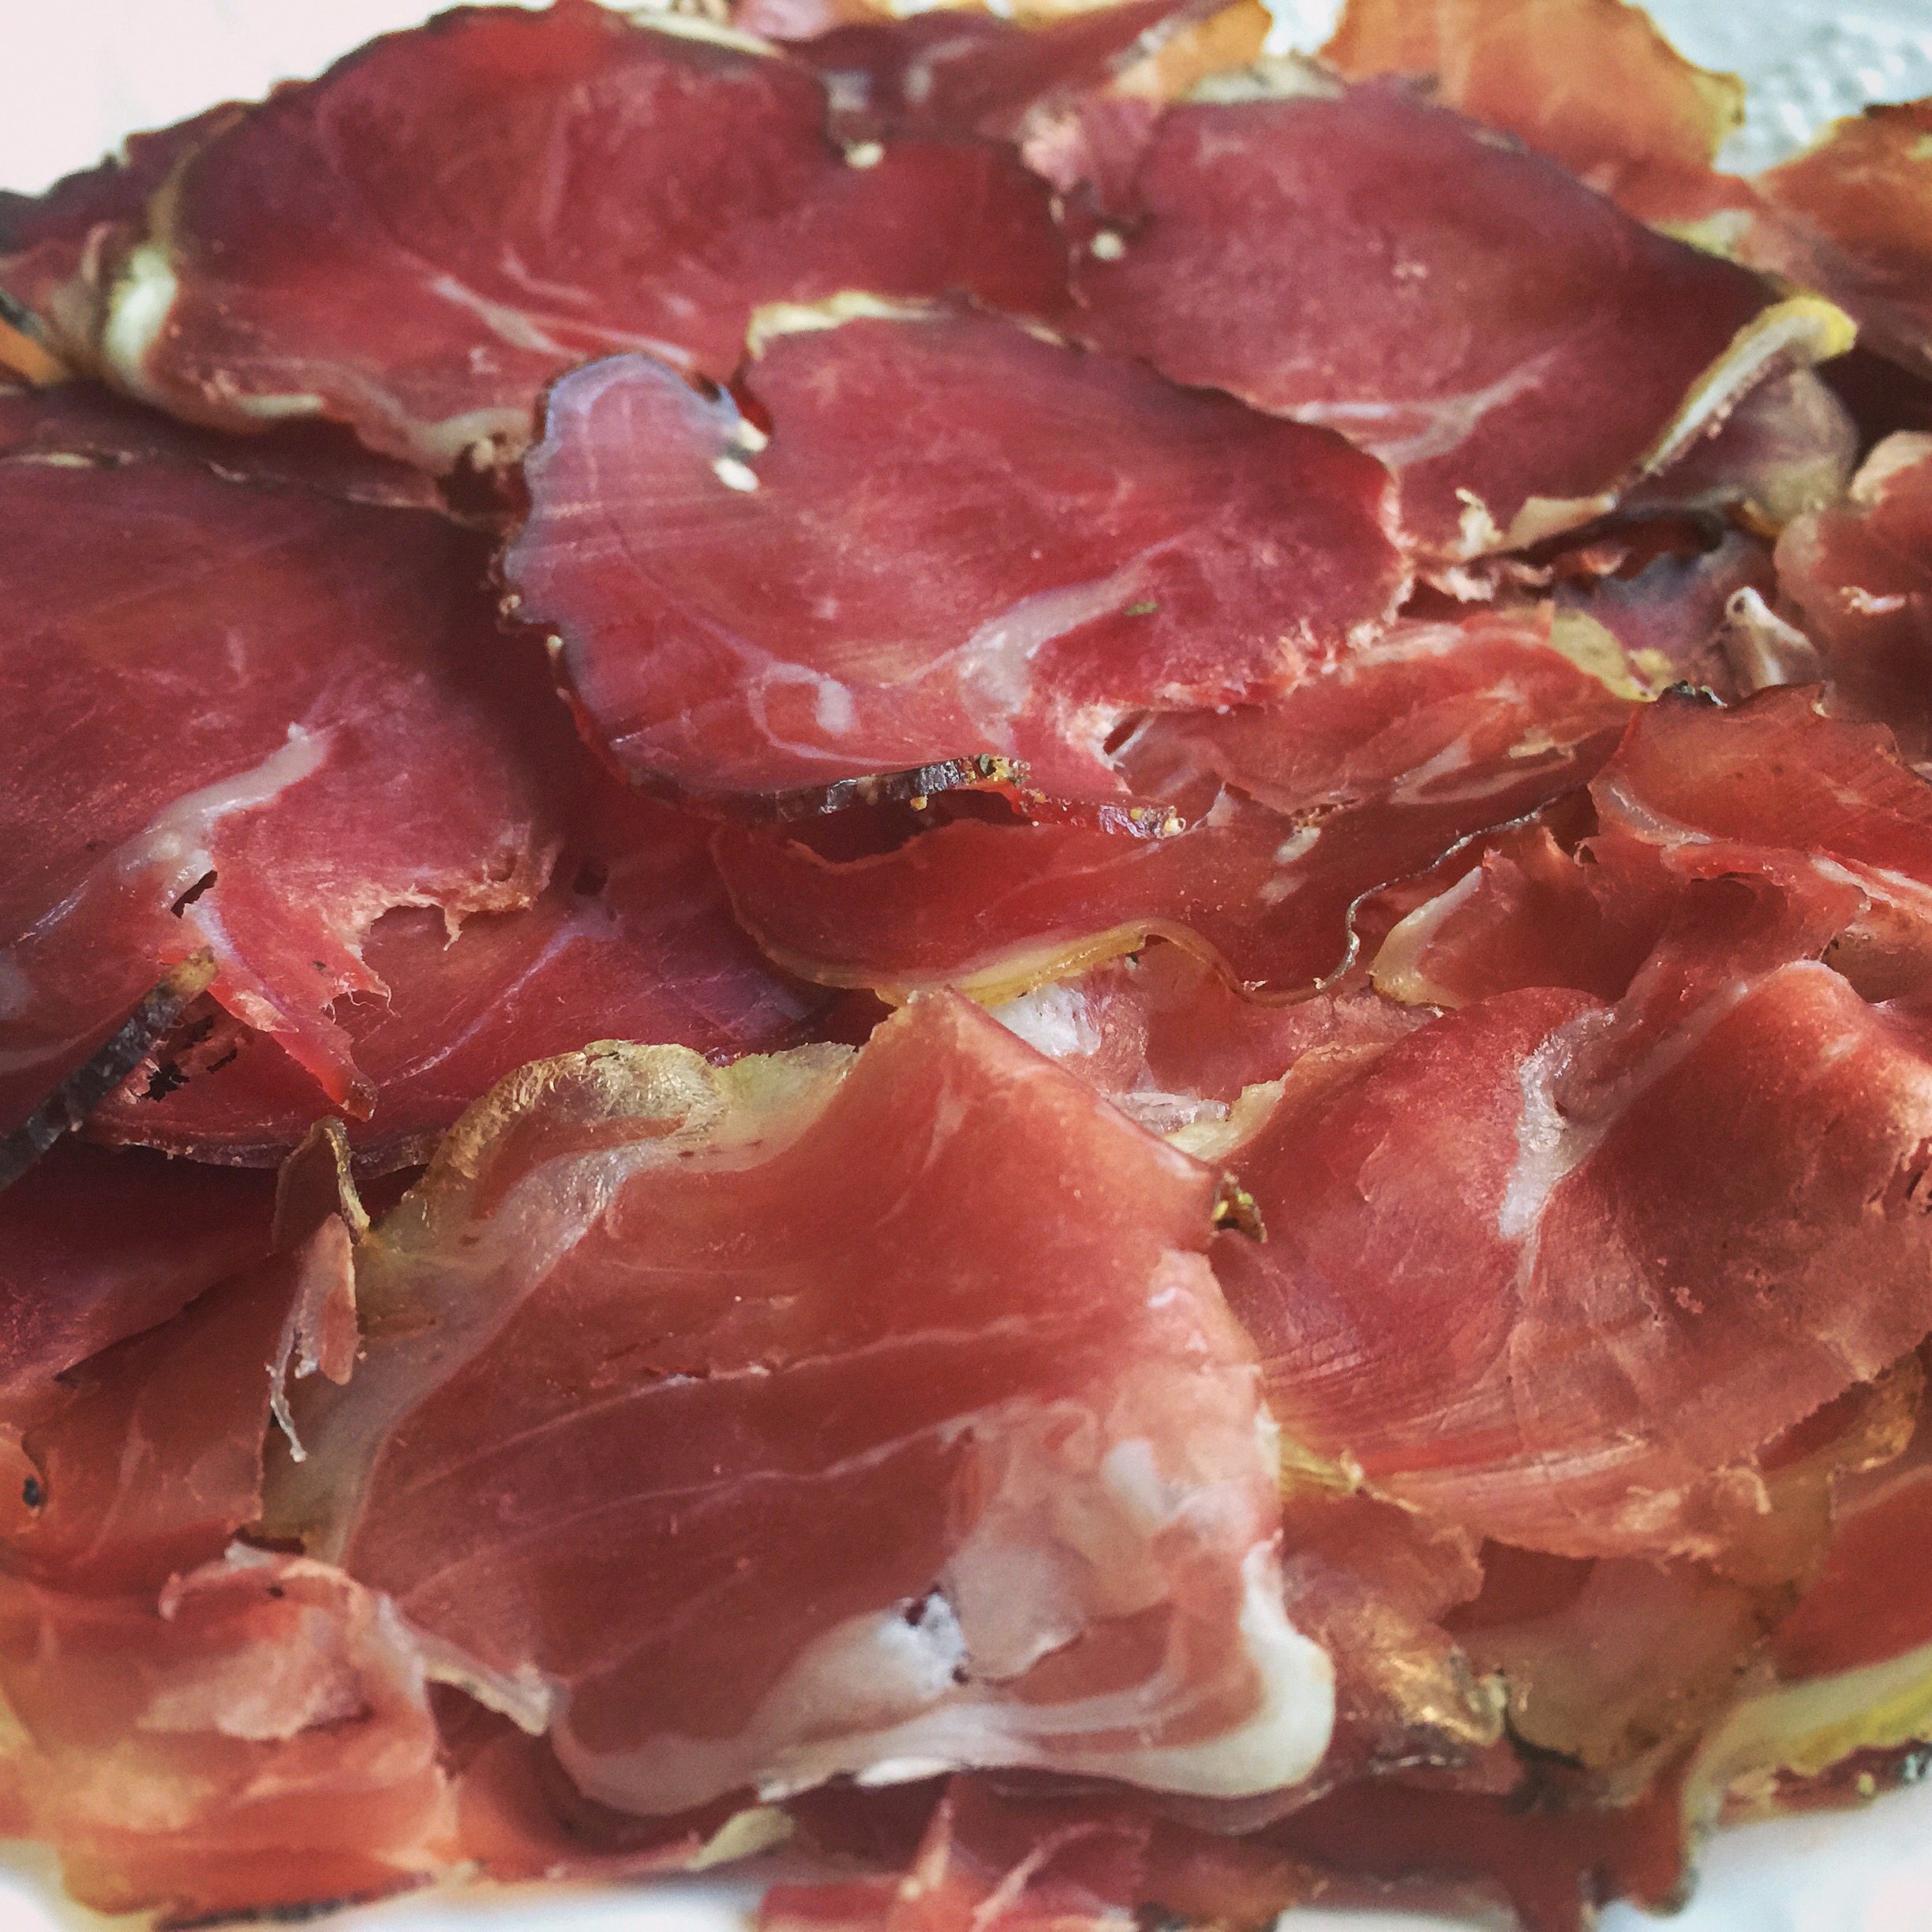
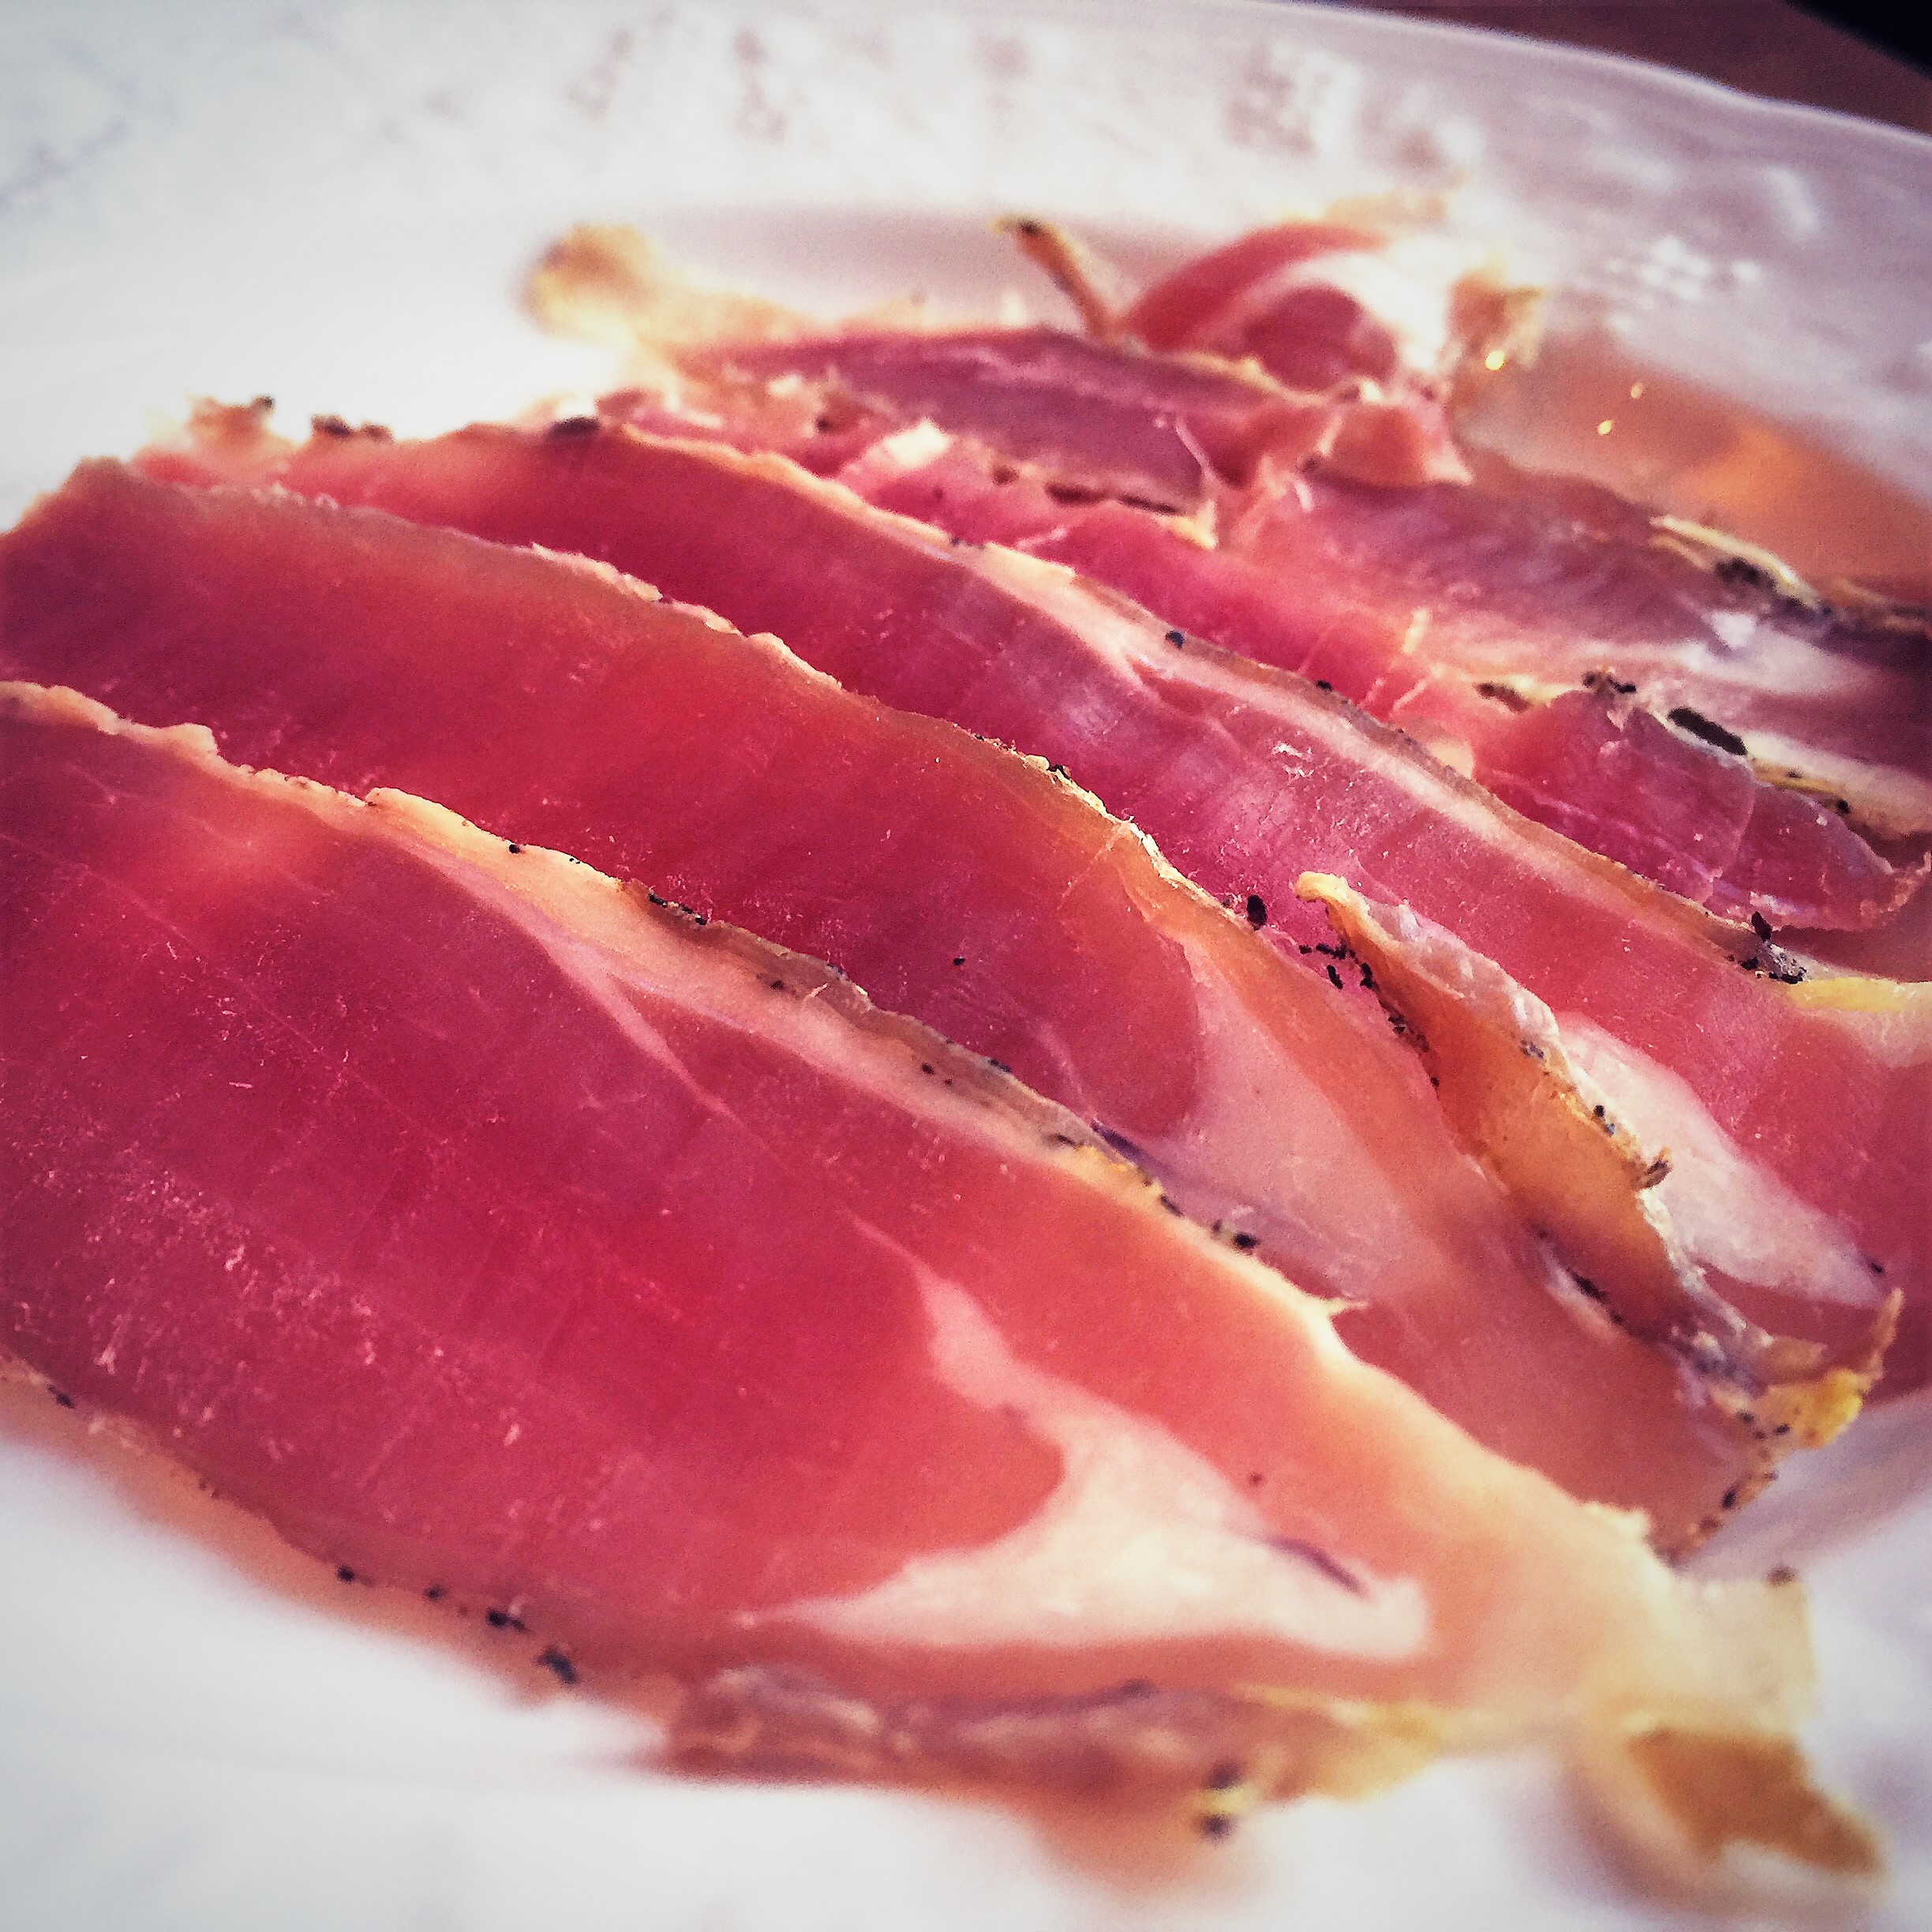
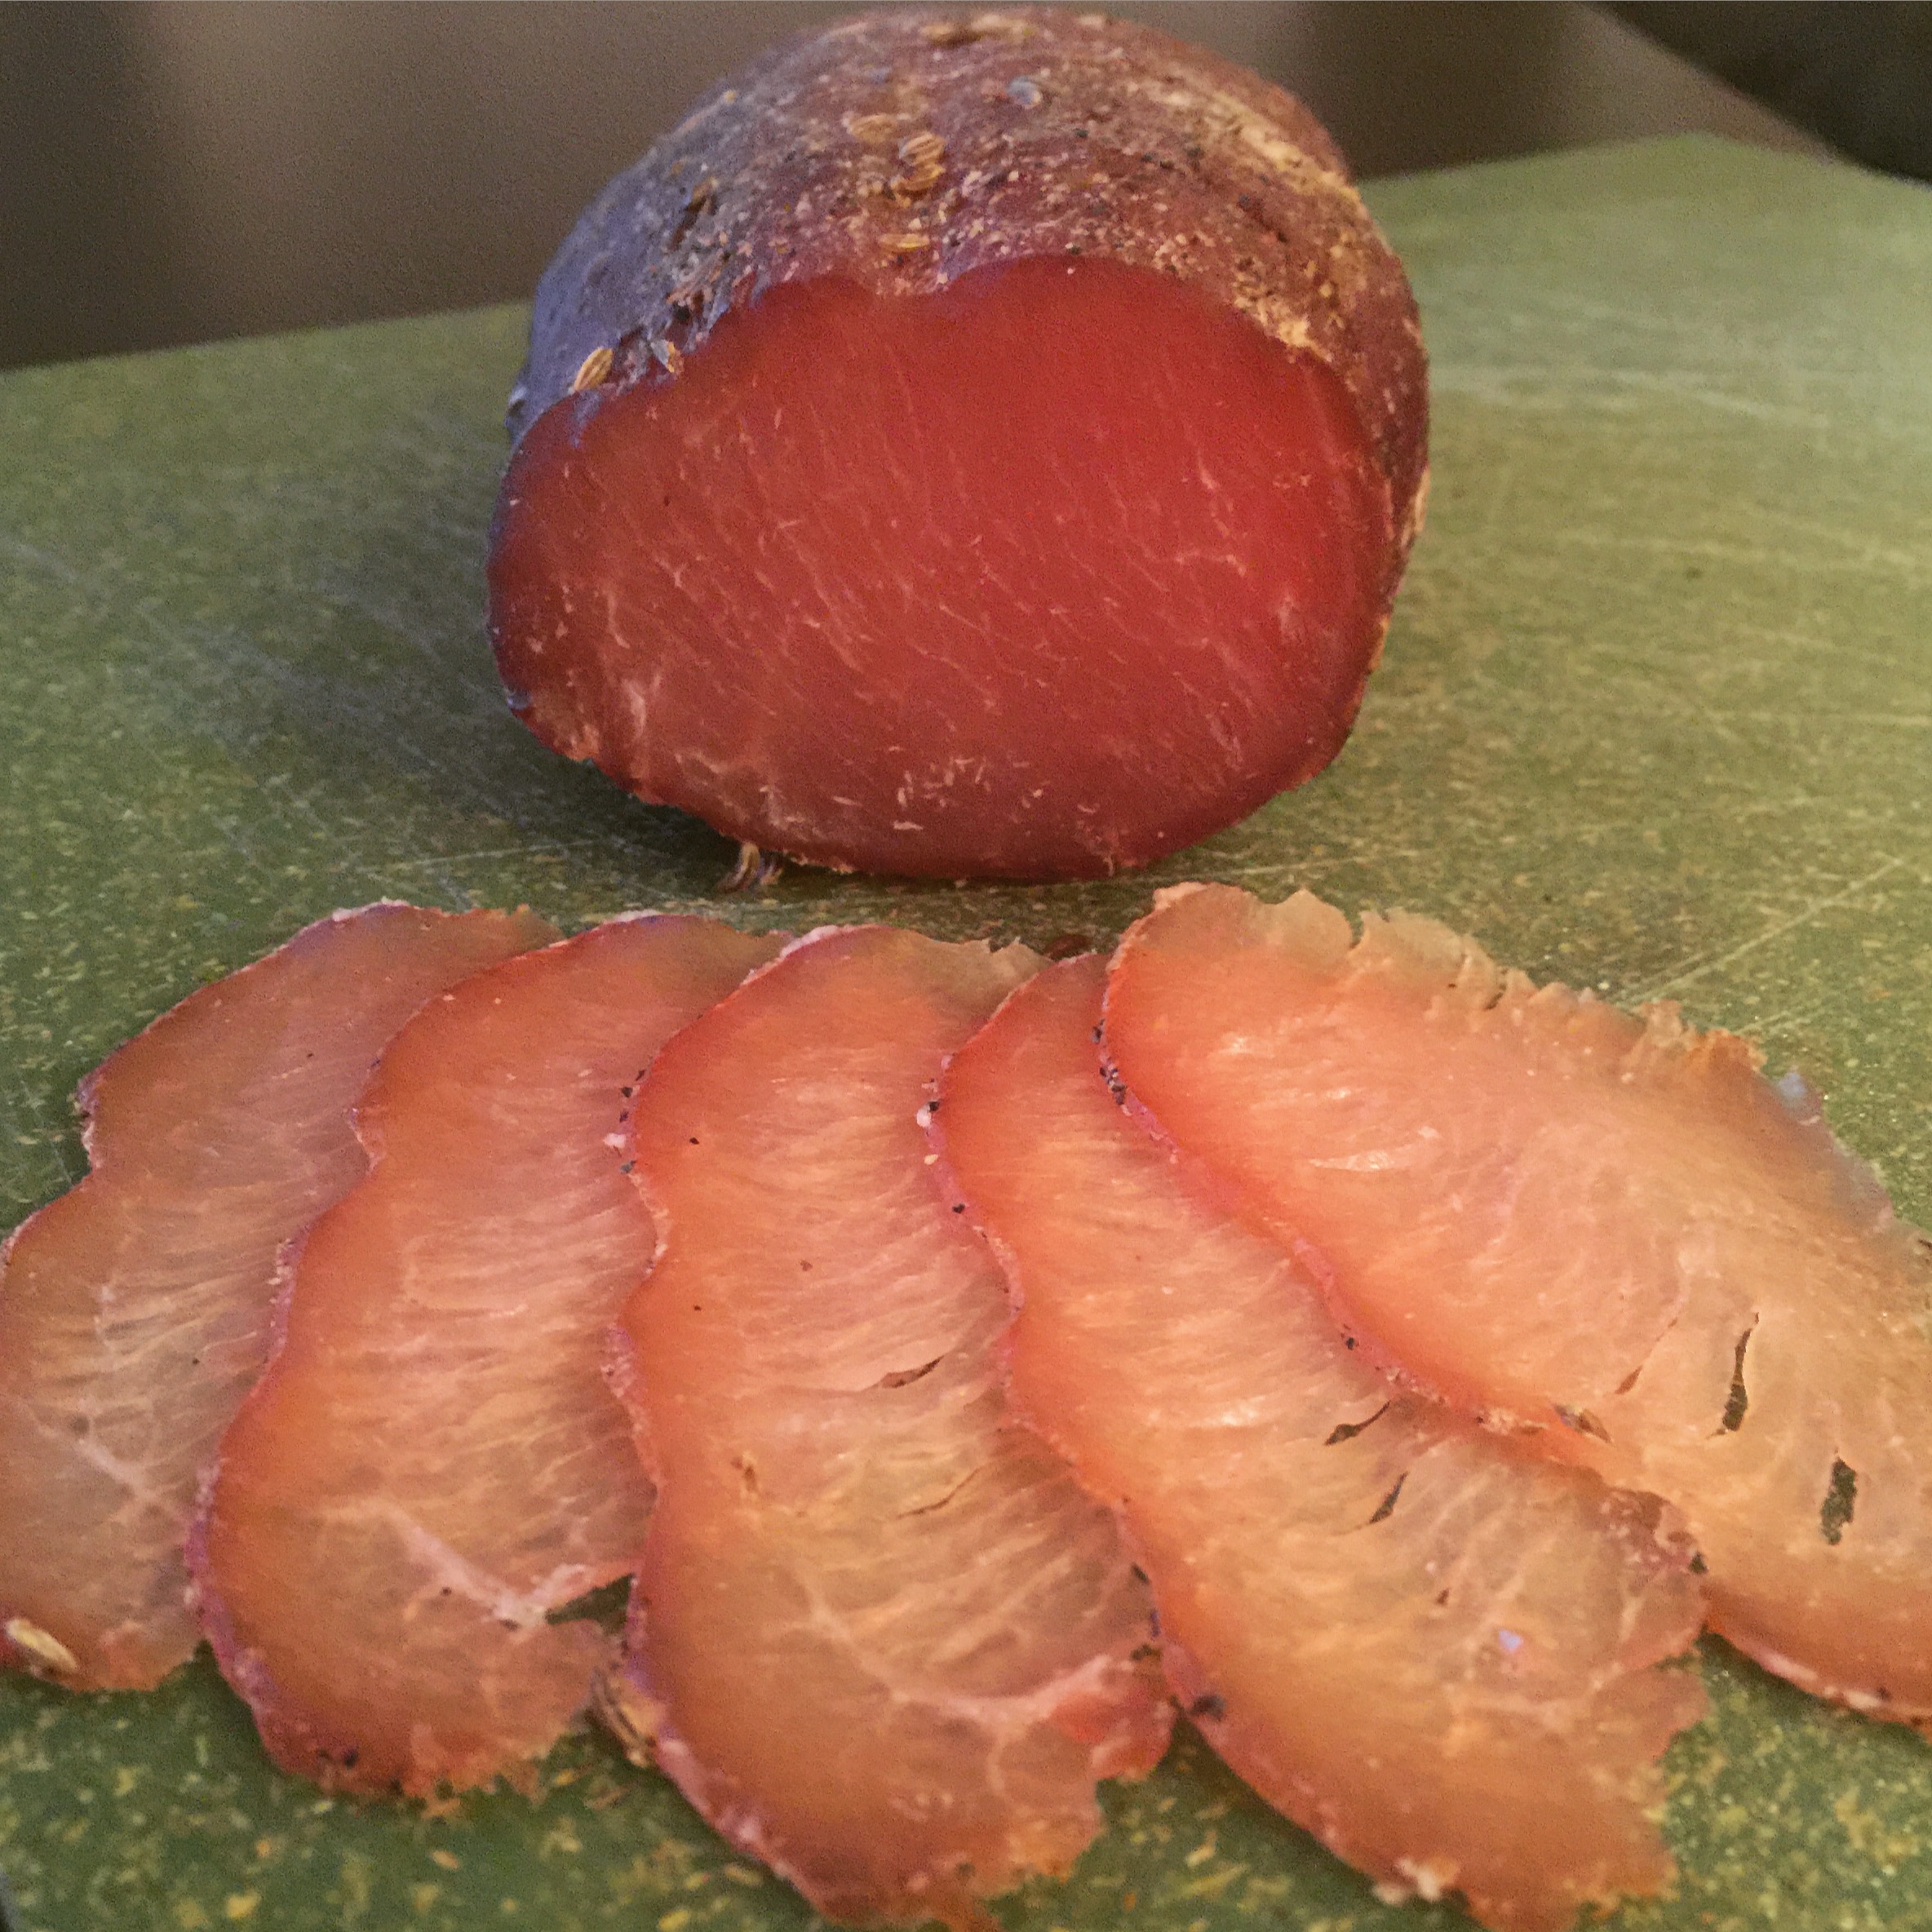
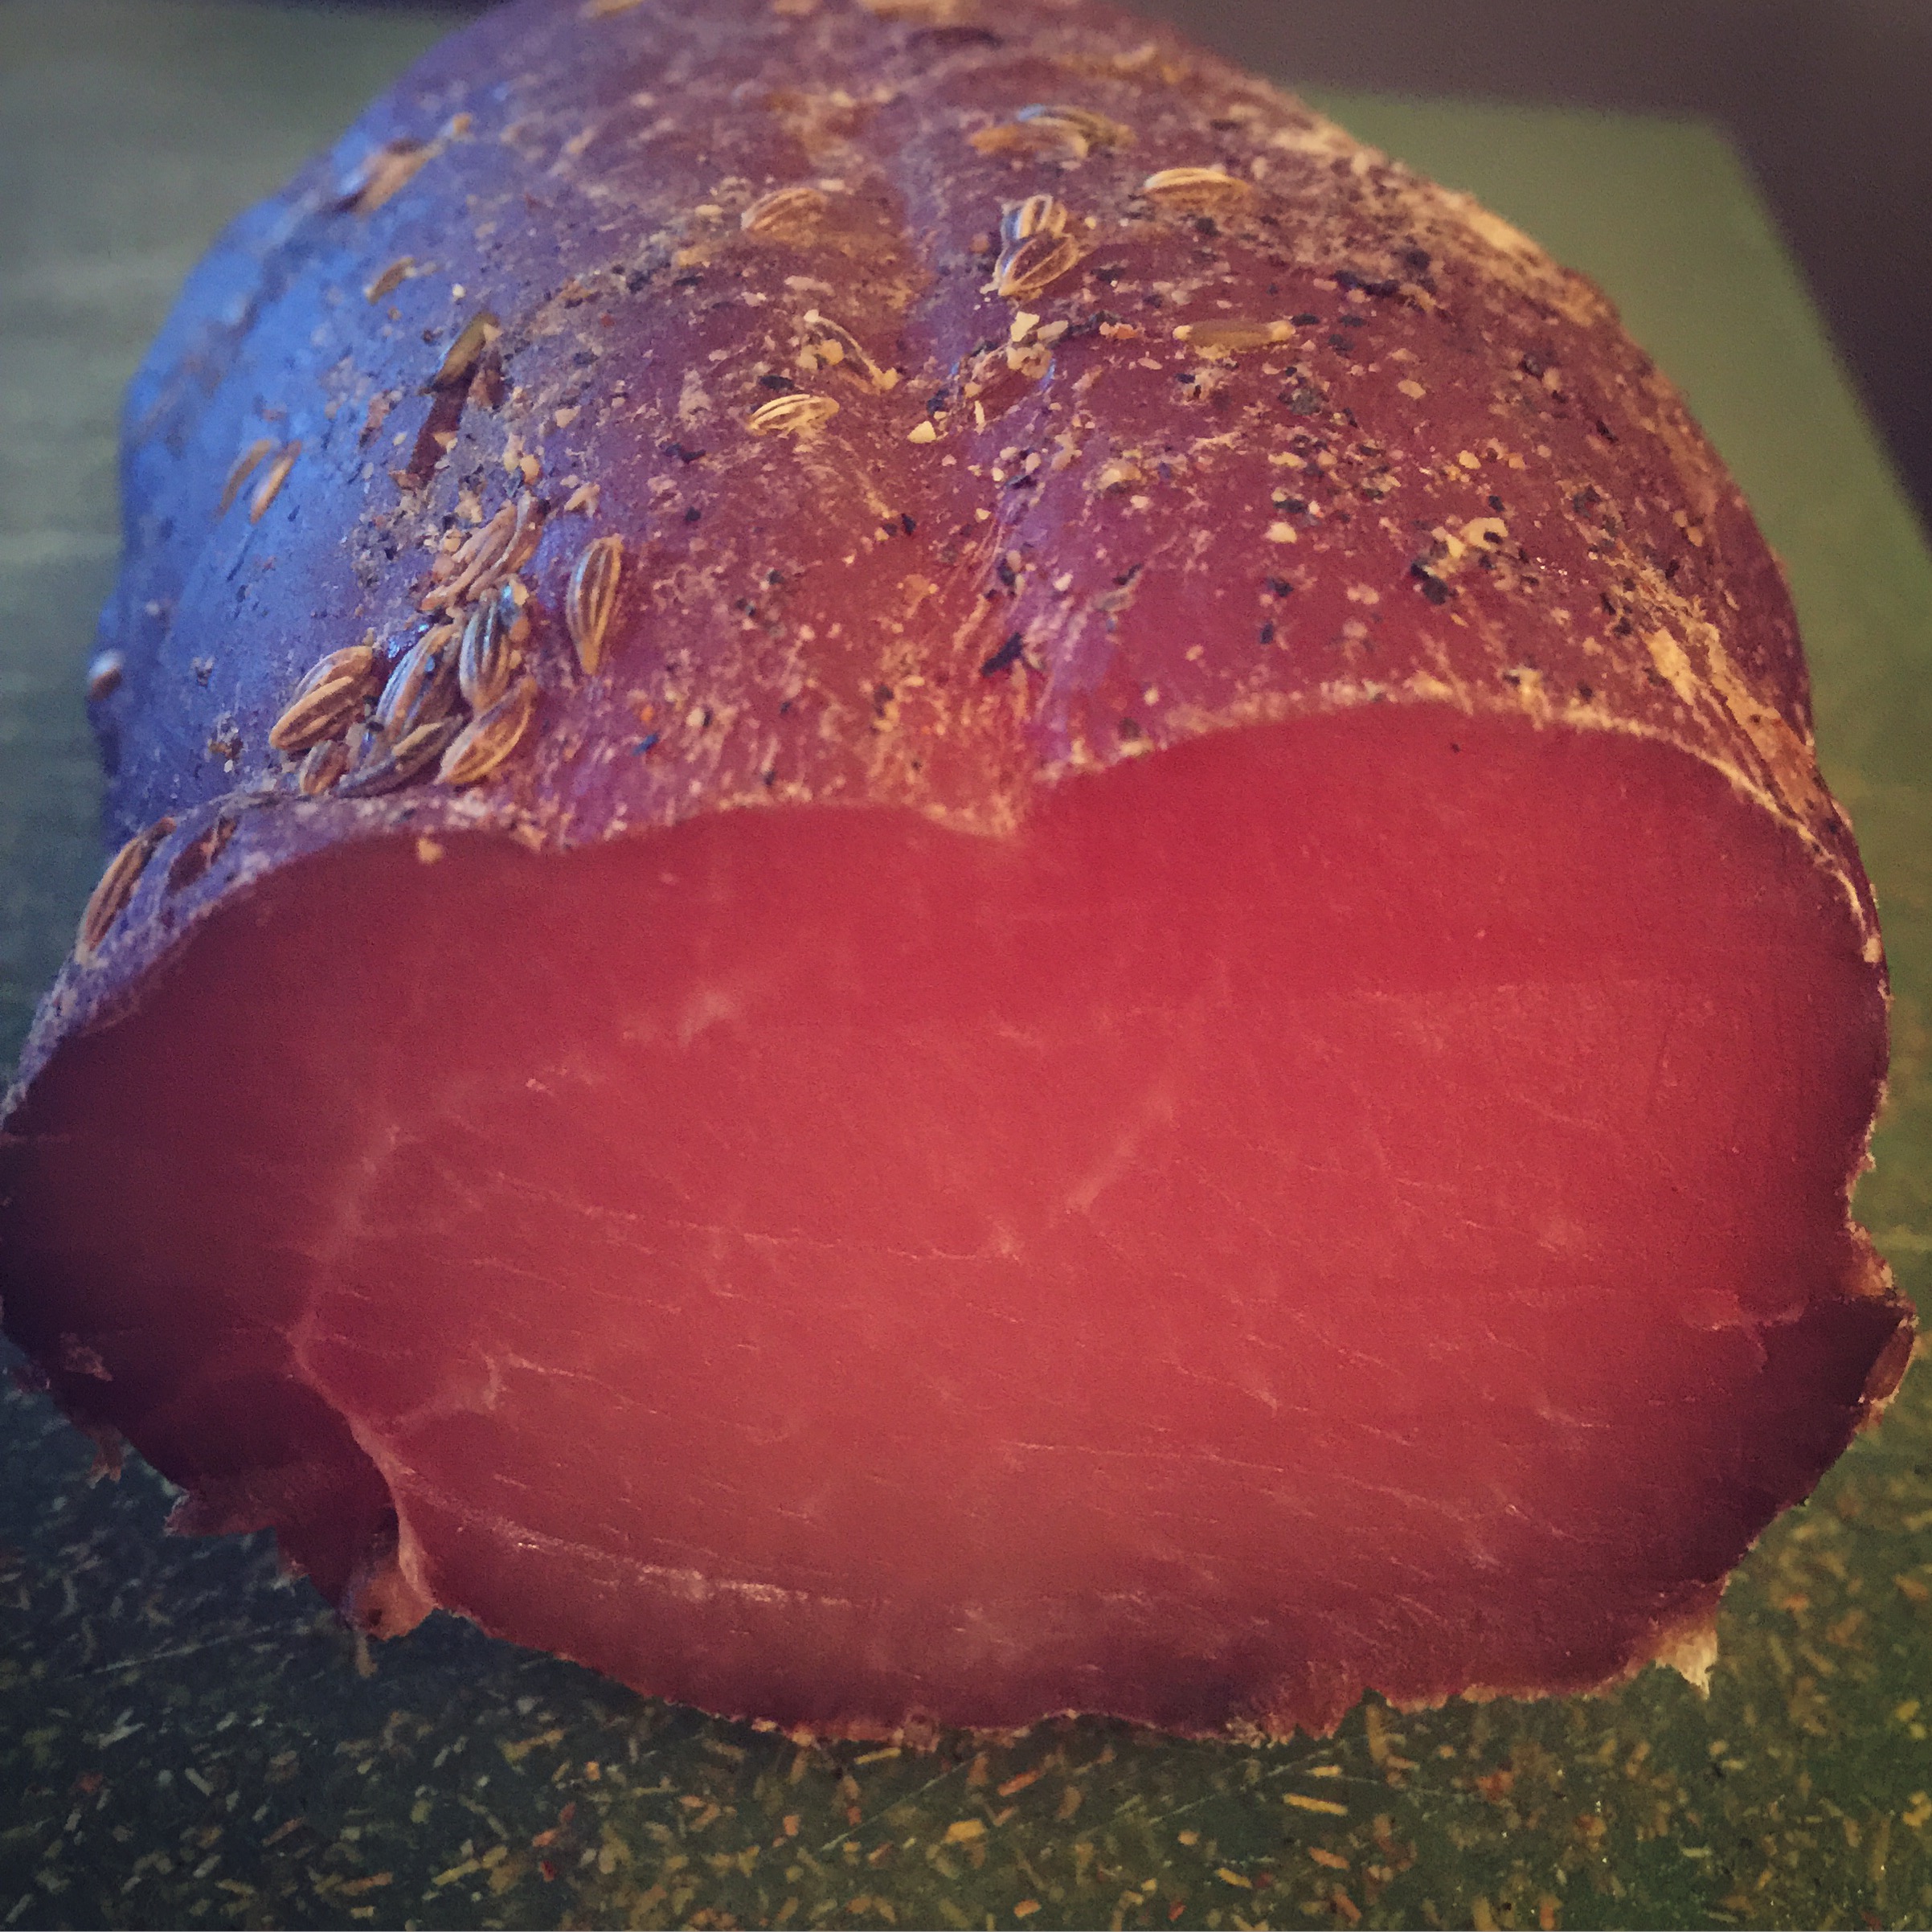
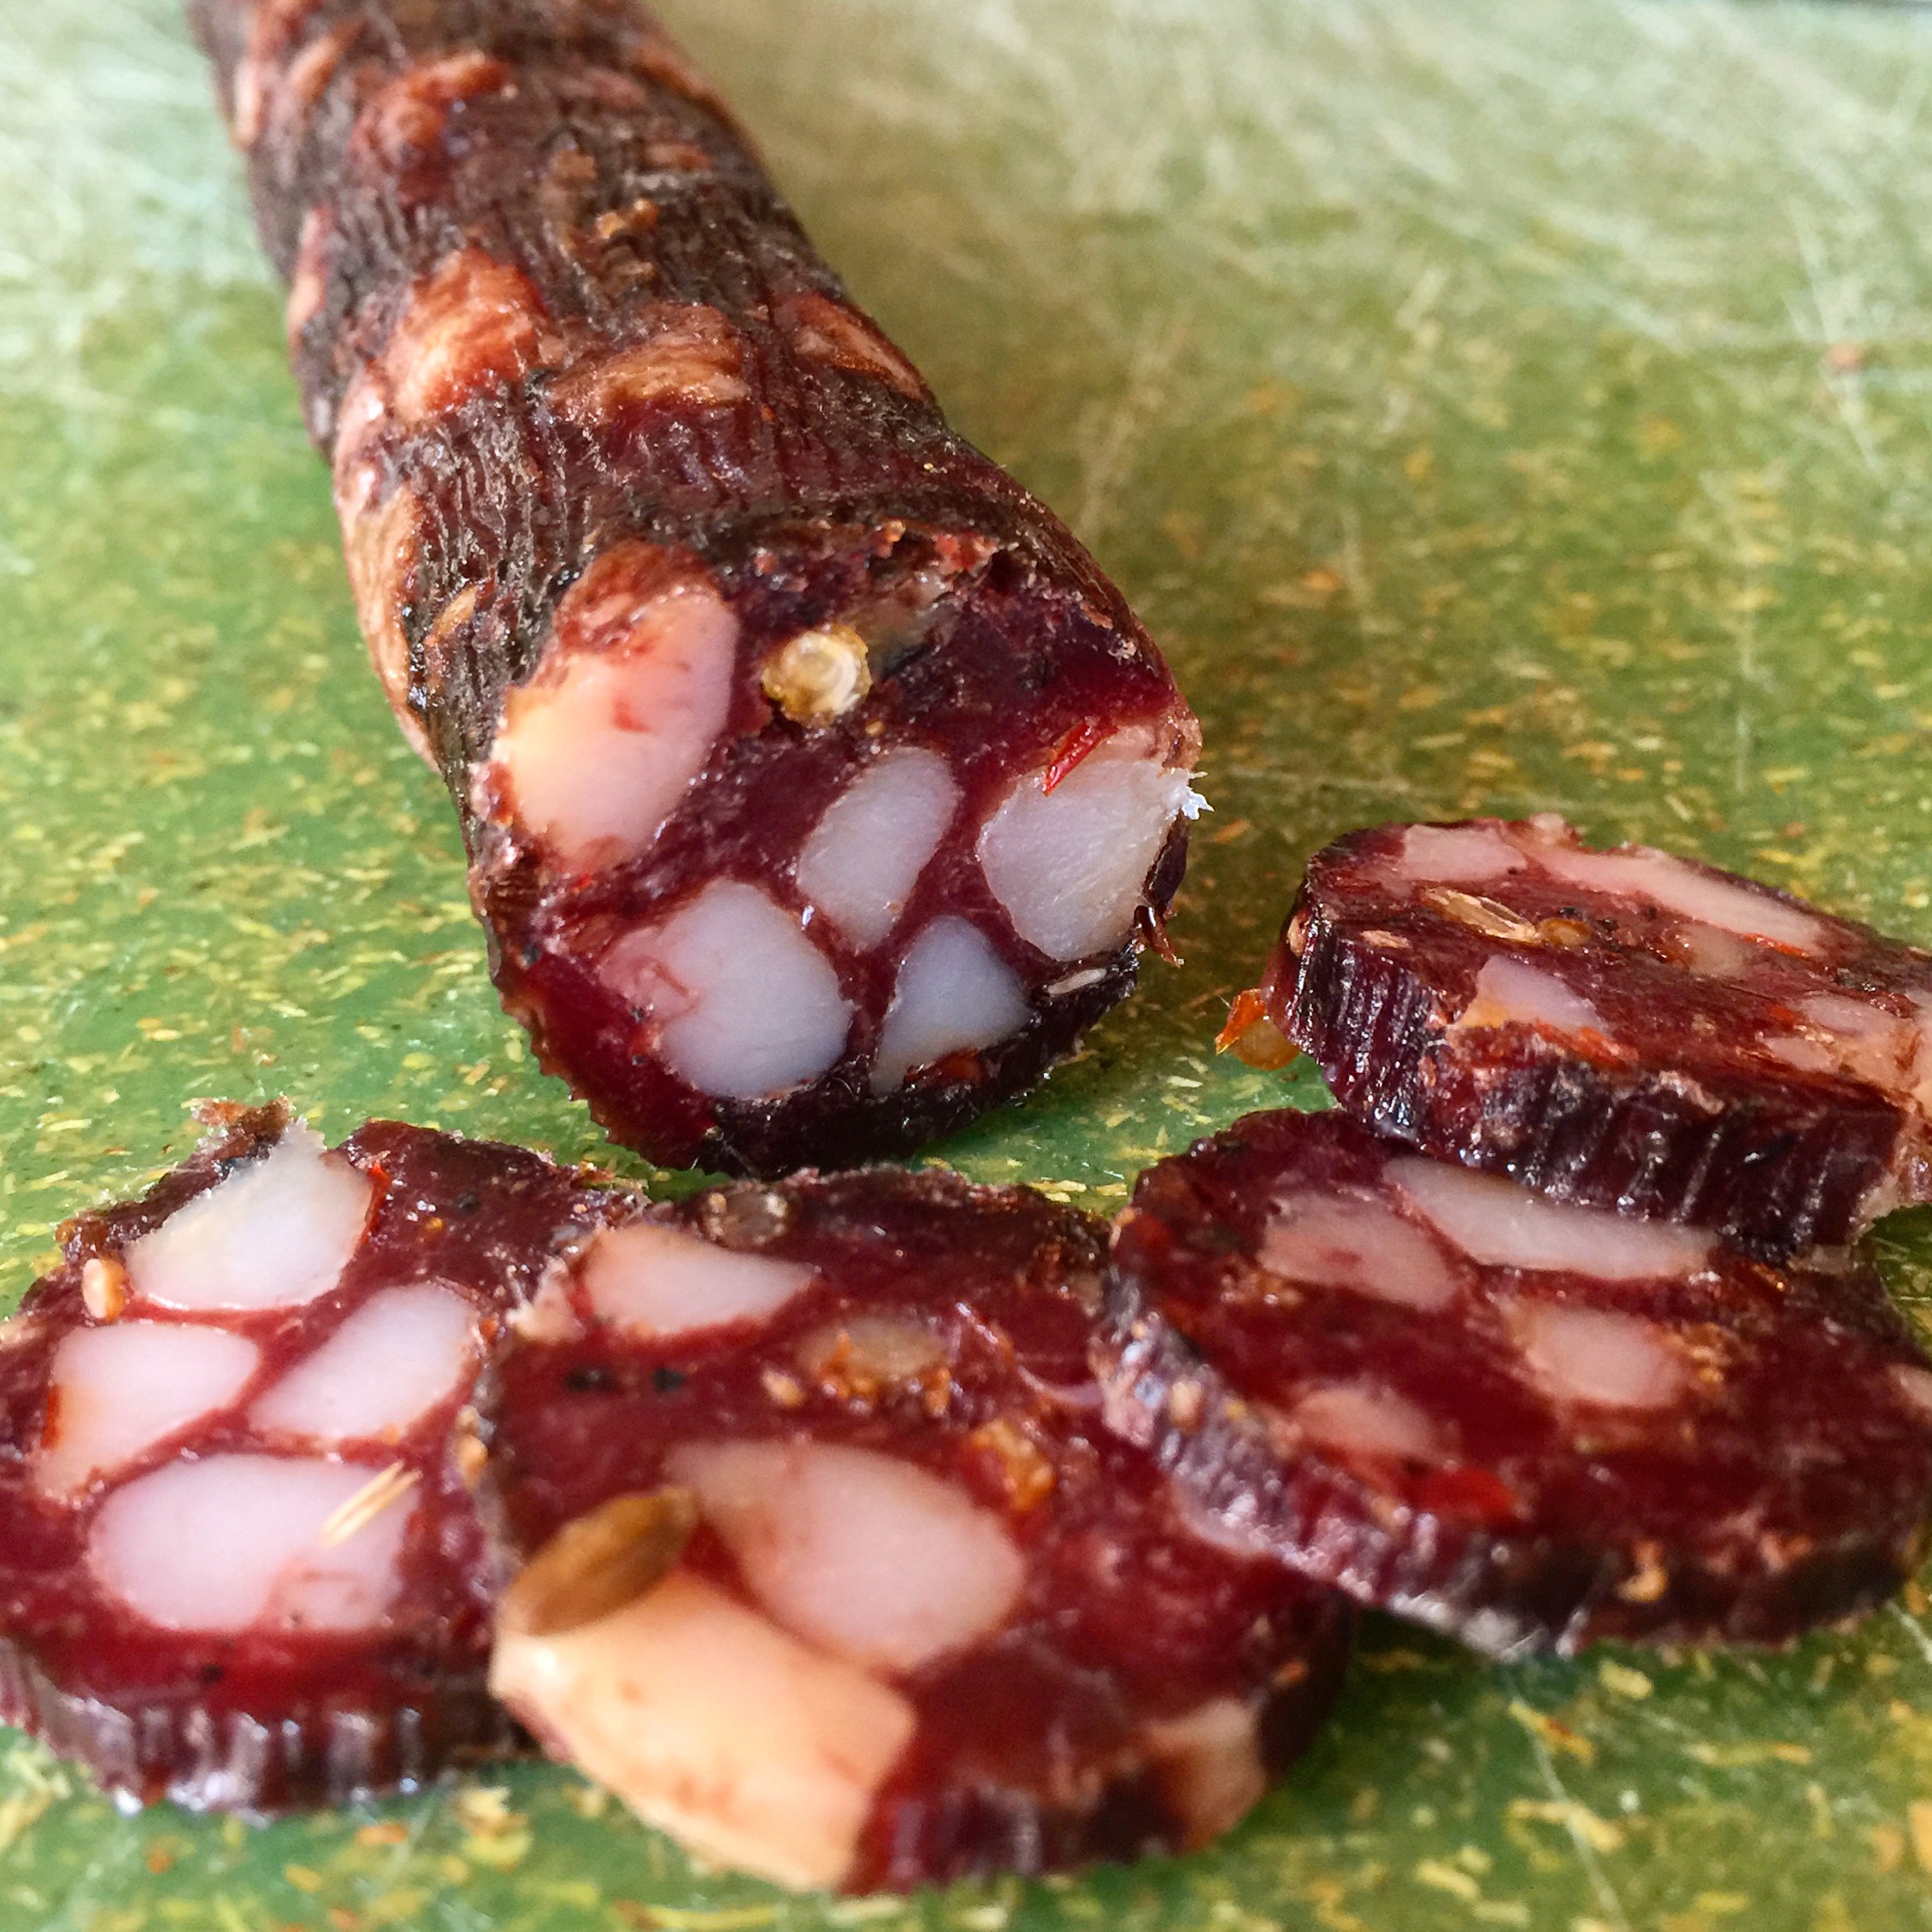
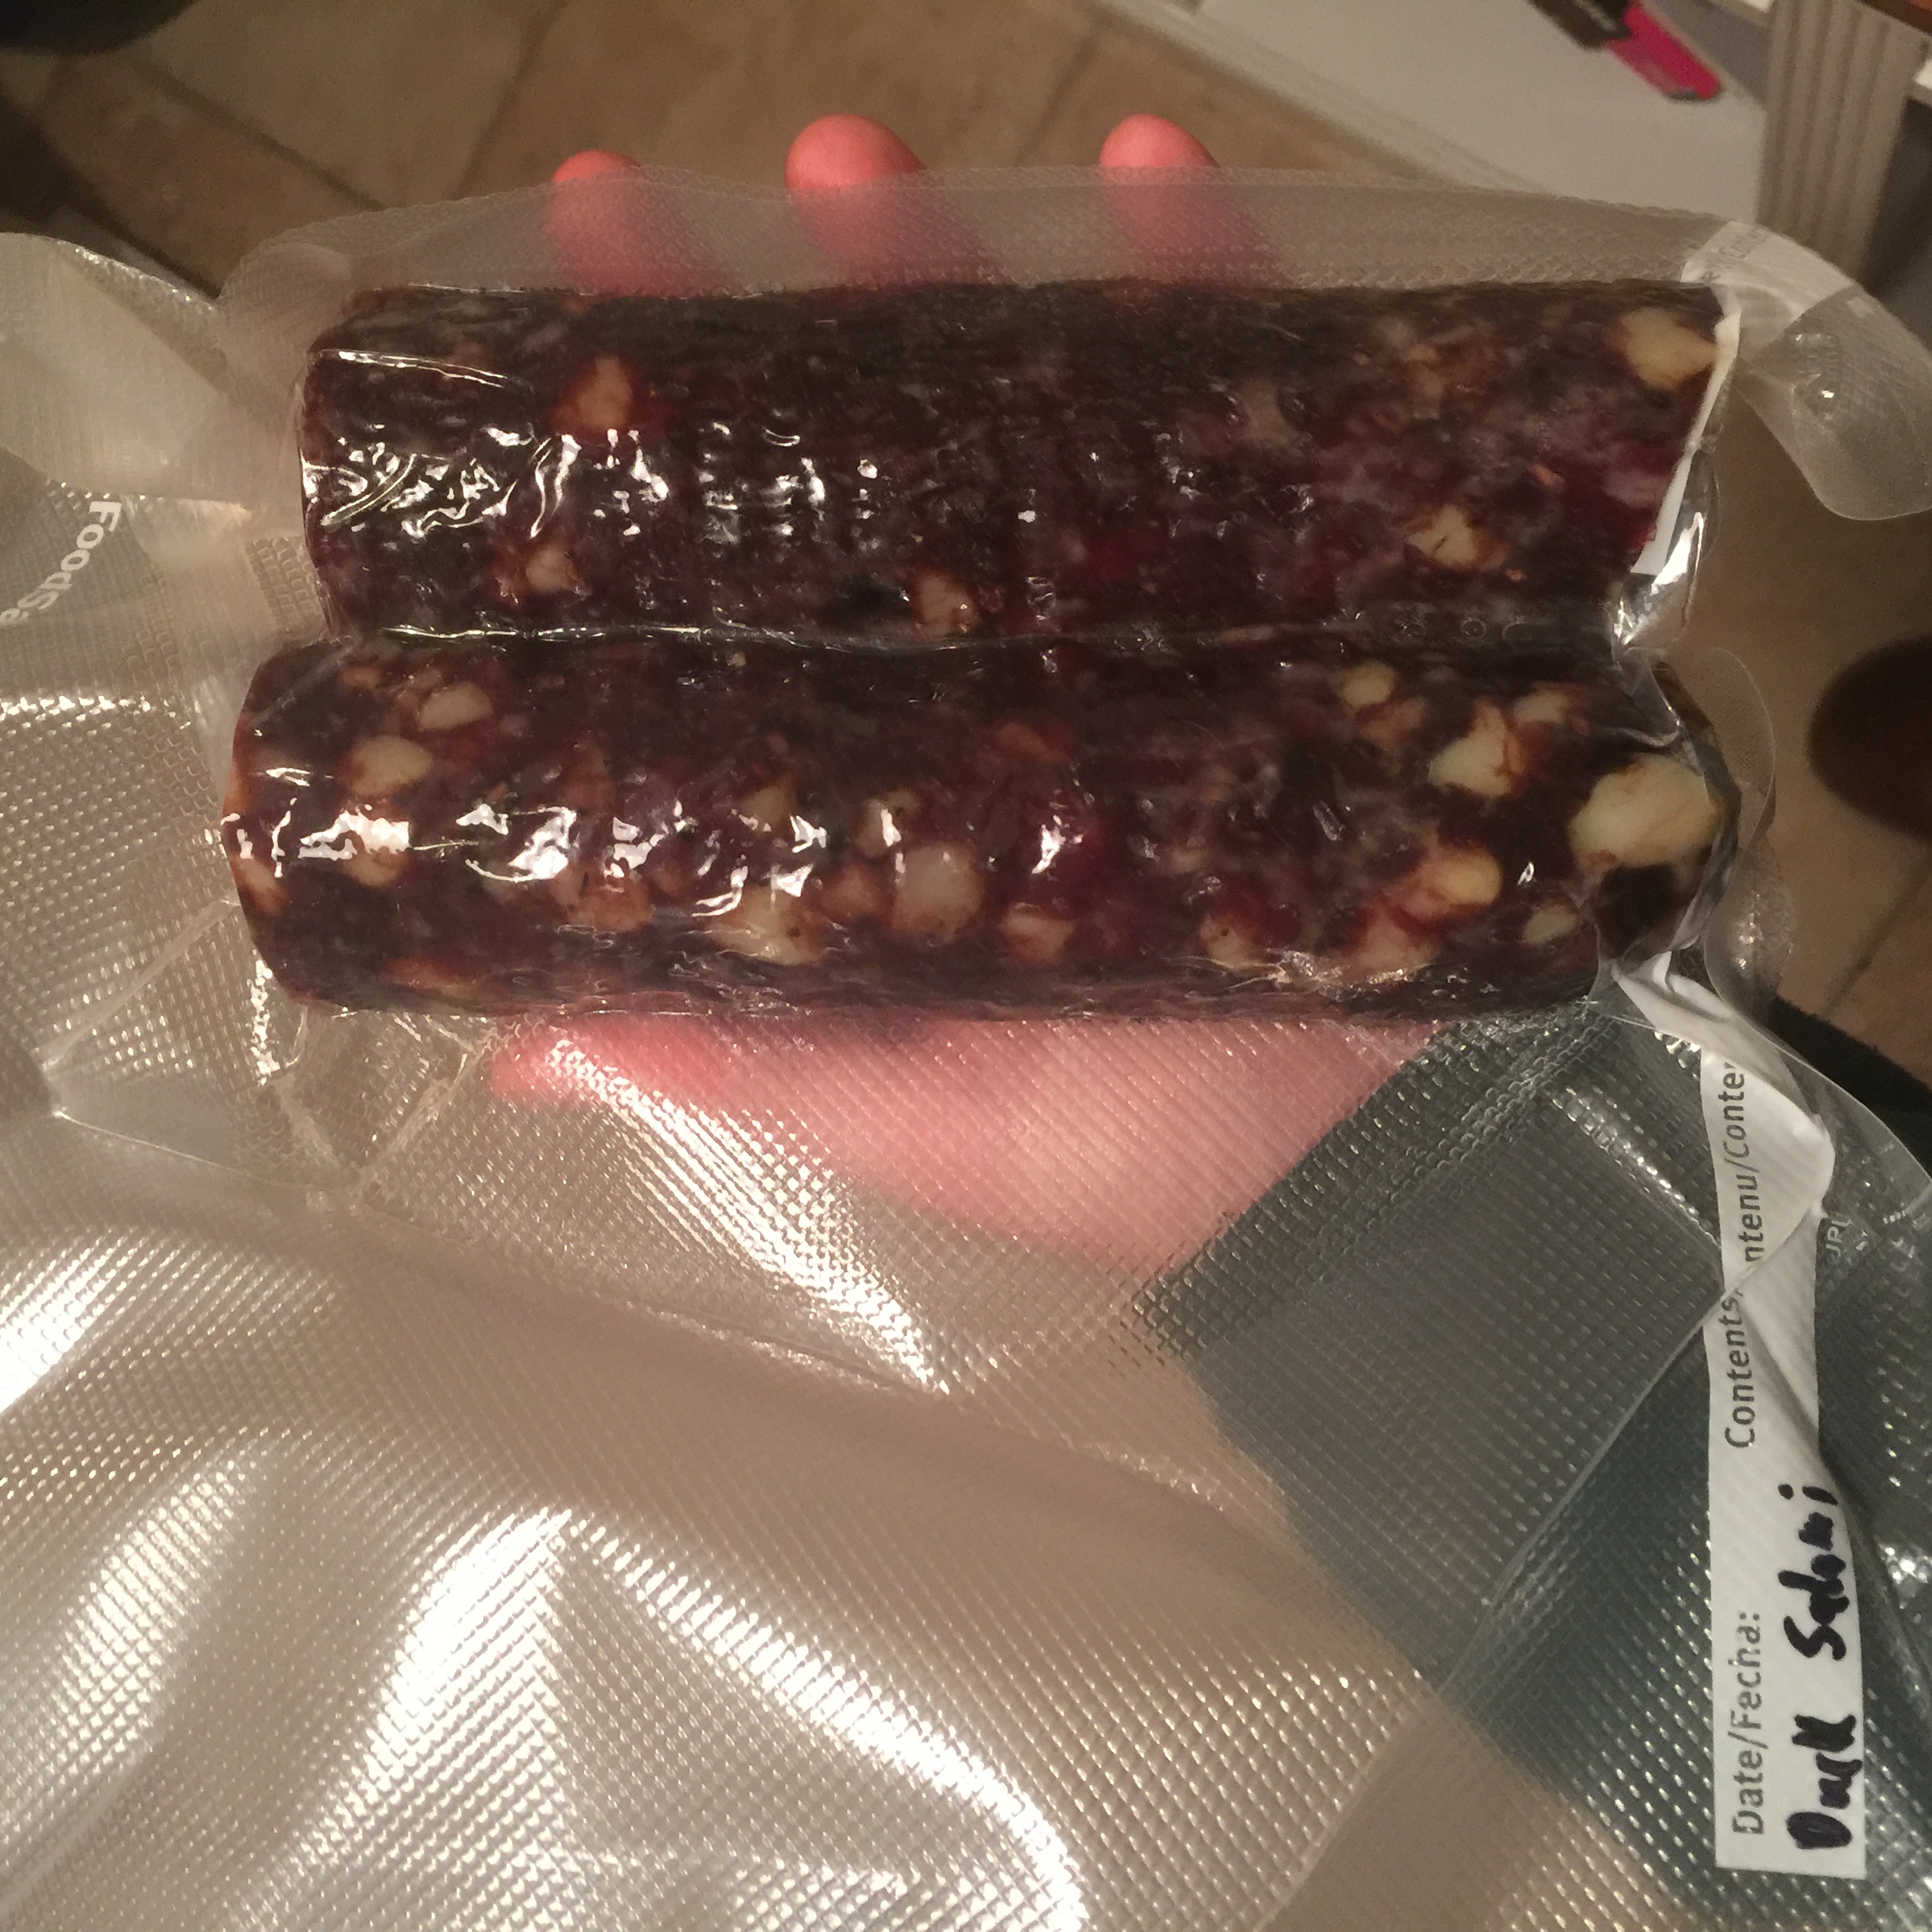
I sliced them open. Wow.

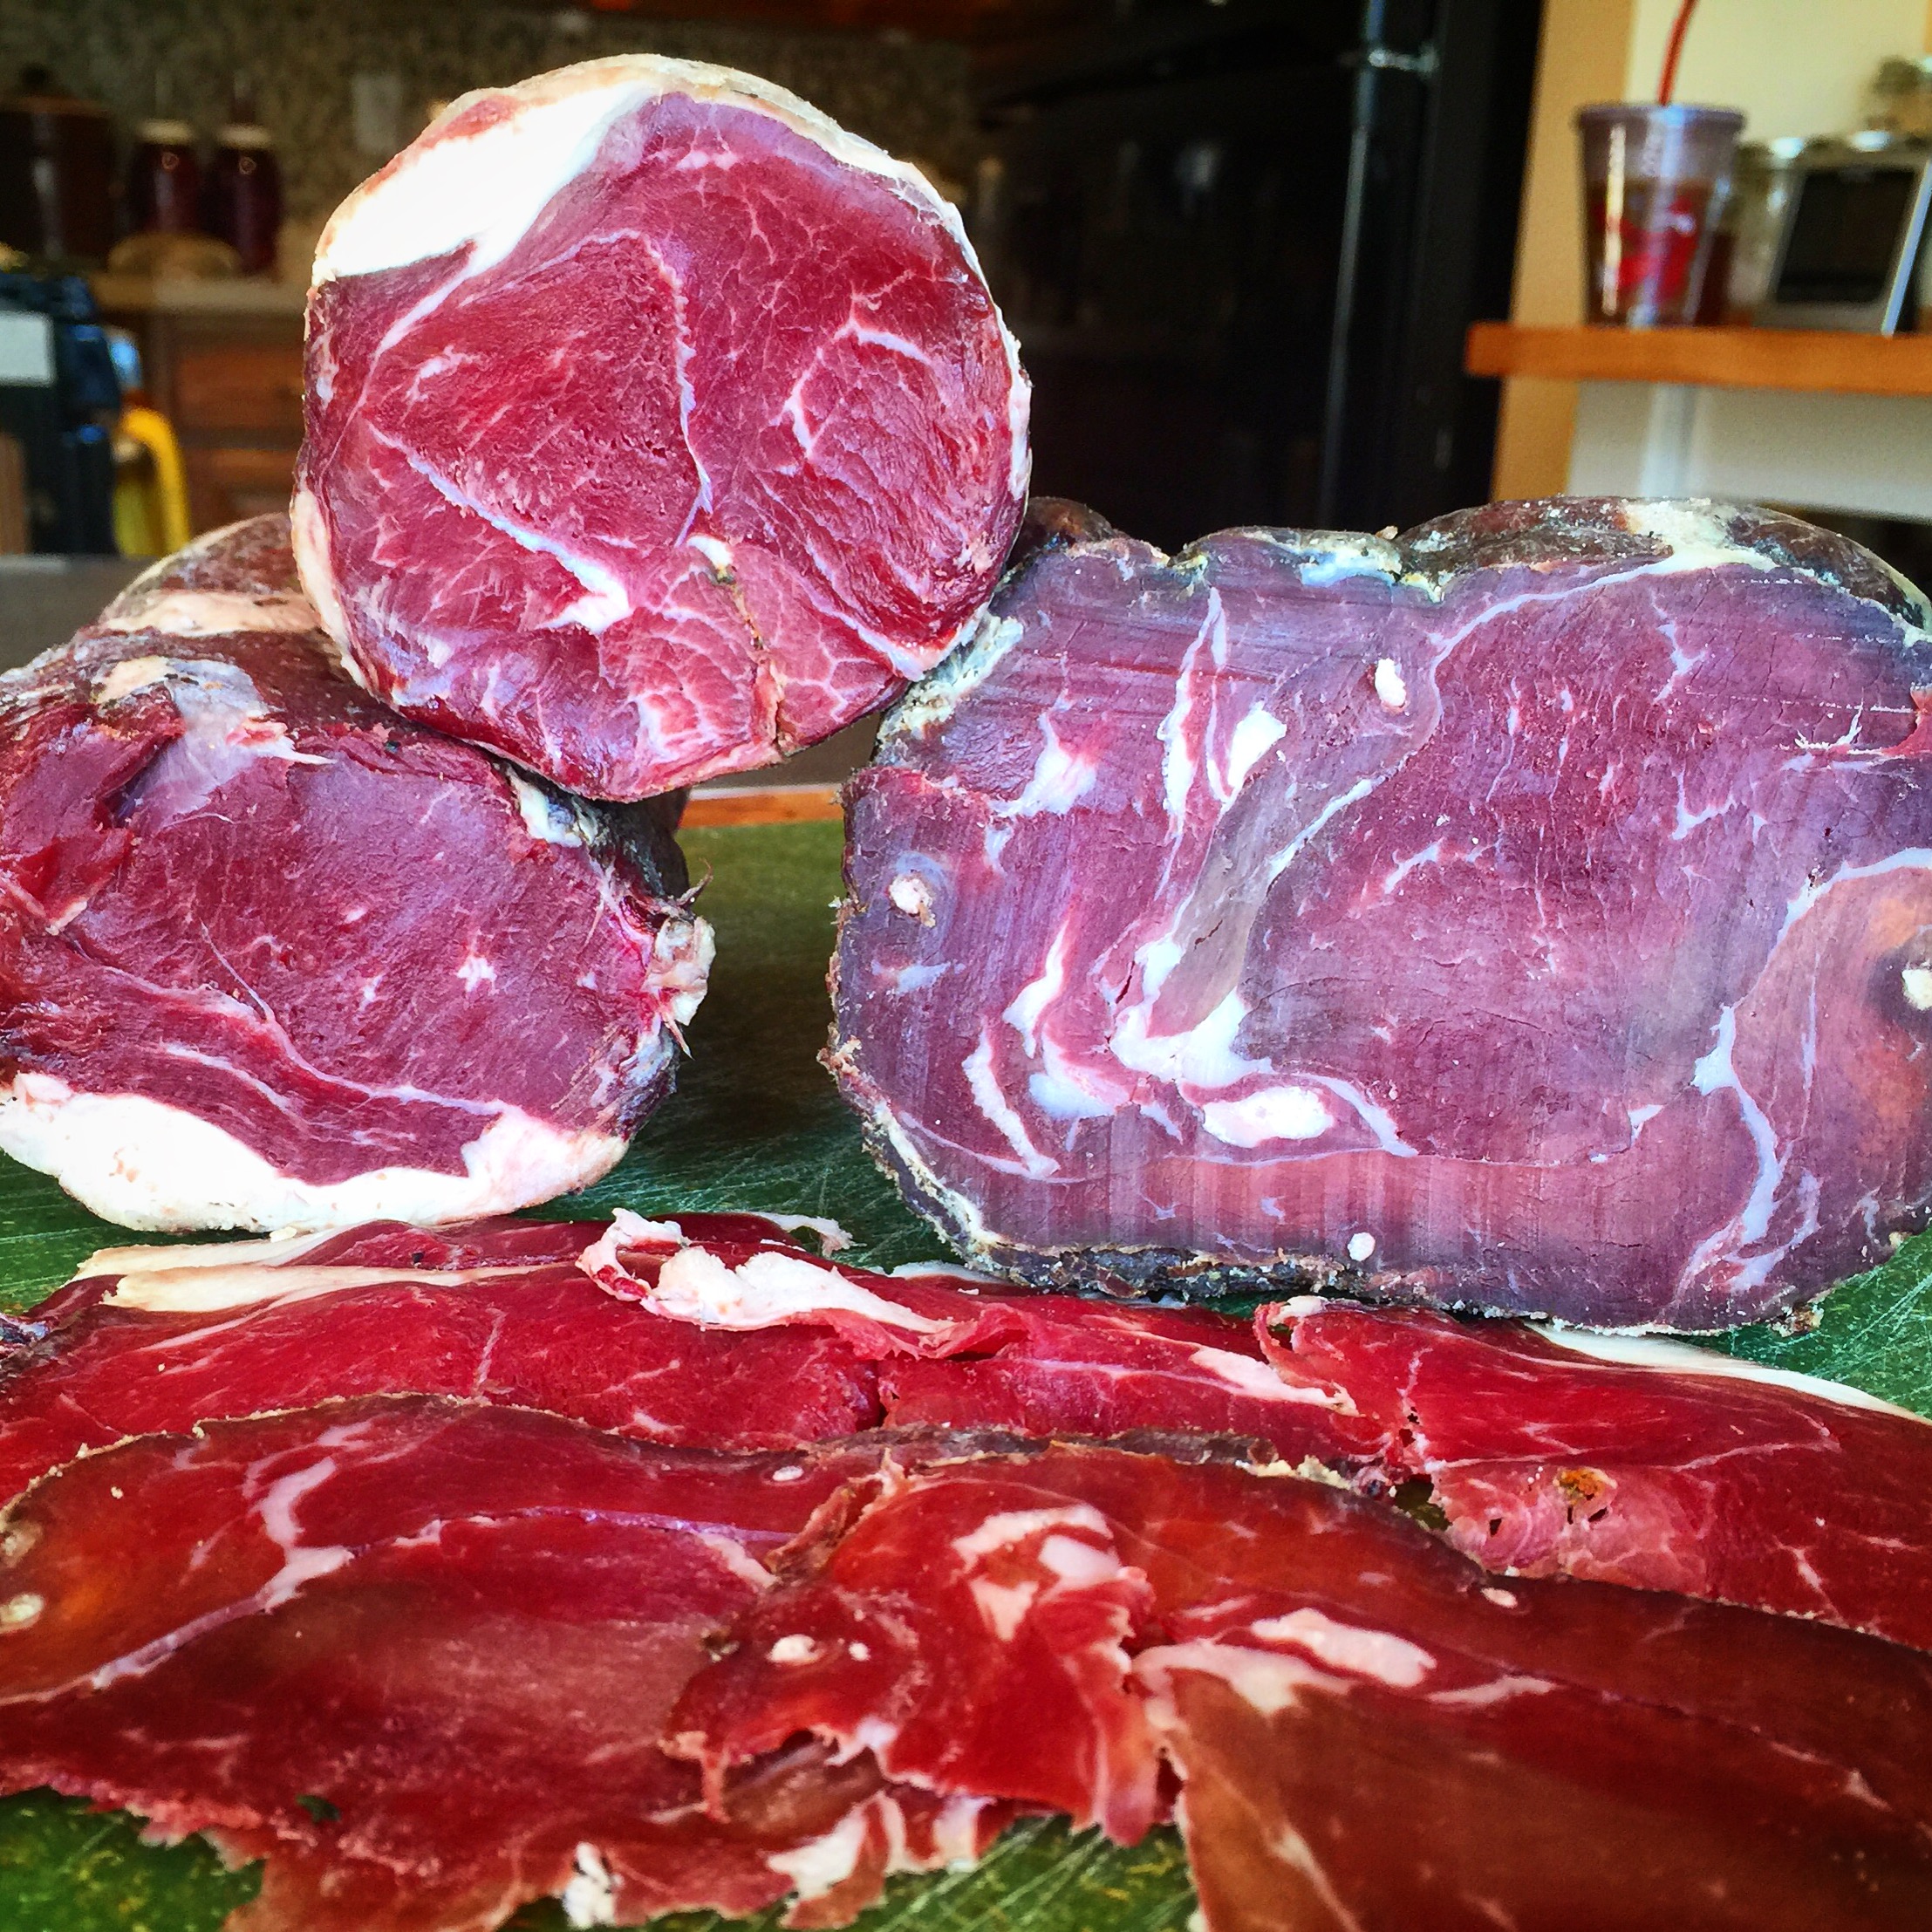
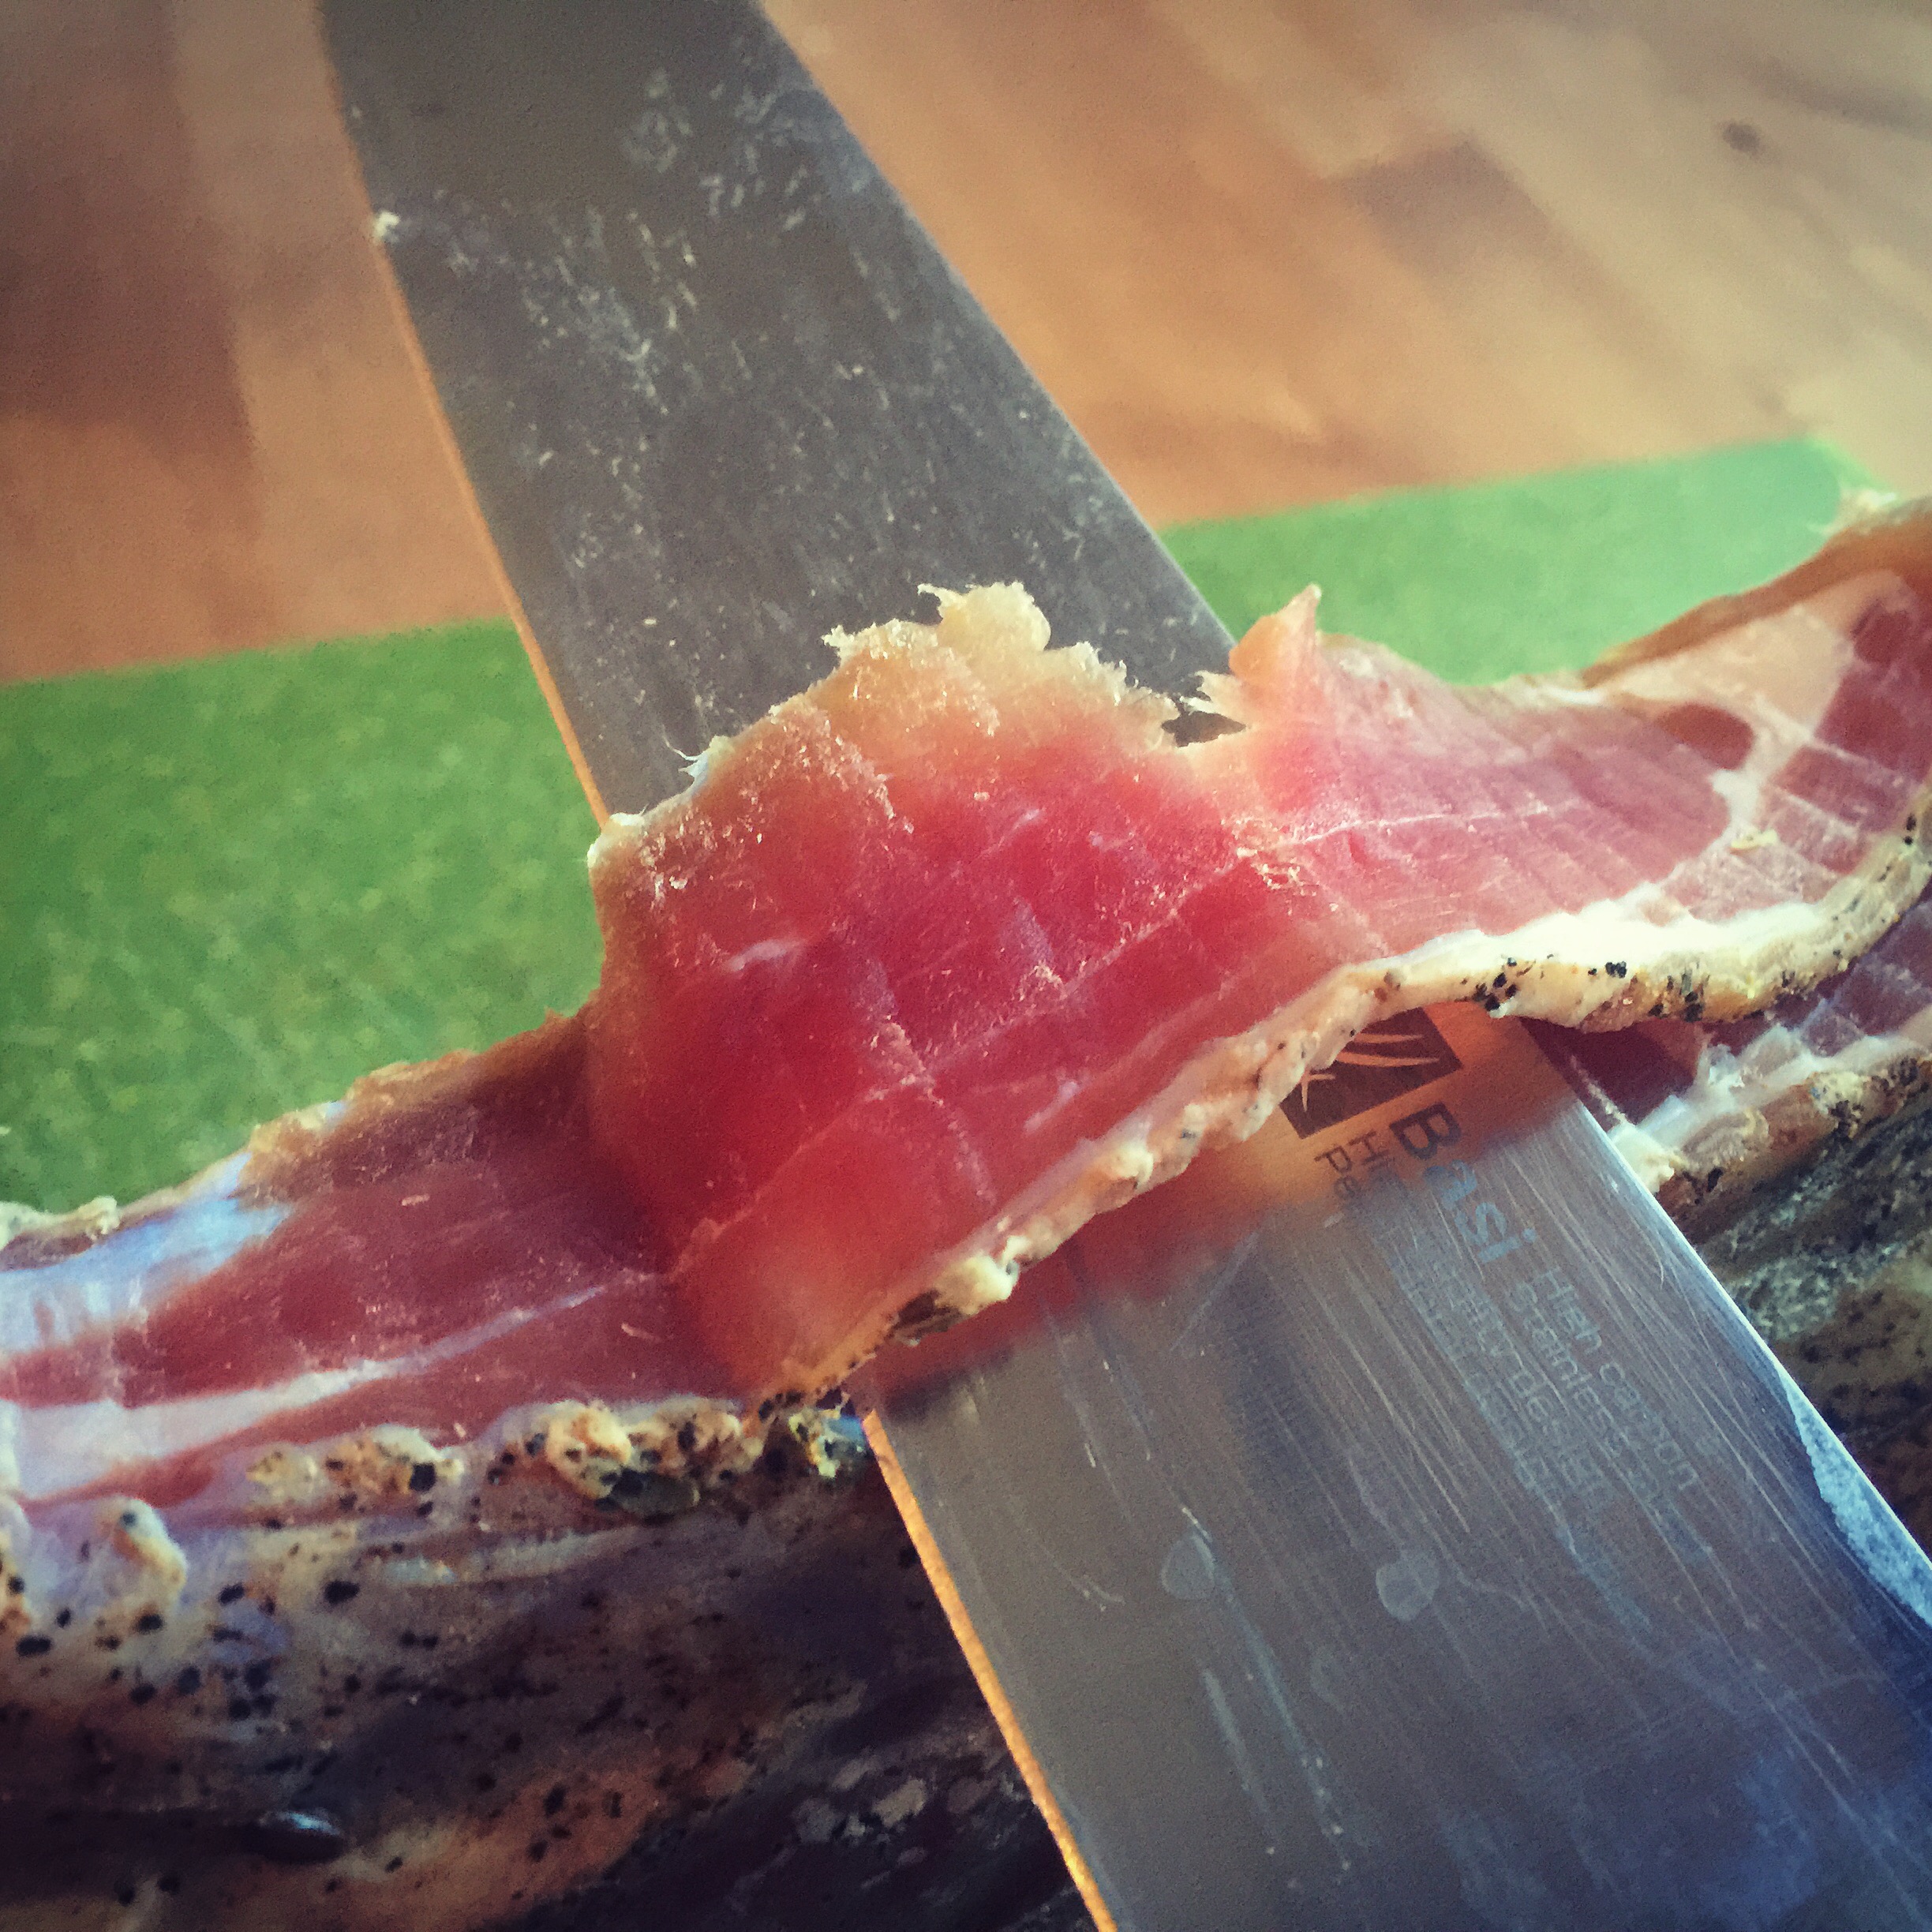
The spicy calabrese duck salami was a kick in the mouth. Flavorful and spicy. They were slightly over powering due to the strong heat from the calabrese pepperoncini, but if it’s not spicy, you’re not doing your job right?

image(29)

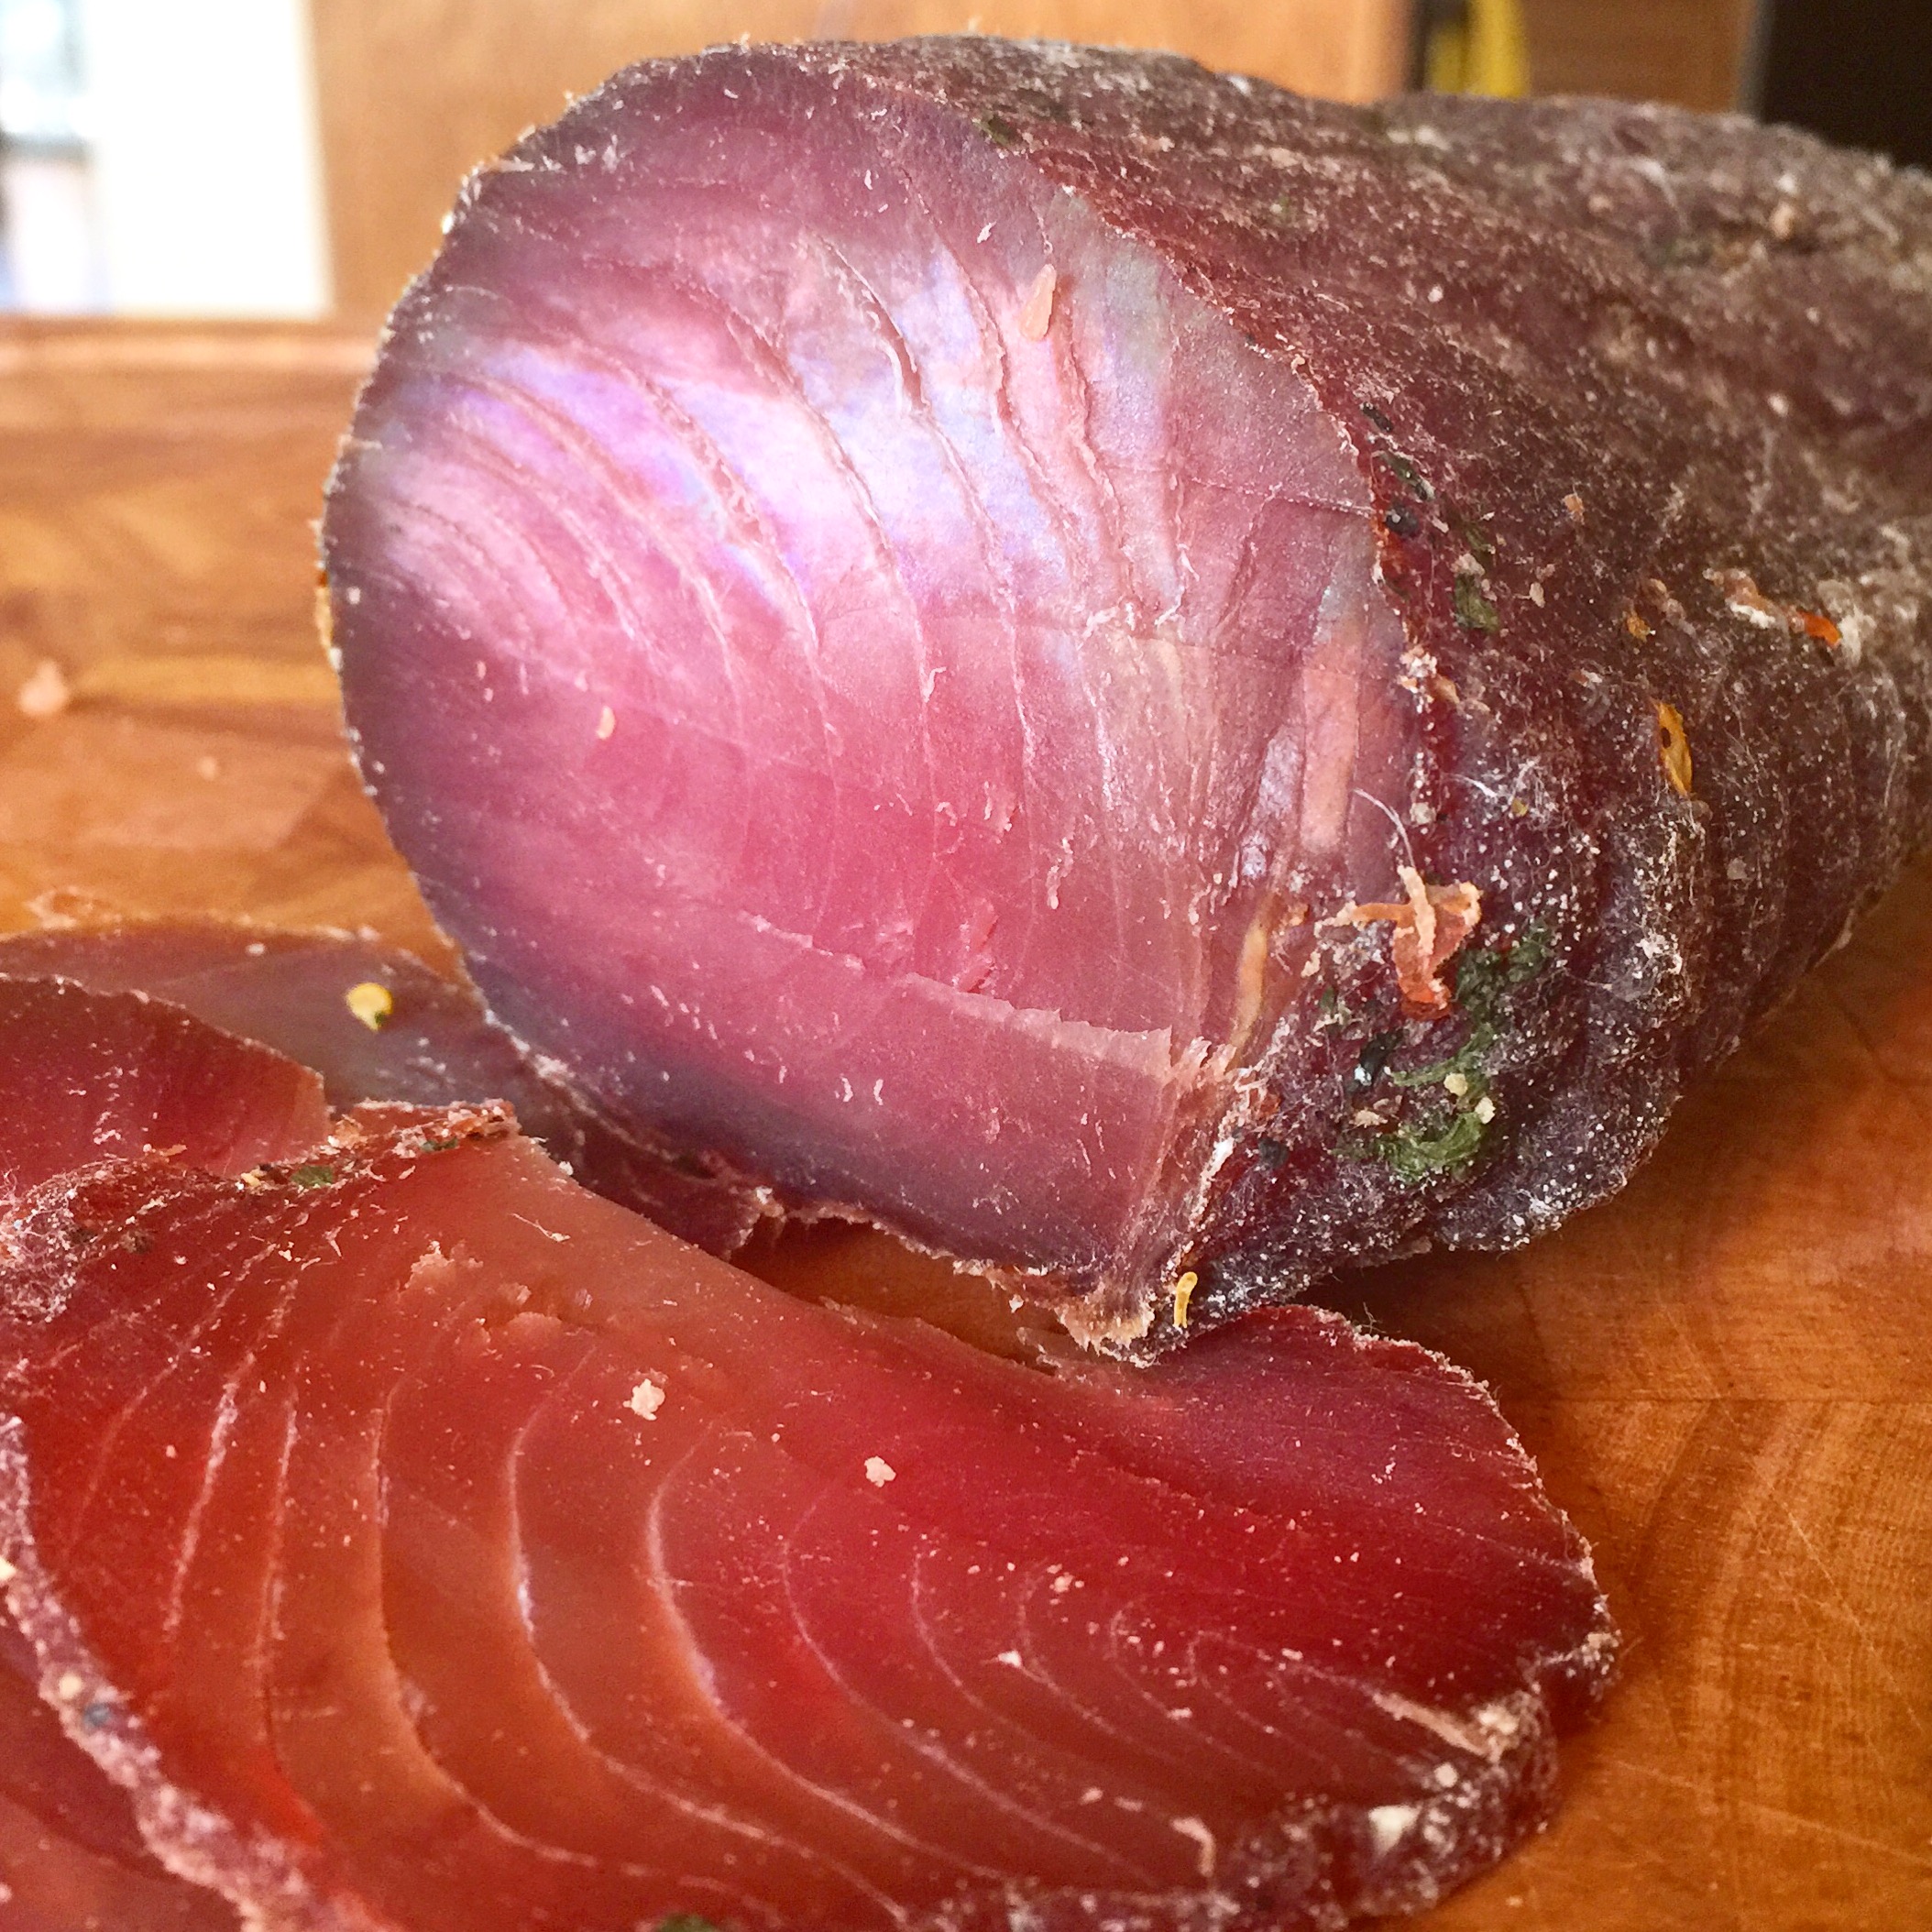
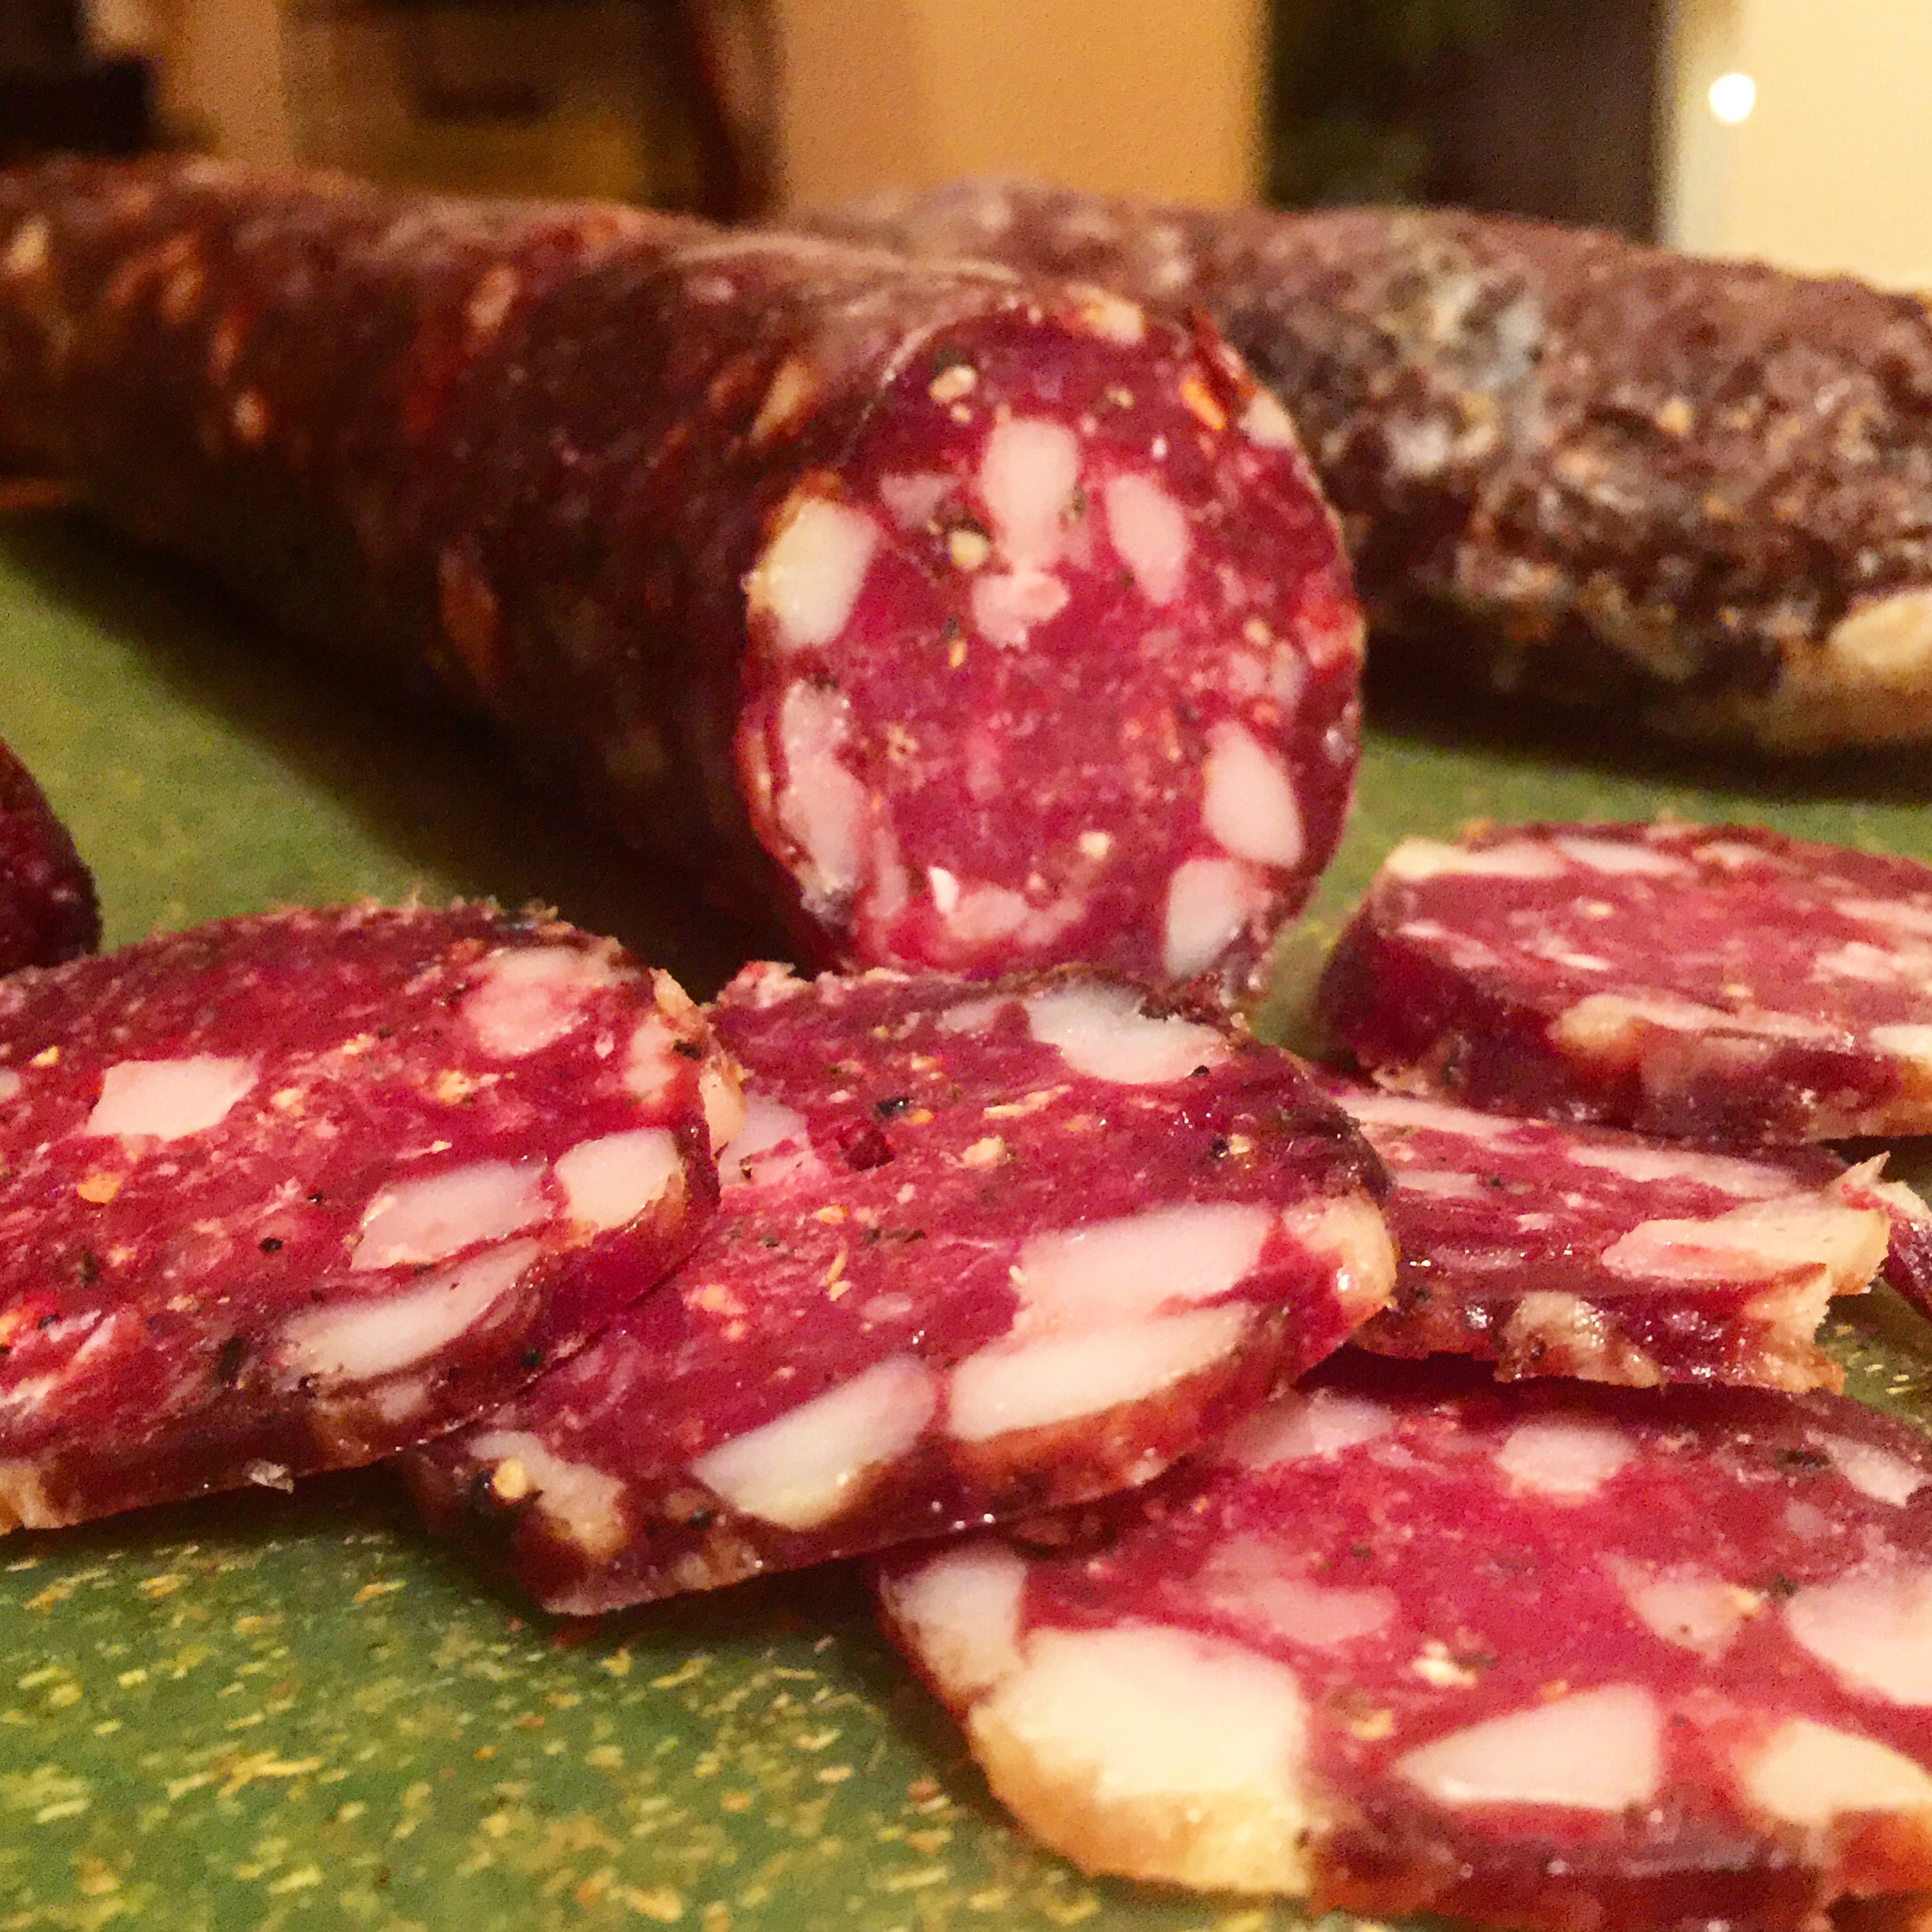
The salame duck l’orange was amazing. The complex flavors really lent themselves well to the flavor of the duck.

image(37)

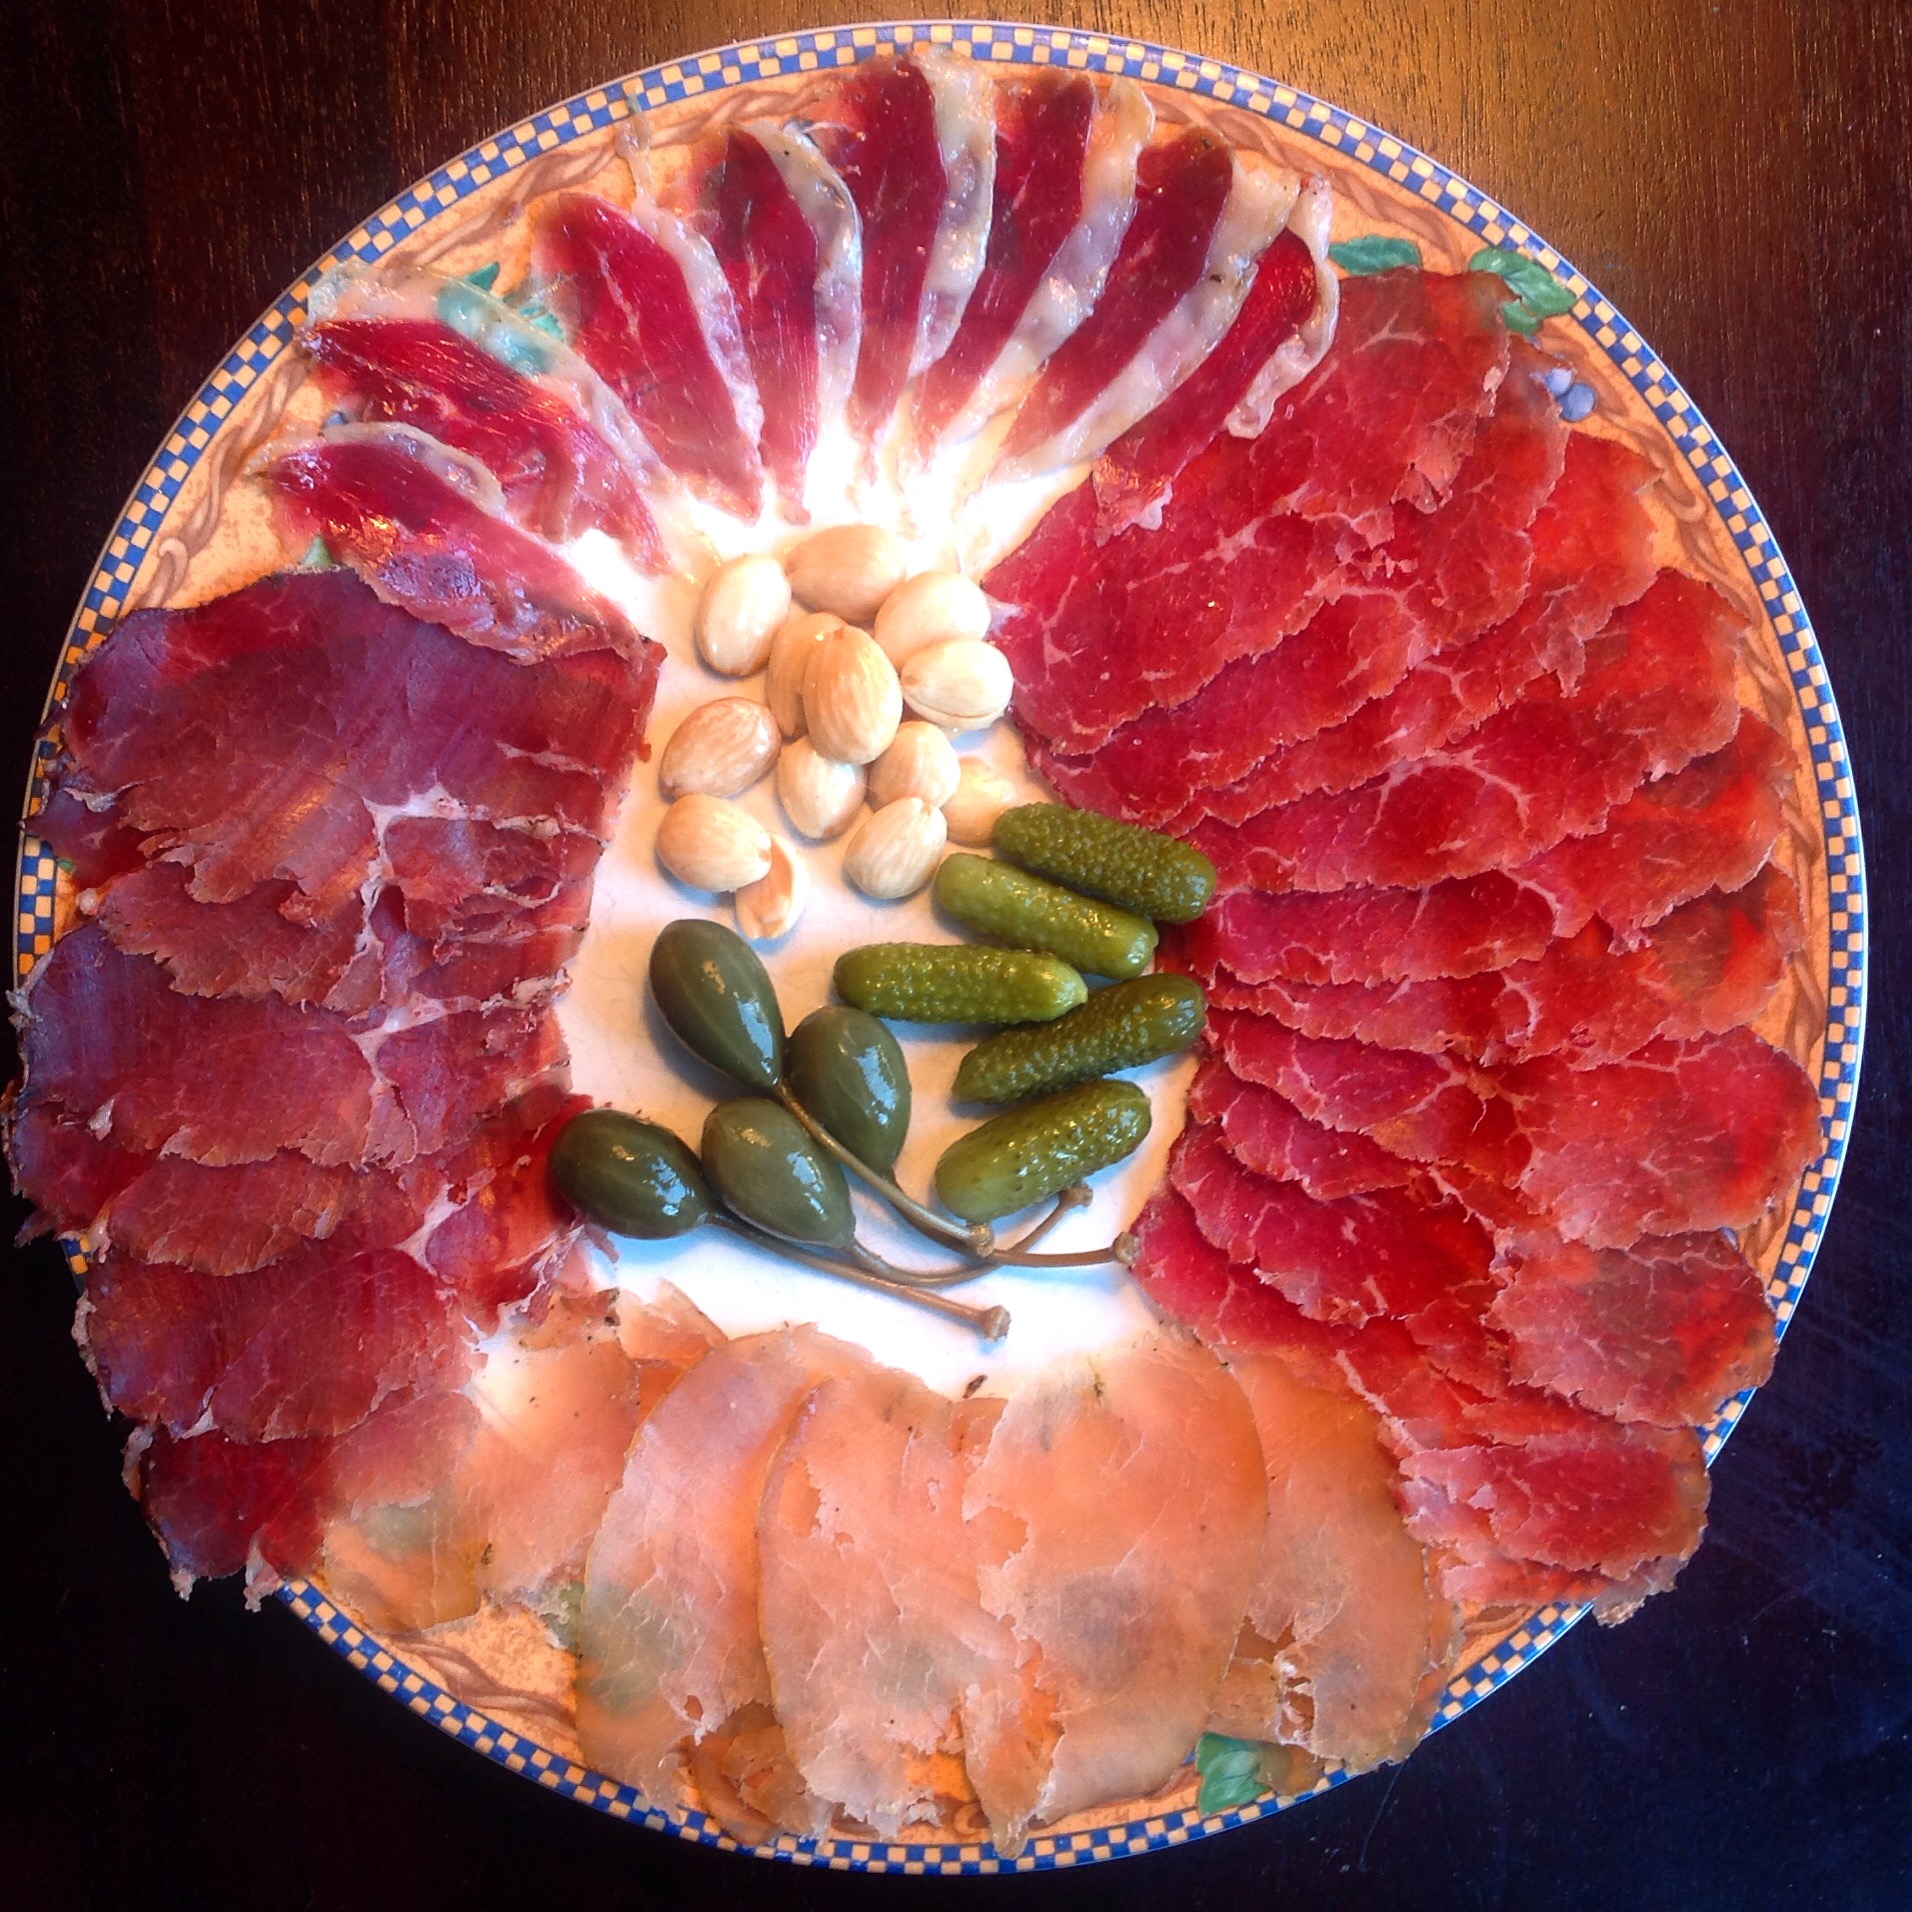
After one last look…

image(38)
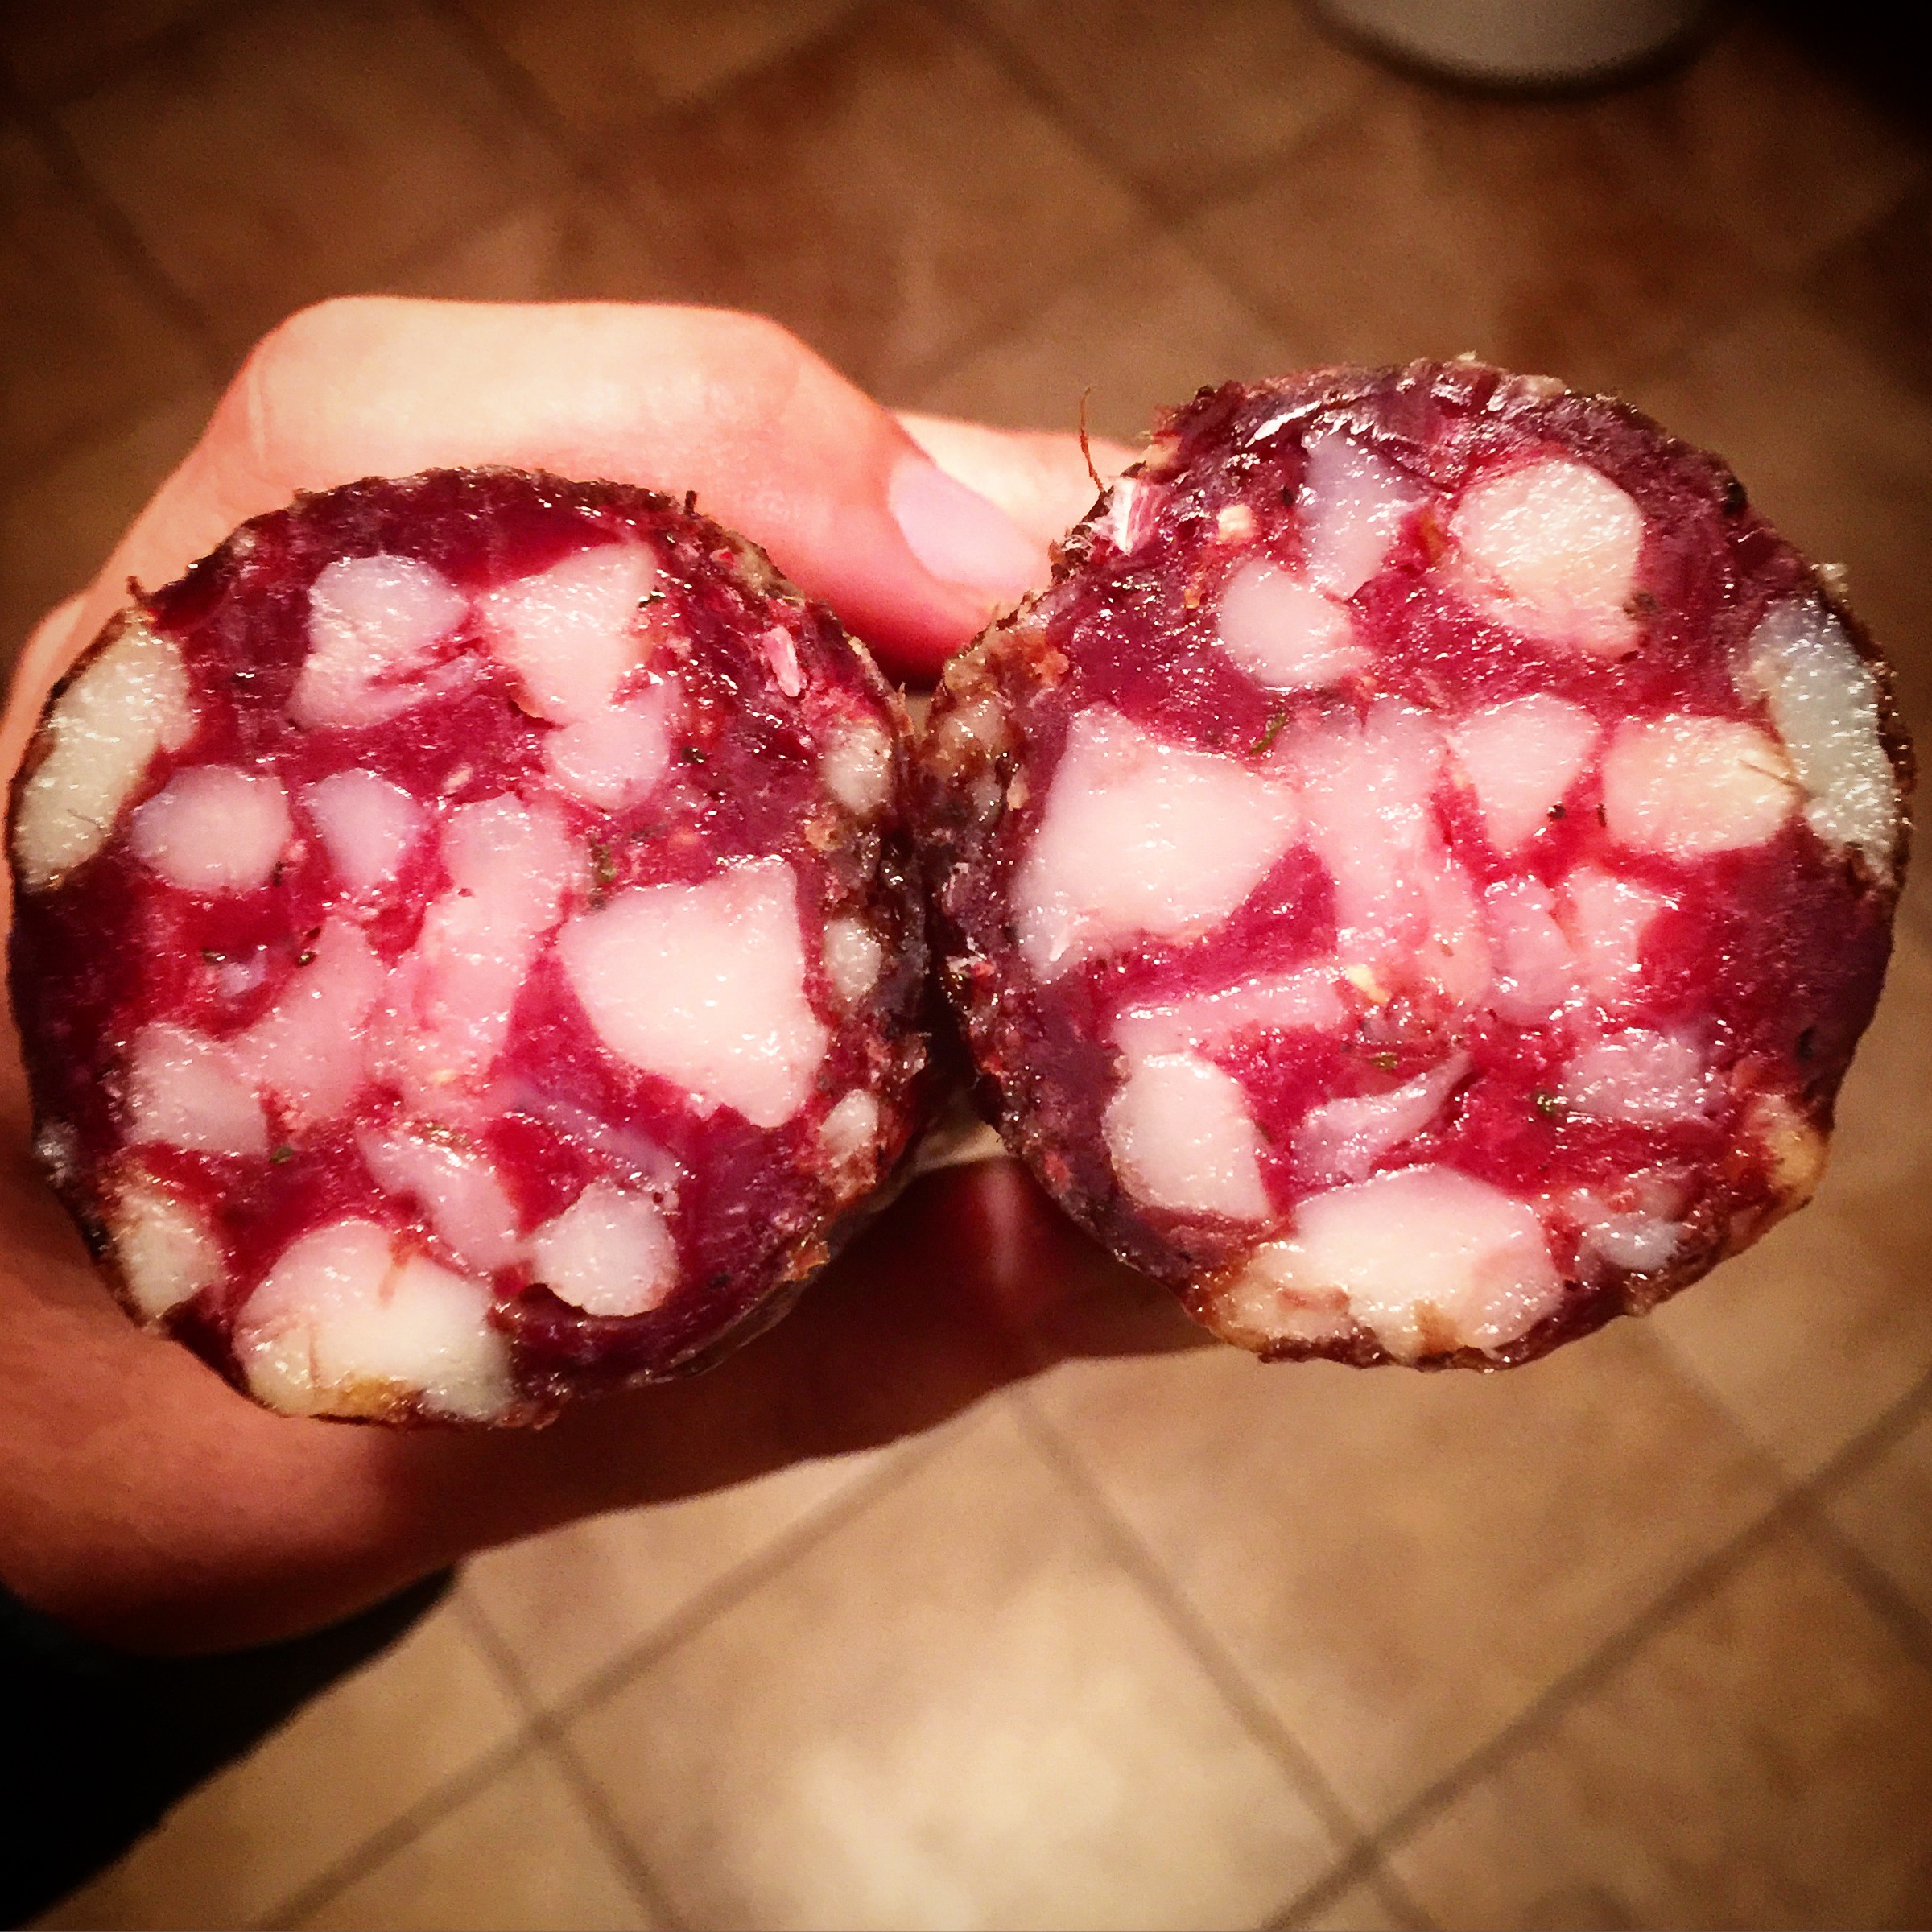
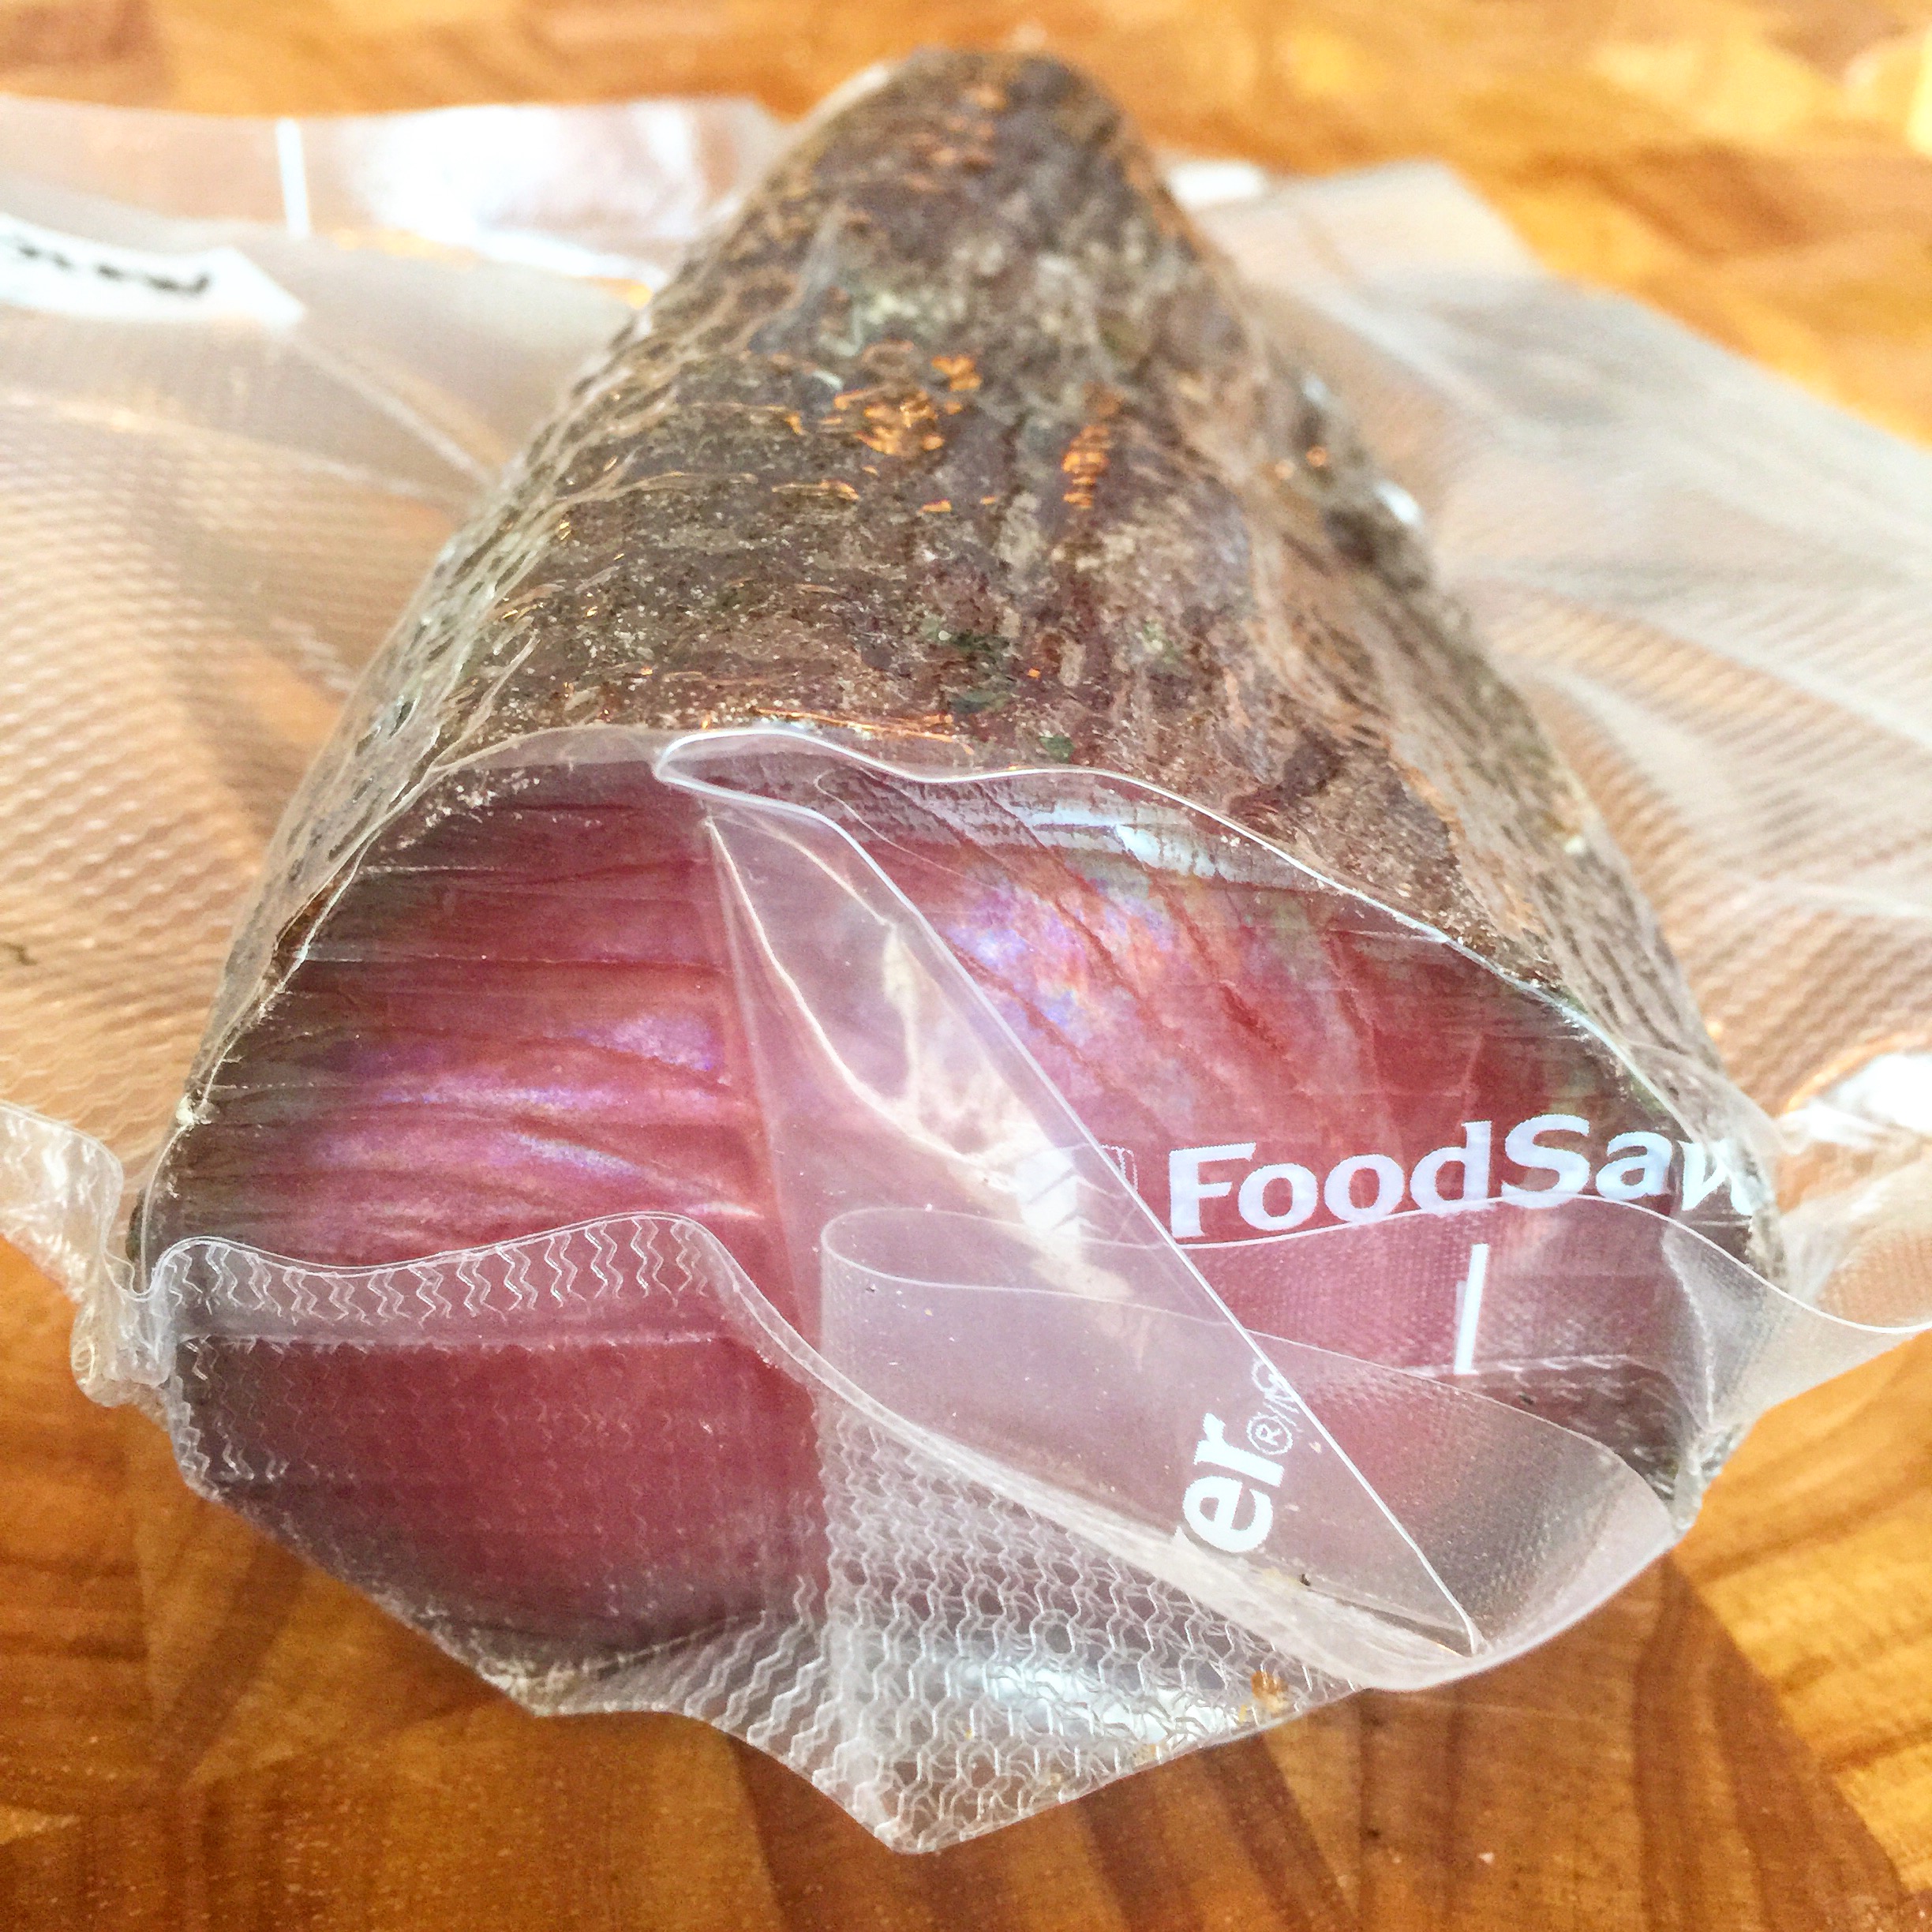
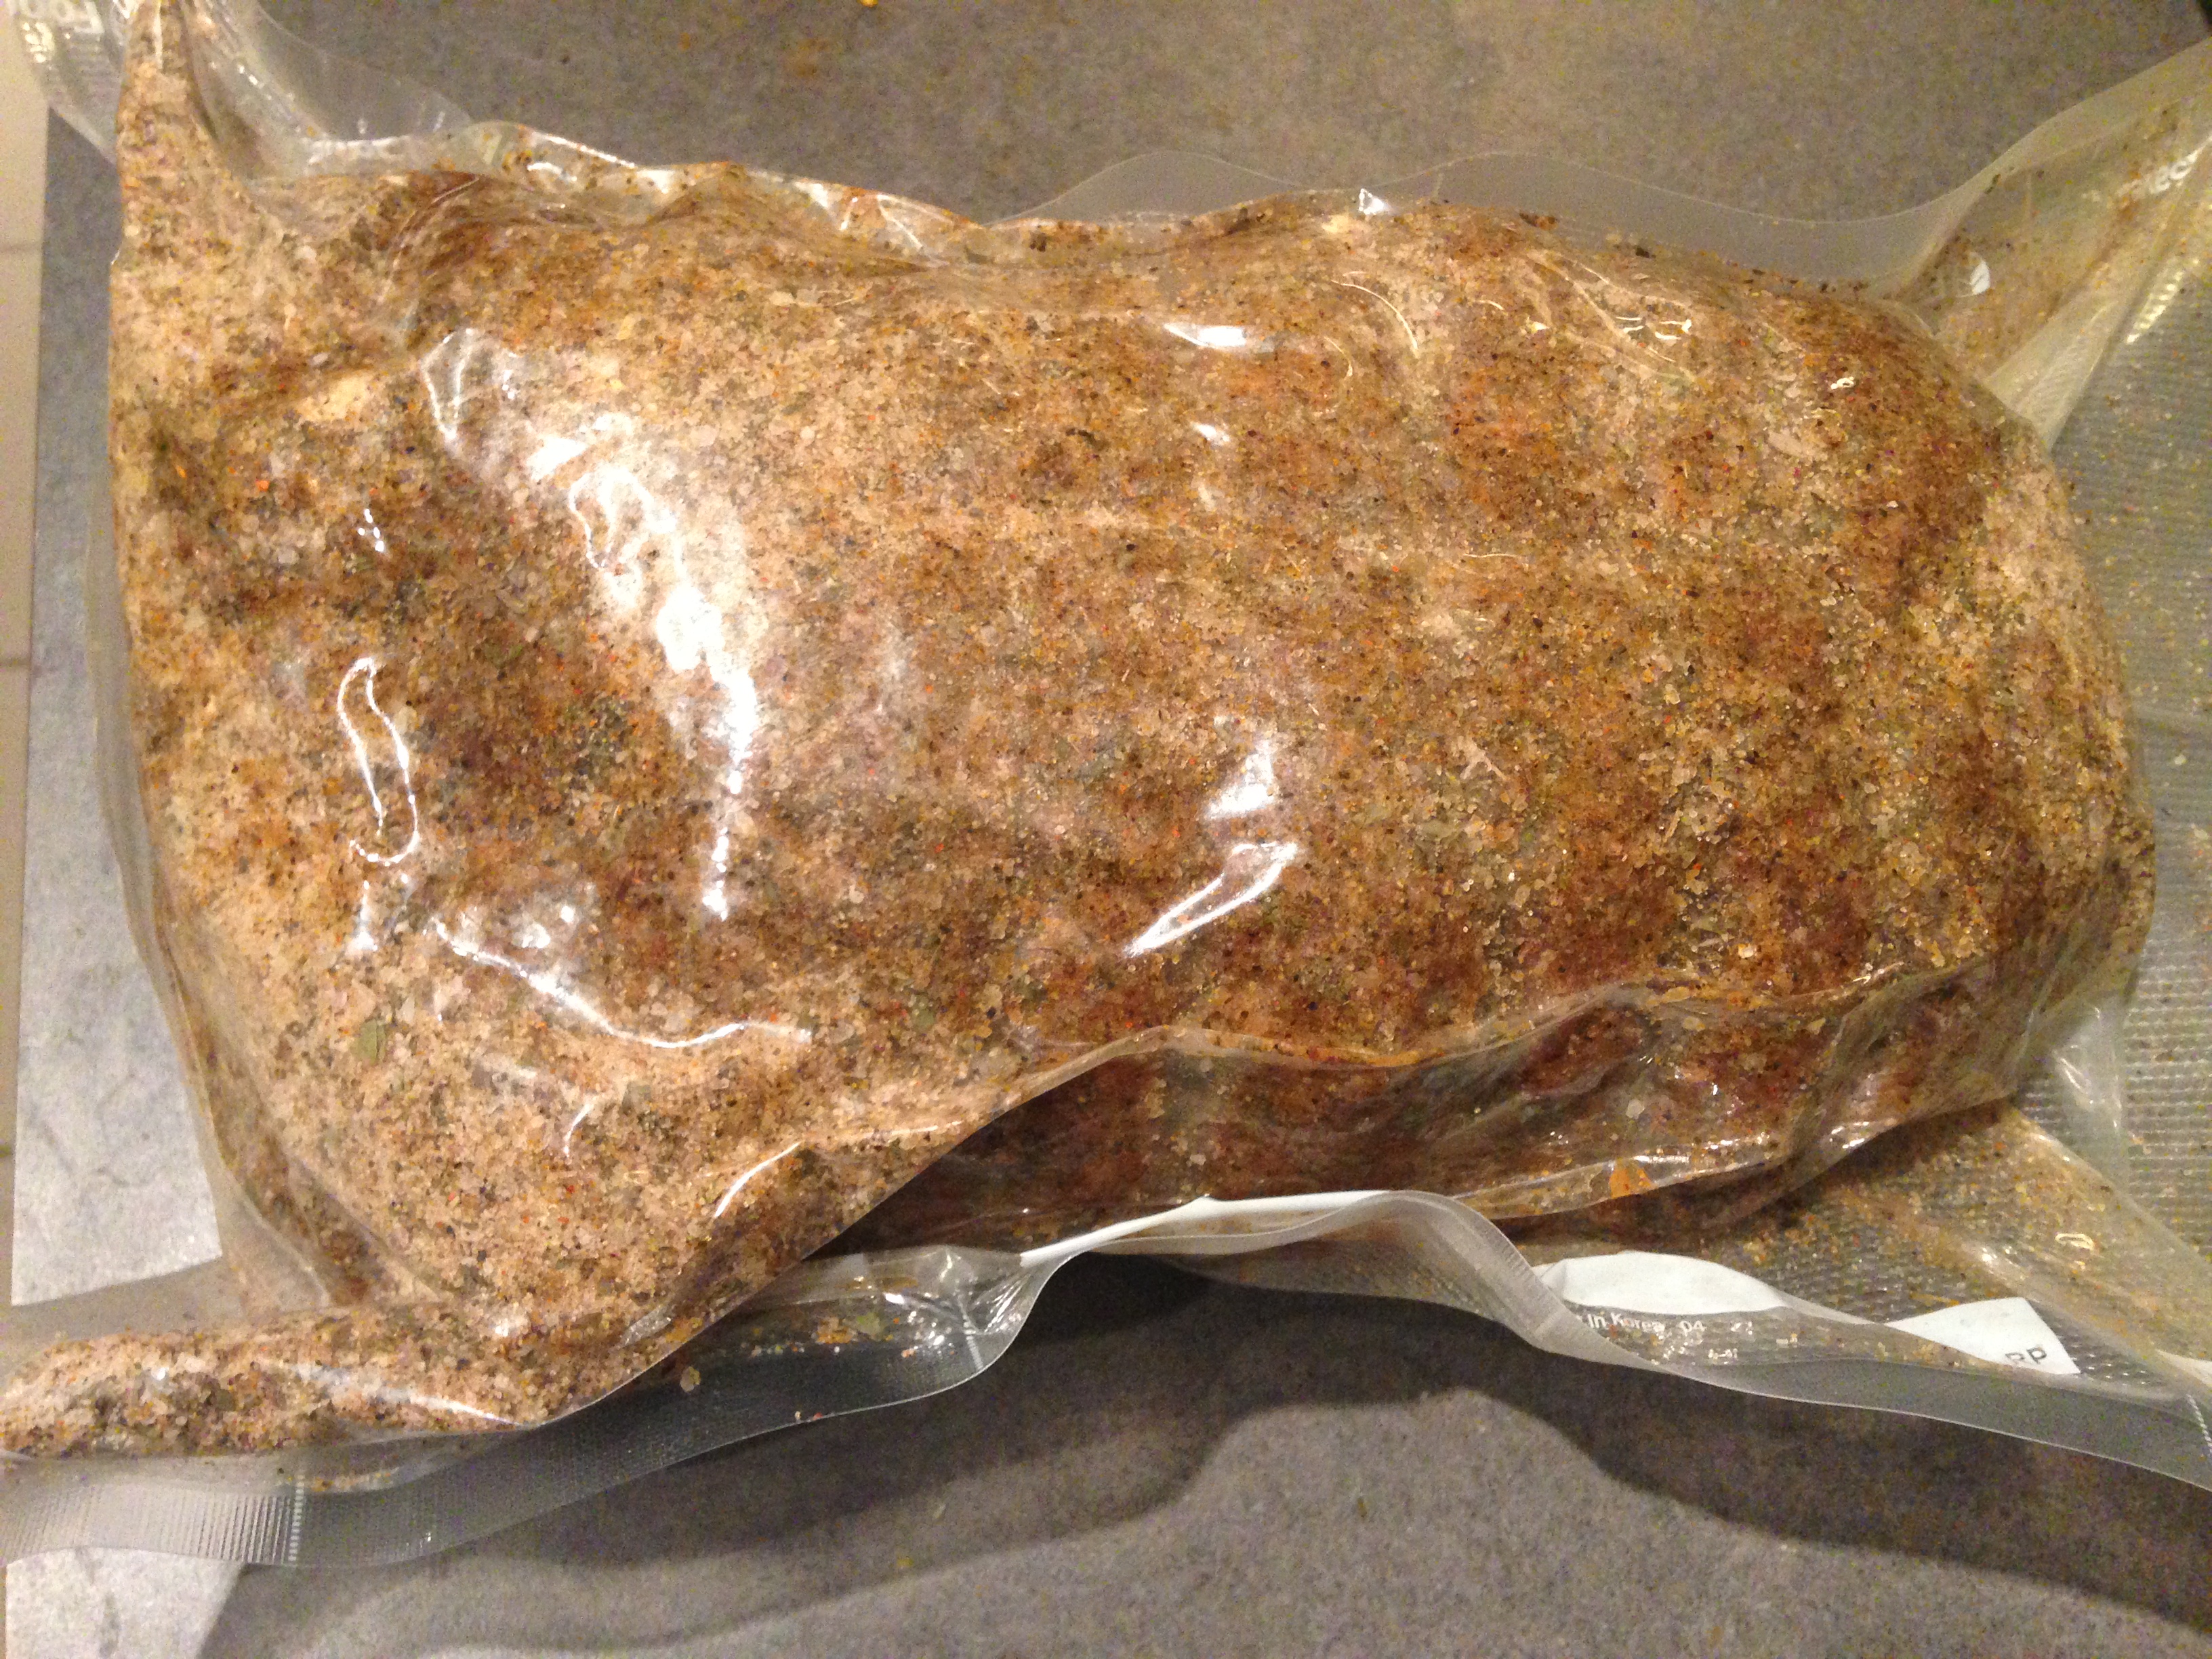
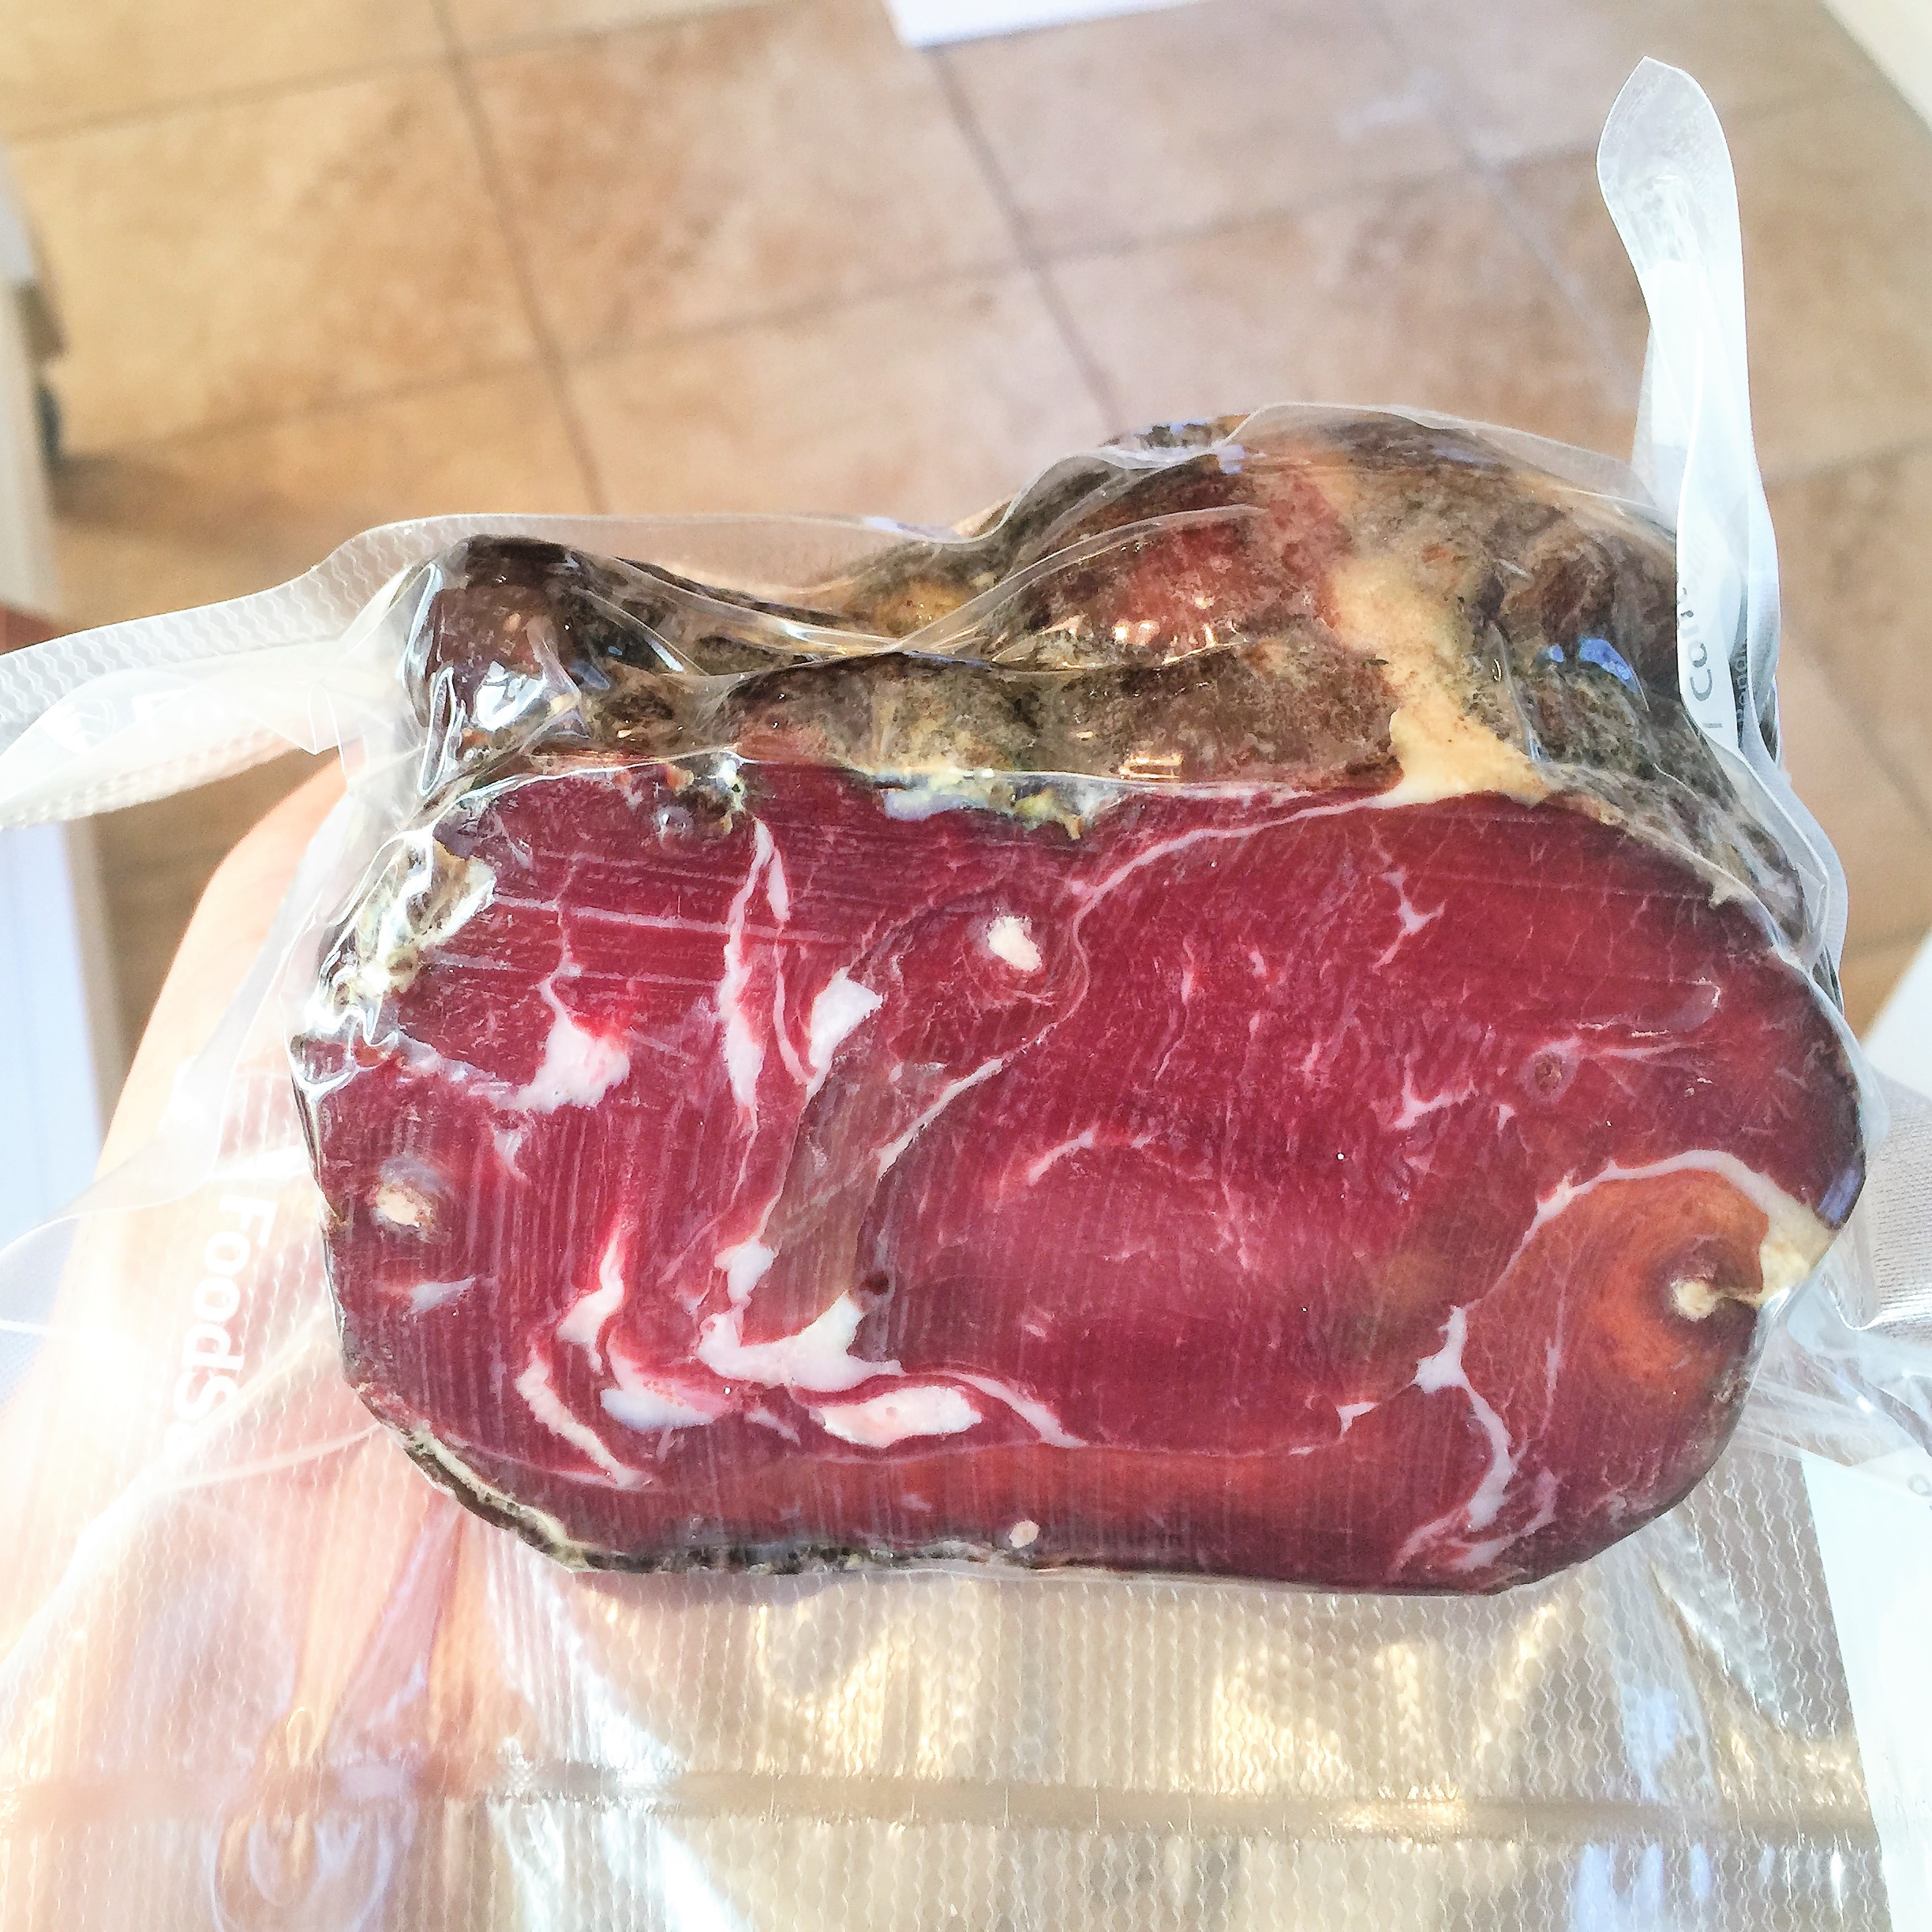
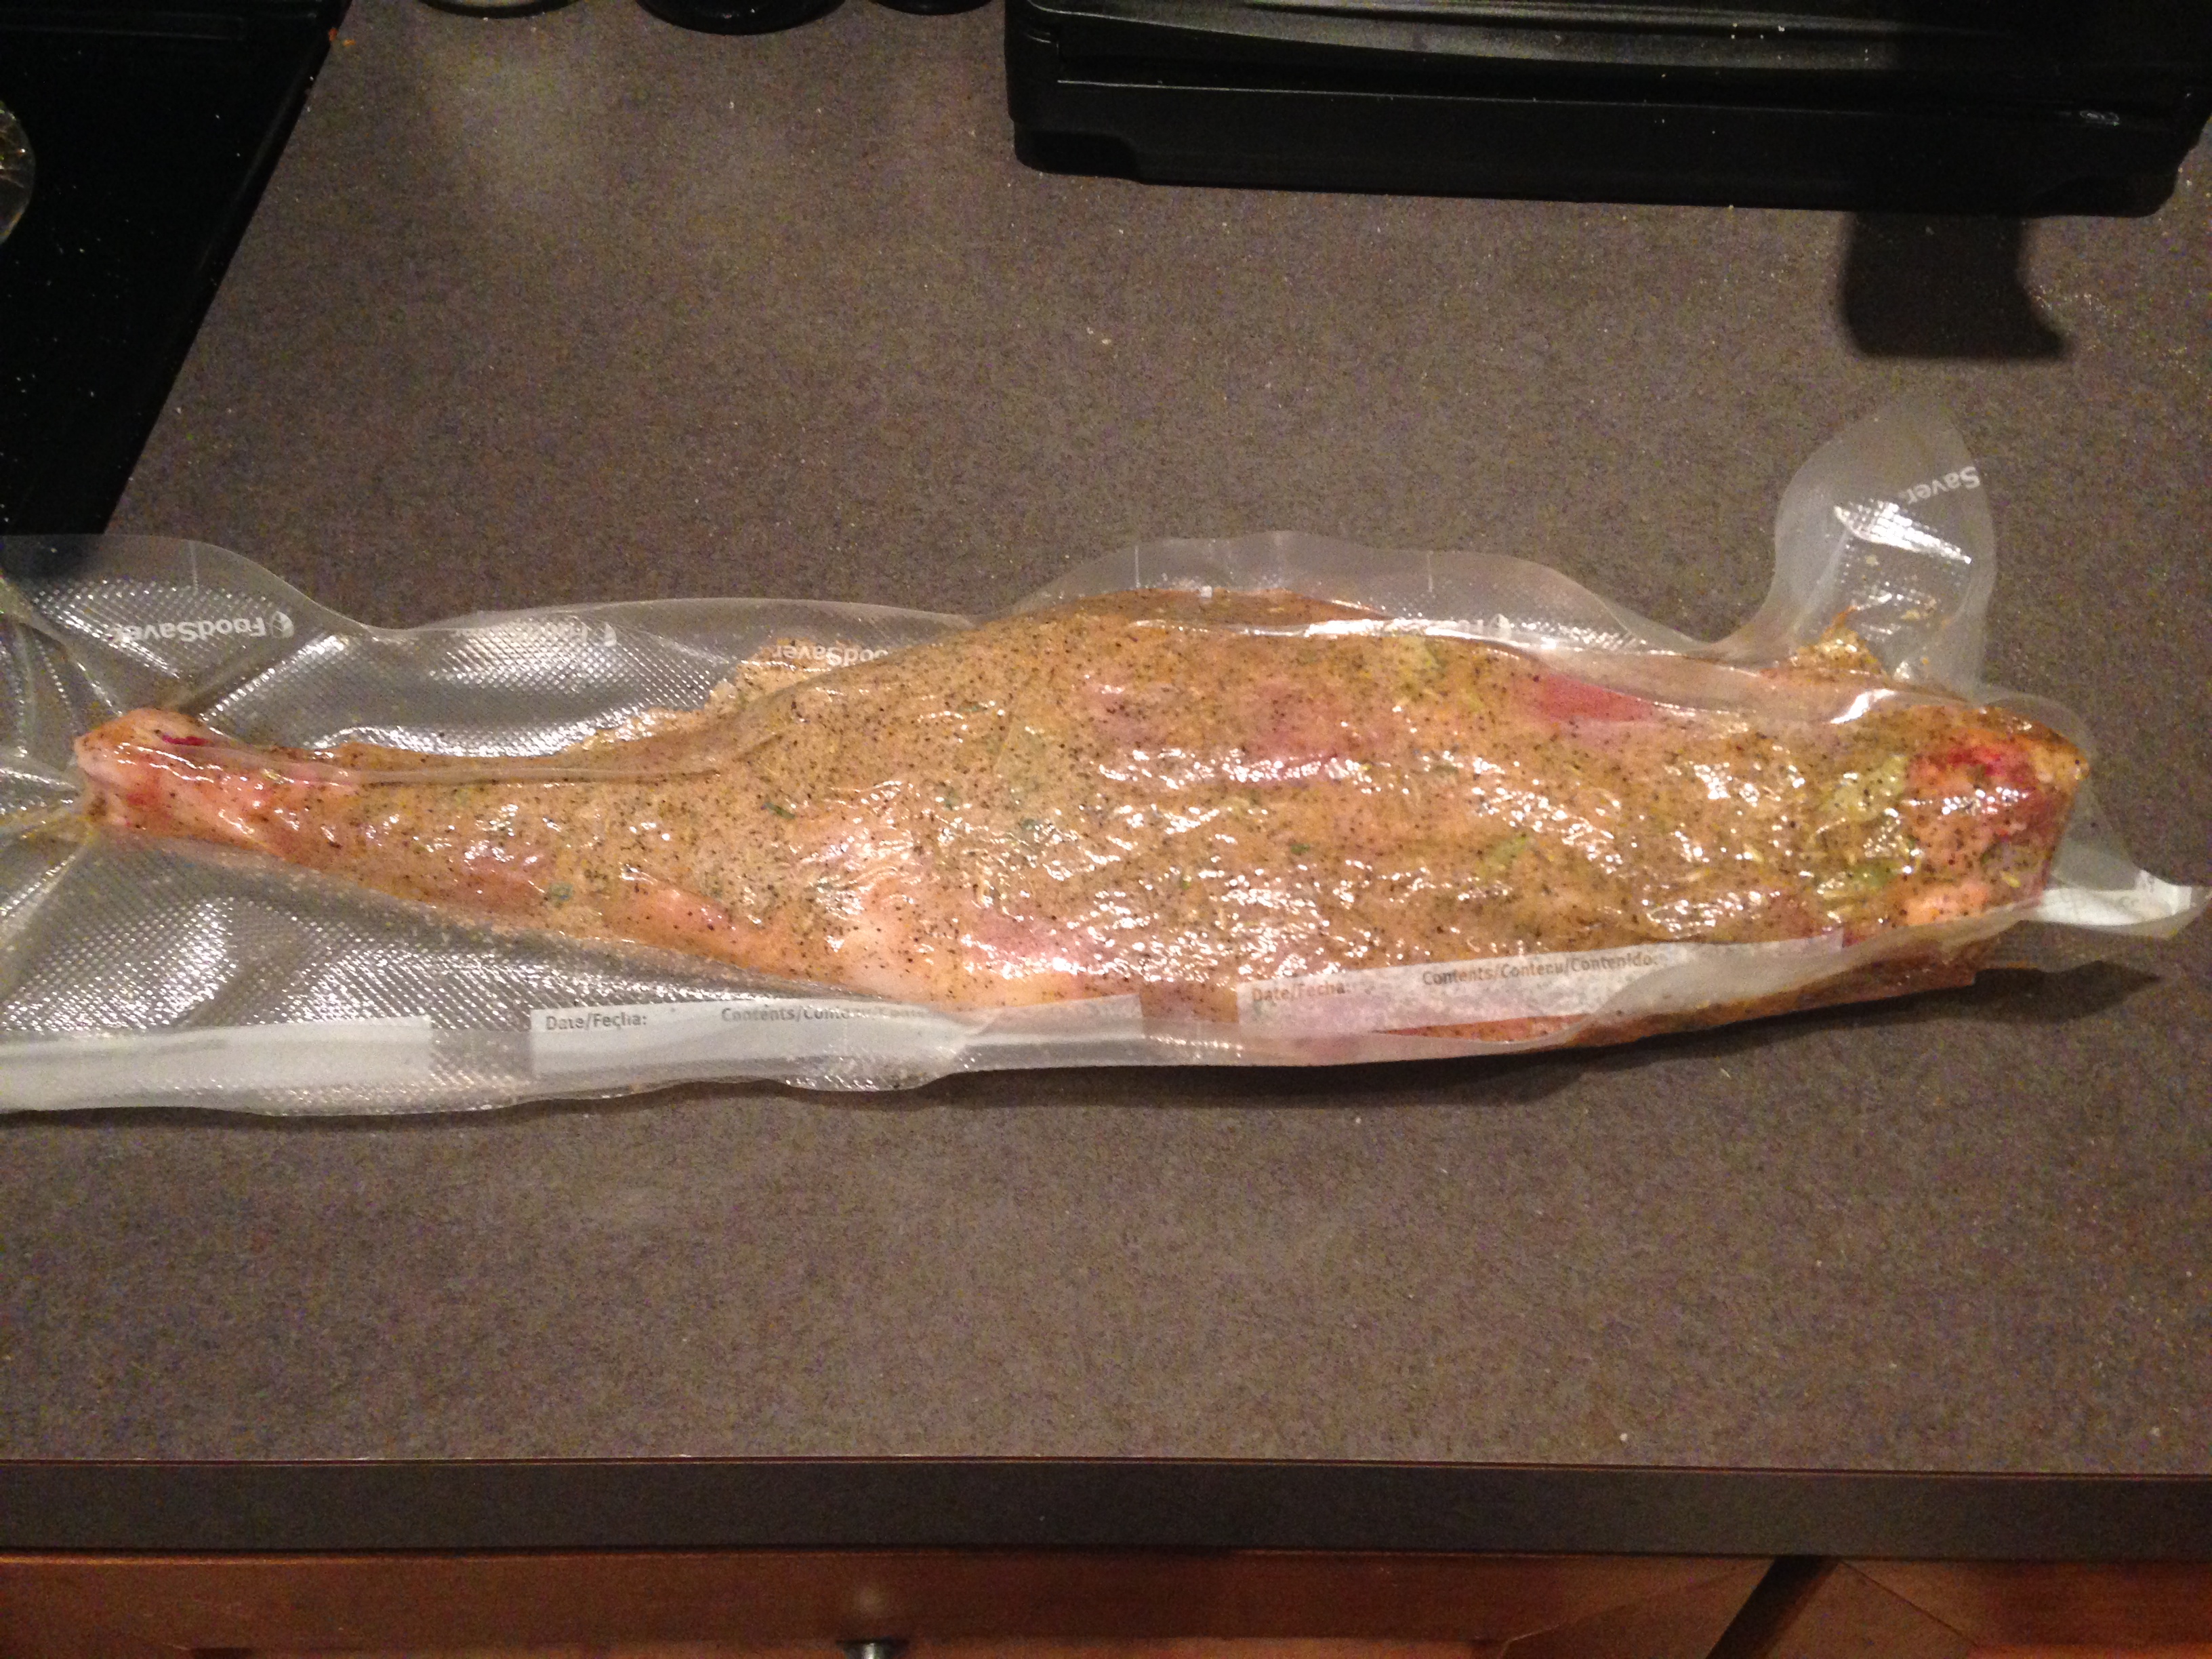
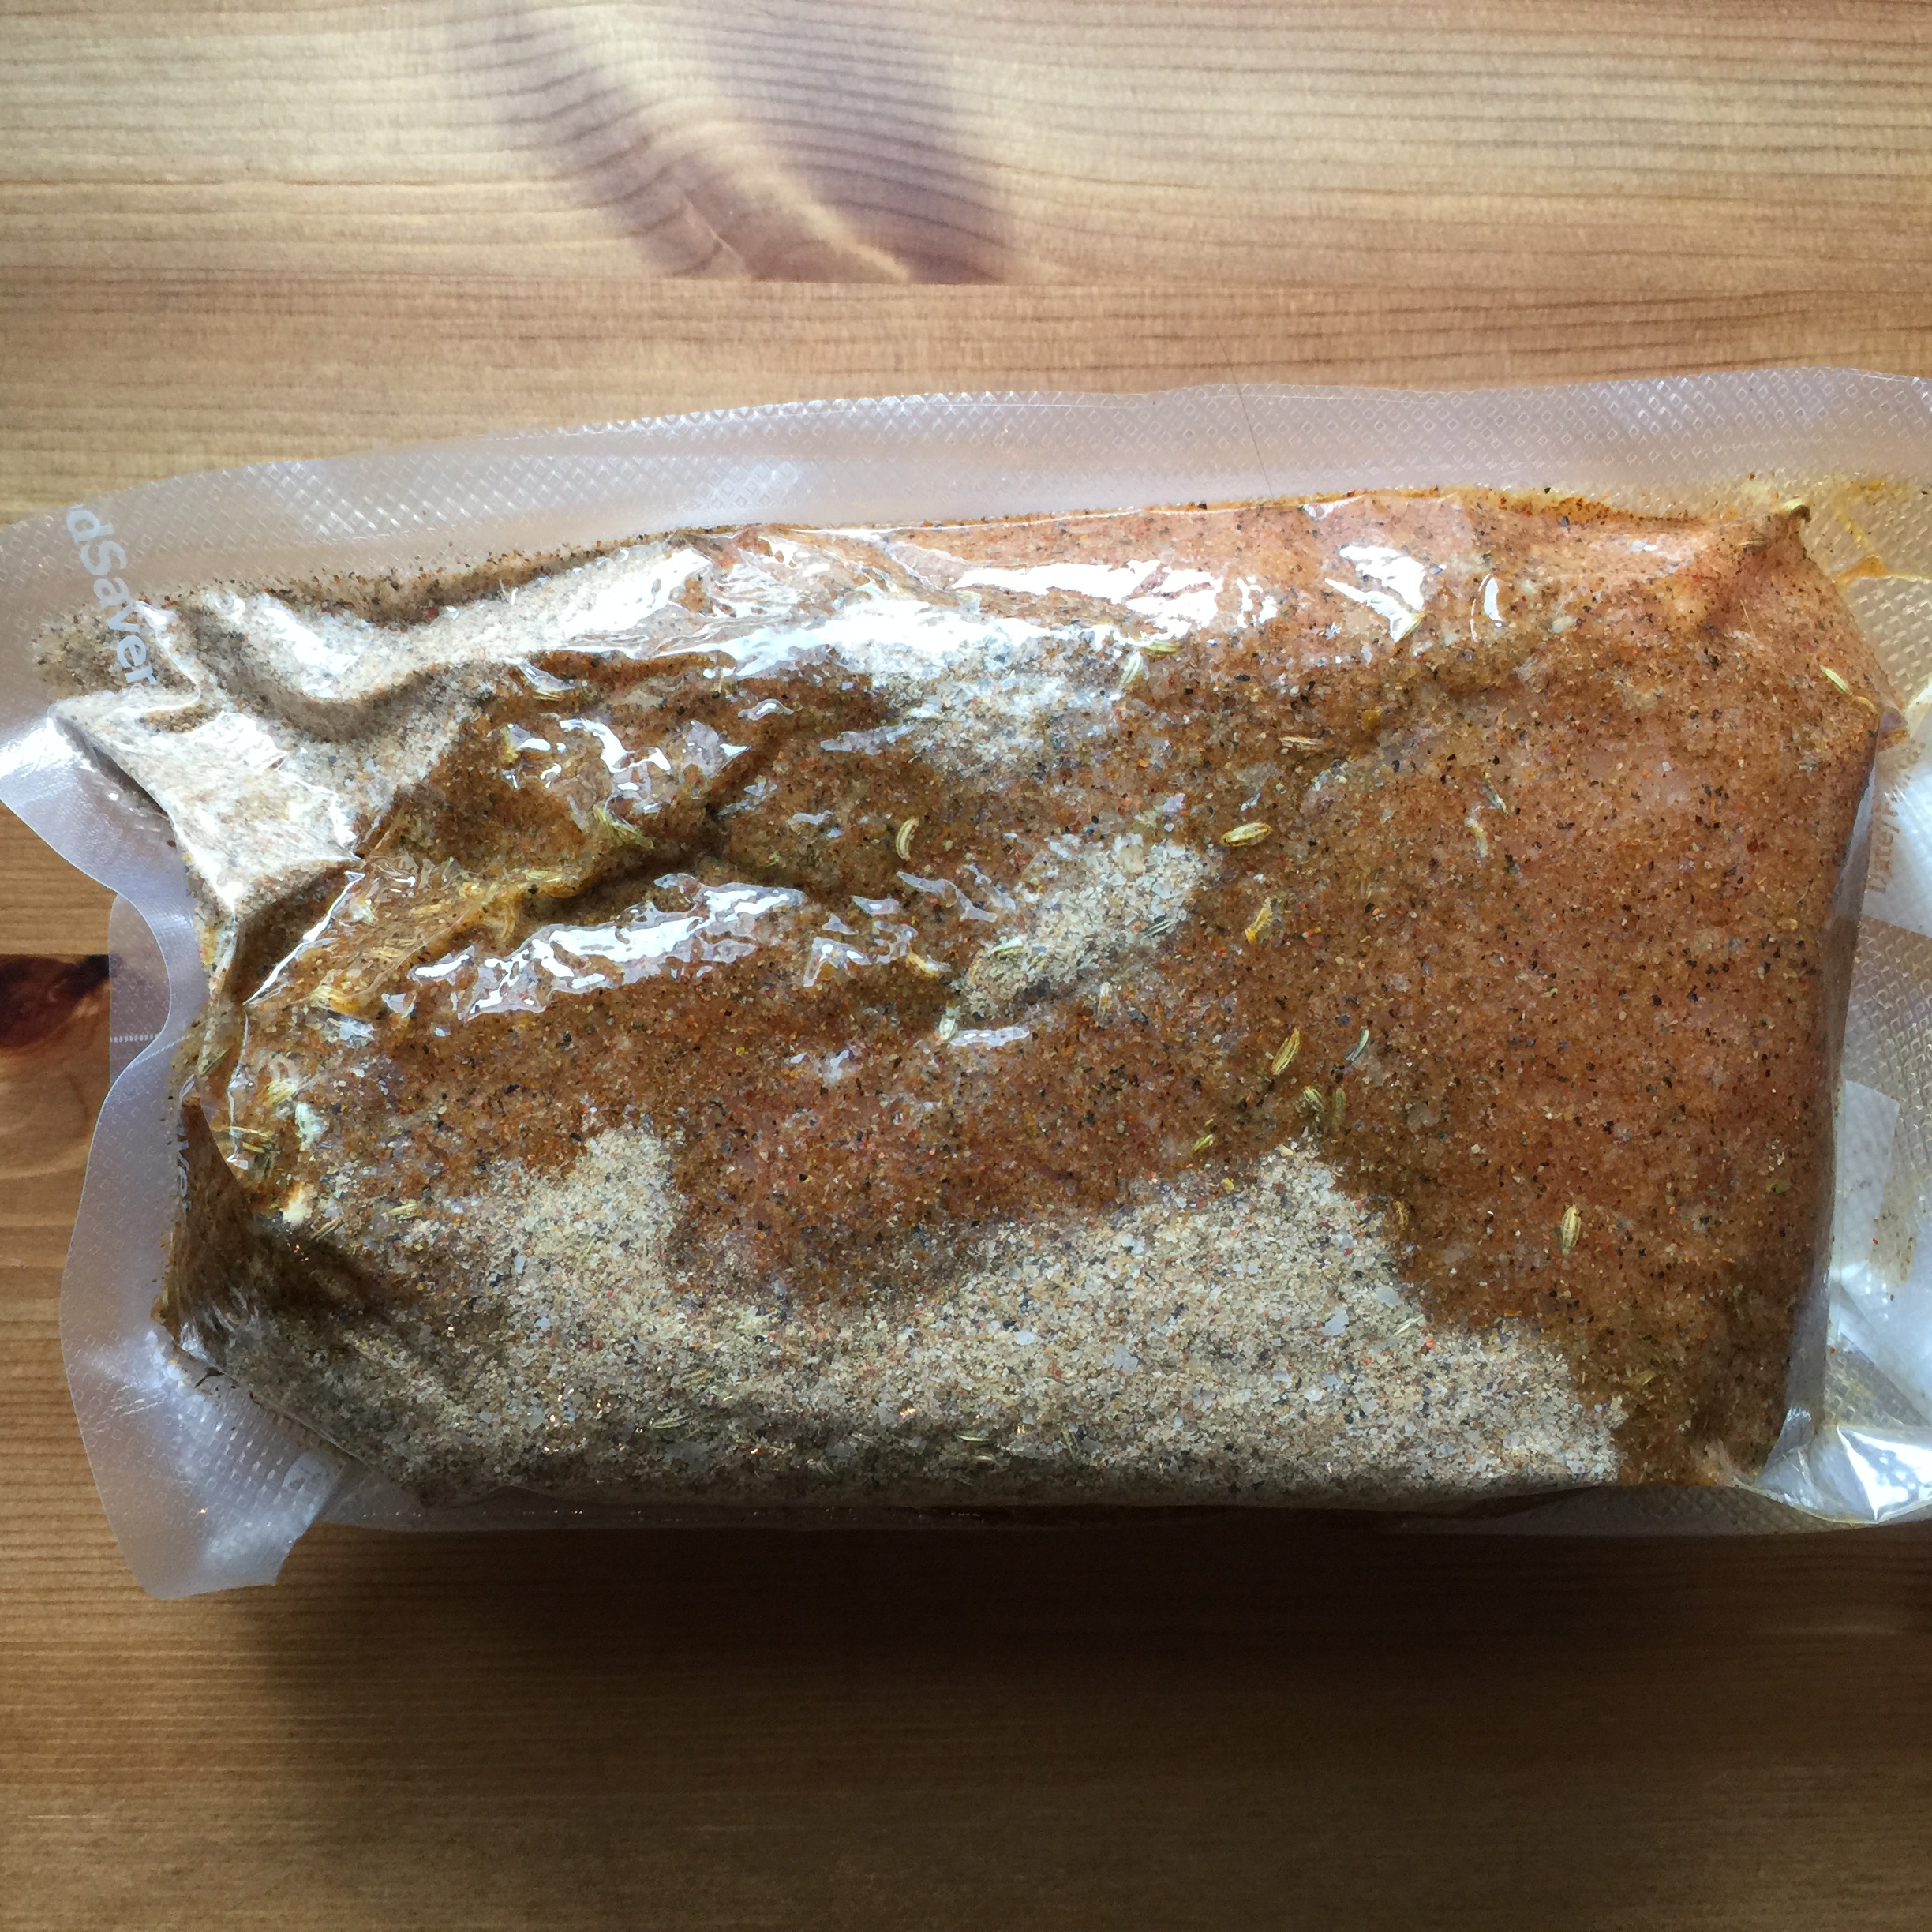
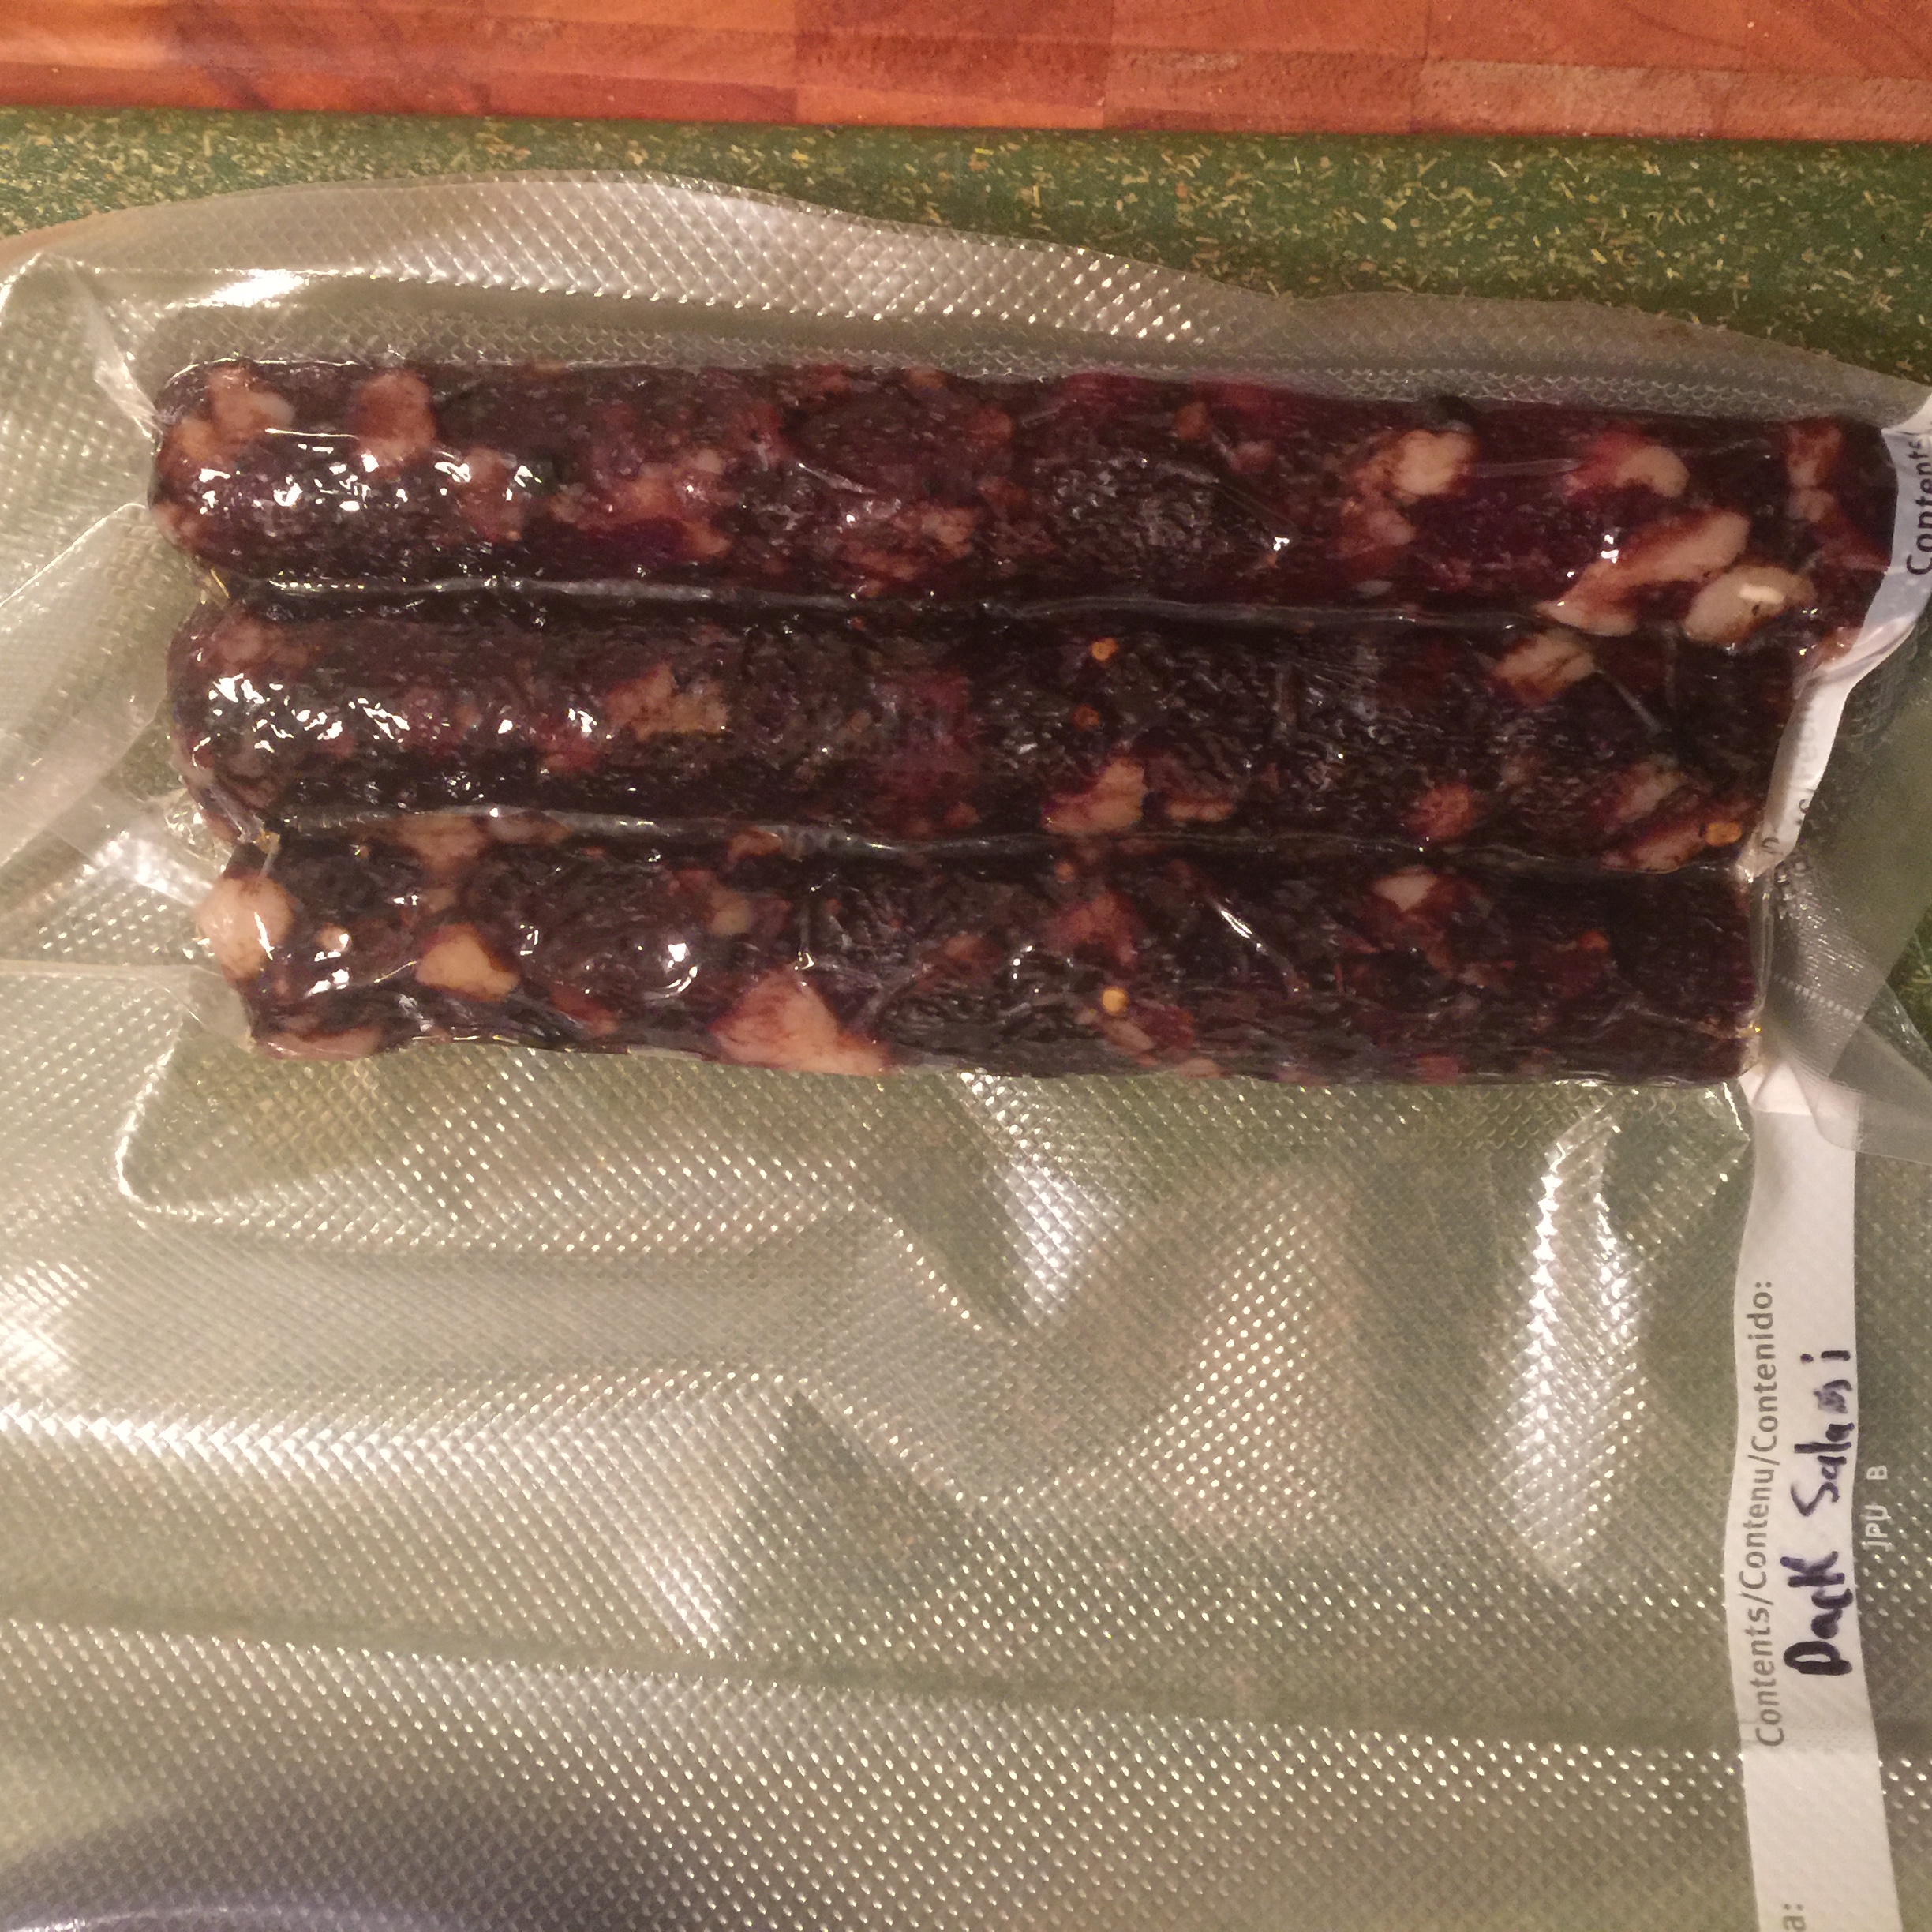
I took the salami and vacuum sealed them, before putting them in the fridge for long term storage.

image(39)


Disclaimer: Meat curing is a hobby that comes with inherent risks. We can all do things to limit this risk by educating ourselves about the process and the utilizing the safest known methods to create our products. This website is for educational purposes only, and all experimentation should be done at each individuals own risk.


Filed Under: Charcuterie Tagged With: charcuterie, cured meats, diy, duck, duck salami, halal, homemade, kosher, salami, salami d'anatra

Non-Pork Fat Options for Salami

March 9, 2016 by AOG 1 Comment


Ratings of the Best Non-Pork Fat Options for Salami:

  1. Brisket (cow) Fat: Best option, low melting point, palatable taste
  2. Duck Fat: Second best option, harder to work with due to room temperature melting point, great taste
  3. Lamb/Goat/Cow Fat: Easy to access, may have strong flavor, higher melting point
  4. Fat Replacer: Fine for increasing fat mouth feel, no chunks of fat, doesn’t really cut it
  5. Lamb tail fat: Hard to find, personally have never used, seems promising

Overview:

Most salami that we see in the stores and restaurants today are made out of pork meat and fat. Even salami that are made from different animal meat sources often use pork fat due to its beneficial properties. It has a great flavor and a lower slip melting point (the way that the melting point of a waxy solid, such as a fat, is measured and reported) than most other animal fat, although not so low that it becomes a liquid on the lower end of room temperature. This means it maintains its integrity when in the salami, but will melt in your mouth when you take a bite. Basically, creating perfection.

However, some people choose not to eat pork. Having friends and family who are pork free, I have done a lot of research into finding pork free charcuterie recipes. For the most part, this hasn’t been too hard. There are many pork free whole muscle cure alternatives. When I turned my attention to salami though, I faced a conundrum. Most recipes that use non-pork meat still use pork fat because of its aforementioned qualities. I found historical evidence of halal salami producers using lamb tail fat, but it is notoriously difficult to find in most areas of the United States. Some stores sell “fat replacer” to help with the mouth feel that fat produces, but is not the same as having real chunks of fat in your salami.As a pork eater myself, I cannot deny the pleasure of pork fat, as it melts in your mouth, creating sinful bliss. I was determined to find a way to replicate this so that my non-pork eating friends could enjoy the same luxury as me.

As a side note, I discuss these fat options in terms of salami because that is what I have focused on making. It can also apply to sausage and other charcuterie products.


Background:

As a chemist by training, my initial instinct where to look into the chemical composition of the fat of different animals compared to pork. The slip melting point will vary based on the ratio of different fatty acids in the fat itself, therefore it is important to know what types of fatty acids each fat you are considering uses has, and in what ratios.

There are saturated and unsaturated fatty acids. Saturated fatty acids tend to “stack” better together, and are therefore are harder to “pull apart”, and tend to have a higher melting point. Unsaturated fatty acids have double bonds which introduce a kink into the molecule. This means they cannot stack as well, are easier to “pull apart”, and therefore have a lower melting point.

Stearic Acid is an example of a saturated fatty acid:

800px-Stearic_acid.svg

Oleic Acid is an example of an unsaturated fatty acid:

Oleic-acid-based-on-xtal-1997-2D-skeletal

As you can probably see from their structure, saturated fats like stearic acid have no problem stacking together. This makes them harder to pull apart, as discussed above. Whereas, from the structure of oleic acid, you can see that there are kinks on the molecular structure that make it less stackable, and therefore make it easier to pull apart. (These terms are not 100% scientifically accurate but are being used to illustrate the concept, feel free to read the source material for a more scientific discussion of the forces that hold these molecules together.)

In general, animal fats have a slip melting point between 22-40 C/71-104 F. It turns out, the ratio of unsaturated to saturated fatty acids plays a very important role in creating these slip melting points.

The composition of the fats from different animals varies based on their species, their diet, their genetics, and the area that the fat is taken from. These are all important factors that one must consider when looking at fat sources. For example, some animals are purposely fed a particular feed in order to lower their fat slip melting point. Other animals have been engineered to have increased marbling with lower slip melting points of that fat.

So, what does this have to do with our quest for a non-pork fat source for salami? A lot, actually. In general, pig fat tends to have a slip melting point around 30C, which varies based on feed, genetics, and cut. Cow fat, the most commonly available substitute, has an average slip melting point of 40C. This difference is enough to change that melt in your mouth feel that well cured pork products succeed in producing.

MP of fats


Brisket (cow) Fat:

Interestingly, fat from the brisket cut of a cow has a very unique composition. It is high in unsaturated fats like oleic acid, and low in saturated fats like stearic acid. This means that the fat from the brisket area of a cow has a much lower melting point than cow fat in general; in fact it averages around 25 C. This is a slip melting point as low as most pork fat, making brisket fat an ideal substitute for pork fat.

slip melting points cow cutsThe data shows that the fat from areas that have lower concentrations of saturated fats have a lower slip melting points. Brisket fat has fewer saturated fatty acids, and therefore a lower slip melting point, as illustrated in the following figure:

slip melting points cow cuts scatterplot

Since the way that animals are raised, their genetics, and their feed play such an important role in the overall taste of the fat, I would love to see more research looking at these factors as well. One example of ongoing research is the genetic engineering of Japanese black cattle (think Waygu or Kobe beef) which have been engineered to have higher ratios of unsaturated fatty acids, better marbling, and a lower slip melting point. In addition, the distinctive taste of jamón iberico de bellota fat is created by a combination of genetics, European acorn feed, and the way the pigs are raised. Farmers in the United States (and abroad I am sure as well) are doing a lot to understand how important these factors are for their pigs, and are doing really good work ensuring that they raise pigs that not only have higher ratios of unsaturated fatty acids but great marbling and taste. All of these factors are important in creating delicious cured meat products.

Overall, there is some really interesting research being done on this topic, and for those who are scientifically minded I suggest taking a look into the literature. In the references below (where the figures have come from), I have referenced two pamphlets that have been written for the general public consumption, which I have found very fascinating. They have their own references page, where more information on individual studies can be found.


Duck Fat:

Duck fat is my second recommendation for fat to use in salami. It is a particularly palatable fat, but does have a slip melting point that is around room temperature, some sources saying that it is around 77F/25 C. This can make working with it tricky. However, as long as you keep your temperatures low and work fast, there is no reason it can’t be used. In addition, if you are working with an old world culture, many suggest a lower fermentation temperature anyway. I found that using a fermentation temperature of 75F/23-24C worked perfectly for duck fat salami.

I should mention here, that by duck fat, I mean actual fat that has been taken off of a duck, not rendered duck fat like you can buy at the supermarket. Rendered duck fat does not have the collagenous matrix that raw duck fat from the animal has, and won’t hold up nearly as well in salami making. I will be posting the recipe of an all duck salami that I have made with duck fat, in order to give more insight into how this process can go smoothly and create a delicious final product.


Lamb/Goat/Cow Fat:

I assume that if you are making non-pork salami, you probably have a piece of meat that has both non-pork meat and fat. Using this fat is my third favorite option. The benefits are that the fat is on hand already. With this method, you make sure that nothing goes to waste.

One aspect of using this fat, which may be a benefit or a drawback (depending on your opinion) is that fat tends to store a lot of the flavor of the animal. Adding lamb or goat fat may add a stronger flavor to the salami than desired. Then again, that may be the exact desired outcome.

The big downside is the texture. The slip melting point of most commercially available animals, in most cuts, will be higher. This means the salami will not “melt in your mouth” in the same way as a pork salami will. However, talk to farmers, see how they treat and feed their animals. You may be able to find animals that have fat that is more amenable to your uses. Just because something commercially available may not be perfect, doesn’t mean the right option isn’t out there if you do your research and talk to the right people.


Fat Replacer:

Fat replacer is a commercially available product that is added to salami to create the mouth feel of fat without actual fat. It is made of cellulose, xanthum, and konjac. All of these are used to “mimic” the texture of fat. There are claims that it is good for “healthy” salami. I personally doubt any health claims the company may make, but if you are trying to make a pork free (or even vegetarian) salami and want to use this as a substitute, it’s not awful. That being said, I would use it in conjunction with actual fat as mentioned above.


Lamb Tail Fat:

The elusive lamb tail fat. As discussed above, many factors play a role in the slip melting point of fat. Of particular importance are the genetics of the animal, its feed, and the area you are taking the fat from. This is especially true for lamb tail fat. While most lamb have thin tails these days, certain breeds have fat tails. The fat in these tails, due to physiological reasons, has a lower slip melting point. As discussed above in the case of brisket cow fat, this creates that “melt in the mouth” taste that is so appealing.

I cannot say too much more about this, since I have never used it myself. I would love to try it in the future however. It seems to be used in many traditional halal products, so if you can get your hands on it and try it, I would imagine that it would be worth it.

People who know way more about lamb tail fat than me have written blog posts on it that are worth reading:

http://www.jennifermclagan.com/fat-tailed-lamb

http://www.anissas.com/those-fat-tails/


Summary:

All in all, these are some good non-pork alternatives to fat for salami or sausage making. I did some research, stumbled upon some things, and tried them out. This is by no means an extensive list, nor will it work for everyone. I suggest everyone to do as much research as they can and come to their own conclusions. I welcome any feedback from people who make non pork salami and any methods they have found to be useful.


References:

http://www.beefissuesquarterly.com/CMDocs/BeefResearch/PE_White_%20Papers/Marbling%20-%20Management%20of%20cattle%20to%20maximize%20the%20deposition%20of%20intramuscular%20adipose%20tissue.pdf

http://animalscience.tamu.edu/wp-content/uploads/sites/14/2012/04/Handout-3-Melting-Points-of-Animal-Fats1.pdf

https://en.wikipedia.org/wiki/Stearic_acid

https://en.wikipedia.org/wiki/Oleic_acid

Filed Under: Science Tagged With: brisket fat, charcuterie, cured meat, duck fat, fat, fat replacer, halal, kosher, lamb tail fat, pork-free, salami, science

Modern Mosciame

March 6, 2016 by AOG Leave a Comment

Mosciame. Mojama. Muxama. That seductive, yet elusive charcuterie product that I have been trying so hard to recreate. The taste of which transports you to sunlight days, with sea salt breezes, where nothing ever seems to be urgent, pressing, or stressful. The pace of modern day life seems to be slowed down by simply a taste of this delicious cured product. Obviously, once the idea of recreating this transportive taste took hold of me, I couldn’t rest until it was done satisfactorily. And finally, I can rest, happy with the success of the process that I will detail here.

IMG_1199

In this post, I will detail my second attempt at making modern style mosciame. You can read about my first attempt at making modern mosciame here. After my first attempt at making modern style mosciame yielded such a strong flavored product, I decided to try to make one that was milder and had more universal appeal. In order to do this, I limited steps that I thought may have increased its strong and earthy flavor. I didn’t use a starter culture in the cure, I used cheesecloth instead of a beef bung for casing, I lowered my RH to 70%, and my temperature to 50 F in order to stimulate more rapid weight loss and to discourage excessive mold growth.


Curing (2 weeks):

The meat was cured using an equilibrium cure for 2 weeks in the normal refrigerator.

Mosciame cure ratio with accurate ratios

image(3)

After this point, the cure was rinsed off and it was patted dry.

image(2)


Casing (1 hour):

The tuna was then cased using cheesecloth.

image(1)


Drying (1 month+, until 30% of weight is lost):

Temperature: 50F/10C, Humidity: 70% RH

image

It was hung in the curing chamber in order to dry.

image(10)

After 30 days, it had lost 30% of its weight and was pulled from the curing chamber.

Mosciame weight loss over time new trialIMG_1188


Tasting:

The mosciame was taken out of its casing, scrubbed clean with white vinegar, and patted dry.

IMG_1189

IMG_1190

I was excited to try this, and boy oh boy, I was not disappointed.

IMG_1204

This mosciame has the complex umami flavor you’d expect of aged tuna, without some of the stronger more yeasty overtones that the first modern mosciame trial had. It seems like one or more of the changes that I made in my protocol made this process work a bit more traditionally and created a product with more universal appeal.

IMG_1194

Sliced thin with my cuchillo jamonero, or my jamón carving knife, this product is amazing.

IMG_1203

It is always nice when one of your experiments works! While I will still sneak slices of my first modern mosciame trial for myself as a treat, I have a feeling that I will be slicing this second modern mosciame product more often for friends and family.

IMG_1200

Stored under vacuum seal for future uses!

IMG_1196


Disclaimer: Curing fish is a hobby that comes with inherent risks. We can all do things to limit this risk by educating ourselves about the process and the utilizing the safest known methods to create our products. This website is for educational purposes only, and all experimentation should be done at each individuals own risk.

Filed Under: Charcuterie Tagged With: atum, atún, charcuterie, diy, homemade, mojama, mosciame, muxama, tonno, tuna

Traditional Modern Mosciame

March 6, 2016 by AOG 2 Comments

There are traditional and more modern ways to create charcuterie products. Traditional methods may rely on the use of caves or more natural spaces that have the ideal humidity and temperature in order to allow the cured products to dry over time. Modern methods tend to use curing chambers to recreate these nature environments. You can see more about curing chamber instructions here and here.

I have previously discussed the history behind making mosciame and my first attempt at doing it in a curing chamber here. I have since perfected this method, as described here.

Here, I will discuss what I call the traditional modern method. Today, amidst concerns of pollution, instead of leaving their meat to air dry outside, some Italians use an oven at around 77-86 F for 4-6 hours to dry the meat. It can be pressed into a uniform shape if desired, and can be stored in olive oil.

I decided to try this method with a beautiful piece of sushi grade tuna.

image


Curing (48 hours):

I cut the piece of tuna in half, and placed them in two different excess cures; simple and soy maple.

image(1)

I allowed the fish to cure for 48 hours while being pressed.

image(2)

After 48 hours, I removed it from the cure and rinsed it off.

image(5)


Drying (7 hours):

Temperature: 35C/95F

I placed it in the dehydrator at 35C for 7 hours.

image(6)

After this time, the mosciame lost ~30% of its initial weight.

image(13)

I removed it from the dehydrator and brushed it with olive oil.

m7


Tasting:

I sliced it thin, and served it two ways:

image(16)

m5

It was awesome. Way better than I expected from a dehydrator method. I am a fan of the slow curing process, but this definitely created a delicious final product that is worth trying if you don’t have access to a curing chamber or want something a bit quicker.

Stored in a vacuum sealed bag, it awaits more tastings in the future.

m4


Disclaimer: Curing fish is a hobby that comes with inherent risks. We can all do things to limit this risk by educating ourselves about the process and the utilizing the safest known methods to create our products. This website is for educational purposes only, and all experimentation should be done at each individuals own risk.

Filed Under: Charcuterie Tagged With: charcuterie, cured meat, diy, homemade, mojama, mosciame, tonno, tuna, tuna prosciutto

Brine Cured Olives

March 4, 2016 by AOG Leave a Comment

Here, I will be writing about the process of making brine cured olives. I previously wrote about the process of making dry salt cured olives. Dry salted cured olives are some of my favorite types of olives, but some people are less partial to them due to their increased bitterness and strong taste compared to their brine cured counterparts. As you can see, there are some distinct differences in brine cured olives (top) and dry salt cured olives (bottom):

image(40)

Here, I will detail the process of using a brine cure to cure olives. This method takes longer than dry salt curing olives, but is able to leach away more of the bitterness. It is a fermentation process, so if you have a fermentation jug or set up, now is a good time to use it. Otherwise, any vessel should do, just make sure to cover the top loosely to avoid contamination with outside sources and to allow for gas release. CO2 will be released during the fermentation process, and can cause problems if not given an outlet.


Method: Similar to the salt cured method, I used black olives. The first step is to sort them for deformities, and wash the pile of good olives, and dry them off.

image(117)

Then, the olives will be stored in an appropriate container. Add a medium strength brine (.75 cups per gallon of cool water) to cover them. I used a fermentation jug, and two mason jars with fermentation air lock set ups.

image(123)

Allow the olives to sit in the initial medium strength brine for 1 week at room temperatures (60-80 F).

After 1 week, pour out the olives and the medium strength brine.

image(26)b

Put the olives back into their containers, and cover the olives in a strong brine (1.5 cups of salt per gallon of cool water).

In the following picture, you can see the color (and bitter compounds) being leached out by the consecutive brine changes. On the left, the olives are in their initial brine solution, on the right, they have had their brine solution changed out. They are noticeably lighter on the right.

image(28)b

Every month, replace the brine solution with a new strong brine solution (1.5 cups of salt per gallon of cool water).

Keep this up until the olives are to your liking. The longer they cure, and the more brine changes that are done, the less bitter that they will be.

After 2-3 months, the olives are generally ready for consumption.


To store the olives: Leave the olives in a cool, dark place in a strong brine to store them (up to 12 months) in an airtight container. I used a mason jar with a vacuum sealed top.

image

To eat the olives: Soak in water over night (optional) to decrease the saltiness of the olives. Toss in olive oils and herbs, and serve at room temperature.

image(1)


Resources:

http://anrcatalog.ucanr.edu/pdf/8267.pdf

Filed Under: Preservation Tagged With: black olives, brine, brine cured, diy, fermentation, homemade, olives

Dry Salt Cured Olives

March 3, 2016 by AOG 2 Comments

Have you ever tried a raw olive off of an olive tree? It makes me wonder how anyone ever unlocked the key to these bitter fruits. In the Mediterranean region in particular, olive trees abound. One taste of a raw olive directly off the tree would be enough to set anyone off the fruit entirely. However, at some point in history, it was discovered that it was possible to use salt and brine solutions to store the olive harvest as well as to leach away the bitter compounds, oleuropeins. And so, our love affair with olives and olive oil began.

In the beginning of the season, olives are green. As they spend more time on the tree, they darken and become black. Both green and black olives can be cured.

Olive-Tree

I have been interested in curing my own olives for a while now, but geographically, I don’t have access to olive trees. This year, I placed an order with a farm in California, and received 17 lbs of black olives.

image(116)

I decided to cure the majority using a brine method, and the rest using a dry salt cured method.


Methods: In this post, I will be discussing the dry salt cured method of preserving olives.

First, you have the raw black olives. You want to sort them for deformities, and wash the pile of good olives, and dry them off.

image(118)

After you have sorted the good olives from the bad olives, weigh the olives that you have. Mix the olives to salt in a 2:1 ratio (aka for 2 lbs for olives, mix in 1 lb of salt). Mix them thoroughly.

Next, you want to set up a container to hold the salt and olives for the next 6-8 weeks at room temperature (60-80 F). I used a cheese mold lined in cheesecloth that worked out well.

image(120)

Pour the olives into the container, cover with a new layer of salt, and lay the tails of the cheesecloth over the olive and salt mixture.

image(121)

Once a week, re-mix this mixture by pouring the olives and salt into another container, mixing it around, and pouring it back into the cheesecloth lined cheese mold.

image(122)

After 6-8 weeks, the olives are most likely ready.

image(123)

Pour the olives out over a sieve to get rid of the extra salt, and allow them to dry overnight.

image(24)b

image(23)

image(22)


To store the olives: Make a 10:1 ratio of olives to salt (aka 10 lbs of olives to 1 lb of salt). Mix this together, and store in an airtight container at room temperature (use within 1 month), in the refrigerator (use within 6 months), or in the freezer (use within 12 months).

I stored mine in a mason jar that I sealed using a vacuum sealer, and they are now safely stored in the fridge.

To eat the olives: Take the olives out of storage, and boil them for a few minutes (optional step). Allow them to air dry, and soak them in olive oil with herbs. I have found that they are best if they are allowed to marinate in the olive oil and herbs at least overnight if not longer.

image(27)c


Resources:

http://anrcatalog.ucanr.edu/pdf/8267.pdf


Filed Under: Preservation Tagged With: black olives, curing, diy, fermentation, homemade, olives

Winter Cured Lamb Prosciutto

February 28, 2016 by AOG 8 Comments

As discussed previously, there are a number of ways to make lamb prosciutto. Because lamb prosciutto is made with the leg of a lamb, it has a bone running through it. You can cure the lamb prosciutto with the bone in, or take it out. If you take out the bone, you can either cure the lamb prosciutto in two separate pieces or tie it together tightly to try and get rid of any air pockets from where the bone used to be. I have tried both of these methods which you can see at the following links:

  • Lamb Prosciutto (cured in two separate pieces)
  • Lamb Prosciutto (tied together as a roast, and cured)

I personally liked curing the lamb prosciutto in two pieces. Therefore, I cured my most recent lamb prosciutto in two pieces with two different winter spice cures.

image(10)


Curing (3 weeks):

I used two different spice cures for the two pieces of lamb prosciutto; a traditional lamb cure and a winter spice lamb cure.

lamb prosciutto cure ratios traditional winter lamb prosciutto cure spiced lamb winter 1

I allowed the leg of lamb to cure in their spice cures for 3 weeks under vacuum seal.

image(2)b


Casing (1 hour):

I used beef bung casing to case the meat, and used butcher netting to tie it up and get it ready to hang. After this, I used a toothpick to puncture any air holes that may have been evident and could harbor the growth of bad bacteria.Th meat was weighed, and was ready to go into the curing chamber.

image(48)

image(46)


Drying (1 month+, until 30% of weight is lost):

Temperature: 54F/12C, Humidity: 70-80% RH

After being cased, the lamb prosciutto was put directly into the curing chamber to join the other meats that were hanging.

image

The meat was allowed to lose ~30% of its initial weight, and was pulled from the chamber.

lamb prosciutto weight loss #1 lamb prosciutto weight loss #2


Tasting:

Lamb prosciutto is one of my favorite cured meats. The traditional lamb prosciutto was done first. The first slices into it were heavenly.

image(19)

Later, when both of these were ready, I did a taste test with what I had left of my Arthur Ave lamb prosciutto.

image(16)


image(9)

Great alone, or as I always like to say…meats that cure together, stay together.

lamb prosciutto

Ahhhh….beef bresaola, lamb prosciutto, lamb salami, and duck salami. All out for a day of fun.

image(15)


Disclaimer: Meat curing is a hobby that comes with inherent risks. We can all do things to limit this risk by educating ourselves about the process and the utilizing the safest known methods to create our products. This website is for educational purposes only, and all experimentation should be done at each individuals own risk.


Filed Under: Charcuterie Tagged With: charcuterie, cured meat, diy, lamb, lamb prosciutto

Arthur Ave Lamb Prosciutto

February 27, 2016 by AOG 4 Comments

Lamb prosciutto, or prosciutto d’agnello can either be made with the bone in or bone out. If it is made with the bone in, it is slightly harder to deal with, and it is harder to slice on a commercial slicer. If it is made bone out, you have to deal with the air pockets that the removal of the bone creates. There are two ways to deal with this; you can cure it in two separate pieces with no potential for air pockets, or you can cure it in one piece by tying it together as tightly as possible to eliminate any air pockets (some people use meat glue to eliminate any chances of air pockets when following this procedure). Air pockets are dangerous because they create an anaerobic environment which can promote the growth of dangerous bacteria.

My first attempt at lamb prosciutto turned out remarkably well, even with as little as I knew at the time. I bought a bone out leg of lamb, and cured it in two separate pieces. You can see the details here: Lamb Prosciutto Attempt #1.

Since my initial attempt, I have made lamb prosciutto again:

  • The second time, emboldened my previous success, I decided I wanted to try to cure a bone out leg of lamb, tied tightly together in one piece. I bought a bone out leg of lamb from a specialty Italian butcher, who butchered it and tied it together like you would for a roast.
  • The third time, I decided to go back to my method of splitting the bone out leg of lamb into two pieces to cure, in order to experiment with two different spice cure.
  • In the future, I plan to cure a bone in leg of lamb, and hand slice it with my cuchillo jamonero, or my specialty jamón carving knife.

Here, I will detail the process that I followed for my second lamb prosciutto attempt. In a future post, I will discuss the lamb prosciutto that I cured most recently using two different winter spice cures.


I was able to buy a leg of lamb from an Italian butcher shop at Arthur Ave in the Bronx. I explained to the butcher there what I wanted, and he took the time to tightly tie the leg of lamb together into a roast.

image(3)


Curing (3 weeks):

I have updated the curing ratios to reflect my most recently used values.

lamb prosciutto arthur ave

image(4)

I allowed the leg of lamb to sit in the cure for 3 weeks under vacuum seal.

image(2)

image(1)


Casing (1 hour):

The meat was cased in a 100 mm collagen casing. After this, a toothpick was used to puncture any air holes that may have been evident and could harbor the growth of bad bacteria.

I then sprayed my meat with Bactoferm Mold 600, which is a single strain culture that contains freeze-dried form spores of Penicillium nalgiovense. This promotes beneficial mold growth and tends to keep any potentially dangerous mold growths at bay.


Drying (1 month+, until 30% of weight is lost):

Temperature: 54F/12C, Humidity: 70-80% RH

The lamb prosciutto was put directly into the curing chamber at this point. If you have read my first lamb prosciutto post, you know that I used to use a fermentation stage step. I have found this to be unnecessary for whole muscle cured products, and now move directly from the curing and casing stages to the drying stage.

image(17)

The meat was allowed to lose ~30% of its initial weight, and was pulled from the chamber.

image(16)

image

It was taken out of its casing, rinsed off with white vinegar, and patted dry.

image(1)


Tasting:

Ahhh the flavor of lamb prosciutto, one of my all time favorites.

image(5)

This one looked a little gnarly, due to the butcher string that kept it together.

image(9)

Sliced thin, the taste was great…

image(4)

However, compared to my previous attempts, I didn’t love the aesthetics of this final product. That is why for my next attempt, I cured my lamb prosciutto in two pieces. I also will be trying a bone in lamb prosciutto in the future to avoid this problem. This product was stored under vacuum seal.

image(26) (2)


Disclaimer: Meat curing is a hobby that comes with inherent risks. We can all do things to limit this risk by educating ourselves about the process and the utilizing the safest known methods to create our products. This website is for educational purposes only, and all experimentation should be done at each individuals own risk.

Filed Under: Charcuterie Tagged With: charcuterie, cured meat, lamb prosciutto, prosciutto

Goat Prosciutto

February 25, 2016 by AOG Leave a Comment

Goat prosciutto caught my eye early on when I was learning the craft of curing meat. Luckily, I have access to a large number of halal butchers, and was able to procure a bone in leg of goat fairly easily. This is the first cured meat product I made that was bone in, and I was excited about the possibility. Because of how lean a leg of goat is, this project is done fairly quickly, so it is a good project if you are looking for one with a quicker turnaround.

Goat prosciutto is also called violino di capra, occasionally prosciutto di capra, or mocetta (when it is bone out).  It gets the name violino di capra because when one is carving the cured meat product, it looks like one is playing the violin (not the easiest process to take a photo of when you are by yourself). Melodious AND tasty, you can’t beat that.

image(11)


Curing (suggested 2 weeks):

So, this project was a bit of a mess from the start. I bought the goat leg on a bit of a whim because it looked so beautiful that I couldn’t resist.

image(159)

I didn’t have my scale with my at the time, so I couldn’t weigh my ingredients. I also didn’t have some of my critical ingredients, such as nitrates, which I had to add halfway into the curing process. Basically, I picked some spices I thought would go well with goat, measured by eye, and added them to the curing mixture. (See my other for posts for suggested curing ratios to use)

image(181)

The spice cure was rubbed on the goat leg and it was allowed to cure.

image(185)

My suggested cure time is 2 weeks, but because I got distracted and busy, this one stayed in the cure about 6 weeks.

image(187)


Casing (1 hour):

After I remembered the meat was hanging out in my fridge in the cure, I rinsed it off and patted it dry.

image(5)

A bone in piece of meat is a difficult one to case. We ended up using a 100 mm collagen casing, which served its purpose.

image(9)

It was tied in butcher string, and hung in the curing chamber to dry.

image(12)


Drying (1 month+, until 30% of weight is lost):

Temperature: 54F/12C, Humidity: 70-80% RH

The meat was weighed and tracked for weight loss during its time in the curing chamber.

image(15)

It was allowed to lose ~30% of its initial weight, and was pulled from the chamber.

image(23)


Tasting:

So… my first tasting of this product was, underwhelming. It was overly salted (due to my inexact cure) and didn’t have the beautiful bright red color I expected to see (perhaps due to my late addition of nitrates).

image(22)

However, after spending a few months under vacuum seal, I tried it again, and the flavor was much improved!

image(10)

image(12)


It still was too salty for my taste, but it had a great, strong meaty flavor that came out. It is stored under vacuum seal in my fridge now, taken out for tastings along the way.

image(21)

My goal is to redo this experiment, with a carefully measured cure, and hopefully create an even better final product.


Disclaimer: Meat curing is a hobby that comes with inherent risks. We can all do things to limit this risk by educating ourselves about the process and the utilizing the safest known methods to create our products. This website is for educational purposes only, and all experimentation should be done at each individuals own risk.

Filed Under: Charcuterie Tagged With: charcuterie, cured meat, goat, goat prosciutto, mocetta, violino di capra

Turkey Bresaola

February 24, 2016 by AOG 1 Comment

So, let’s delve into some lesser known versions of bresaola. Bresaola di tacchino, or turkey breasaola, is a lesser well known cured meat product. I have seen it advertised in Italian as a “healthy” alternative to the traditional cured meats which may be red meat based and have a higher fat content. I don’t know if one could really consider it healthier, not do I really care too much. I believe that in moderation, there is nothing wrong with making and eating cured meats. This is especially true when you make your own and control the quality of meat and levels of salt and nitrates that go into it. My interest in bresaola di tacchino was mostly curiosity driven. I had never tried it before, and was very curious about the flavor that a cured and dried turkey product would have.

Honestly, I don’t like turkey. I think it’s a waste of a meat. Thanksgiving is only redeemed by the Italian food we use to accompany it, and I never would consider adding turkey as a cold cut to any sandwich. Before I made the bresaola di tacchino, turkey bacon was the only turkey product I liked. Fried and crispy, although not the same as regular pork bacon, I was able to see its appeal.

I bought a large turkey breast from Wegmans with the idea in mind to make it into turkey bacon. That never happened, and my smoker situation was up in the air at the time, so after keeping it in the freezer for a couple of months, I decided to pull it out and to try to make the elusive bresaola di tacchino. When I started this project, I had the lowest of low hopes, and just did it, basically to see what would happen.

Best. Decision. Ever.

image(20)


Curing (2 weeks):

The turkey.

image(159)

It was difficult to find much information online about people who have cured their own bresaola di tacchino. I found a few recipes in Italian that were done in very traditional ways, and not ideal for what I wanted to do. So I did what any good experimenter does; I made it up. I tried to create a cure that would complement the turkey, and followed my basic operating procedure.

image(158)

turkey curing ratio

I was slightly worried because turkey is poultry, and I know it can be more prone to carry certain diseases, but I didn’t find too much information on any changes that needed to be made when curing turkey compared to other meats, so I went ahead as usual. I assume that the usual safeguards can help prevent the spread of disease in most cases, but if you plan on doing this yourself, please be sure to do your own research on safety issues and make sure you are comfortable with the risk level.

The bresaola di tacchino was rubbed in the cure spices, and then placed in a vacuum sealed bag in order to cure for 2 weeks.

image(160)

image(161)

After the bresaola di tacchino was cured for 2 weeks, the cure was rinsed off and the turkey patted dry.

image(178)


Casing (1 hour):

I encased the bresaola di tacchino in a beef bung casing and used butcher string to wrap it up. I used a clean toothpick was used to puncture any air holes that may have been evident and could harbor the growth of bad bacteria.

image(179)

image(180)

I didn’t spray this meat with Bactoferm Mold 600 (Penicillium nalgiovense) but I put it in the curing chamber with meats that had been inoculated, so over time the mold jumped onto it. The use of penicillium nalgiovense promotes beneficial mold growth and tends to keep any potentially dangerous mold growths at bay.


Drying (1 month+, until 30% of weight is lost):

Temperature: 54F/12C, Humidity: 70-80% RH

After being cased, the bresaola di tacchino was weighted.

image(181)

It was hung to dry in the curing chamber, set to its usual settings, and its weight lost over time was tracked.

image

It was allowed to lose ~30% of its initial weight, and was pulled from the chamber.

image(1)

turkey weight loss

The bresaola di tacchino was uncased and rinsed down with white vinegar and patted dry.

image(3)


Tasting:

Now. This is where I was surprised. I pulled the bresaola di tacchino, rather unenthusiastically, with a few other experiments I was more excited about to be frank. I sliced them up and offered them around. Unanimously, we ALL decided that was LOVED the bresaola di tacchino. The other meats were good, but this one was FANTASTIC.

image(21)

To this day, I don’t know why this particular product was so good, and it desperately needs to be repeated. The meat quality was great, the spices were right on, and the texture was perfect. If you are looking for a unique curing project, perhaps one that is kosher or halal, this is one you don’t want to miss.

image(13)


image(11)

It also goes perfect on a plate with other cured meats. This charcuterie plate has my homemade turkey bresaola, beef bresaola, duck prosciutto, and lamb prosciutto.

image(4)


Disclaimer: Meat curing is a hobby that comes with inherent risks. We can all do things to limit this risk by educating ourselves about the process and the utilizing the safest known methods to create our products. This website is for educational purposes only, and all experimentation should be done at each individuals own risk.

Filed Under: Charcuterie Tagged With: bresaola, bresaola di tacchino, charcuterie, cured meat, diy, turkey bresaola

  • « Previous Page
  • 1
  • 2
  • 3
  • 4
  • 5
  • 6
  • 7
  • Next Page »
  • Instagram

Copyright © 2025 · Foodie Pro Theme by Shay Bocks · Built on the Genesis Framework · Powered by WordPress