“This is it. The big one. The one we’ve all been waiting for.” -Oliver Wood
When I was a kid, I begged my parents to buy me lunchables; instead, they stocked my brown paper bag with prosciutto, mortadella, and crackers. In high school, prosciutto and arugula sandwiches became my daily lunch and pre-sports snack. When I studied abroad in Pisa, I alternated between caprese sandwiches and the wide range of salumi available to me, always finding a way back to the prosciutto. When I traveled to Spain and discovered the Spanish sister of prosciutto, jamón, I made my sister eat so much of it with me that she became a vegetarian for a bit when we came back home. So, it seemed only natural to me when I started along my meat curing journey, that making prosciutto would be on the list.
It took me a while. Making prosciutto, or jamón, is an intimidating undertaking. I read and read and read. I found books, blogs, online groups, and research articles. Finally, I traveled to Emilia-Romagna with my sister, and we visited two different prosciuttifici, one in Parma and one in Modena. It was these visits that finally gave me the confidence to go forward with curing my own prosciutto. (NOTE: All of this preparation was probably overkill, if you’re considering taking the plunge, go for it!)
Finally, I made contact with a farm in Michigan I found through online meat curing groups, Ham Sweet Farm. They raise great quality animals in a very conscientious manner, and their meat has been among the best I’ve used, if not the best. I got a rear leg from them to use for prosciutto, and the process was started.
The meat:
In Europe, animals are usually processed using seam butchery, meaning that individual muscles are kept intact. This is an intensive process that requires significant time and effort, so in America most animals are butchered by making cuts across the muscles, using technology such as the band saw. Both methods have their own pros and cons, but it’s important to know that if you receive the meat as a primal from an American processor, you will generally receive it with the ball and socket hip bone intact, and part of the hip bone just sawed through to create the cut of meat.
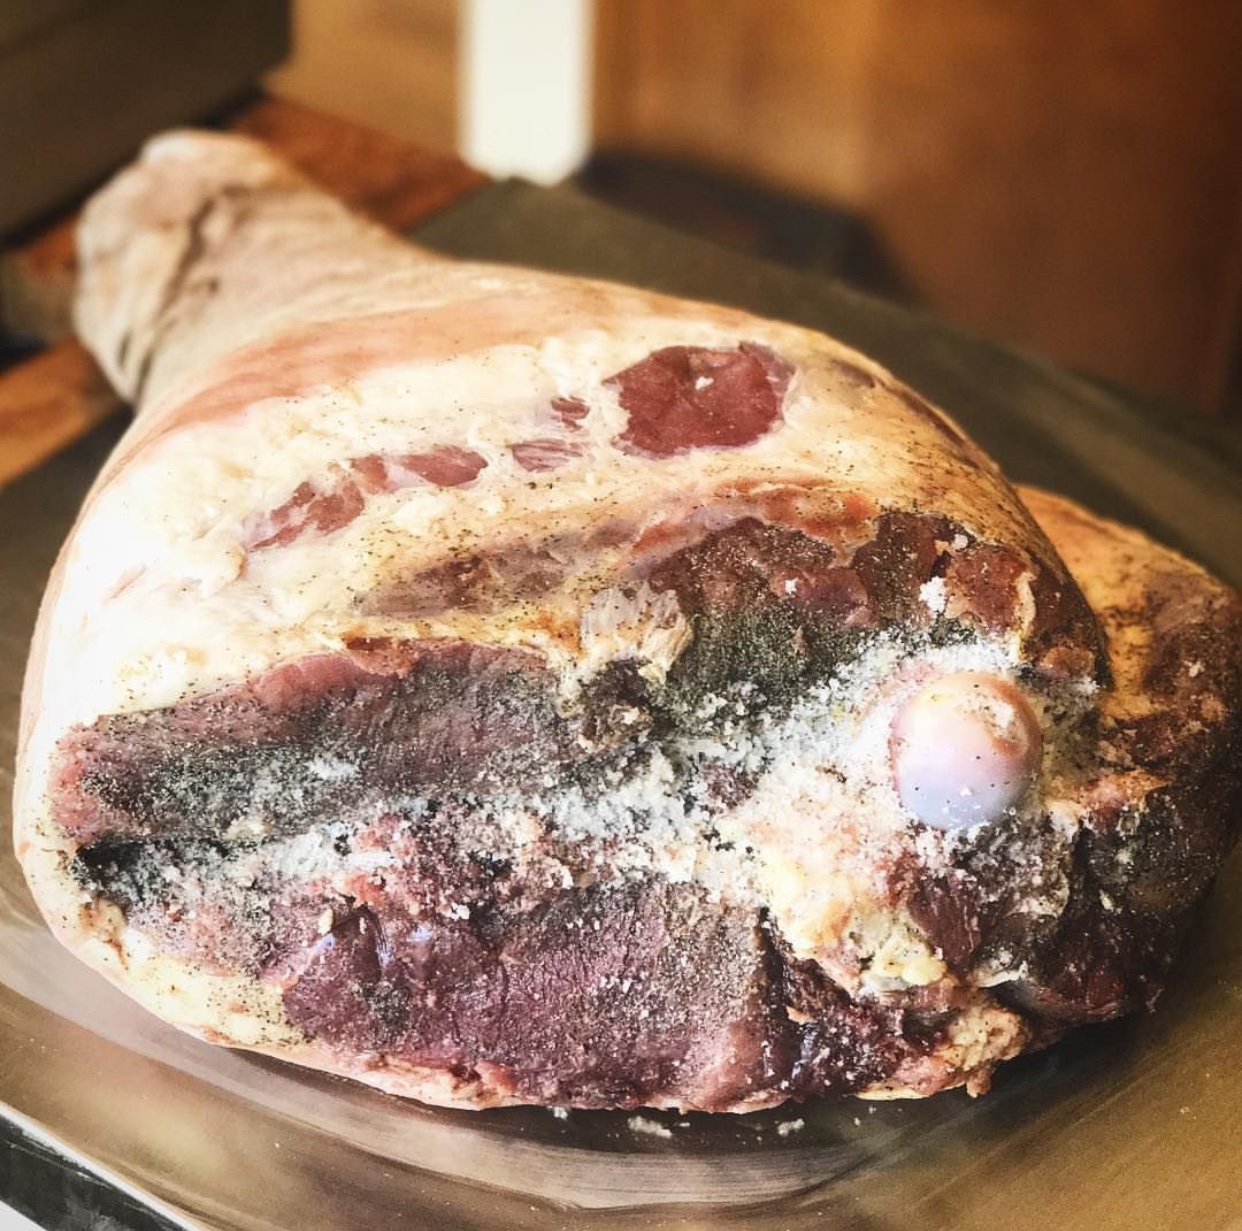
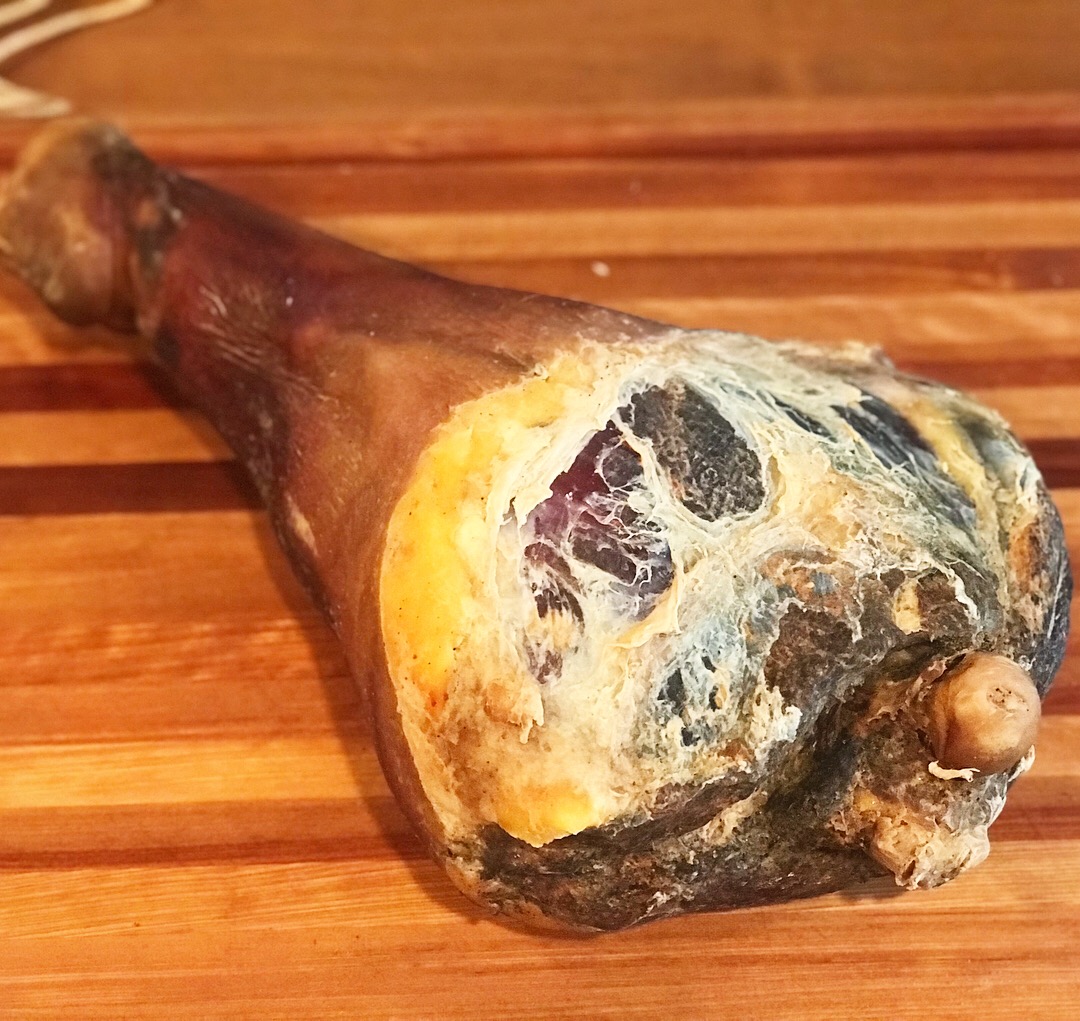
In order to cure prosciutto in the Italian way, as opposed to the Spanish way, you need to do some butchering to the leg primal. You will need to remove what is left of the hip bone, called the aitch bone in this context, and expose the ball part of the ball and socket hip joint. You can then clean up the surface, and this will give you the characteristic shape of the Italian prosciutto. If you prefer to cure the prosciutto the Spanish way, you can leave the aitch bone in place and simply clean up the surface of the meat as needed.

After the aitch bone is removed, the next important step is to milk the femoral vein. After death, blood can pool in the venous system. The processor will usually do their best to flush the system of all blood, but often they don’t get it all. You want to “milk” the vein by pressing firmly on the distal end of the vein and tracing its path through the leg until you get to the proximal, open end at the face of the leg. Blood should pour out of the open end. Repeat this until it doesn’t. If the meat you are using is still semi frozen (like mine was), you may not have a lot of luck with this process. You can try again after the “first salting”.
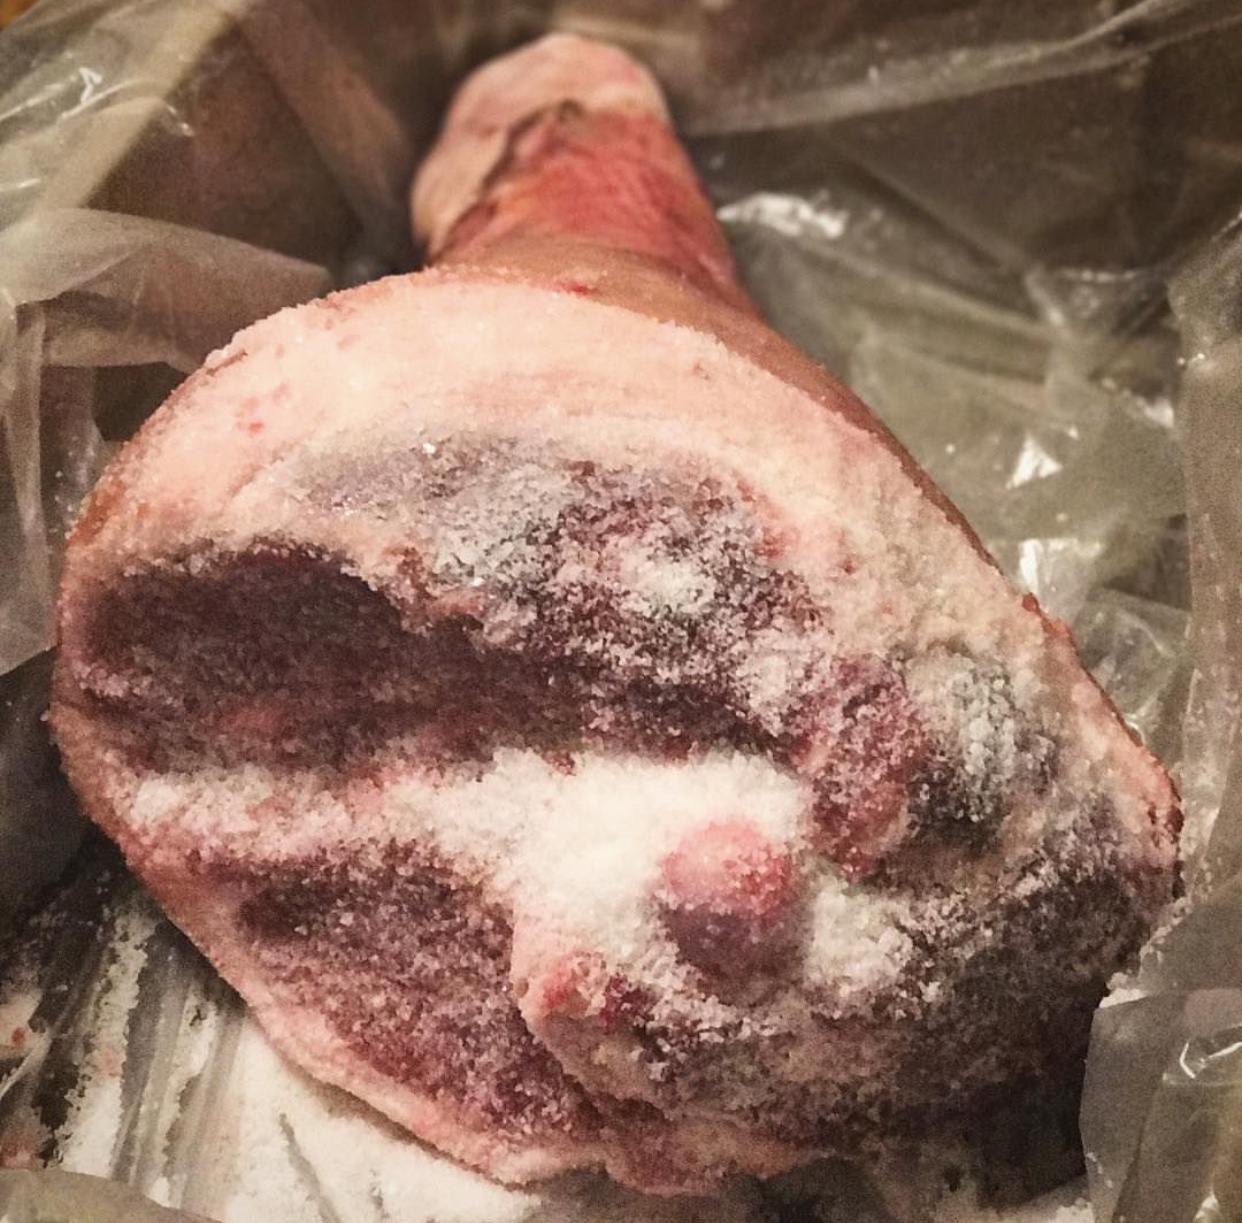
First Salting (4C/40F, 1 week):
For prosciutto, we add in a step we don’t usually use for other cured meats called the “first salting”. I learned about this method when visiting the prosciutto factories in Parma. It was explained to me that this is done to draw out excess blood and to limit bacteria growth early in the process.
To do the first salting, you take an excess of sea salt, and pack it onto the open face of the prosciutto, paying particular attention to the femoral head and the places where the veins are exposed. Use an extra-large ziplock bag in a plastic container (in case of leakage) and allow this process to take place in your regular fridge at 4C. After a week, you want to wash away the excess salt. Don’t be surprised if you see a bloody and salty liquid in the bottom of the bag… that just means the salt is doing its job of pulling out any excess blood. Try again to milk the femoral vein to get out any blood that may be left, and then move on to the second salting.
Second Salting (4C/40F, 3 weeks+):
For the second salting, we do an equilibrium cure. The Italian method just uses sea salt, while the Spanish method also uses nitrates. Because I am a fan of using nitrates for safety reasons, I added them into my cure.
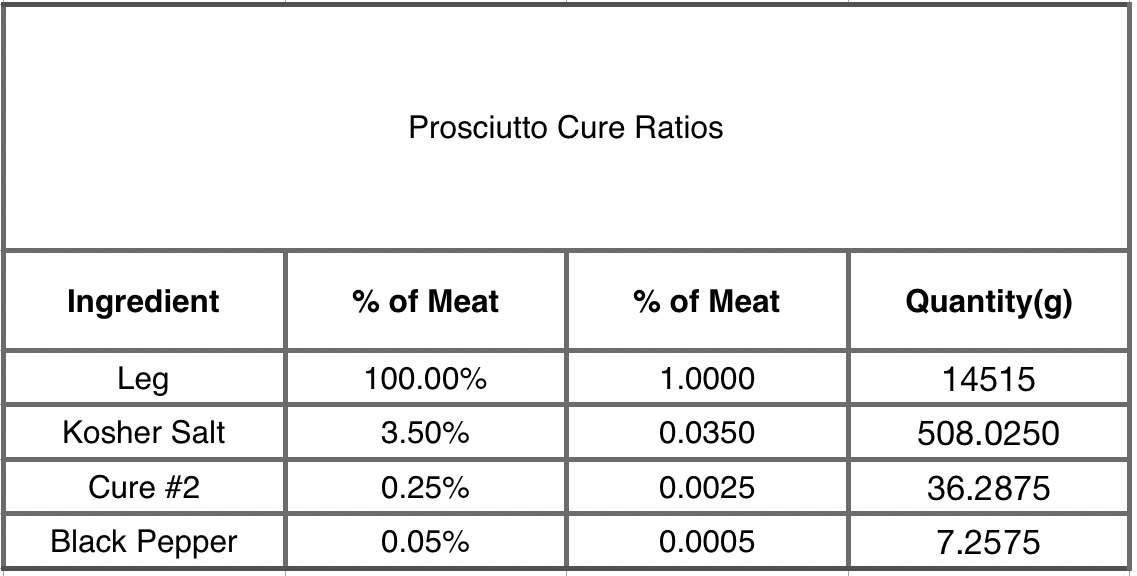
*Note: I like to use equilibrium curing. It allows me some flexibility in when I process the meat after curing, since the time left in the cure doesn’t matter, it is the percentages that are used that do. However, some people don’t do this type of curing and use excess curing instead. In excess curing, it is the time that the meat is left in the cure that matters. If you would rather do excess curing for prosciutto, cure the prosciutto in excess sea salt for 1 day per kg of meat. (For example, for a prosciutto that weights 14 kg, this means it would stay in excess sea salt for 14 days).
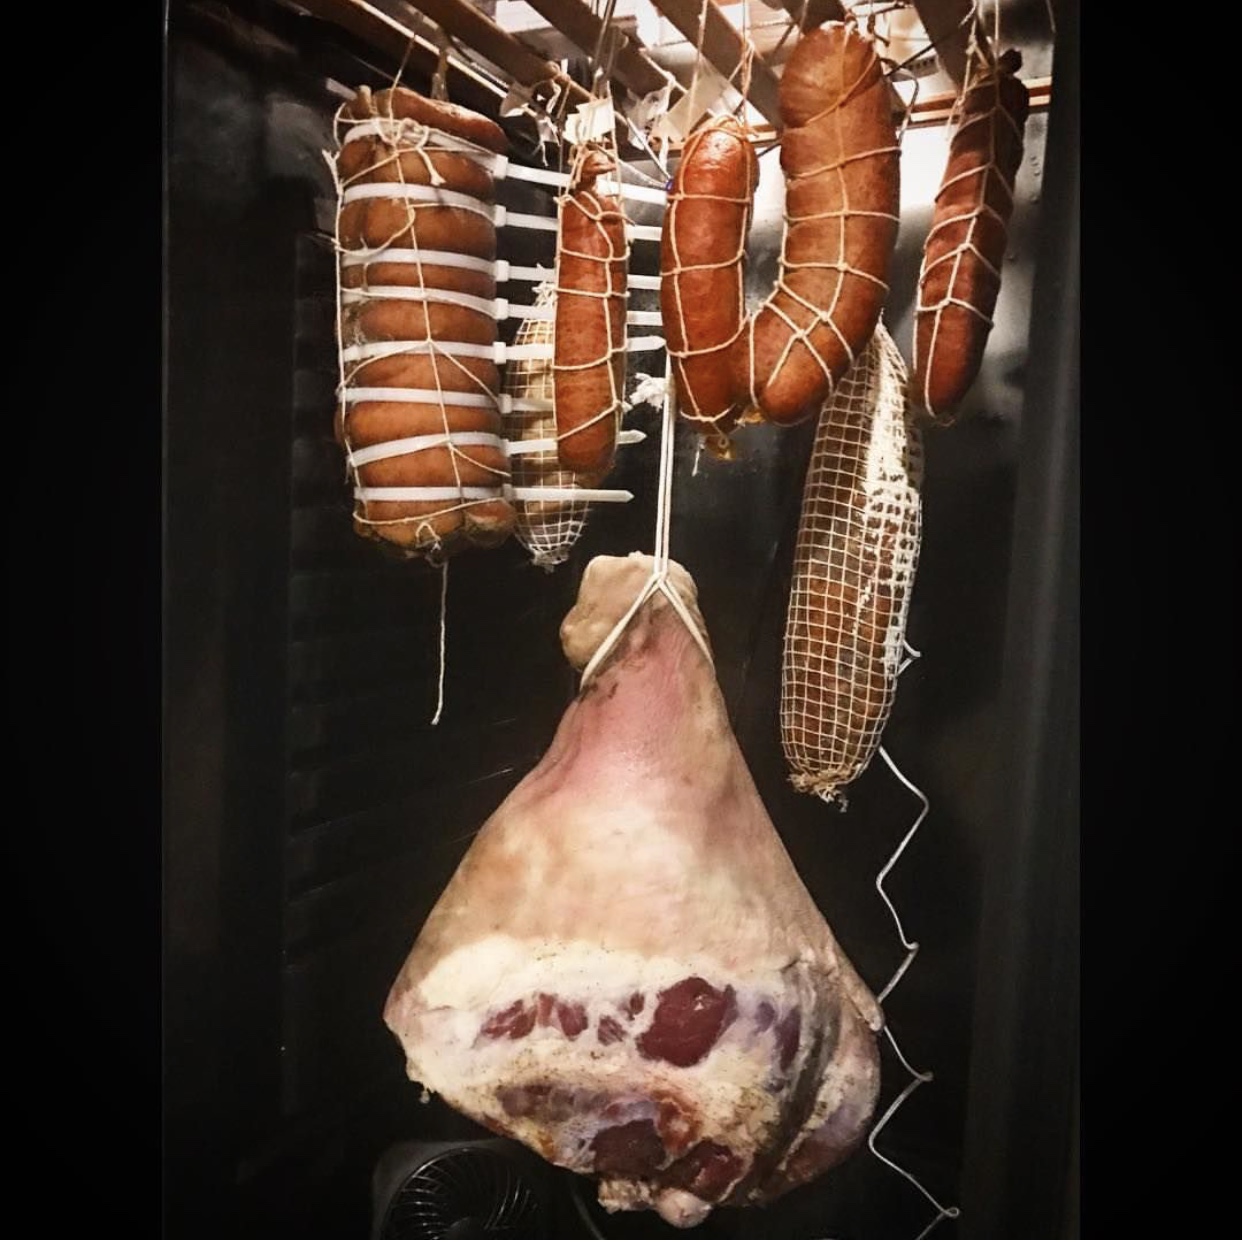
Drying (13C/55F, 65%RH, 12 months):
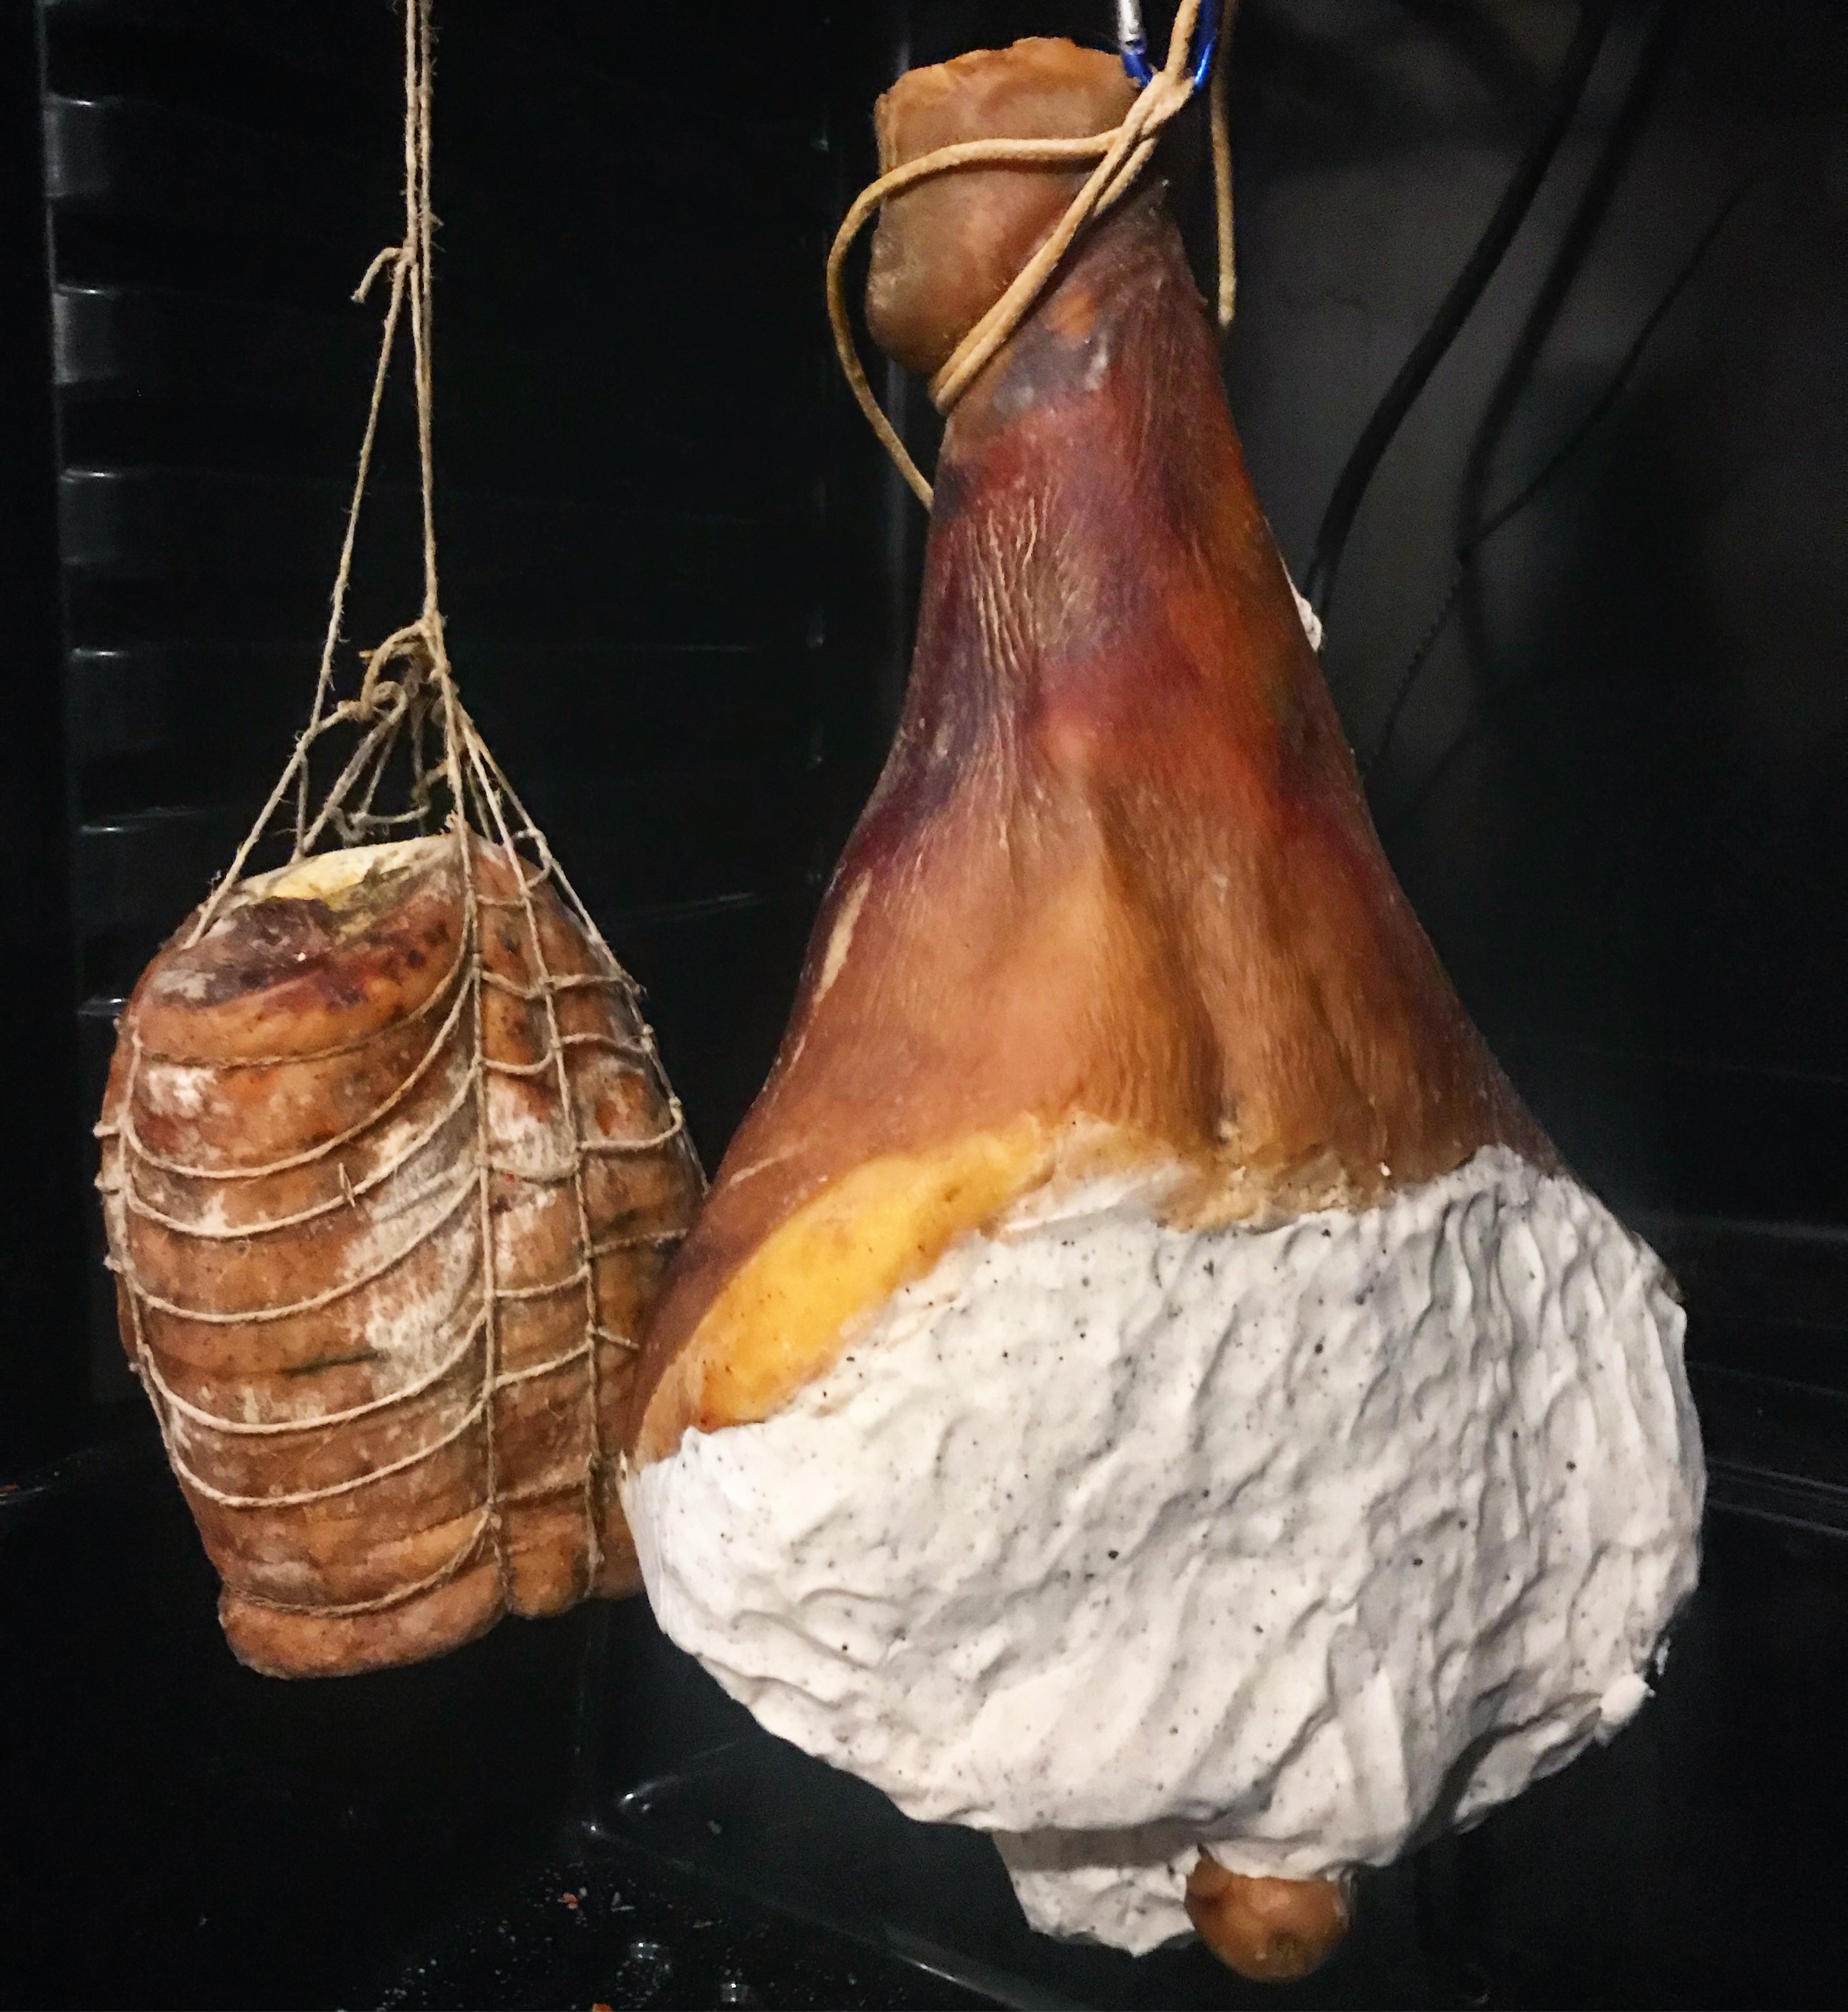
After the meat as been cured, it is time to move it to the curing chamber. Brush off any remaining cure and hang it in the chamber set around 55F and 65% RH.
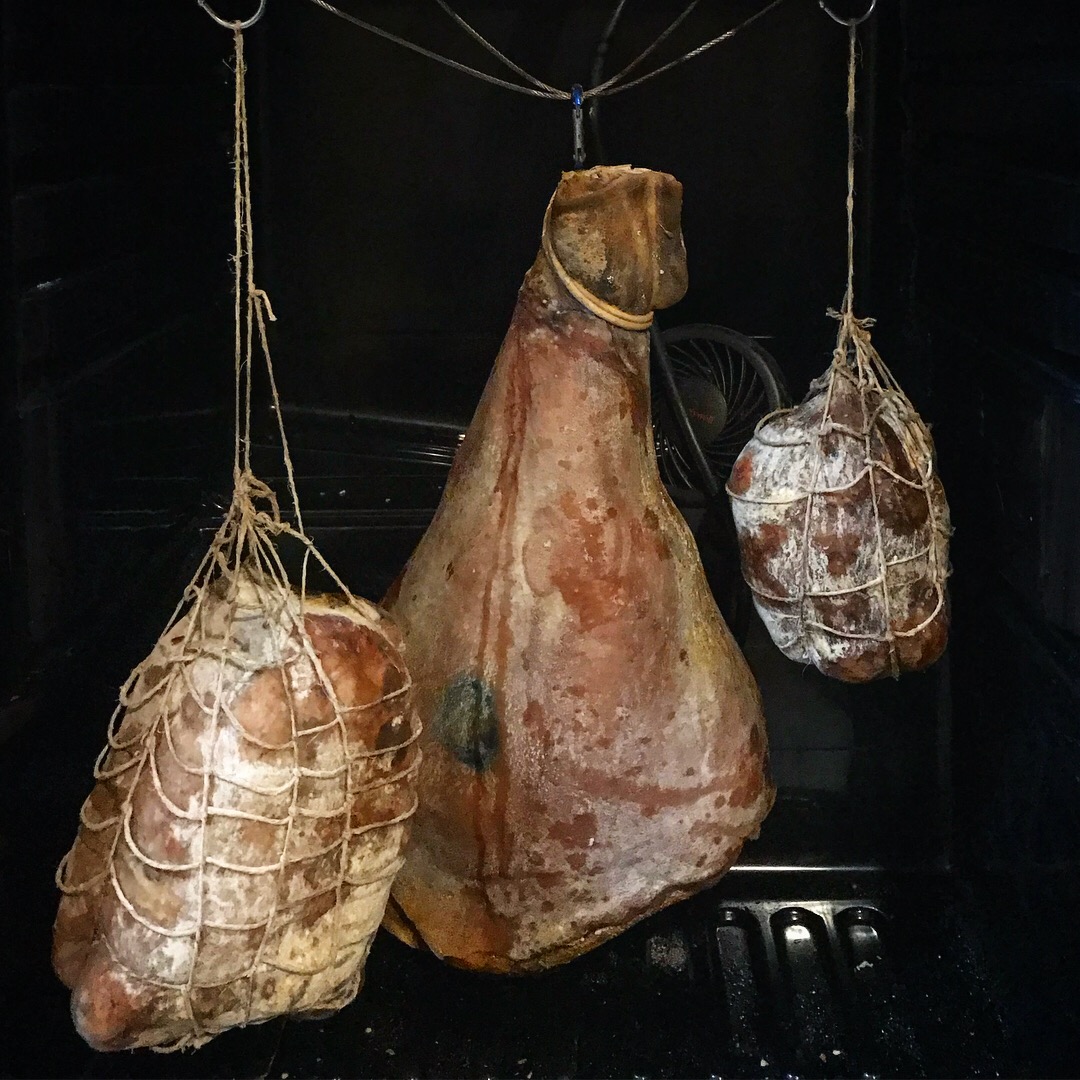
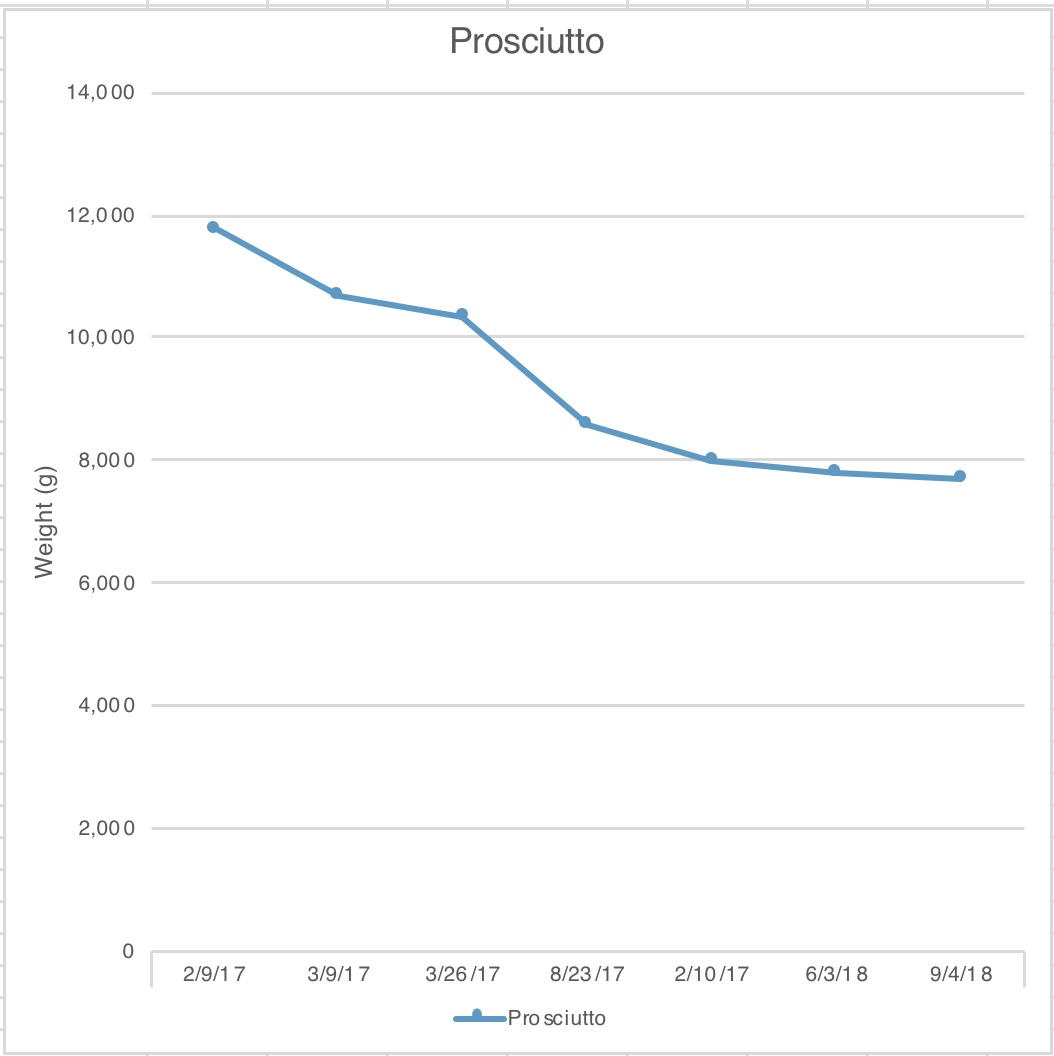
Allow the prosciutto to hang for 12 months, tracking the weight loss over this time if possible. By the end of the year, it should have lost around 30% of its initial weight.
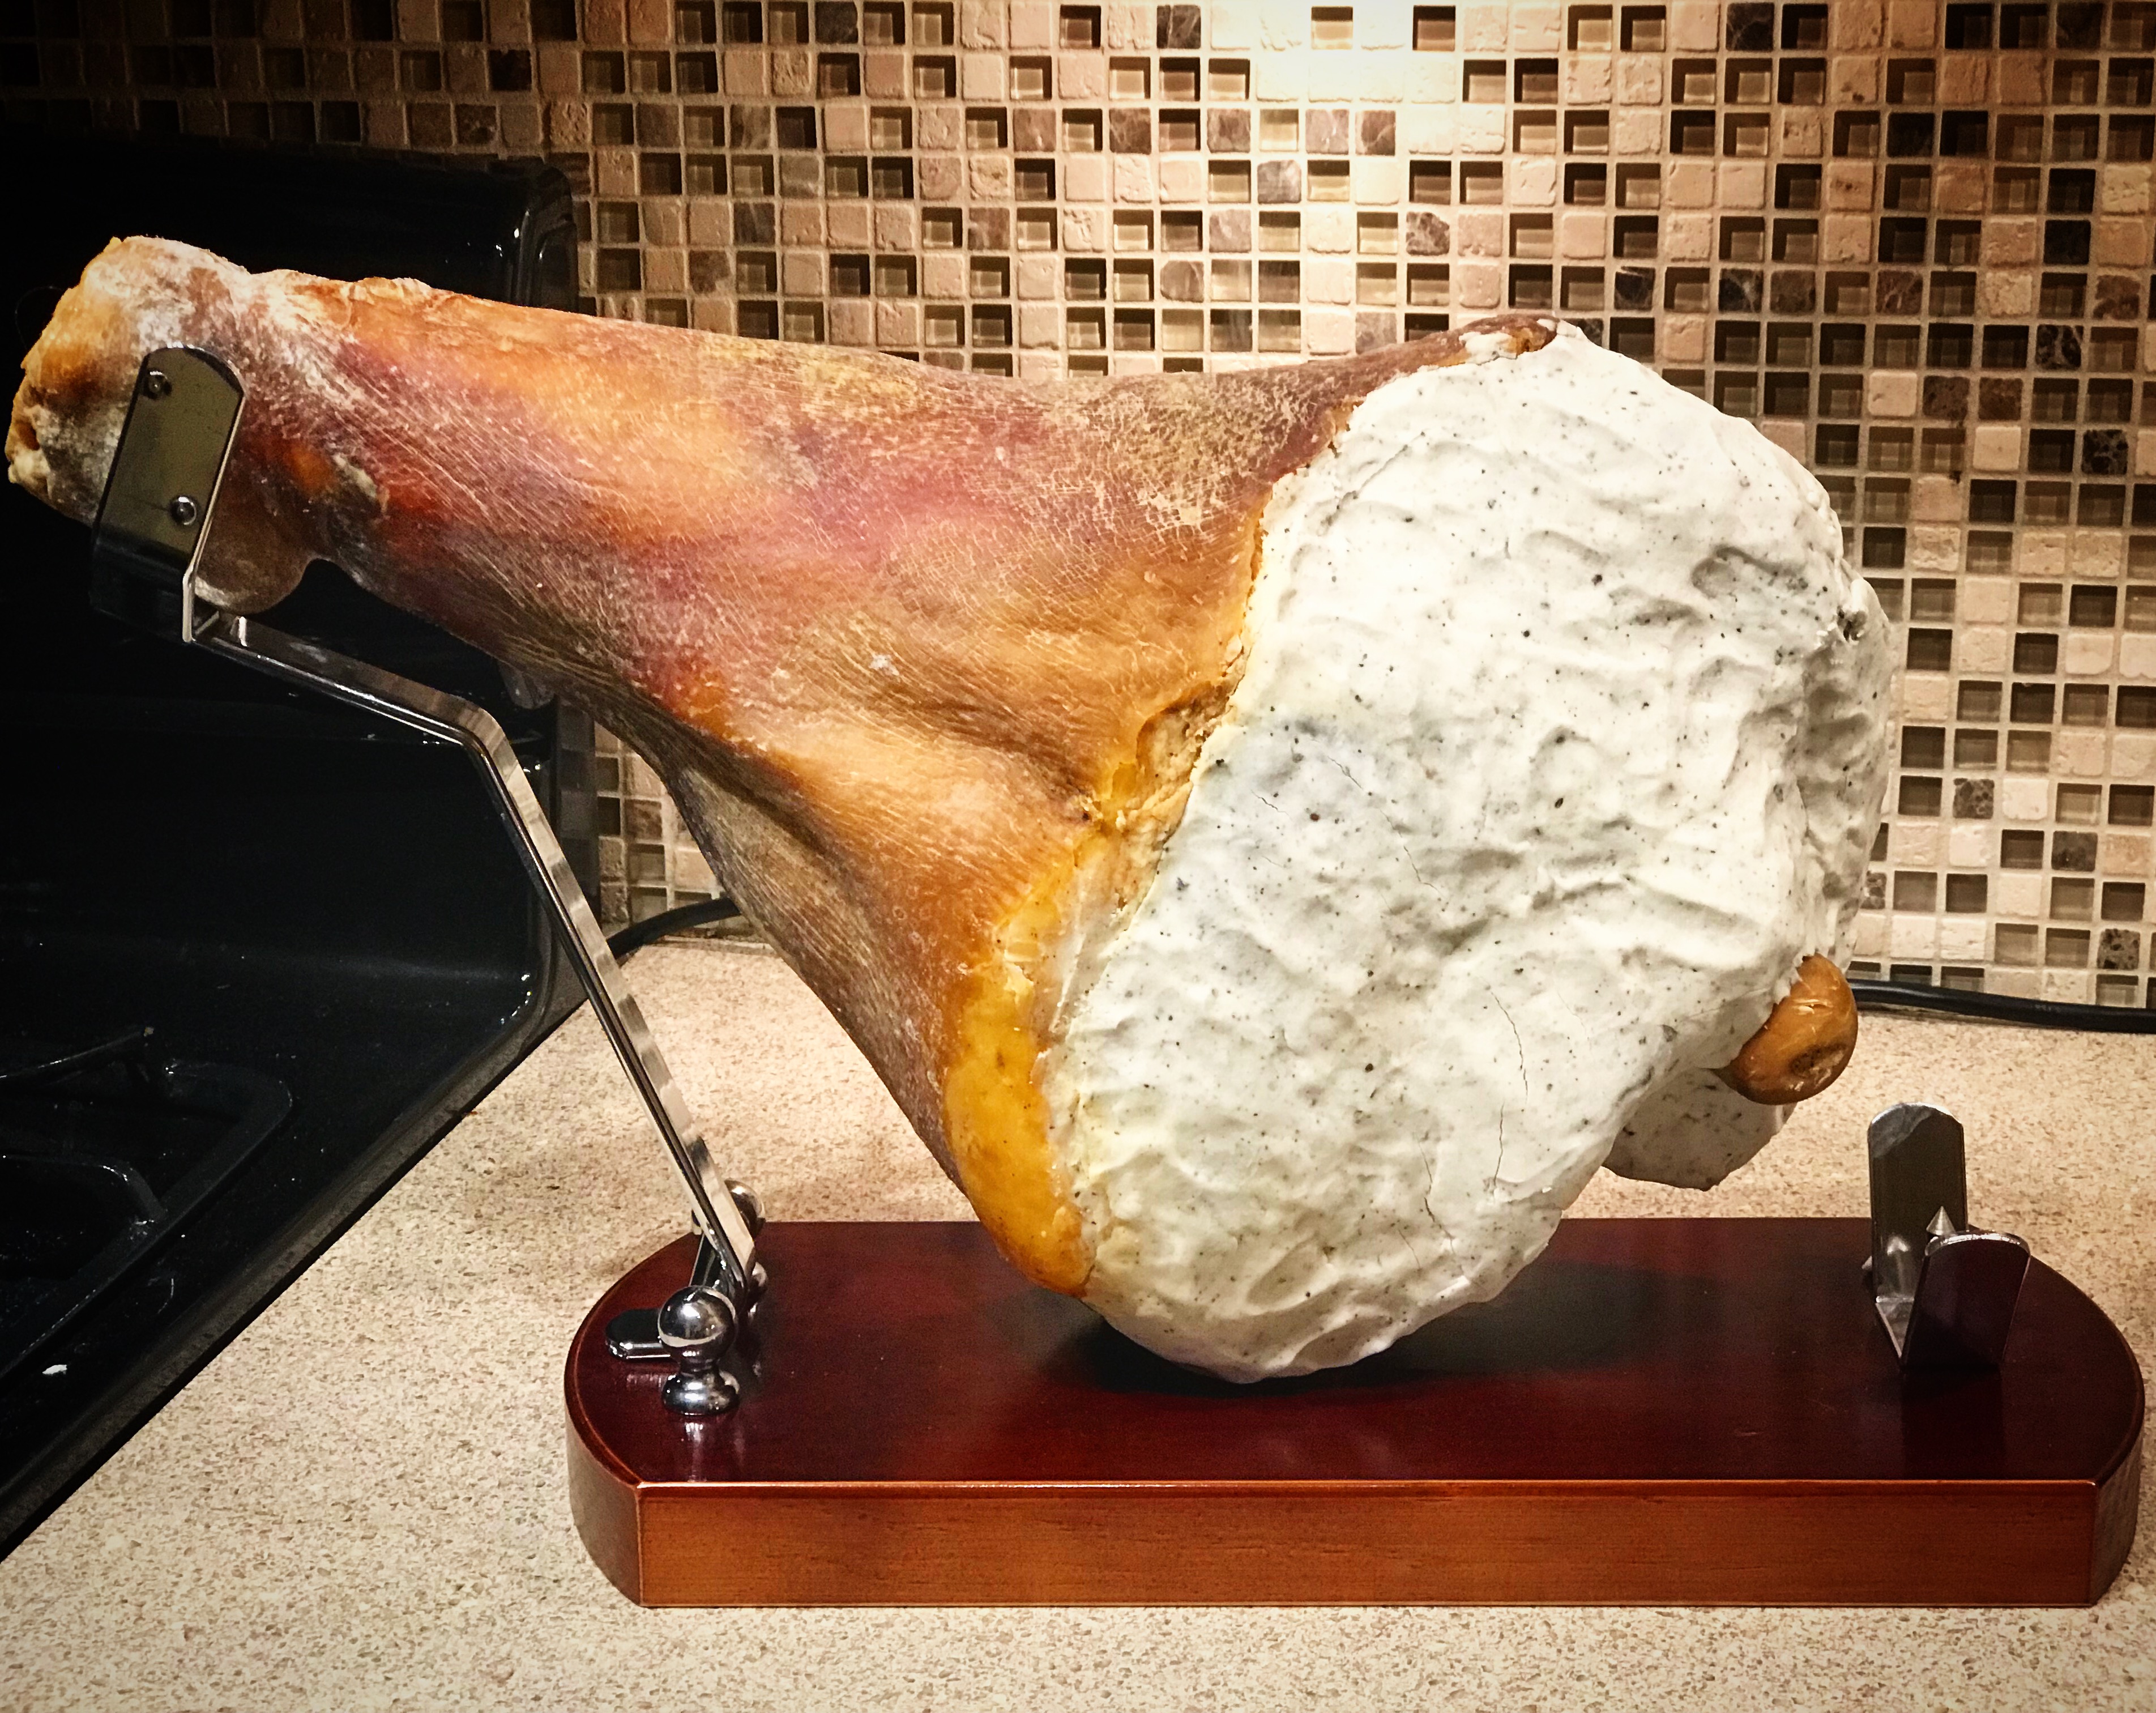
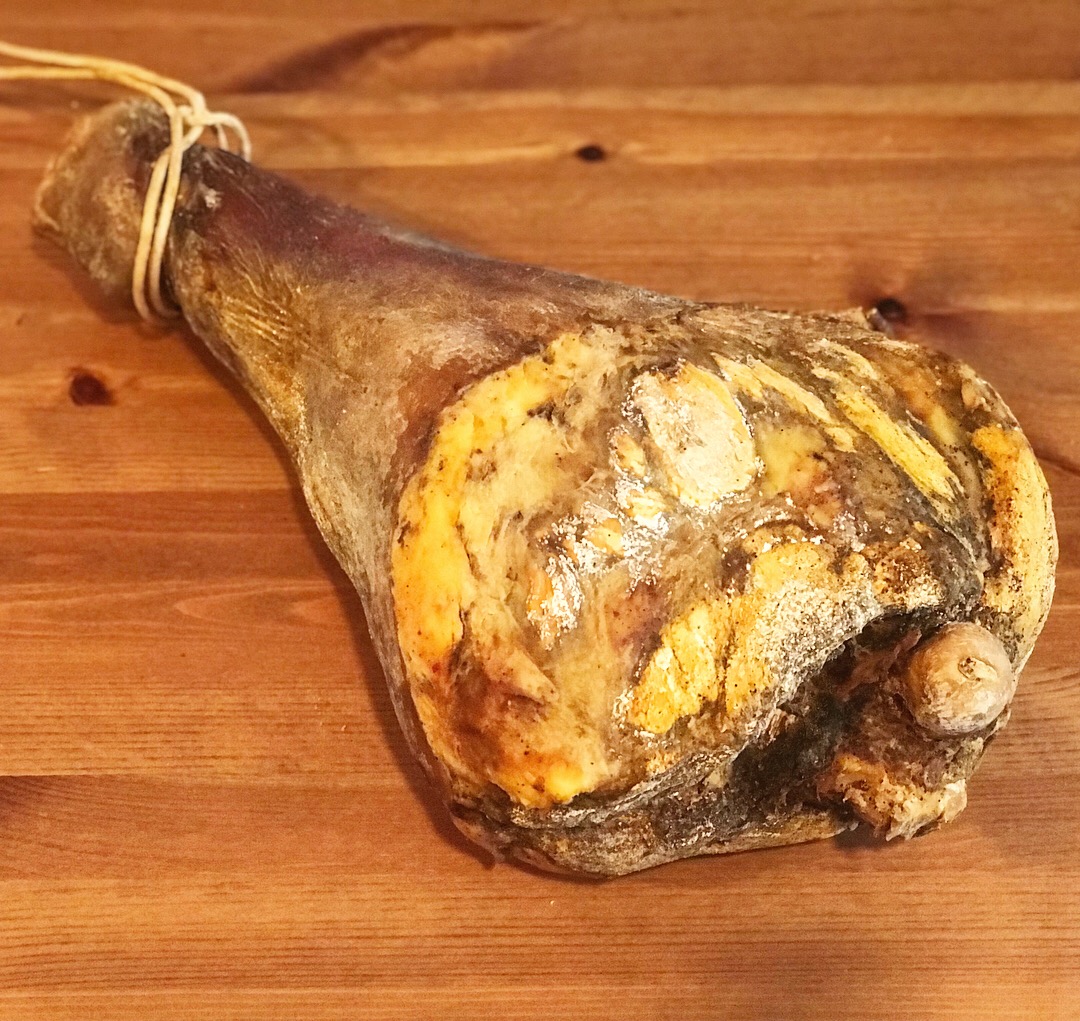
Applying a Sugna:
Following in the Italian tradition, a sugna is applied after the meat has reached its approximate final weight loss, to allow for continued aging for flavor development without drying out the meat.
Before applying the sugna, make sure to use white vinegar to clean off the surface of the prosciutto, removing any mold that has accumulated on the surface.
The sugna is made of lard, rice flour, and black pepper. For my sugna, I rendered leaf lard that I had from Ham Sweet Farm. However, you can use lard that is purchased from the store as well.
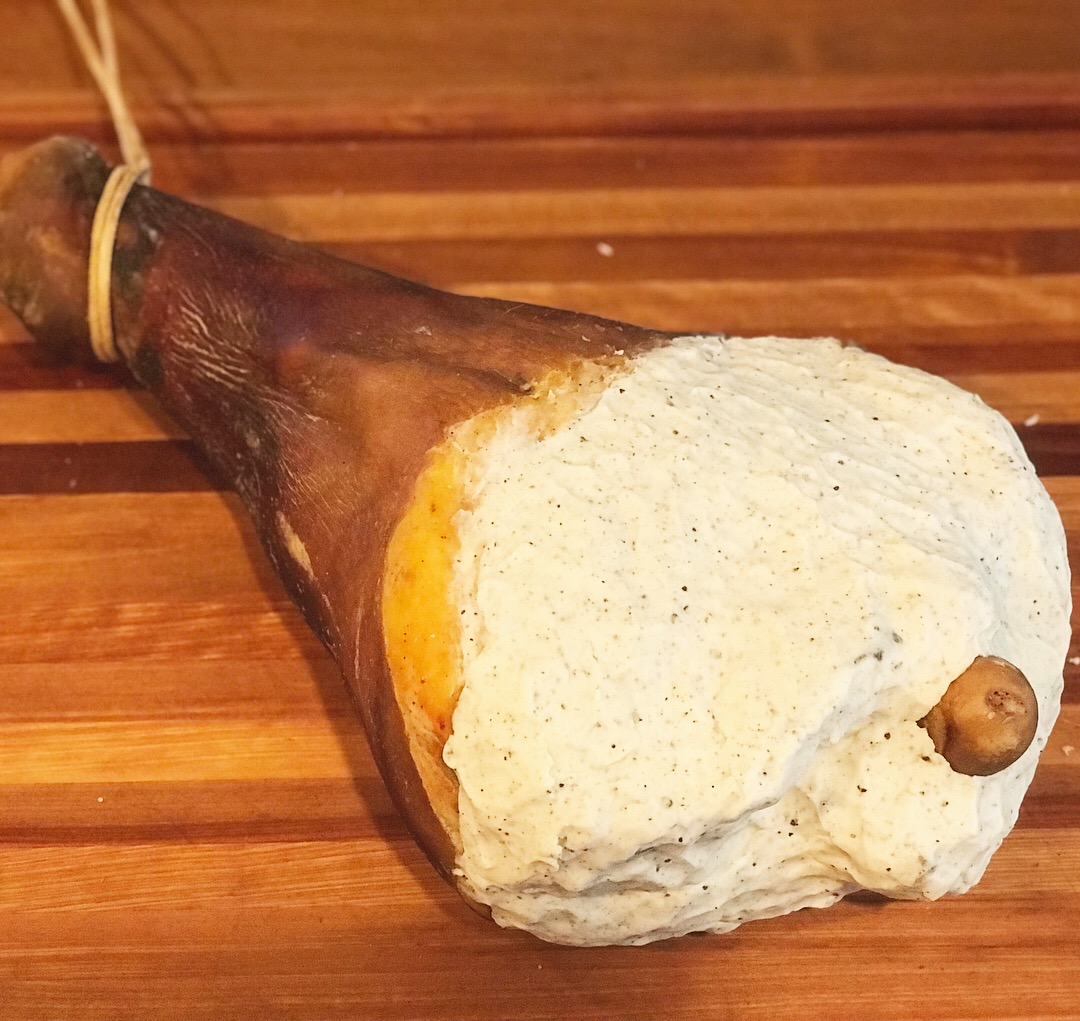
After the sugna is applied, the meat is either put back in the curing chamber, or more ideally in a wine cellar or aging room at a slighter higher temperature to allow for better flavor development. Not everyone uses this method, so if you’d prefer to skip it, that’s alright too. Instead of continuing to age the prosciutto after 12 months and around 30% weight loss, you can move straight to harvesting and tasting your prosciutto.
Aging (17C/62F, 50%RH, 6 months+):
The prosciutto with the sugna is allowed to age for another 6 months to a year to develop a more complex flavor profile.
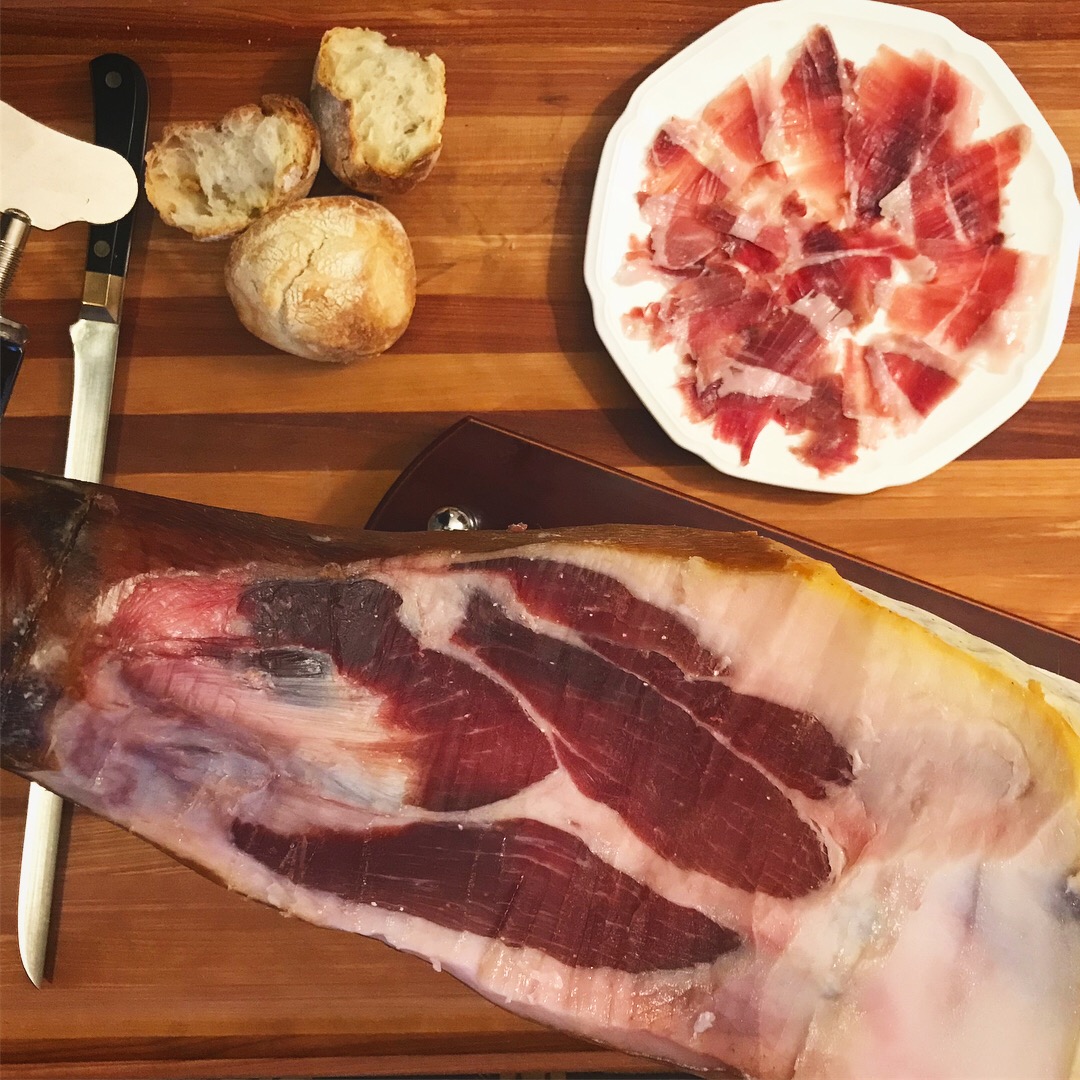
Tasting:
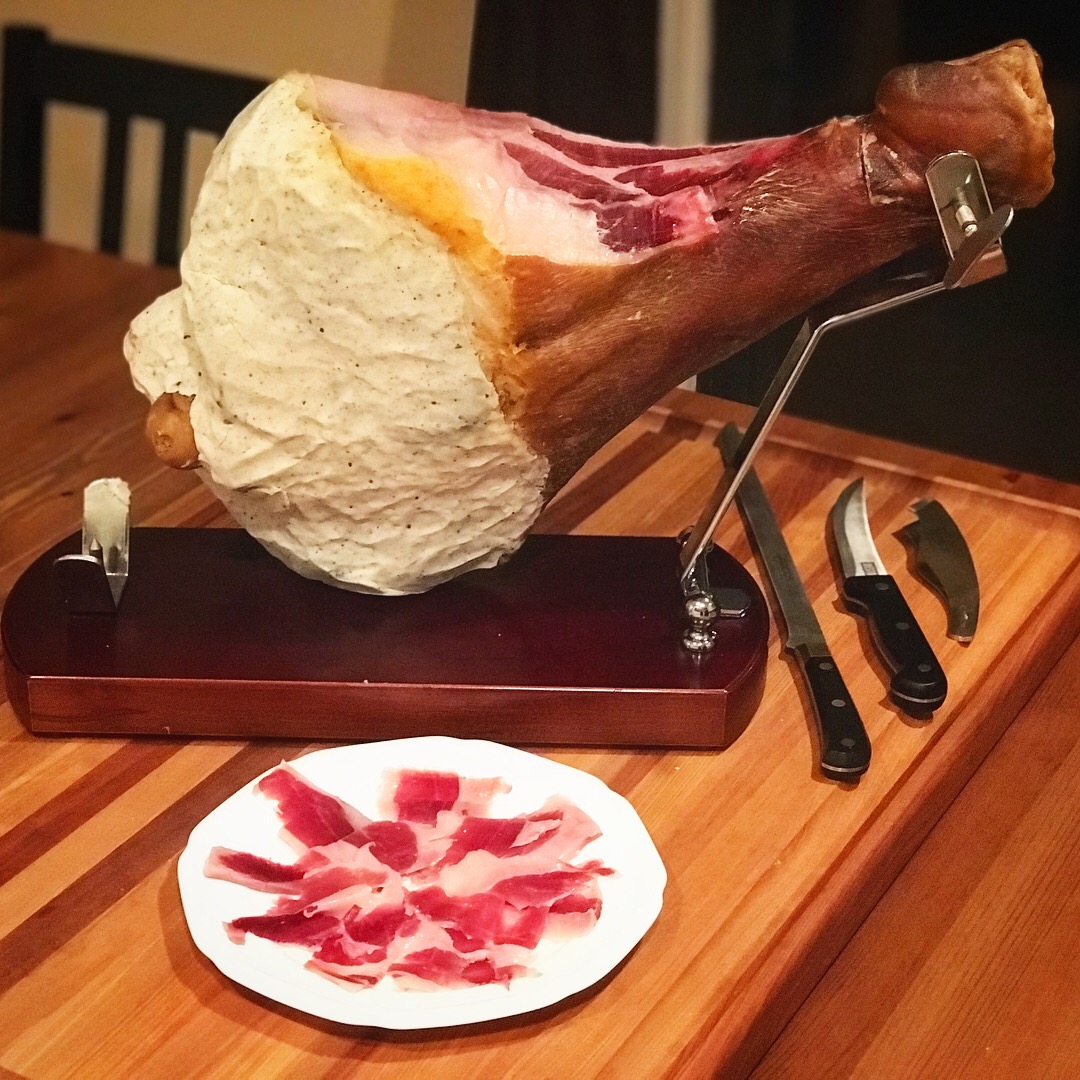
That’s it! When the prosciutto has been aged for at least 18 months, it’s ready! You can either hand cut the prosciutto or remove the bone and slice it on a deli slicer. To hand slice it, place the prosciutto on its side and cut away the skin and outer fat first. Then, carefully cut slices off the prosciutto using a thin, long knife. When you reach the bone, cut around it as much as possible. Then, flip the prosciutto over and cut from the other side. You can keep hand slicing around the bones until all the meat is gone!
This is extremely helpful. I’m planning to do my first prosciutto around Thanksgiving of this year, and just like you I’ve tried to read everything possible. This makes me feel a little more confident about it. Thanks for sharing all your stuff!
Glad to hear!! Hope it all went well.
Patience is rewarded. Very impressive-How did it taste? How would you compare to Parma or Serrano?
Do you think the cure 2 is detectable in the finished product?
Excellent blog!
Thanks! This one was more like a Serrano. I didn’t notice any large effect of the cure 2, but perhaps a side by side comparison would have made it more obvious.
Excellent.,where do you do the second salting? In the fridge as well?
Yup! Second salting also in the fridge.
Is it normal for a ham to have only lost 30 percent weight after 20 months?
It will depend on the chamber and your conditions. If you added sugna especially, yes. Because that should slow weight loss almost to a standstill.
Once fully cured shall i remove and clean off the sugna? Ive had mine cellared for 5 years with Sugna on for most of the duration. It all looks fine just need to know if its wise to leave on whilst slicing? Any help is appreciated.
Depends how quickly you slice it. It’s a protective covering, so if you are going to slice it all in one go, you can take it off. Otherwise, I leave it on and just remove as needed for slicing.
Trying your recipe been as we speak: gonna pull it out of the cure and hang this week. Thx for all the info.one thing I see on your pics that I like is the hanging cord and ‘ knot’. How did you do that. Is there a how-to video somewhere?
Ohh. I’m not sure. I think I probably went on youtube to find some tutorial for it. Good luck!