The Explorations of a Gastrochemist

...because science can be delicious.

  • Beginner’s Guide
  • Wurst Adventure
  • Charcuterie
  • Preservation
  • Science
  • Molecular Gastronomy
  • All Projects
You are here: Home / Archives for culatello

Lamb Culatello

January 15, 2022 by AOG Leave a Comment

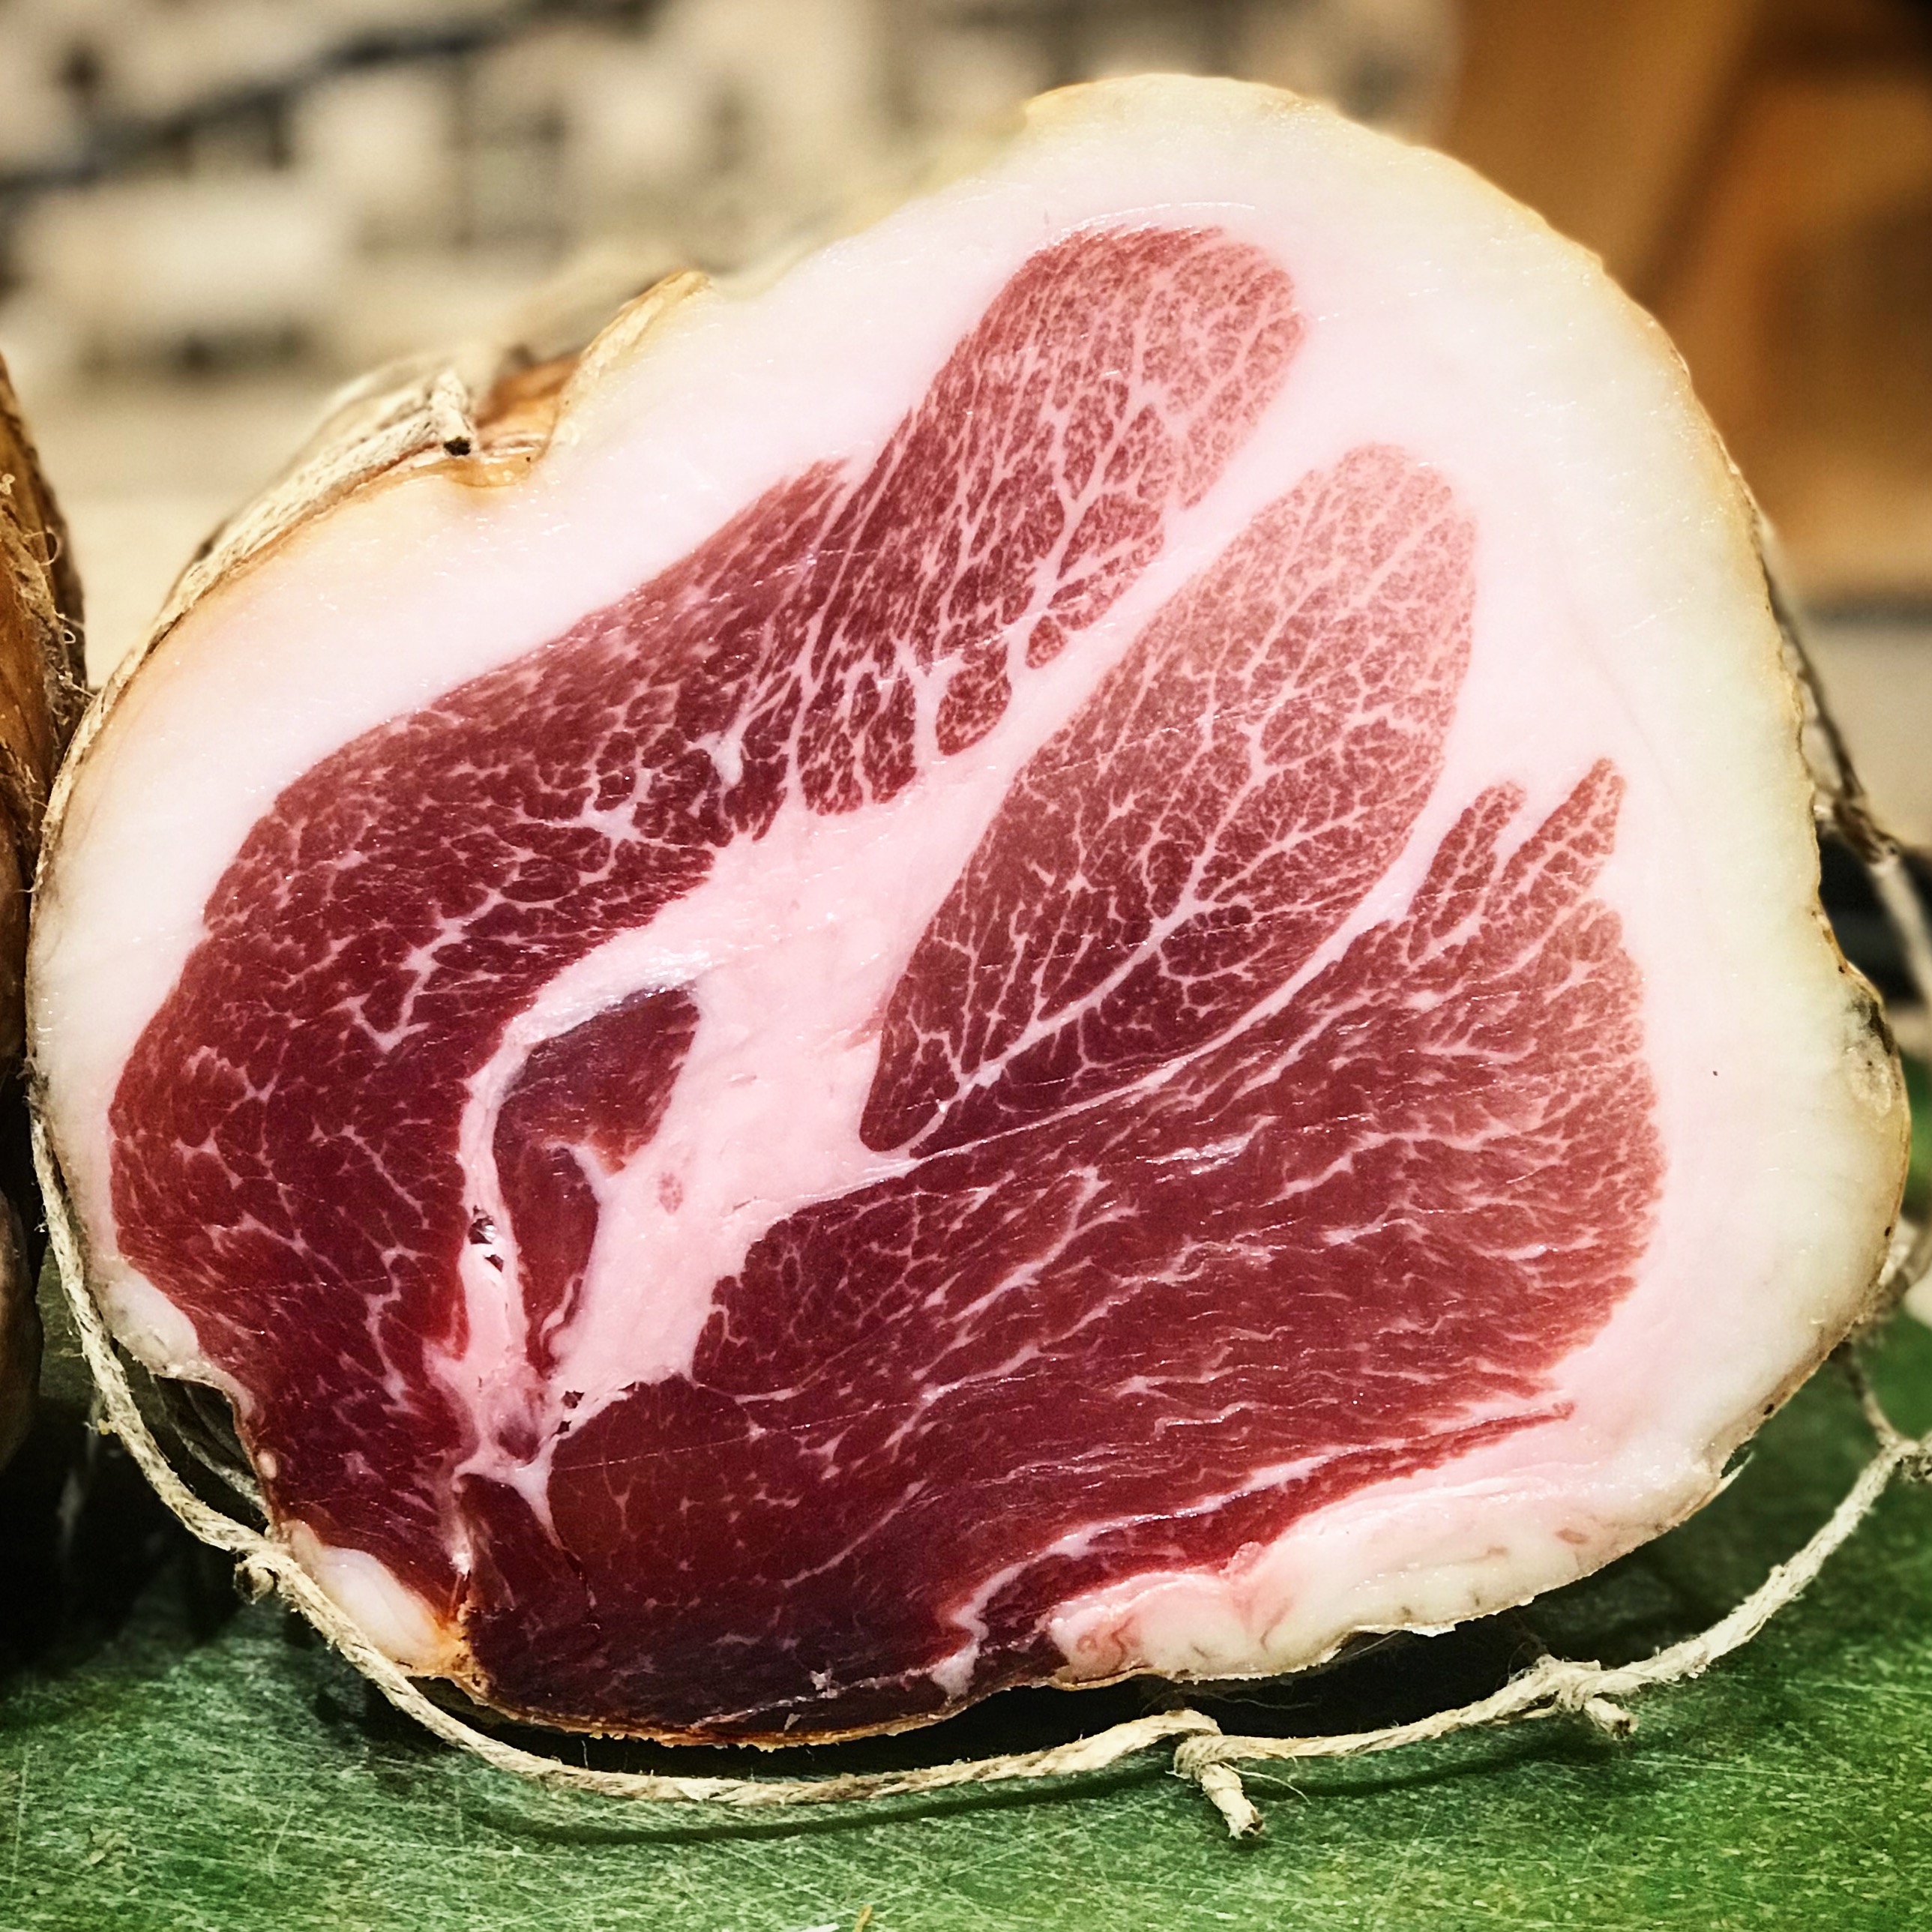
In this post, I will go through the basic process of making lamb culatello. Similar to a pork culatello, this is made by taking the rear leg of the animal, carefully deboning it, and carving out the culatello cut. This is then dry cured and aged until it has lost at least 30% of its initial weight.


The Meat

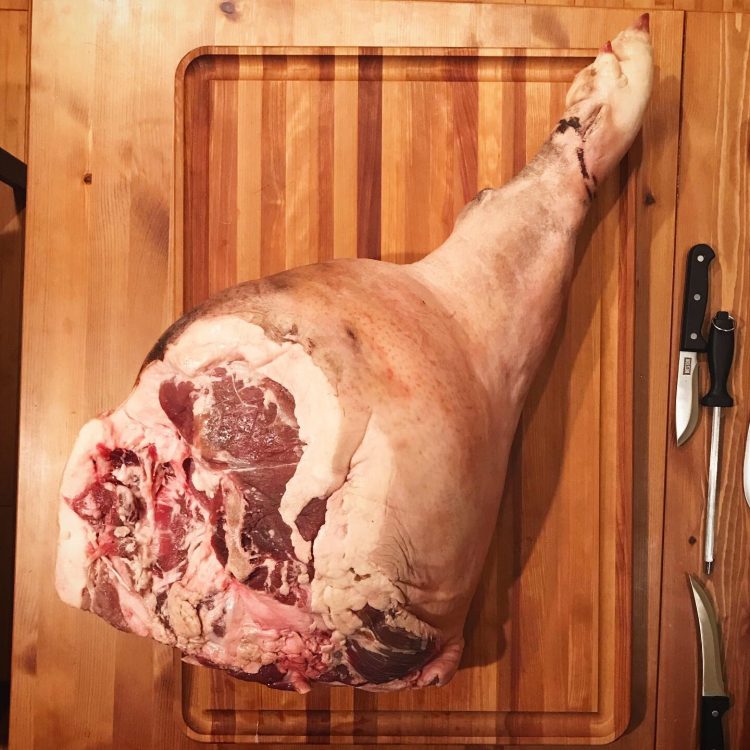
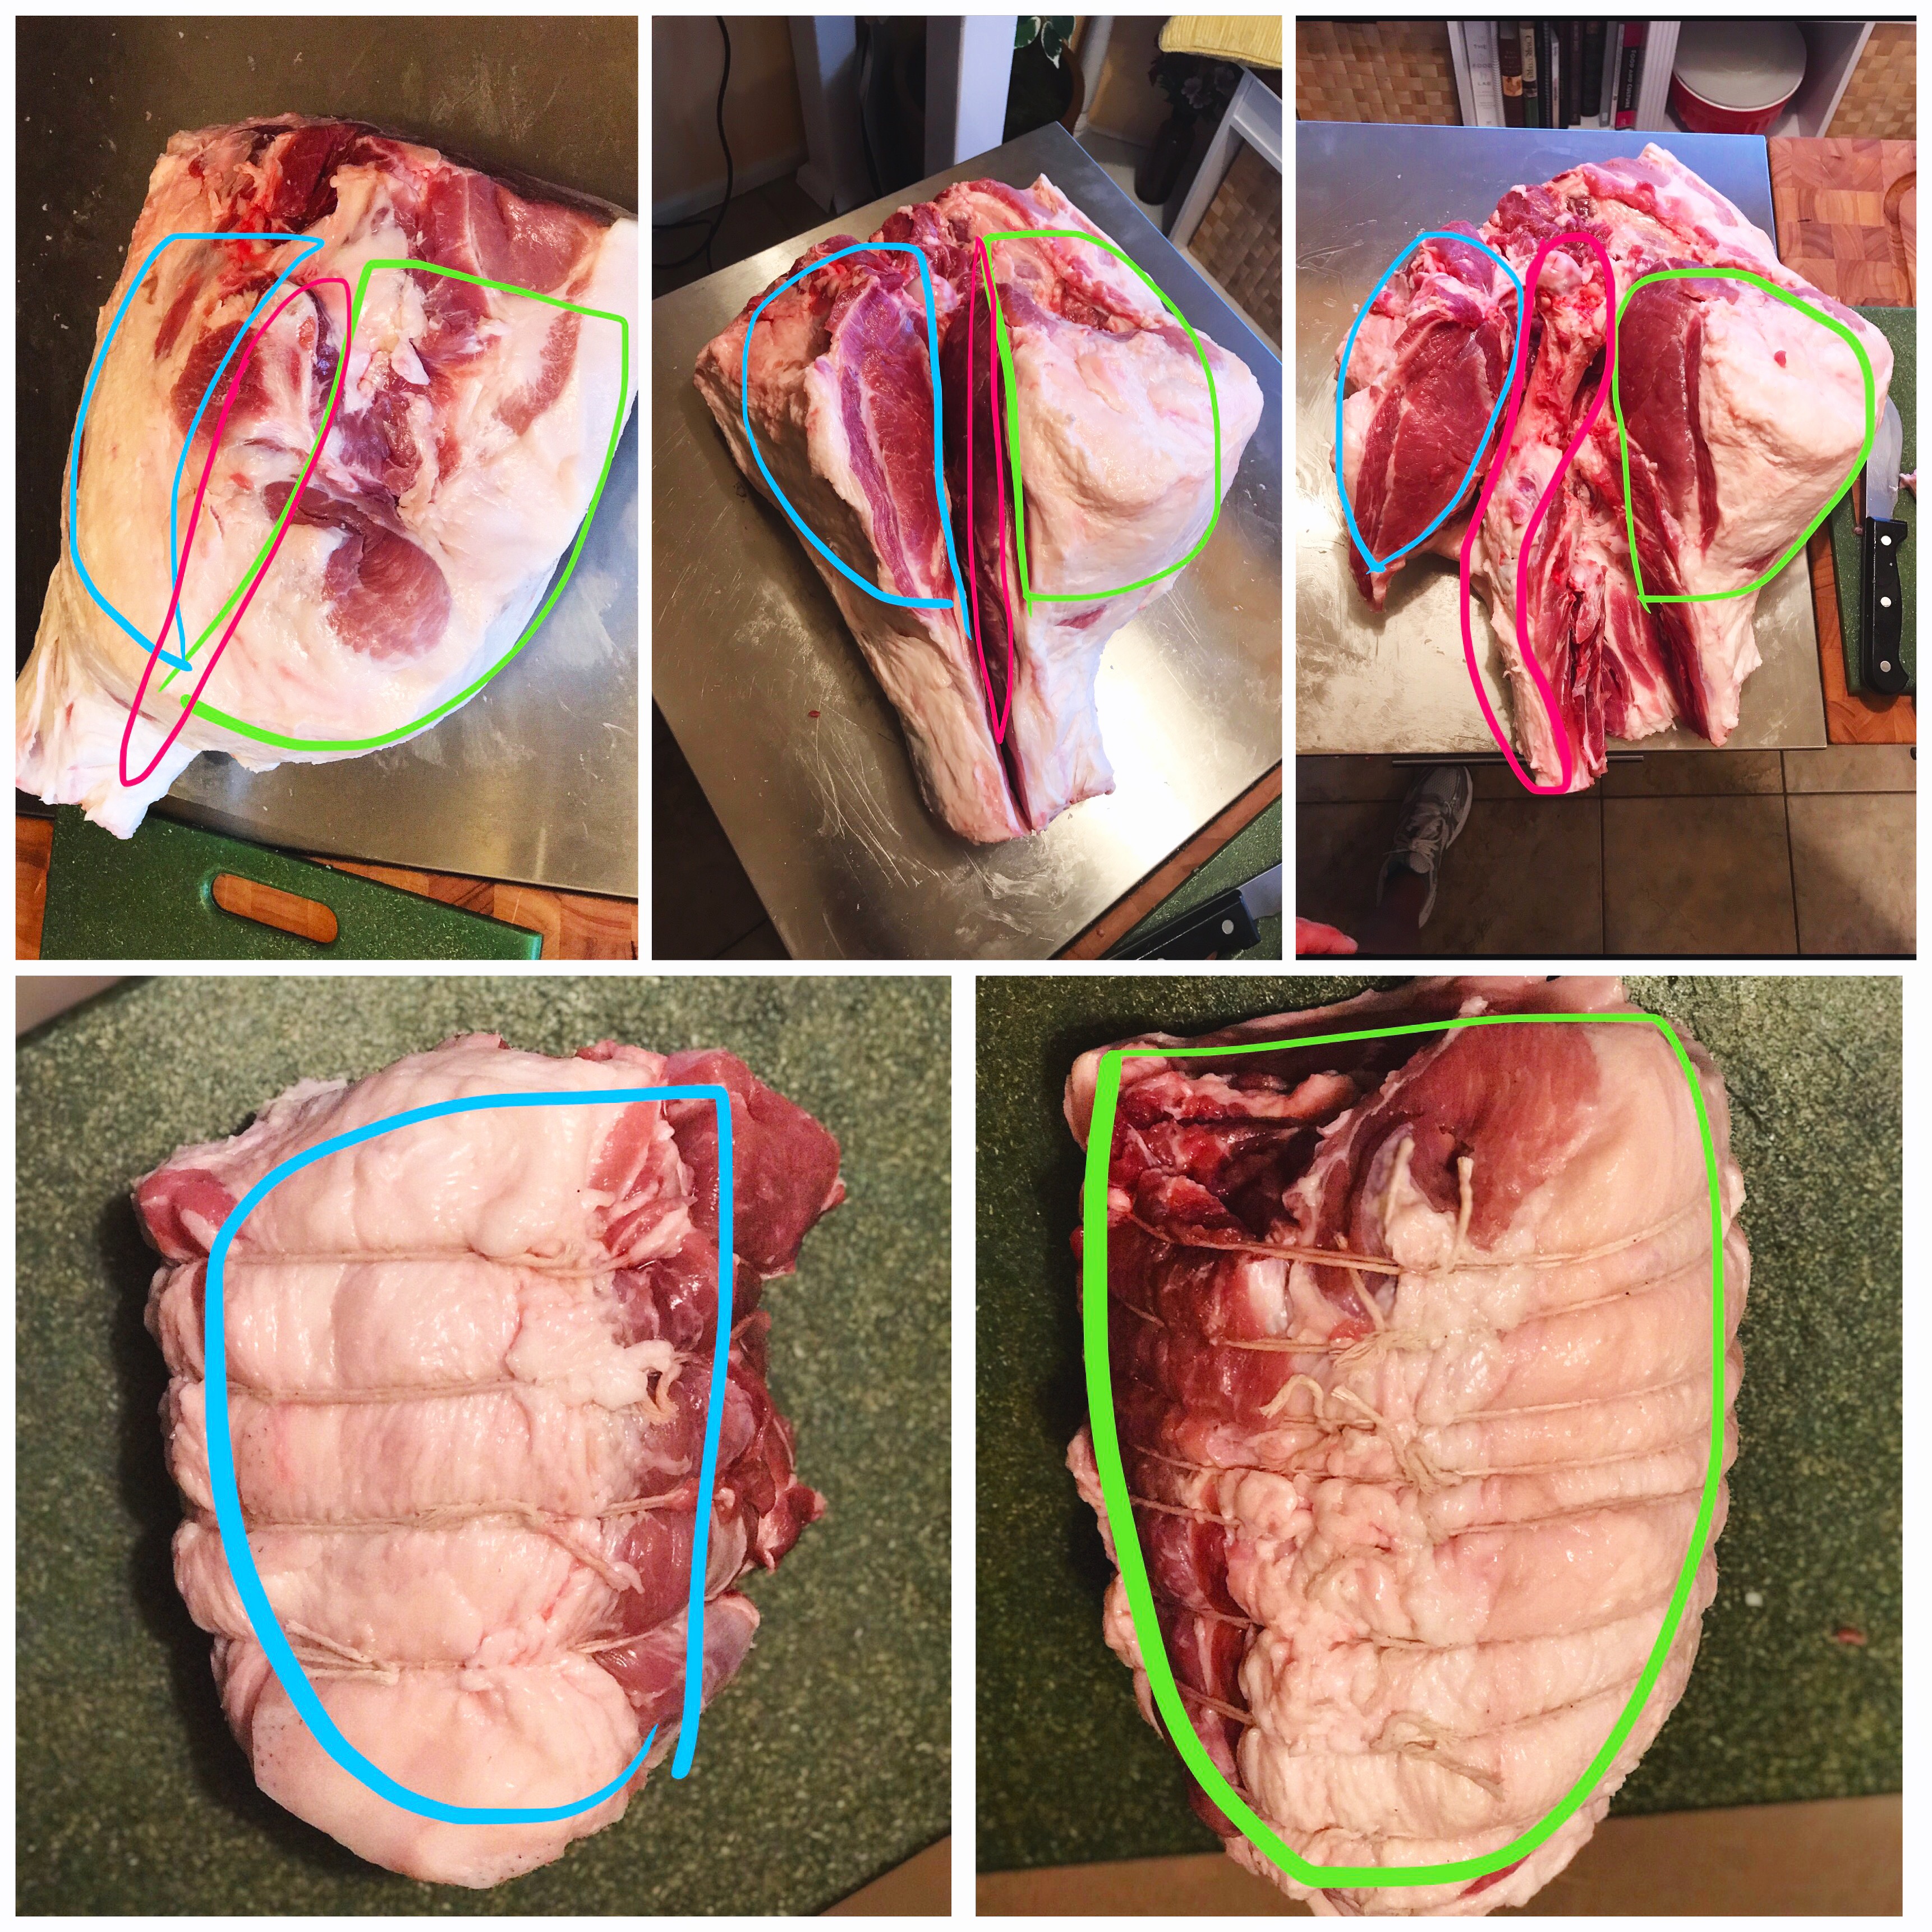
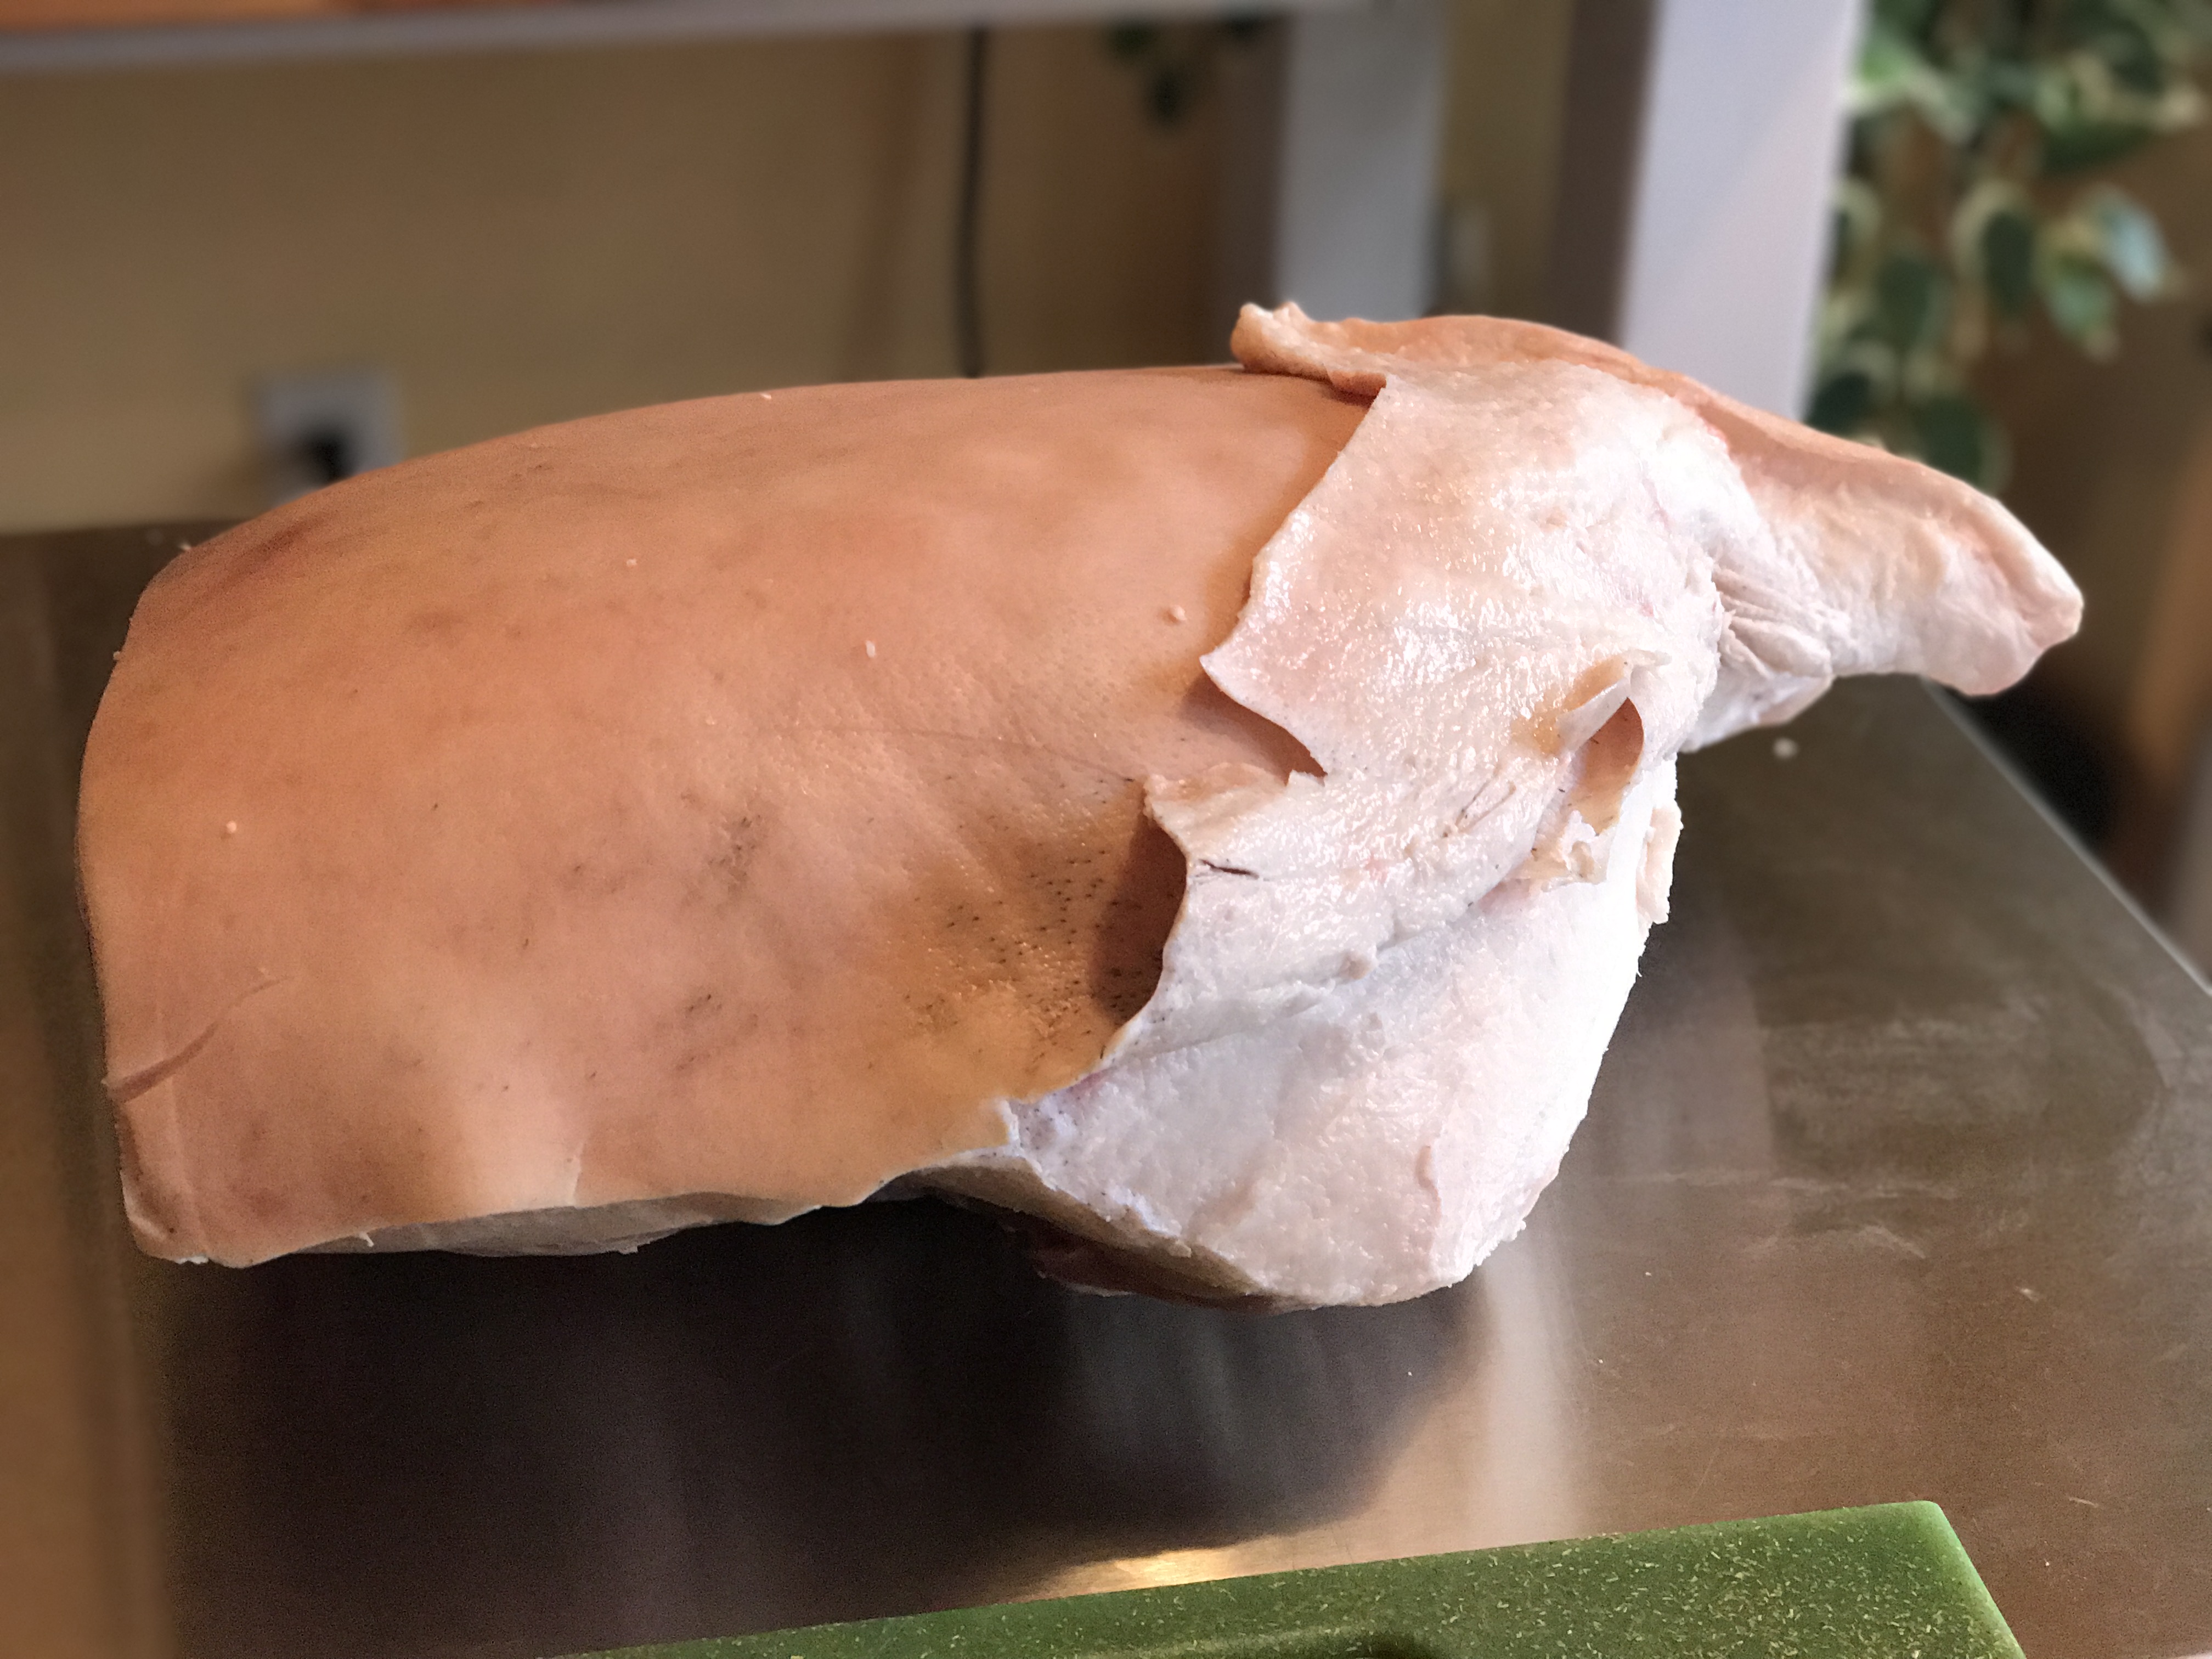
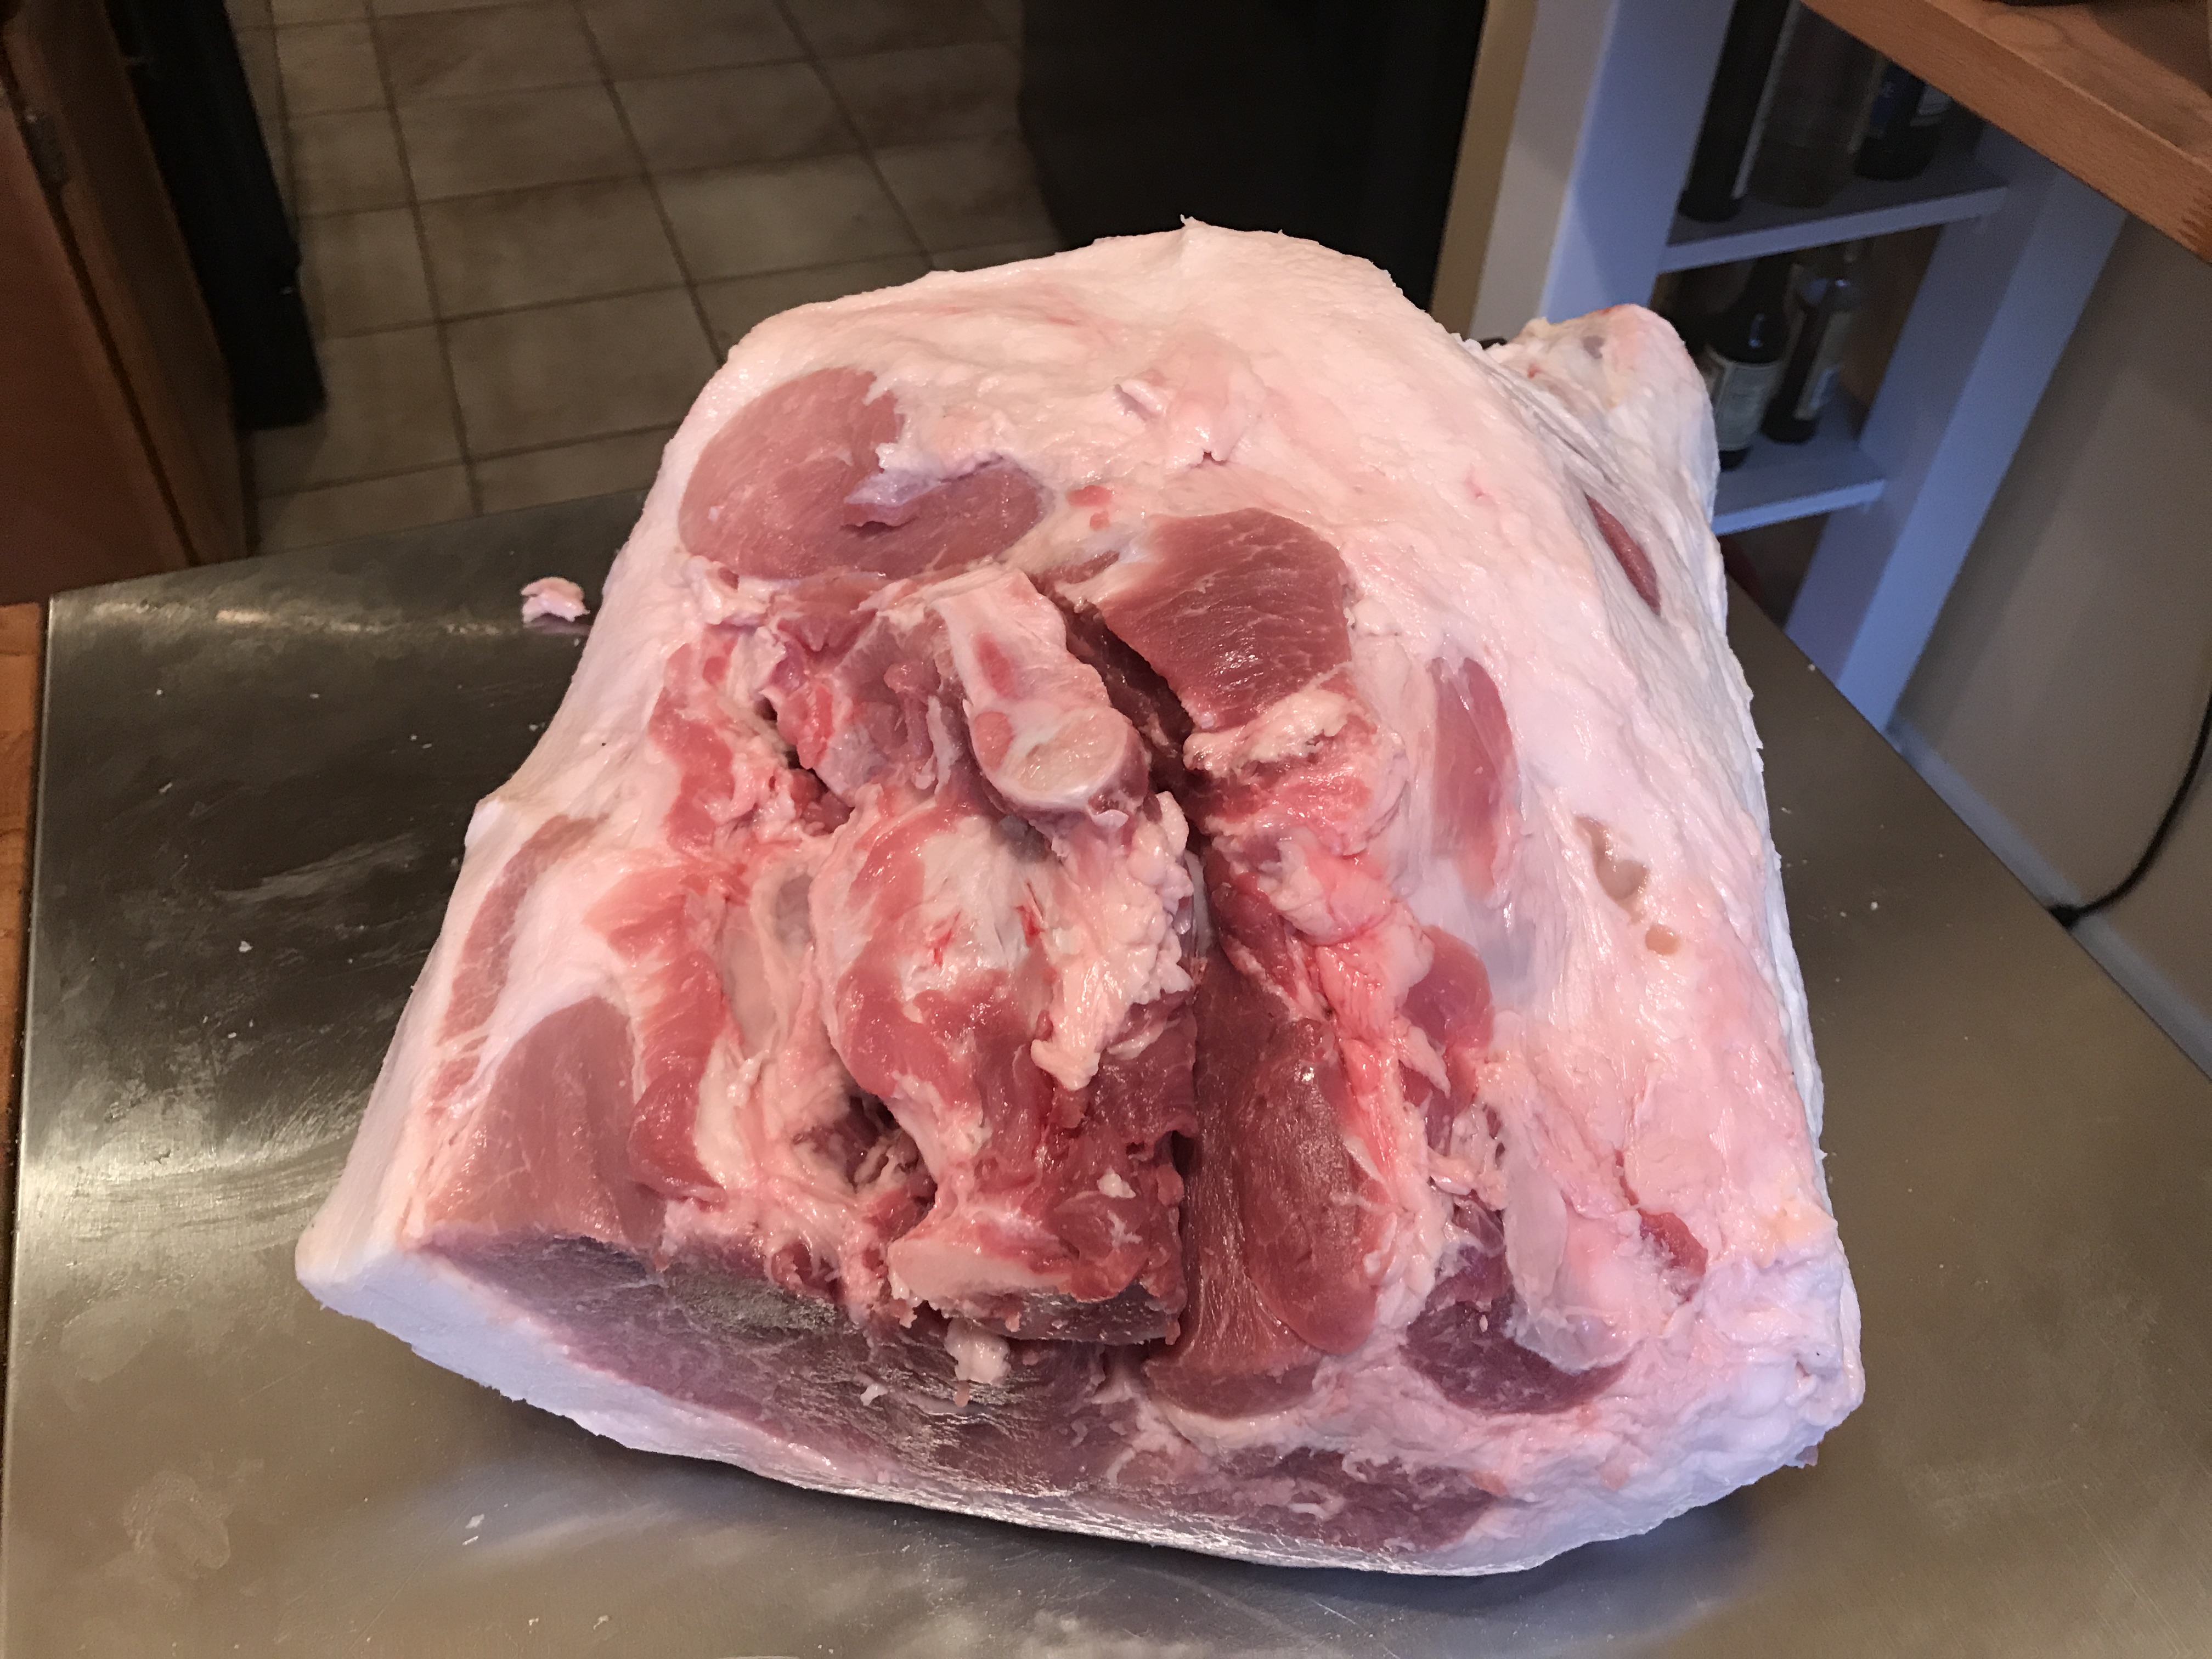
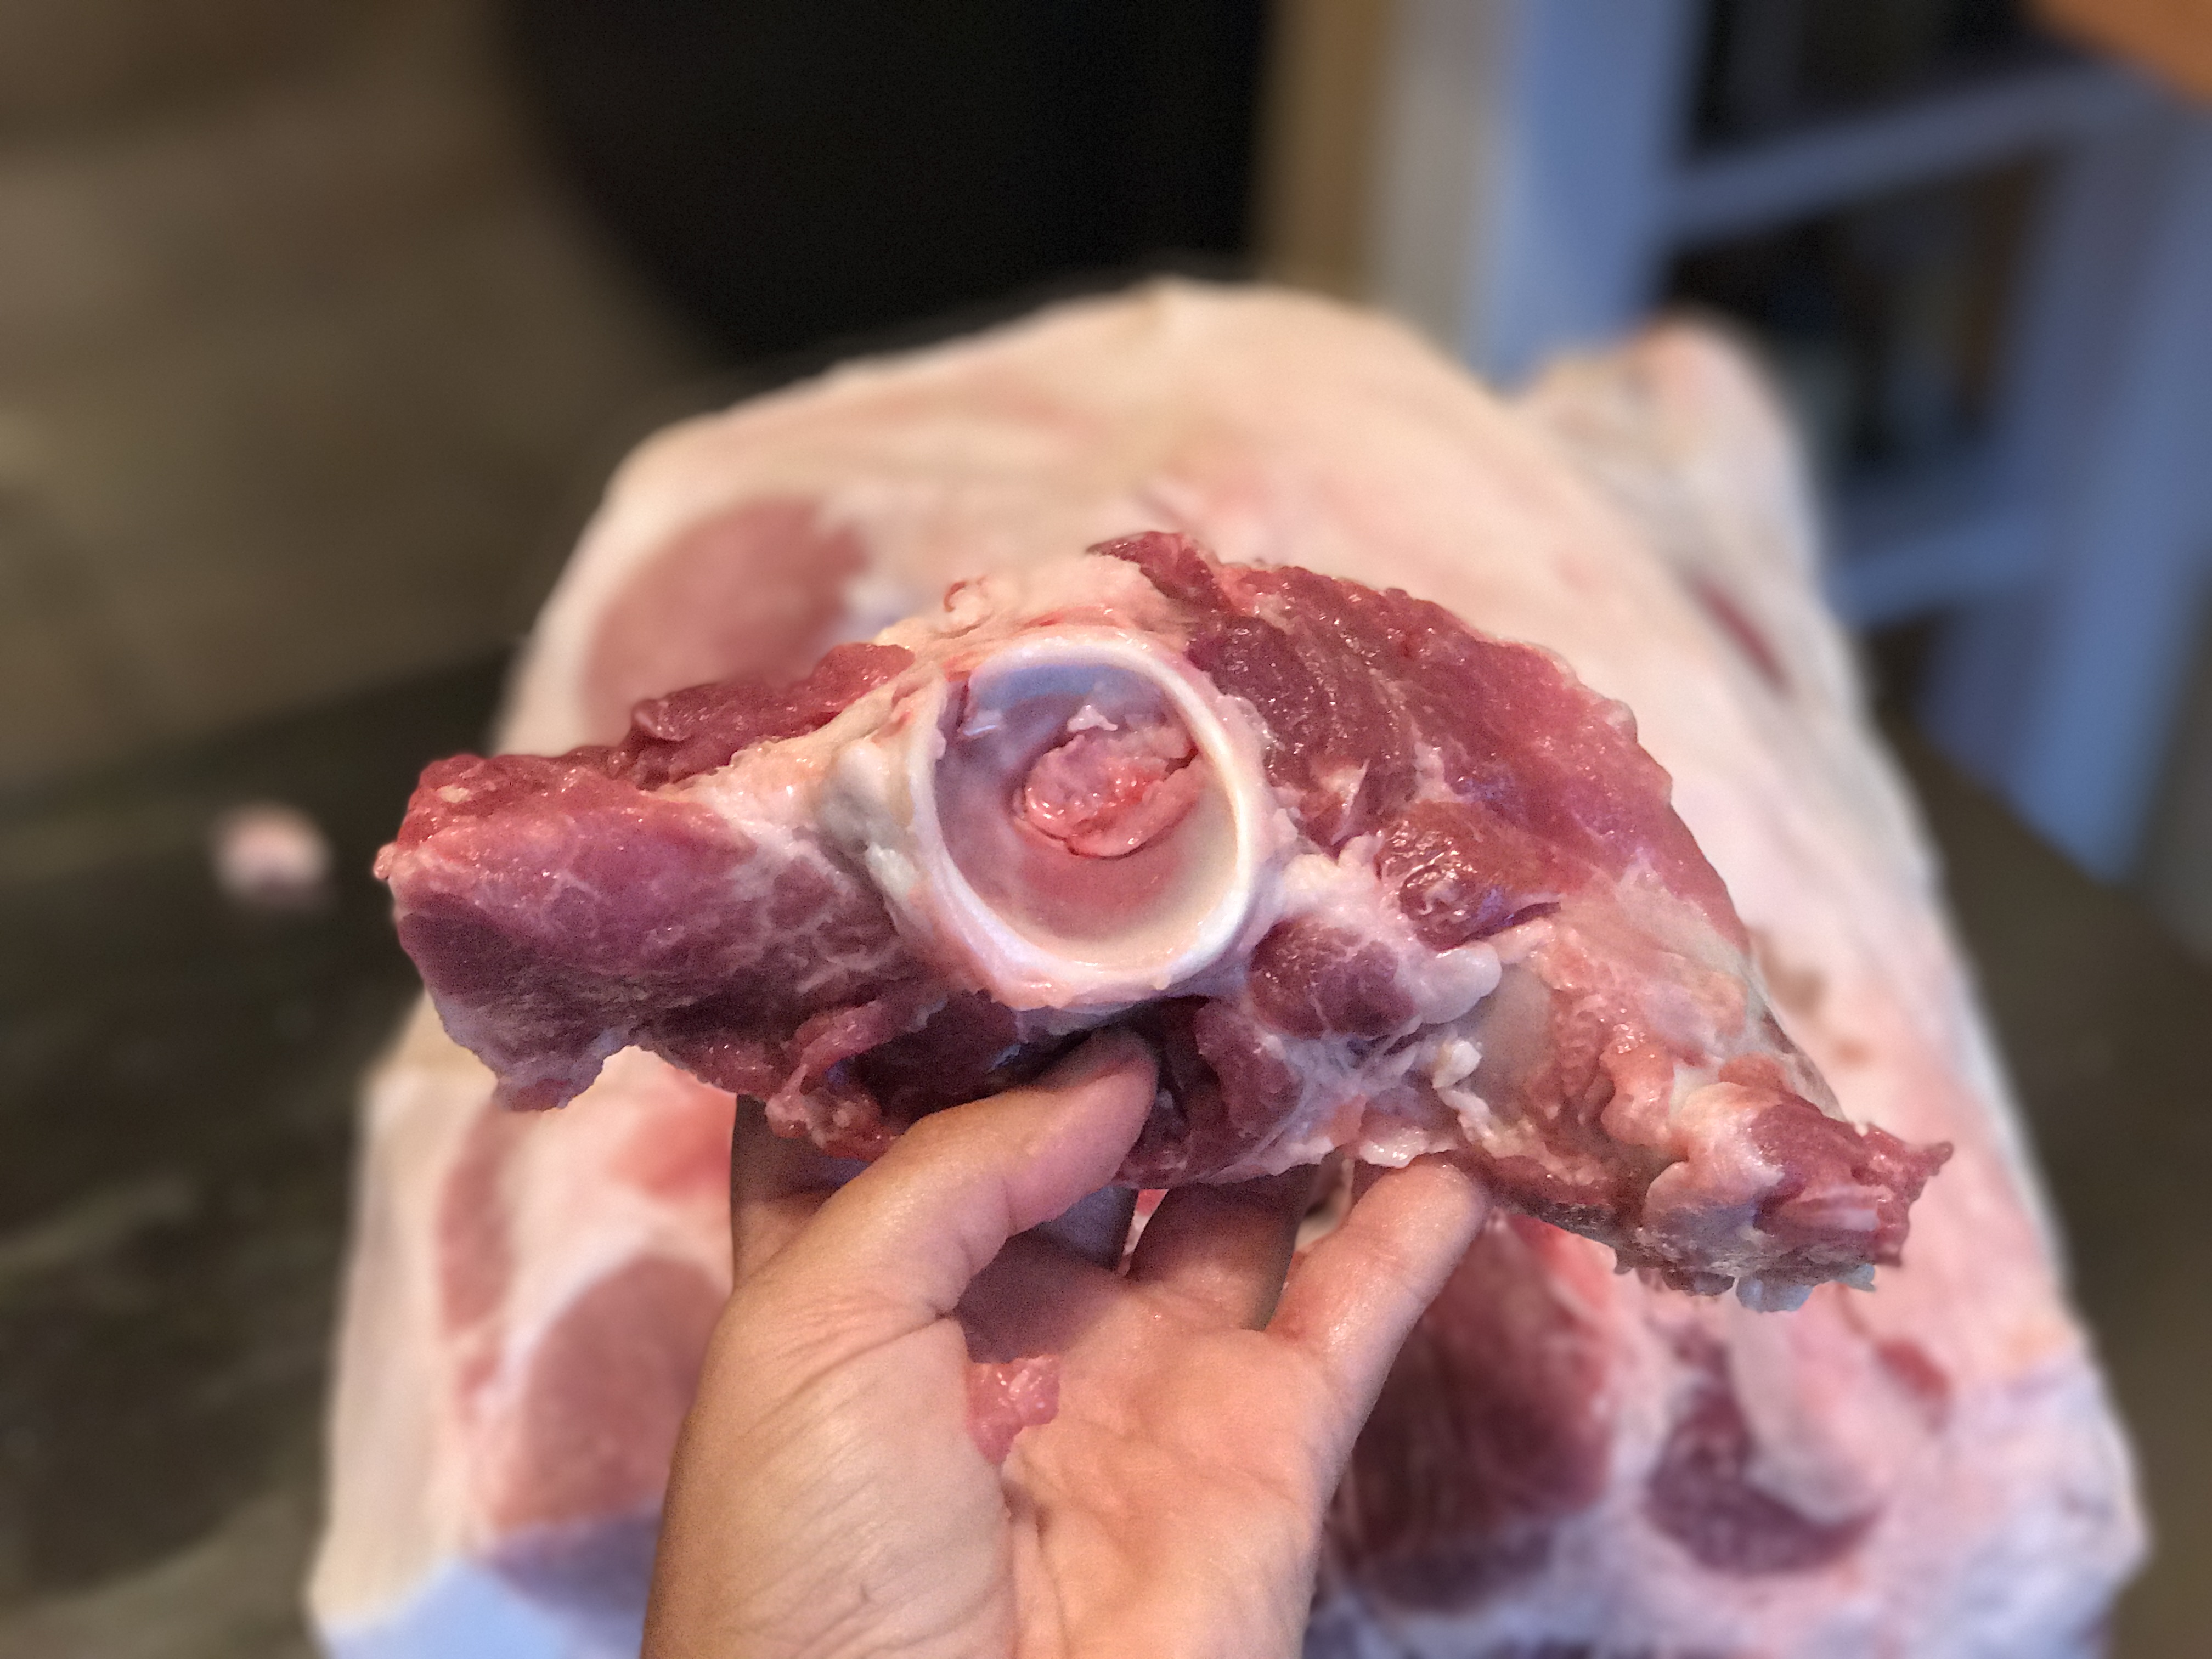
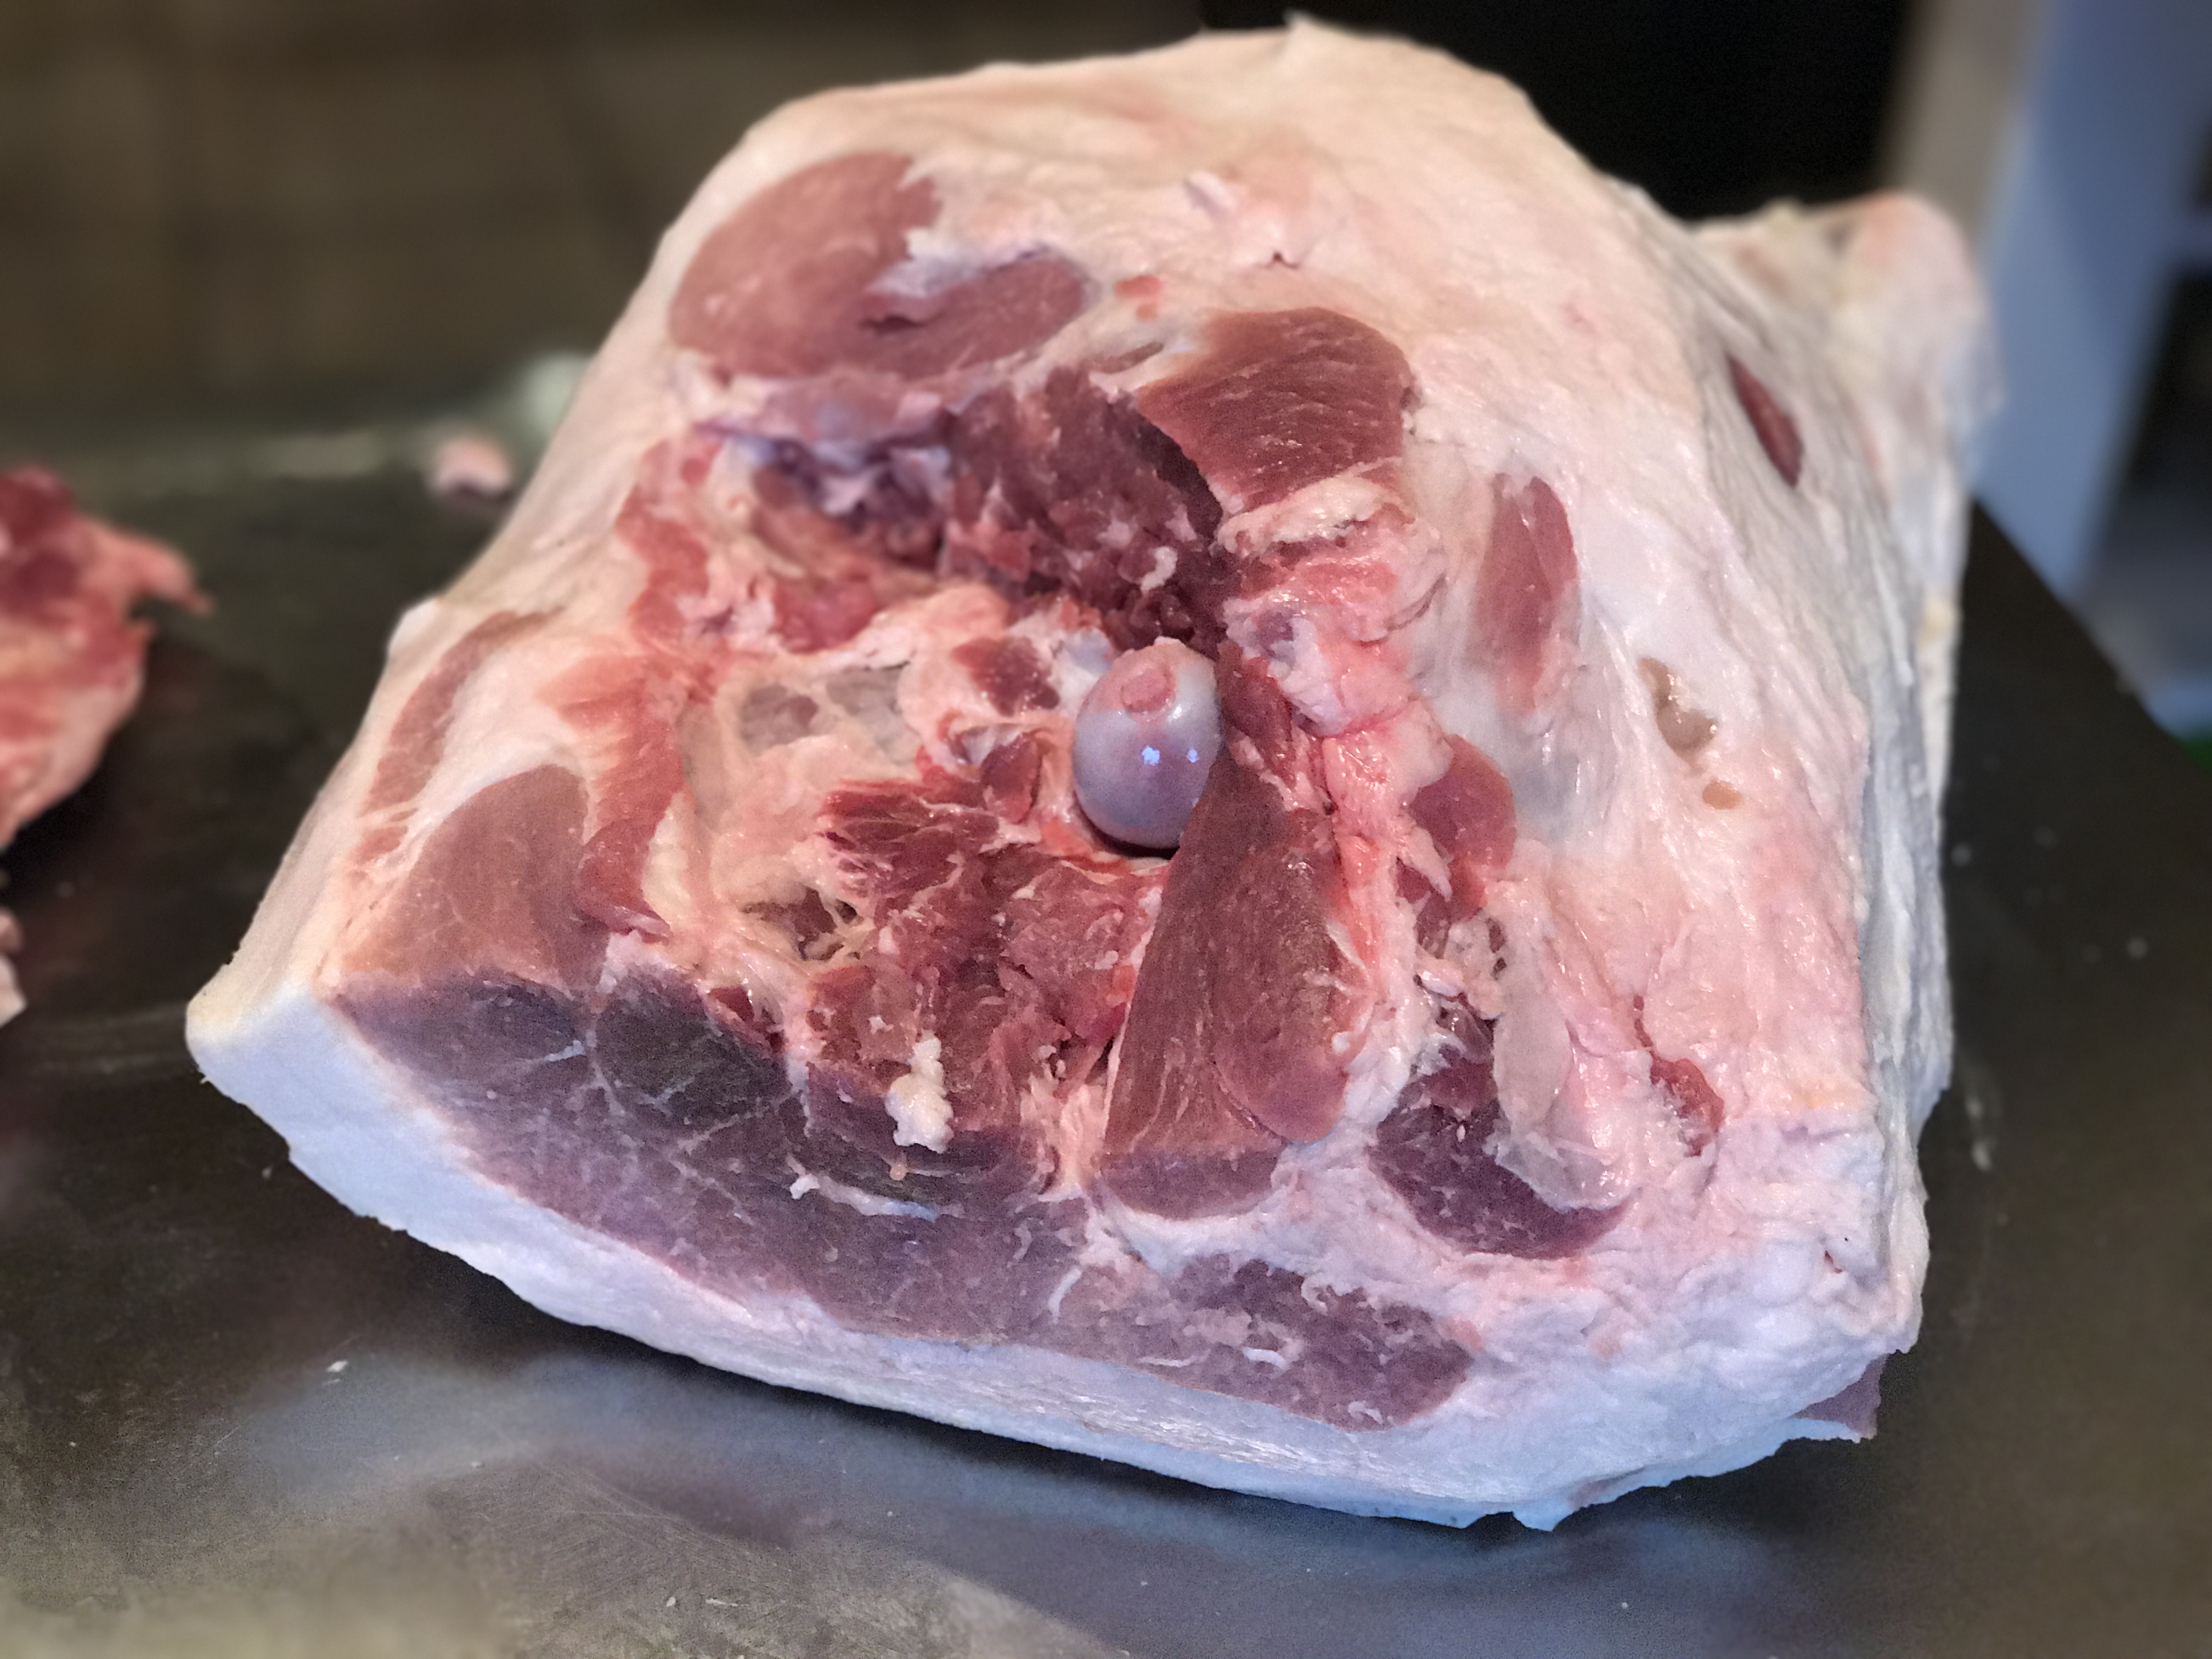
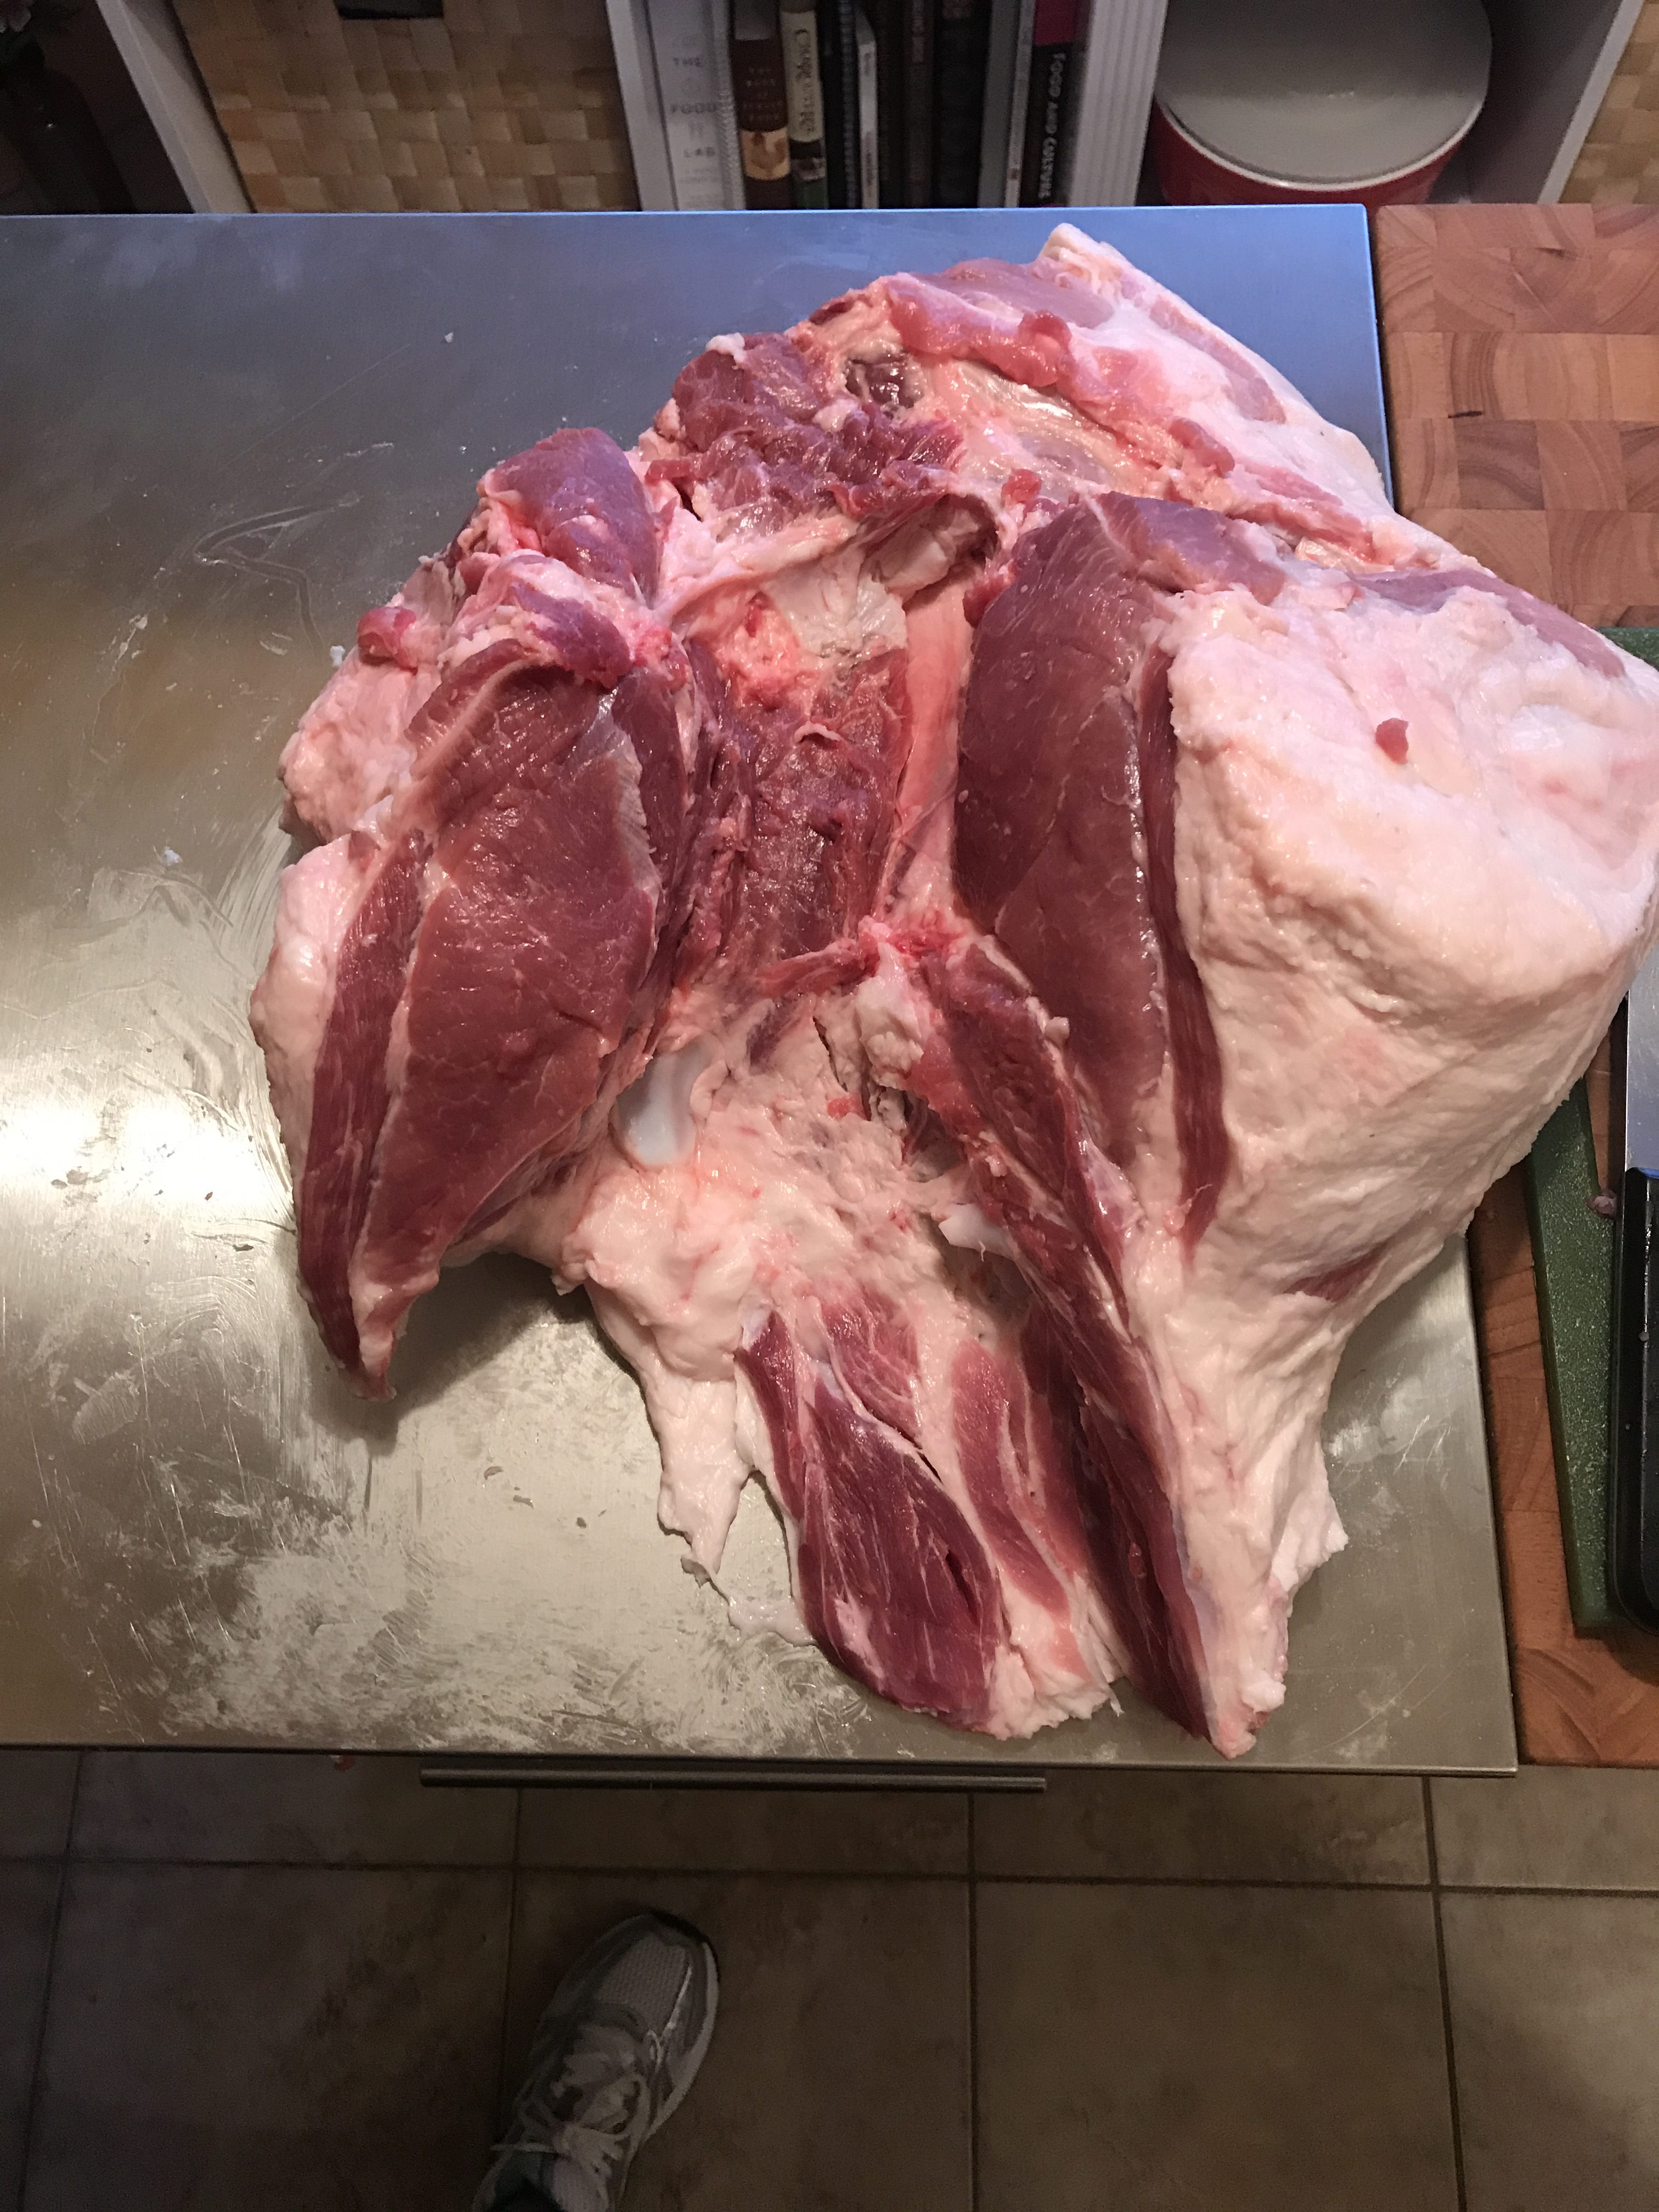
Ideally you will buy a bone-in leg of lamb and cut out the culatello yourself. If all you can find is bone-out leg of lamb, you can still make it work as long as it wasn’t all hacked about in the de-boning process.

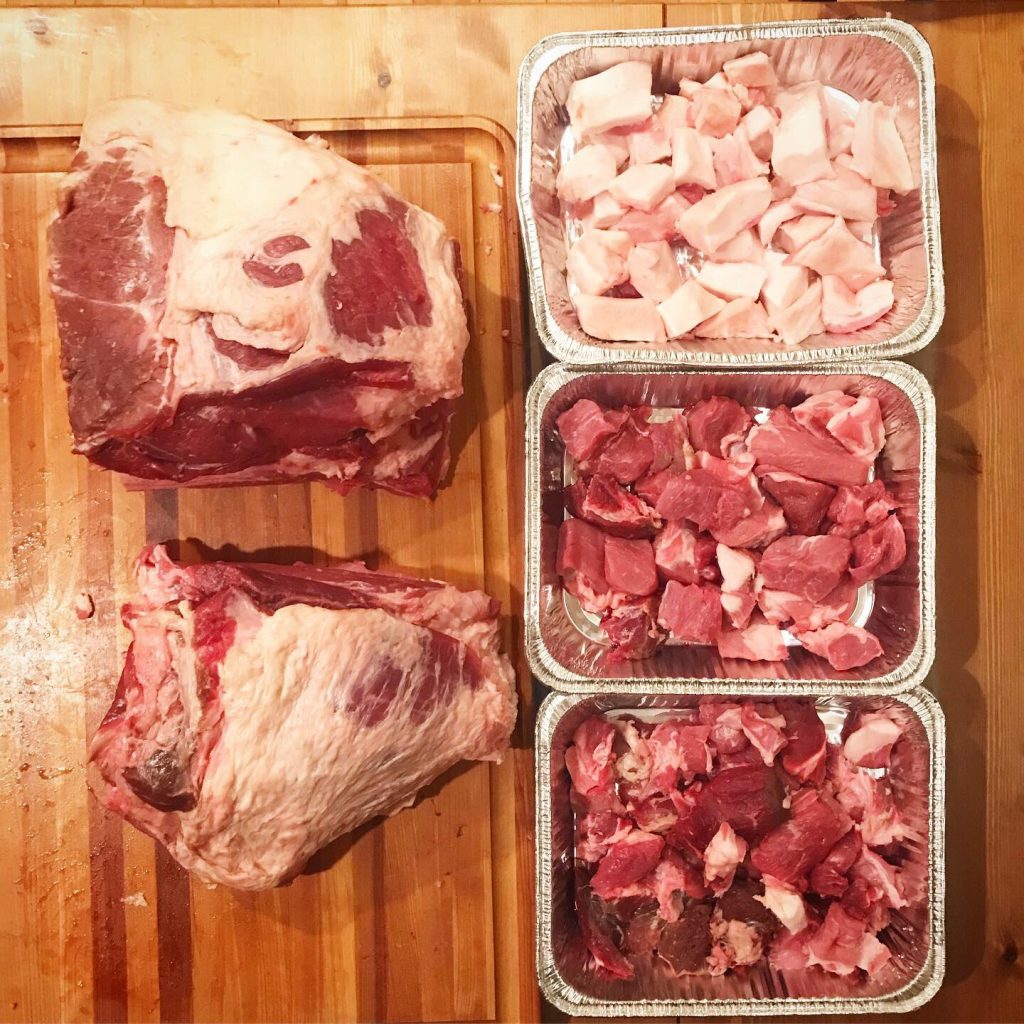
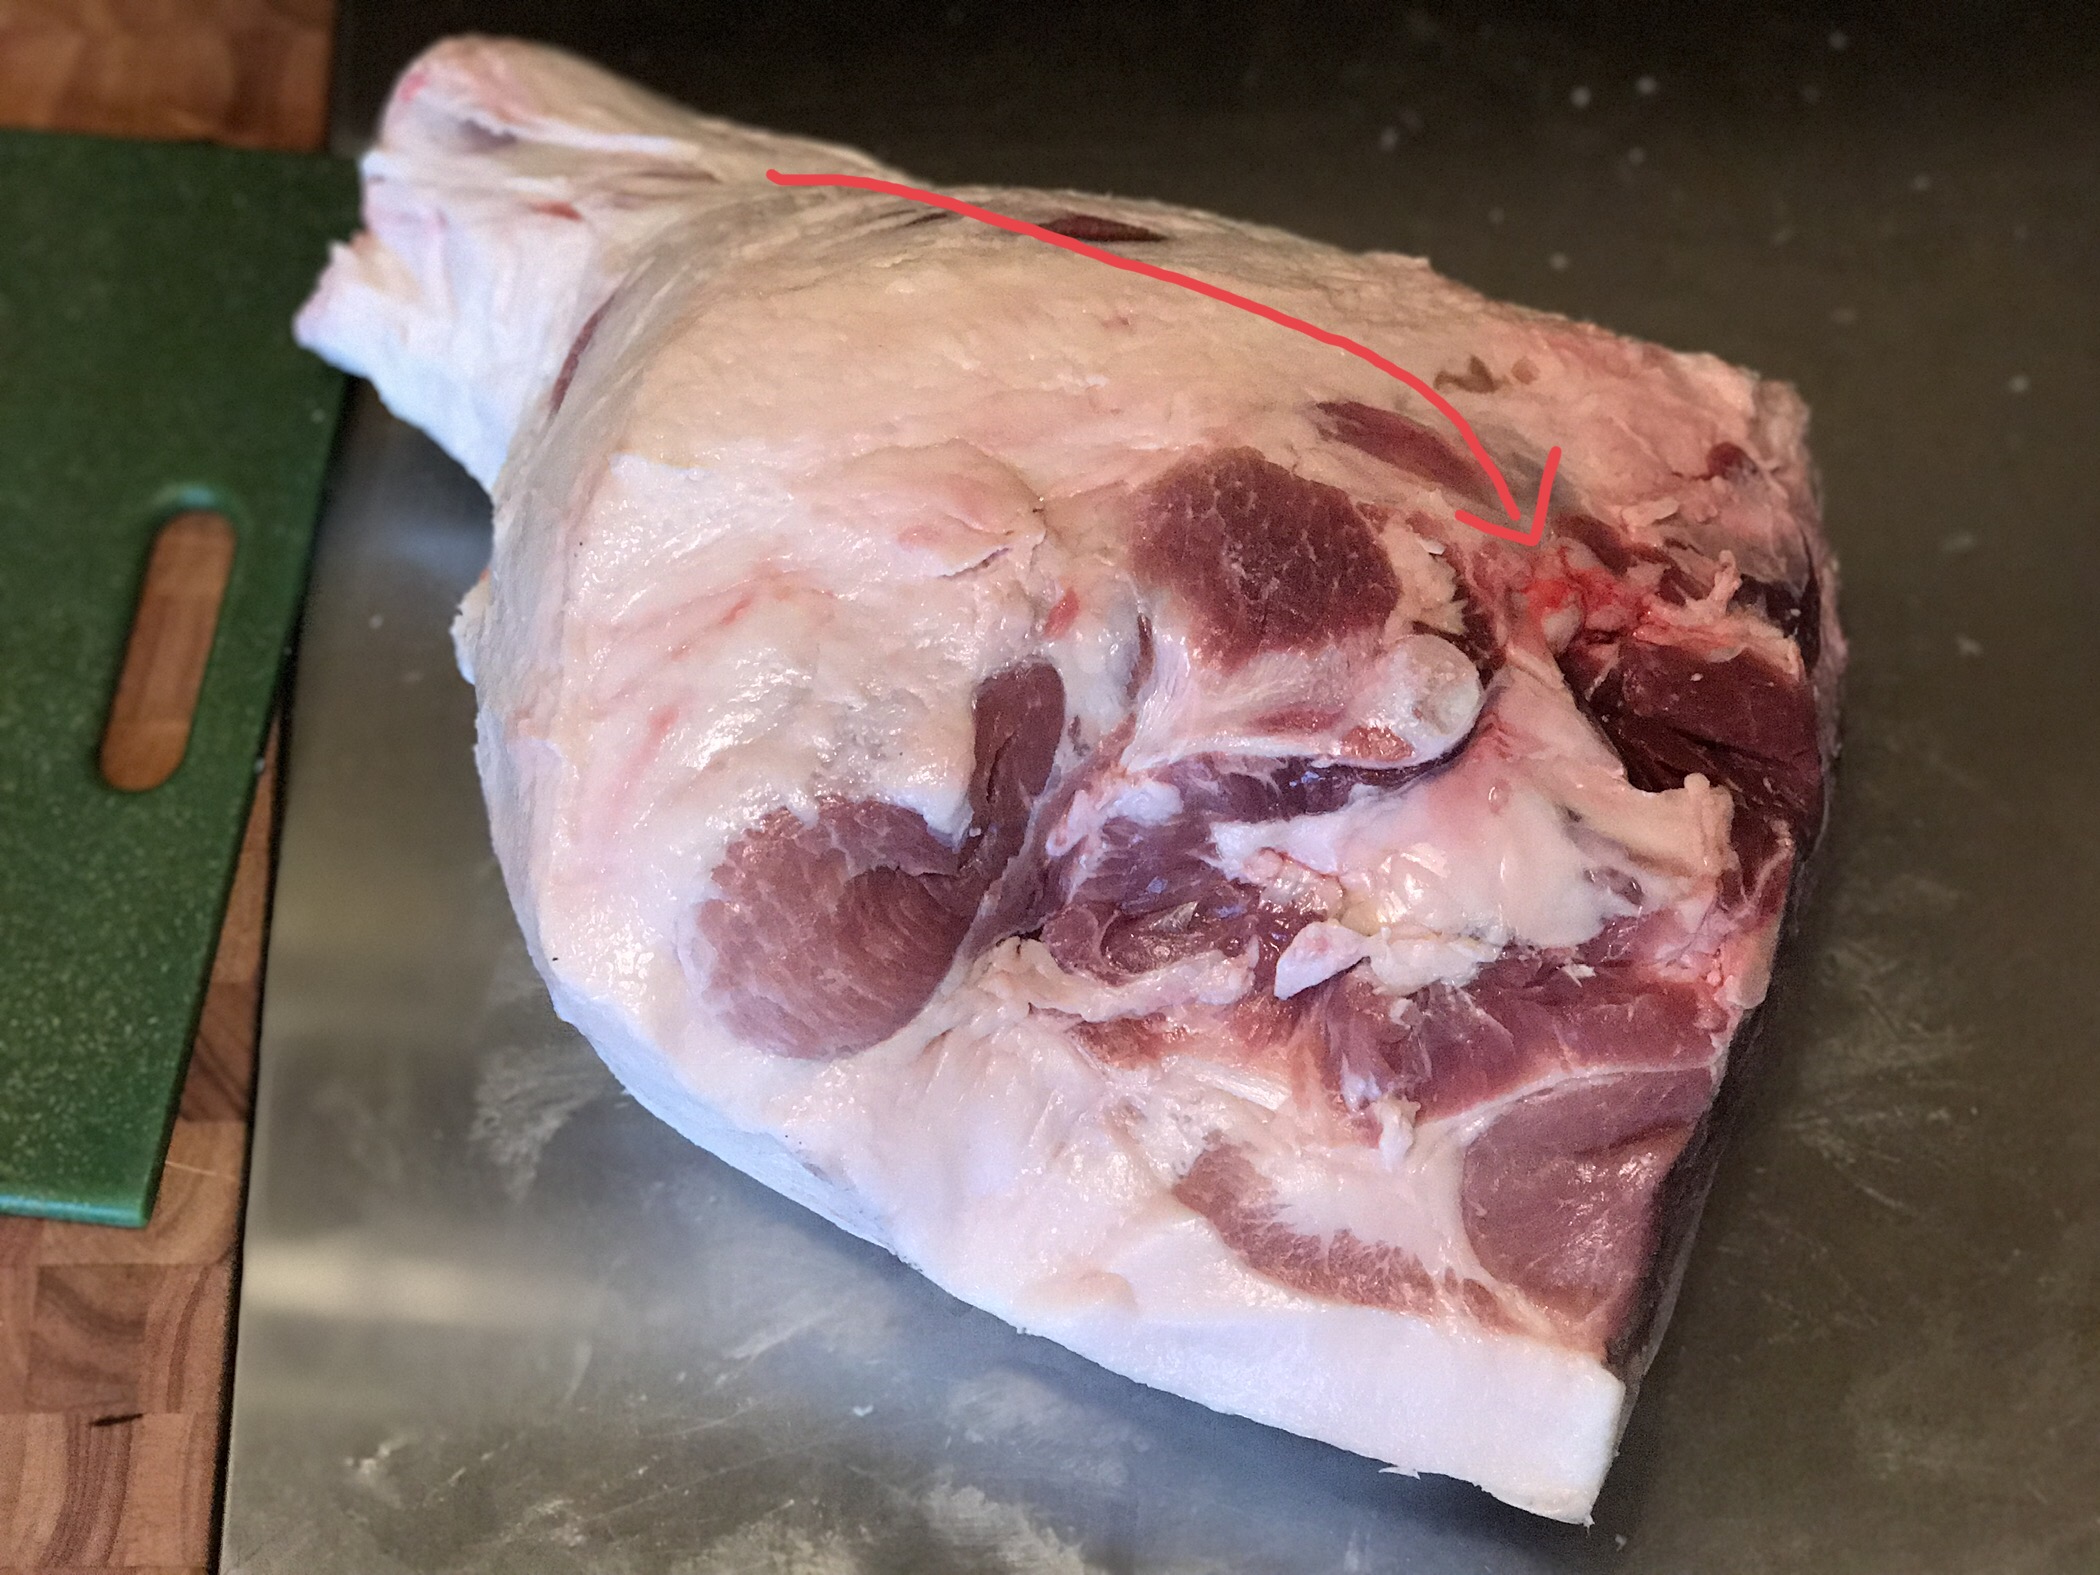
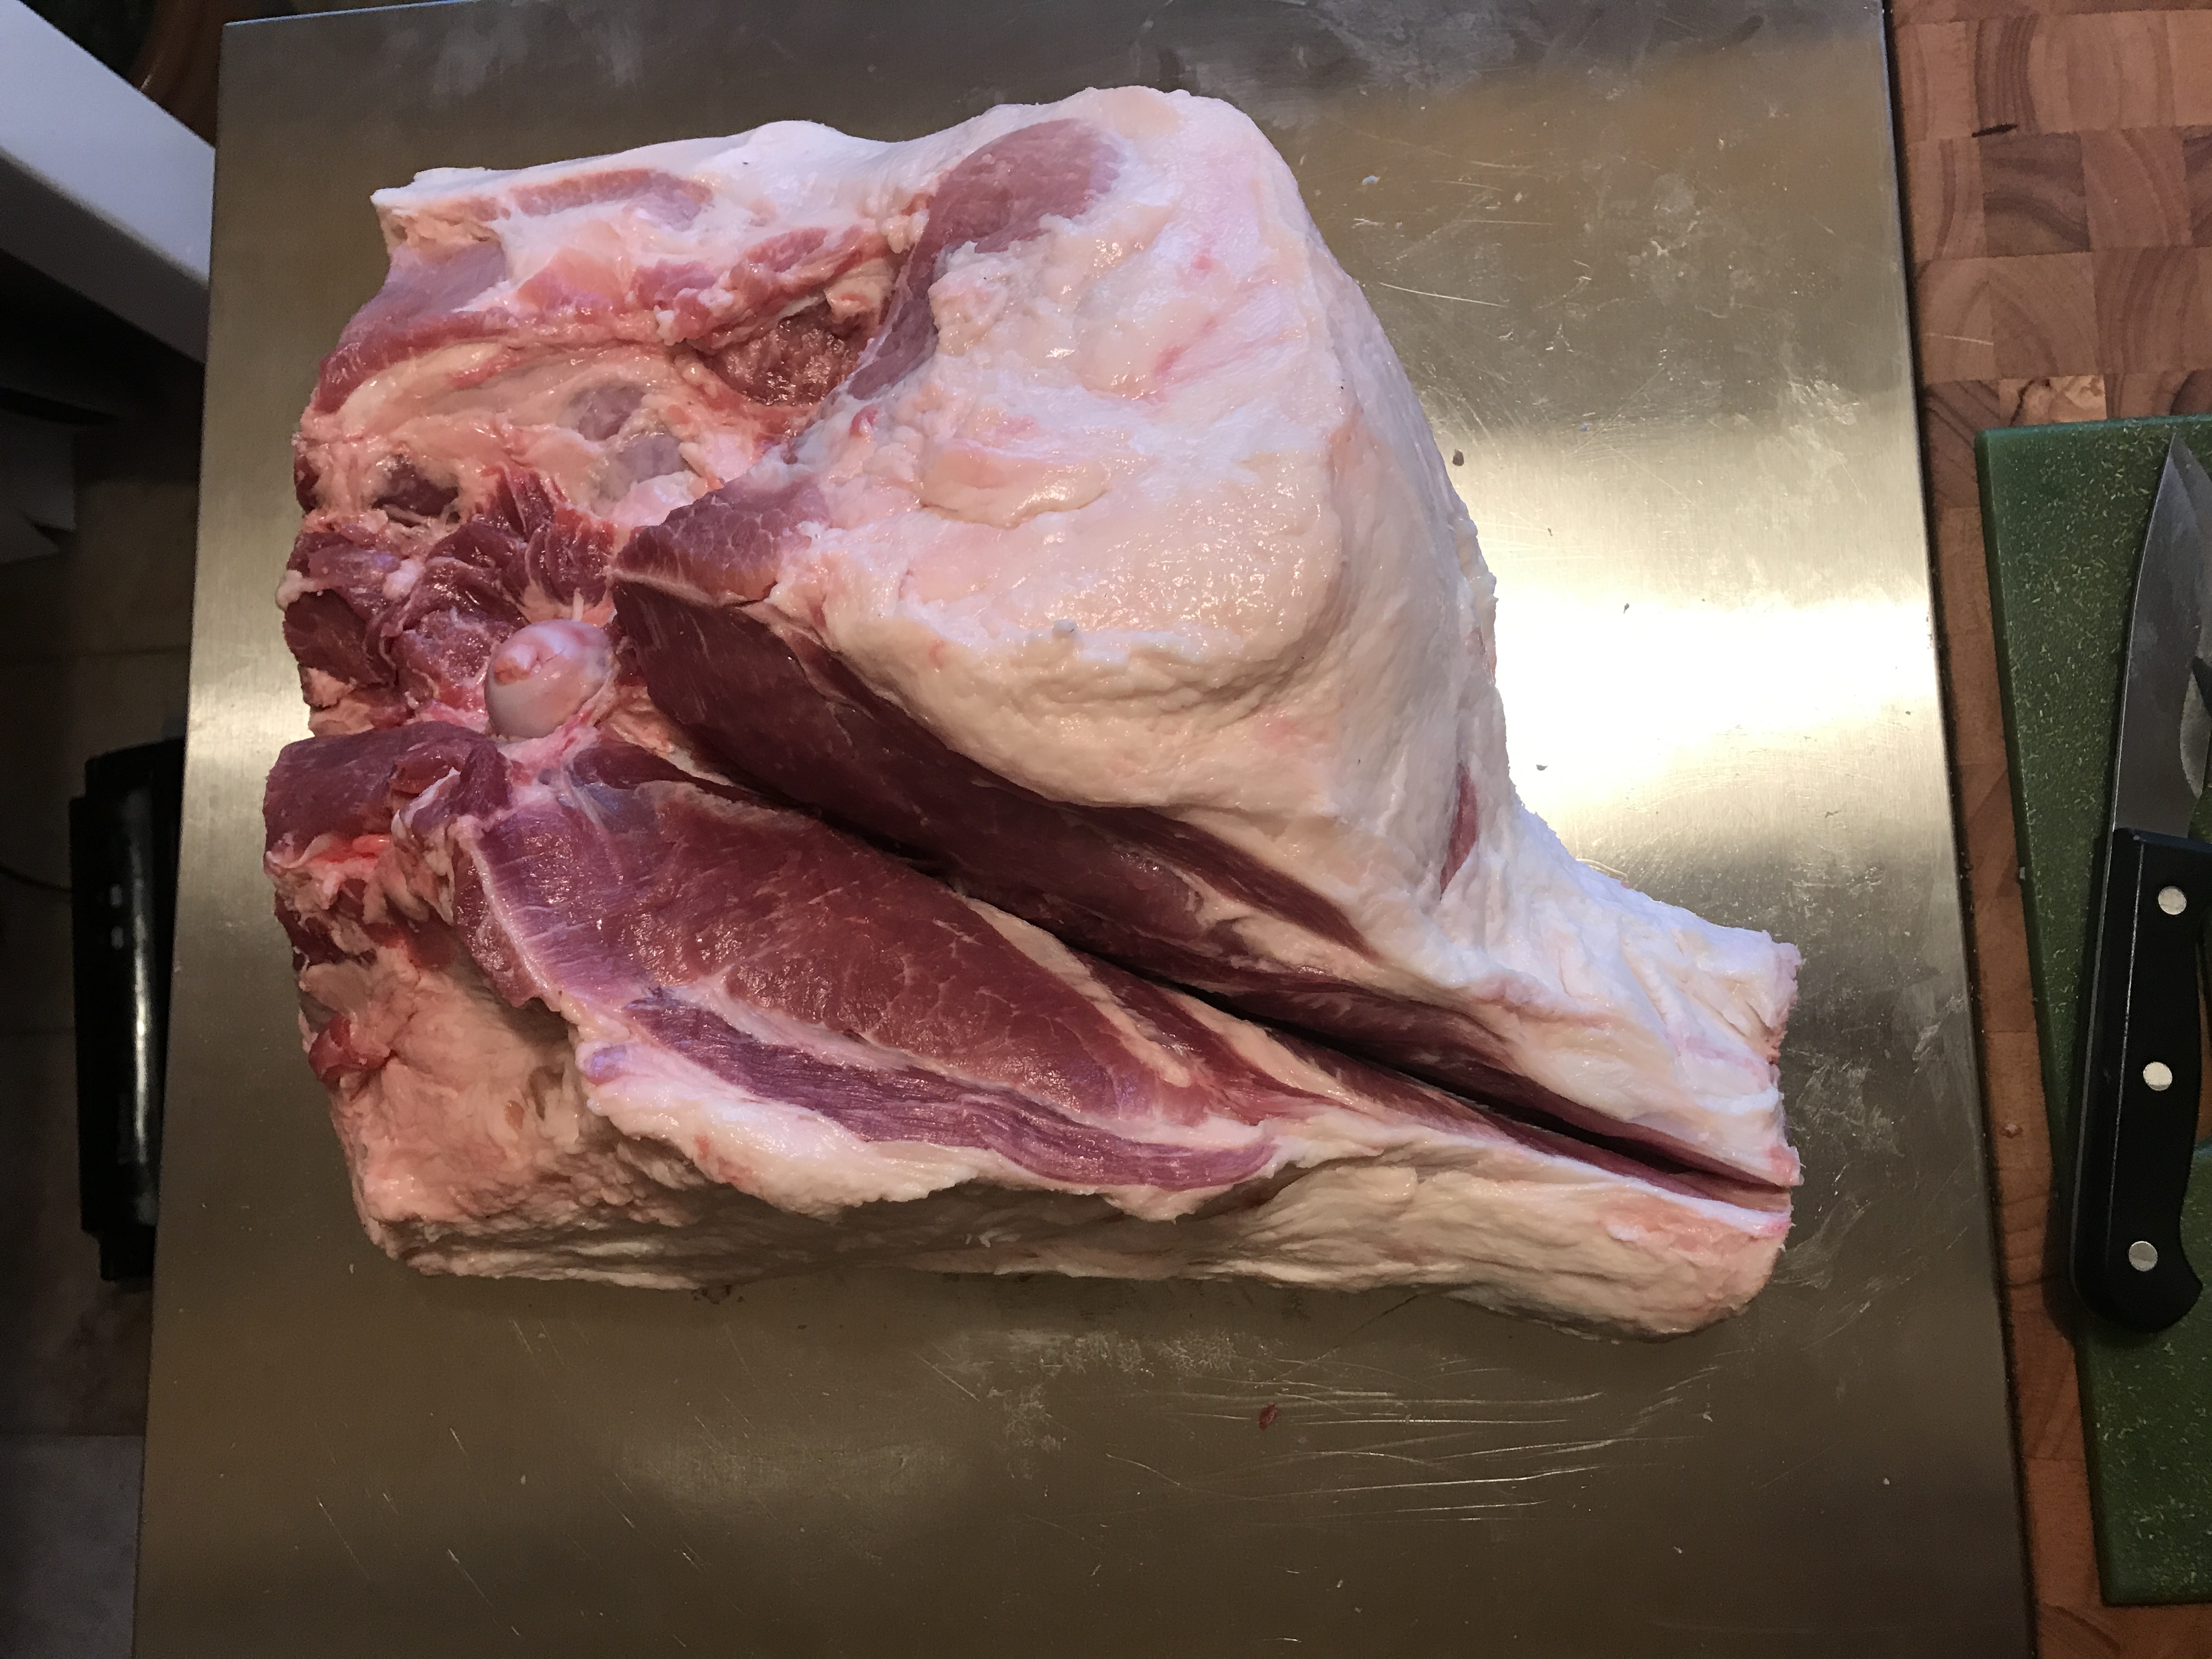
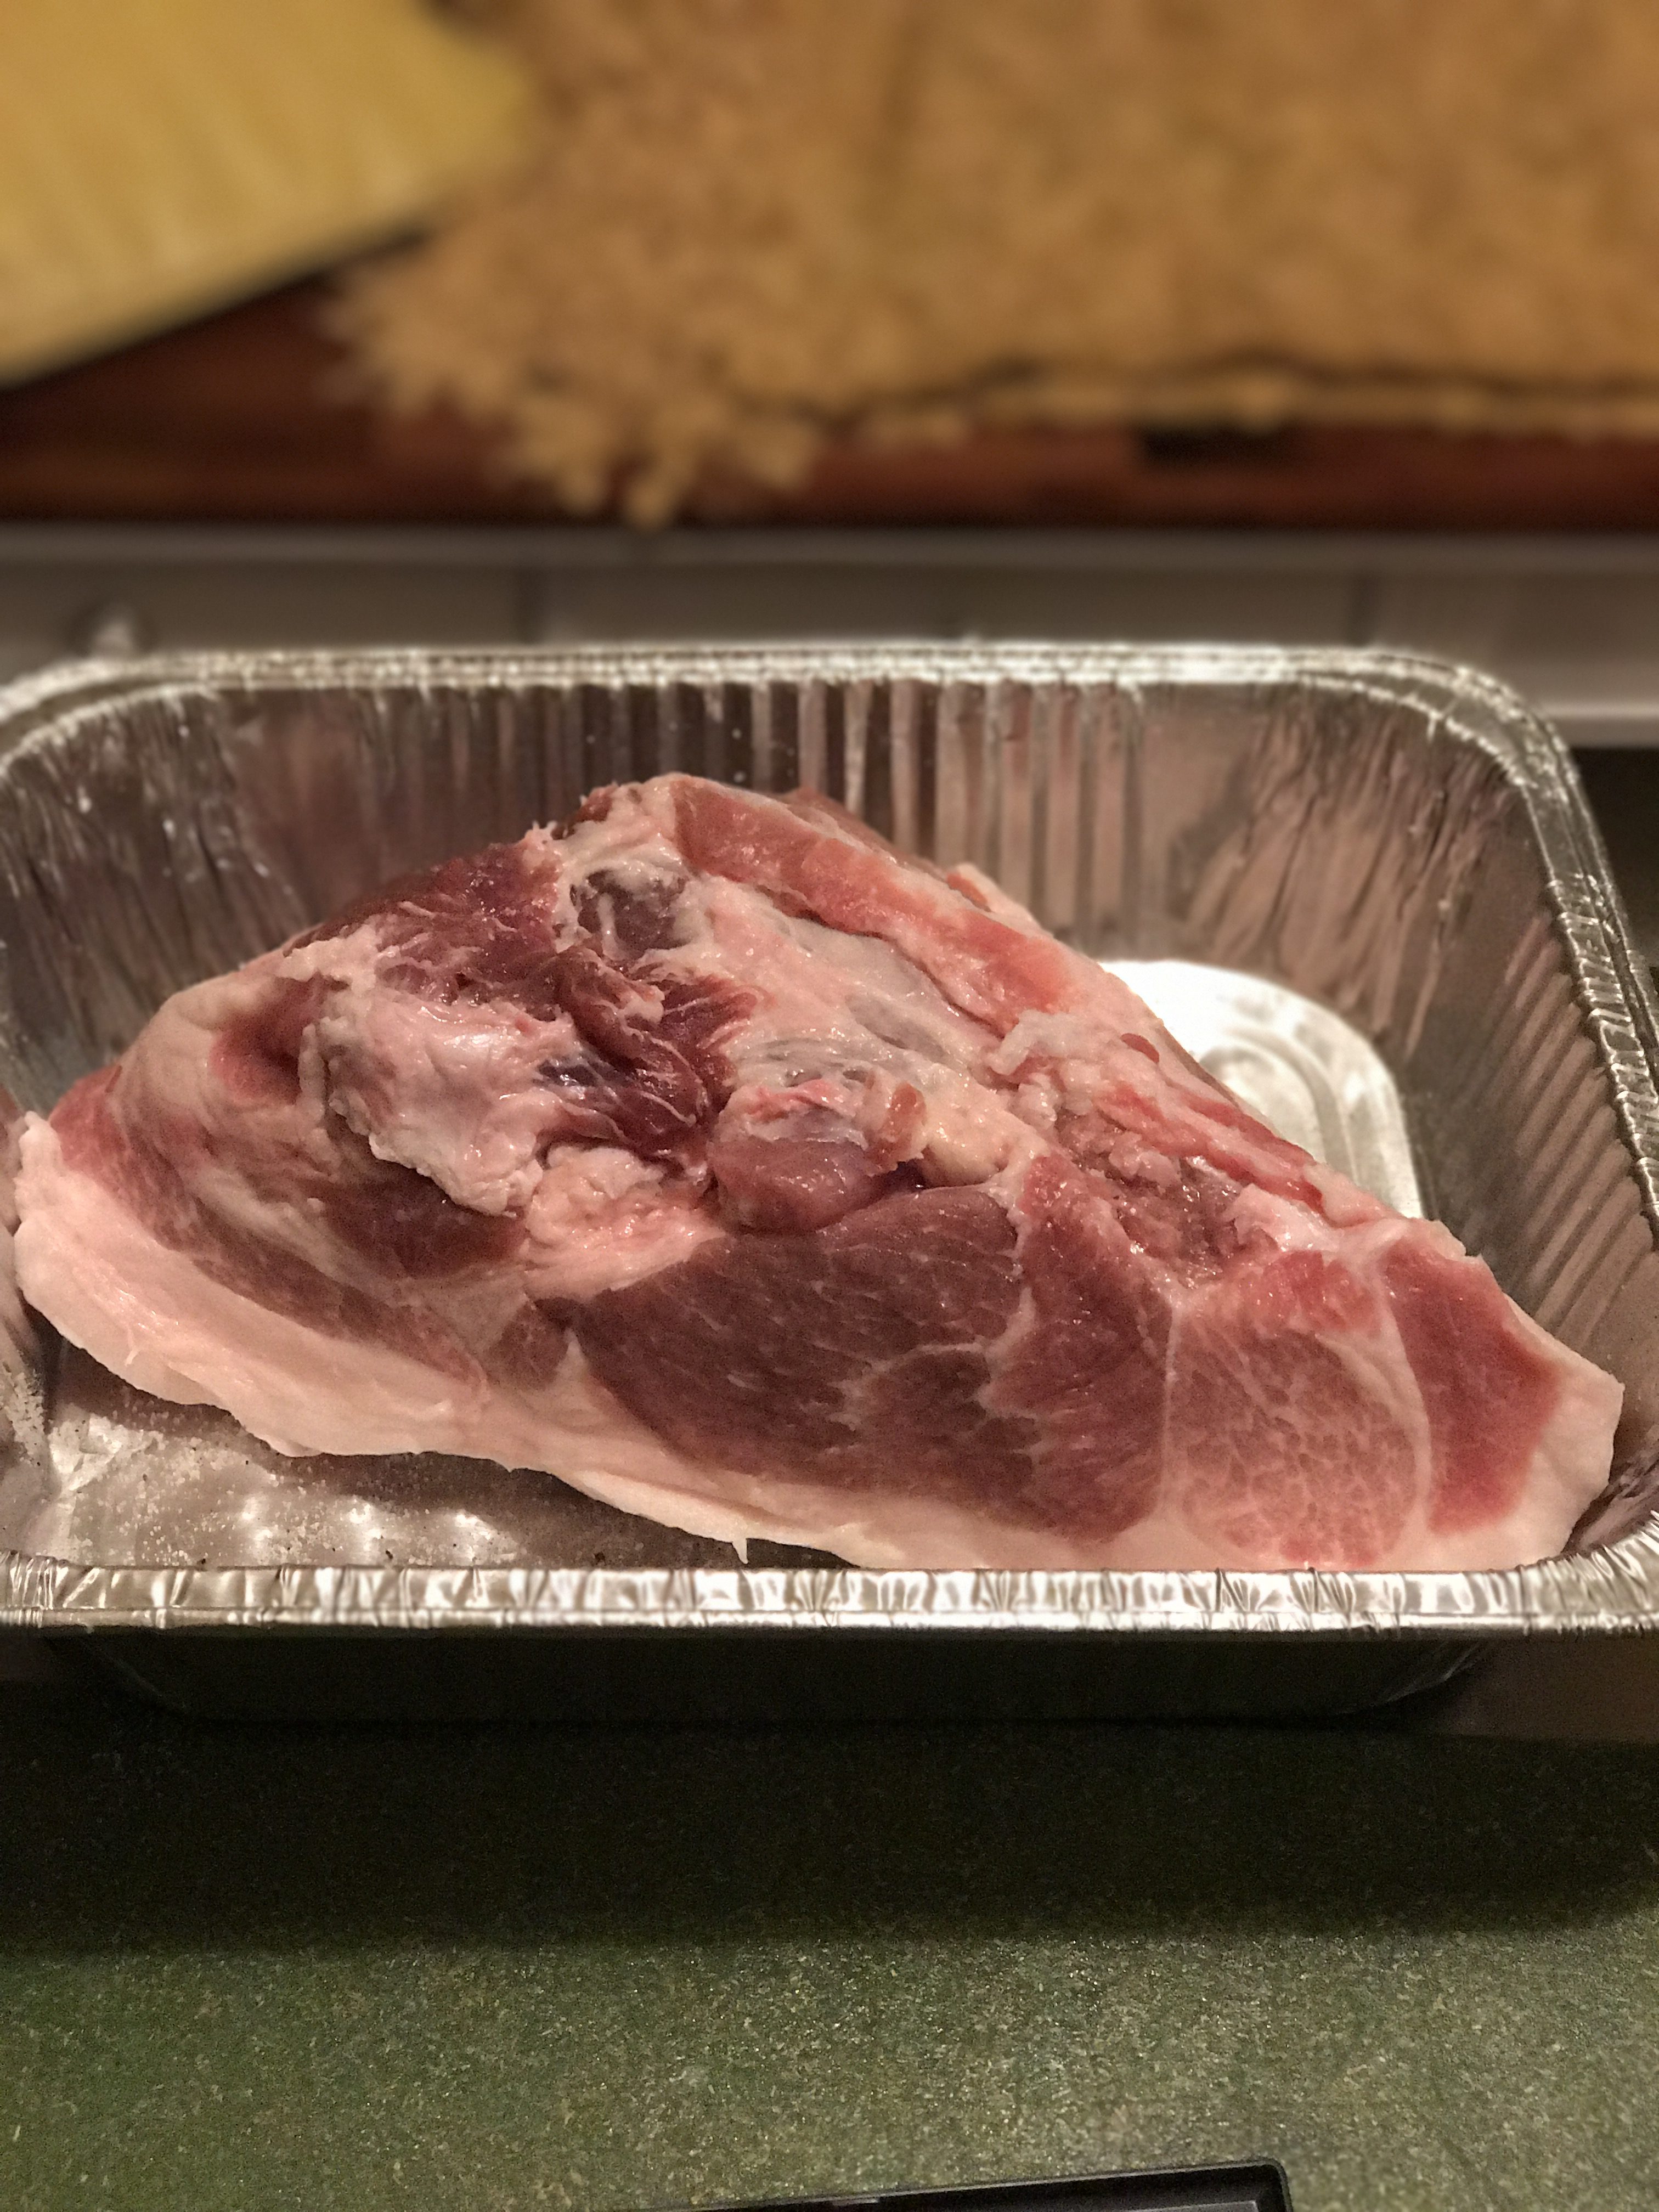
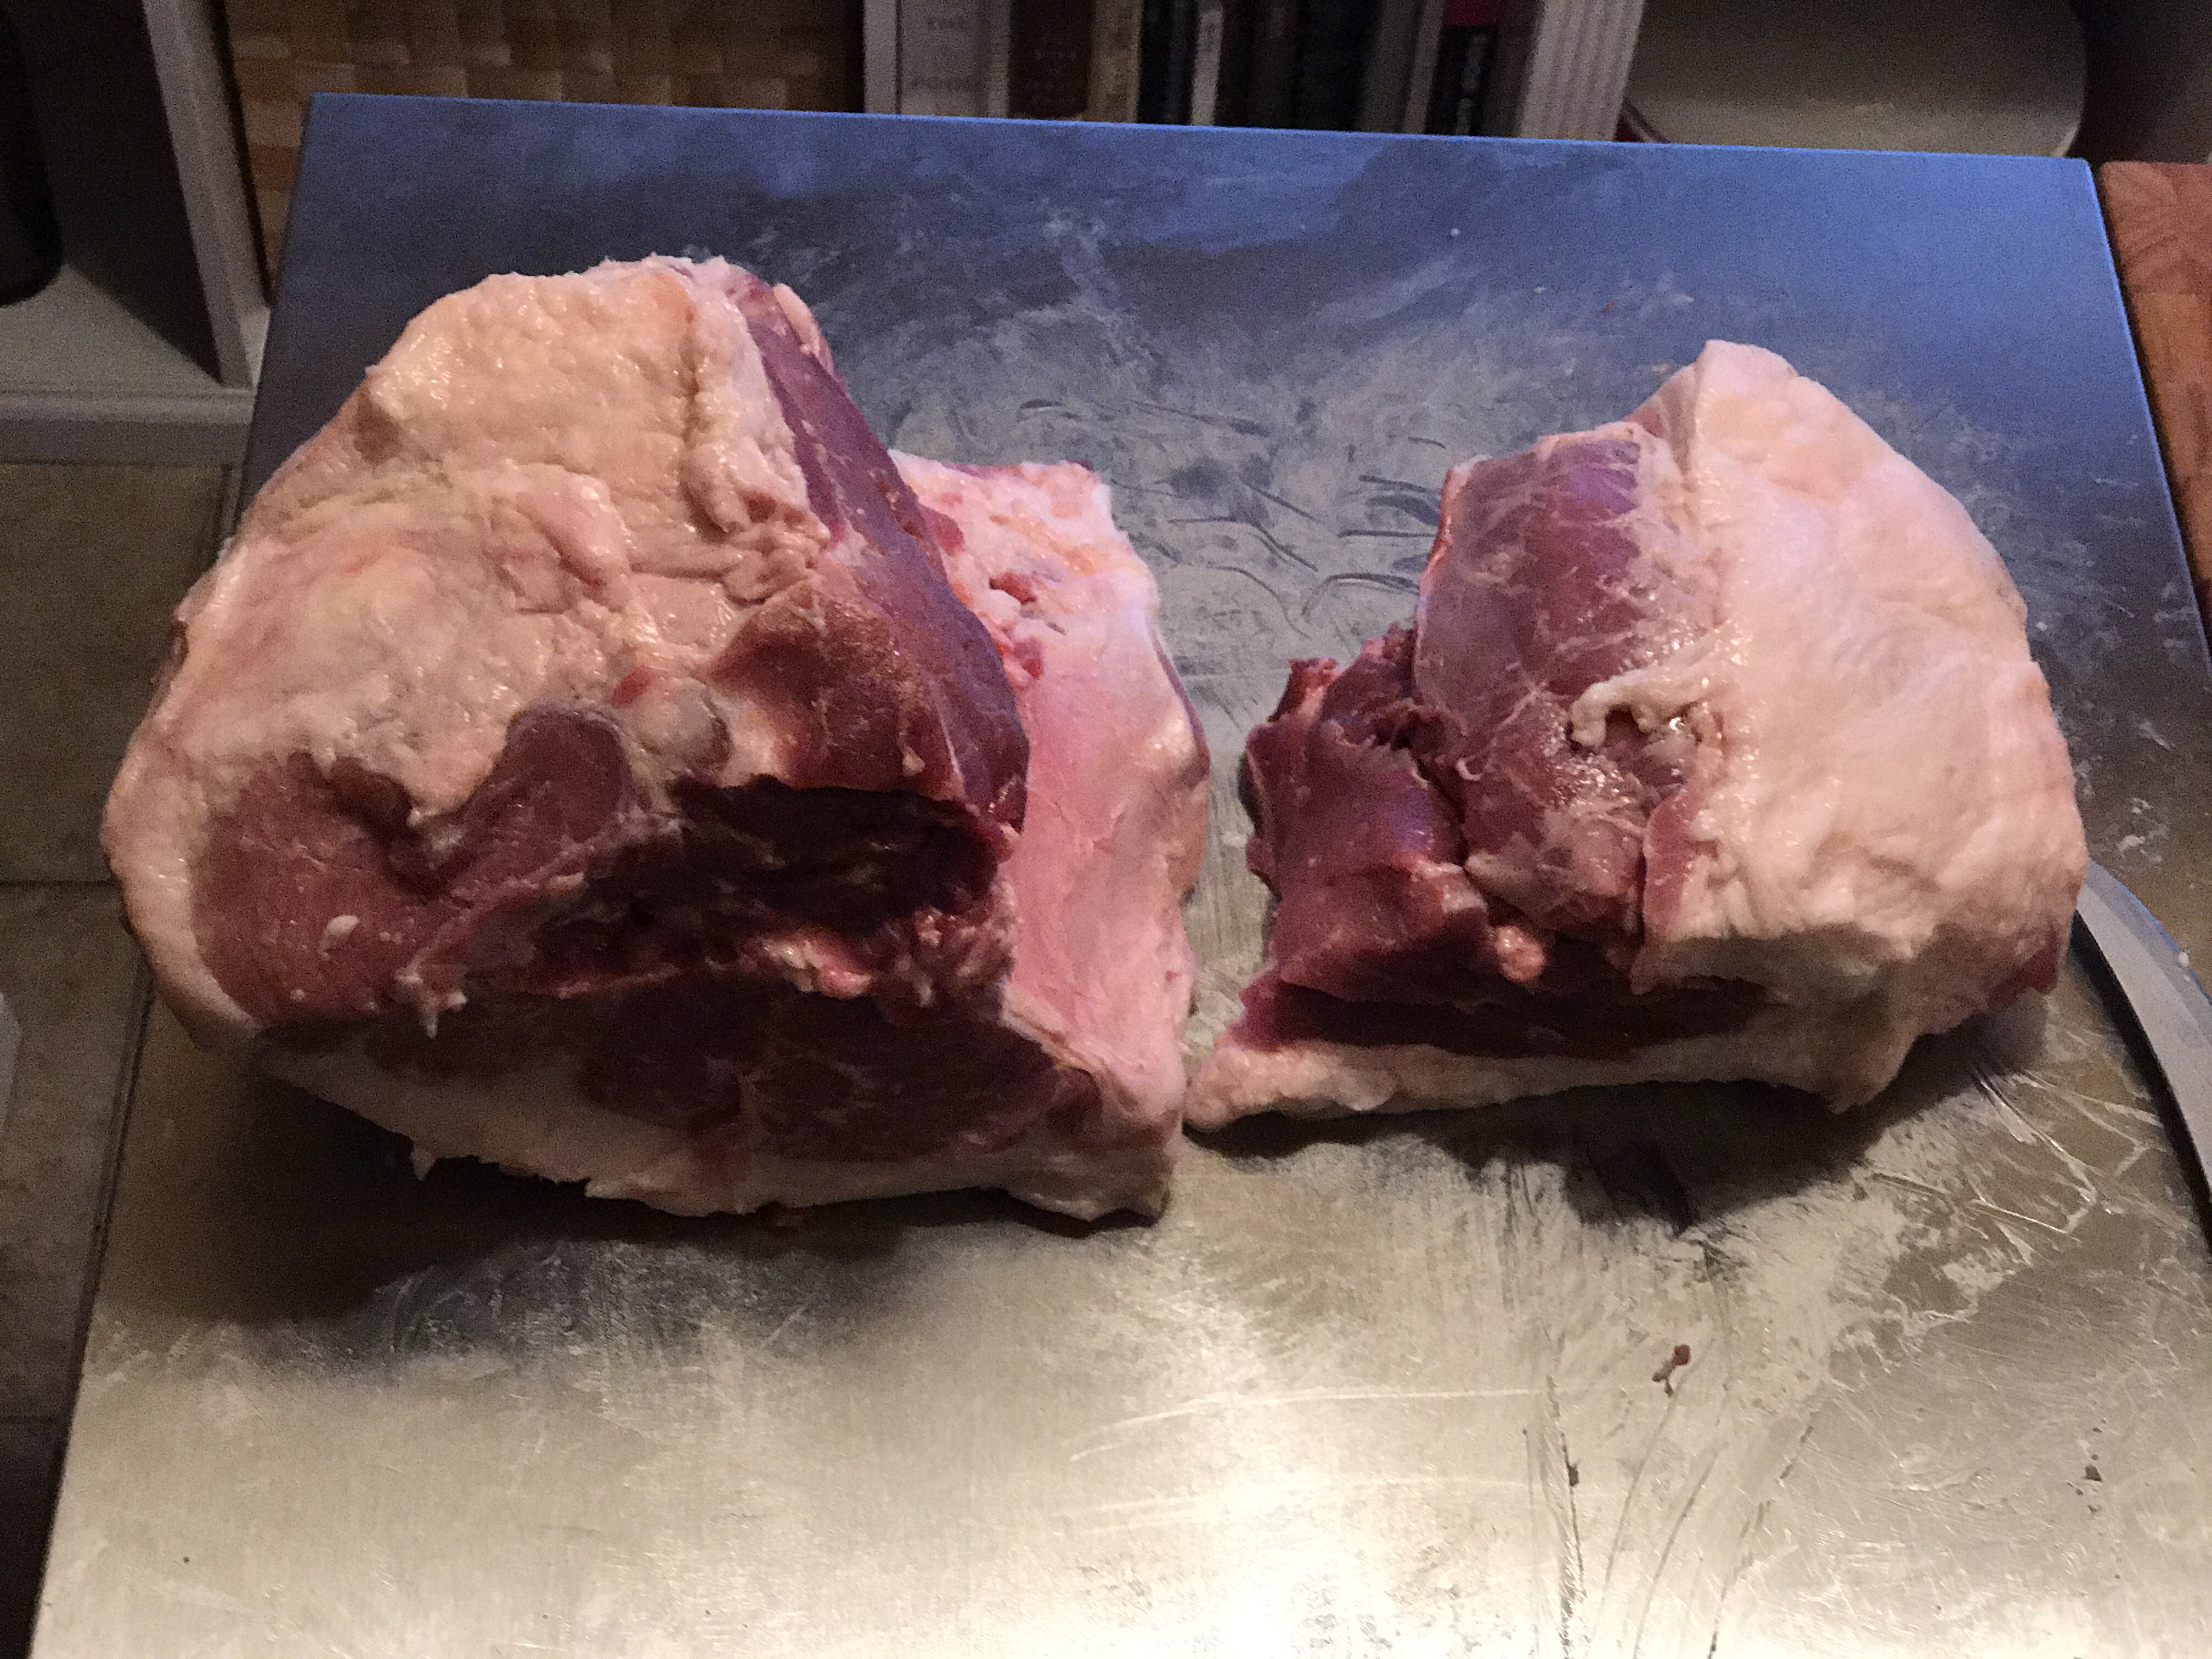
You want to cut the meat into the three pieces of the culatello (bottom), the fiocco (top), and the rumpetto (right). Make sure to do this with clean cuts, not slicing into the muscles. You want to avoid creating air pockets were bad bacteria can propagate.

Lamb Leg Butchered

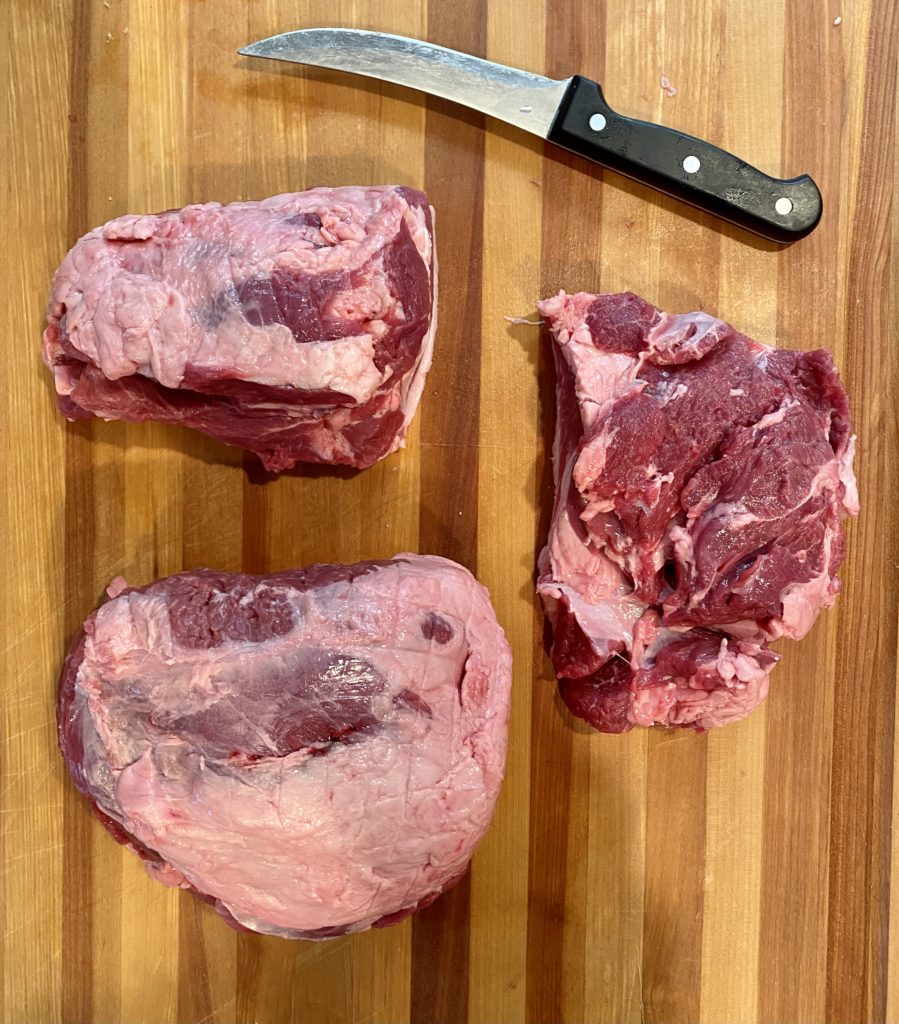
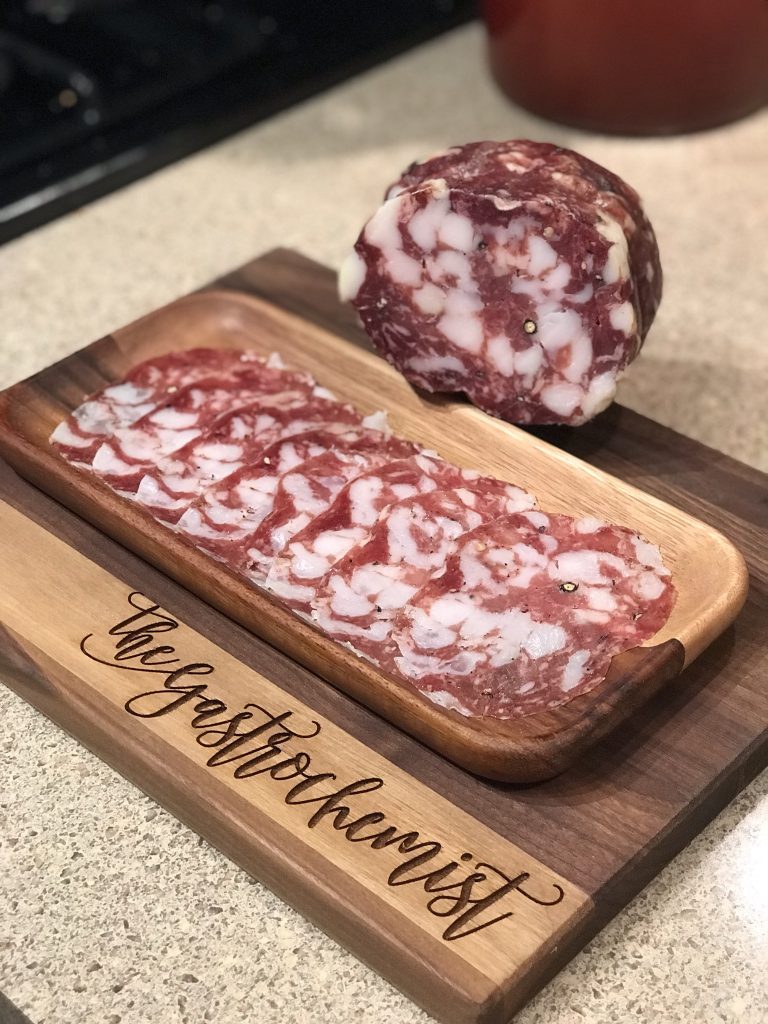
You can also cure the rumpetto and fiocco as whole pieces if you’ve been able to butcher them well. Here, I bought a bone-out leg of lamb and it was already a bit hacked apart, so I decided to save them for some lamb salami.


Curing

(stored at 4C/40F for 3+ weeks)

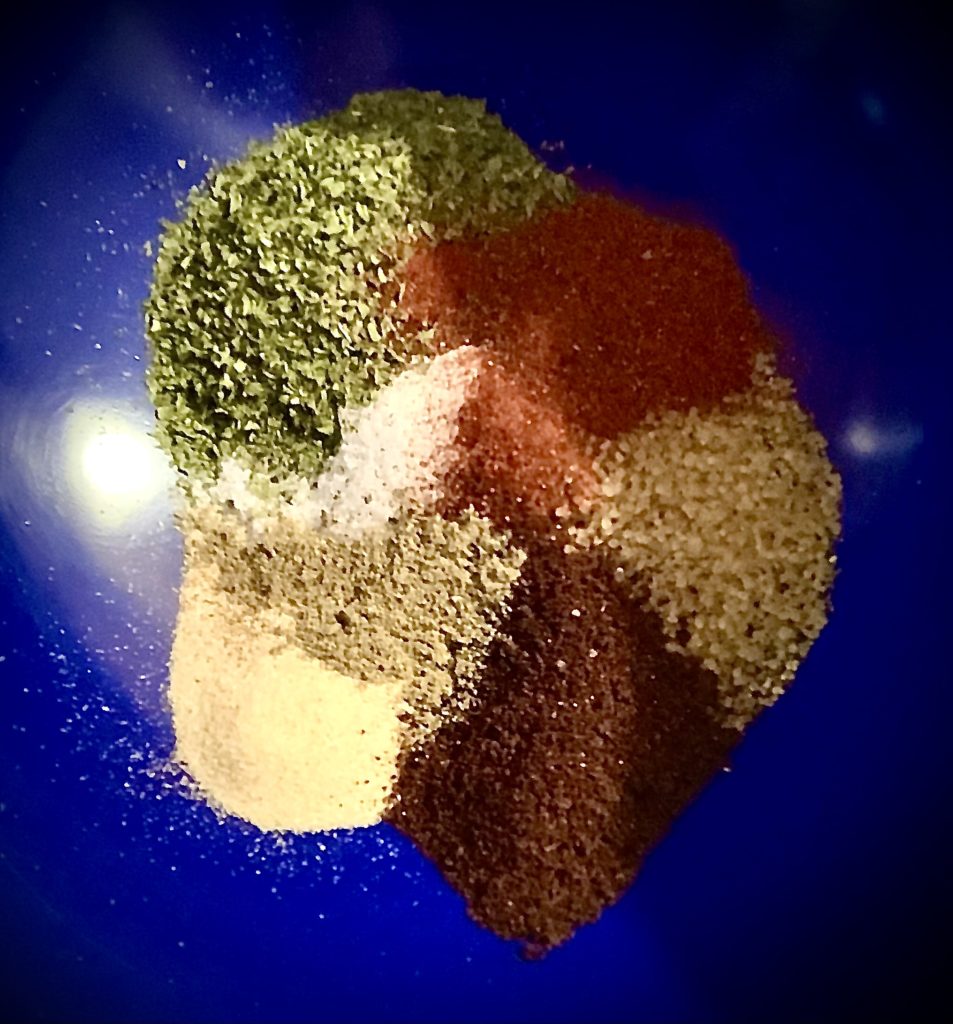
Here, instead of a simple cure as is usually done for pork culatello, I decided to use a spice cure that would complement the flavor of the lamb. You can insert the weight of your butchered lamb culatello into the spreadsheet and it will calculate the weights for the spices for you.

*Please use common sense. Make sure the spreadsheet is working properly for you and double check any calculations that don’t seem right.

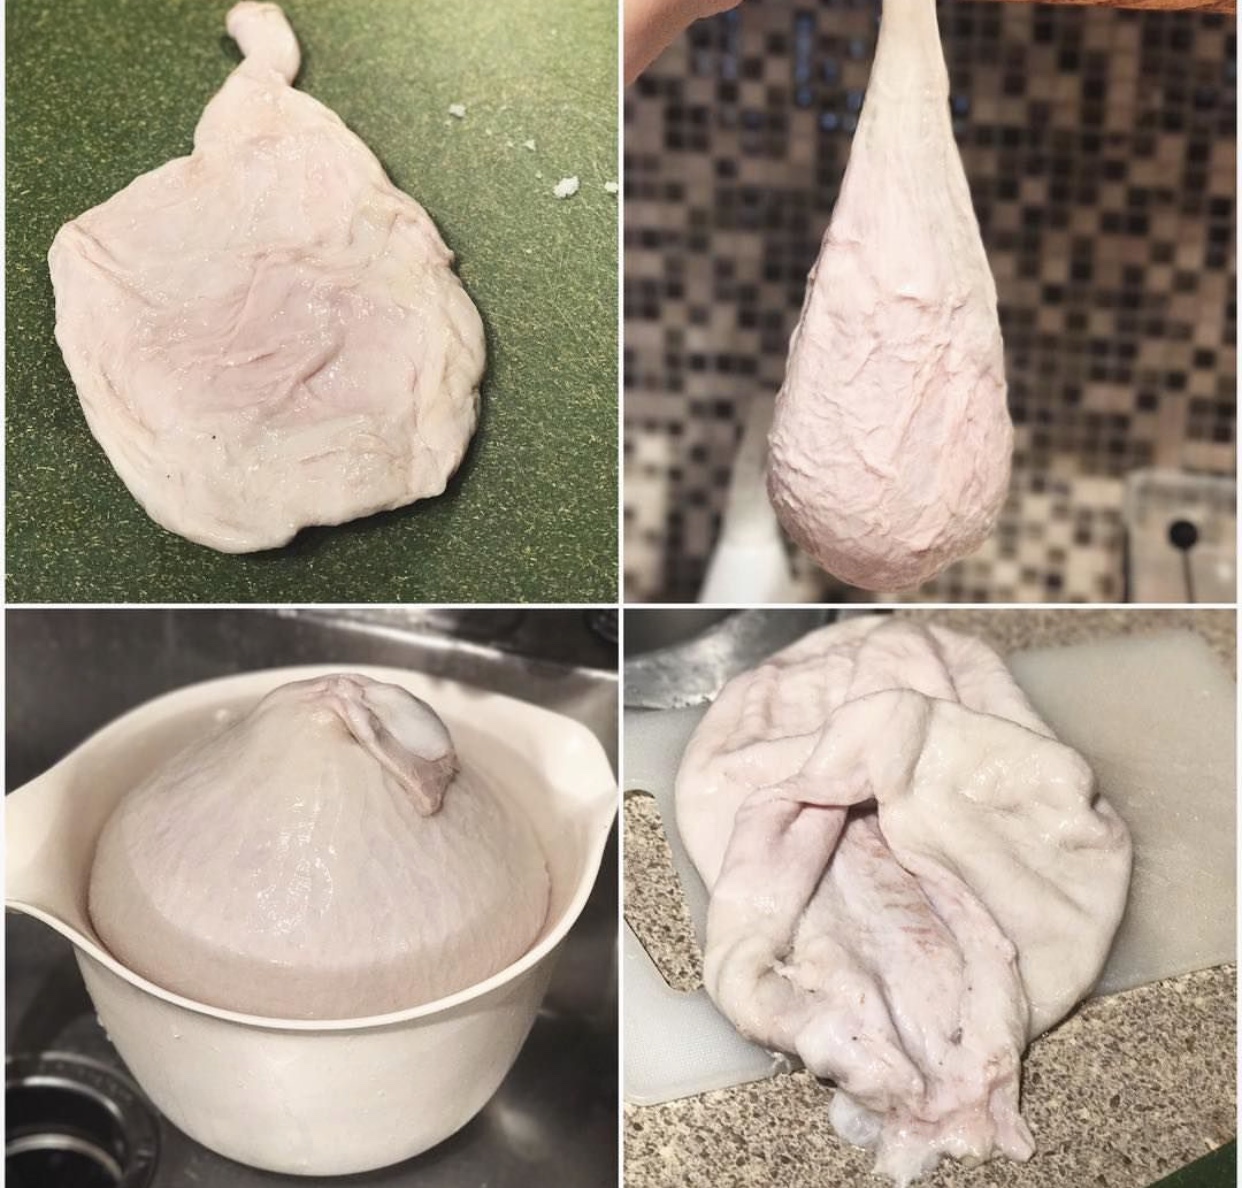
The spices measured out smell incredible…

Lamb Culatello Spices

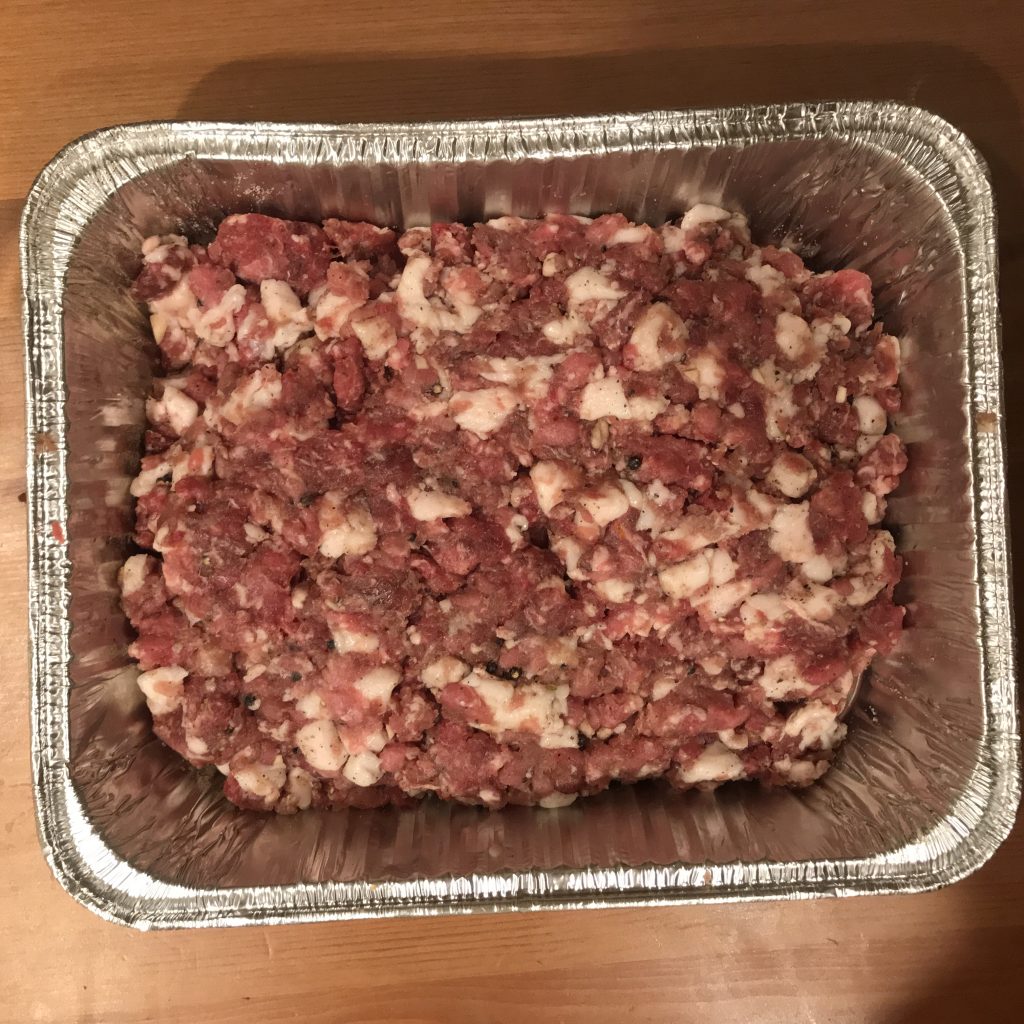
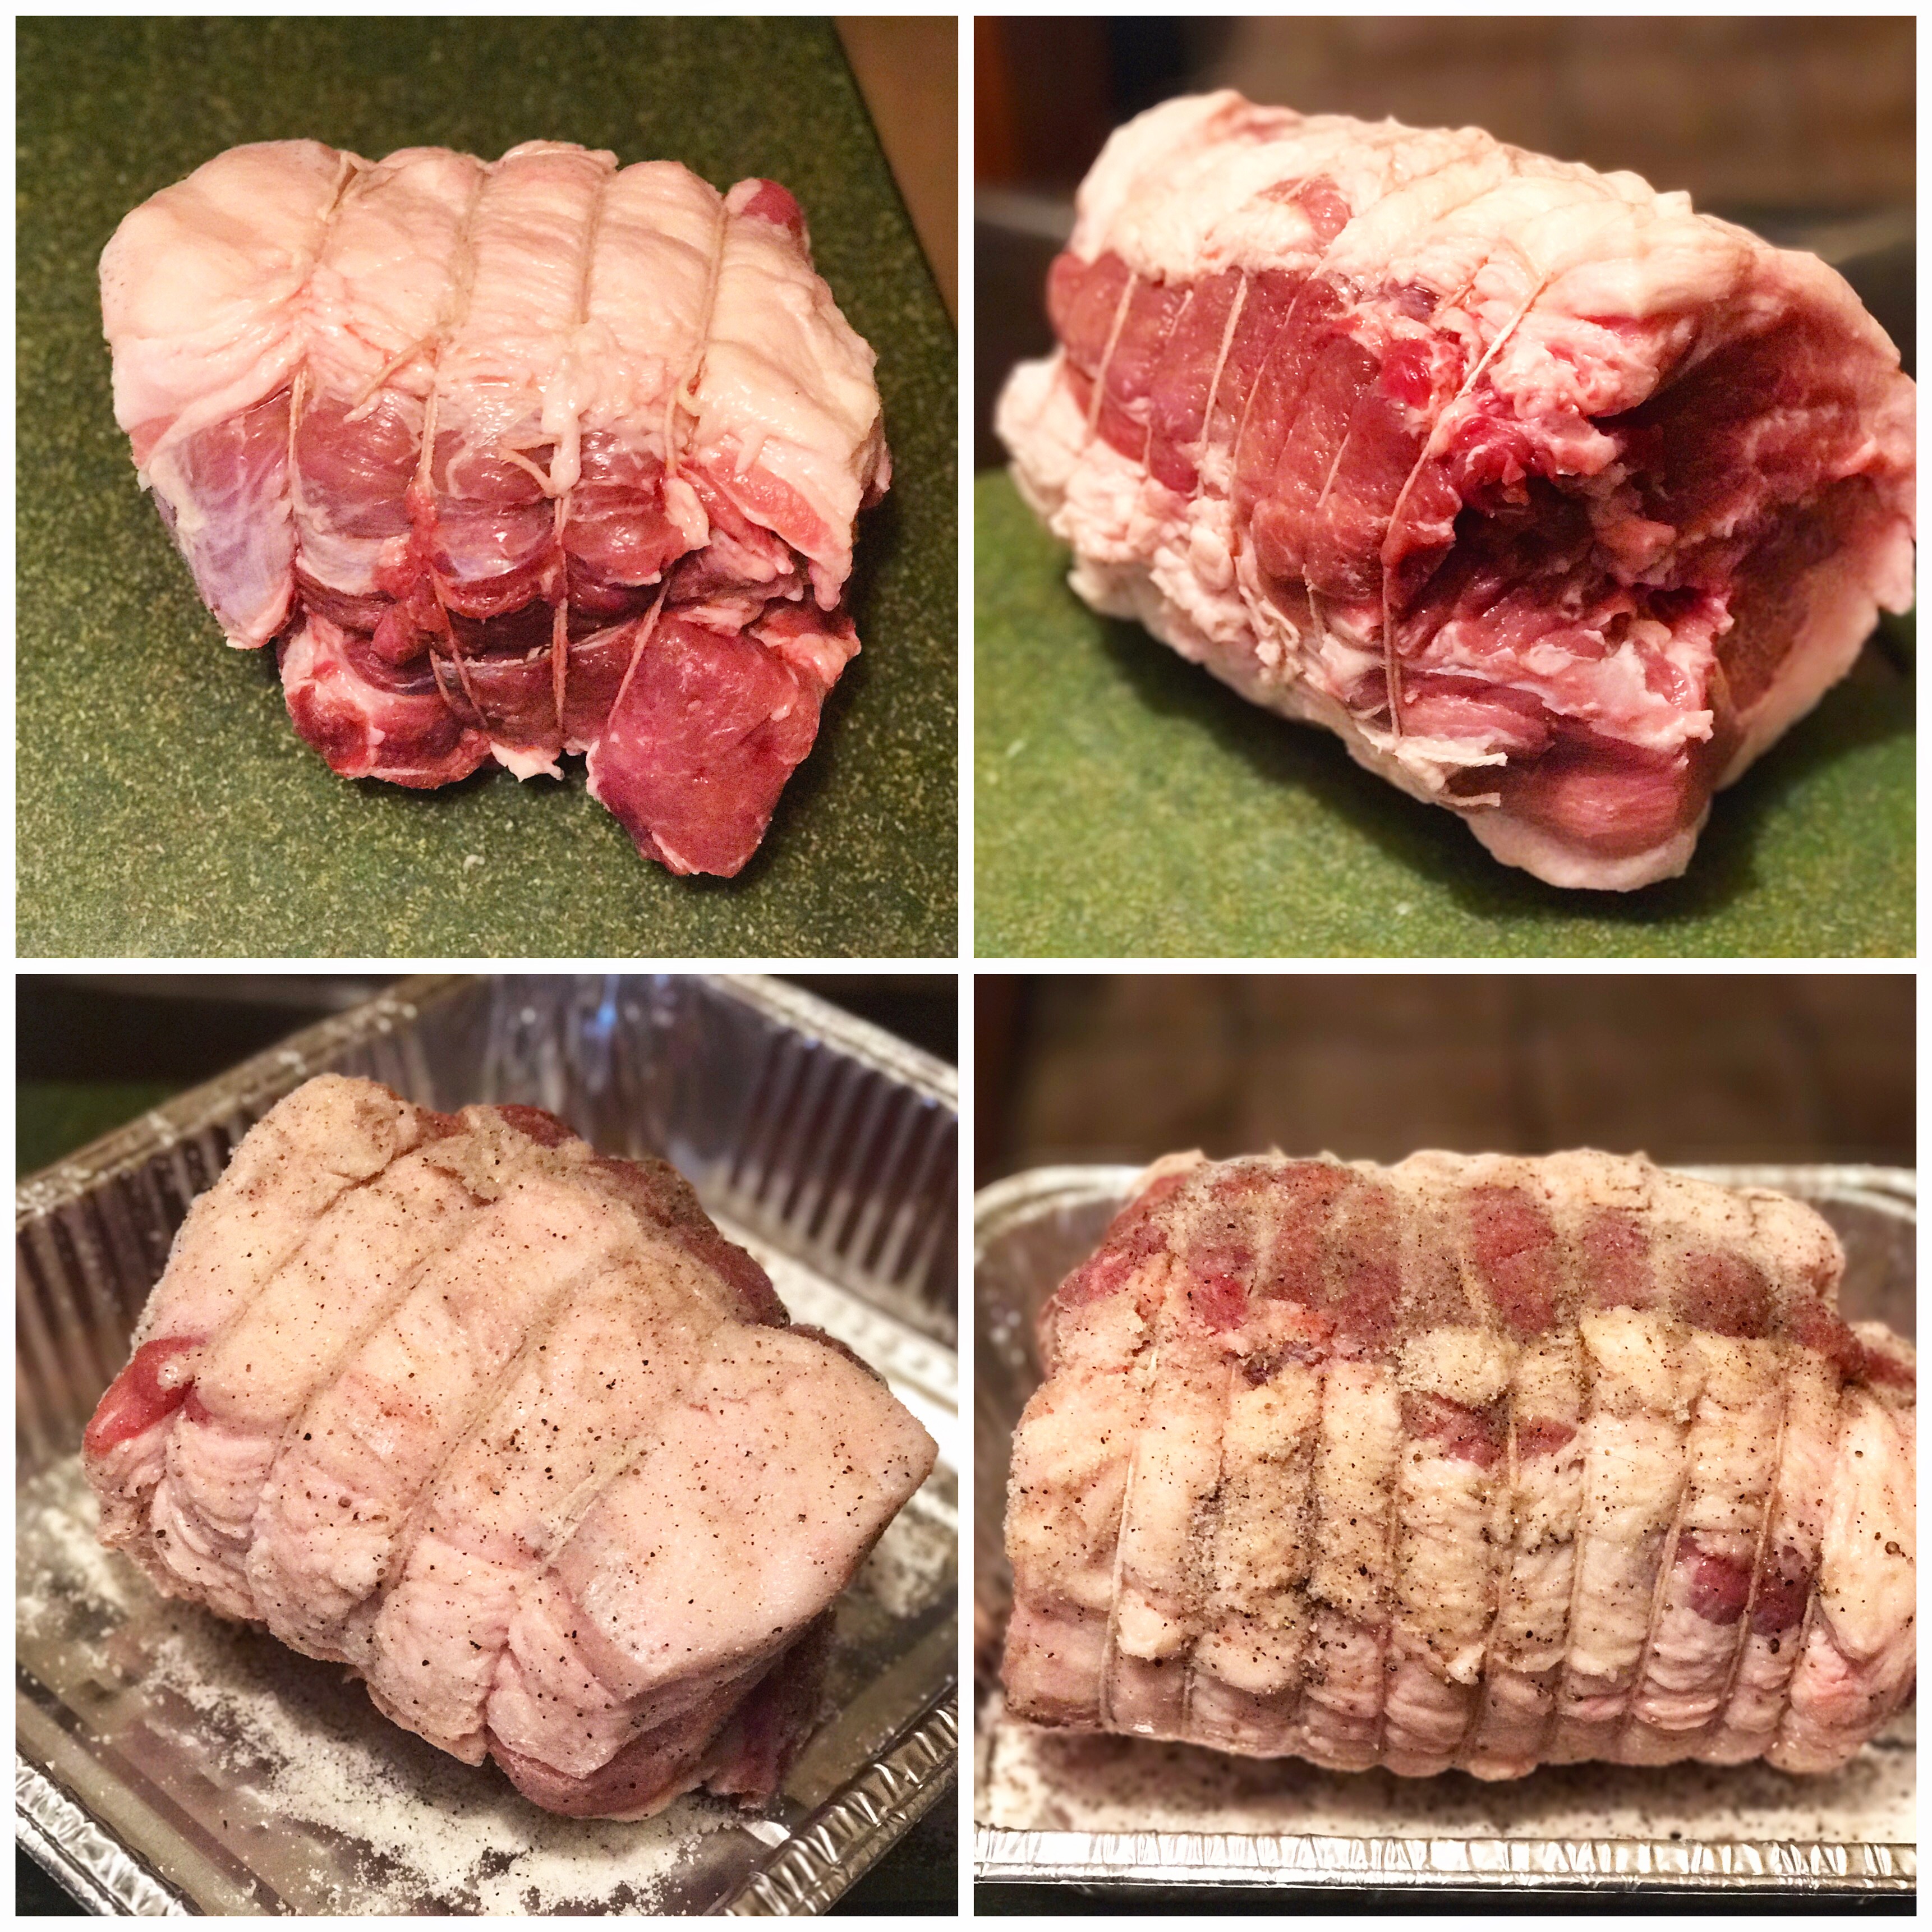
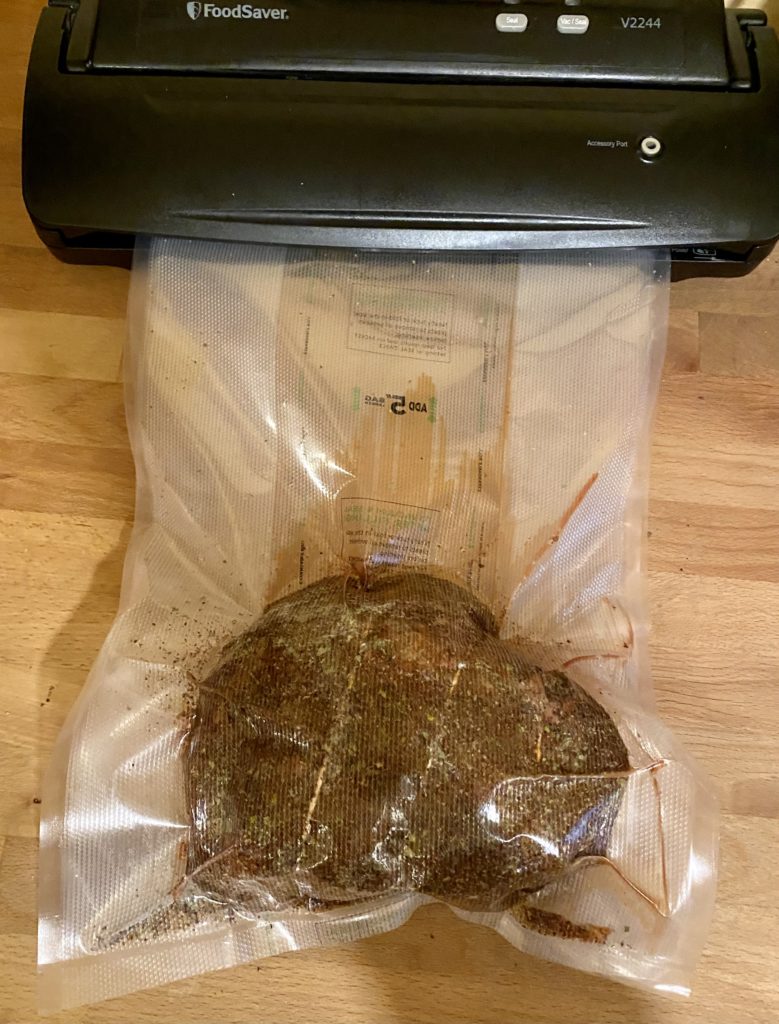
After you have measured out all of the spices, mix it with the lamb culatello that you have butchered out.

Lamb Culatello

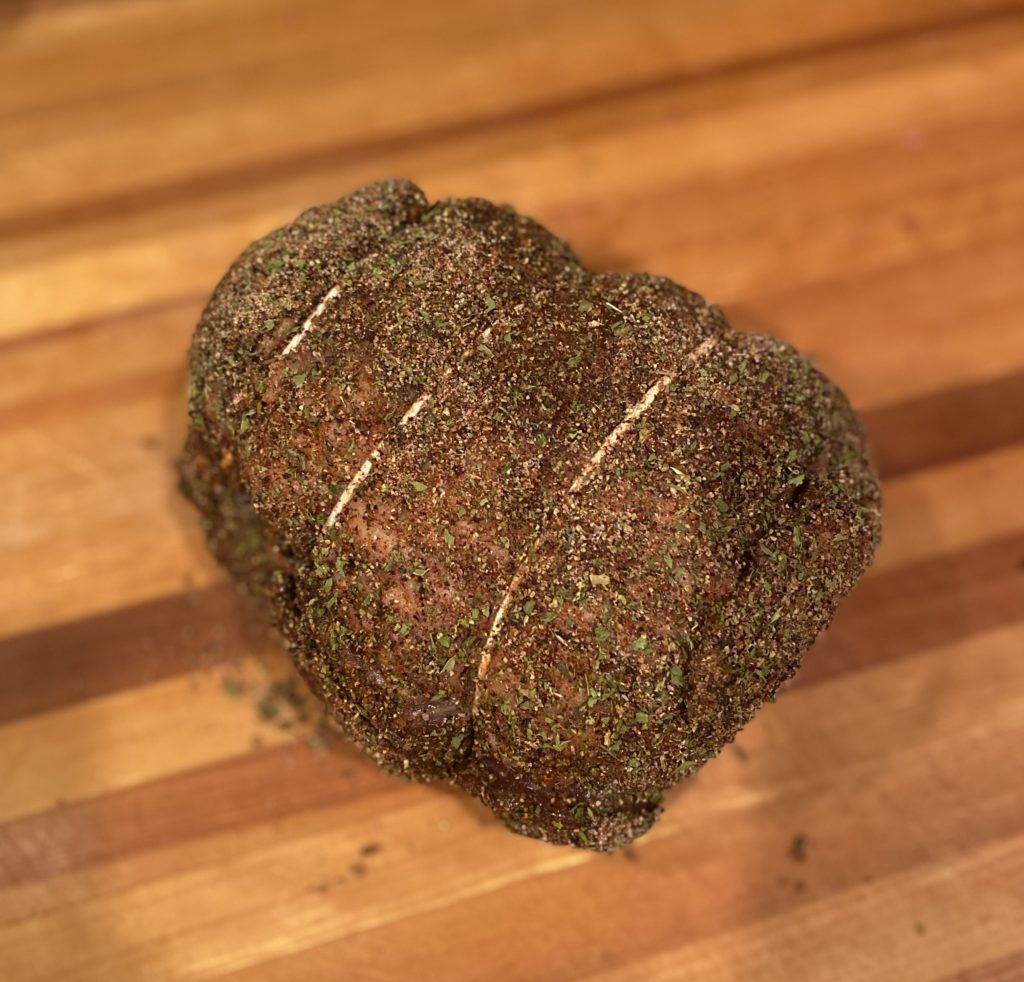
Let it sit for 3+ weeks in the regular refrigerator curing, I like to do this under vacuum to get an even cure.
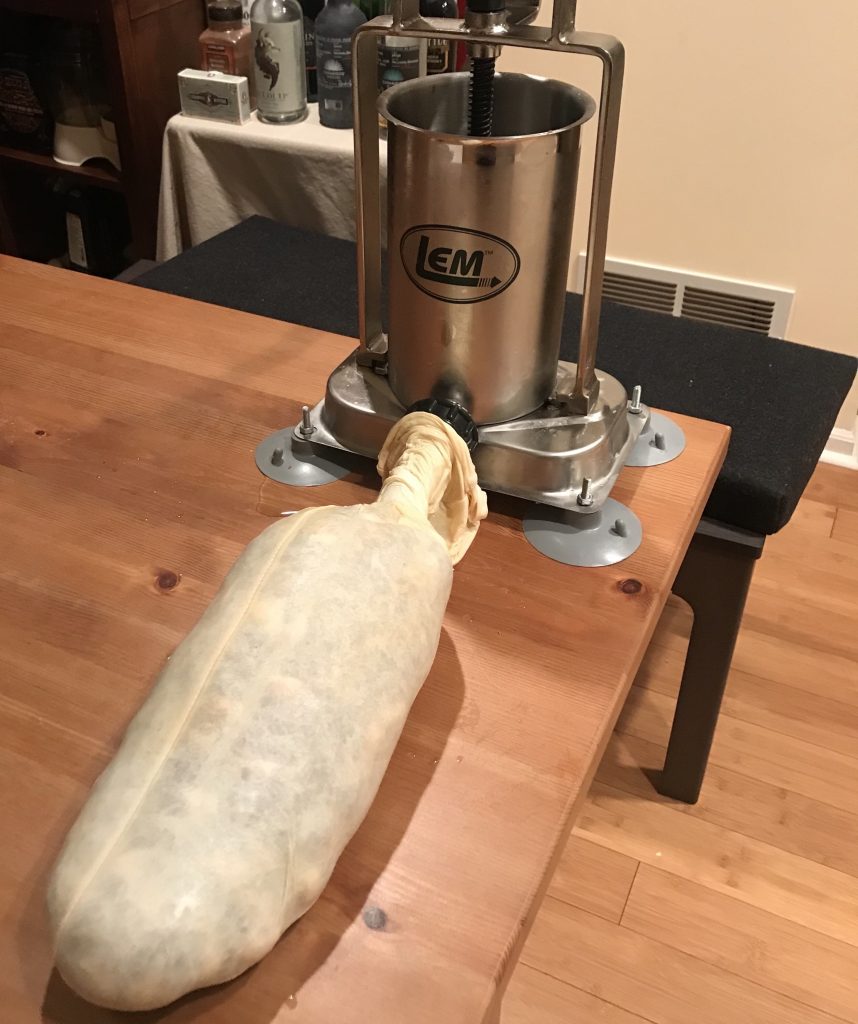
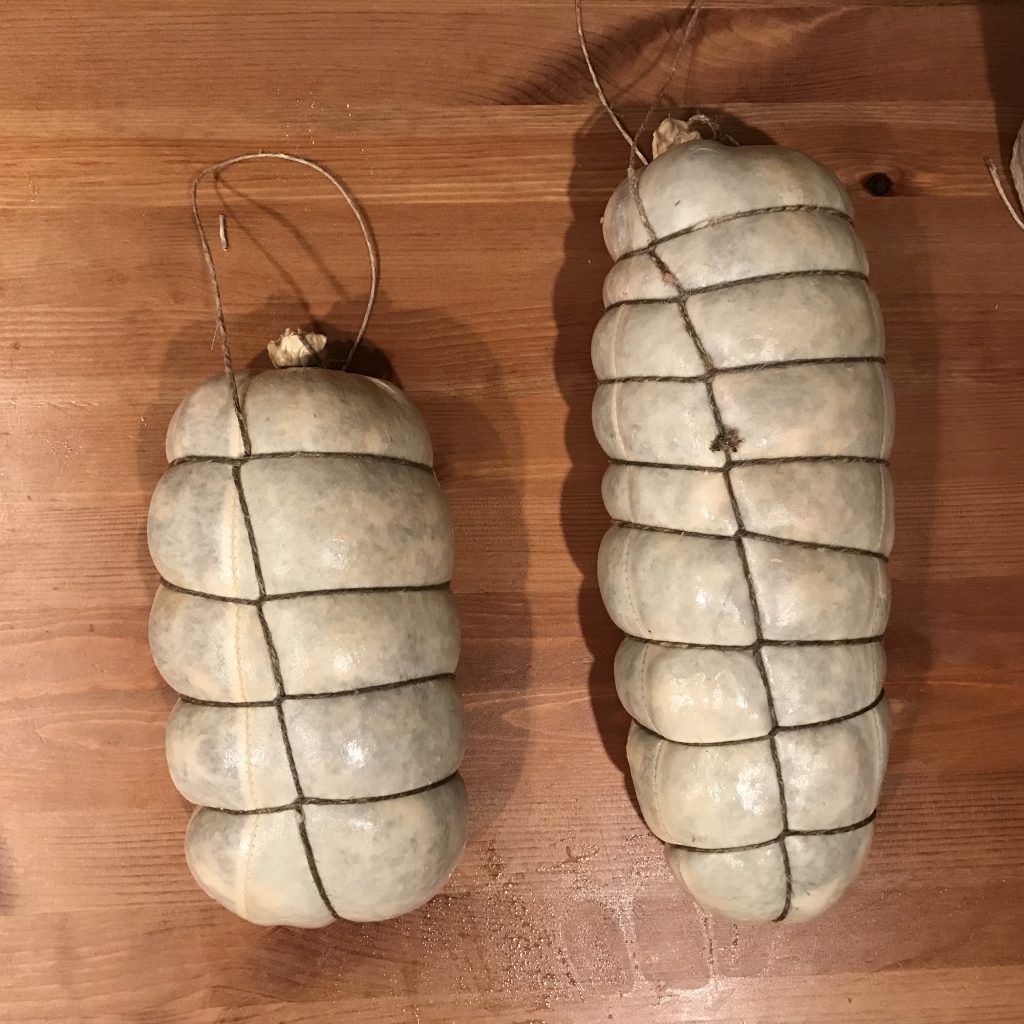
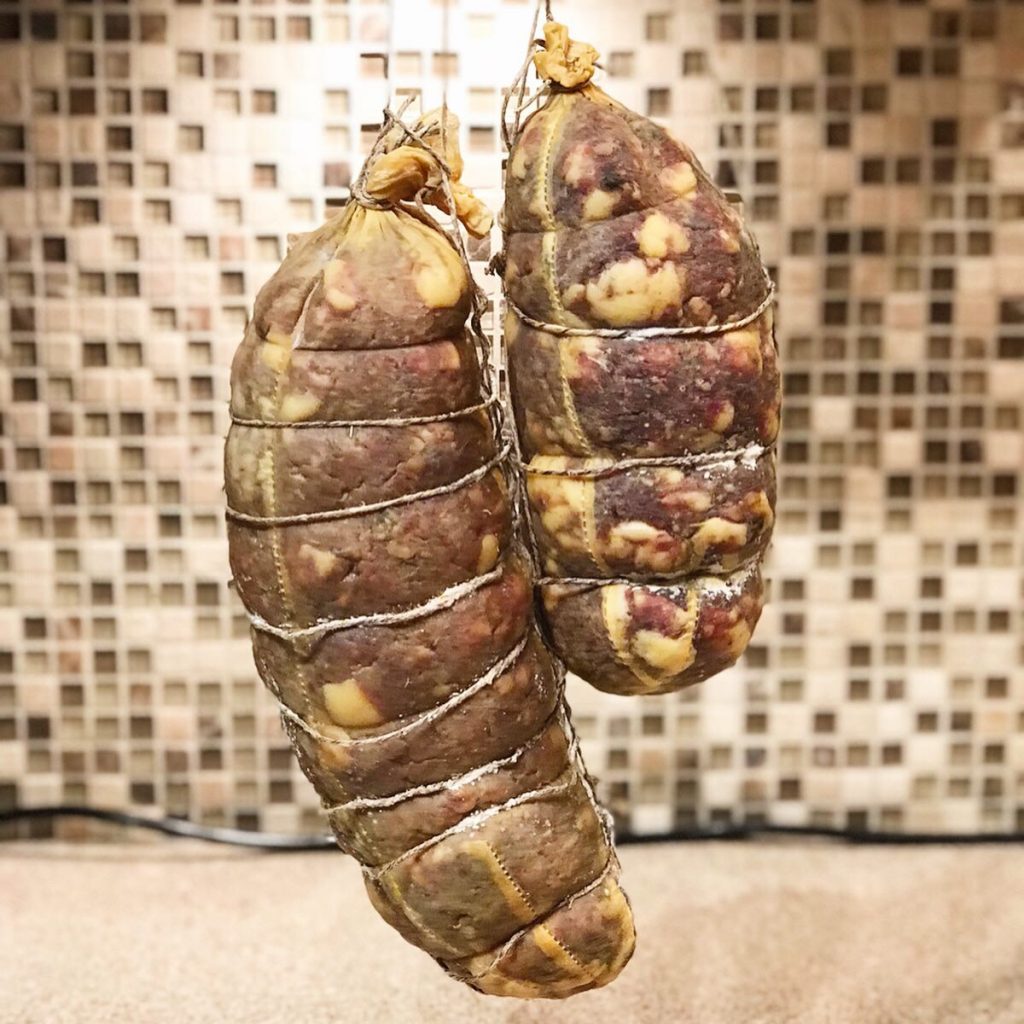
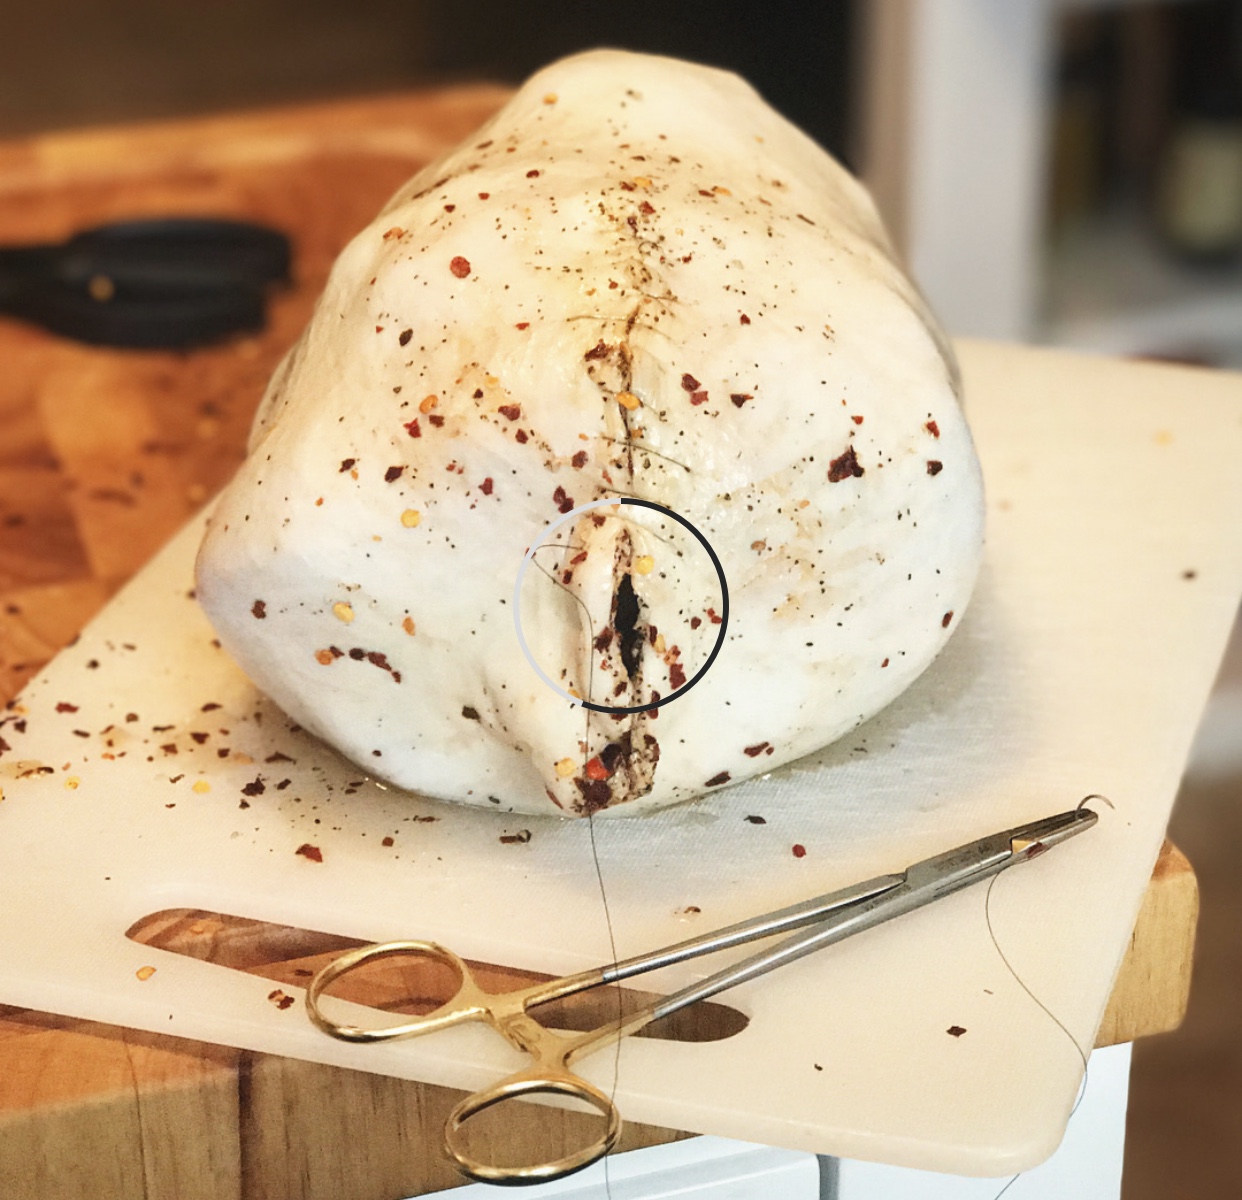
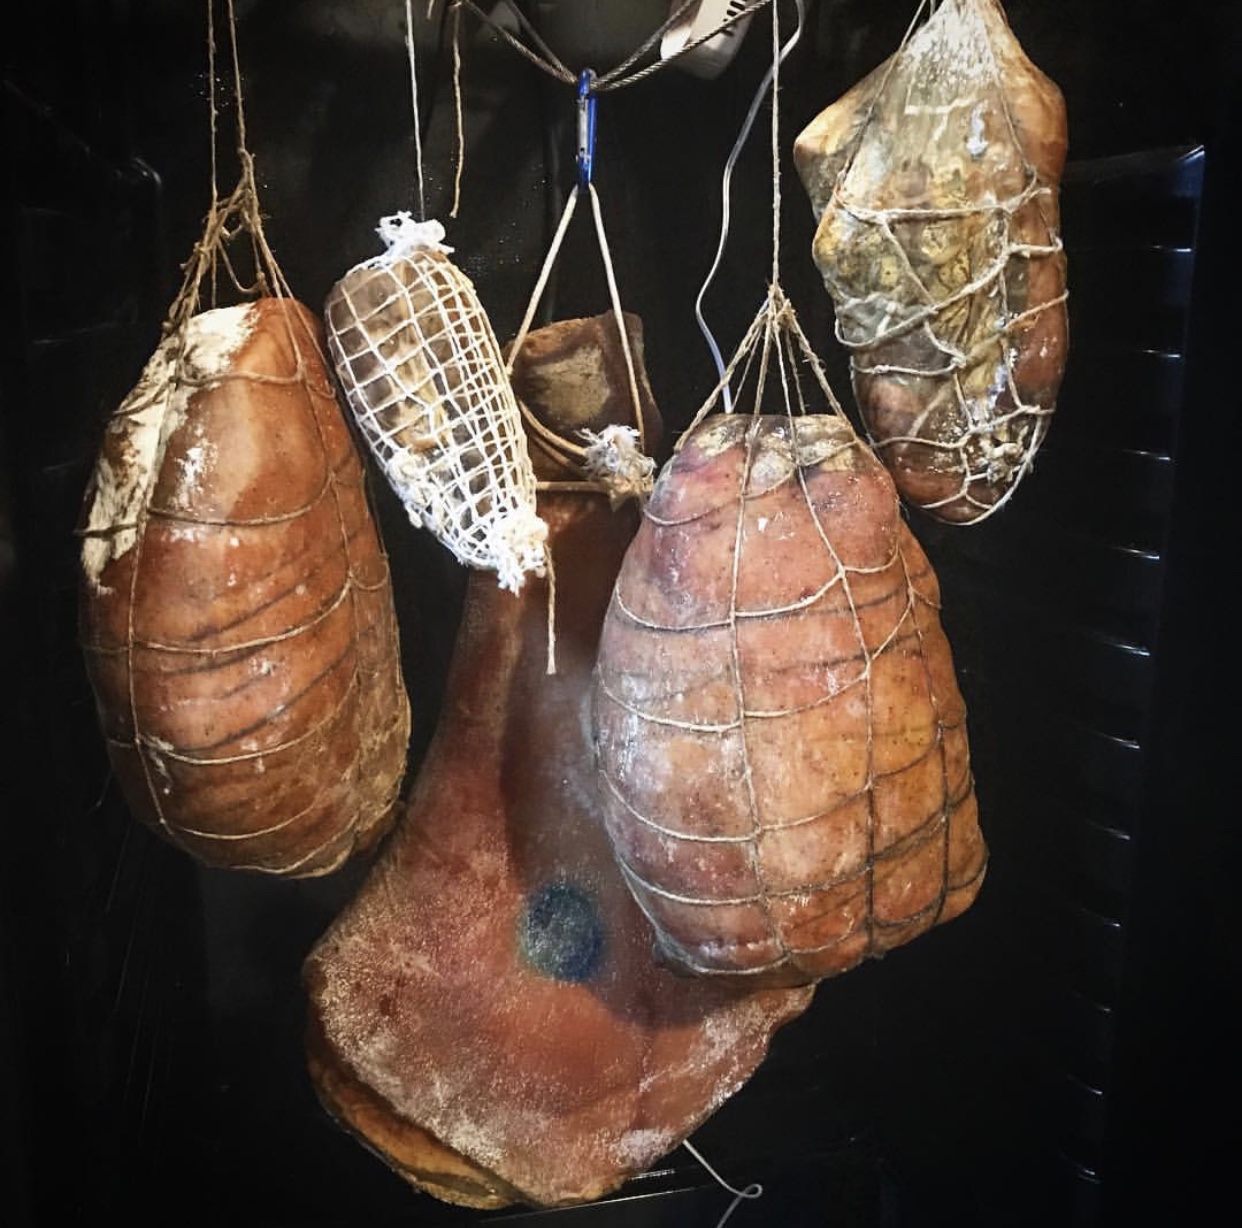
Lamb Culatello

Casing

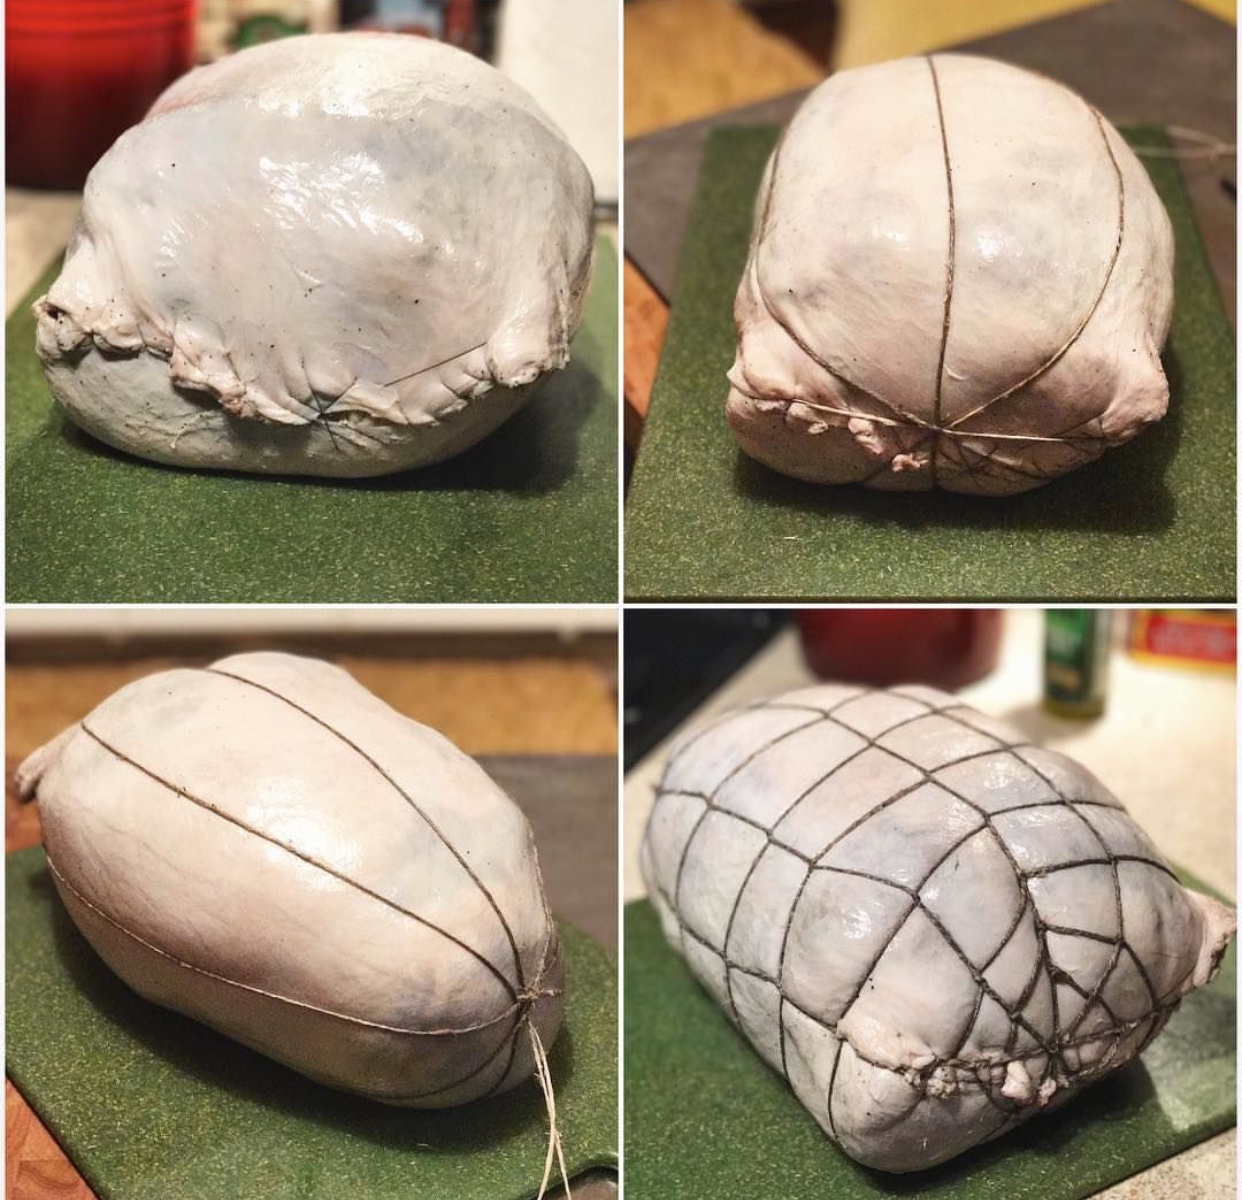
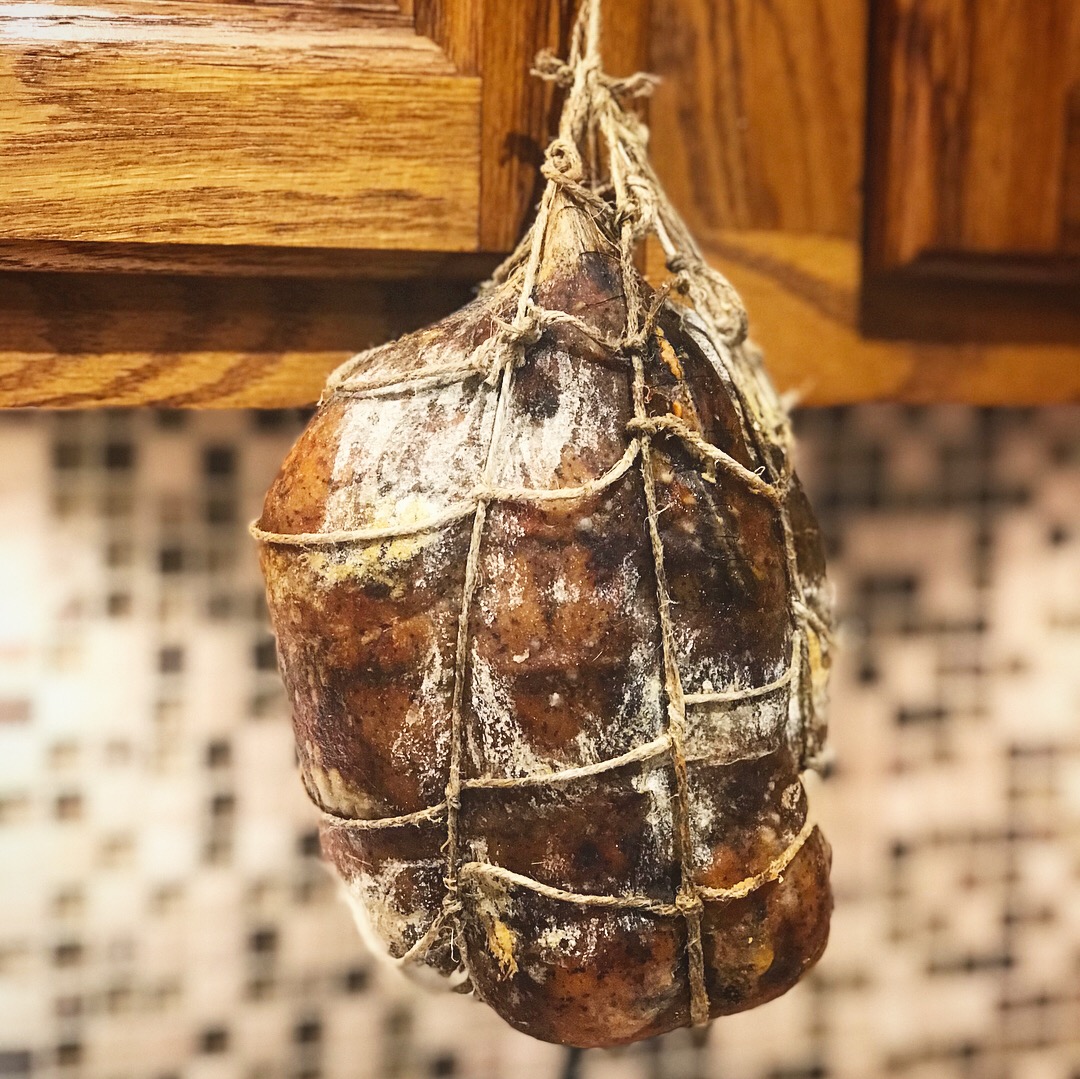
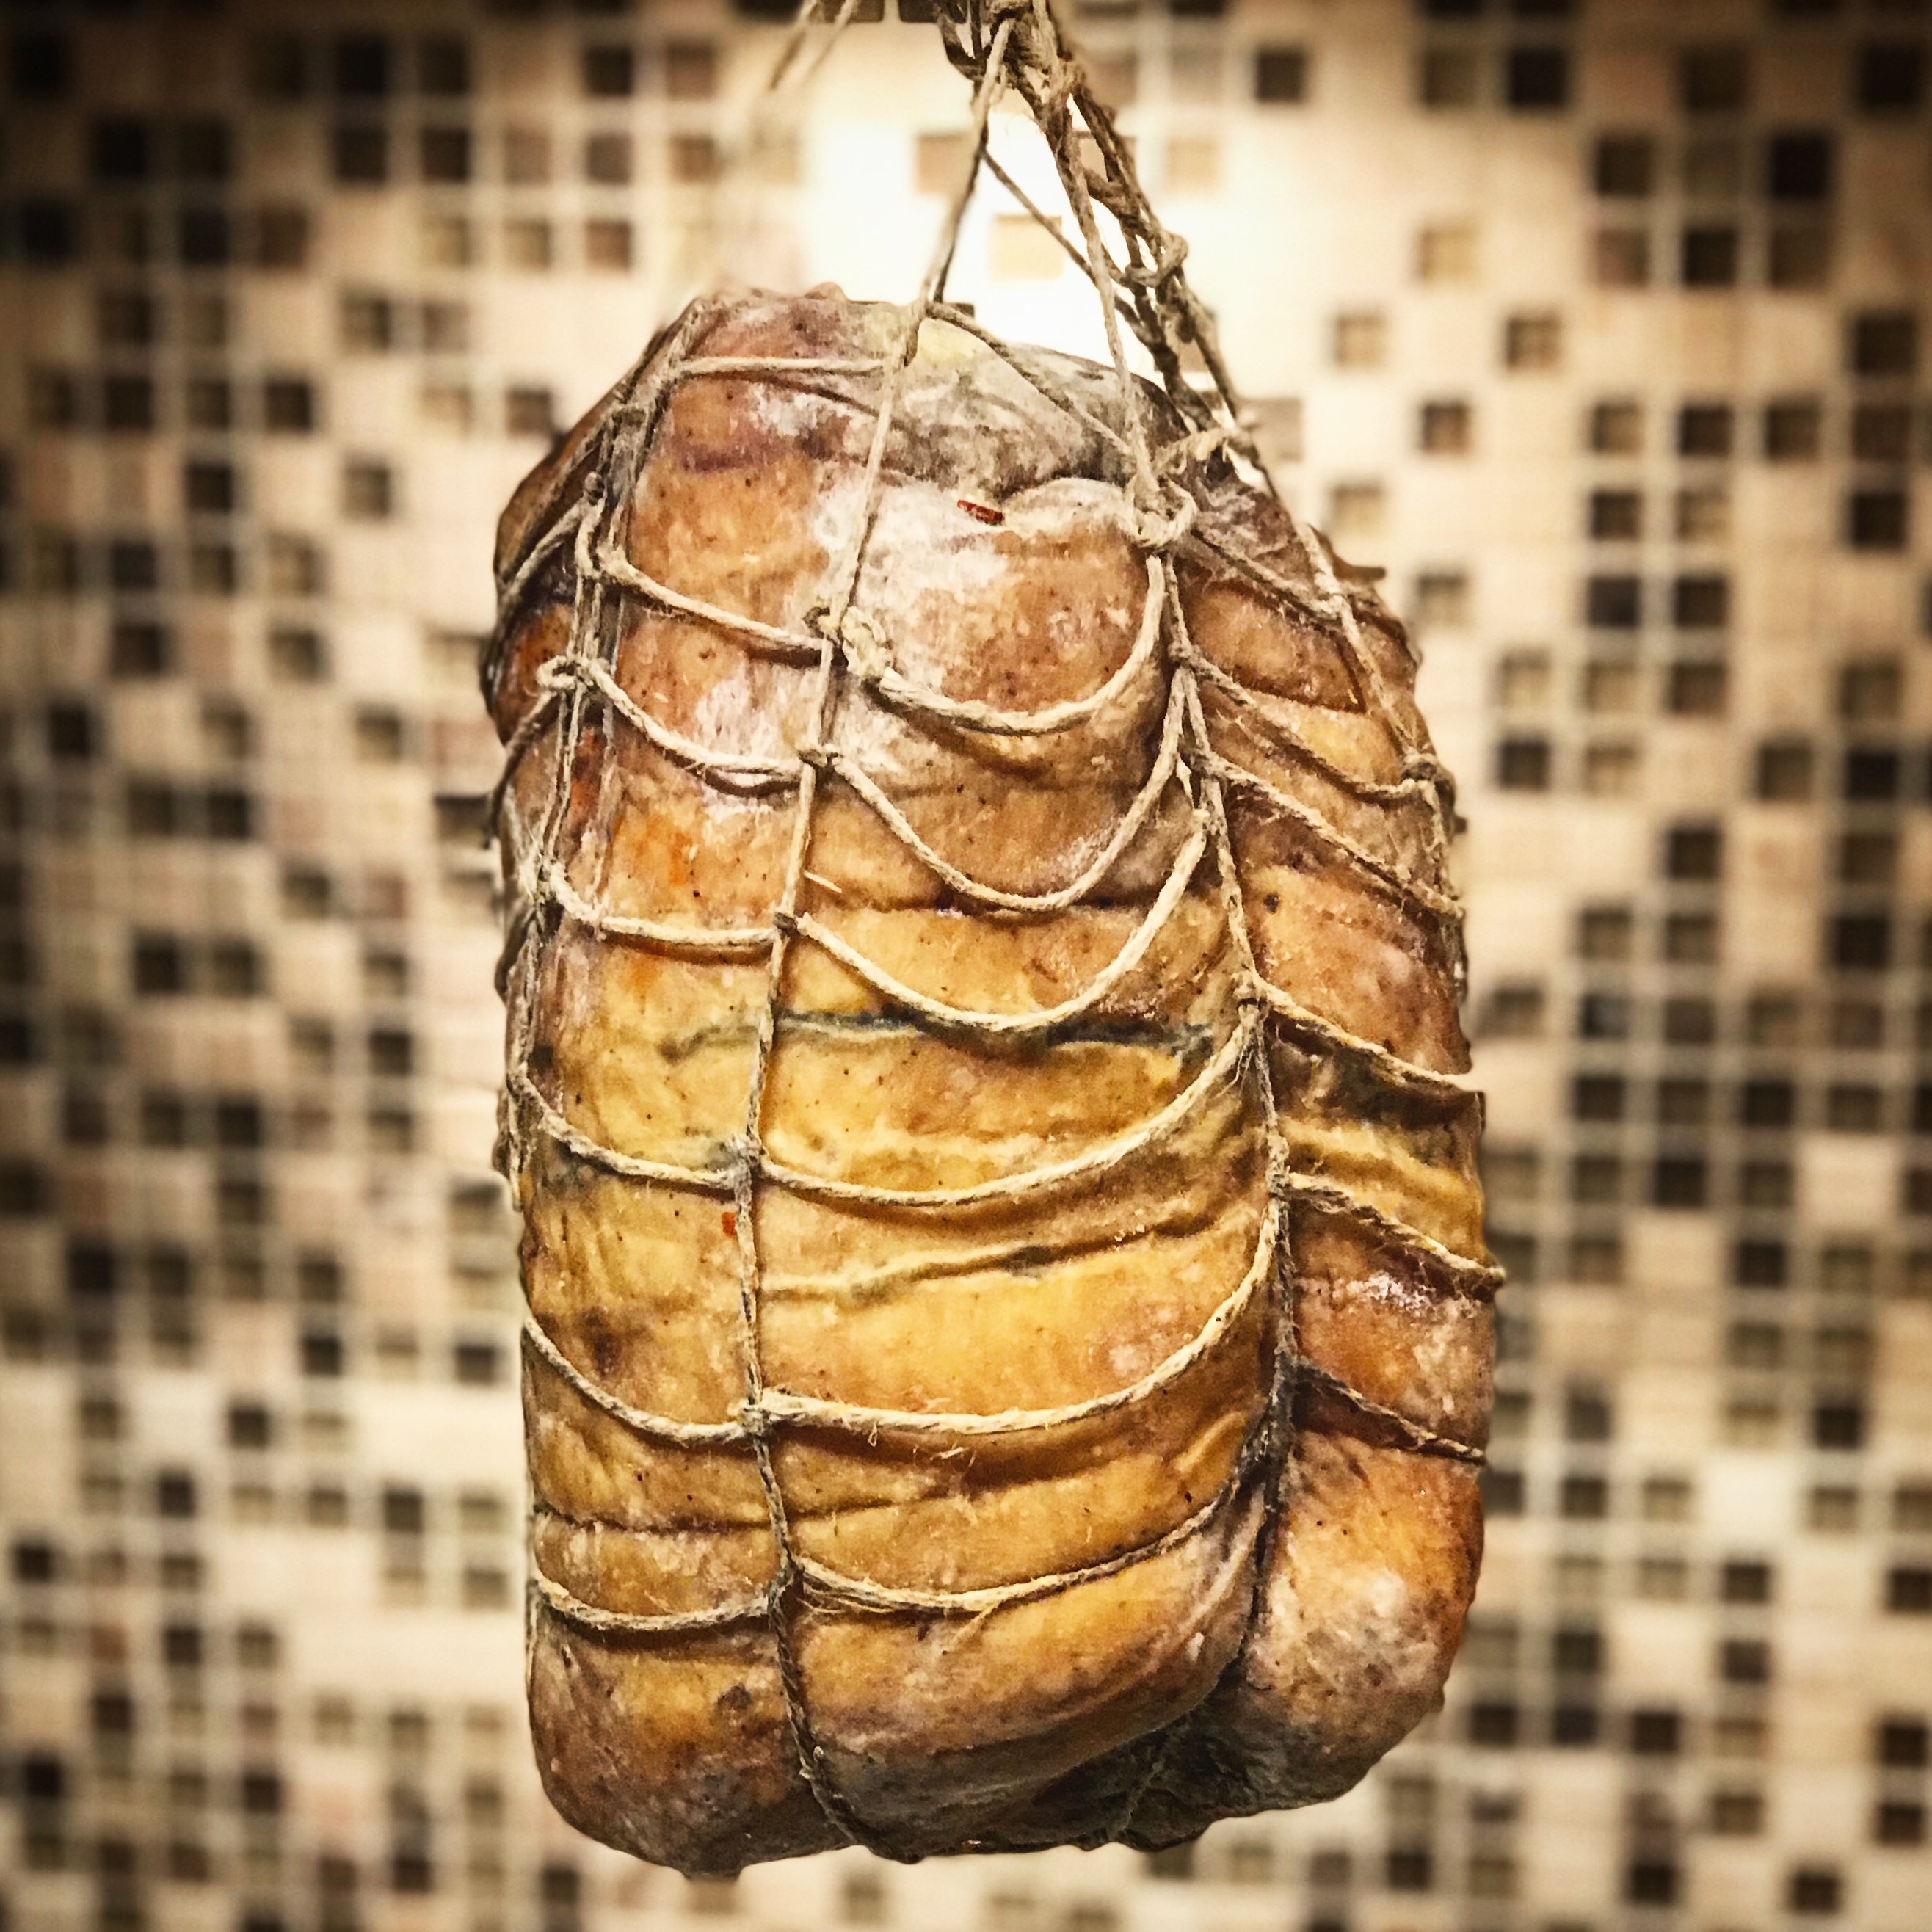
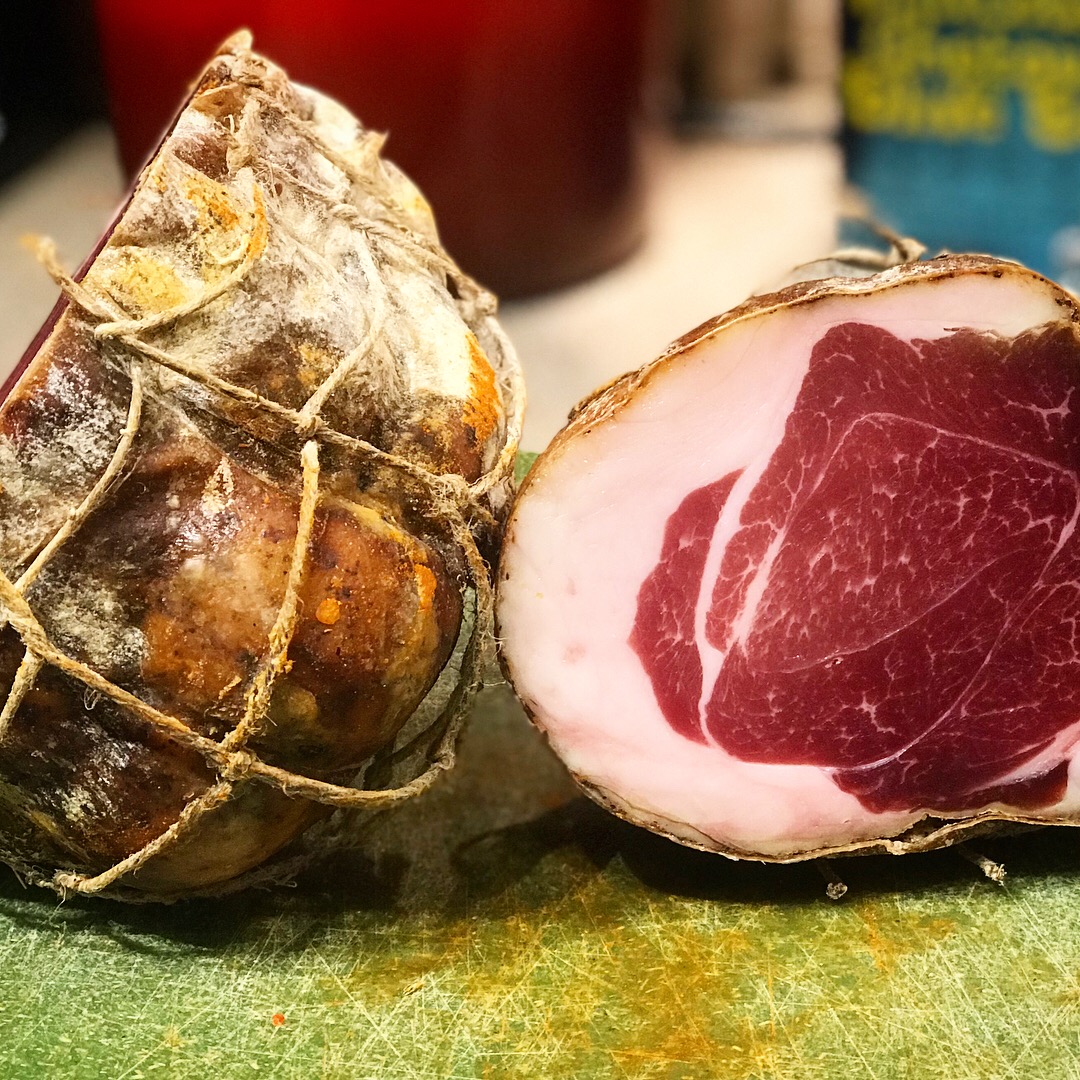
After dry curing for 3+ weeks, the lamb prosciutto will be rinsed off and cased in a large beef bung. This will be strung up and ready to hang in the curing chamber.
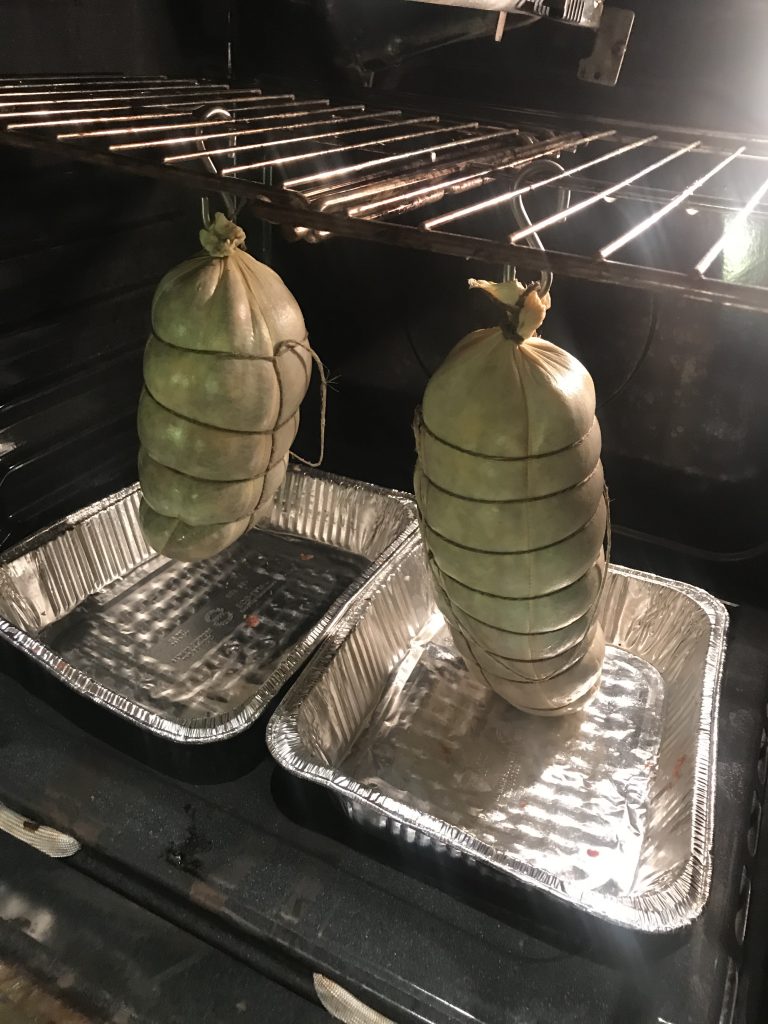
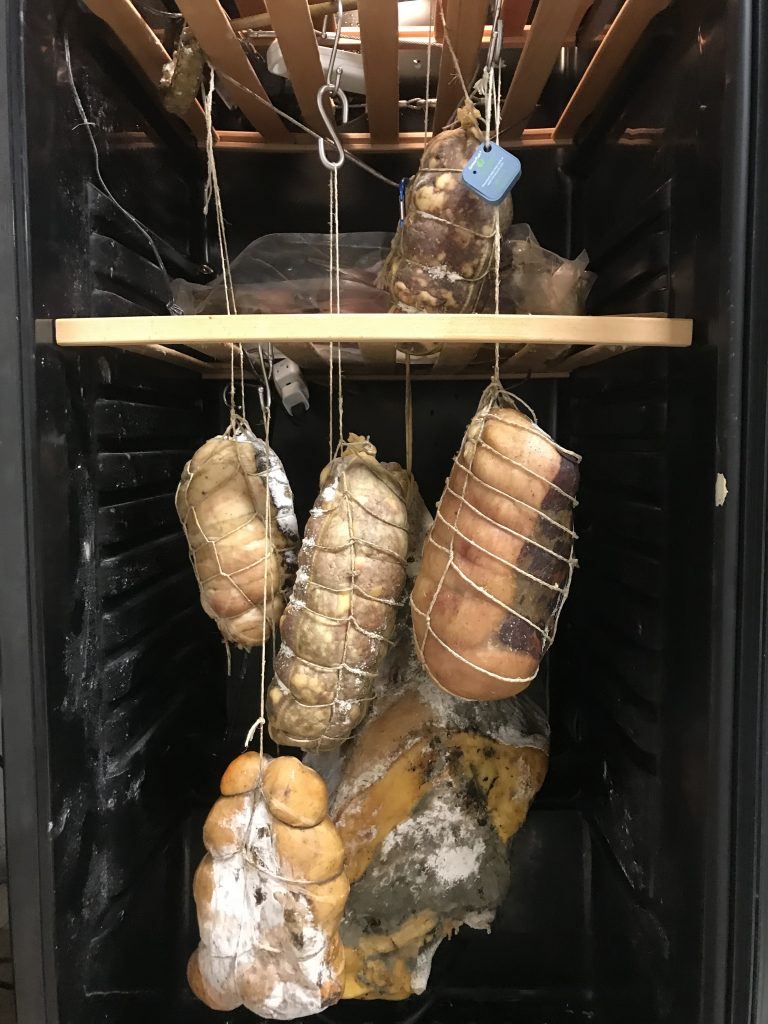
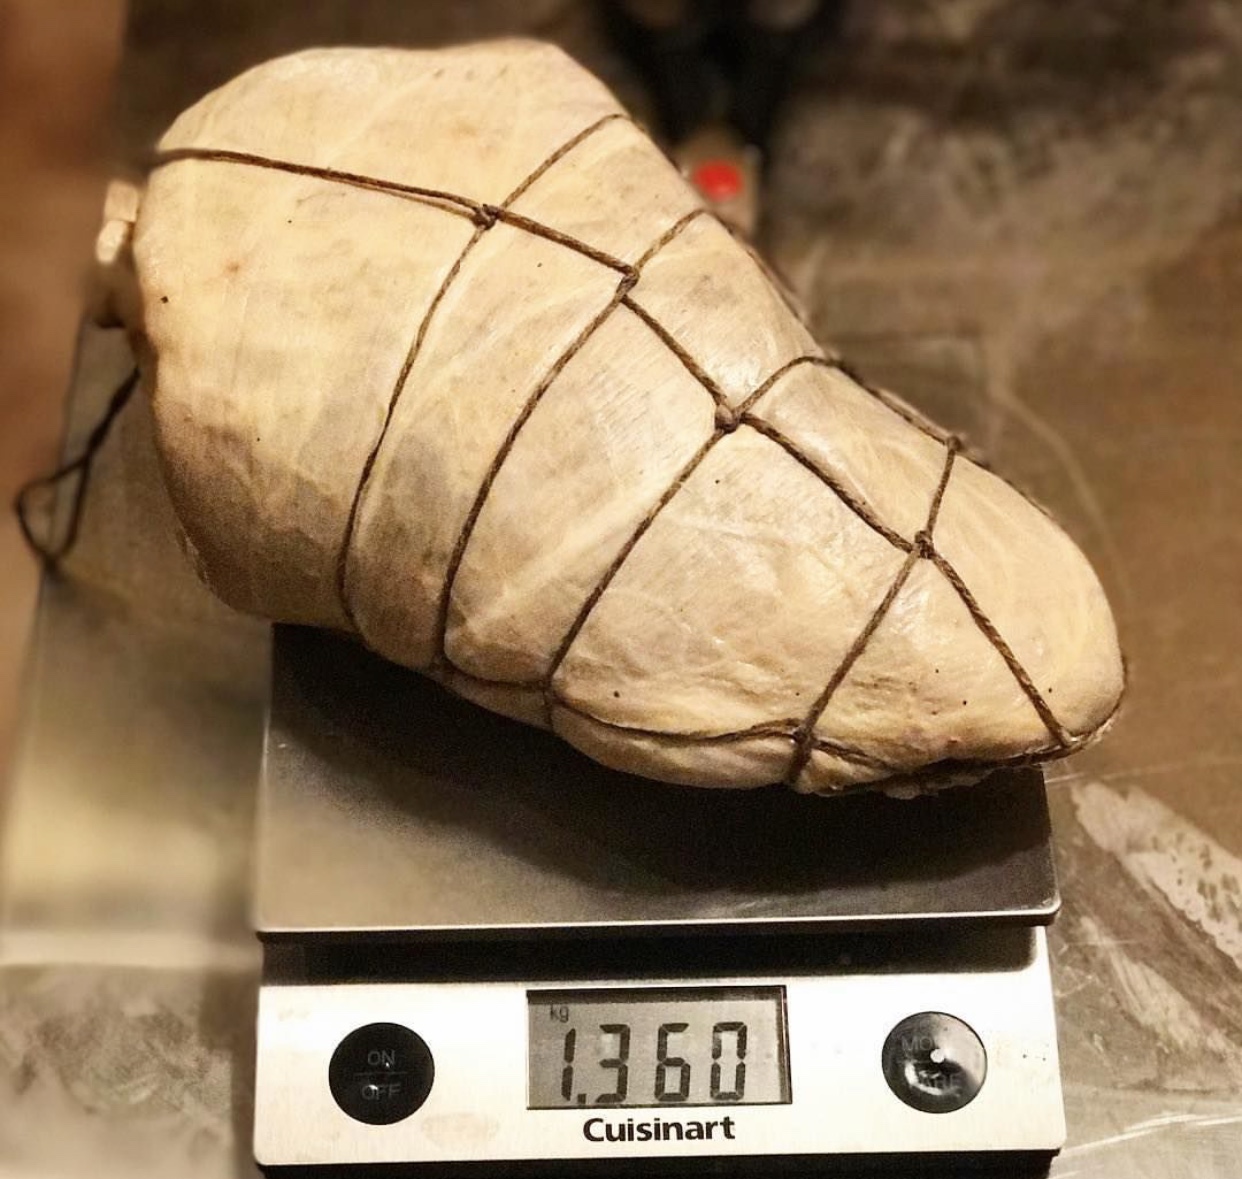
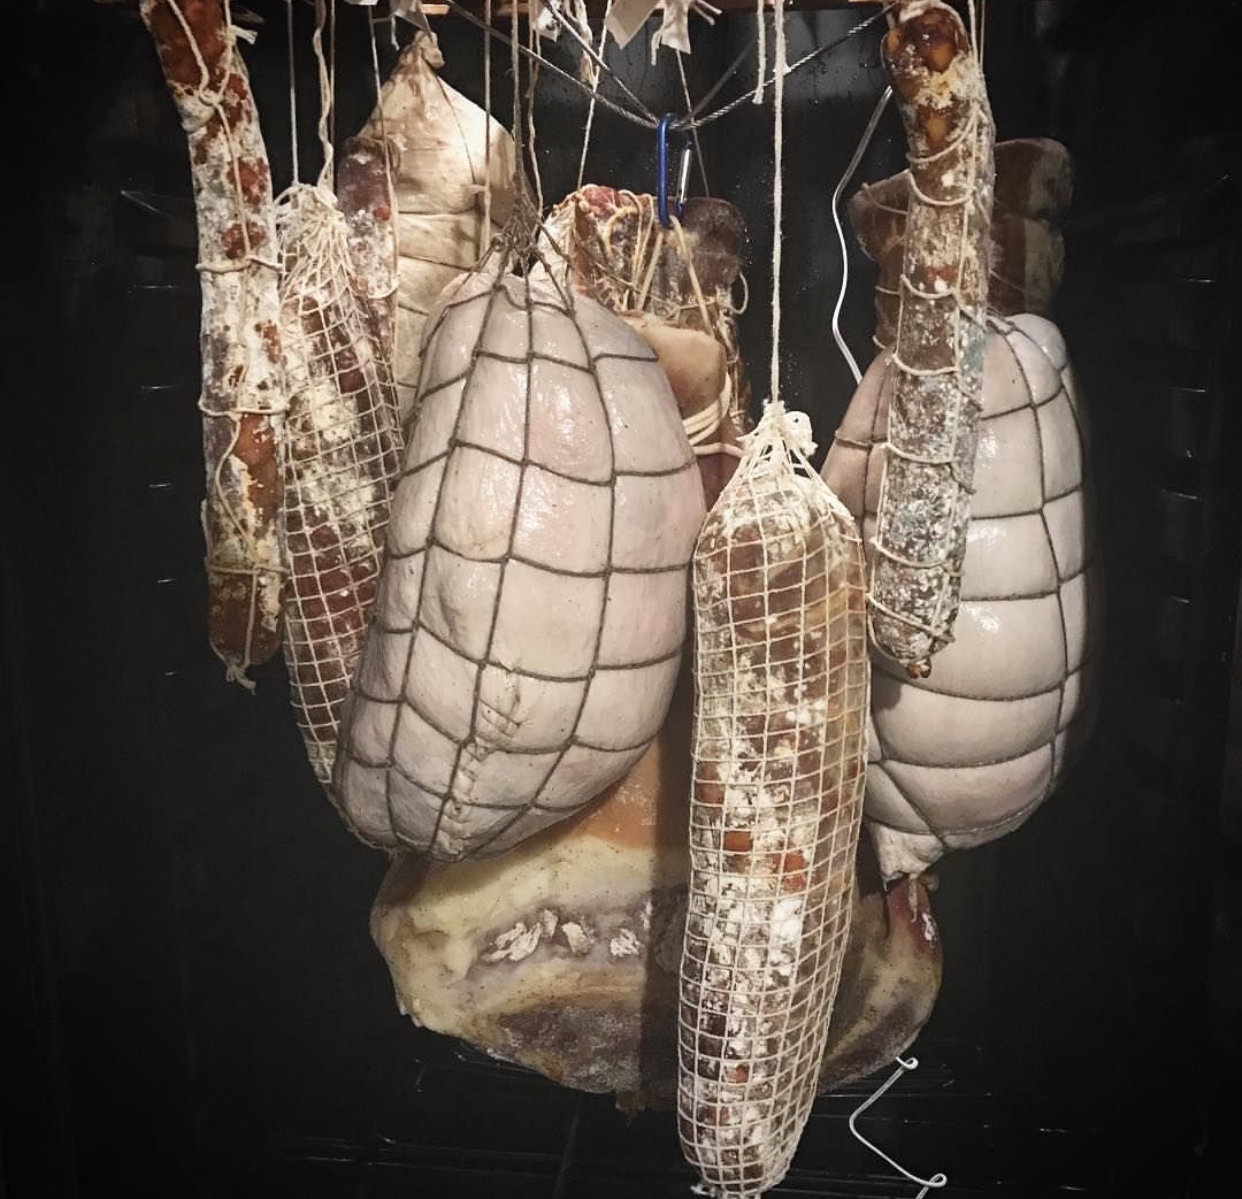
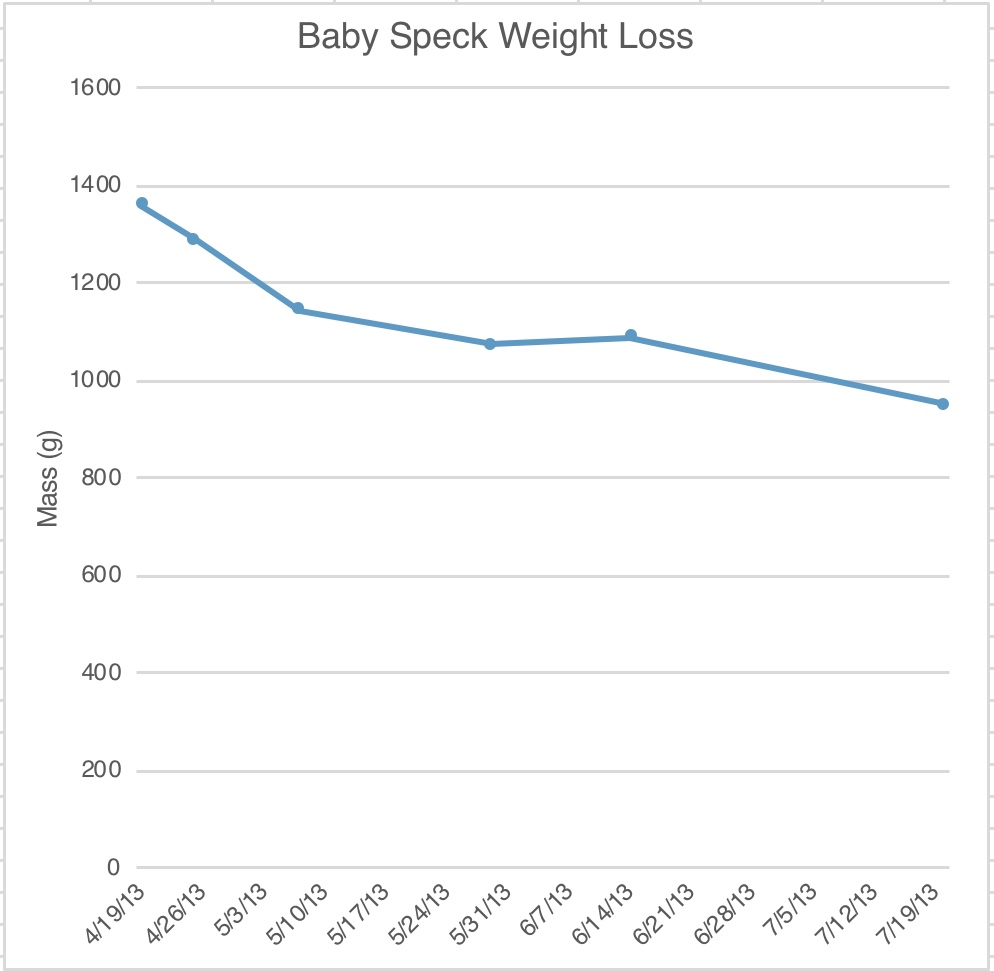

Drying

(dried in the curing chamber at 13C/55F and 70% RH for ~3 months)

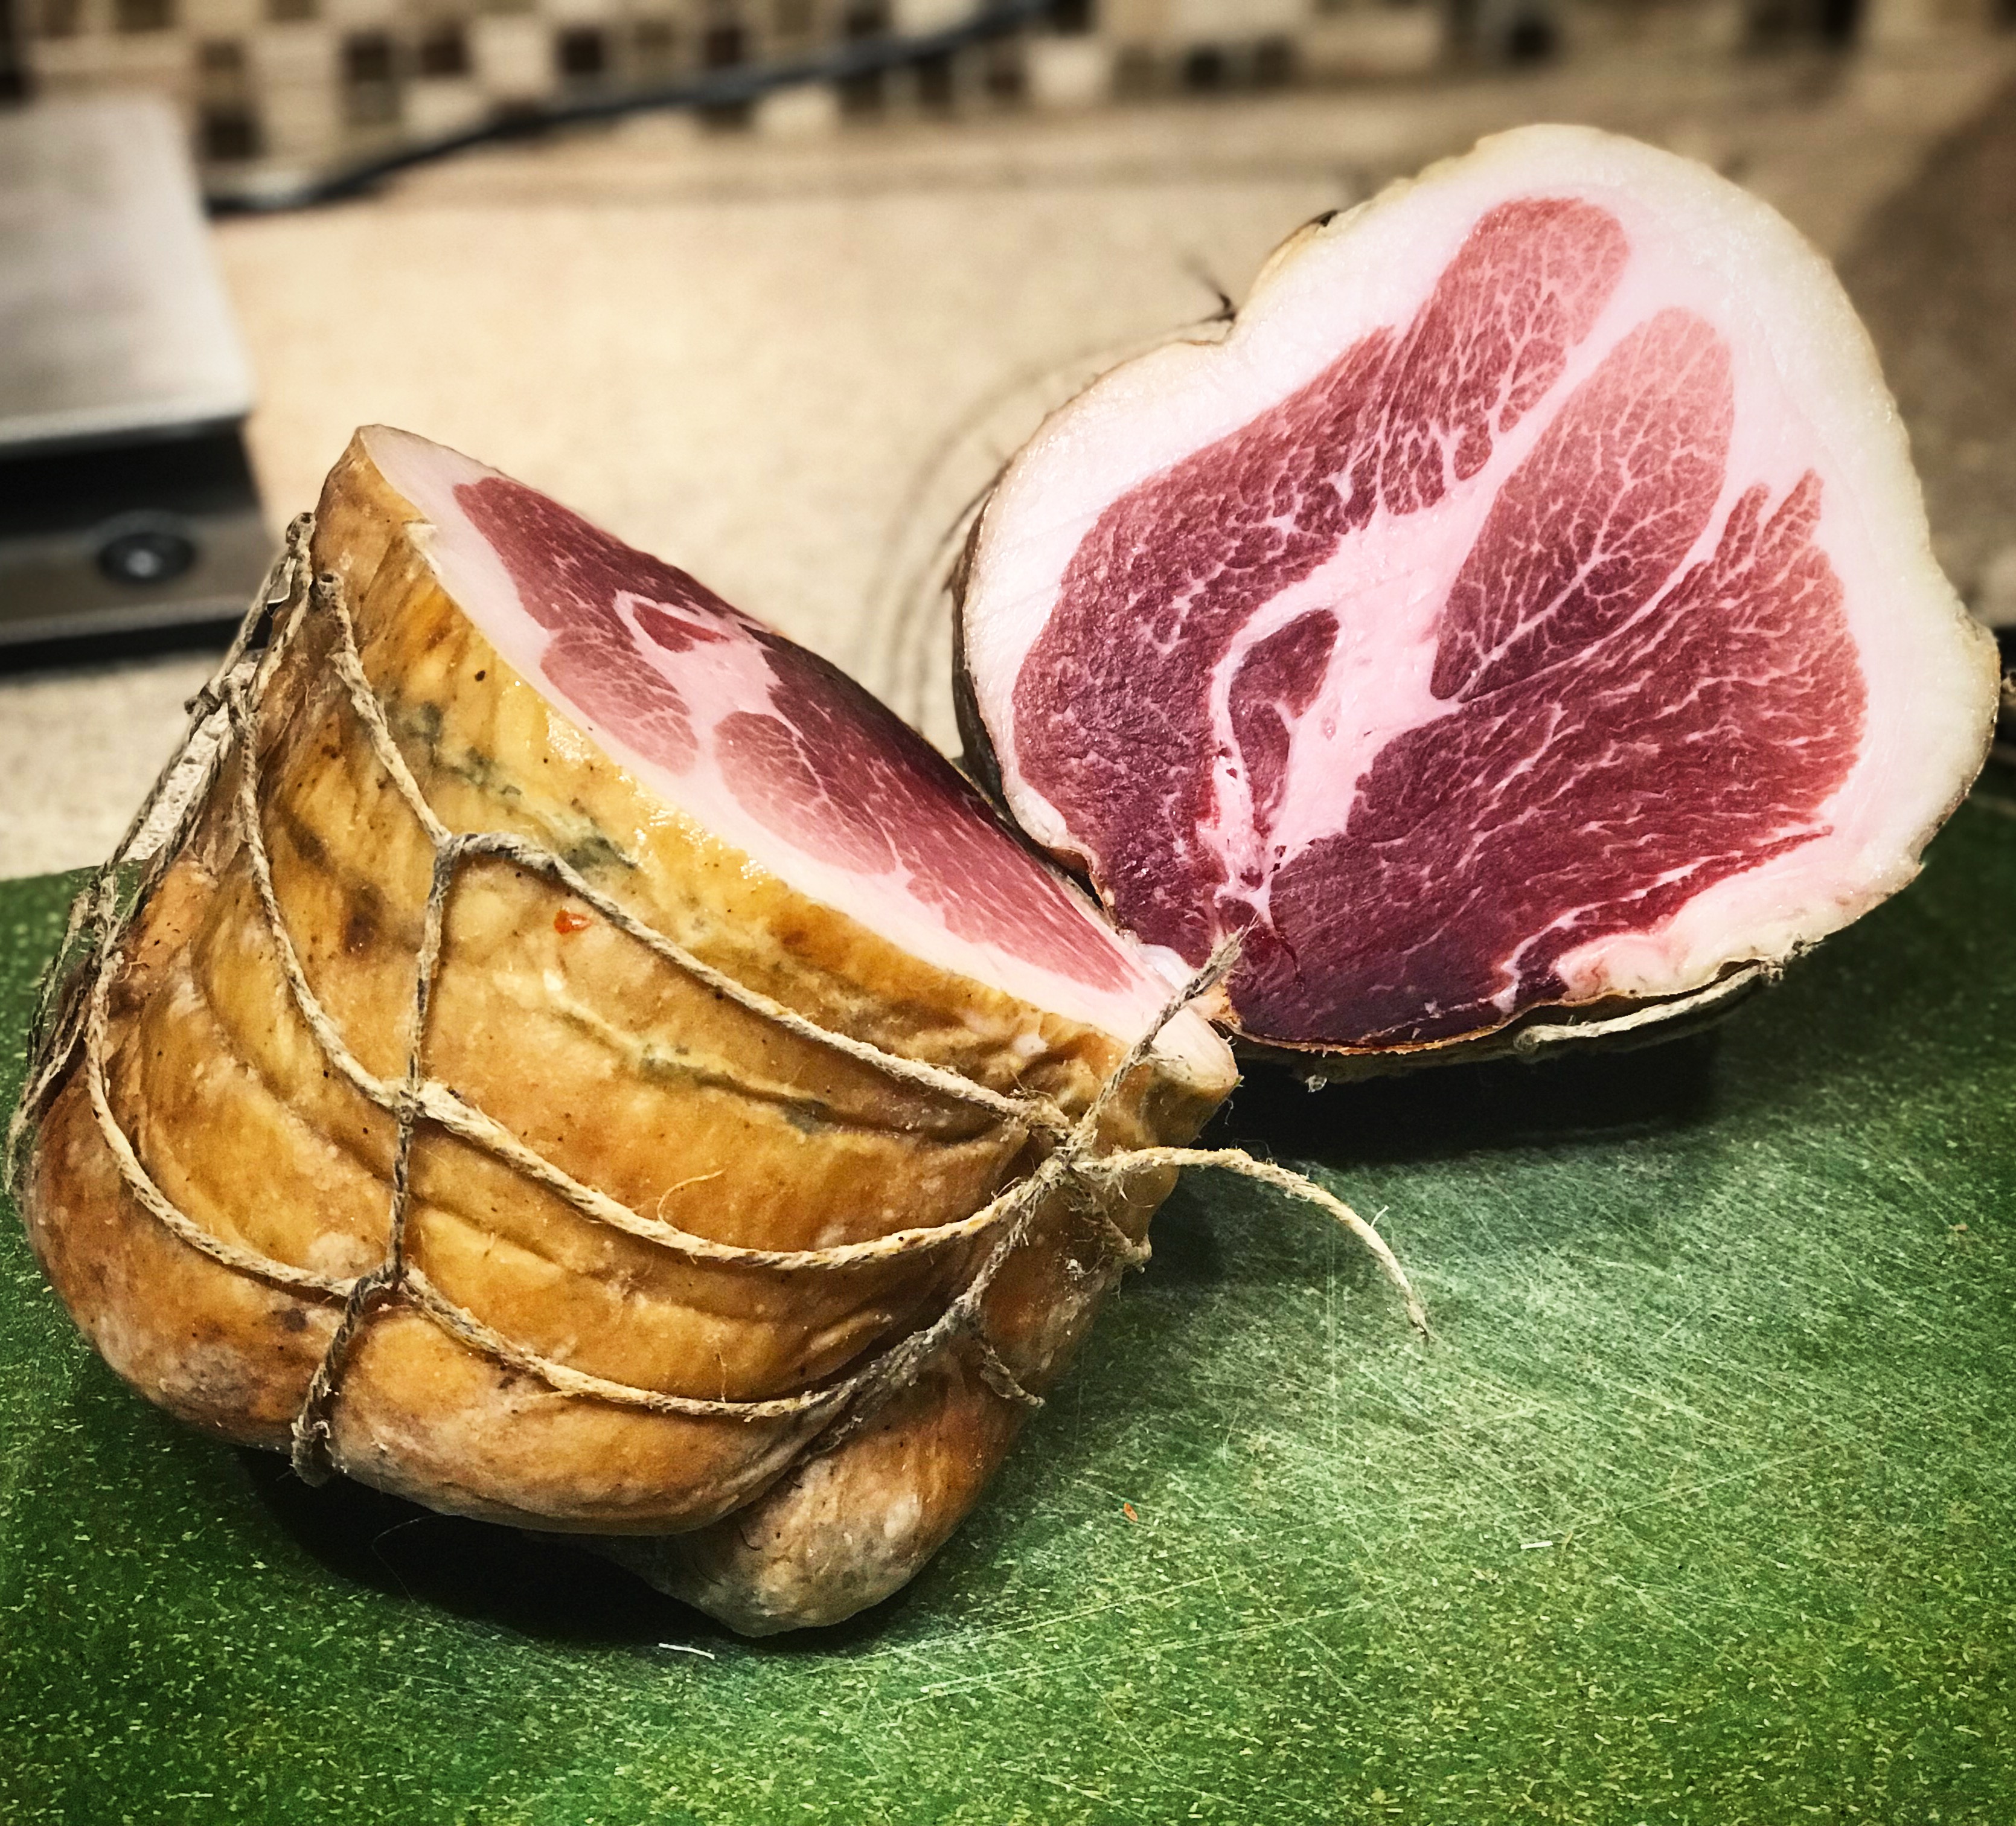
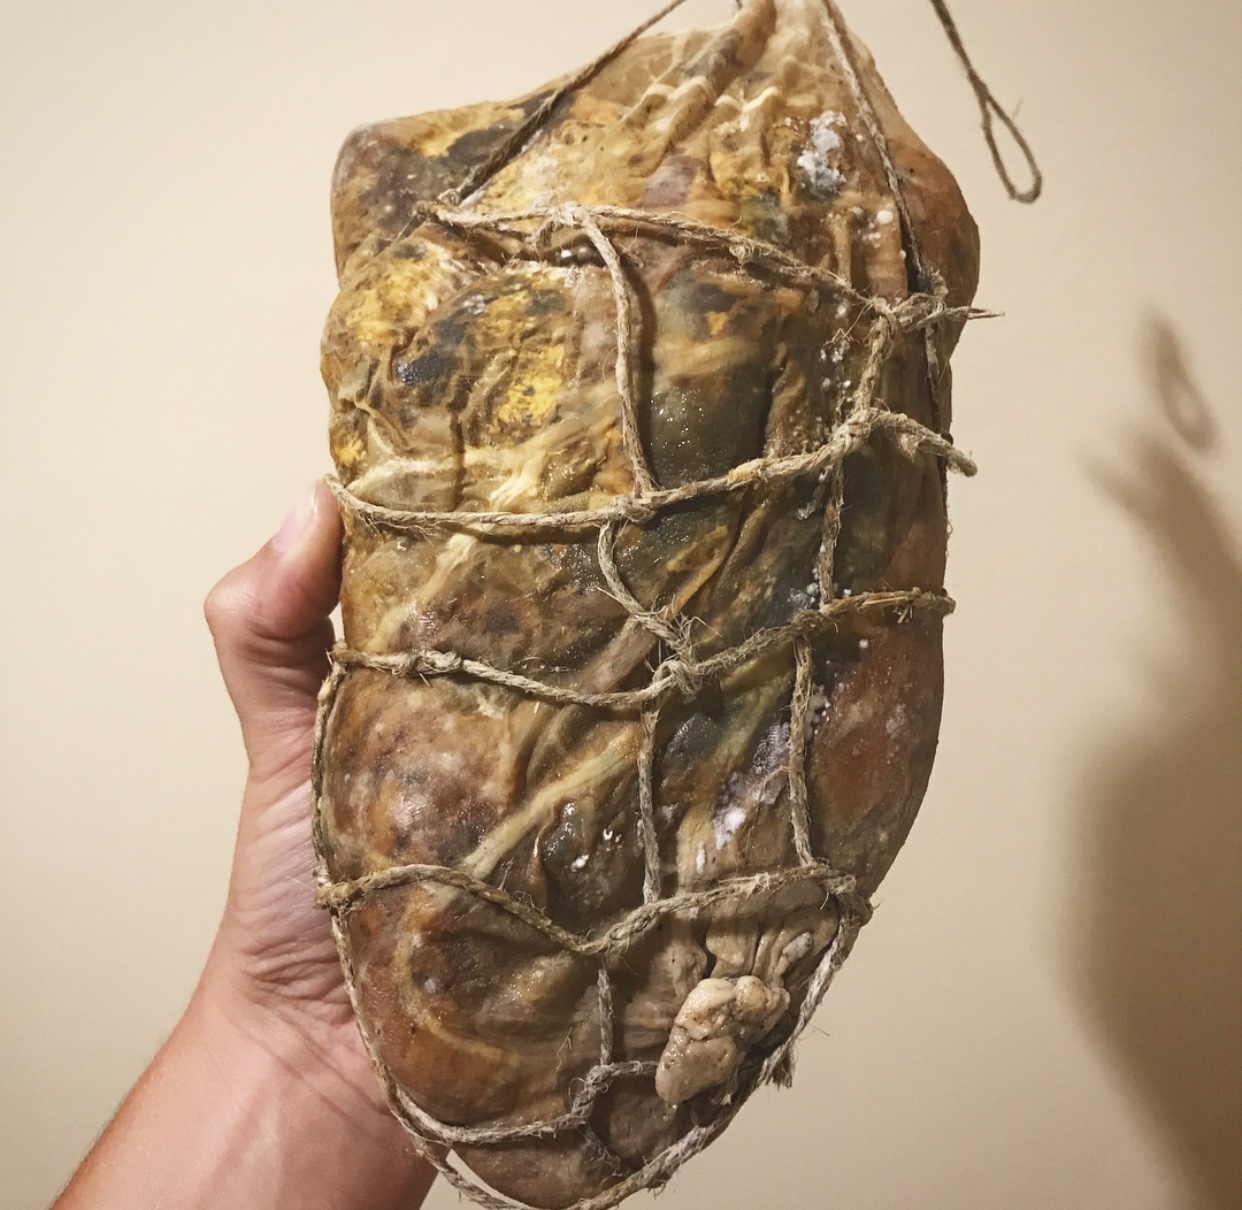
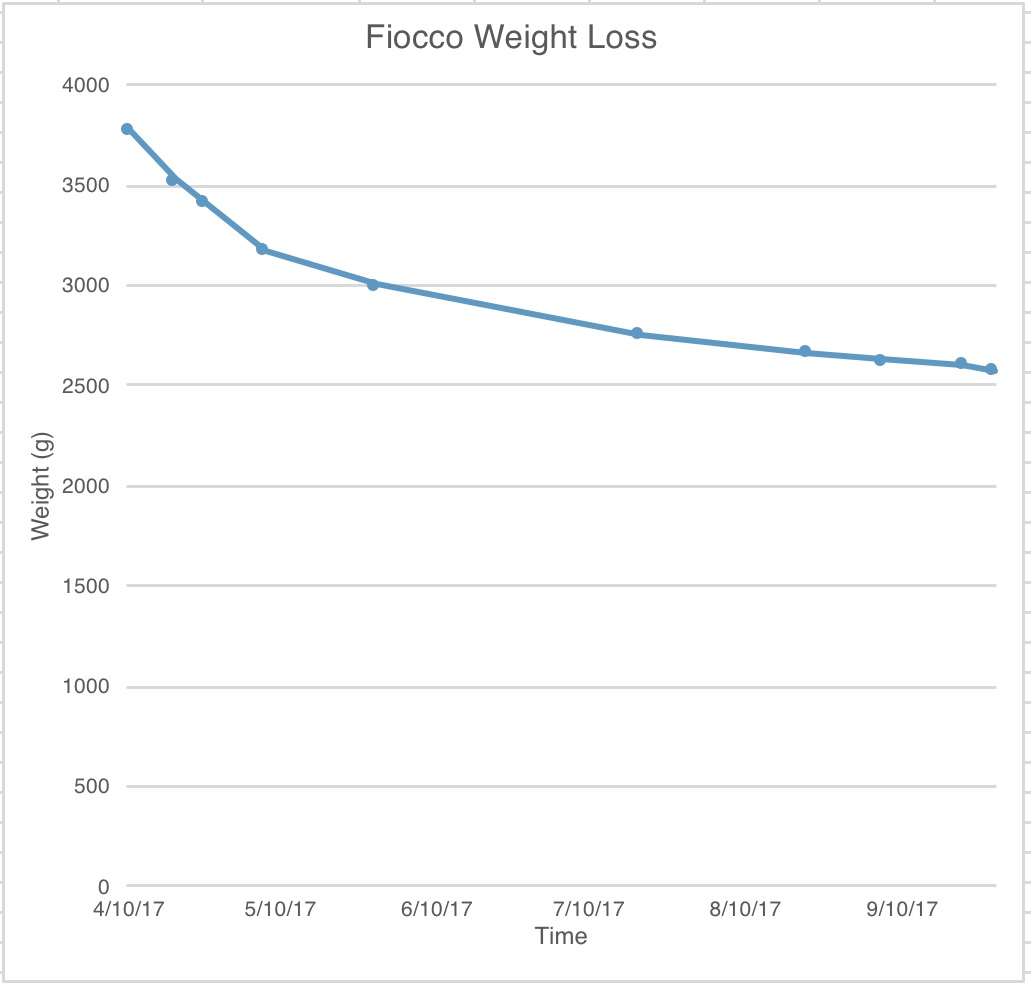
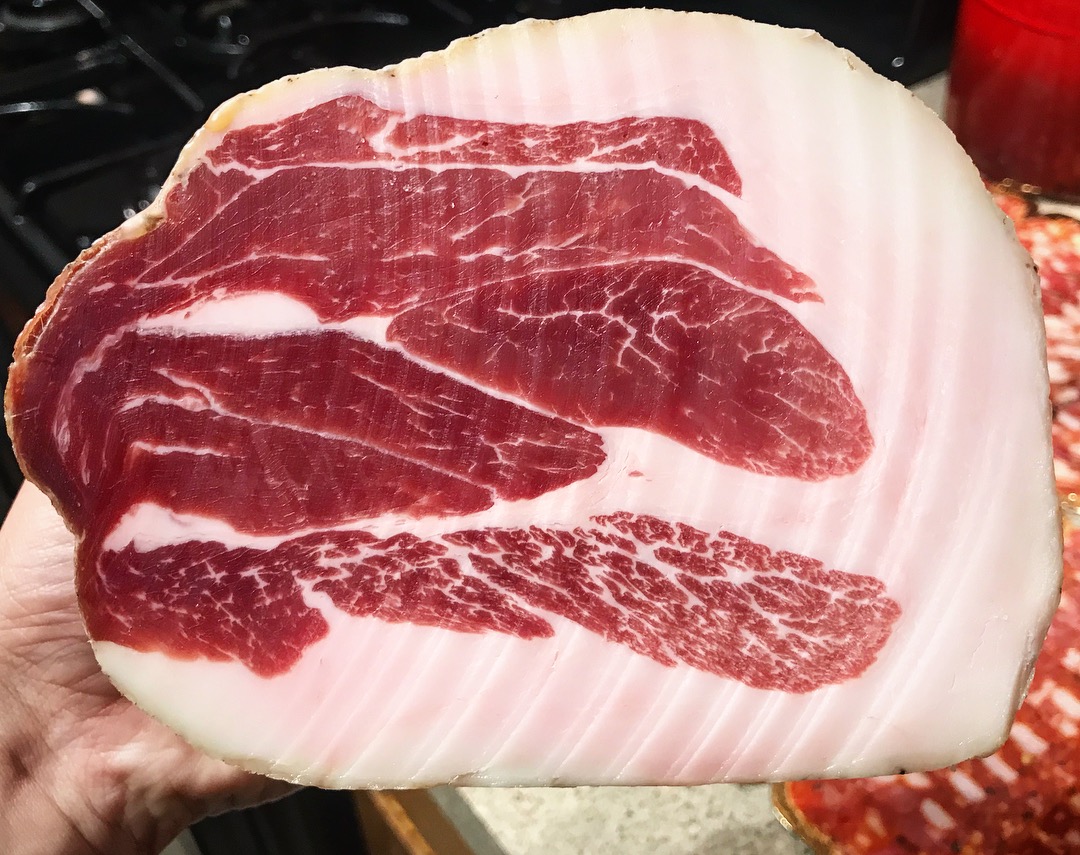
After the lamb culatello is cased and tied, you can hang it in the curing chamber to dry. It needs to hit at least 30% loss of its original weight, at least. I will probably let it go closer to 40%
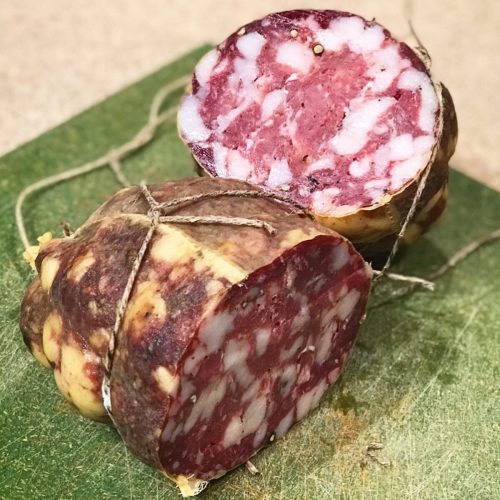
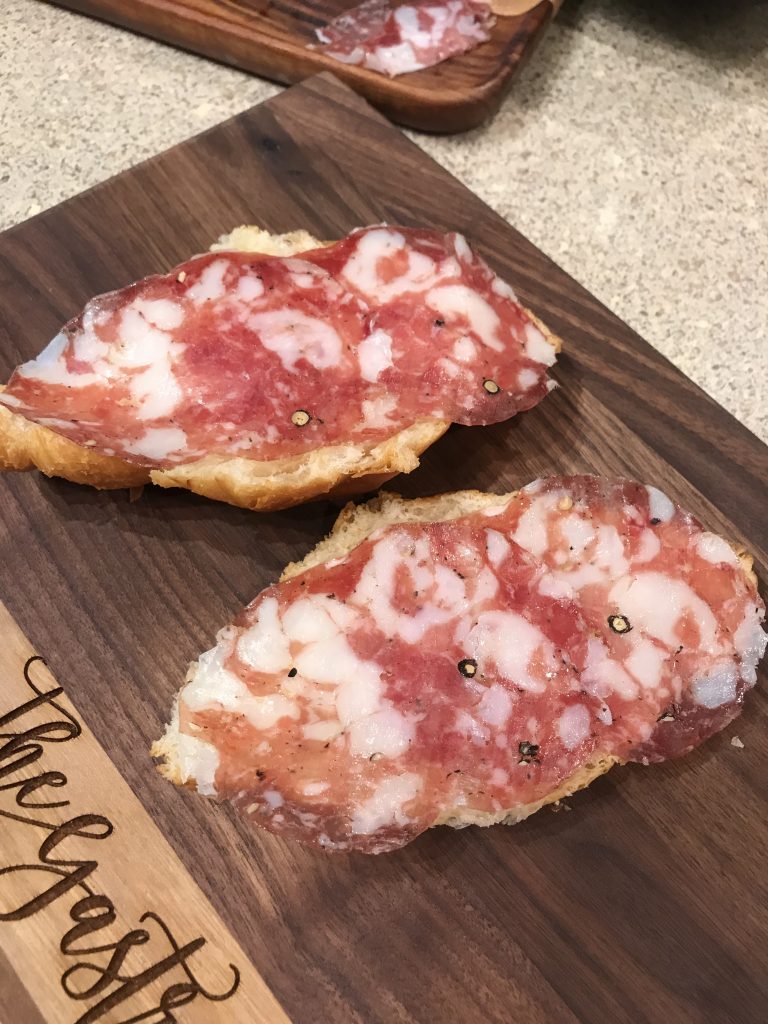
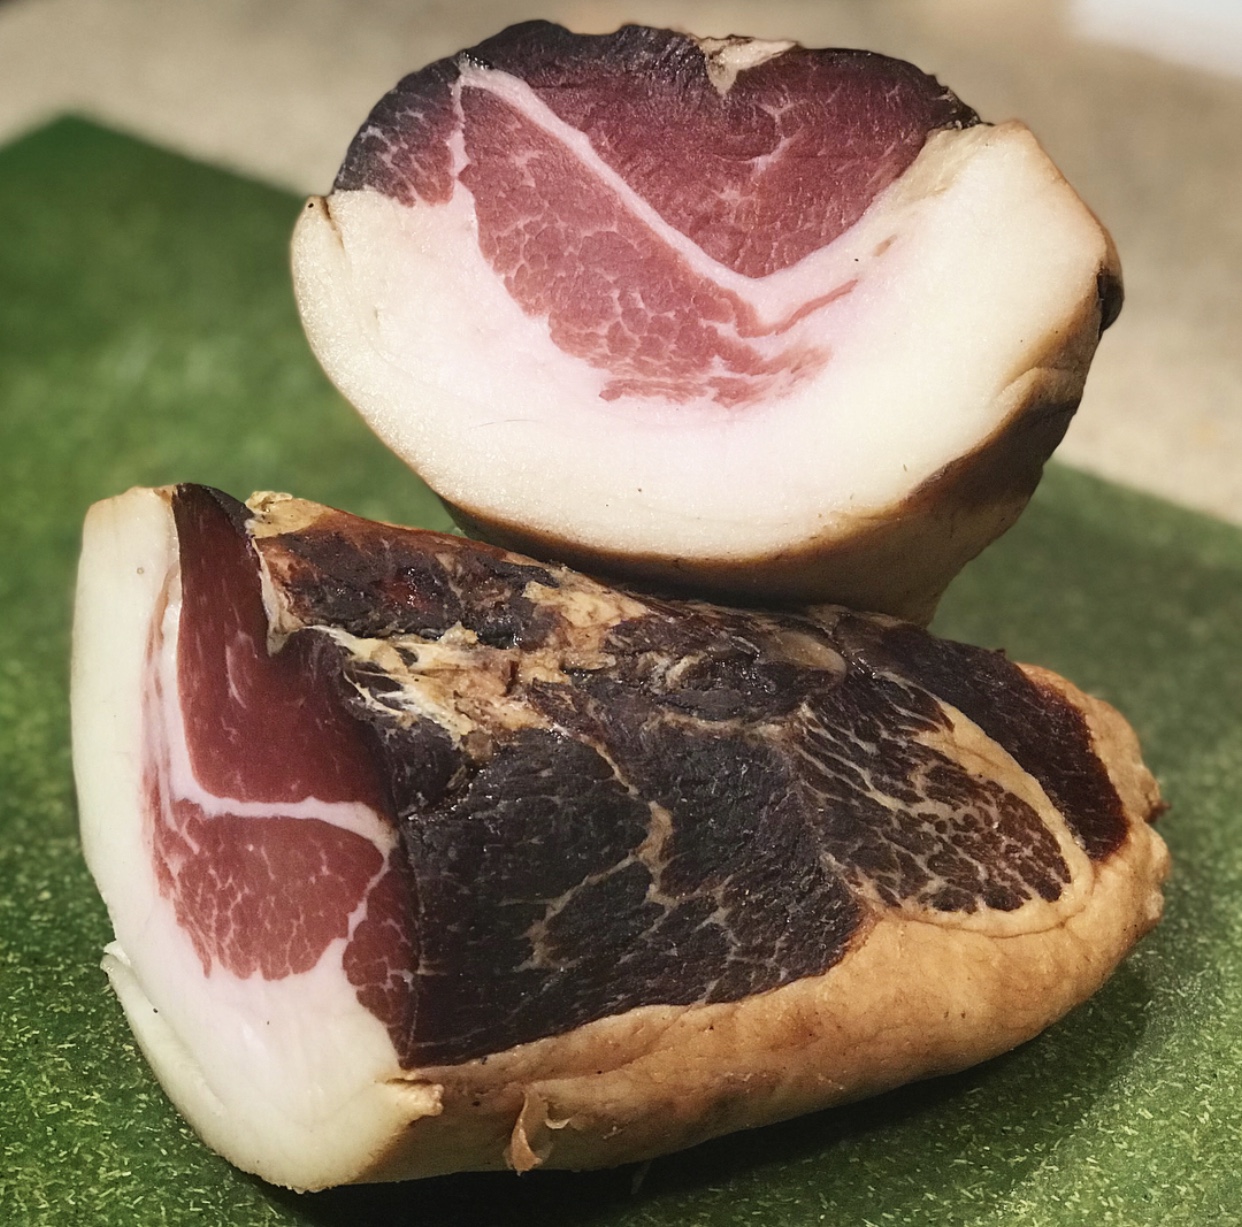
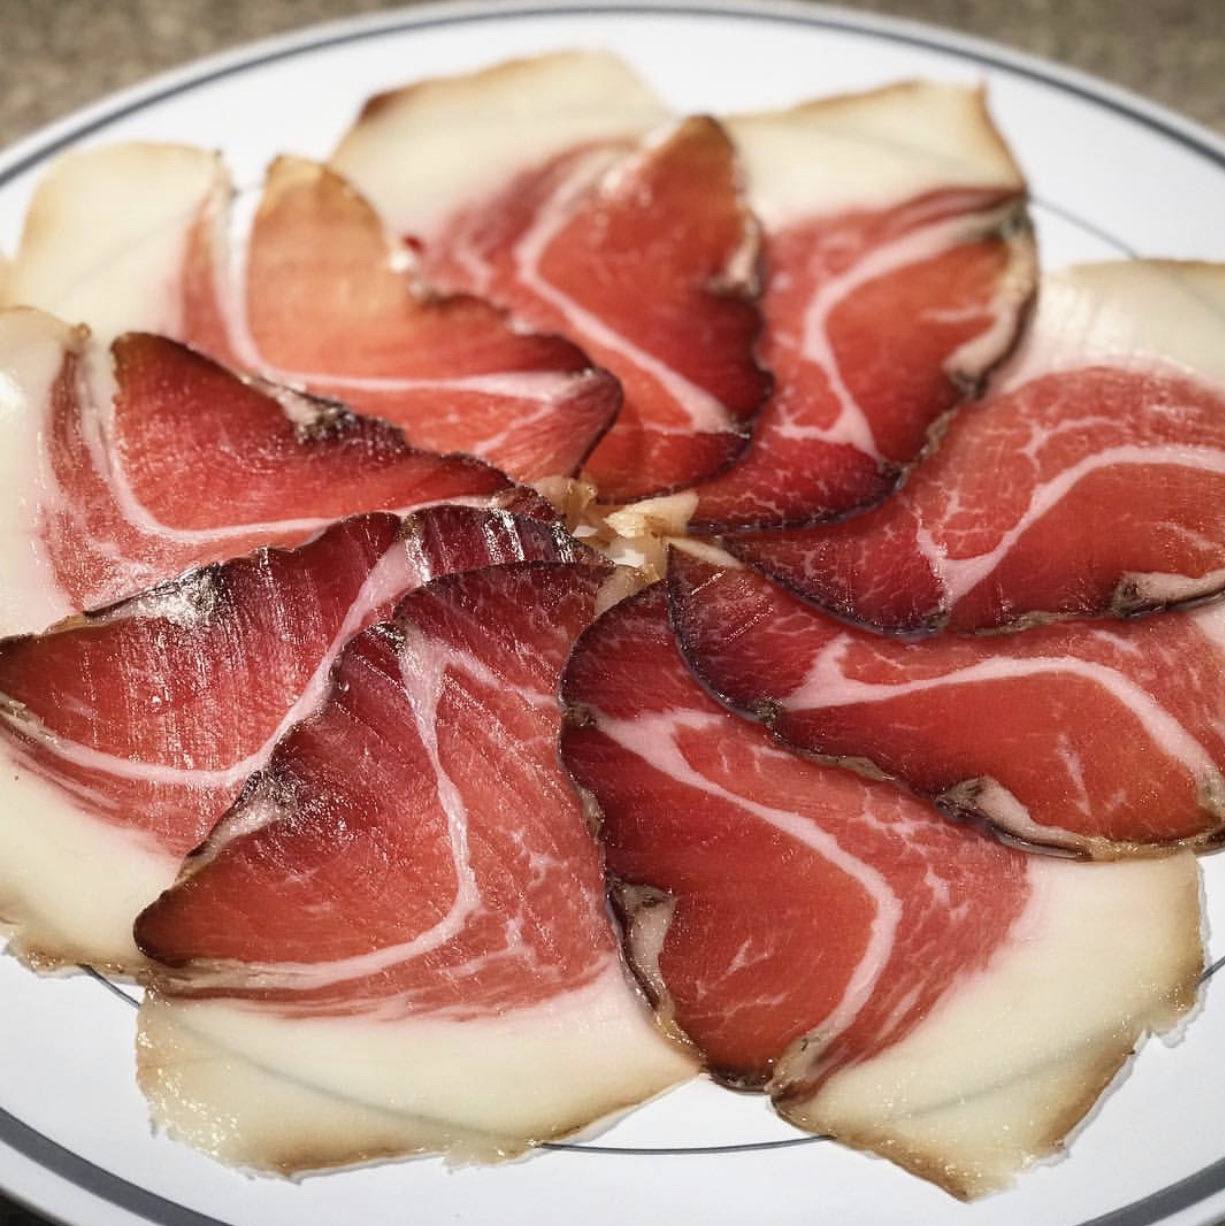
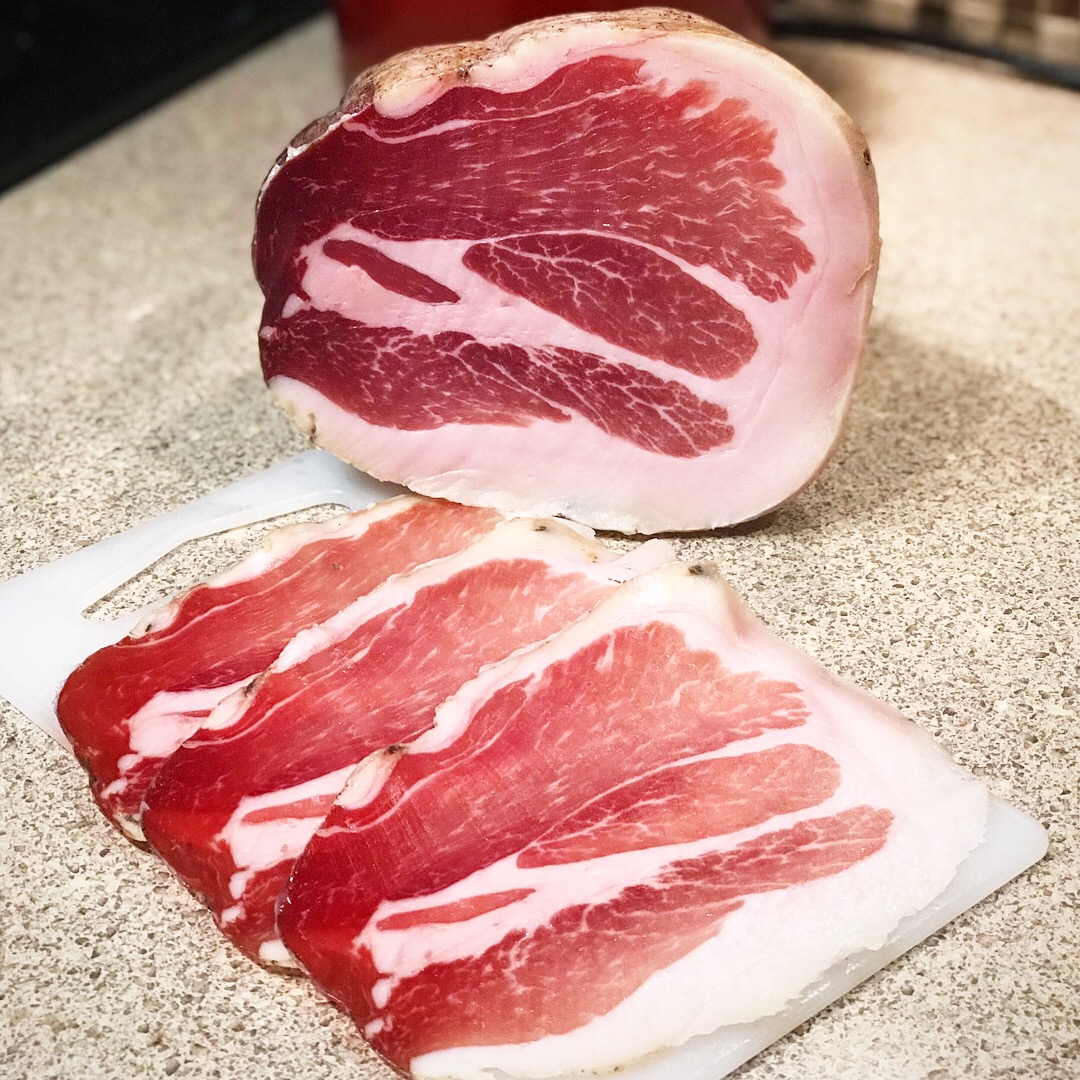
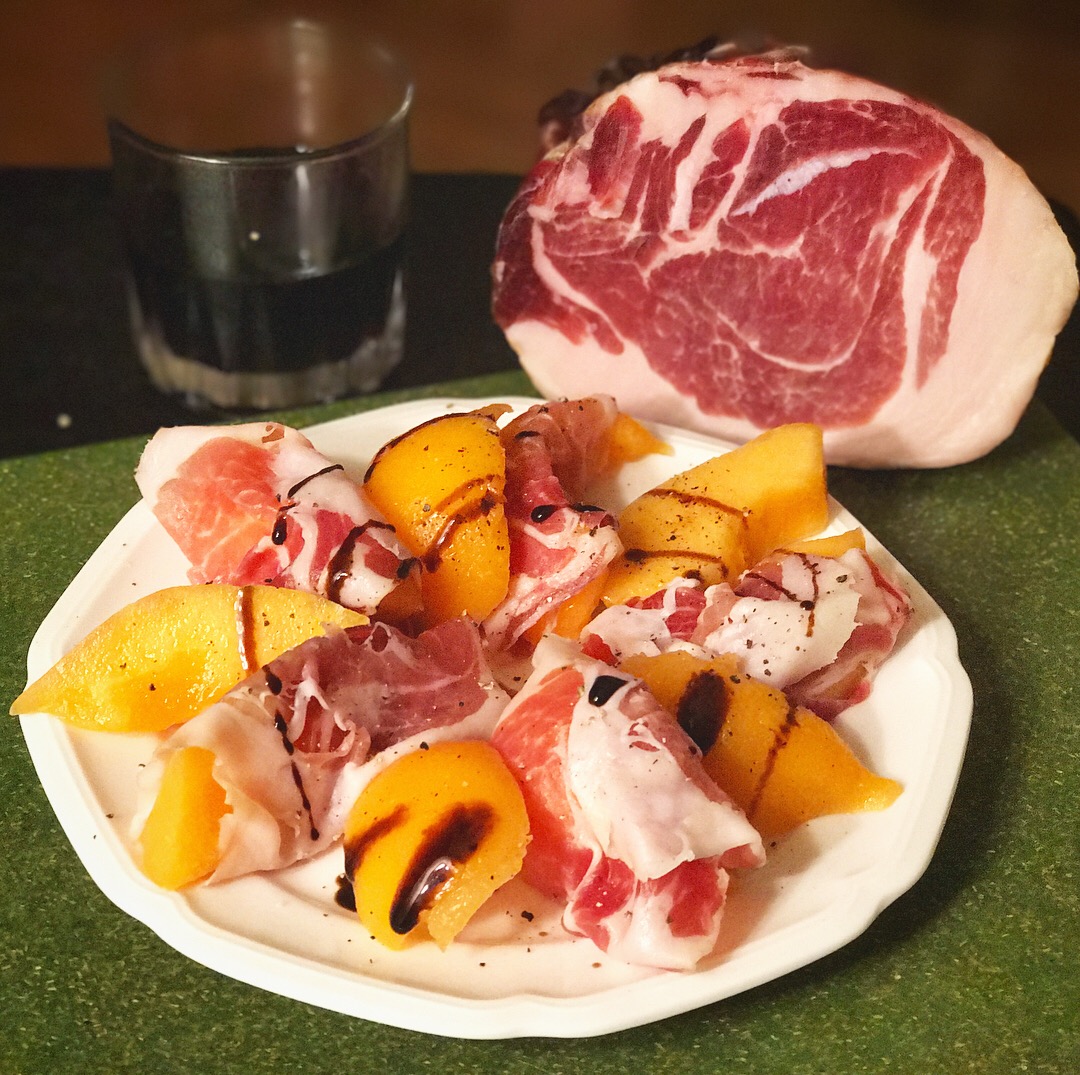

Tasting

After it’s done, comes the best part. Tasting! This is too be added when the process is complete for the most recent project.

Filed Under: Charcuterie Tagged With: agnello, charcuterie, culatello, lamb, lamb culatello, salumi

Strolghino

November 21, 2019 by AOG Leave a Comment

As Halloween has come and passed, the most witchy of all the salami has been on my mind. Strolghino is usually a thin salami that is made using trimmings from the culatello, and eaten after only a few weeks of aging. Its name is thought to derive from the dialect word “strolga” which translates to a word like “witch”. The strolghino is named so for its power of prediction – it is the first indication of how the prized culatello will turn out a year later.


Planning

For this salami, to make it right, you really want to be doing it alongside of making a culatello and fiocco (as discussed here).

Ideally, you will take the trim left over from the leg in the culatello butchering process and use it to make the strolghino. Separate out the trim into pork 1, pork 2, and fat. For the stronghino, you will use the pork 1 (best quality lean meat with no tendons or fascia) and fat. The pork 2 can be used in any saucisson or sausage that will be cooked.

The flavor of meat from this part of the leg can be incredible, so the salami itself doesn’t need much more. Depending on the breed/age/diet of the pig, the leg you are using may have more or less fat. Generally, strolghino is a more lean salami, so you can aim for 15-30% fat for this salami, which is generally achievable just from the trim you will have.

Weigh the lean and fat separately if possible, shooting for 15-30% fat relative to lean, and insert them into the appropriate spaces below on the spreadsheet and it will calculate the necessary amounts of the cure ingredients. (If you have eyeballed the fat/lean ratio, then just insert the total weight into the Meat+Fat cell.)

*Please use common sense. Make sure the spreadsheet is working properly for you and double check any calculations that don’t seem right.


Cubing

After you have planned the ratios for your meat, it’s time to get started. If you’re breaking down a leg, you may have already done this part. If not, it’s time to prepare the meat to be ground. Making sure you keep everything cold (I par freeze my meat beforehand and return it to the freezer when I am done working with it), cube the meat and fat into 1 inch pieces that will fit into your grinder. You can also hand cut your fat if you prefer, if so aim for ¼ inch pieces.


Grinding and Mixing

After grinding the meat, making sure to keep it cold throughout the entire process, mix the meat, fat, and spices together to get a nice bind. I used a stand mixer on the slowest setting for this, although you can also do this step by hand. You want to mix it enough to get a good bind, but not so much that it becomes mush.

Grind your meat (and your fat if you are not choosing to hand cut it) while it is still partially frozen to make the process go as smoothly as possible. I ground the meat using a coarse die here, and hand cut the fat. You can mix the spice cure with the cubed meat before you grind it, or with the ground meat afterwards. I generally mix it before hand to get better spice cure distribution.


Stuffing

After the meat has been mixed together, it’s time to stuff it. Strolghino generally uses small diameter casings, since those were the ones that were traditionally ready first, and will result in the quickest drying. Here, I used wider diameter casings because I had them on hand. Feel free to use what you have available, but the smaller diameter casings will be more authentic for this.  

After stuffing the salami, you can either tie it up by hand, or use netting to secure it.


Fermentation
Temperature: 70ᵒF/21C (strain dependent)
Humidity: 80-90% RH
Time: 48-72 hours (until pH drops to at least 5.3)

After you have stuffed the strolghino into the casings, it’s time for fermentation. The conditions you use for fermentation will depend upon the starter culture strain that you have used. Look it up on the packaging or the website if you’re not sure.

I use B-LC-007, which is a starter culture that requires temperatures of ~70F and a relative humidity ~80-90%. I let the strolghino ferment for ~48 hours, which is about the time it should take to allow the pH to drop into the ideal range. My fermentation chamber is my oven, off, with the light on. This generally gives me the conditions I need.

I don’t currently use a pH meter (they’re relatively expensive), but if you have one, now is the time to use it. Ideally, you want to see the pH drop to around 5.3. In this step, you need to balance the safety concerns (ideally a fast pH drop with American style fast acidifying starter culture) and flavor concerns (ideally a gradual pH drop with European style starter culture). I find the traditional European methods work well for me, but everyone should take into consideration their own concerns when doing this.


Drying
Temperature: 54F/12C
Humidity: 70% RH

After the meat has undergone fermentation, it’s time to let it dry. The strolghino is traditionally only dried around 20 days when in is cased in the traditional small diameter casings. Because I used wider diameter casings, I knew it would not achieve the same level of water loss in that time. So, I hung it in my curing chamber in the usual conditions, ~55F/70%RH, until it lost ~25-30% if its initial weight, which took ~2 months.


Tasting

Ahh. The best part. The tasting. The key to a good strolghino is to use good quality meat and let the quality of the meat shine through by using a simple spice cure. I made this with trimmings from a sow leg from Ham Sweet Farm, and the quality pork flavor shines through. One of my all-time favorites.

Served well on bread.


Disclaimer: Meat curing is a hobby that comes with inherent risks. We can all do things to limit this risk by educating ourselves about the process and the utilizing the safest known methods to create our products. This website is for educational purposes only, and all experimentation should be done at each individuals own risk.

Filed Under: Charcuterie Tagged With: chatcuterie, culatello, diy, recipe, salami, salumi, Strolghino

Culatello

December 30, 2018 by AOG 2 Comments

“And if you don’t know, now you know.” -The Notorious B.I.G.

 DDD87021-BCEF-43B9-9579-78D70E7B9D40


Culatello and Fiocco di Prosciutto (…plus the Rumpetto)

While most people like prosciutto, only those who really know, know of and enjoy culatello. Culatello is often referred to as the heart of the Prosciutto. It is created when you take the freshly cut rear leg of a pig and you remove the leg bones from it. In doing this, you create two whole muscle bundles of meat. The larger of these is the prized culatello di prosciutto while the smaller of the two is the fiocco di prosciutto, often passed off as the ugly step sibling of the culatello, but quite wrongly so. The culatello, while made from the same part of the pig as the prosciutto, has a much different flavor; earthy and sweet, a delicate balance of fat and meat that dissolves on your tongue.

1D74C2F4-713D-4A90-9B93-C51474D7C2BF


The Meat

In order to butcher out the culatello and fiocco, you are going to need to understand a bit of the anatomy of the rear leg. Usually, you will receive a leg primal with part of the hip bone still attached. At the face of the meat, the hip bone articulates with the proximal end of the femur. The femur bone runs through the upper portion of the pig rear leg, the distal end of which articulates with the tibia and the patella to form the knee joint. Then, the tibia and the fibula run through the lower portion of the leg. It’s important to understand how these bones lie in the meat, in order to understand how we will need to remove them to get at the culatello and fiocco cleanly.

F366BB3F-BA63-4EA9-BC51-13100E0DC775

Once you have situated yourself, the first step is to skin the leg. You can either do this now, or wait until you have removed the aitch bone. Either way is fine. Do this carefully, making sure to leave on as much fat as possible. I’m still working on my skinning skills, so it takes me some time and effort to do this, but experts can do this in a few quick knife strokes.

3C626739-04AA-4F3E-8693-713517BCAAAB

Next, you want to remove the portion of the hip bone that articulates with the proximal end of the femur, commonly referred to as the aitch bone. You want to gently remove the aitch bone from the head of the femur, cutting any connective tissue between the two that you come across. This will become easier with practice, as you familiarize yourself with the shape of the bone and the way it protrudes into the meat. It is important to do this carefully, and not cut unnecessarily into the meat. Feel free to use your hands to feel around the bone and inform your cuts. Free the aitch bone entirely, and remove it from the leg.

2C229D30-A047-4E28-A1E2-53D8195B3A71

When the aitch bone is removed from the leg, it should have as little meat on it as possible, meaning that your cuts were clean and efficient. Mine is not quite there, but with practice, makes perfect.

7F39F268-49A8-43A8-9EDD-763726C423E6

After you have removed the aitch bone, you should have what looks like an Italian style prosciutto leg, with the exposed ball joint at the face of the meat.

65EF4F93-343A-4621-828C-0CE4481B49E8

Similarly to making a prosciutto, what you want to do at this point is start to milk the femoral vein. After death, blood can pool in the venous system, even if the blood was drained during the slaughtering process. We want to eliminate all the blood from this piece of meat before we start curing, or it could negatively impact our end results. There are a number of videos and descriptions online of how to do this, but briefly, I attempt to trace the femoral vein through its course in the leg, starting at the distal end and working my way to the proximal face. I apply as much pressure as possible, and attempt to force blood out of the vein in this manner. It’s also important to note, this isn’t a process you can do only once. If you receive a leg that has been frozen, sometimes the blood will be frozen as well, and won’t drain on the day you are cutting. Its important to do this multiple times throughout the process, to make sure all the blood is really drained.

BDACB316-31B7-42C1-BAF5-2AF914A0AD95

Finally, it’s time to do the thing that, if you’re experienced making prosciutto, seems sacrilegious; cutting into the leg. There are traditional ways to do this, but I’ve found a method that I prefer and that works for me. I prefer to cut straight down on top of the bone, and carefully extract it. As someone with less experience, this method helps me to make sure that I don’t commit any grievous errors. If you are more experienced, you can simply “know” where the bone runs, and cut the culatello off by feel.

CA9A9B5B-9500-4FB9-973C-43EDB9996B5F

Once I have exposed the bone and freed it from its attachments to the bundles of meat that are the culatello and fiocco, you have a few options for how you want to cut them out. I like this method, because by leaving both the culatello and fiocco attached, you gain a triangular shaped whole muscle at the face of the prosciutto.

58CD3A7D-74D6-48D8-919C-DFE90E3FB318

I like to make the first cut across the leg, to trim up the faces of the culatello and fiocco, while simultaneously freeing this meat that I call the rumpetto. I like to cure this with spices and cold smoke it, in a modified version of speck. If you don’t save this muscle whole, you can use this extra meat for salami.

D283CBE6-F4E4-4475-B22D-75480306CDE4

Once the face of the meat is trimmed, you can cut out the entire culatello and fiocco.

34A376FB-A235-4D42-8E5E-5E965732E8A3

You want to trim the culatello into its characteristic teardrop shape.  Once you have trimmed it up, you want to tie it using tight slip knots, to help it maintain its shape and make sure there are no air pockets created during the butchering process. And that’s it! You’ve shaped your culatello and fiocco.382F06BE-E23C-47FD-B3F7-21742A4A0C38


Salting (4C/40F, 3 weeks+)

For the salting of culatello, I like to keep it simple. I do an equilibrium cure with salt, black pepper, and cure #2. Some people don’t use cure #2 for whole muscles like this, but I do. I generally cure both the culatello and fiocco in this simple cure, although sometimes I will experiment a bit with the fiocco. I keep them curing in a vacuum sealed bag in the fridge. You can use the following interactive spreadsheets to calculate the cure you will need for your own project; just fill in the weight of your meat in the appropriate white cell in the spreadsheet and hit enter. There is no need to make any other changes to the spreadsheet.


For the rumpetto, I used an alpine spice mix generally used for making speck.

*Notes:

1- Please use common sense. Make sure the spreadsheet is working properly for you and double check any calculations that don’t seem right.

2- I like to use equilibrium curing. It allows me some flexibility in when I process the meat after curing, since the time left in the cure doesn’t matter, it is the percentages that are used that do. However, some people don’t do this type of curing and use excess curing instead. In excess curing, it is the time that the meat is left in the cure that matters.  If you would rather do excess curing for culatello, cure the culatello  in excess sea salt for 1 day per kg of meat. (For example, for a prosciutto that weights 14 kg, this means it would stay in excess sea salt for 14 days).


Casing

Once the culatello and fiocco have been allowed to cure for the appropriate amount of time, you need to rinse them and case them. The culatello is traditionally cased in a hog bladder, since it is one of the few things that will expand to the necessary size. Depending on where you live, you may be able to find hog bladders for sale online. I like the ones that have been packed in salt, not the ones that have been pre-dried that you need to rehydrate. However, it’s really whatever works for you.

You will need to soak the bladder first, to allow it to relax and expand.

214D4524-2AA9-465E-B76A-1D9EBC49DCE3

When you’re ready to go, you cut open the mouth of the bladder, and stuff the rinsed and dried culatello inside. It may seem like it won’t fit, but chances are it will. Once its in, you need to sew the bladder back to together. You can do this using any type of needle and thread that works, or even surgical sutures! I treat the fiocco the same way as the culatello, so by the end I have two pieces of meat encased in bladders.

0BE27477-2F4E-4295-9F7A-1586116E415E

Once the meat is cased in the bladder, it’s time to tie it. Experts can do this process in the matter of 10 minutes or less. The rest of us can be happy just to have it done. It’s hard to explain the tying of the culatello, because you really need to watch it being done. There are a number of videos online for it, so I suggest searching google for videos on how to do the tying. The traditional culatello di Zibello type of tying is what we’re going for here. Of course, at this point the tying is mostly aesthetic, but it’s nice to learn the tradition and can actually be quite fun.

39FDC4A7-088F-48CE-9628-742DB7CC2698

On the other hand, the rumpetto was easily cased in a beef bung, and was hand tied more simply. After tying, it was cold smoked for 4 hours using beechwood.

FF06F008-AC69-4F7C-AF2C-D722011A92B4


Drying (13C/55F, 70%RH, 9-12 months):

After you have tied your culatello, fiocco, and rumpetto, you are ready to let them hang.

86E7DA74-D34B-45A4-ADE1-DDDF55C2A5F4

Here, the hard part is the waiting. You are shooting for ~30% loss, but you also want to allow it to hang for enough time to develop a good flavor. I try to leave my fiocco hanging for at least 6 months and the culatello for at least 9 months, a year if I can handle it.

6F4EEF68-EF7D-4117-8FCC-25C3867AFFB9

First, I pulled the rumpetto, or baby speck.

71DB9B40-FF5F-4B56-B912-A3944563B1A2

7BBFC6A5-D1D2-4CFC-8BDF-F7699E6E3EA1

After the rumpetto, I pulled the fiocco.

C7E6A1BE-78D8-49CB-80B9-48A0A35CAB4D

865BD3F1-B9B1-4AE2-9A26-182154DE9330

Finally, it was time to pull the culatello.

B4896ED8-B435-4984-A7F0-A9887A3708A8

D29390F1-F090-41DF-BE56-55D7E04DAB7C


Tasting

The nice part about curing the all 3 cuts (the rumpetto, the fiocco, and the culatello), is that the rumpetto is done after a short 3 months and the fiocco is done after 6 months, which allows you to satisfy your taste bud curiously about how the process went.

The rumpetto was cut into first.

A830A1A1-2C20-44DF-9894-00E034976BCD

The smoky fat combined really well with the alpine spices in this baby speck.

3712E6C7-60D5-4169-BFEB-F97E277614E1

The first time I cut into the fiocco I was shocked.

3B87D9CF-2239-473C-BAF0-D539CA918A13

After hearing about how it was the poor step sibling of the culatello, I wasn’t expecting too much. It was great. A nice strong flavor, and well balanced meat to fat ratio.

001E3E2E-C749-4767-995B-3AA1FF3B4211

Cut forward 6 months to the culatello. When I cut open the culatello I think my jaw dropped. Jaw dropping beauty and flavor to match.

6B1128B0-1BB8-4F3A-9BD9-FB9ACFFC883B

It was only then when I realized why the fiocco was called the ugly step sibling of the culatello. Not because the fiocco isn’t great, but because the culatello is SO fantastic. It’s hard to describe the flavor, but the balance of earthy sweetness with salty funk and smooth fat is the ultimate experience.

2572D13A-A0F8-47D7-9DB6-D0DA0B2AB755

It’s great served by itself, with some crusty bread, or with some melon. Just make sure you have another one in the making, because it won’t last long!

31BA501A-4443-41E2-801E-3A3A72E83090


Disclaimer: Meat curing is a hobby that comes with inherent risks. We can all do things to limit this risk by educating ourselves about the process and the utilizing the safest known methods to create our products. This website is for educational purposes only, and all experimentation should be done at each individuals own risk.

Filed Under: Charcuterie Tagged With: charcuterie, culatello, cured meat, diy, fiocco, meat, meat curing, recipe, rumpetto, salumi

  • Instagram

Copyright © 2025 · Foodie Pro Theme by Shay Bocks · Built on the Genesis Framework · Powered by WordPress