The Explorations of a Gastrochemist

...because science can be delicious.

  • Beginner’s Guide
  • Wurst Adventure
  • Charcuterie
  • Preservation
  • Science
  • Molecular Gastronomy
  • All Projects
You are here: Home / Archives for cured meats

Spanish Style Chorizo

August 29, 2017 by AOG Leave a Comment

Chorizo! Chorizo! Chorizo! There are so many different kinds of chorizo that it can be hard to know where to begin when talking about chorizo. Some chorizo, such as Mexican style chorizo, is a fresh sausage that is great to crumble and cook with eggs for breakfast. Fresh sausage chorizo are great and can liven up any dish that they are added to. But for me, the real magic is in the Spanish style, dry cured chorizo. Spanish style chorizo is made using a combination of Spanish spices, prominently both dulce and picante pimentón de la Vera. Like any other dry cured salami, it is allowed to hang after it has been mixed and stuffed, until it loses ~30-40% of its initial weight, and is ready to eat at that point. Unlike the fresh style chorizo, the Spanish style chorizo does not need to be cooked to be eaten. The combination of spices in this Spanish style chorizo are fantastic, and it is one of my all time favorite salami. Packed full of flavor, its great however you want to eat it.

IMG_3330


Planning

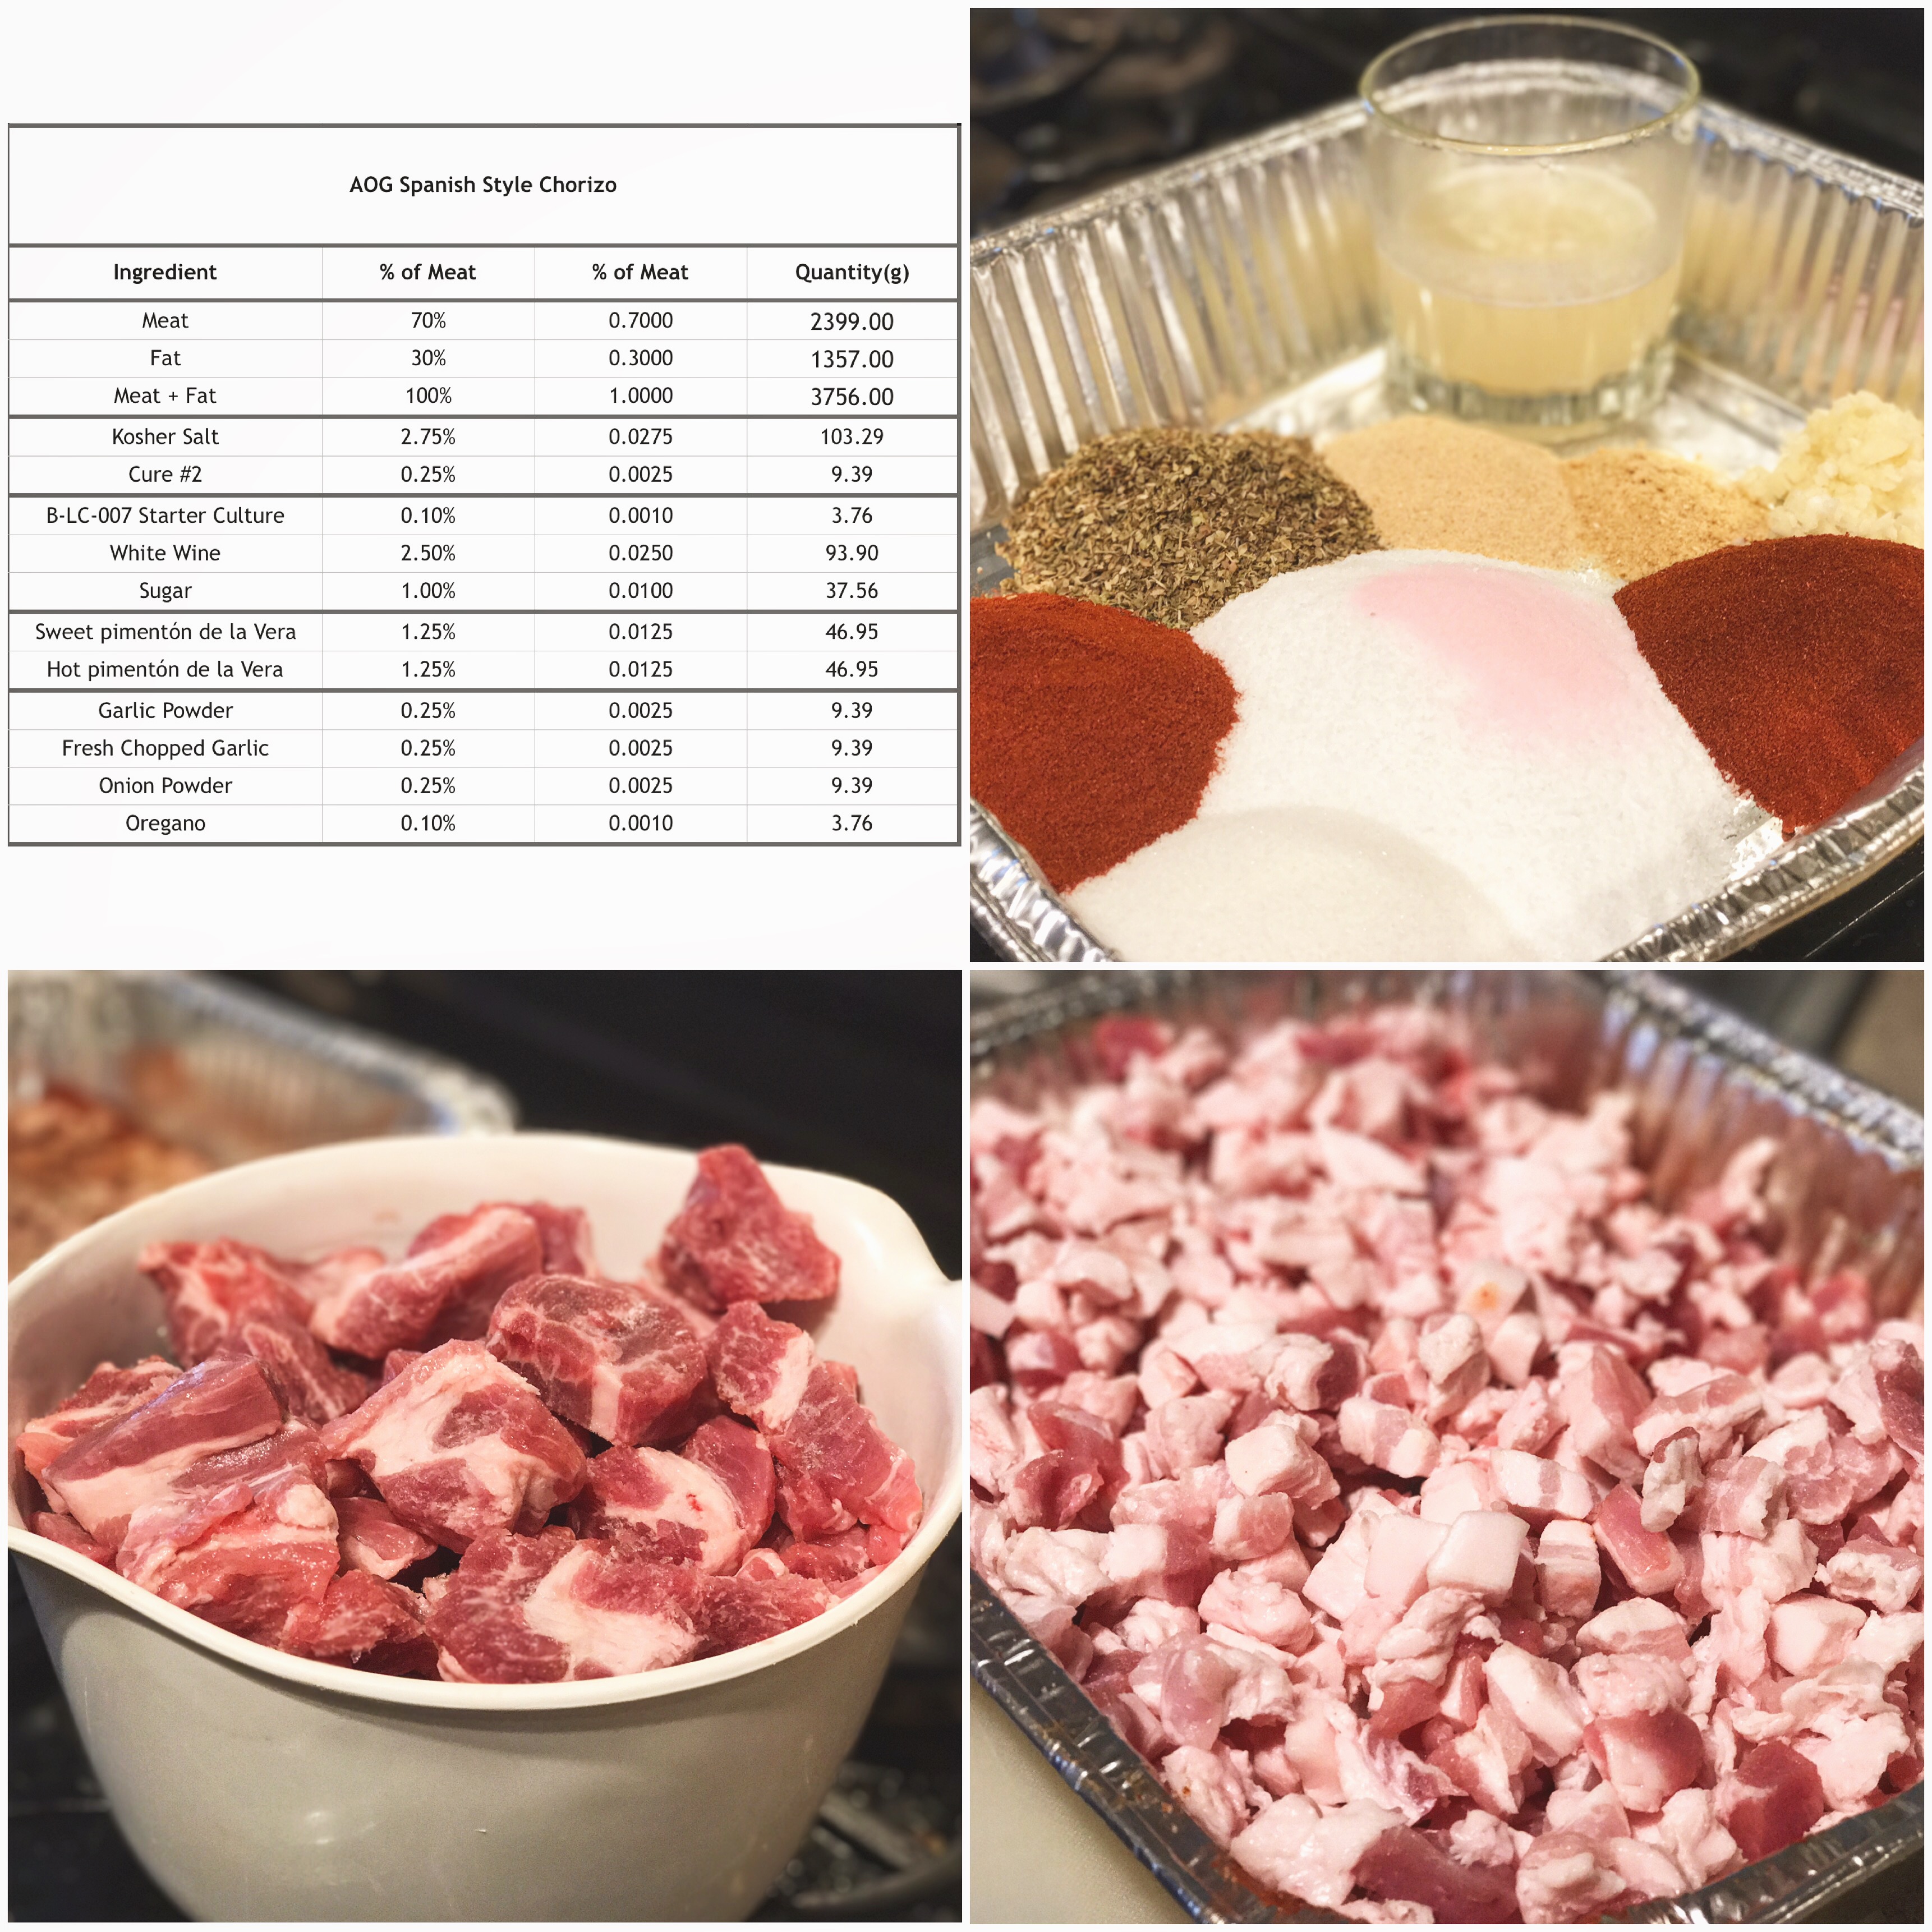
For this salami, you want to use pimentón de la Vera, not just any old paprika. Good quality flavor makes all the difference. Other than that, it’s a pretty simple recipe, so the other spices are ones you probably will have on hand. The ratio of meat/fat is the usual 70/30 percent. I tend to use meat from the shoulder for the meat and belly fat for the fat (because I love the flavor/texture of belly fat) but it is more traditional to use the more firm back fat for this. Whatever you choose to use, just make sure your fat is at least 30% of the total meat weight. Once you’ve weighed your meat, put the value into your spreadsheet, and calculate how much of each spice that you will need. I used a 50/50 sweet to spicy pimentón de la Vera, but if you prefer more spice, you can up the percentage (just make sure to keep the total percentage of the pimentón de la Vera at 2.5% of the weight of the meat). My ratios are below.

IMG_2239


Cubing

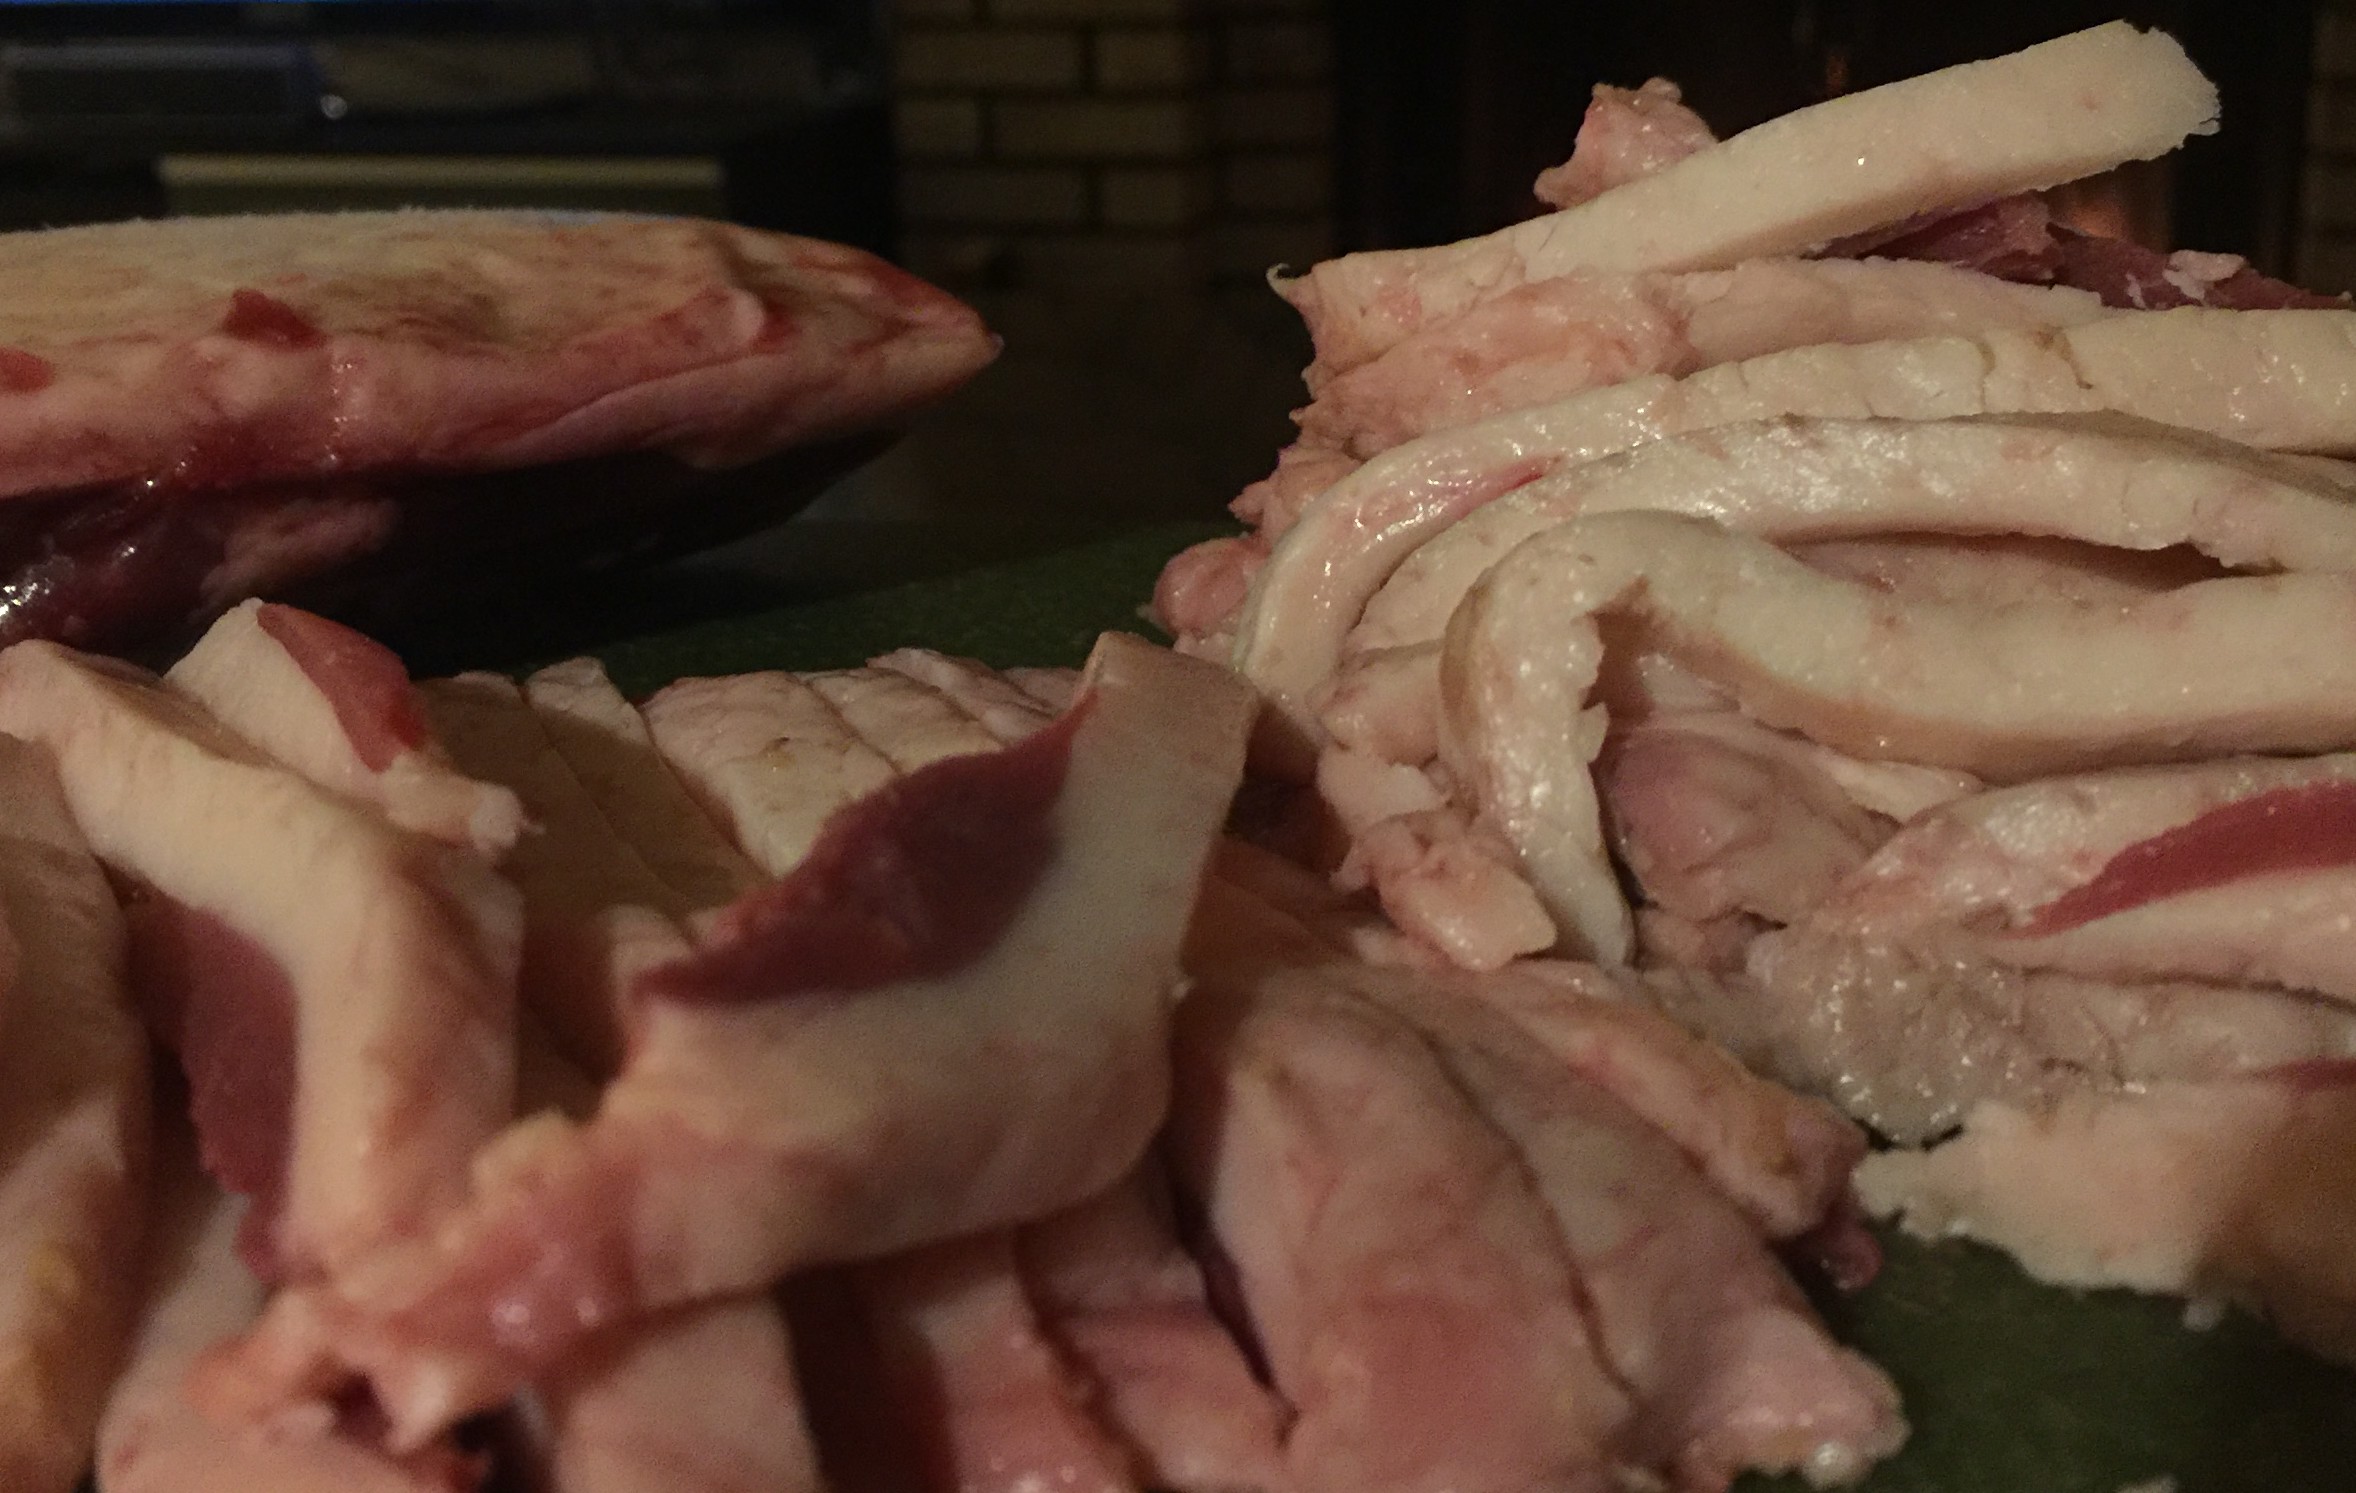
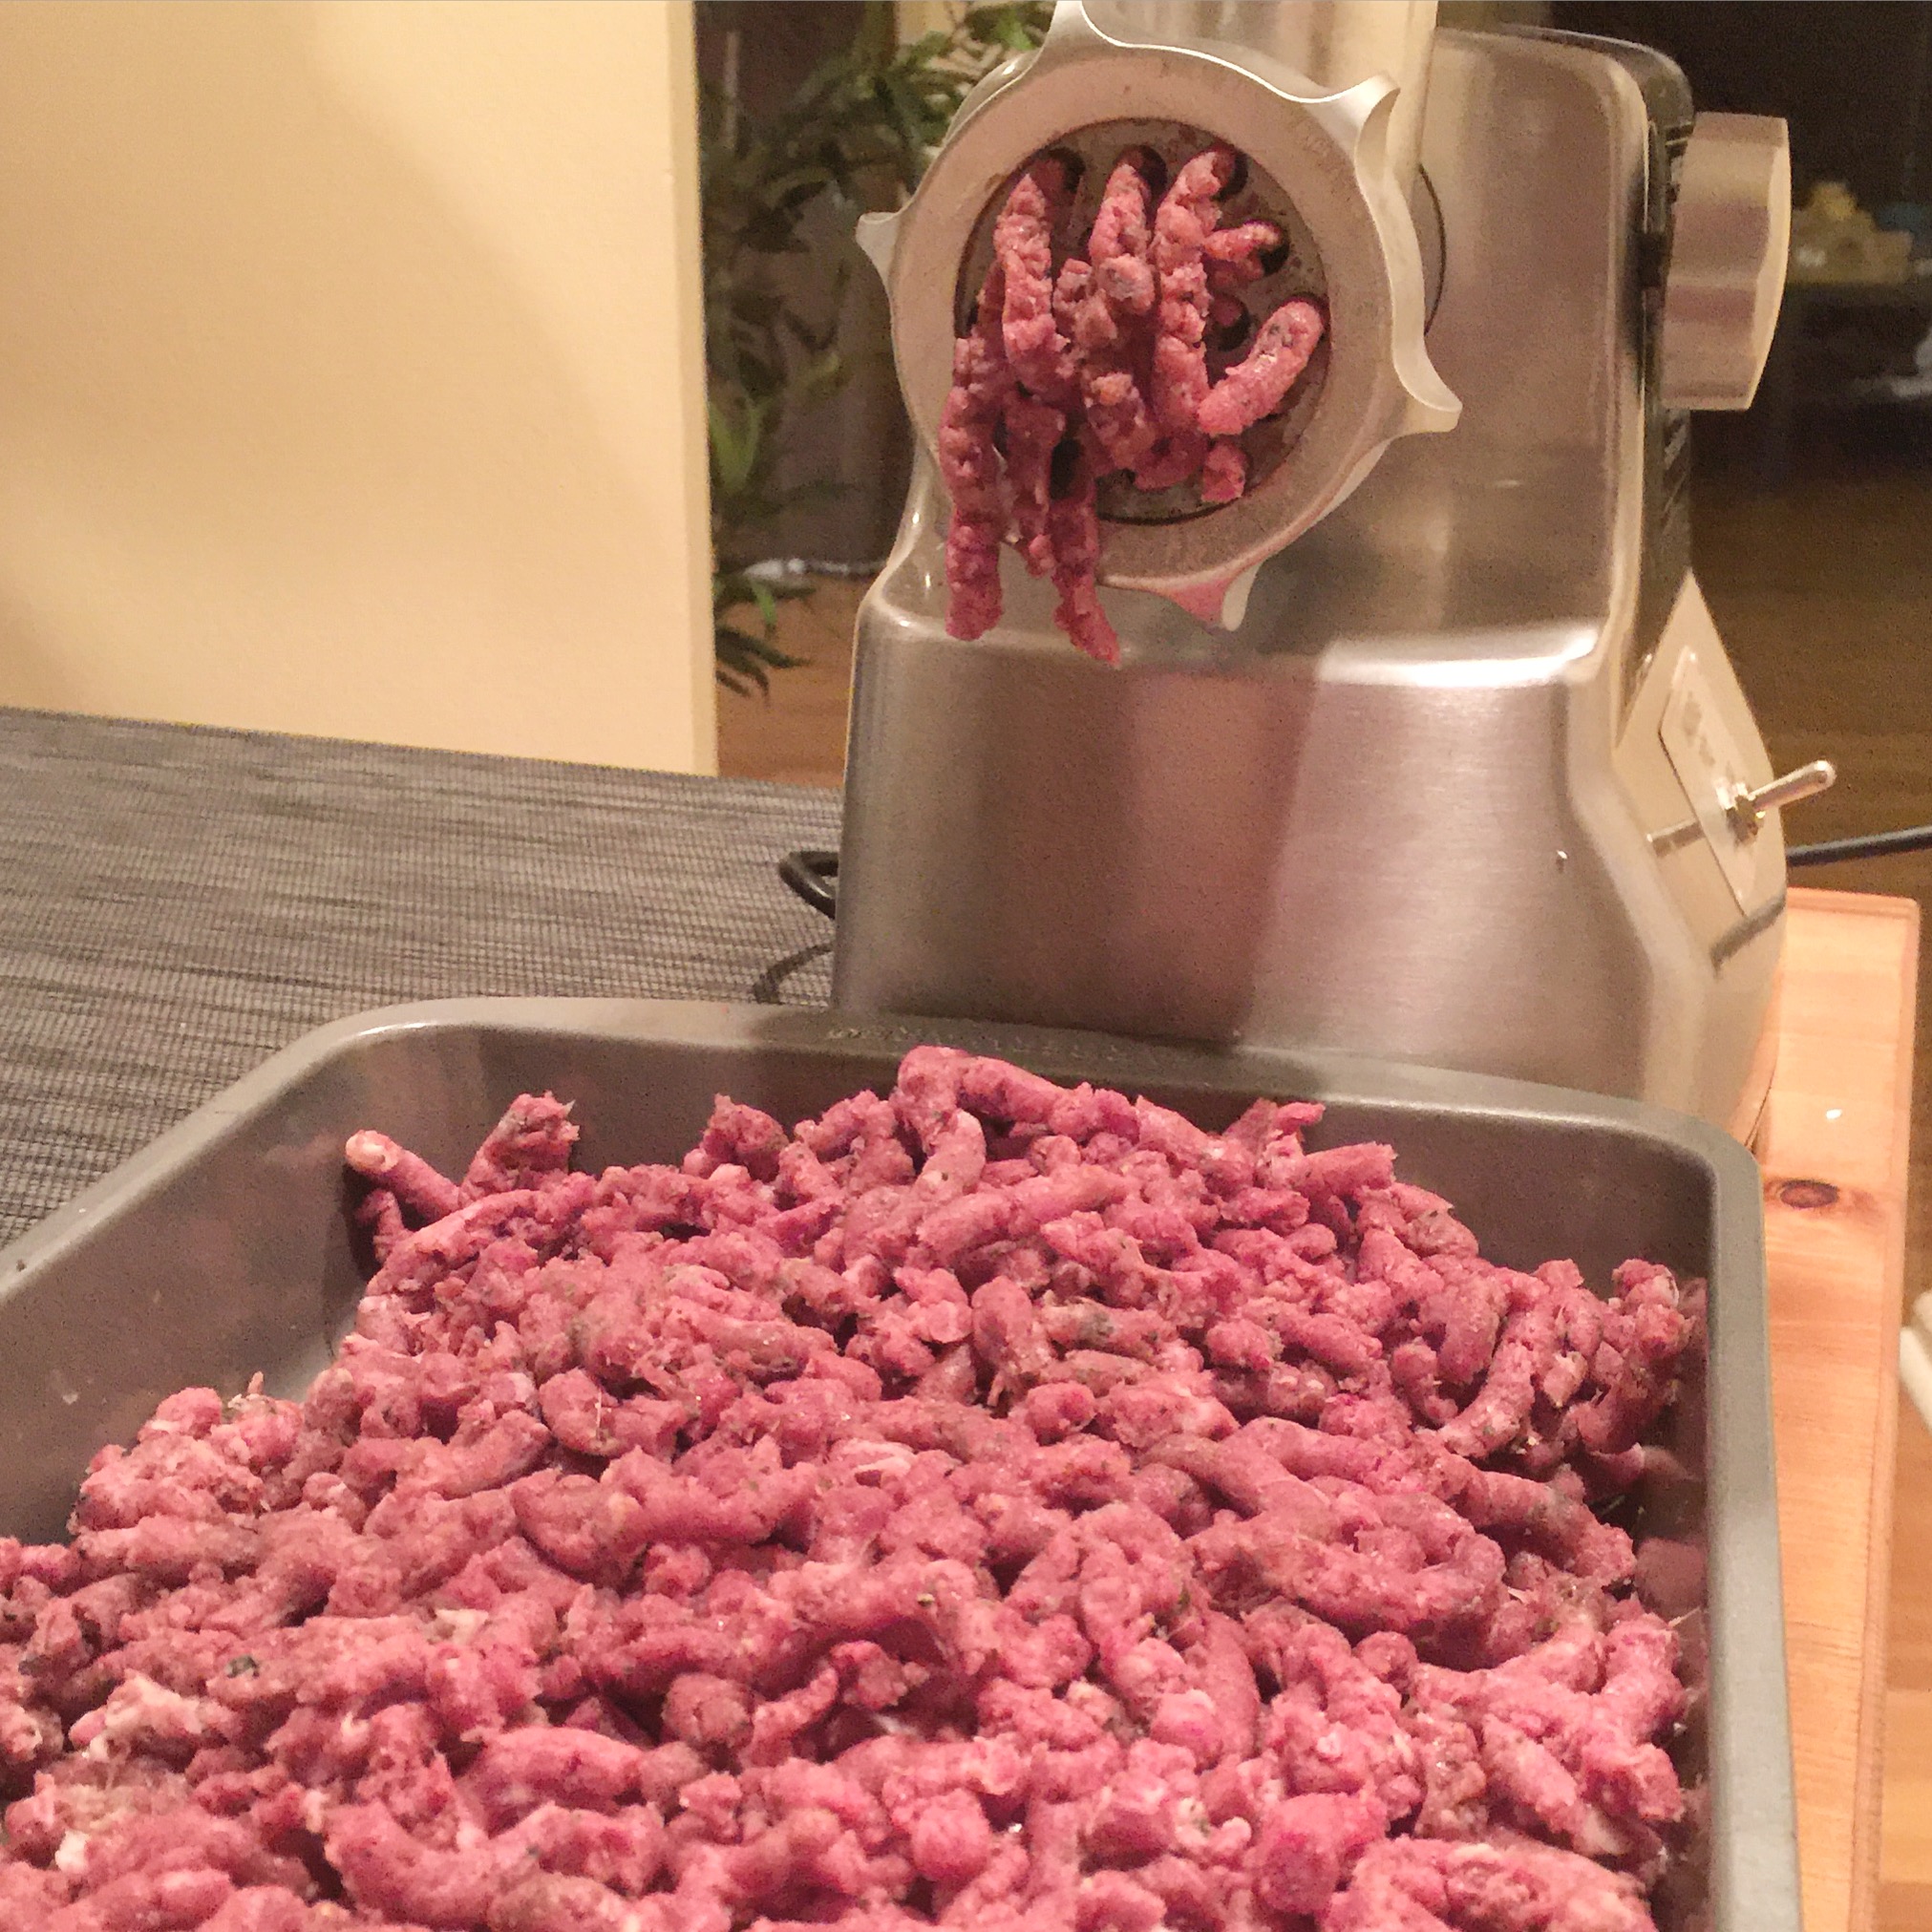
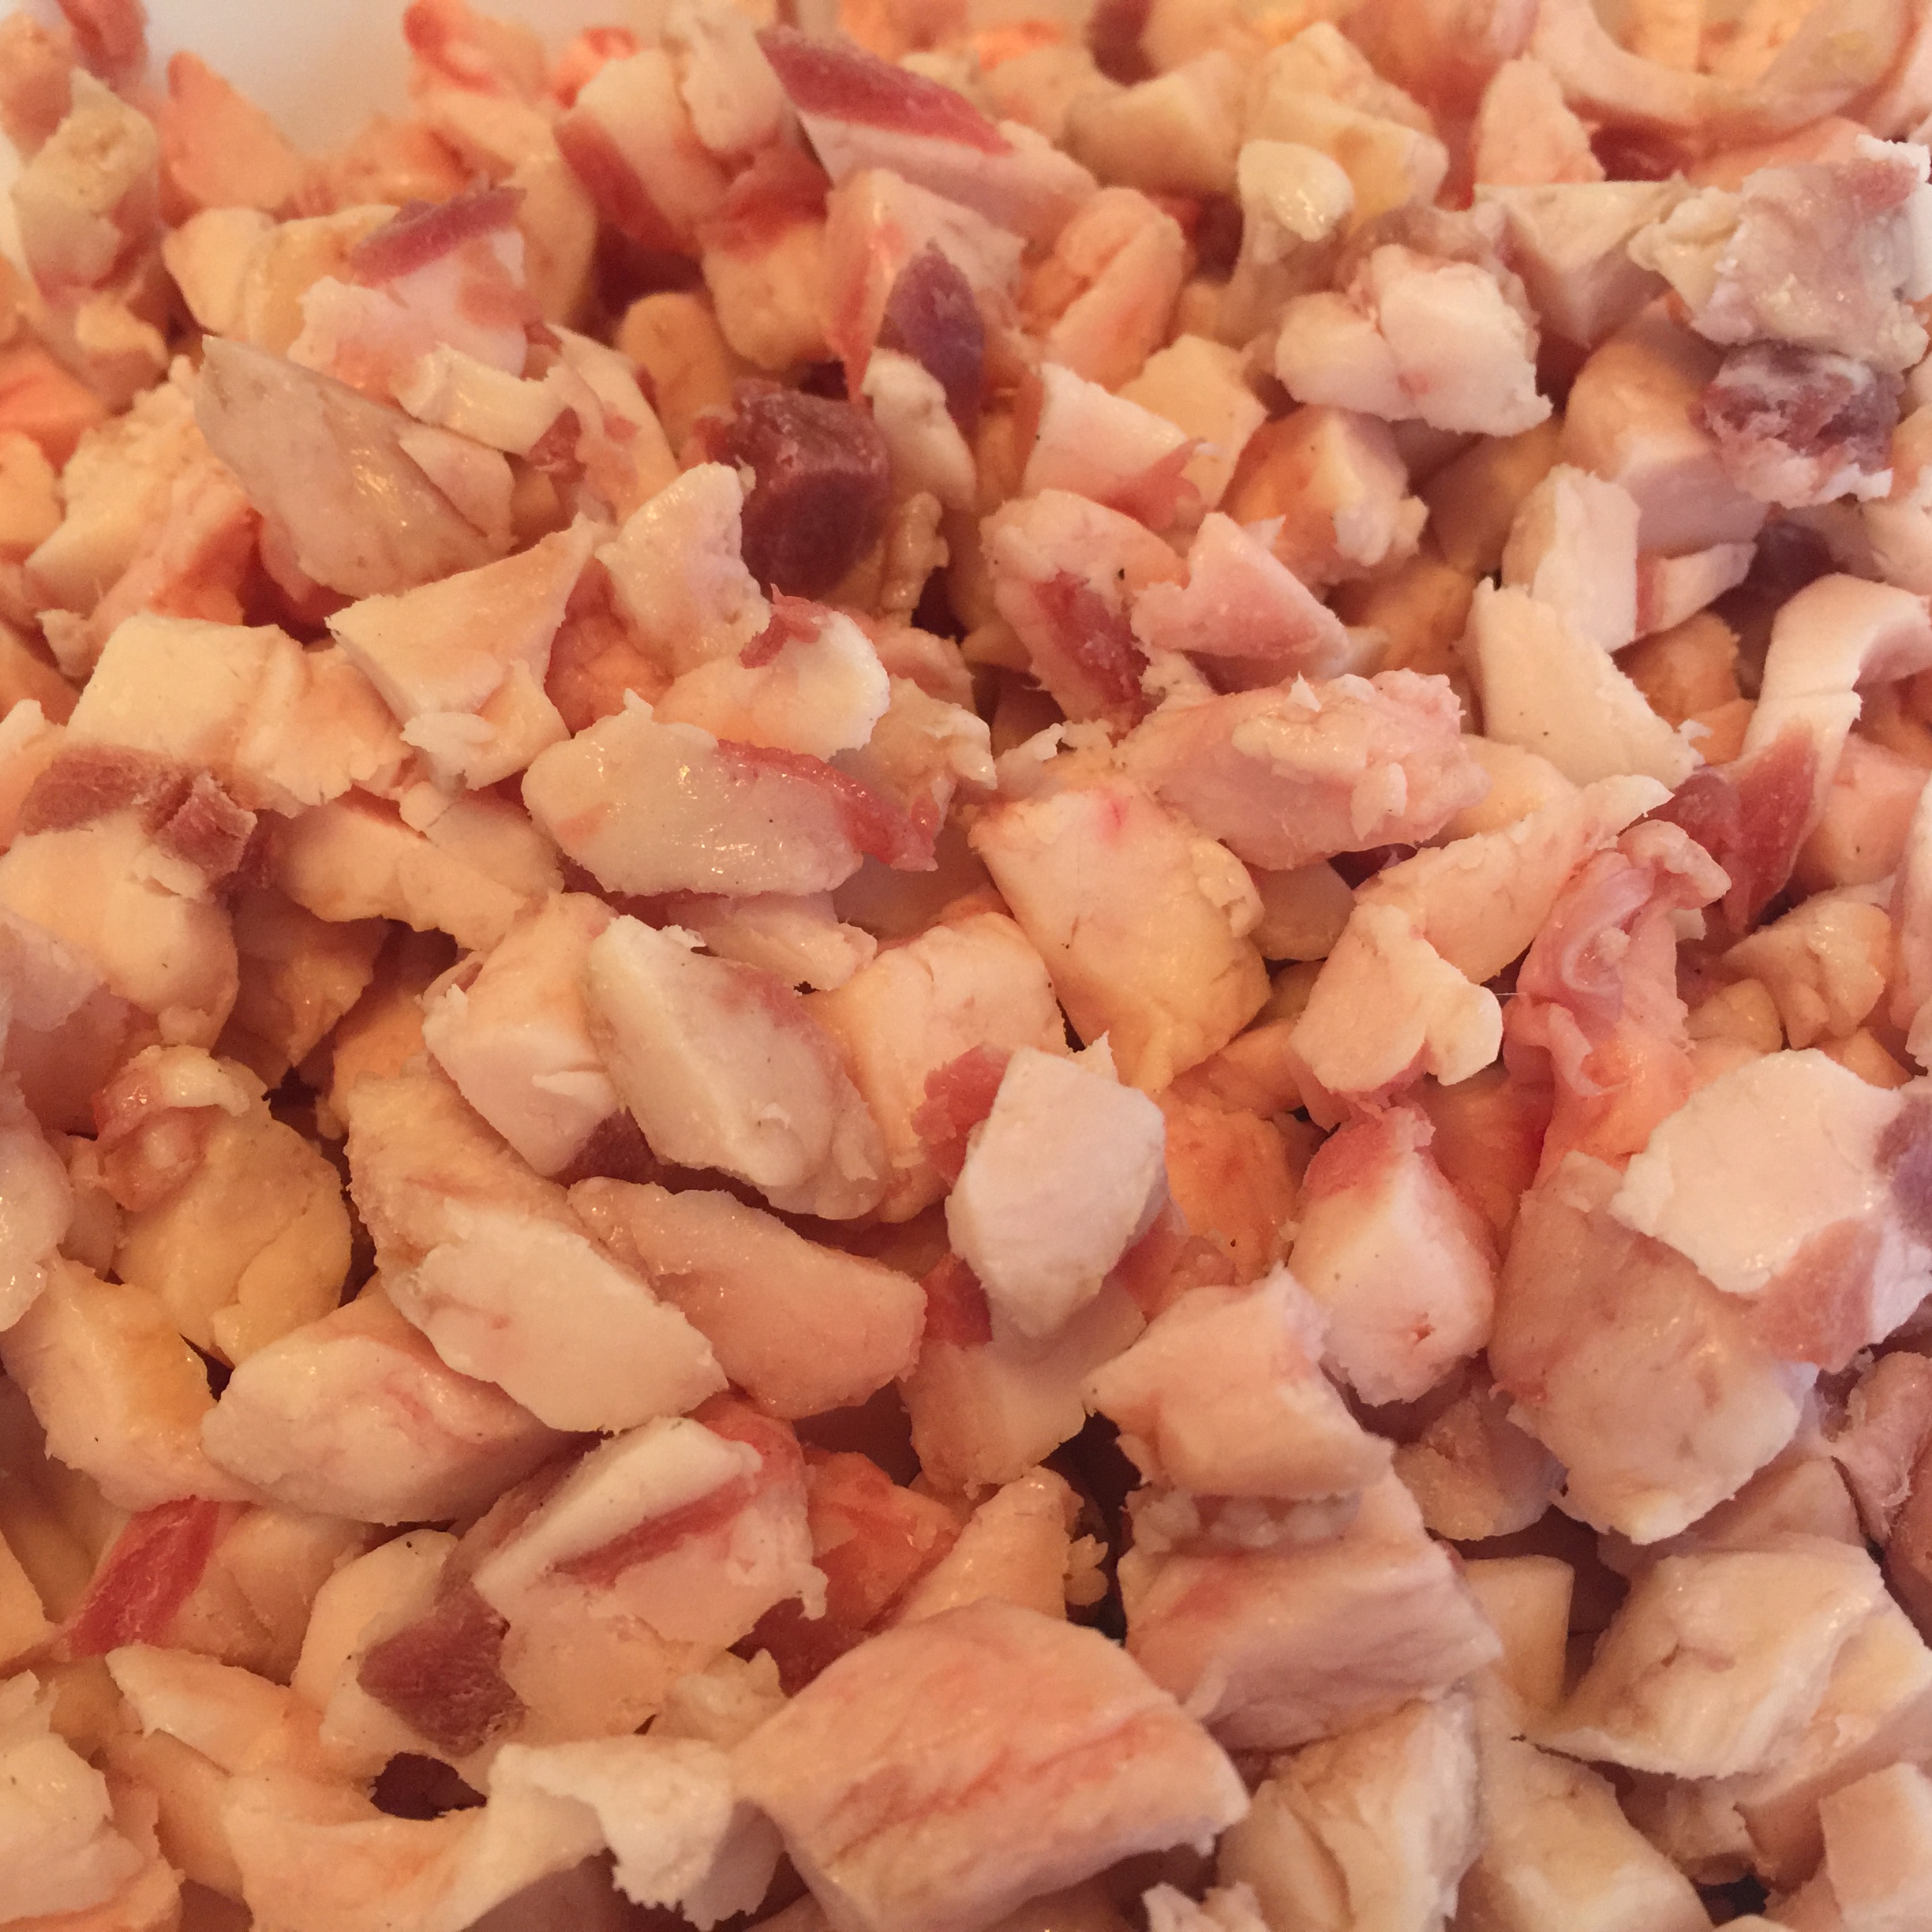
After you have planned the ratios for your meat, it’s time to get started. Making sure you keep everything cold (I par freeze my meat before hand and return it to the freezer when I am done working with it), cube the meat into 1 inch pieces that will fit into your grinder. For this salami, I really prefer to have my fat hand diced, so I cut it into ¼ inch pieces. If you want to grind it, cut it into 1 inch pieces like the meat, and grind it through a coarse die.


Grinding and Mixing

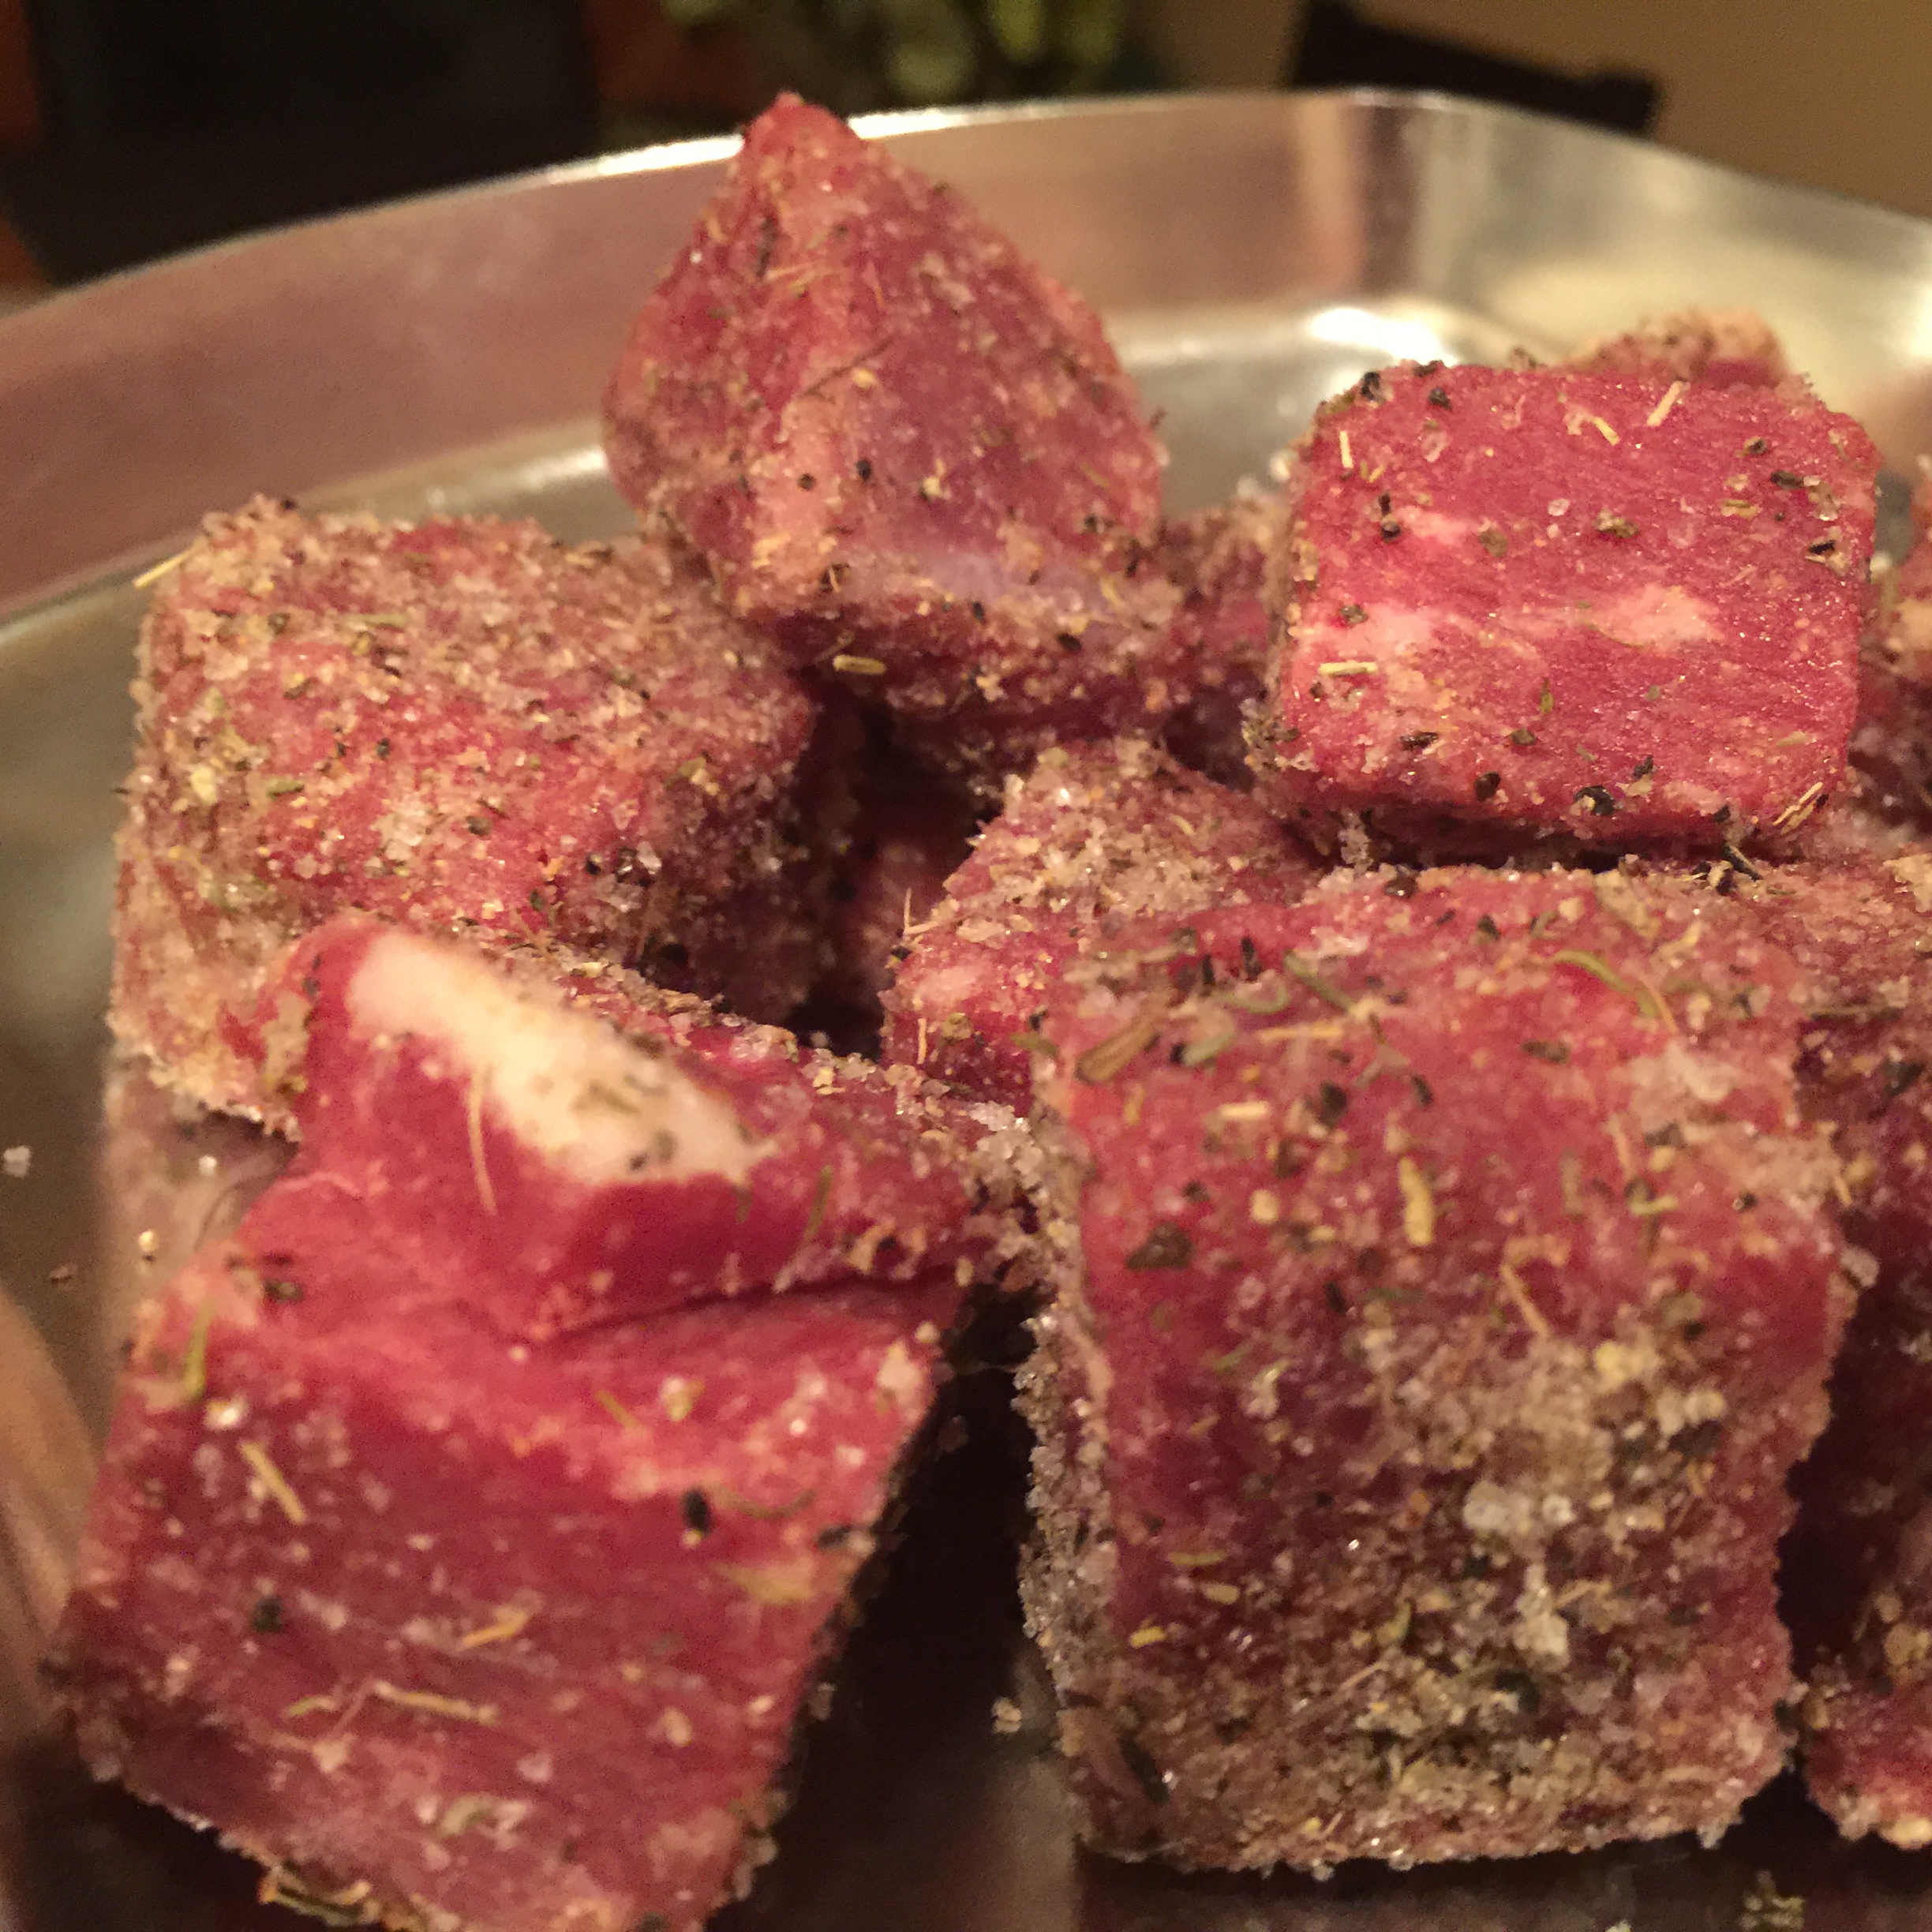
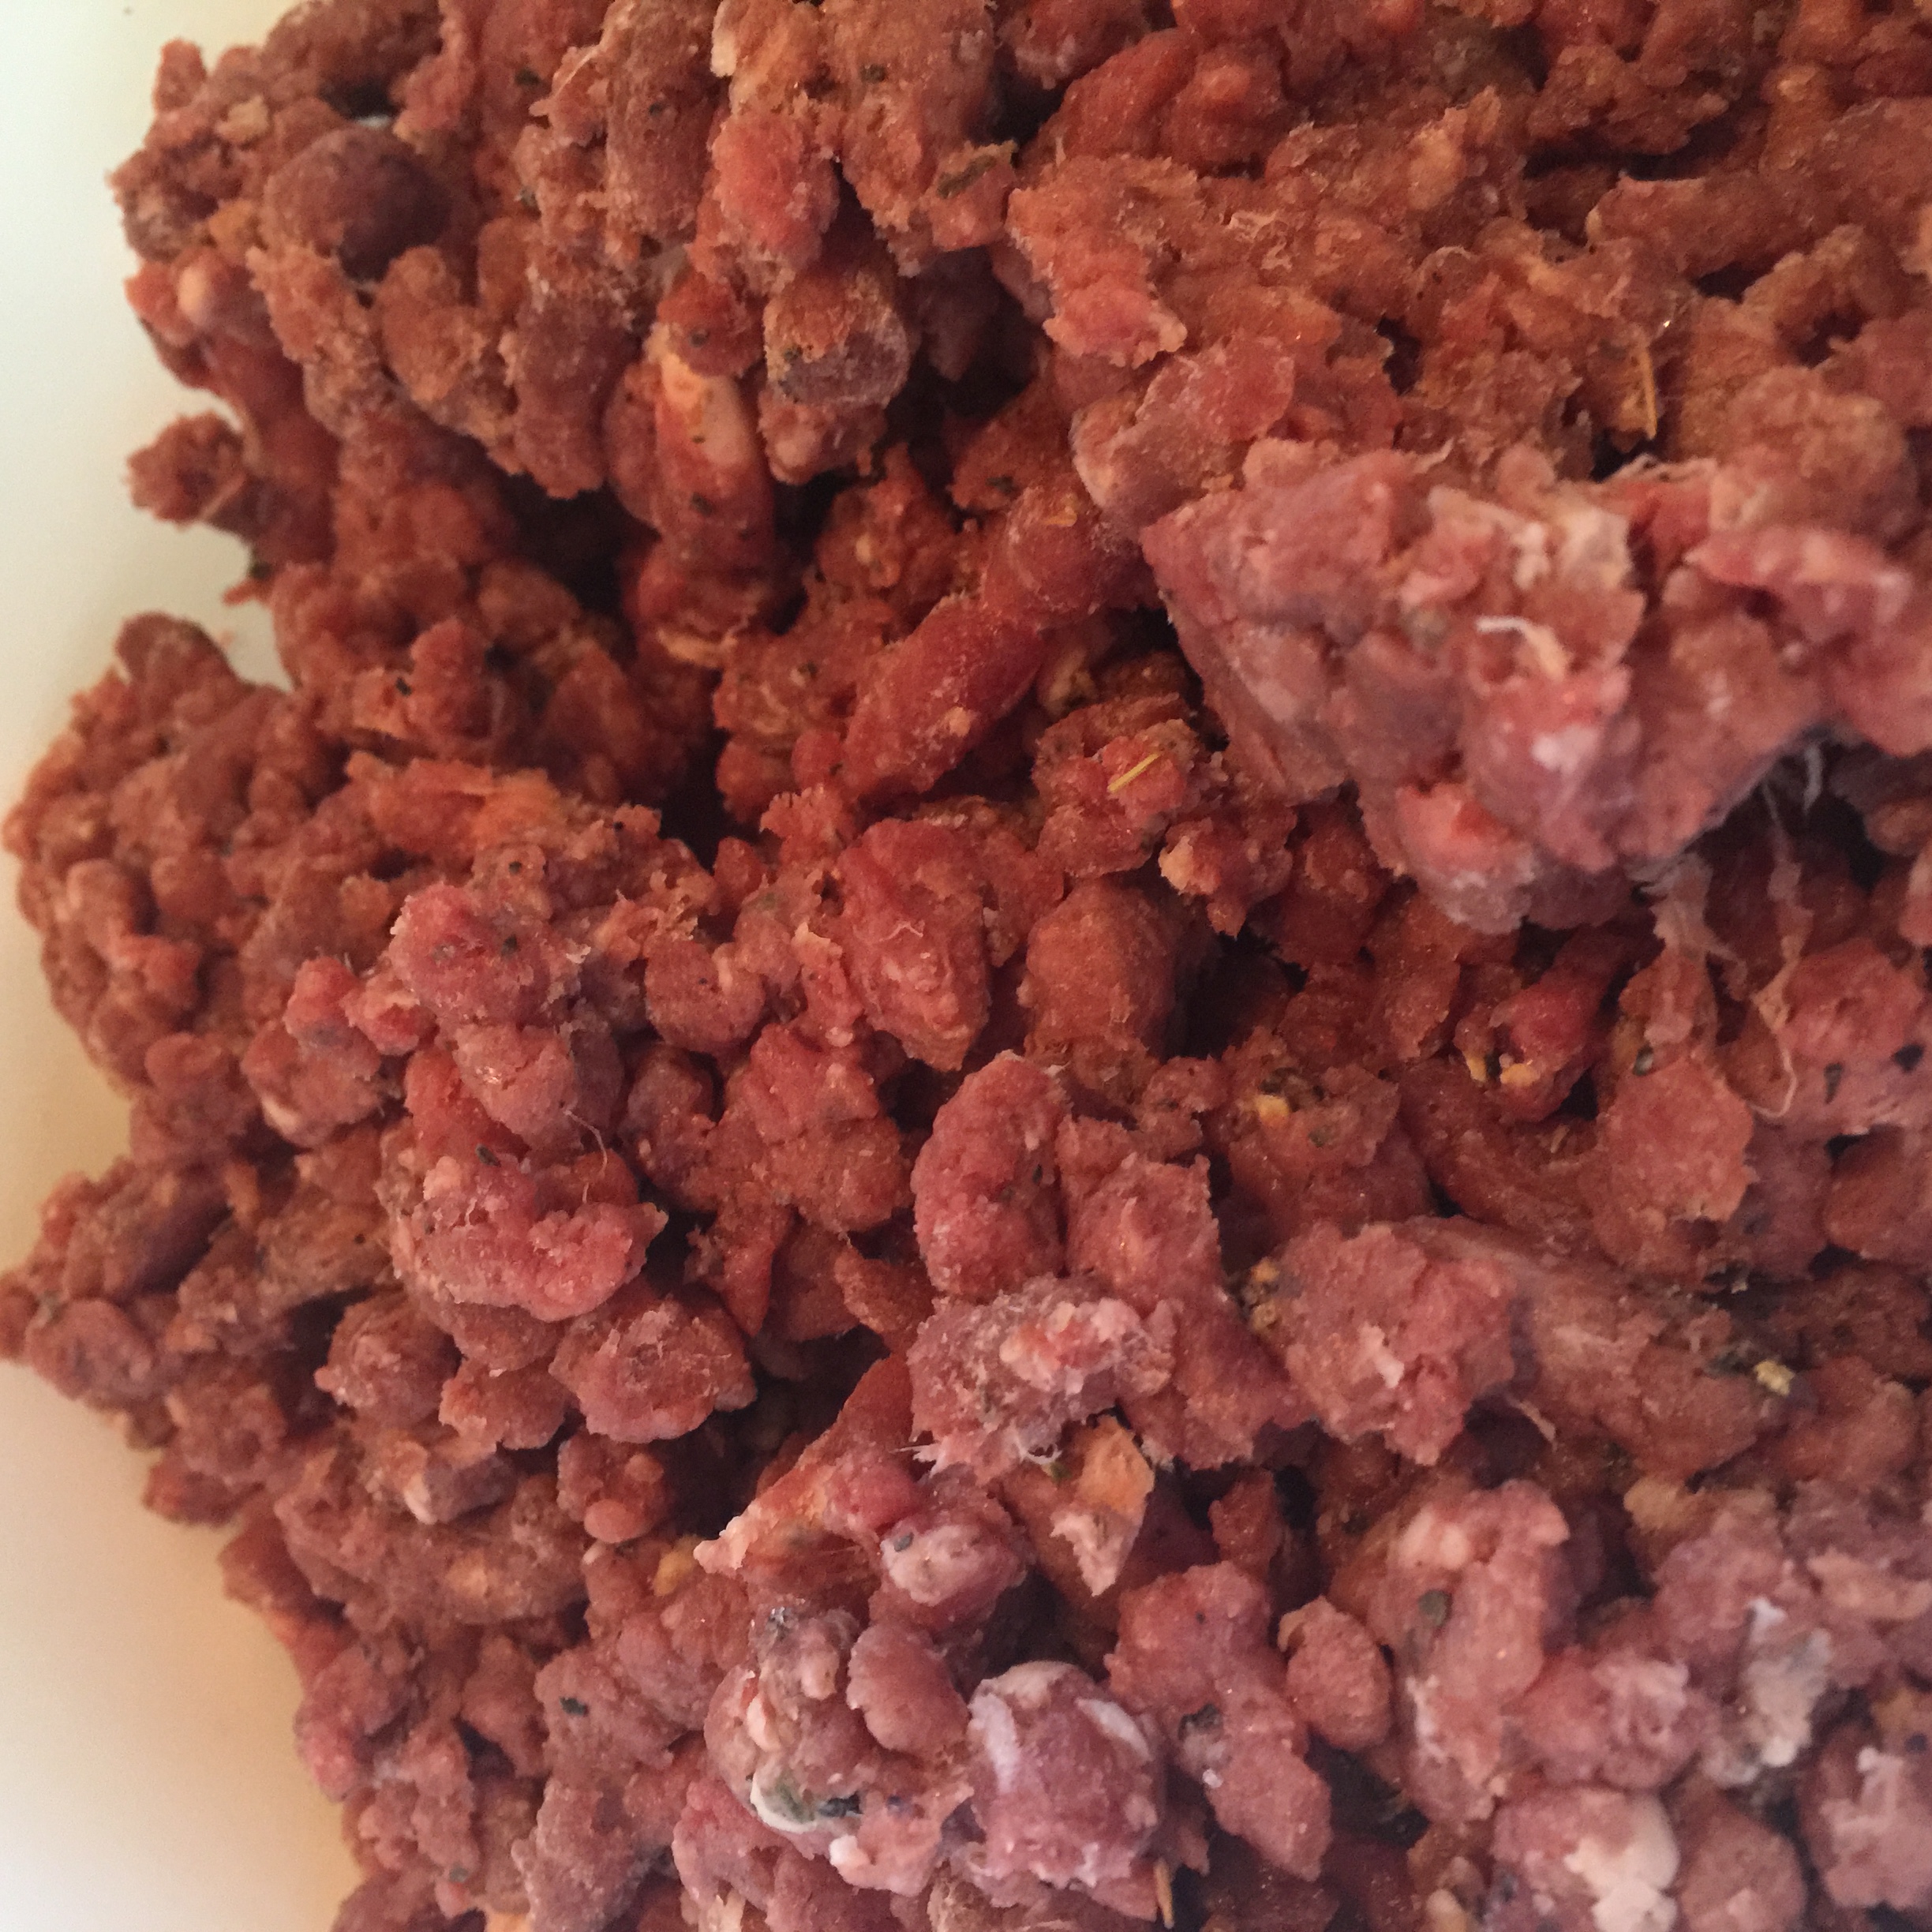
Grind your meat (and your fat if you are not choosing to hand cut your fat) while it is still partially frozen to make the process go as smoothly as possible. I grind the meat on a medium grind, and the fat on a coarse grind (if I am grinding it). You can mix the spices with the cubed meat before you grind it, or with the ground meat afterwards. I generally mix it before hand to get better spice distribution.

IMG_2242

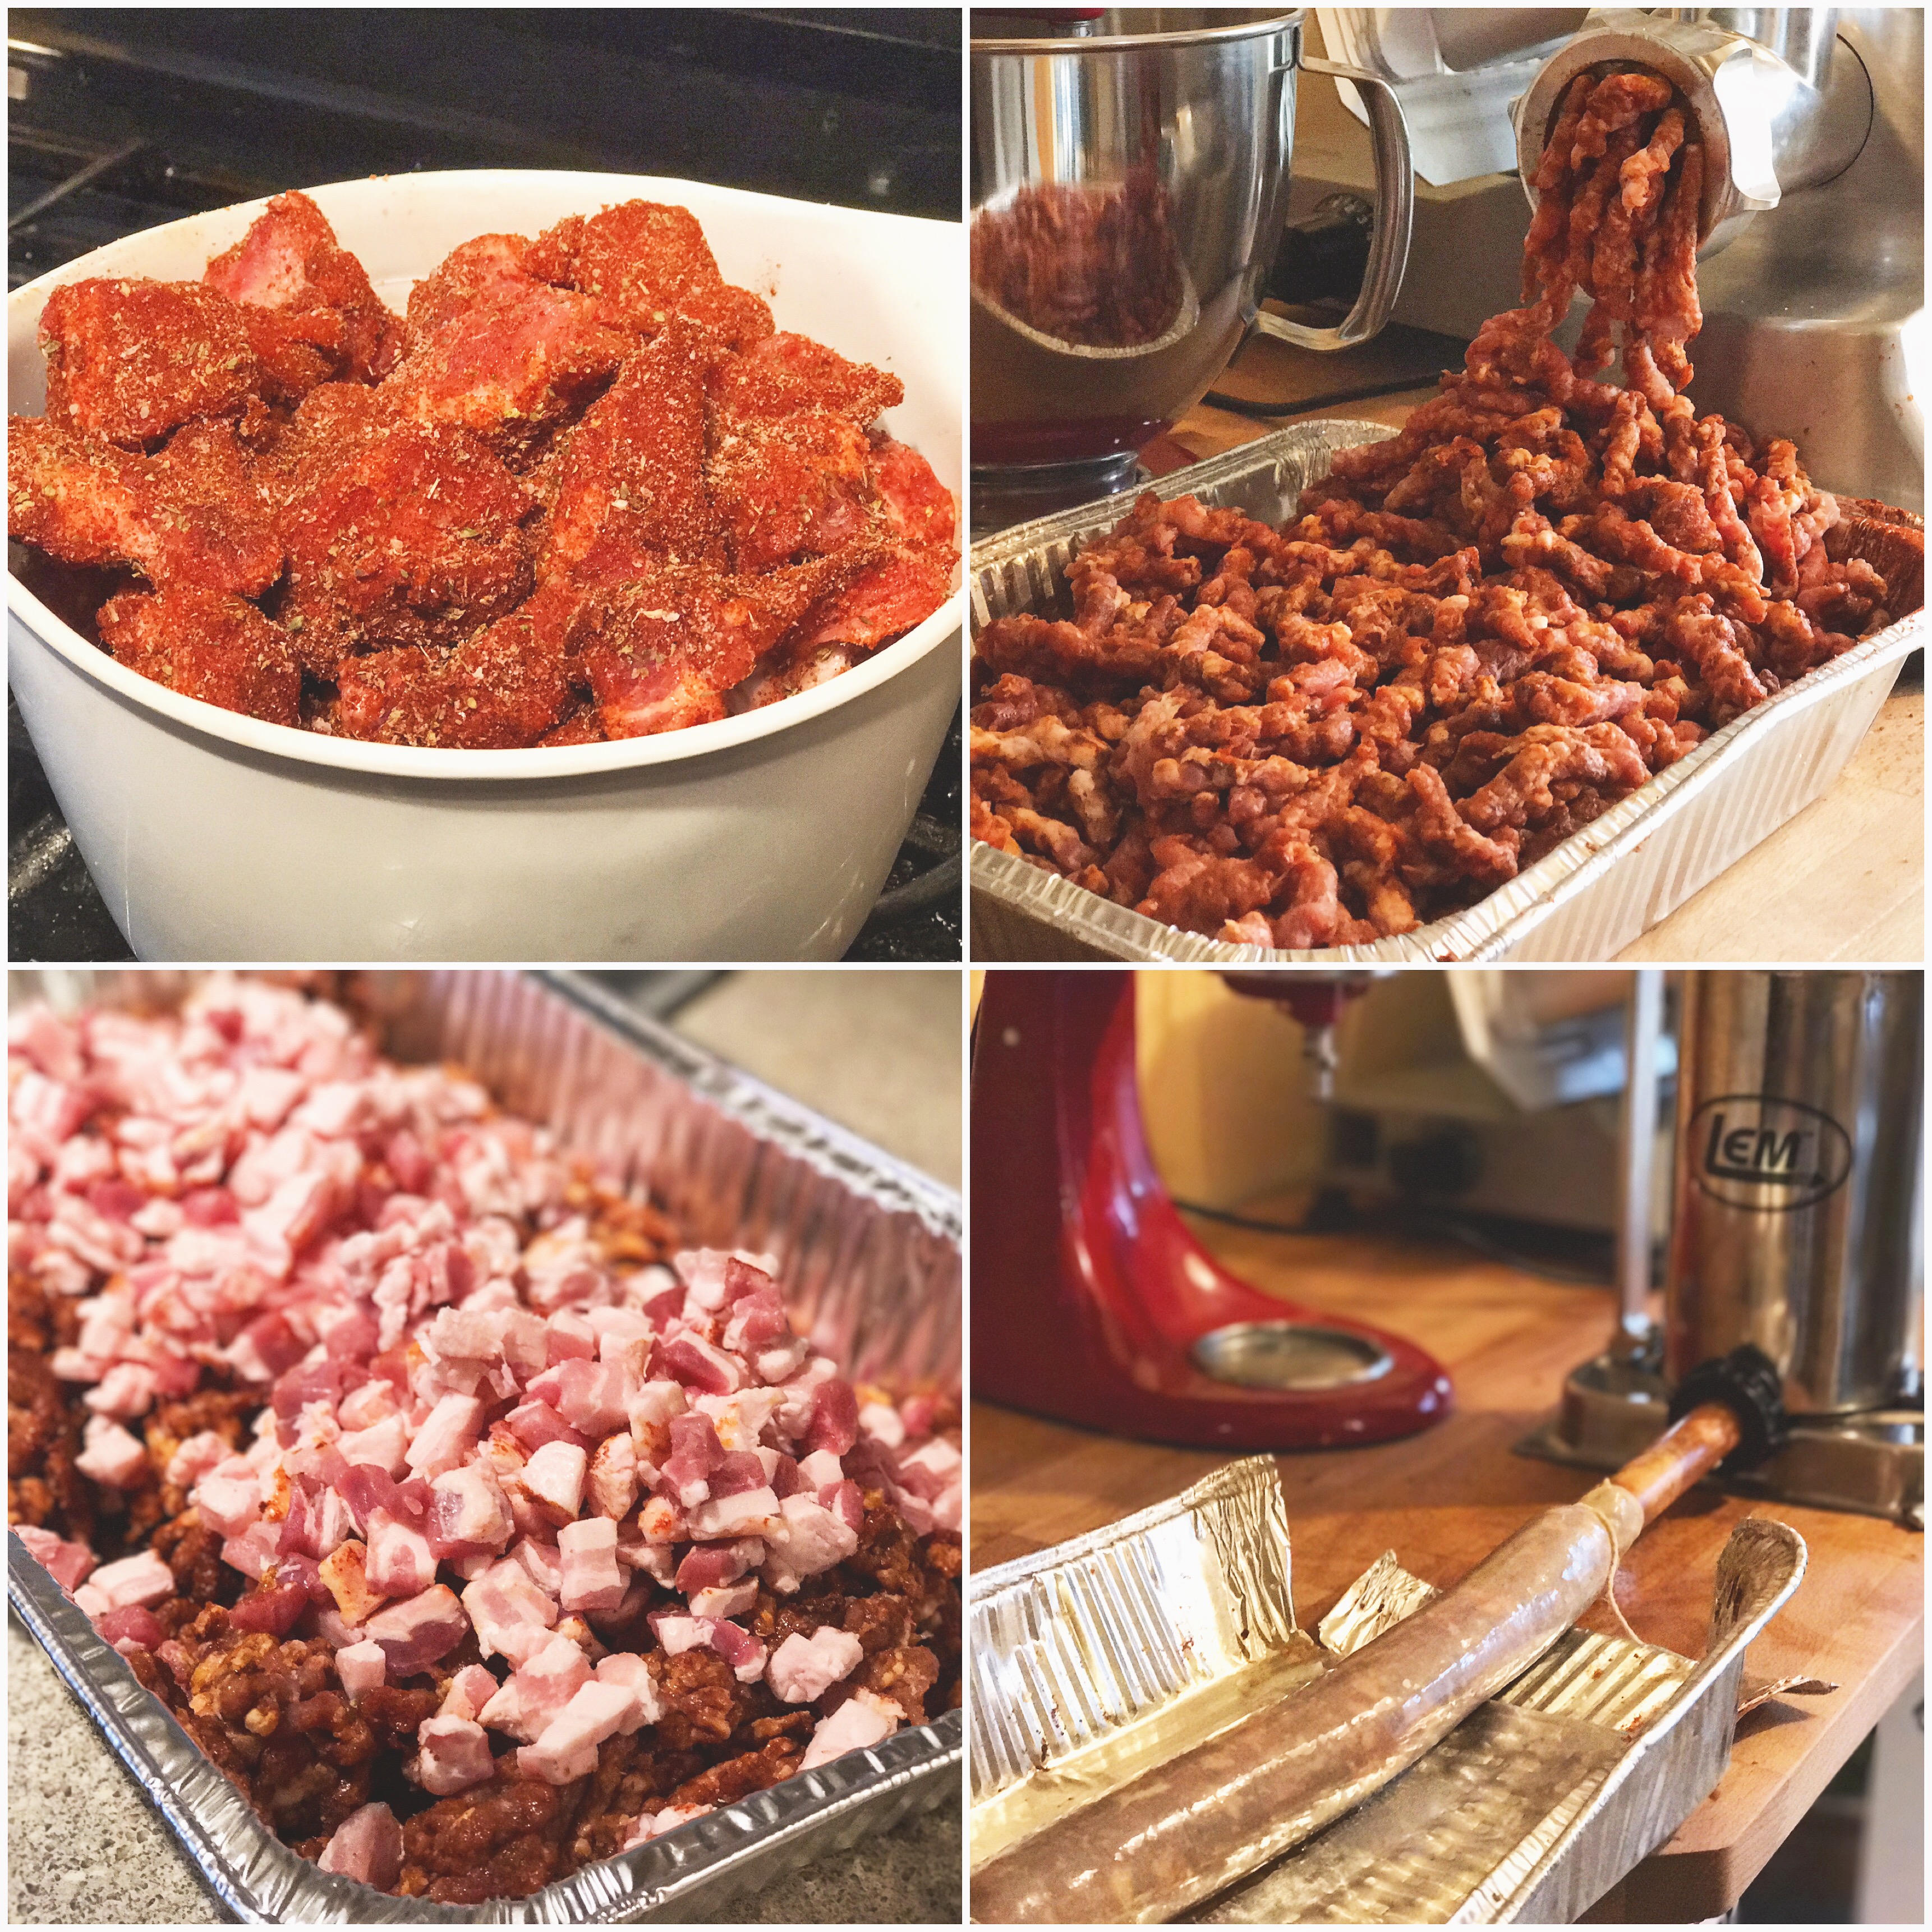
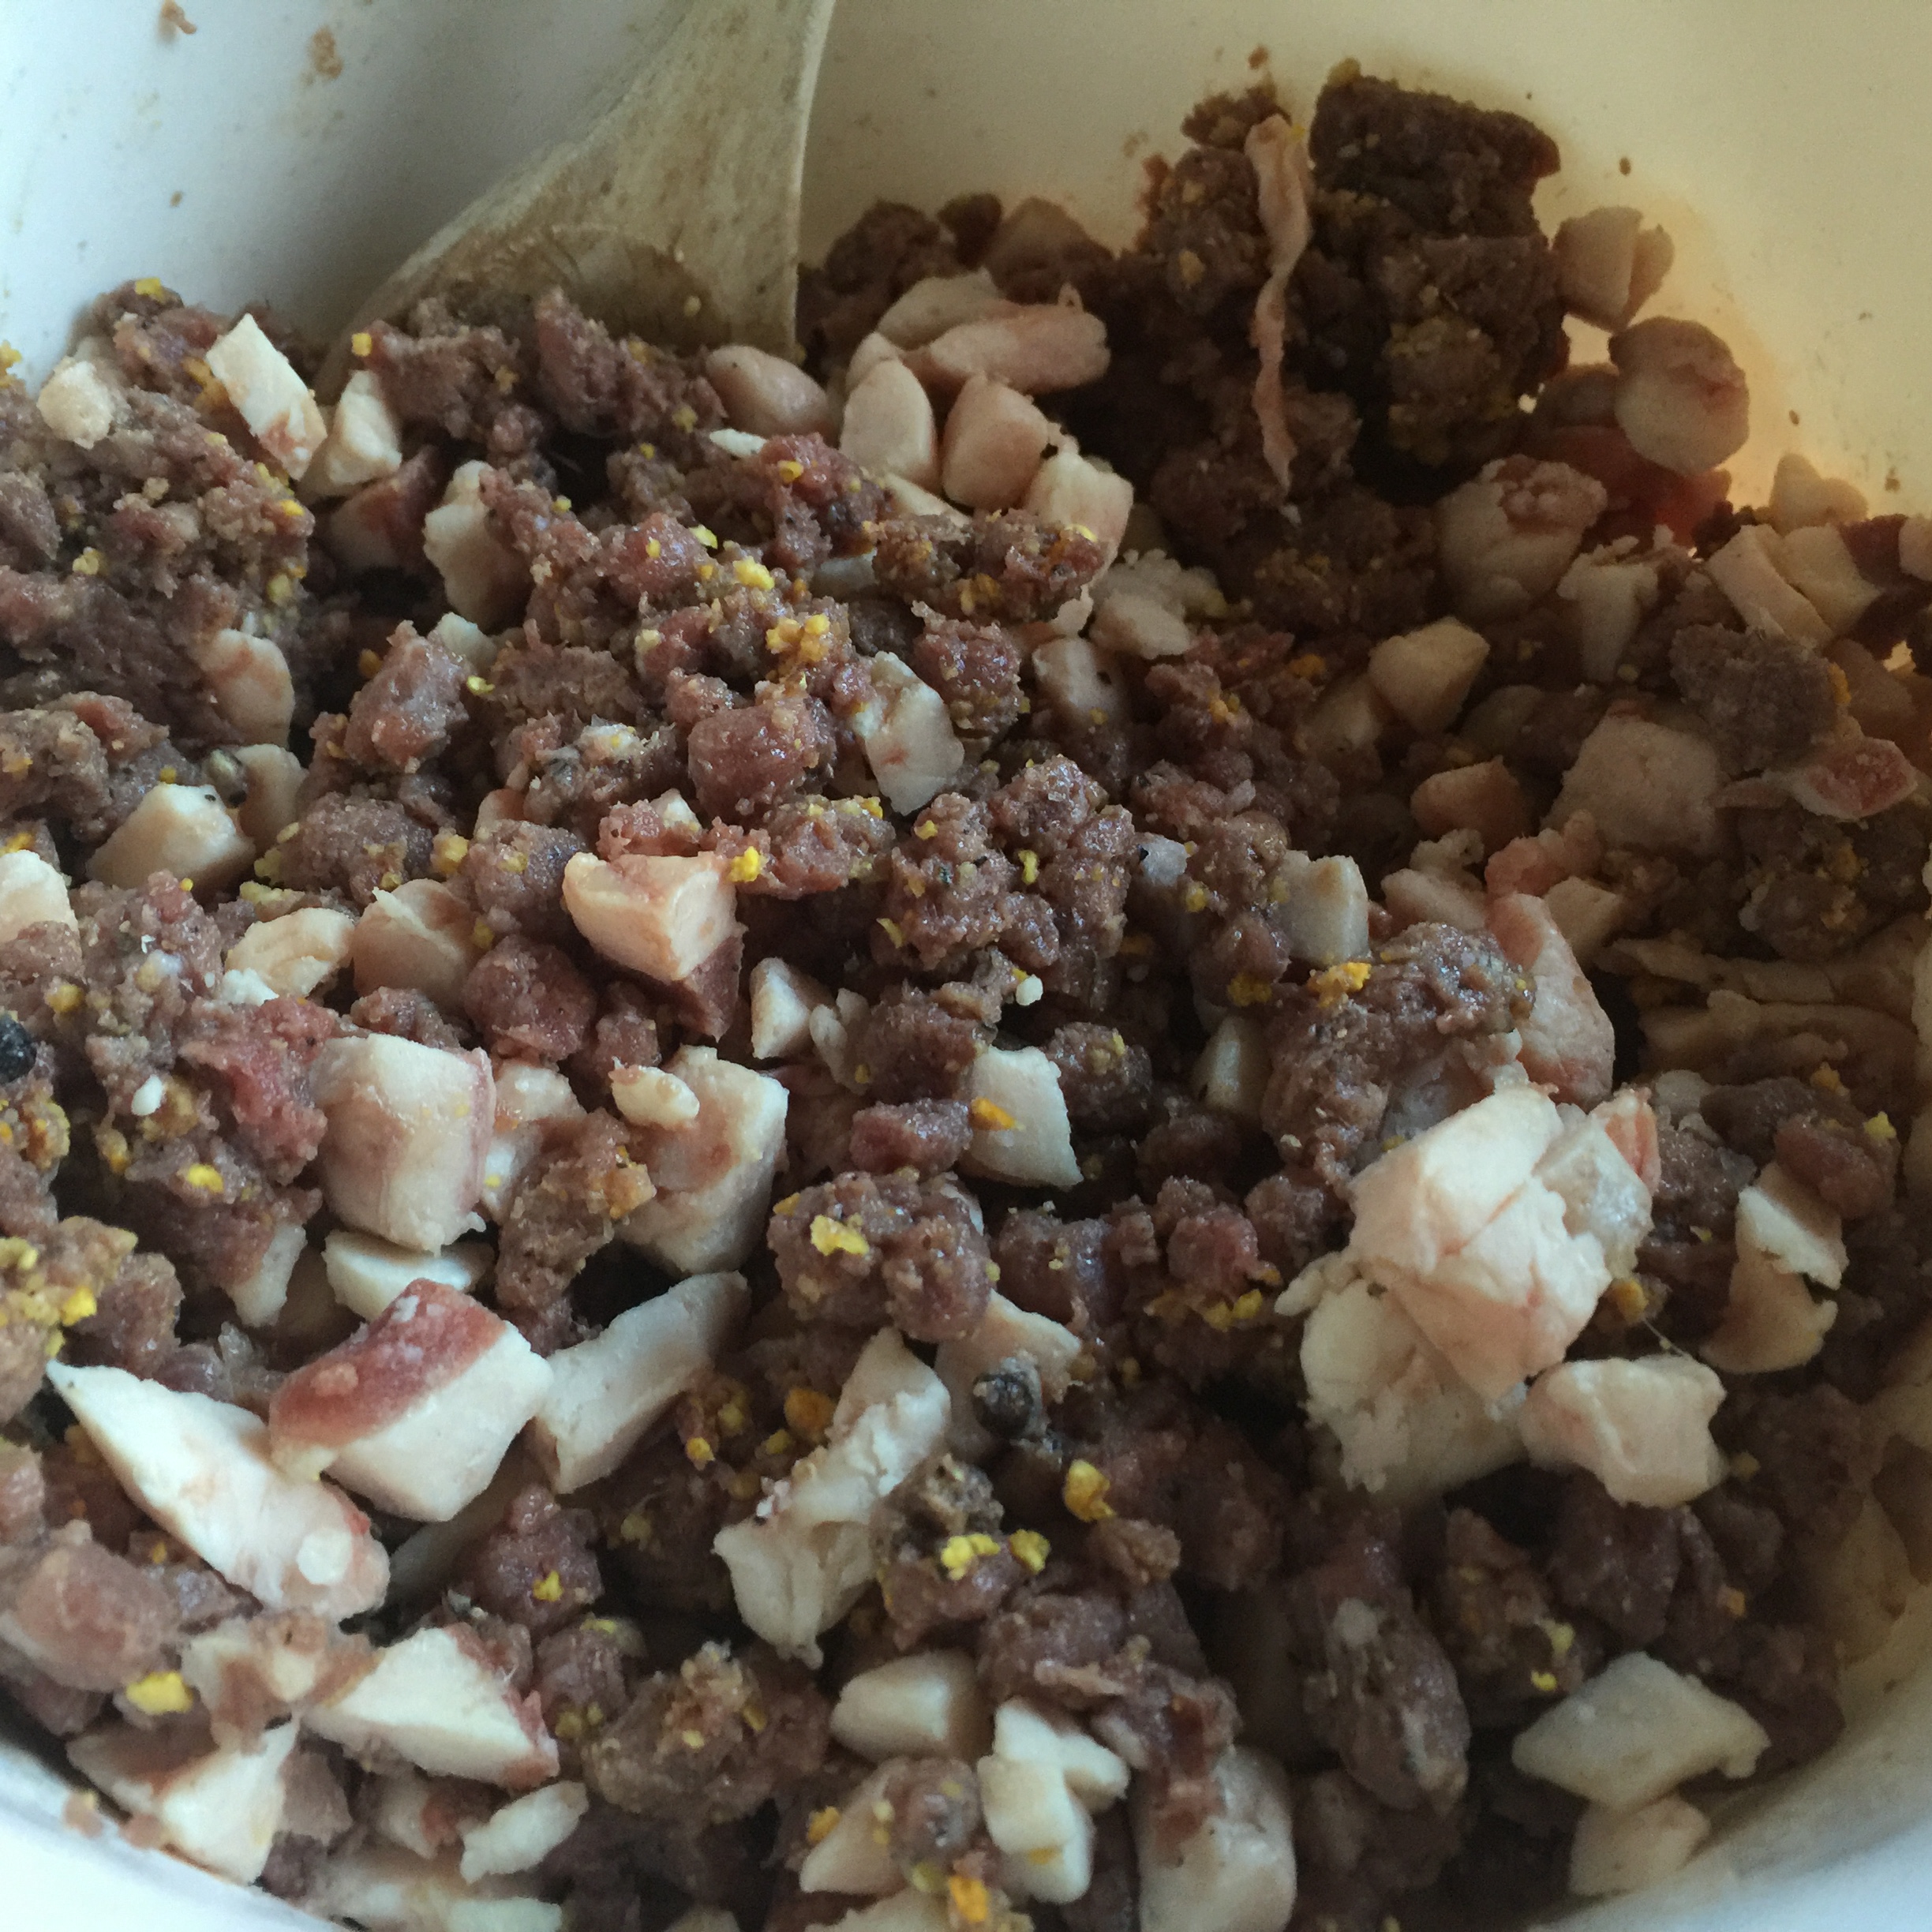
After grinding the meat, making sure to keep it cold throughout the entire process, you want to mix the meat, fat, and spices together to get a nice bind. I used a stand mixer on the slowest setting for this, although you can also do this step by hand. You want to mix it enough to get a good bind, but not so much that it becomes mush.


Stuffing

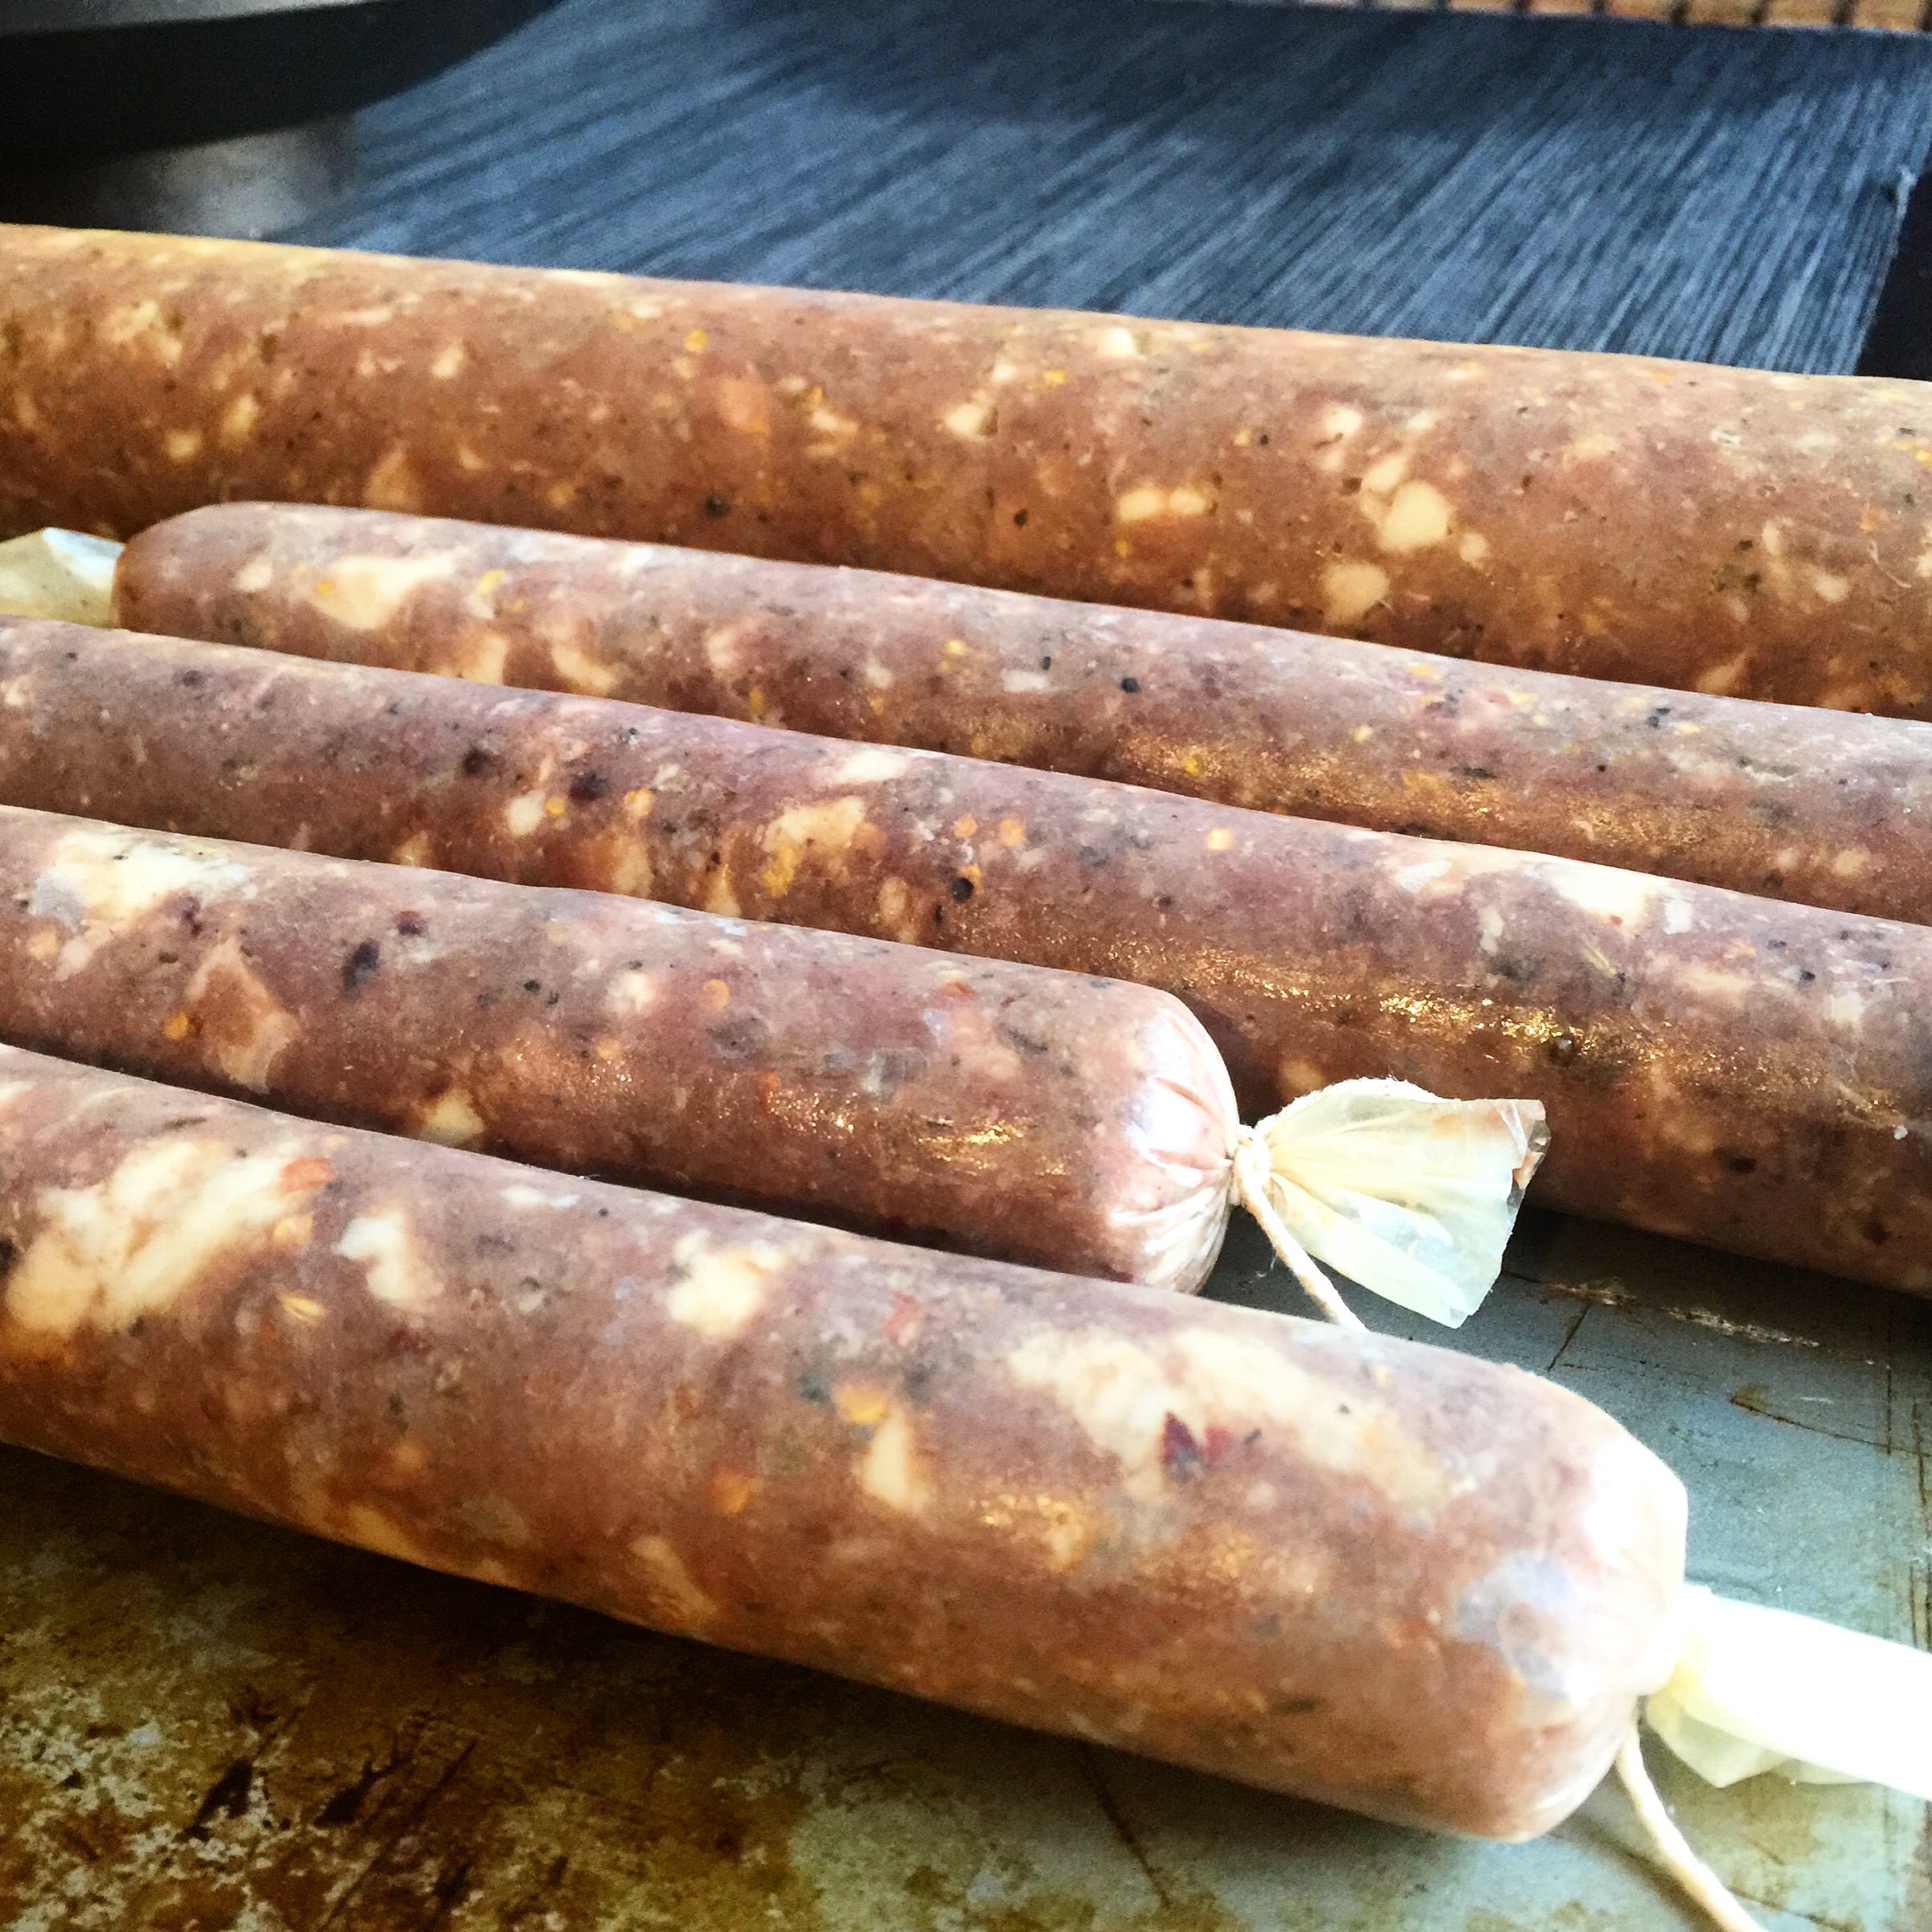
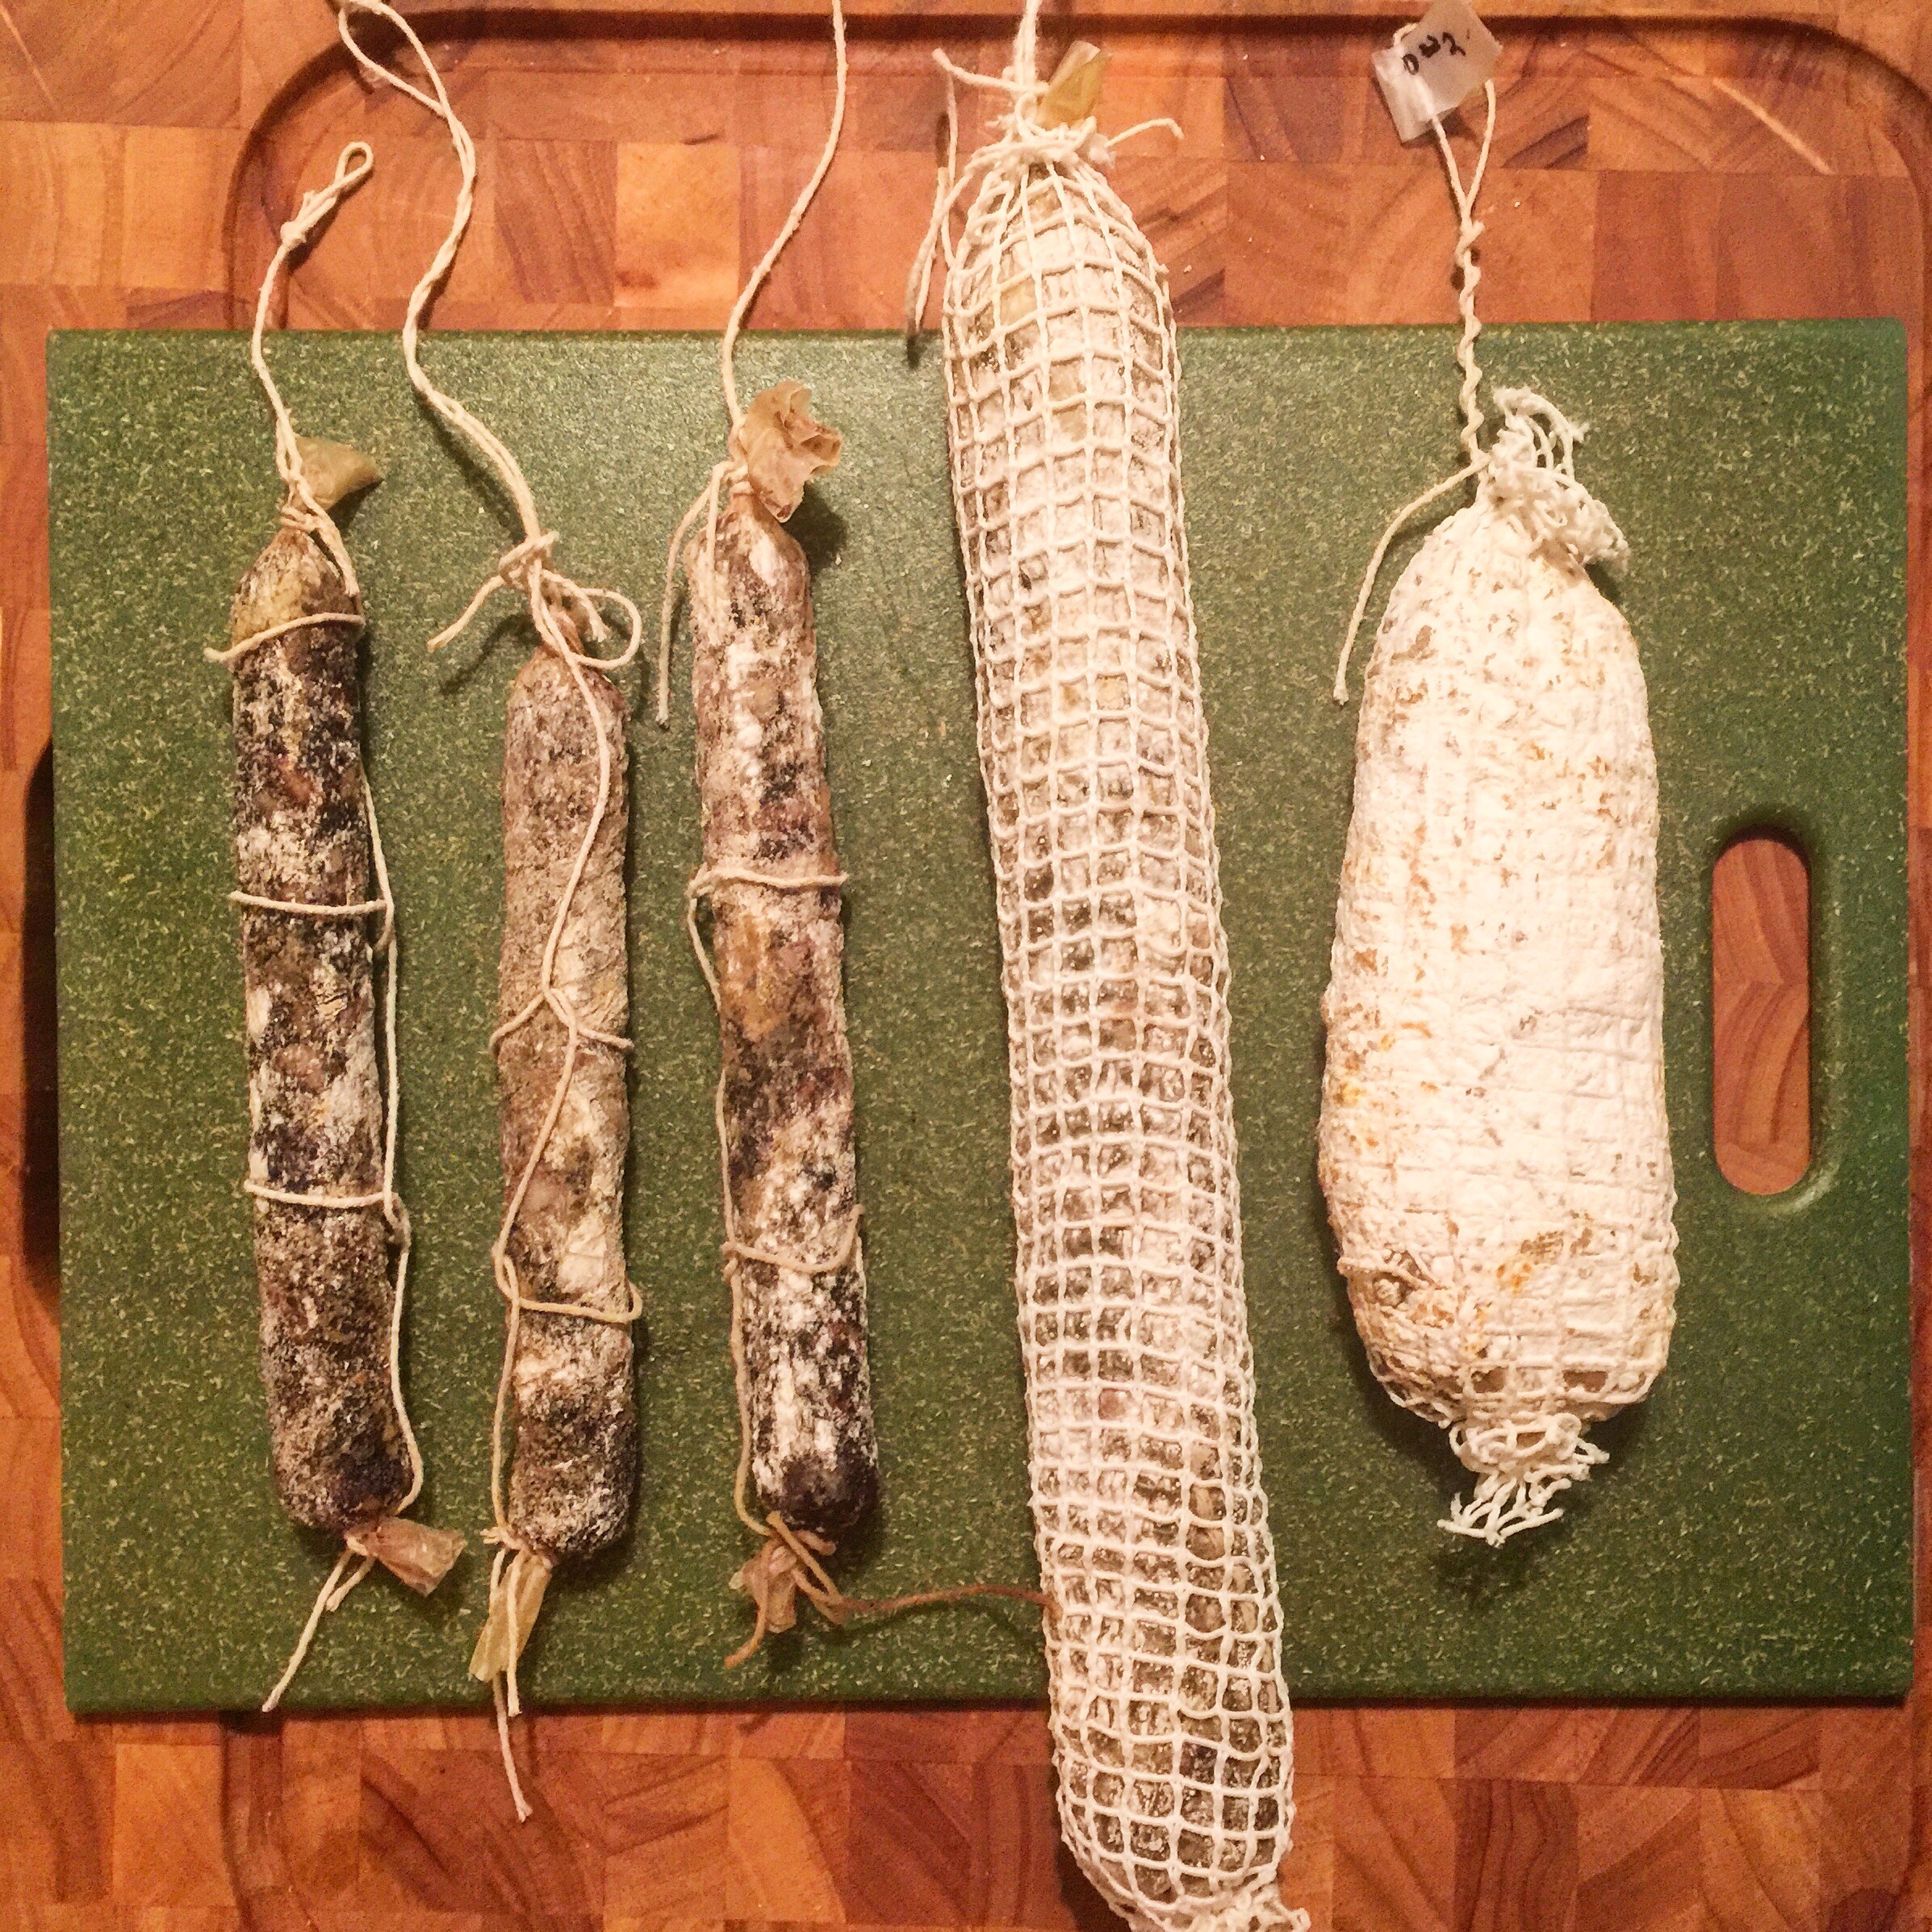
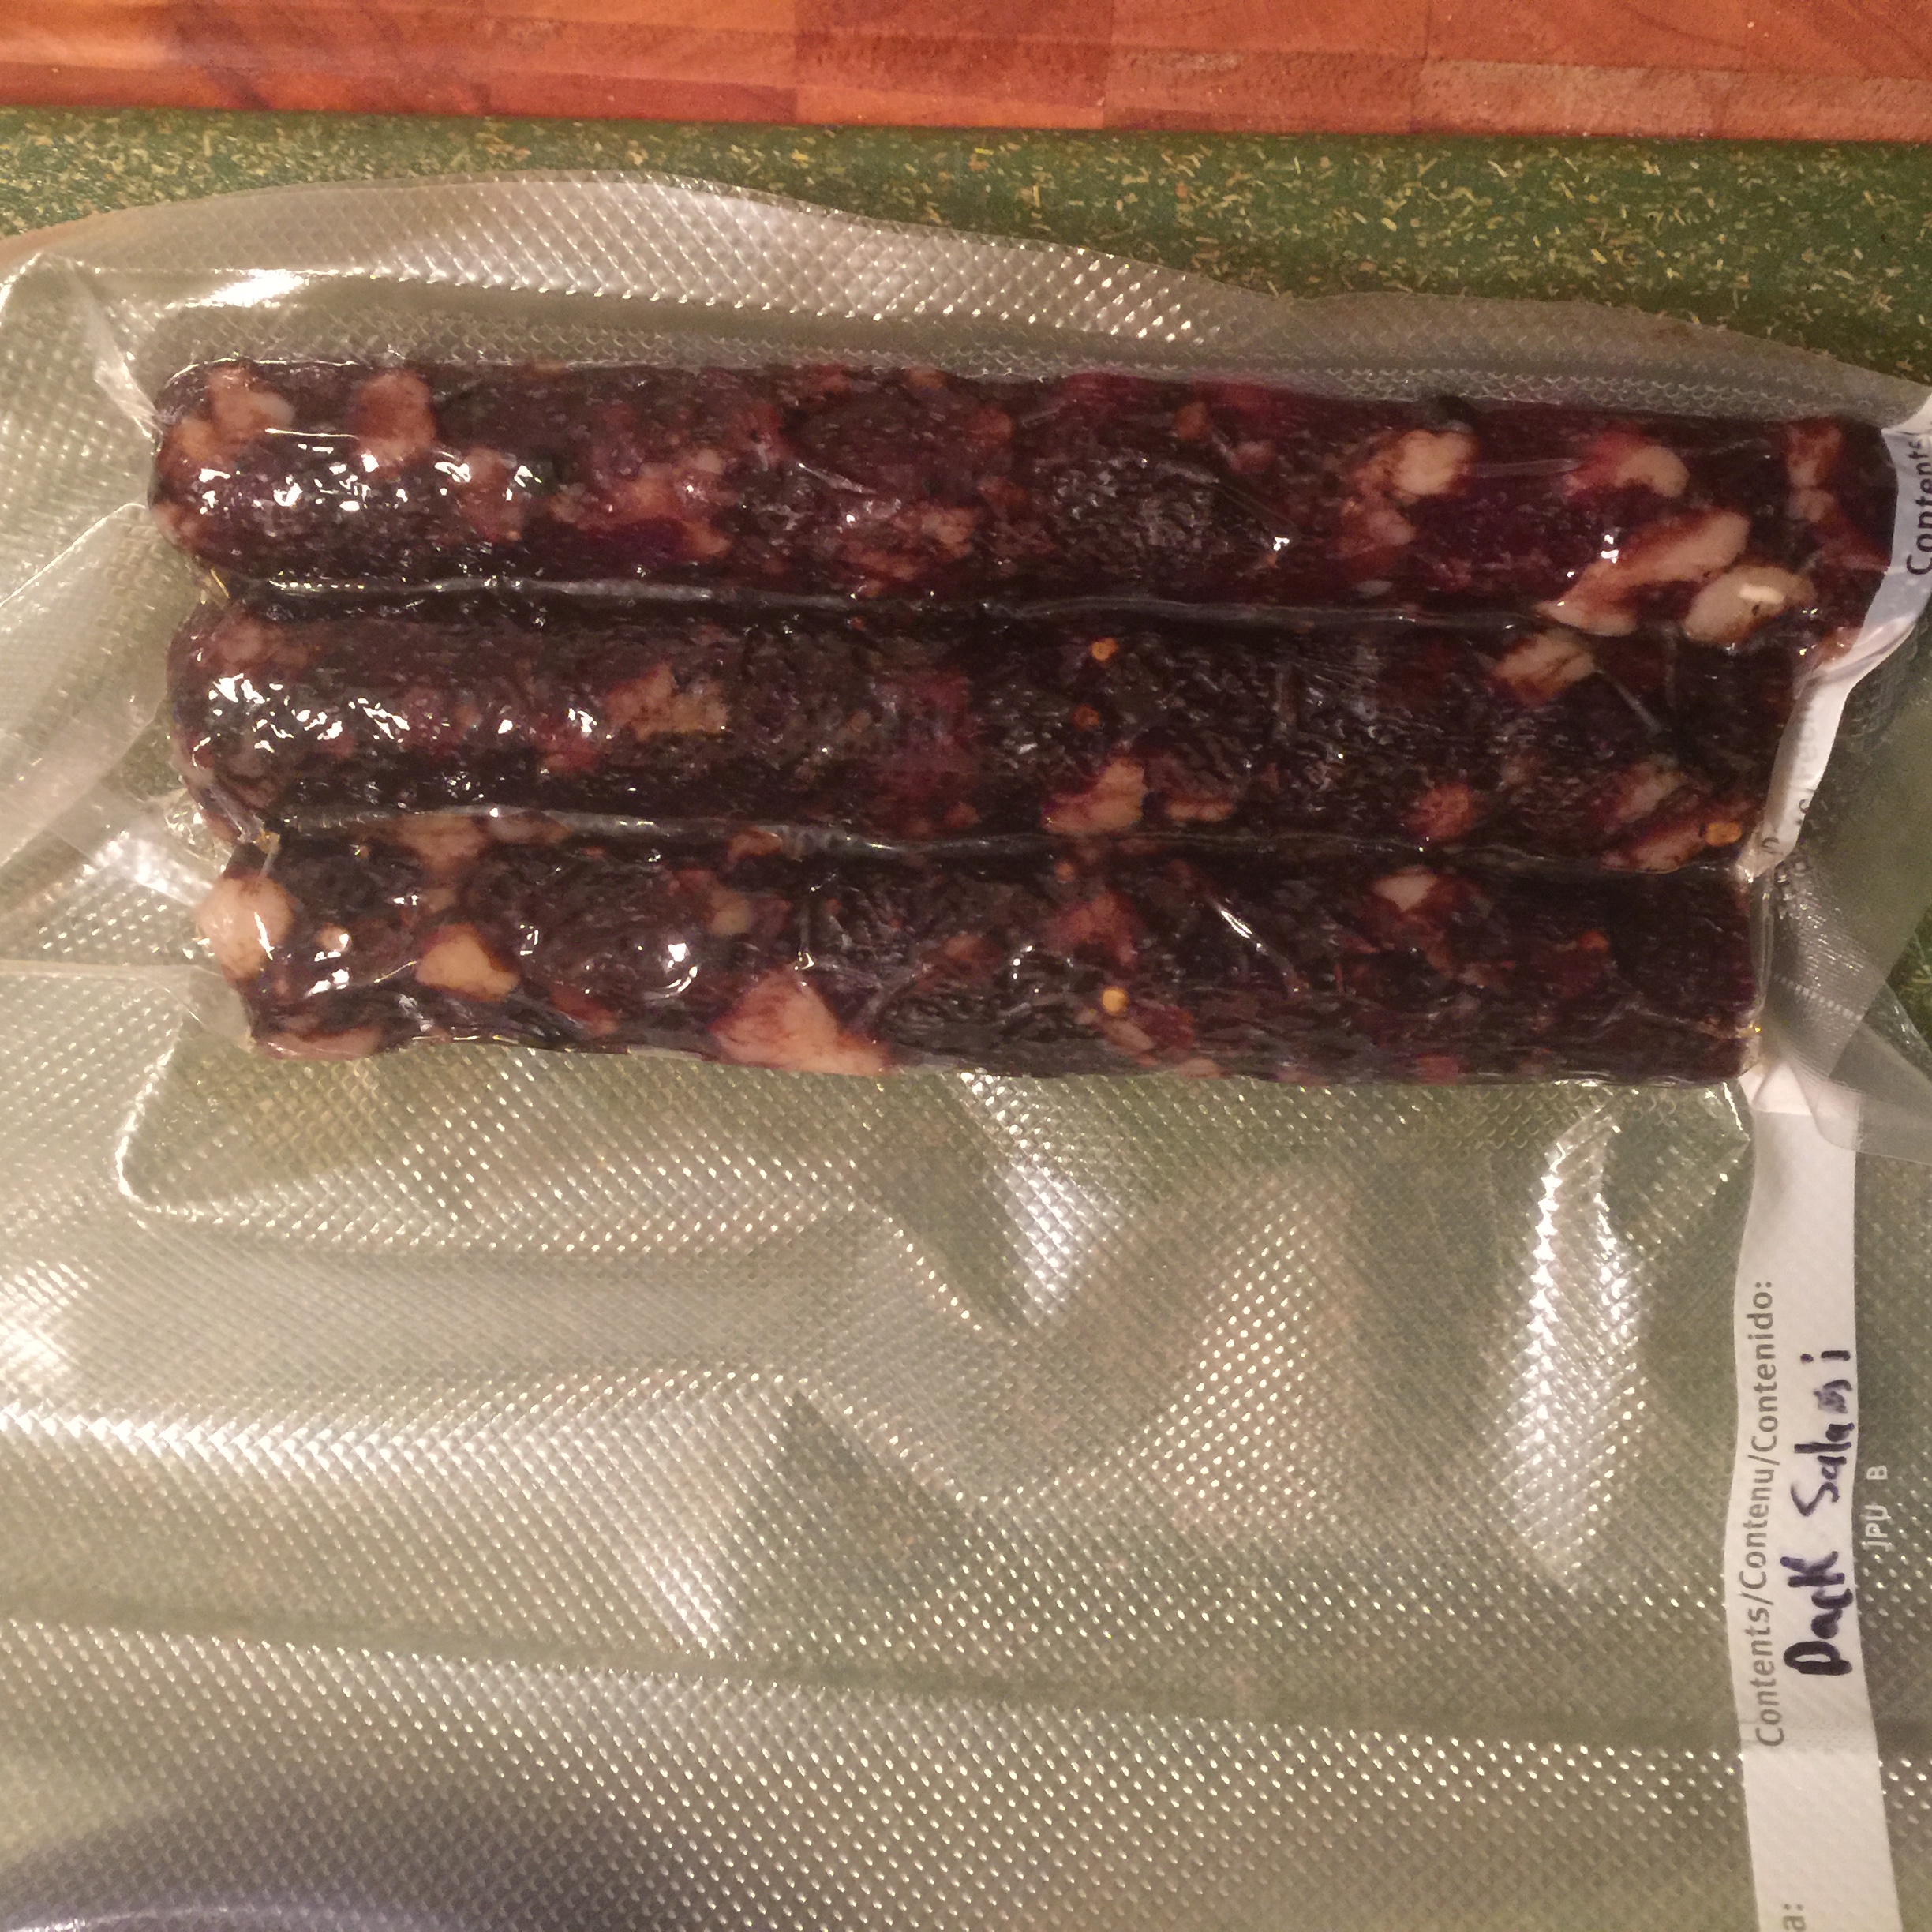
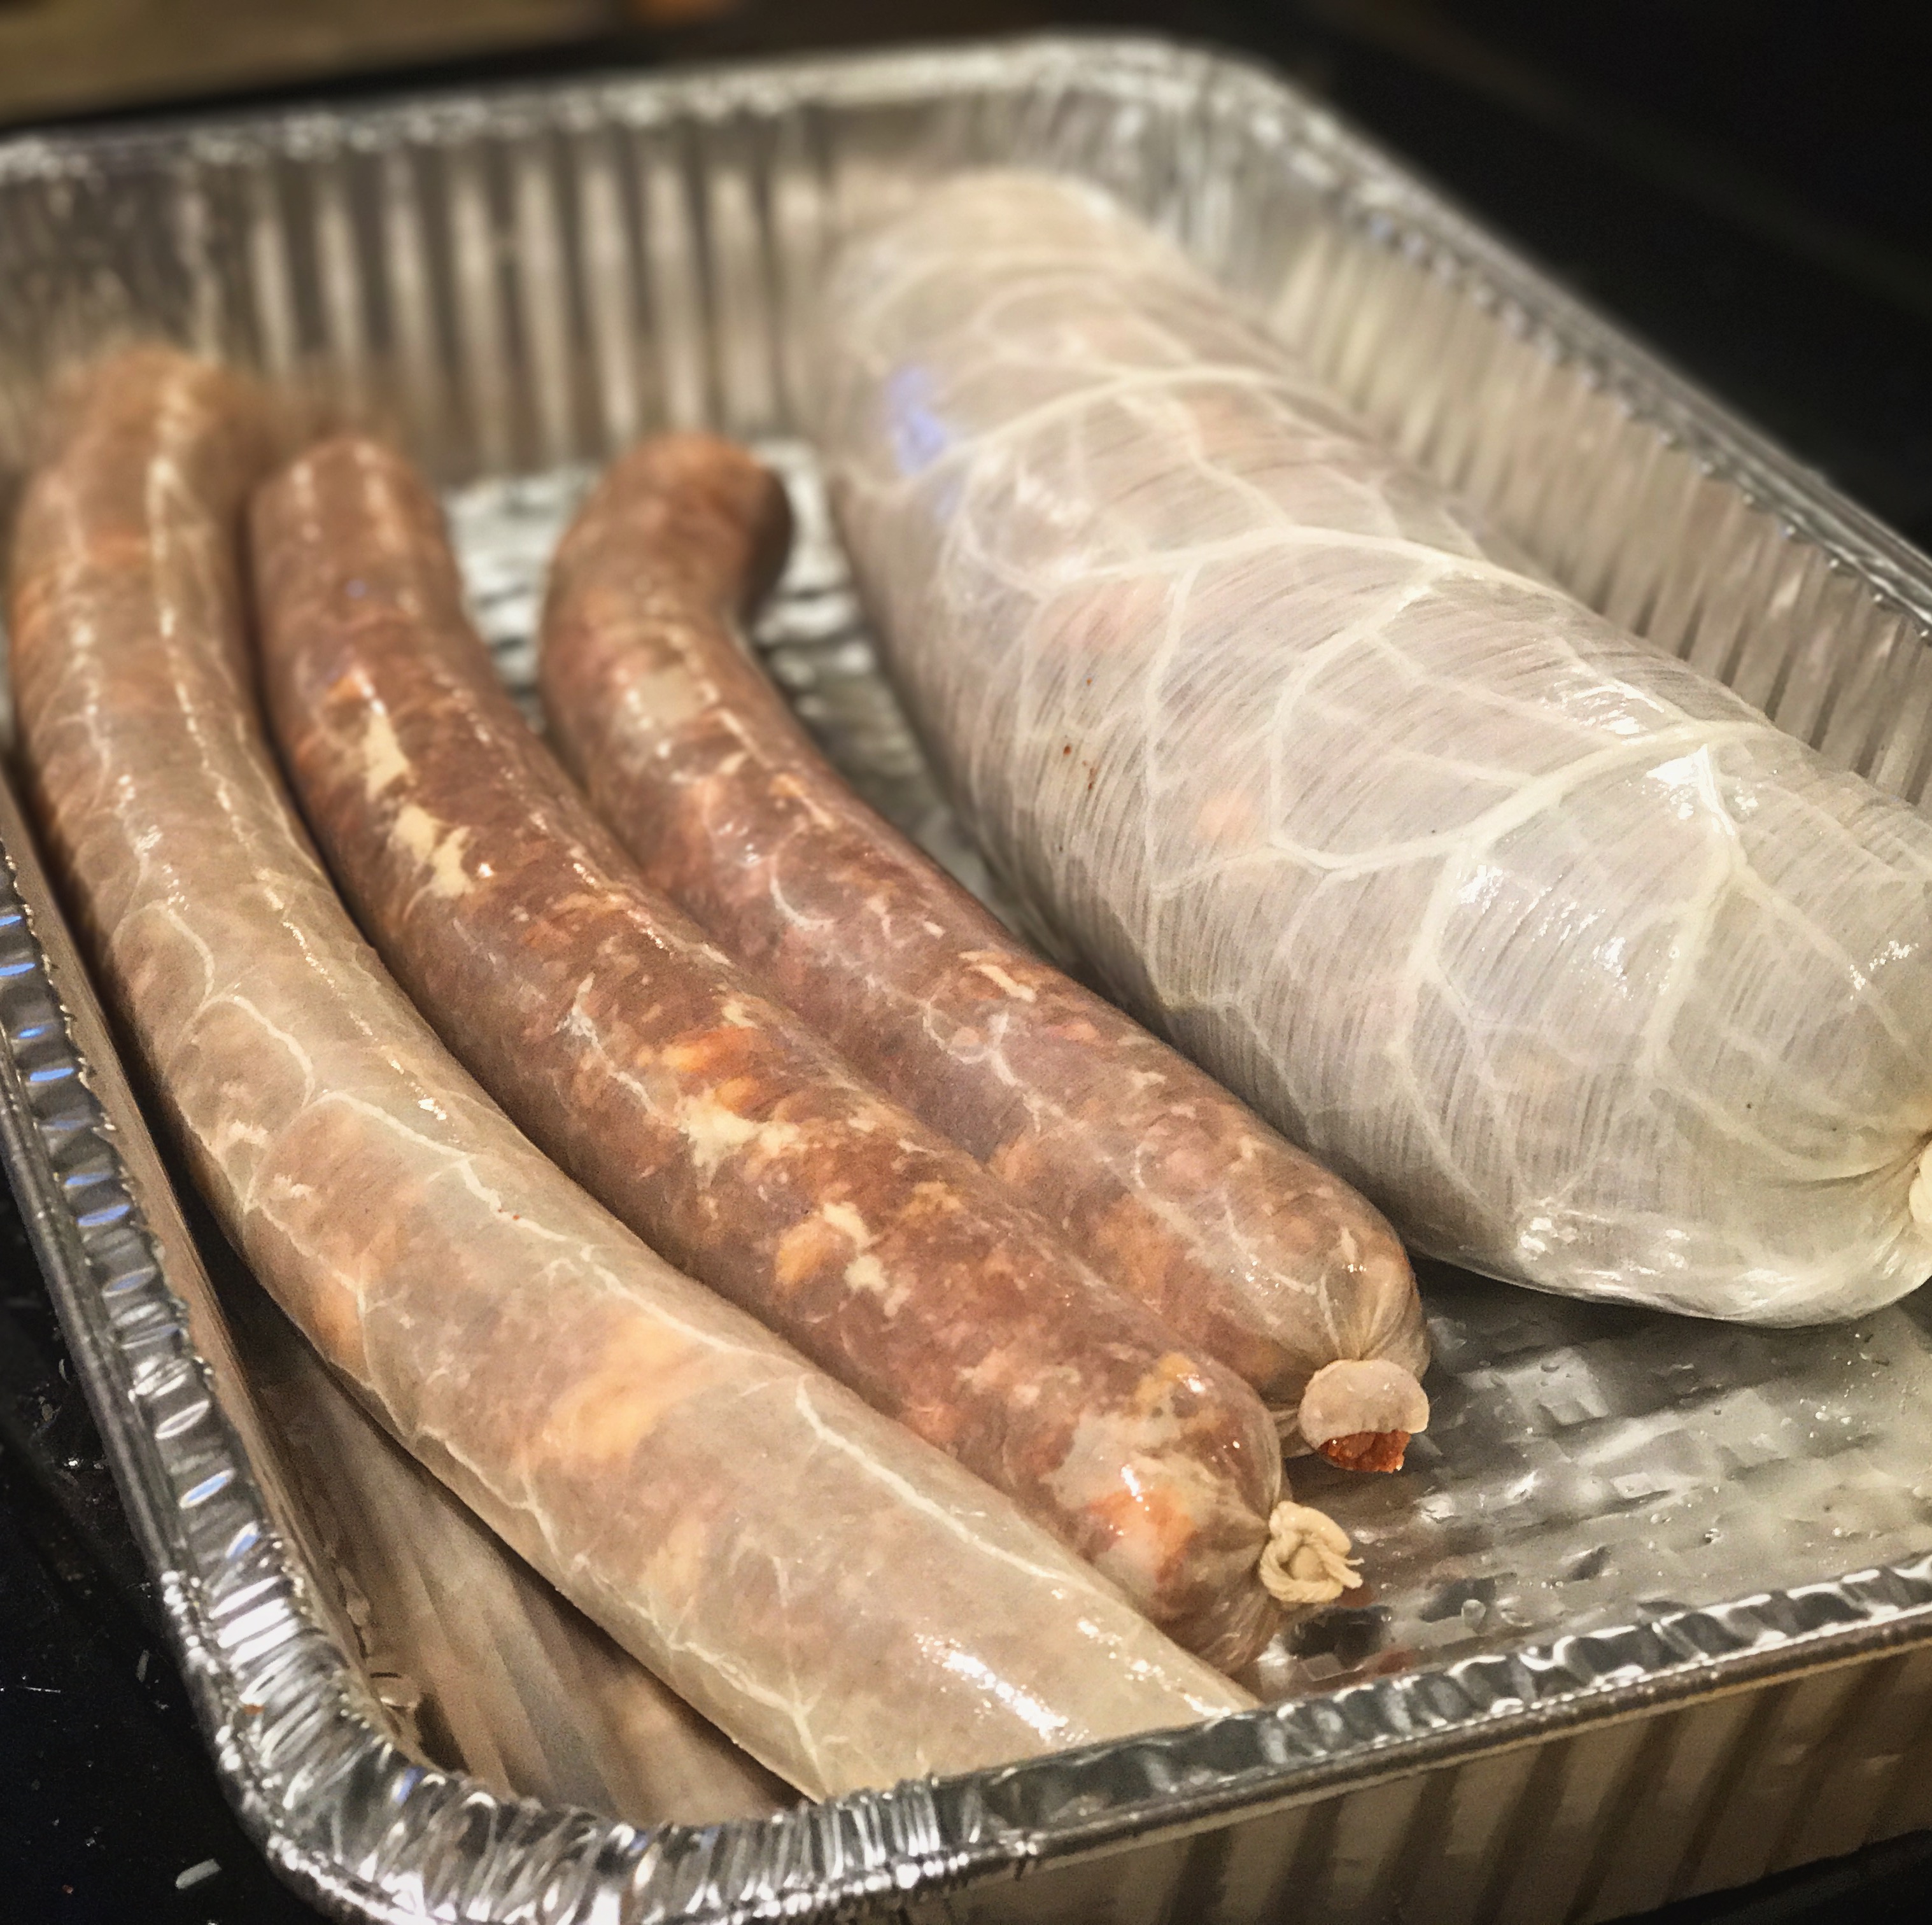
After the meat has been mixed together, it’s time to stuff it. I used two different diameter casings for this, smaller diameter beef middles and larger diameter beef bungs. The smaller diameter ones are more traditional for Spanish style chorizo, but I like a larger diameter salami, so I made one for fun.

IMG_2244


Fermentation
Temperature: 75ᵒF/23-24C (strain dependent)
Humidity: 80-90% RH
Time: 48-72 hours (until pH drops to at least 5.3)

After the chorizo has been stuffed, it’s time to allow it to ferment. The conditions for the fermentation will be strain dependent. I use B-LC-007, which is a starter culture that requires temperatures of ~70F and a relative humidity ~80-90%. I let the chorizo ferment for ~48 hours, which is about the time it should take to allow the pH to drop into the ideal range. I don’t currently use a pH meter (they’re relatively expensive), but if you have one, now is the time to use it. Ideally, you want to see the pH drop  to around 5.3.

IMG_2255


Cold Smoking

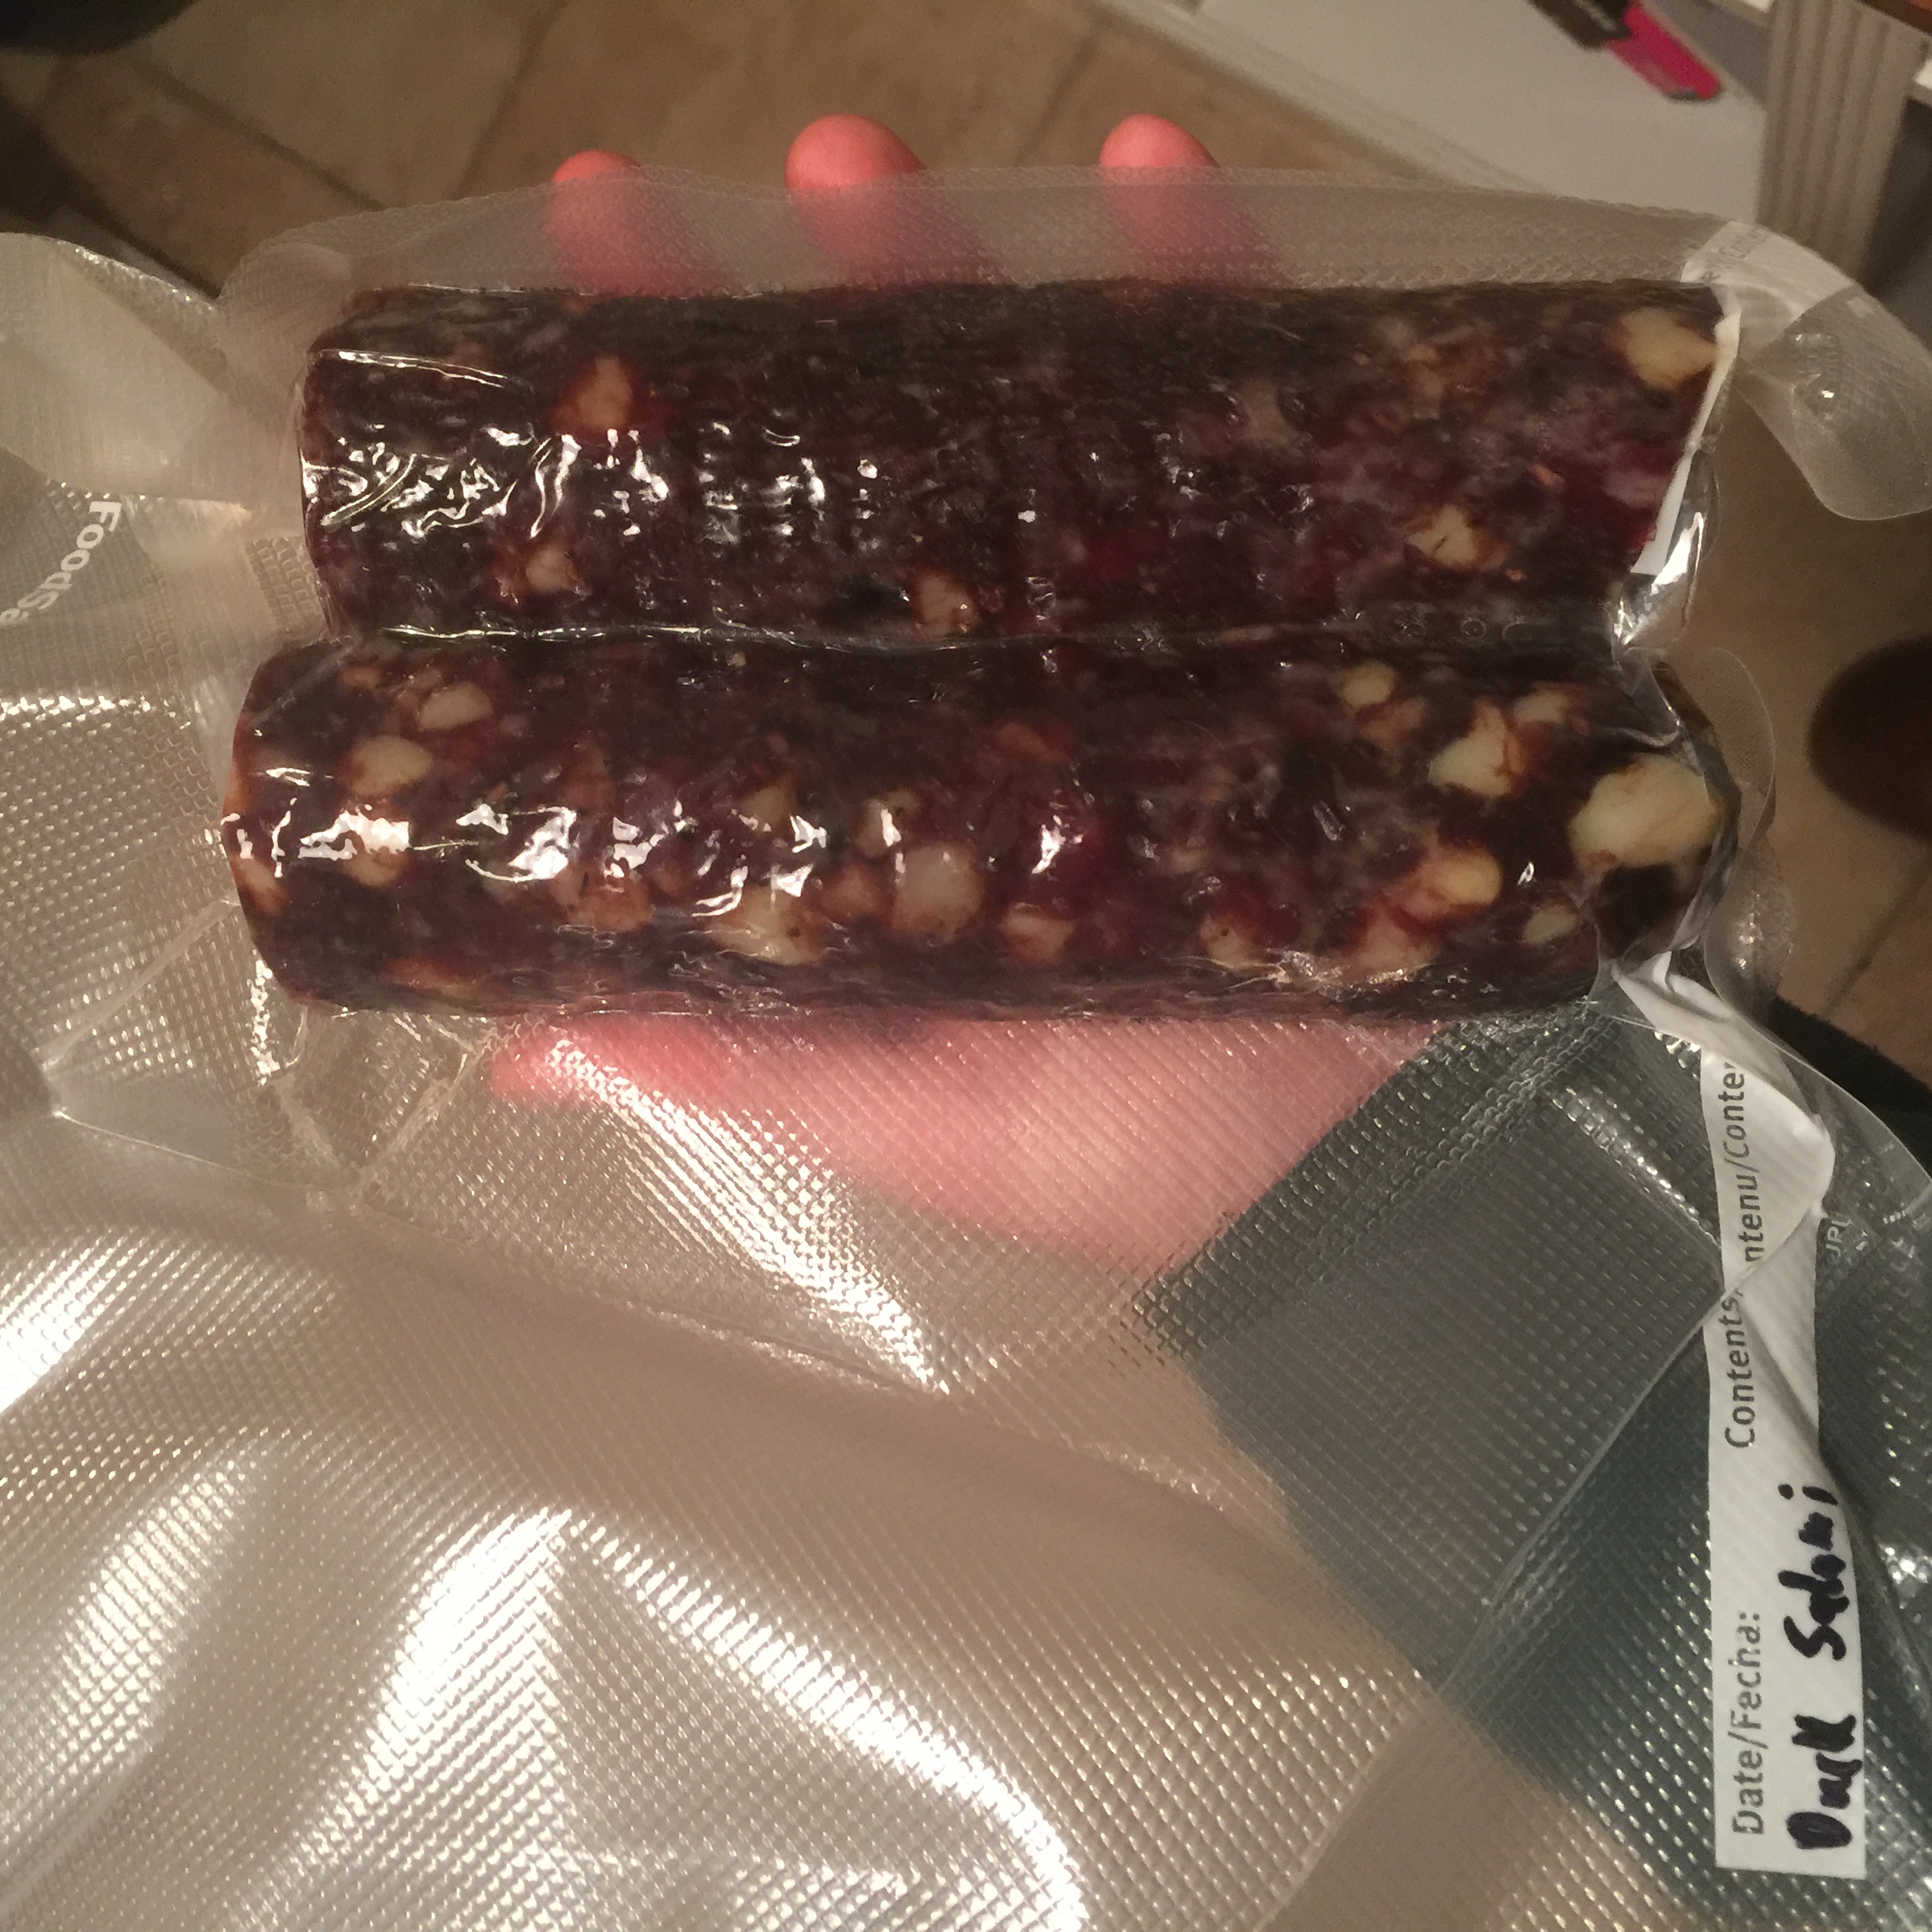
It is not traditional to cold smoke chorizo, but you can if you want to. For an experiment, I cold smoked one link of this chorizo that I made to compare it to the others during the tasting phase. Make sure you smoke with a complimentary wood (I used beech for this) and that you keep your temperatures in the actual cold smoking range (<90F).


Drying
Temperature: 54F/12C
Humidity: 70% RH

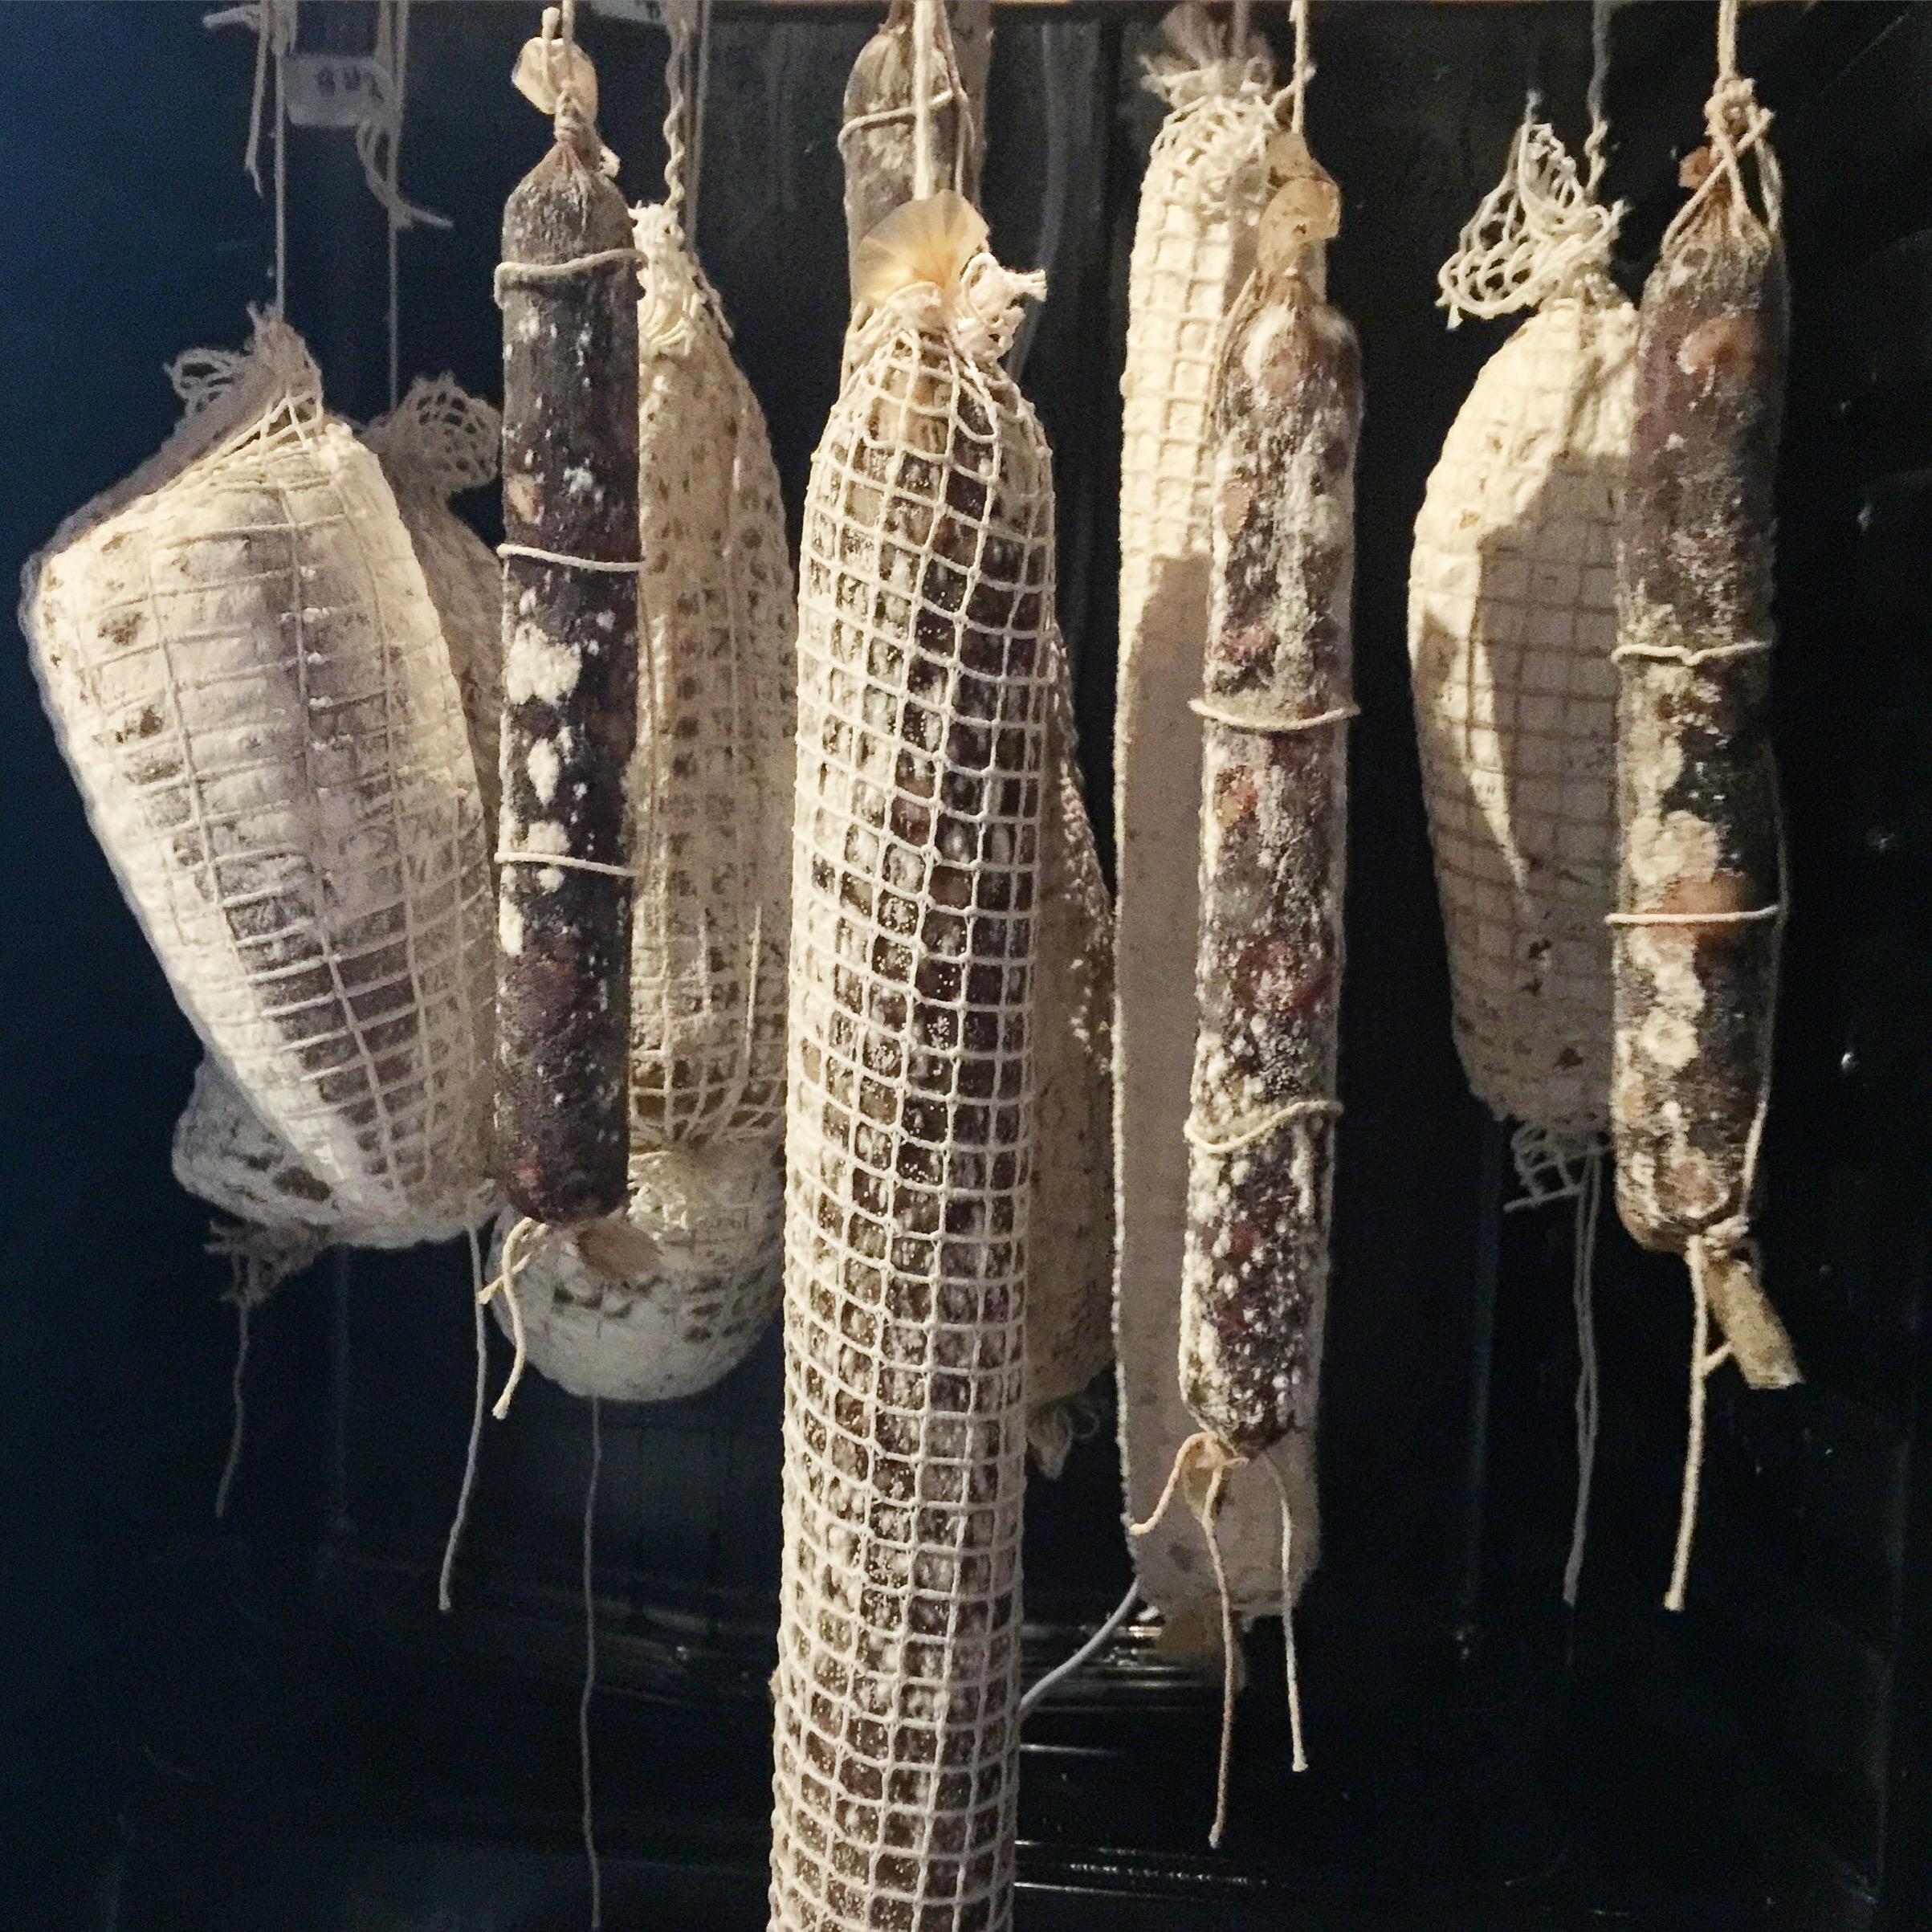
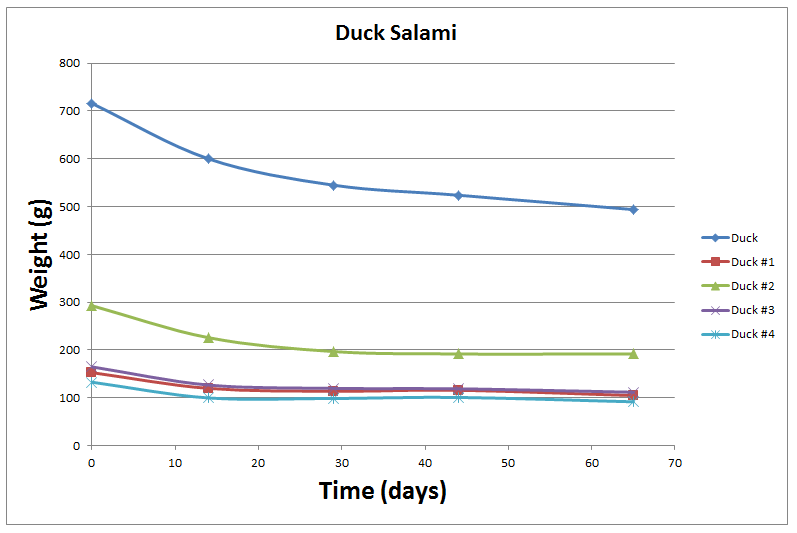
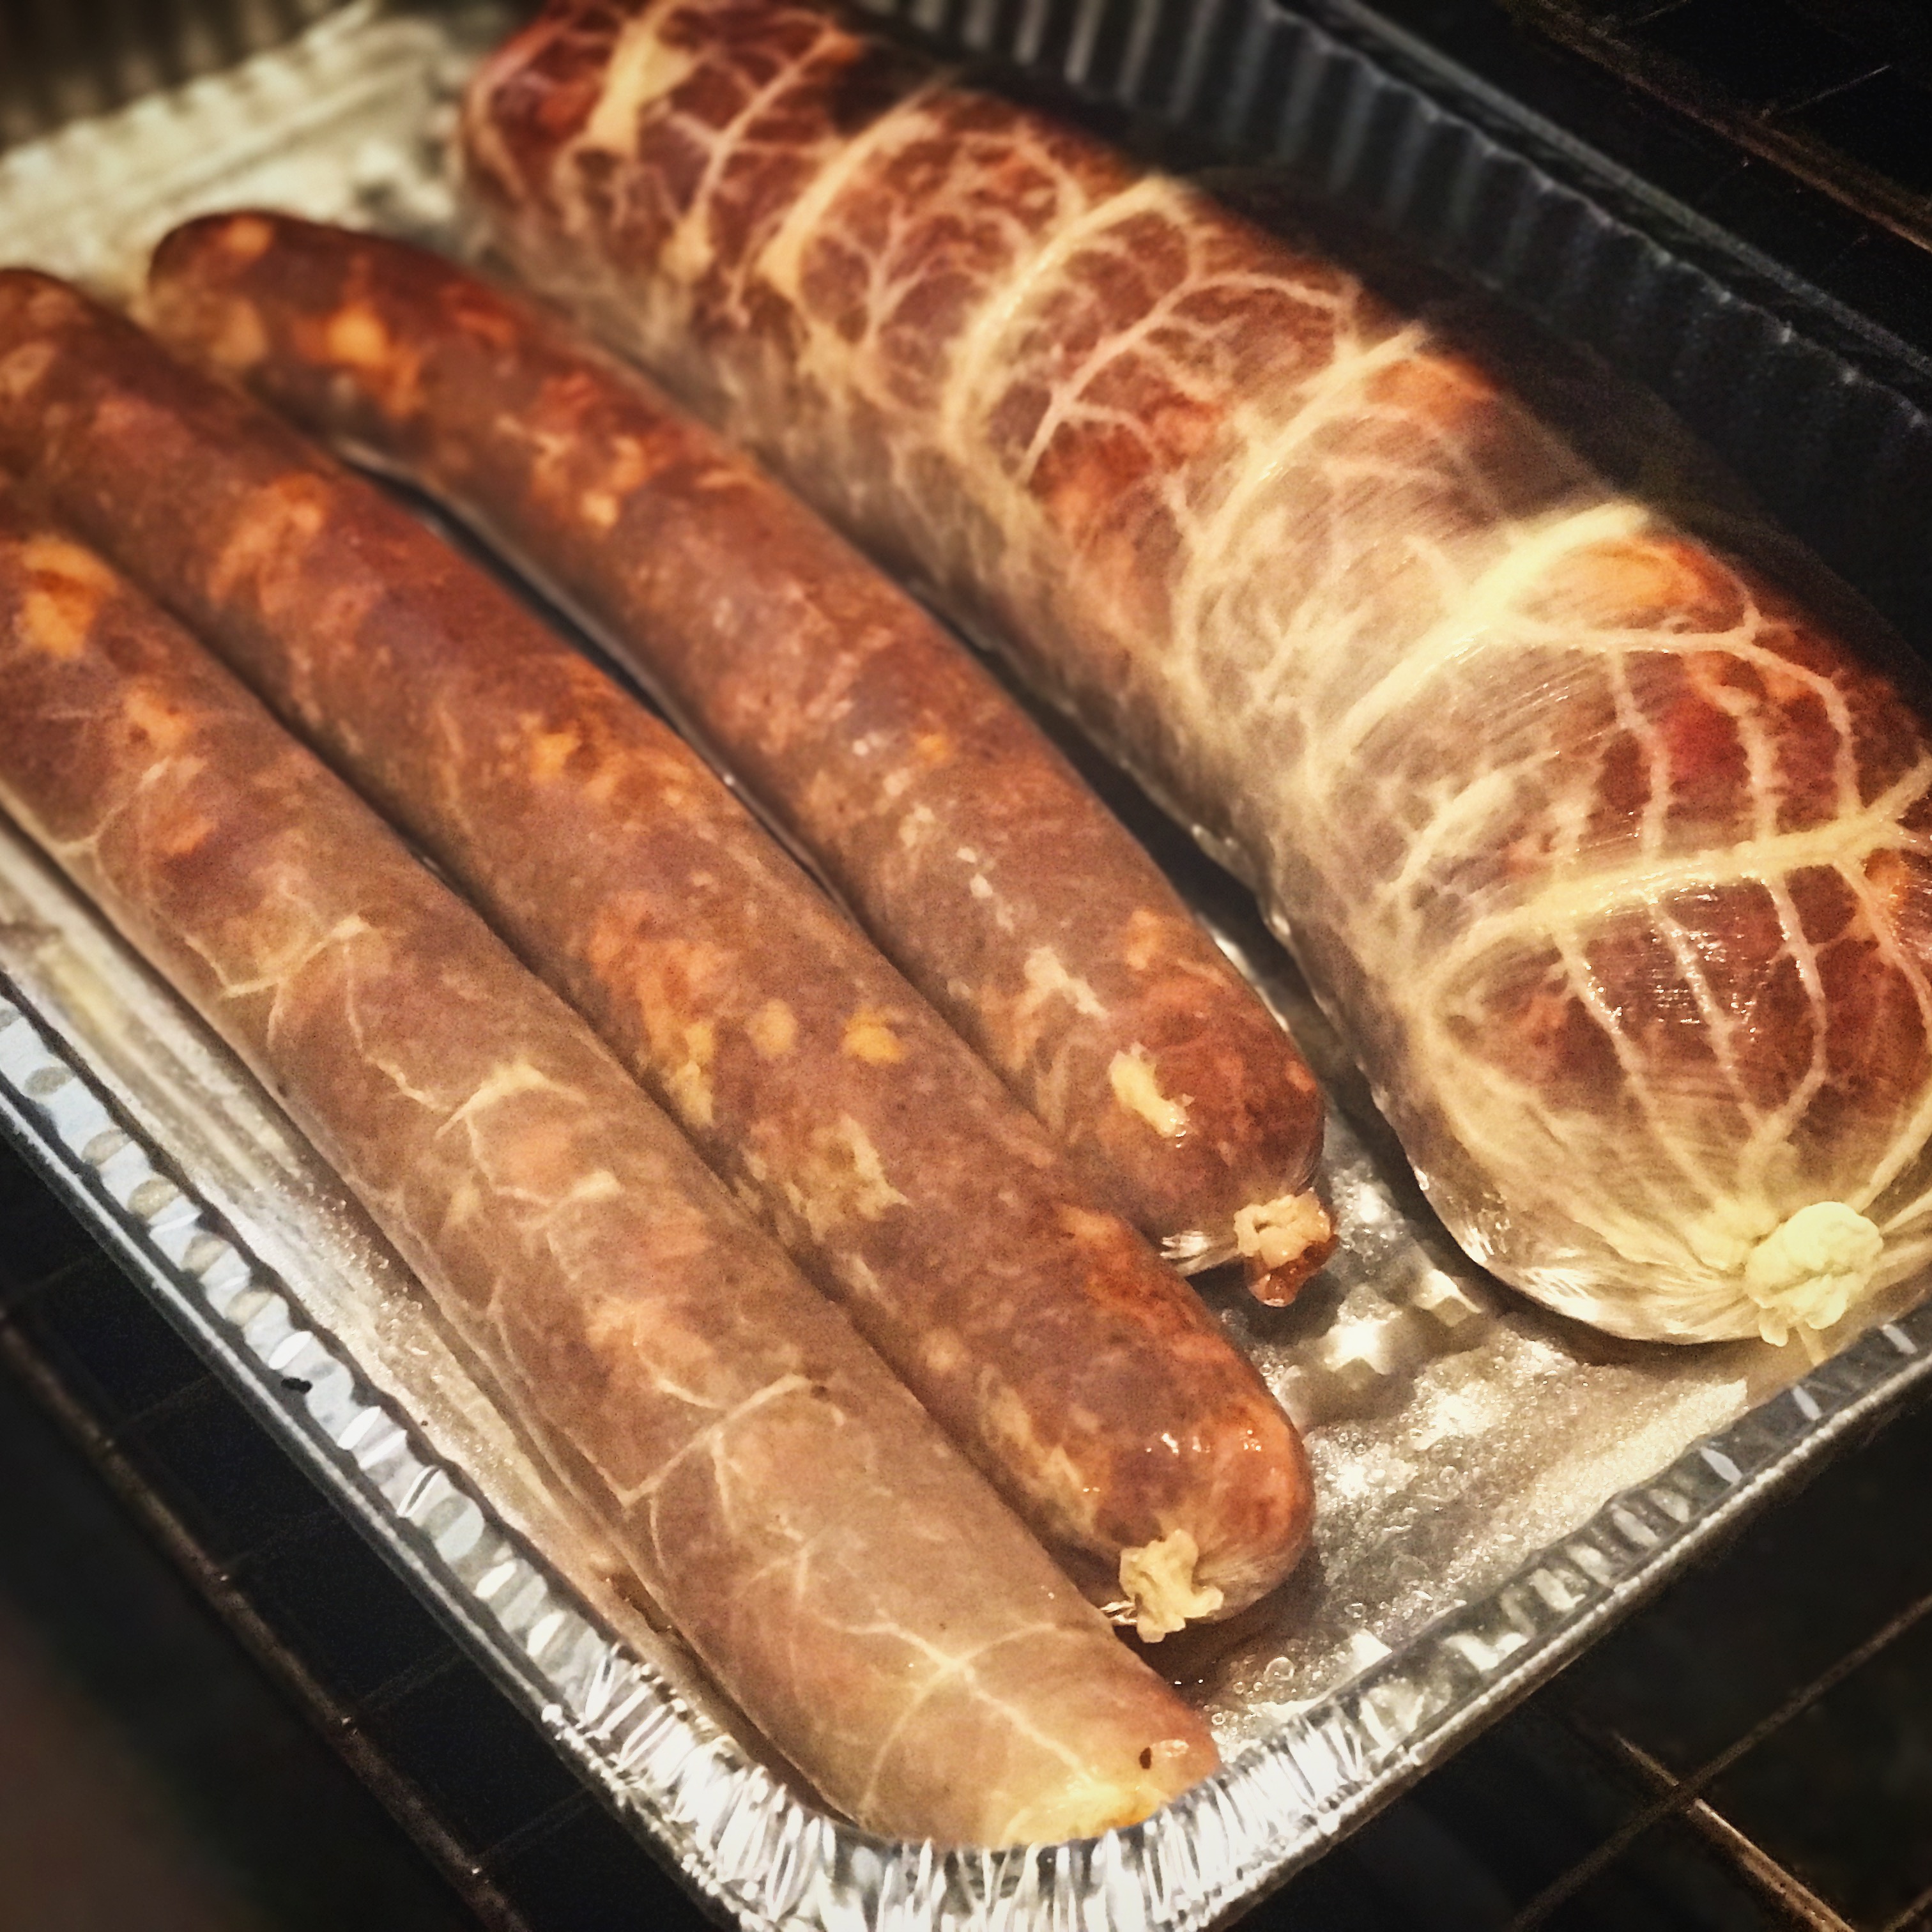
After the meat has undergone fermentation, it’s time to let it dry. I hang it in my curing chamber in the usual conditions, ~55F/70%RH, until its lost ~40% if its initial weight. If you want it to be more firm, you can let it go even longer than 40%, but I like mine to be a little on the softer side.

IMG_5612


Tasting

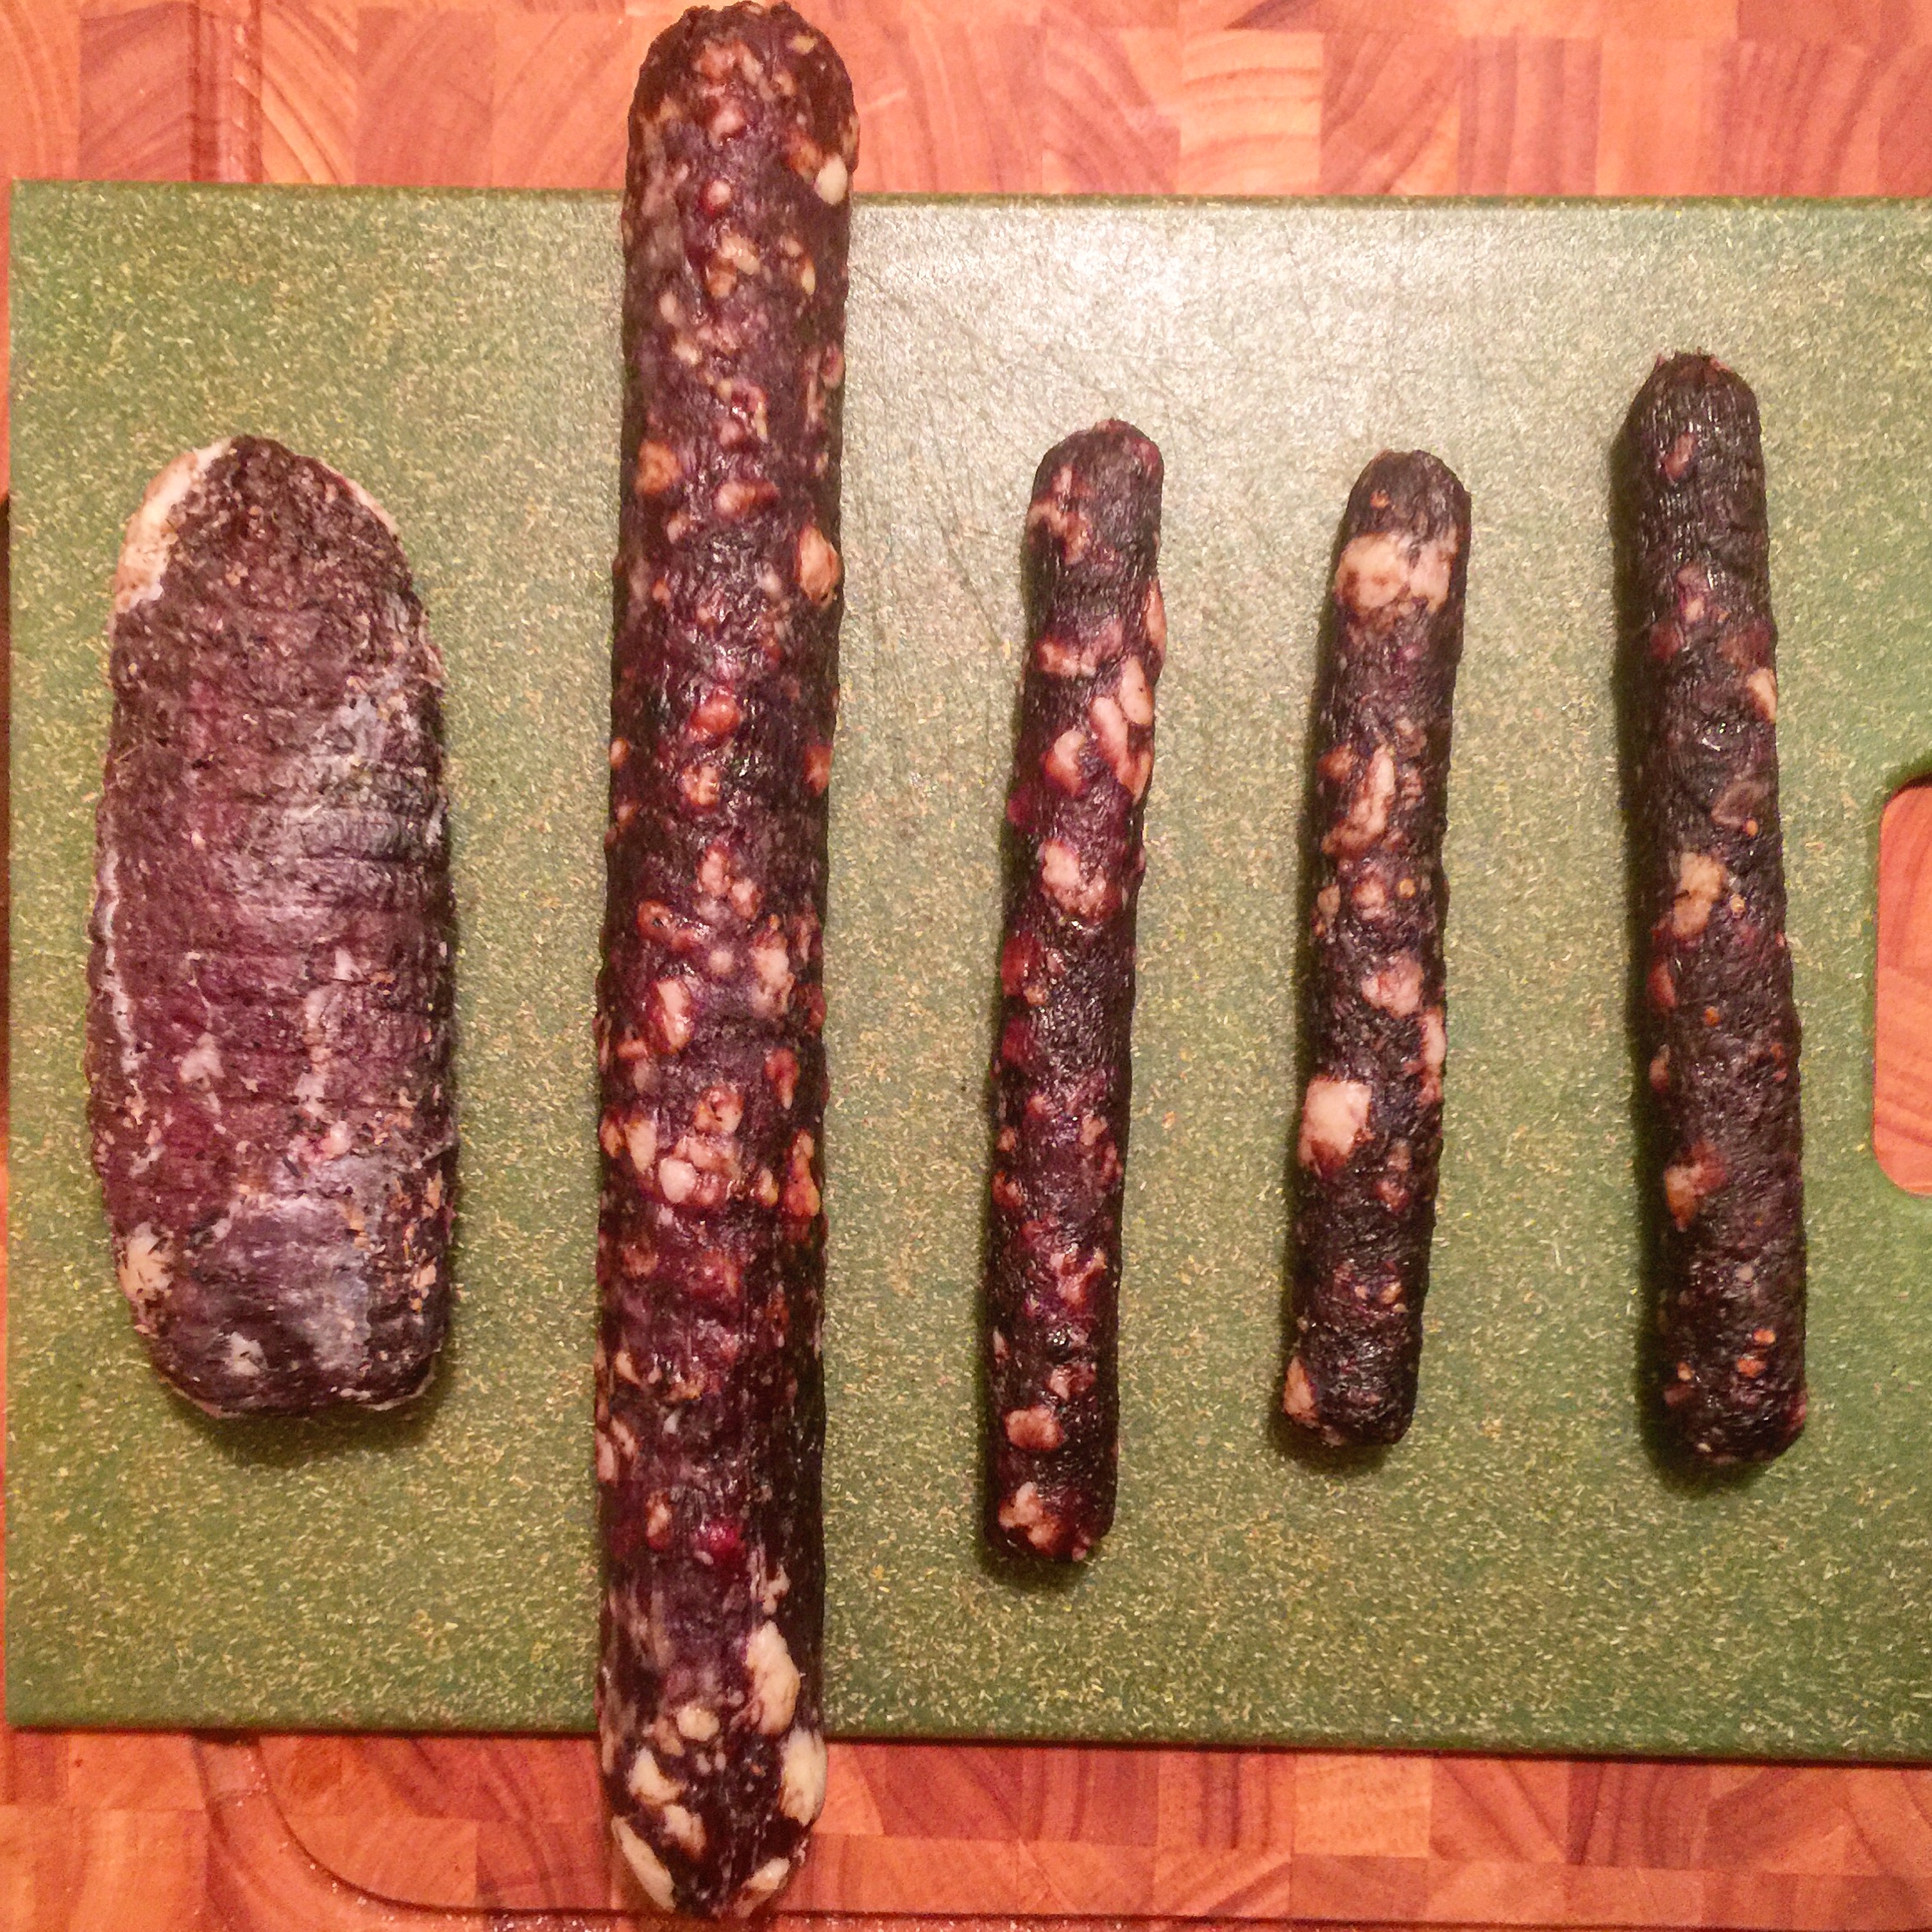
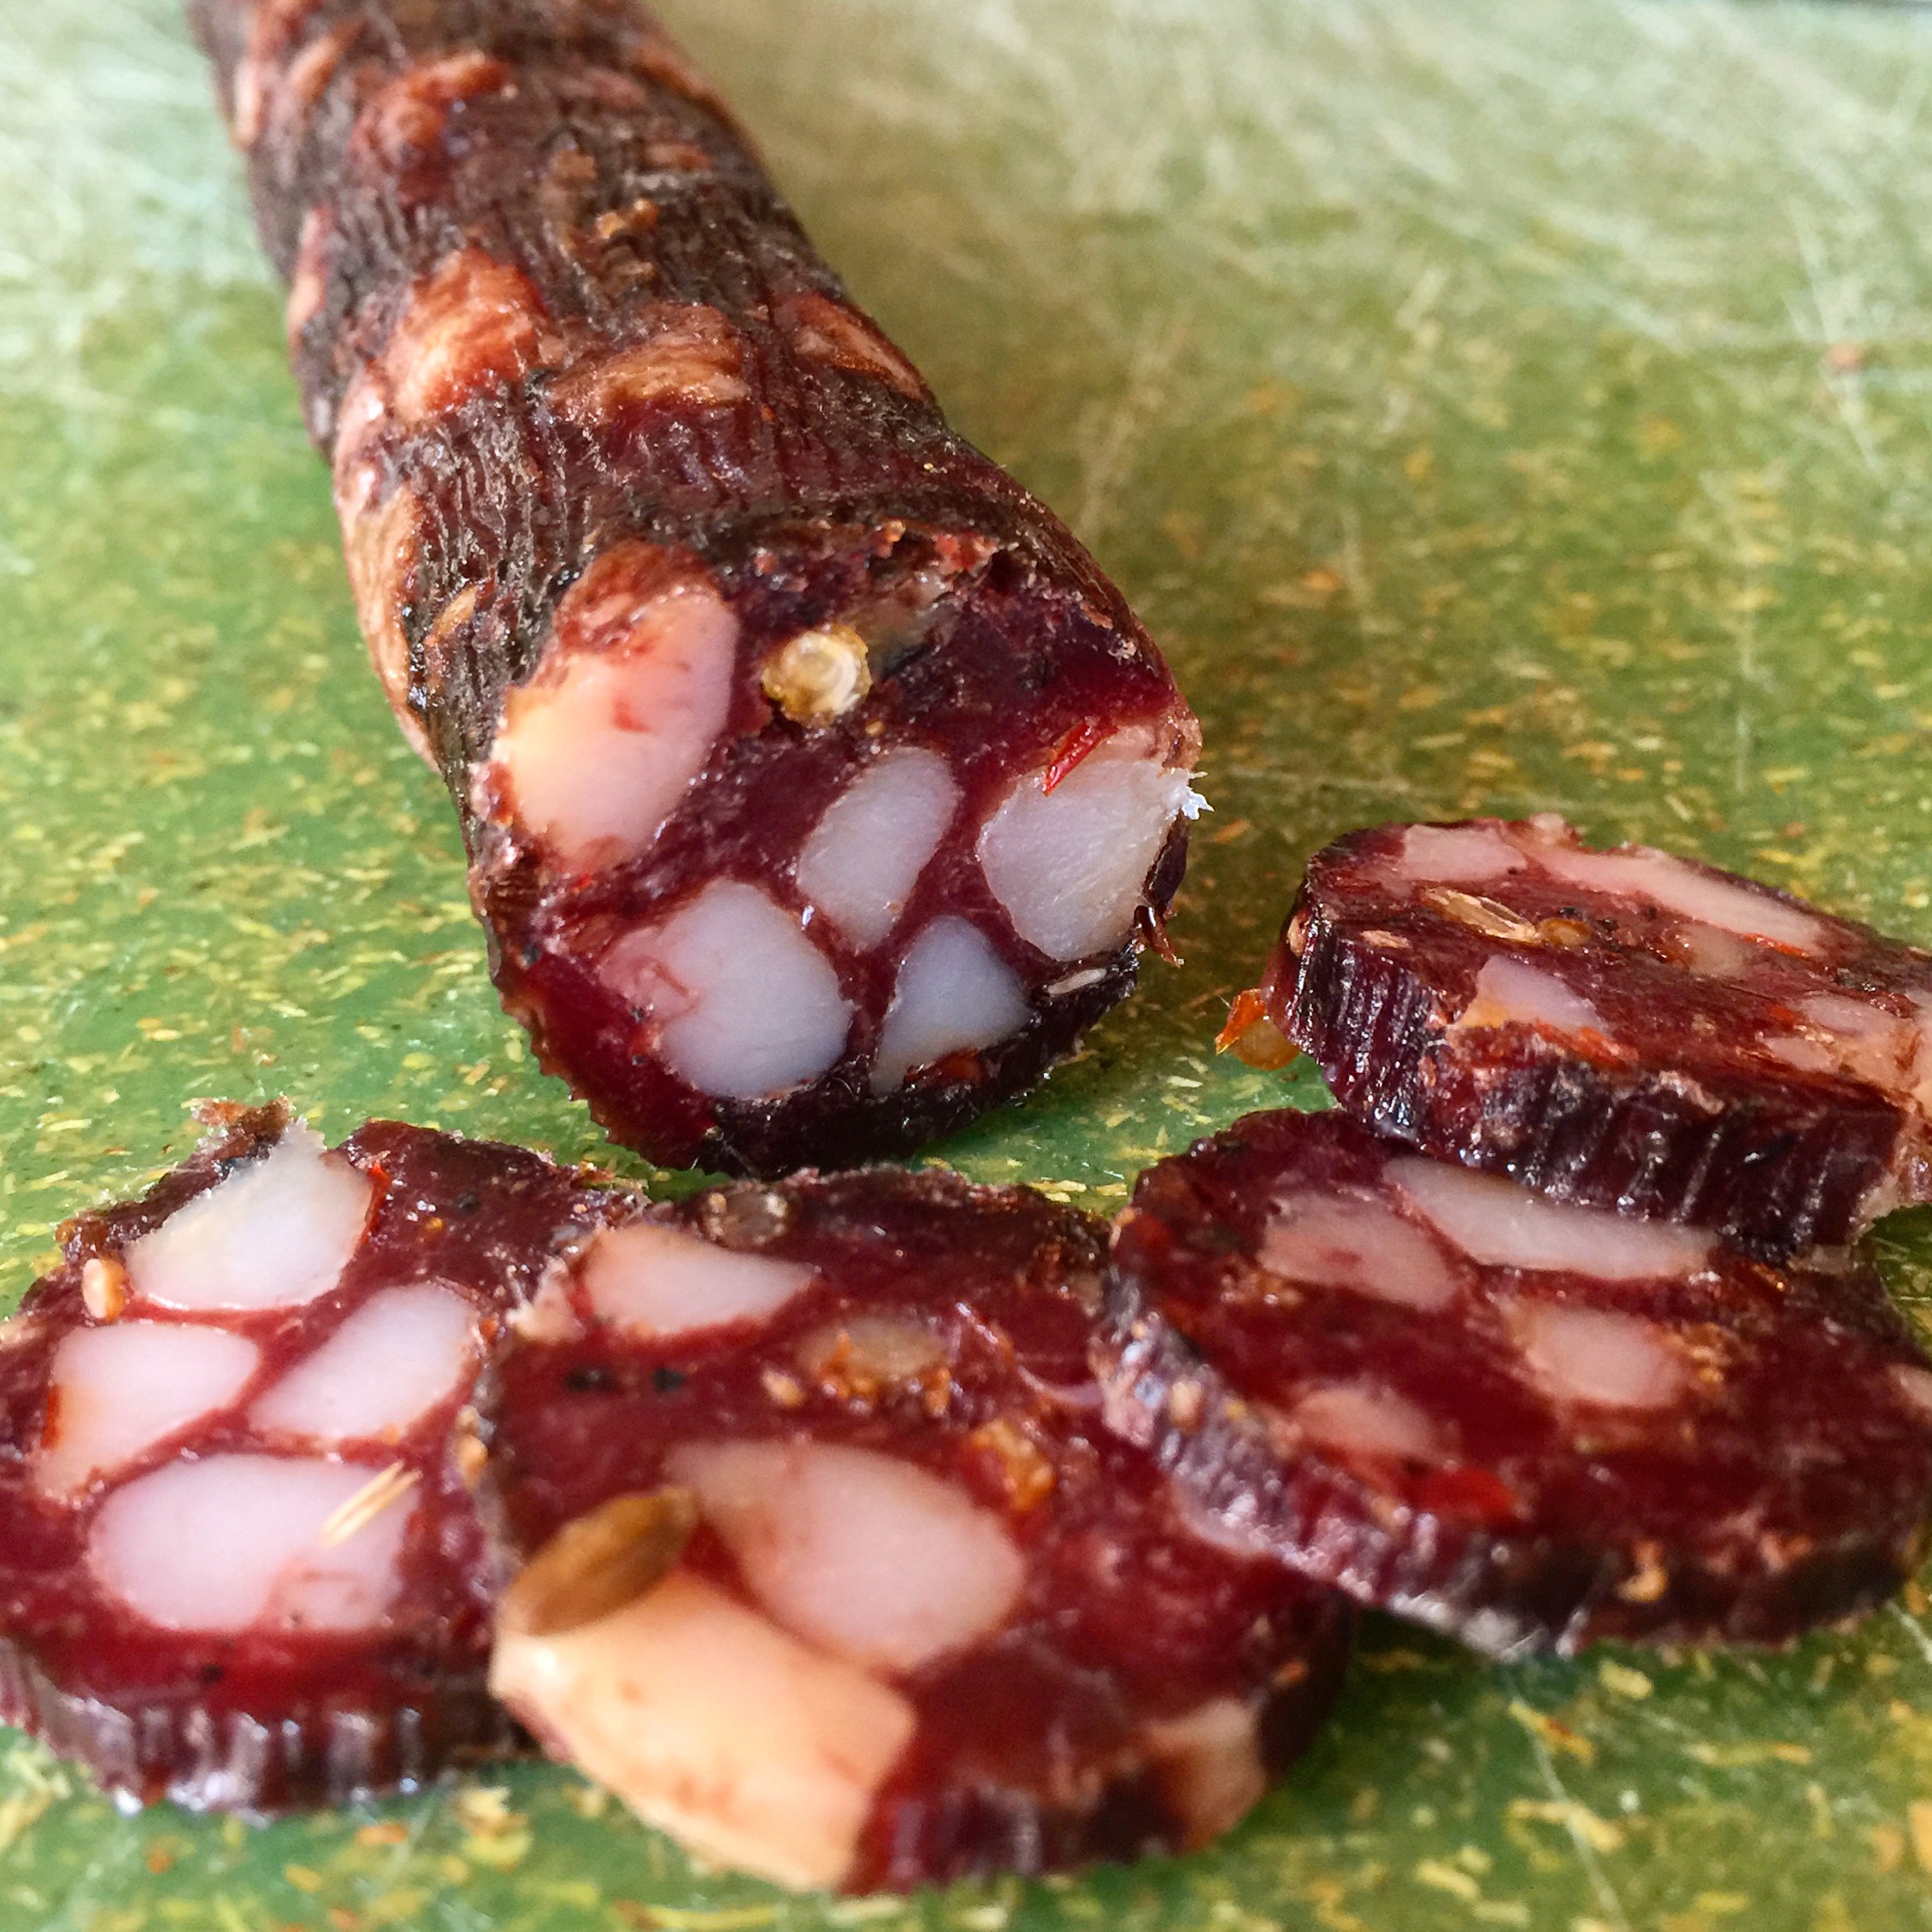
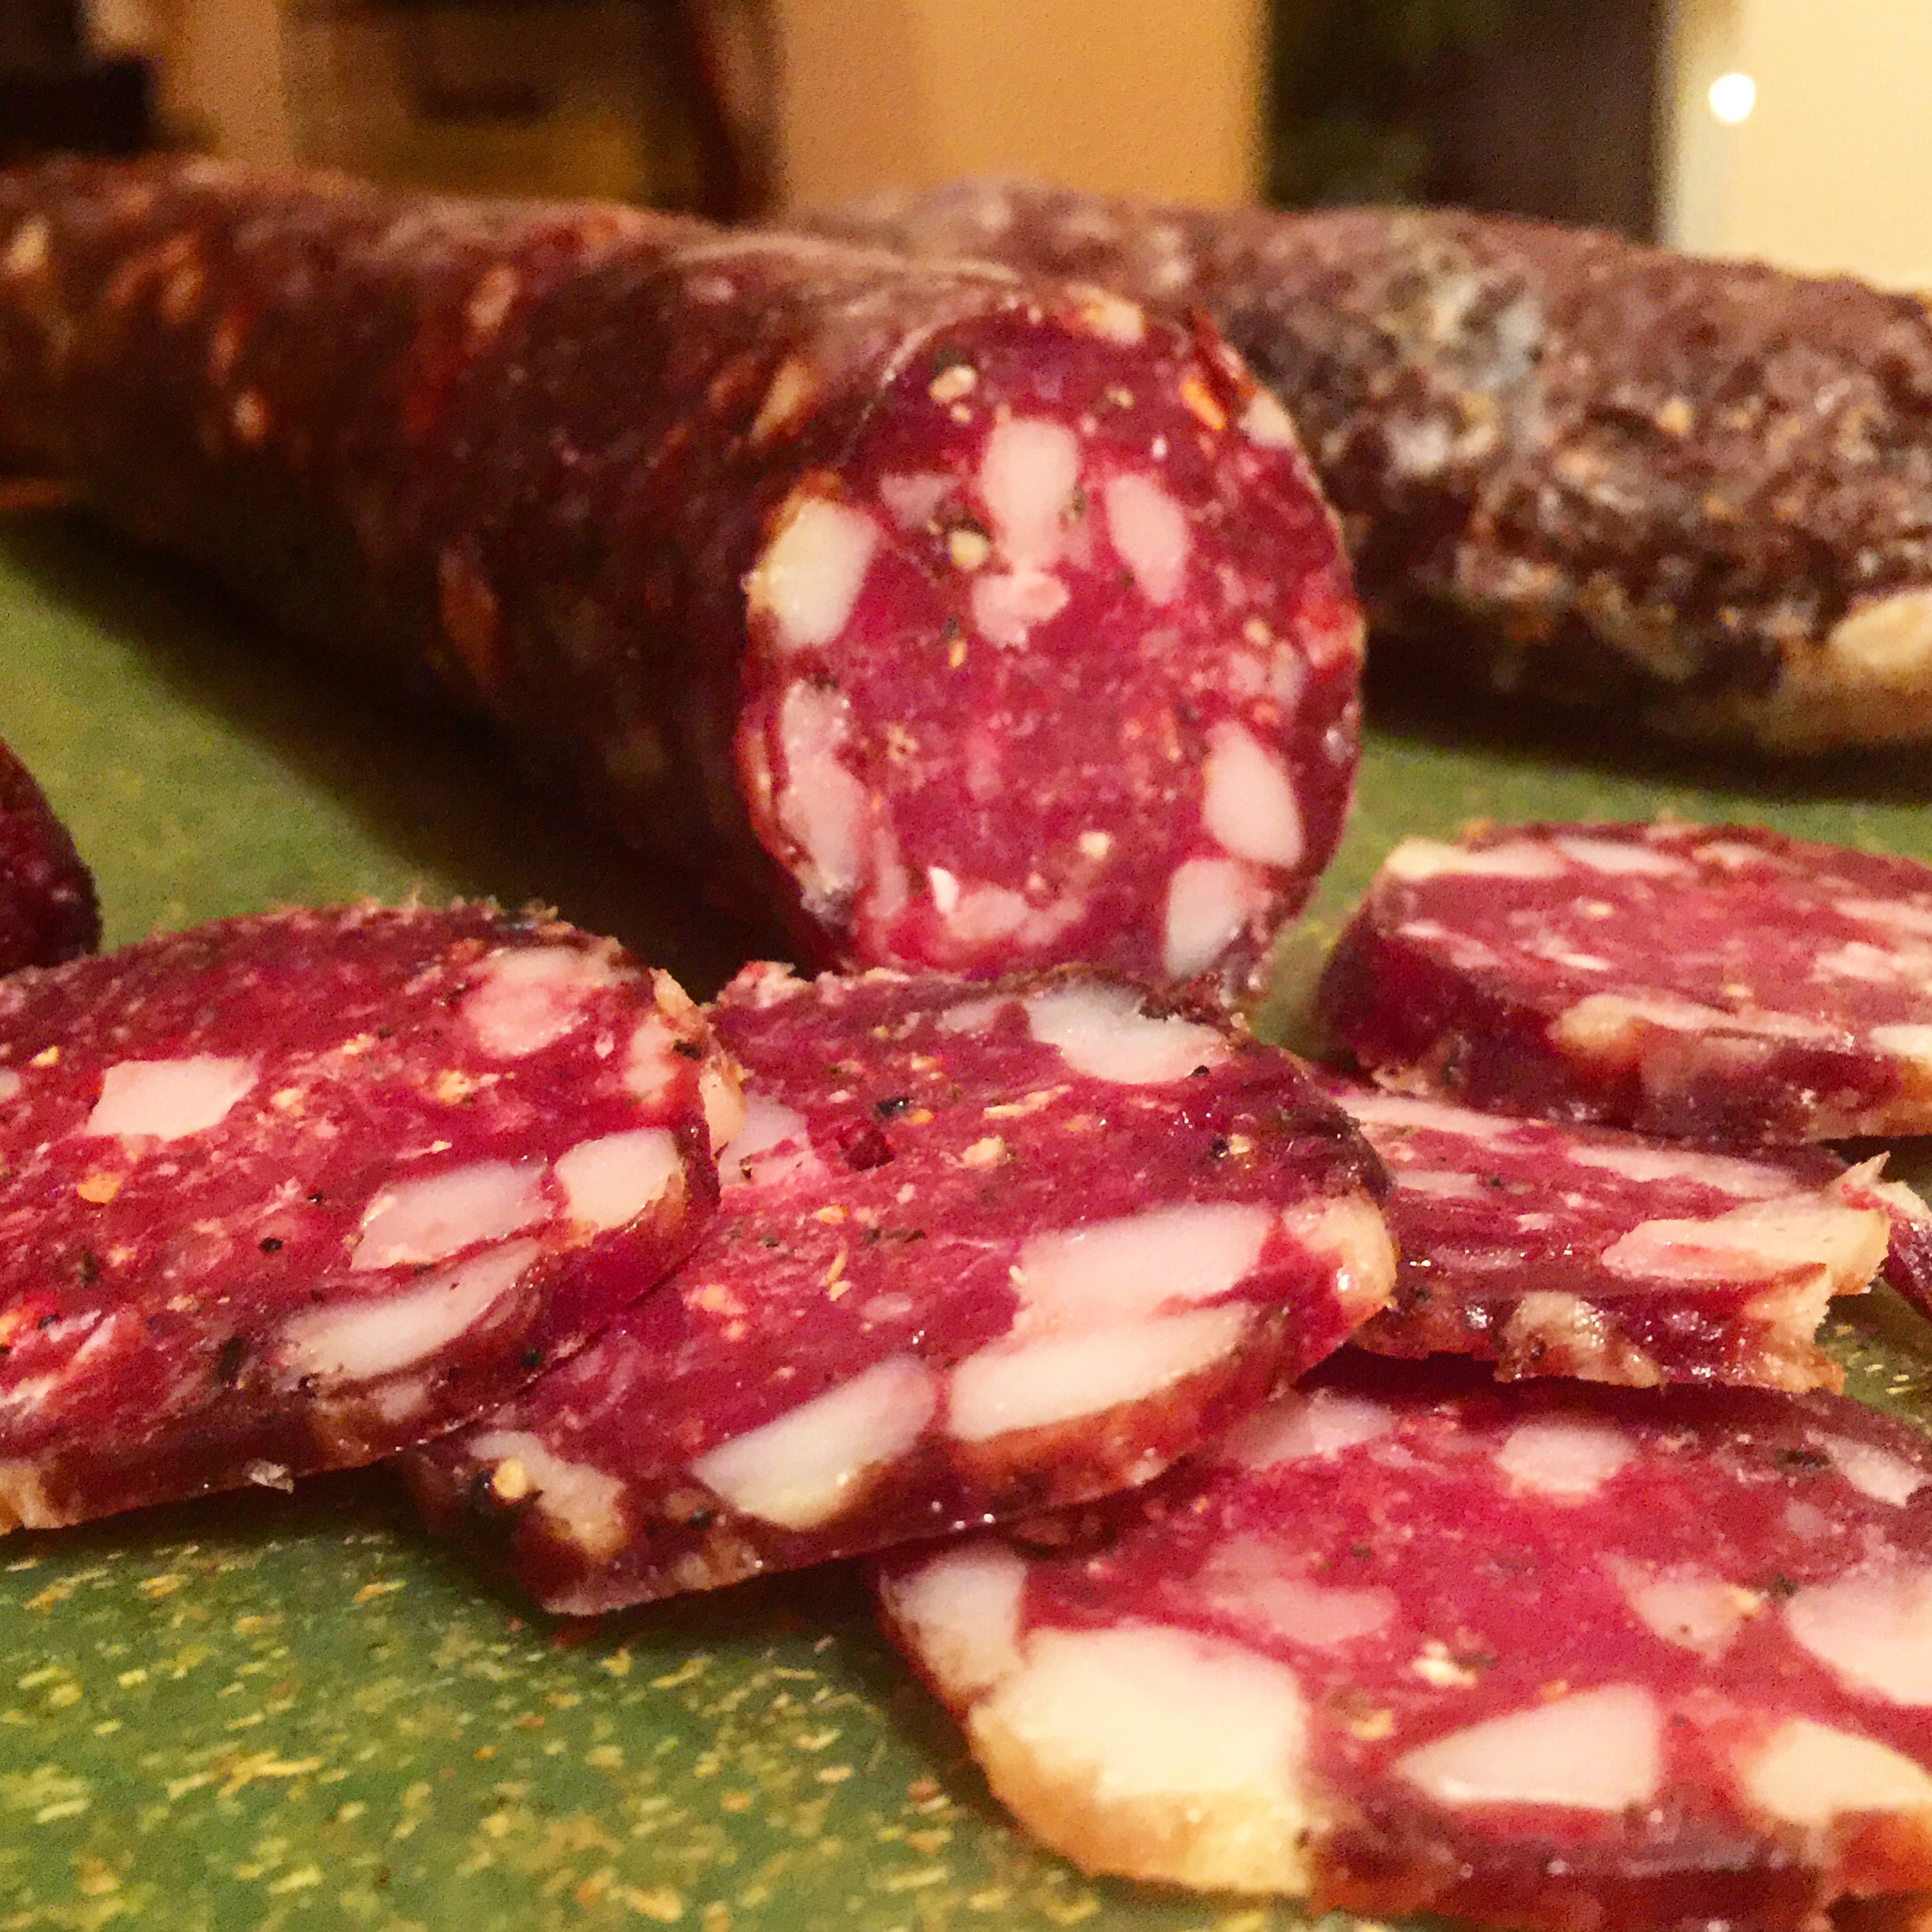
The best part is always the tasting! After the meat has lost the appropriate amount of weight for your tastes, you can pull it from the curing chamber. For this, I pulled the smaller diameter chorizo first.

IMG_8292

I compared the flavor of the smoked chorizo to the non-smoked chorizo.

IMG_8286

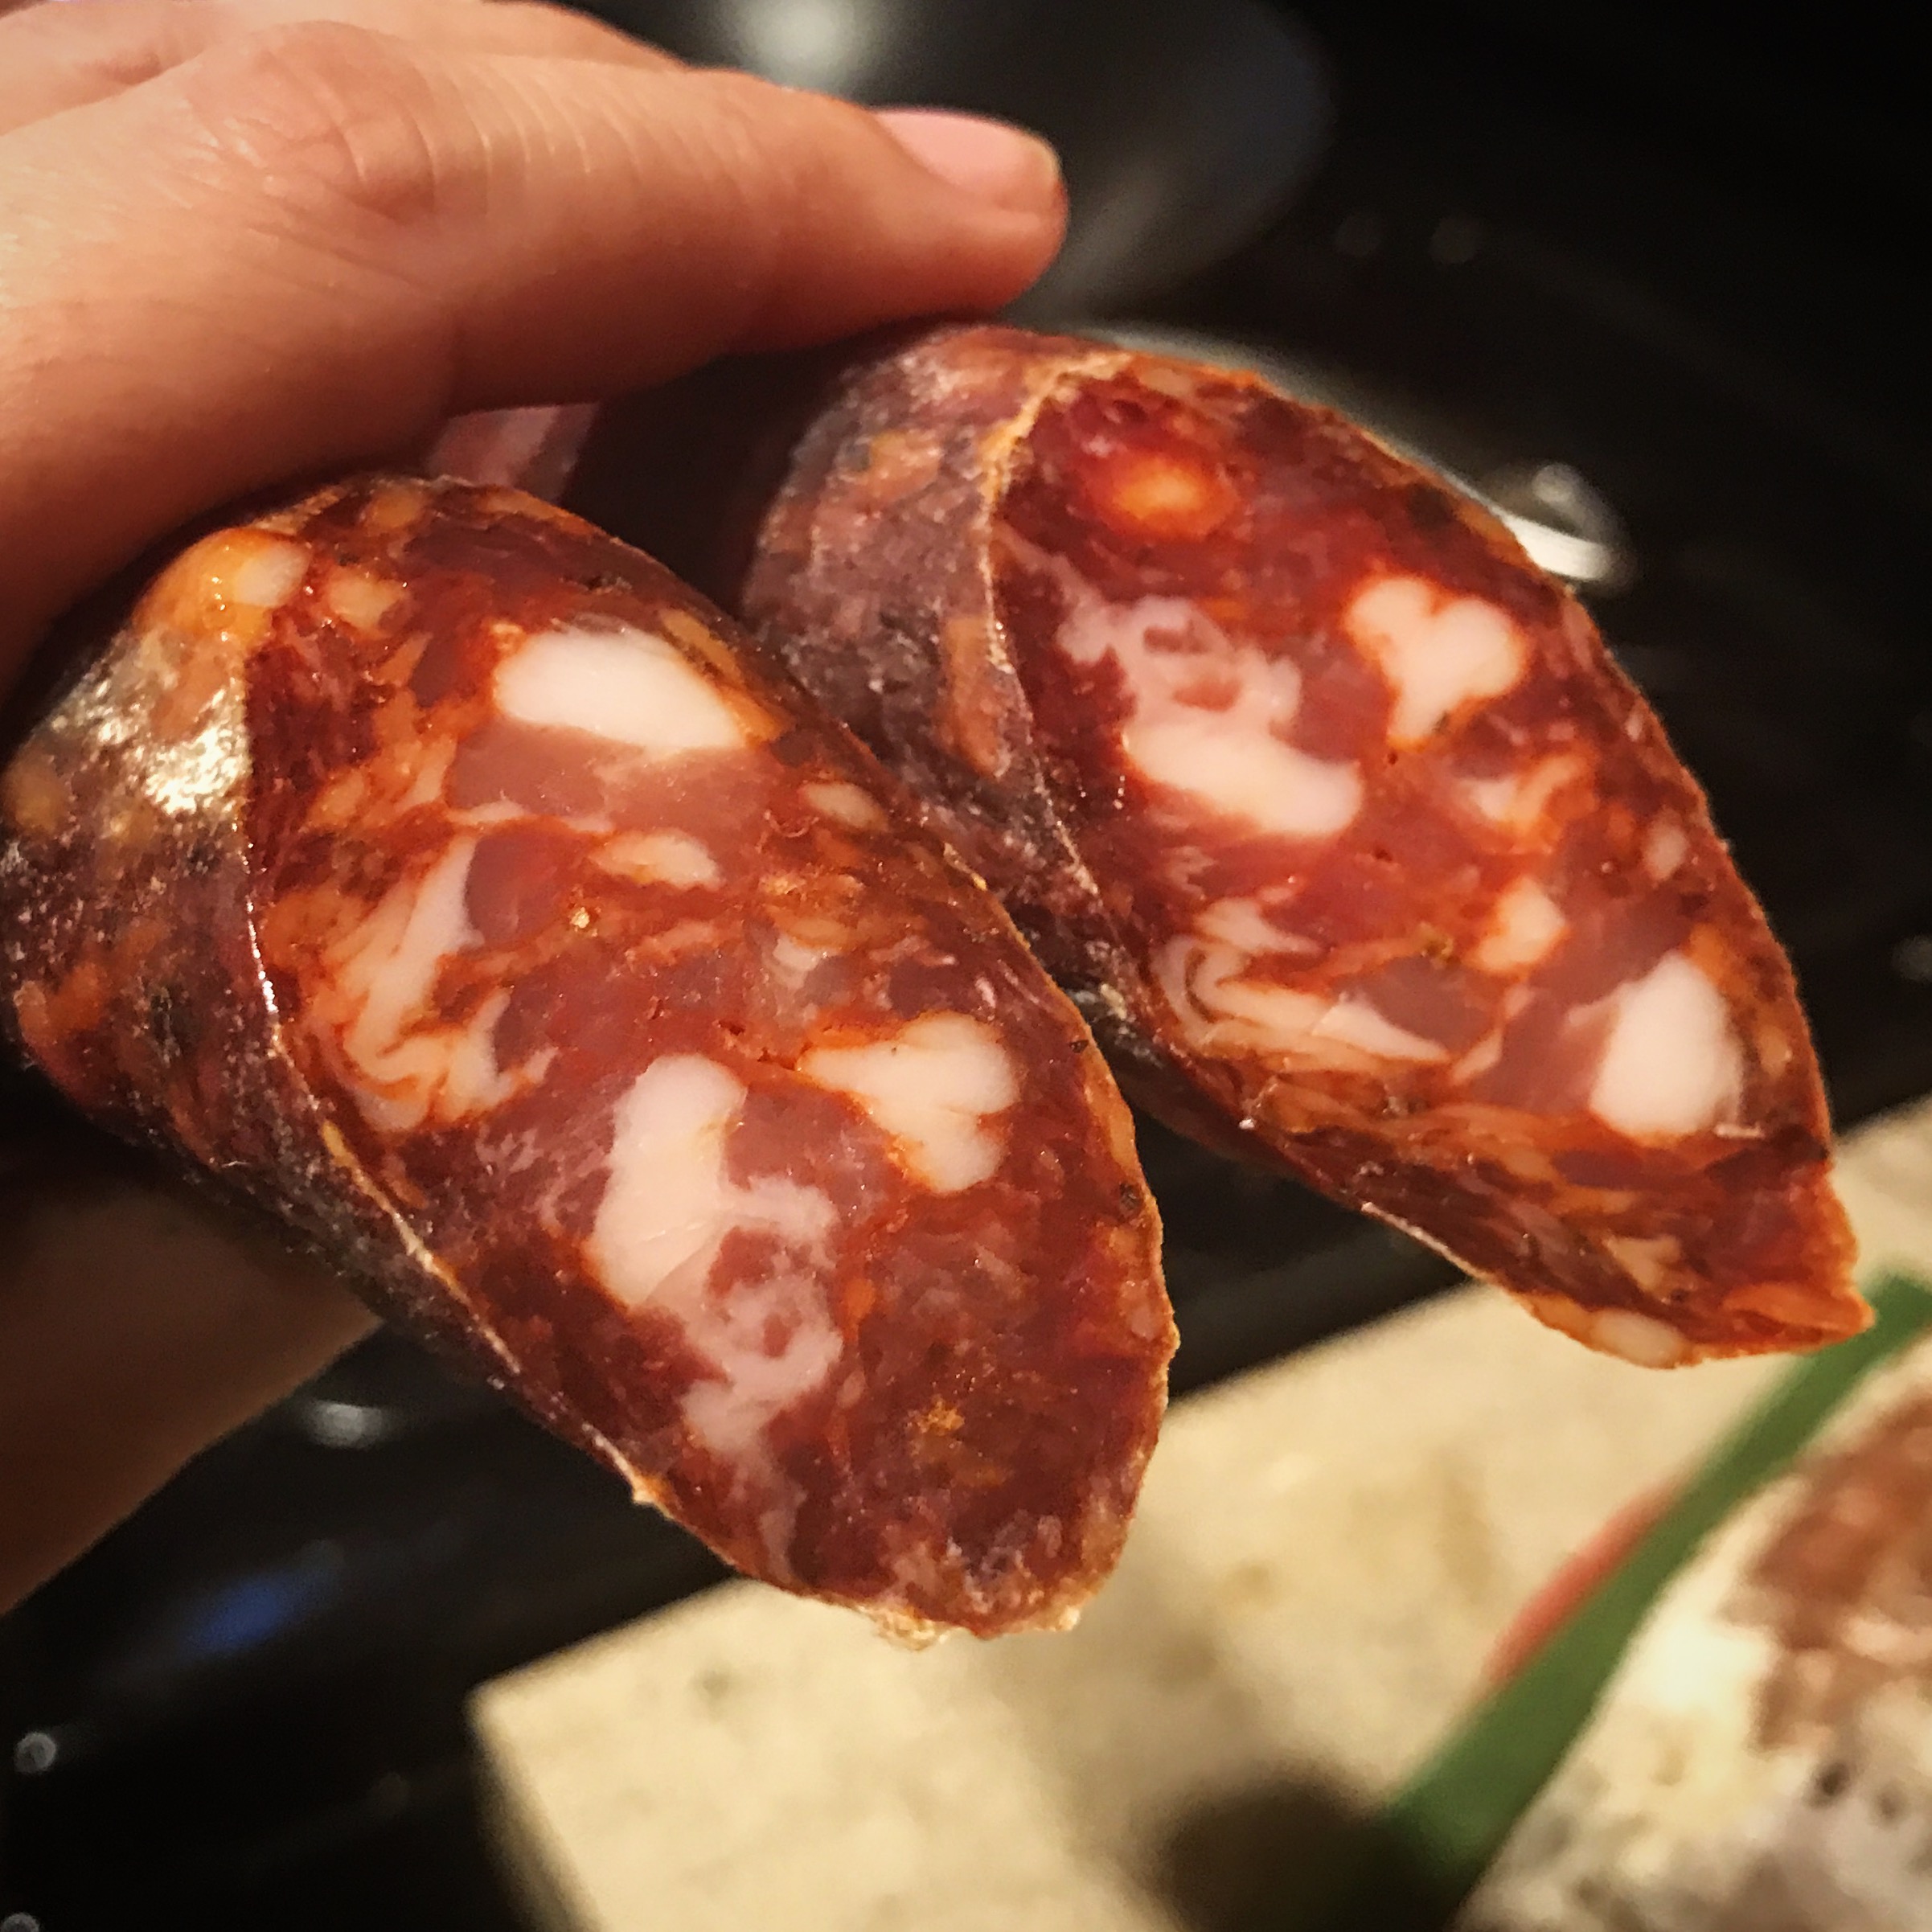
I personally preferred the non-smoked, but others who tried it preferred the smoked. I think it’s one of those things that is up to personal tastes.

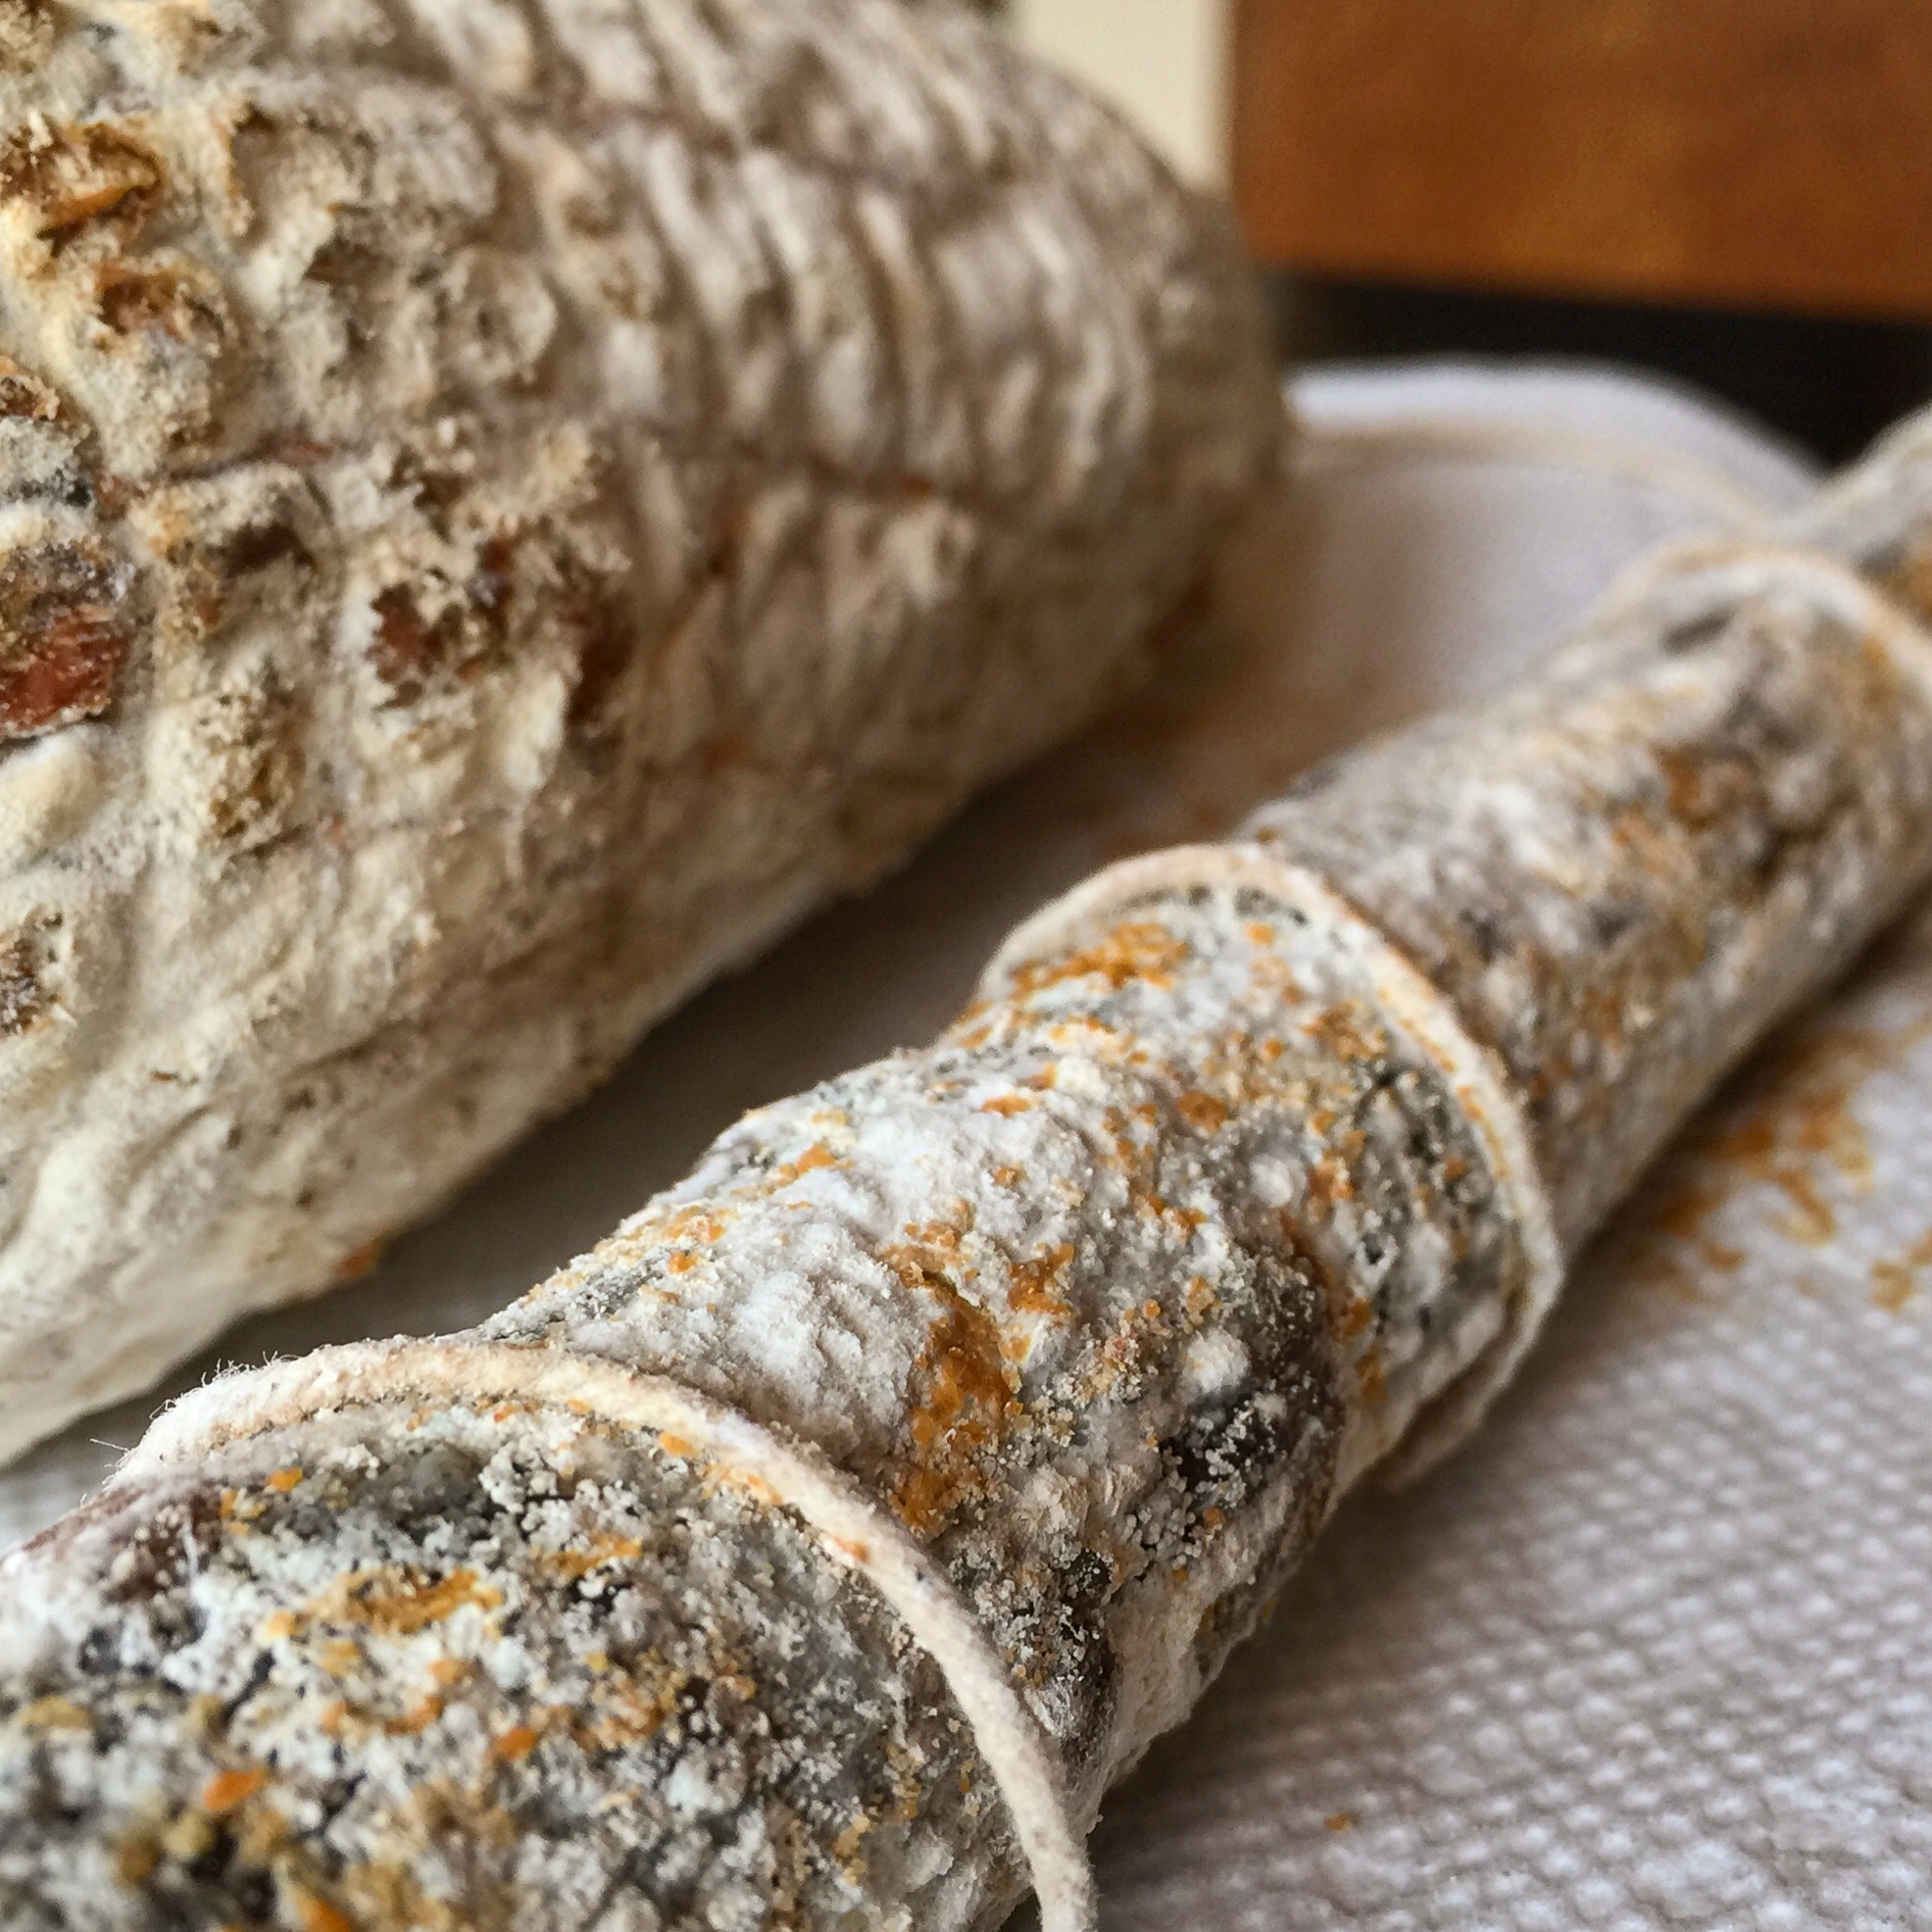
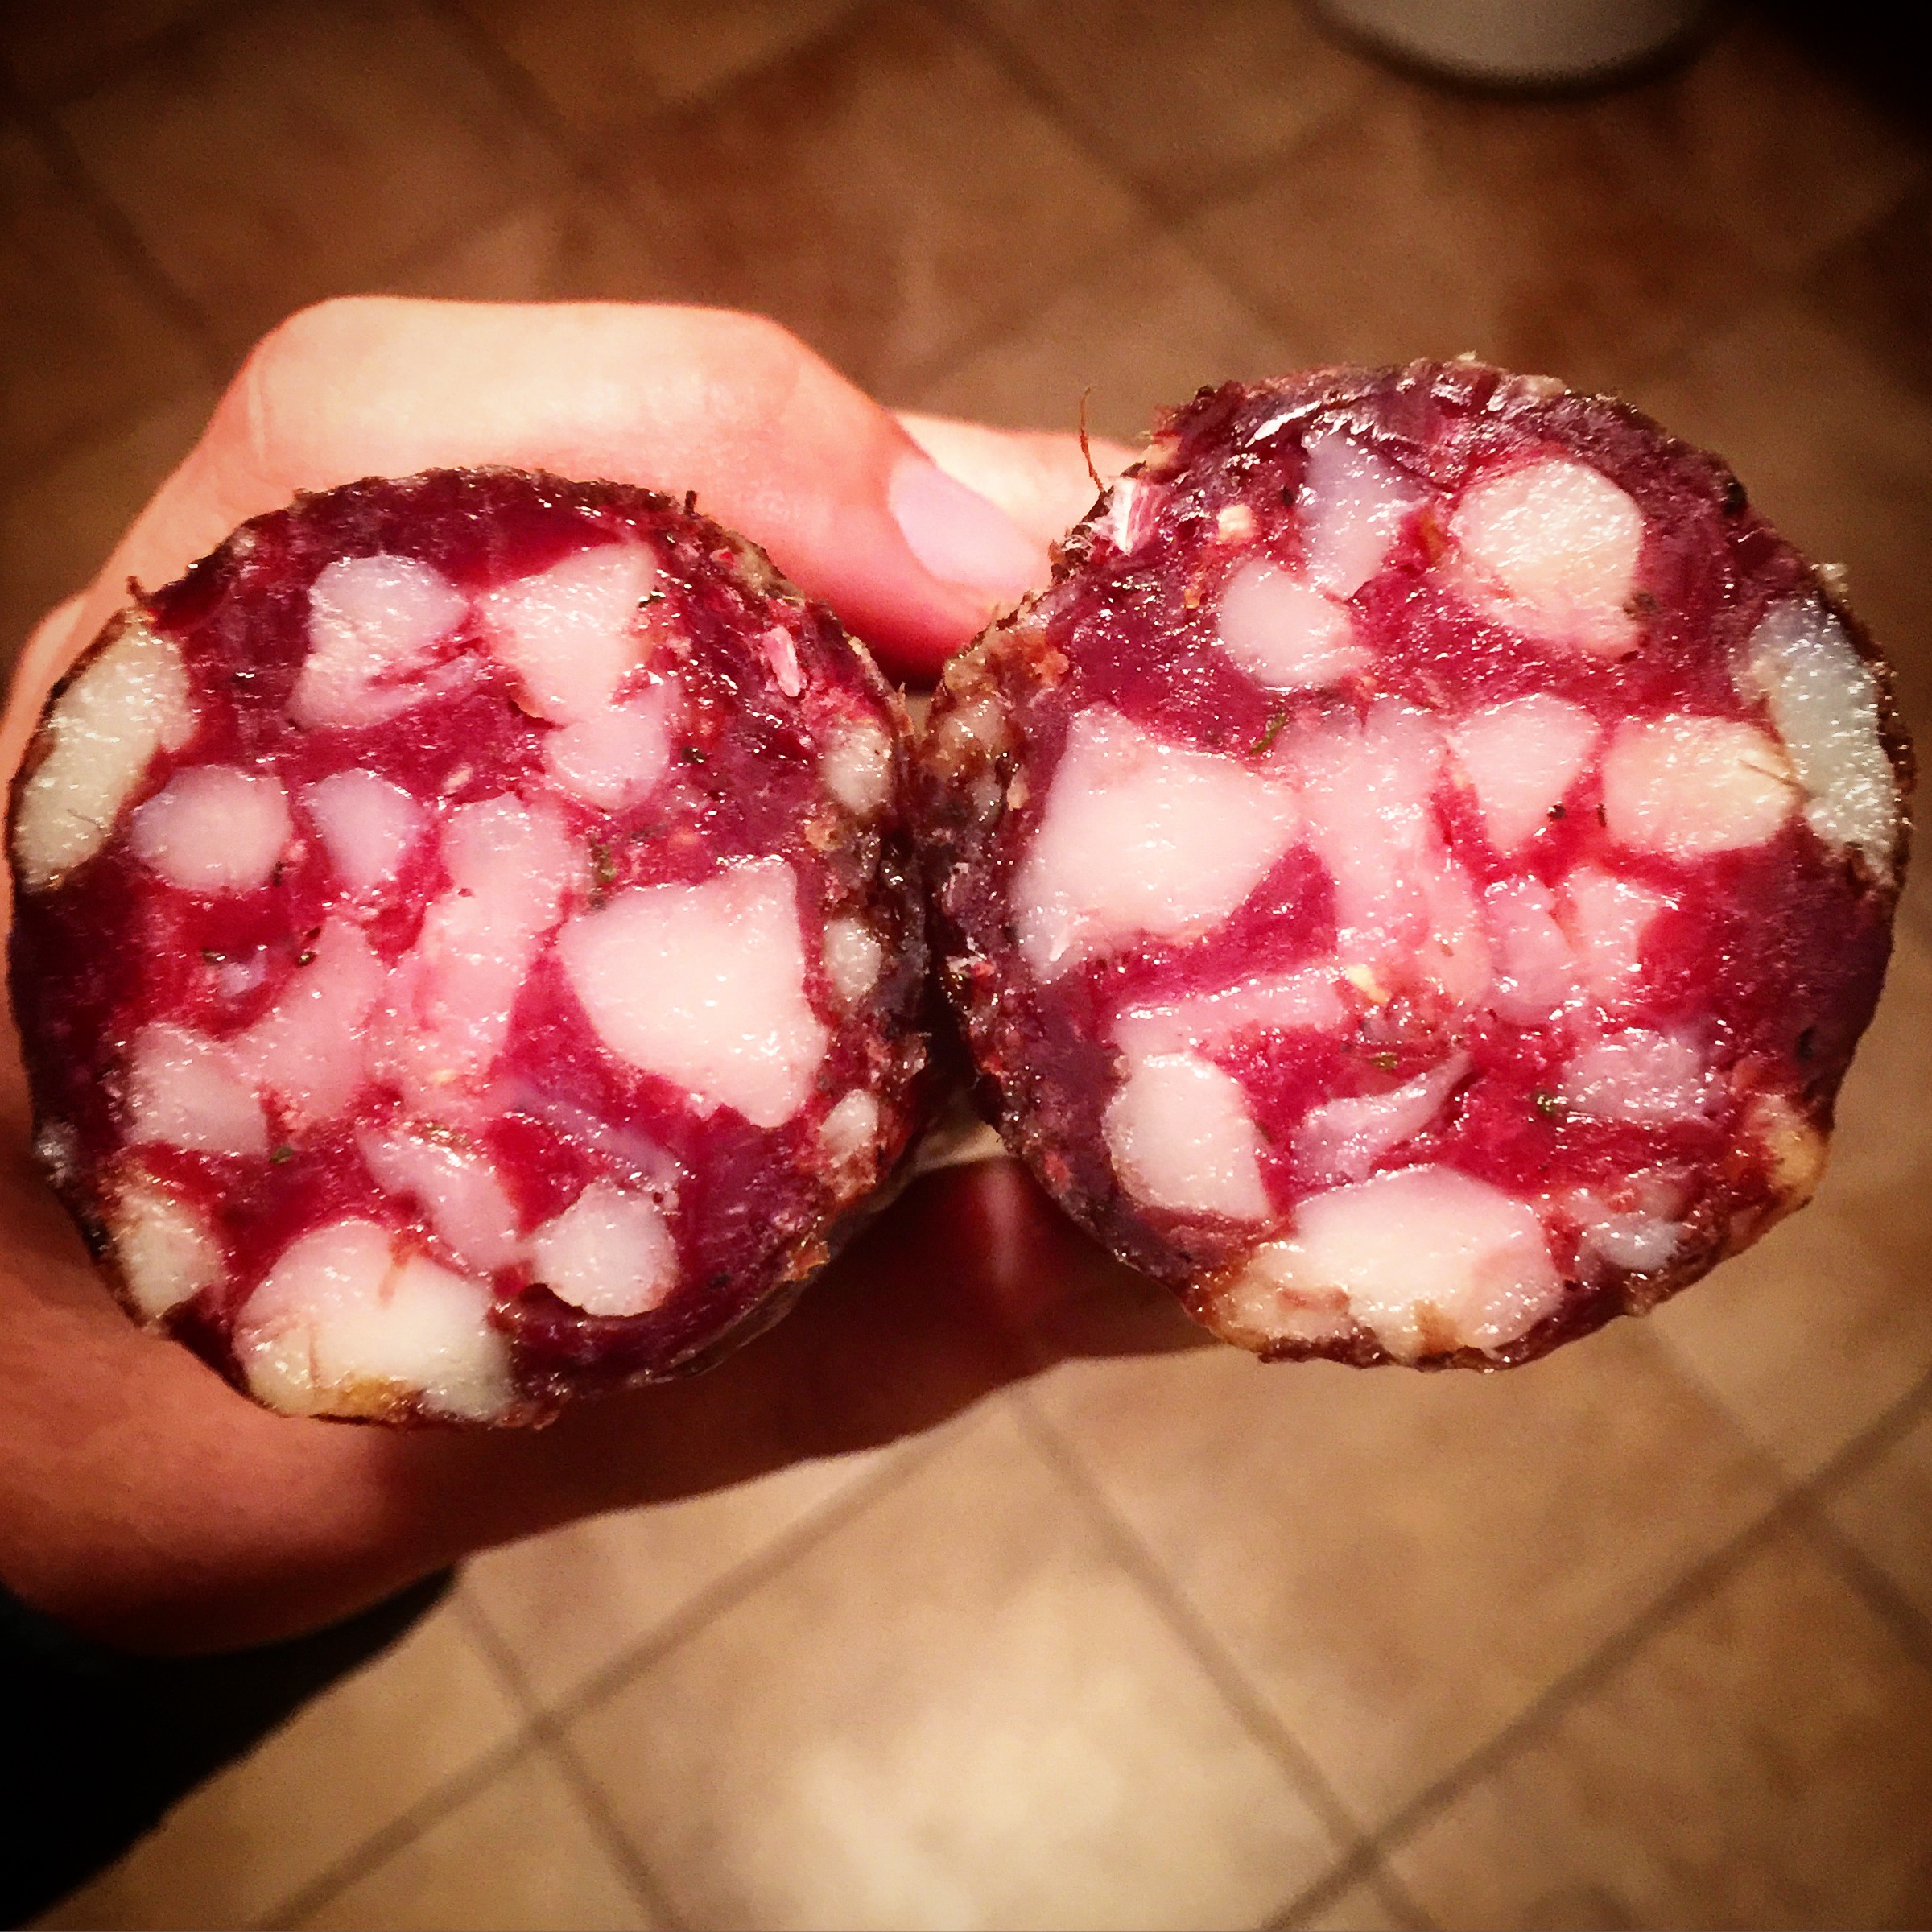
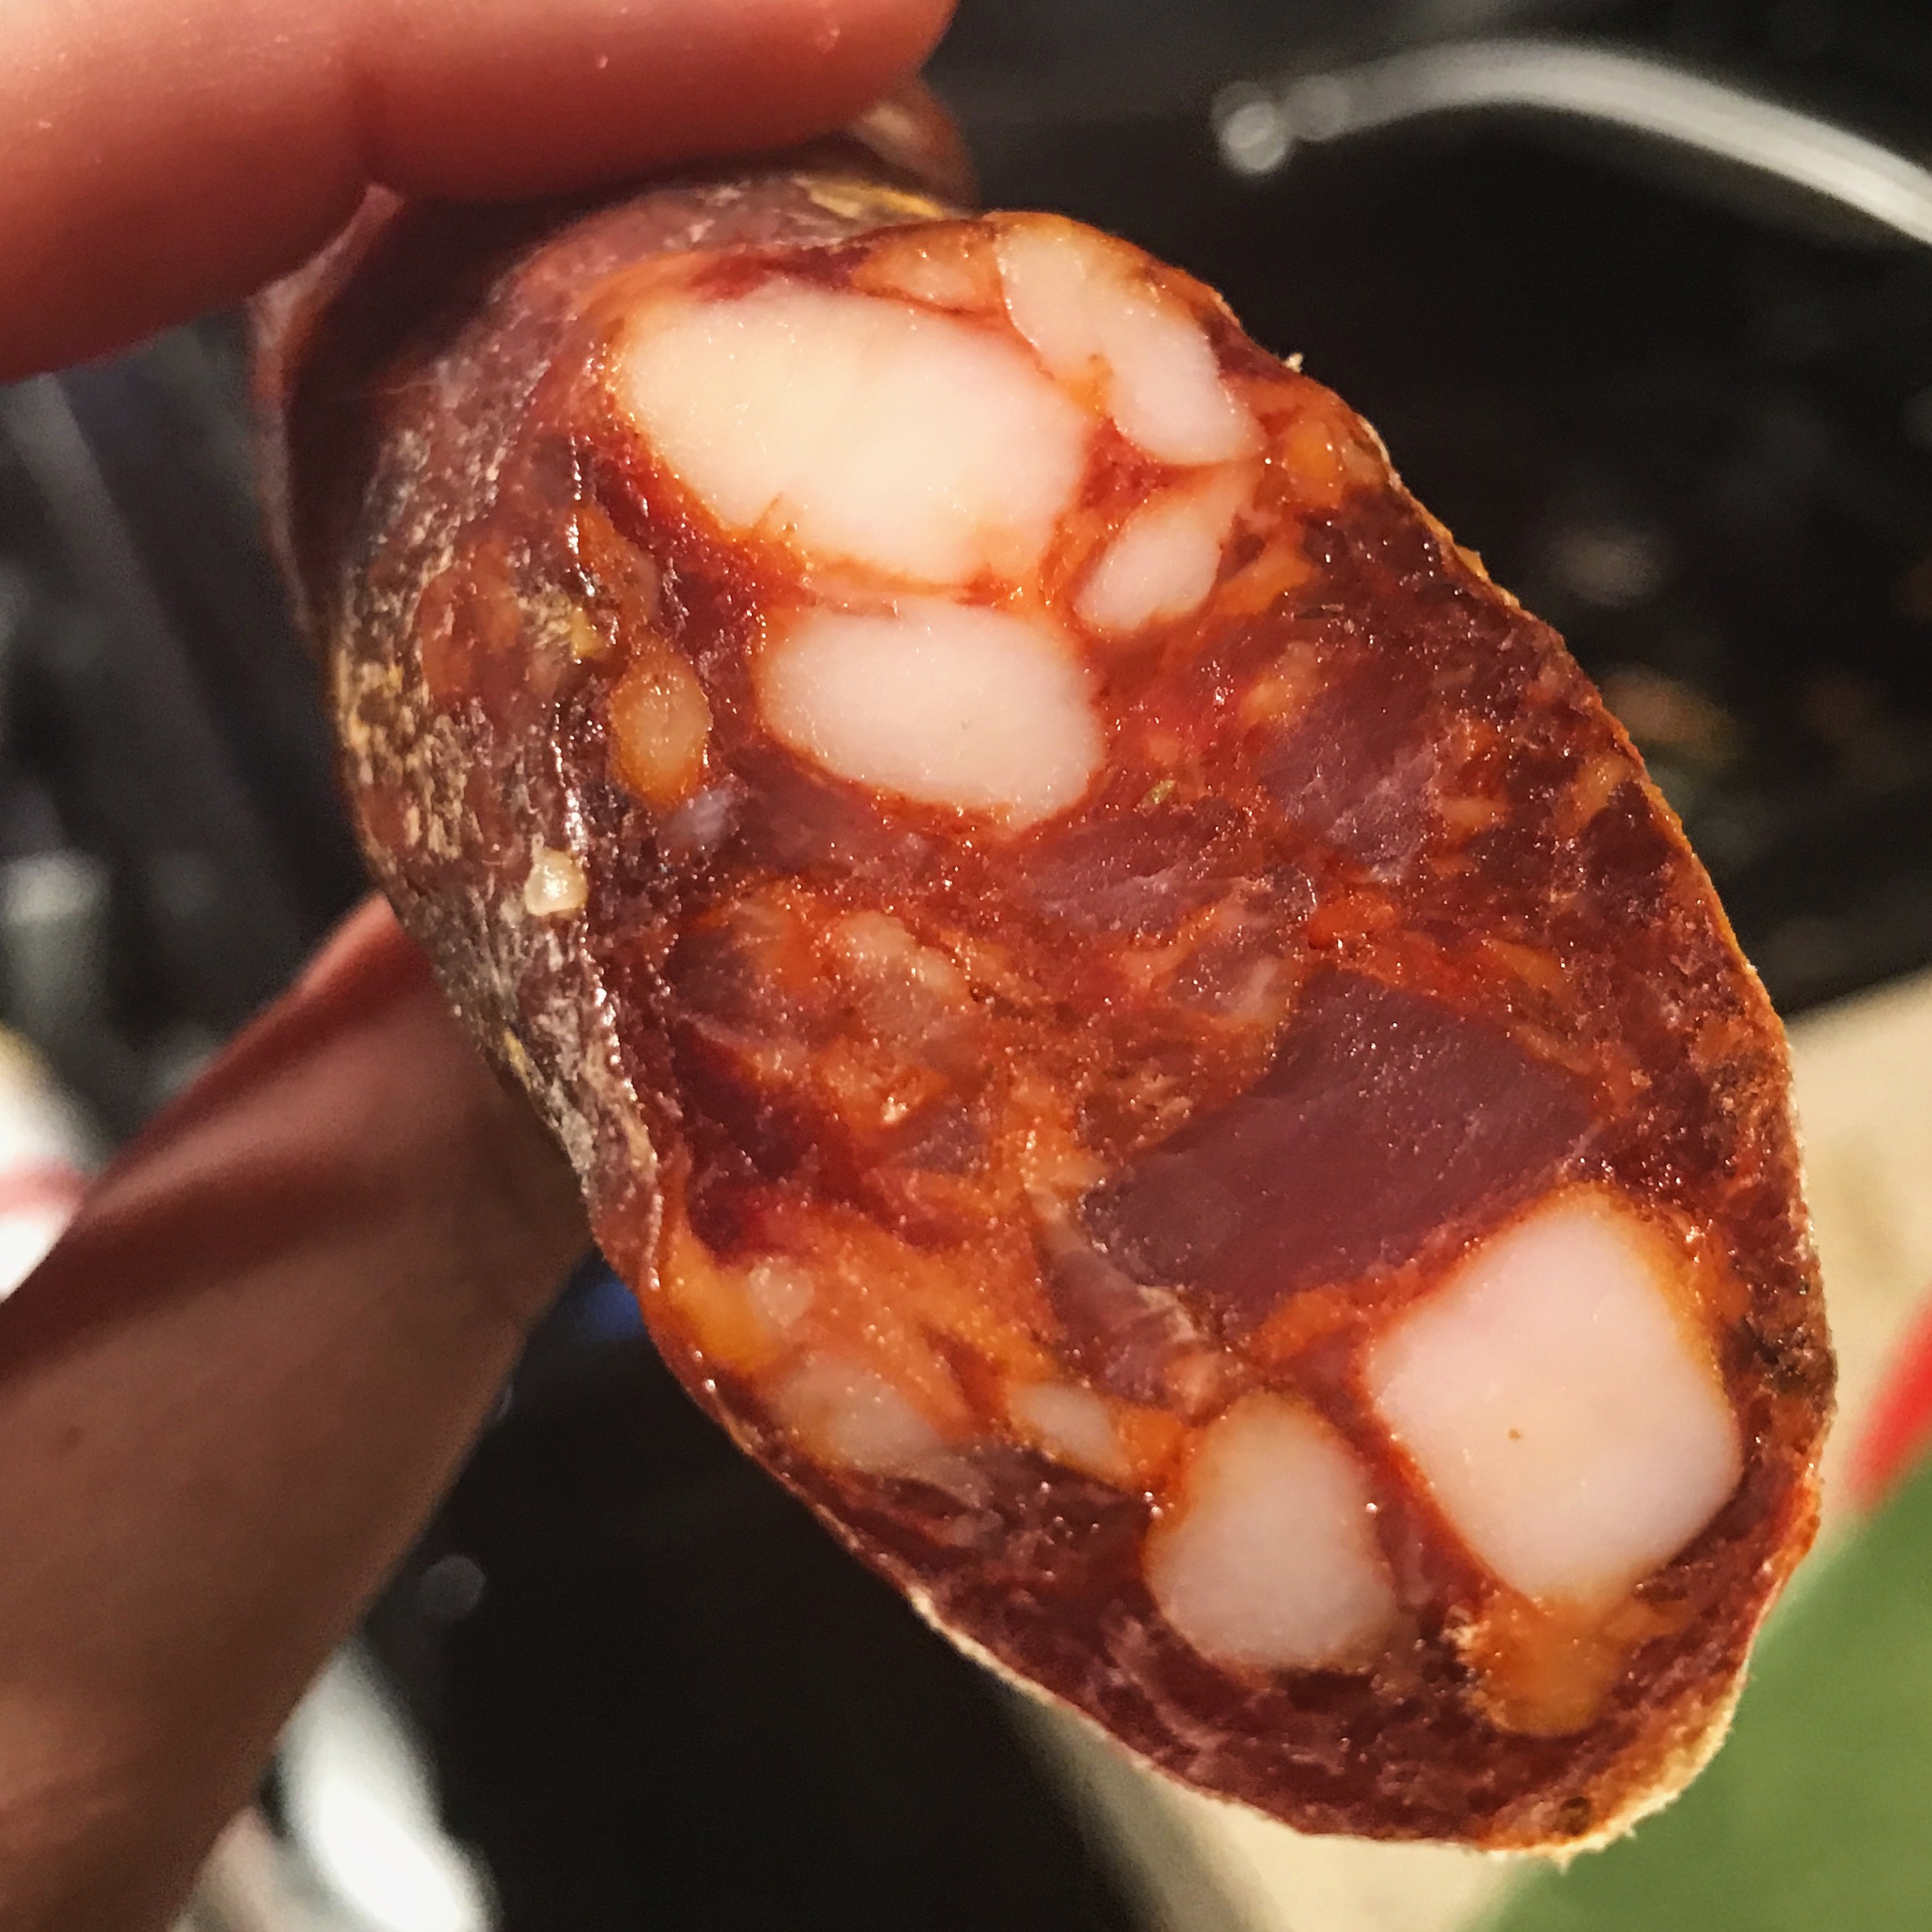
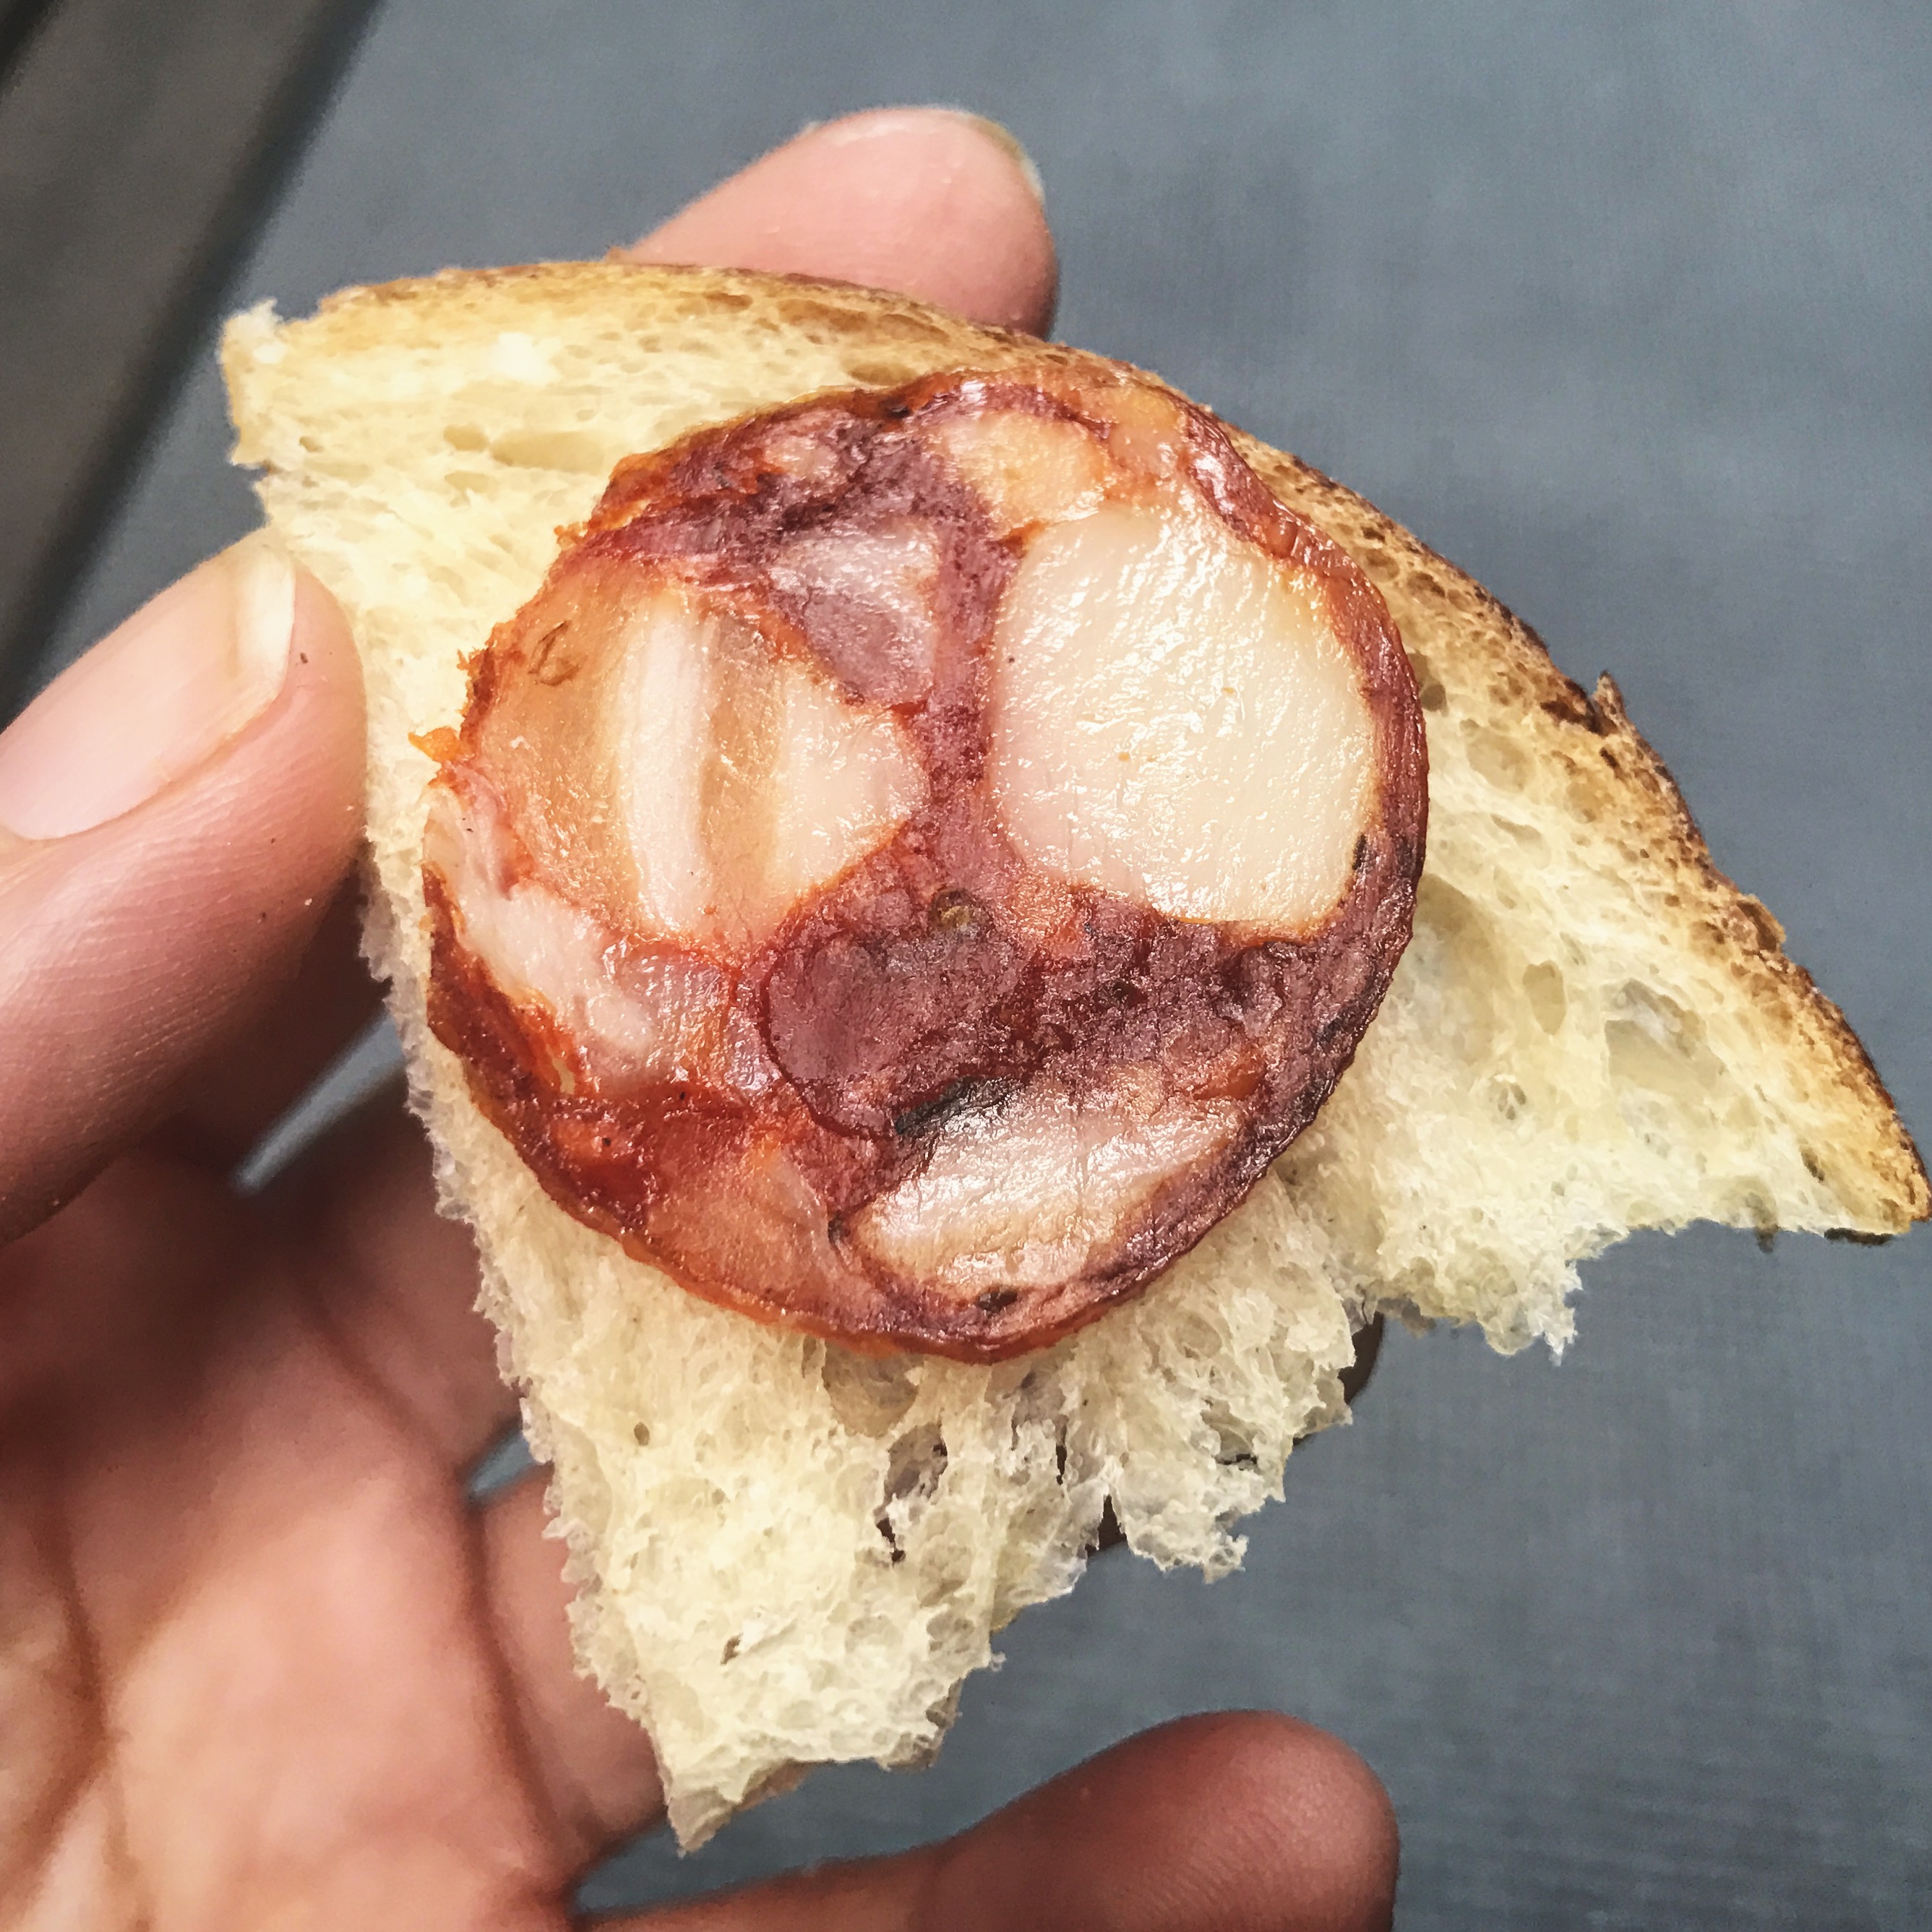
After the larger diameter salami lost the appropriate amount of weight, I pulled it as well. This one was great!

IMG_3331

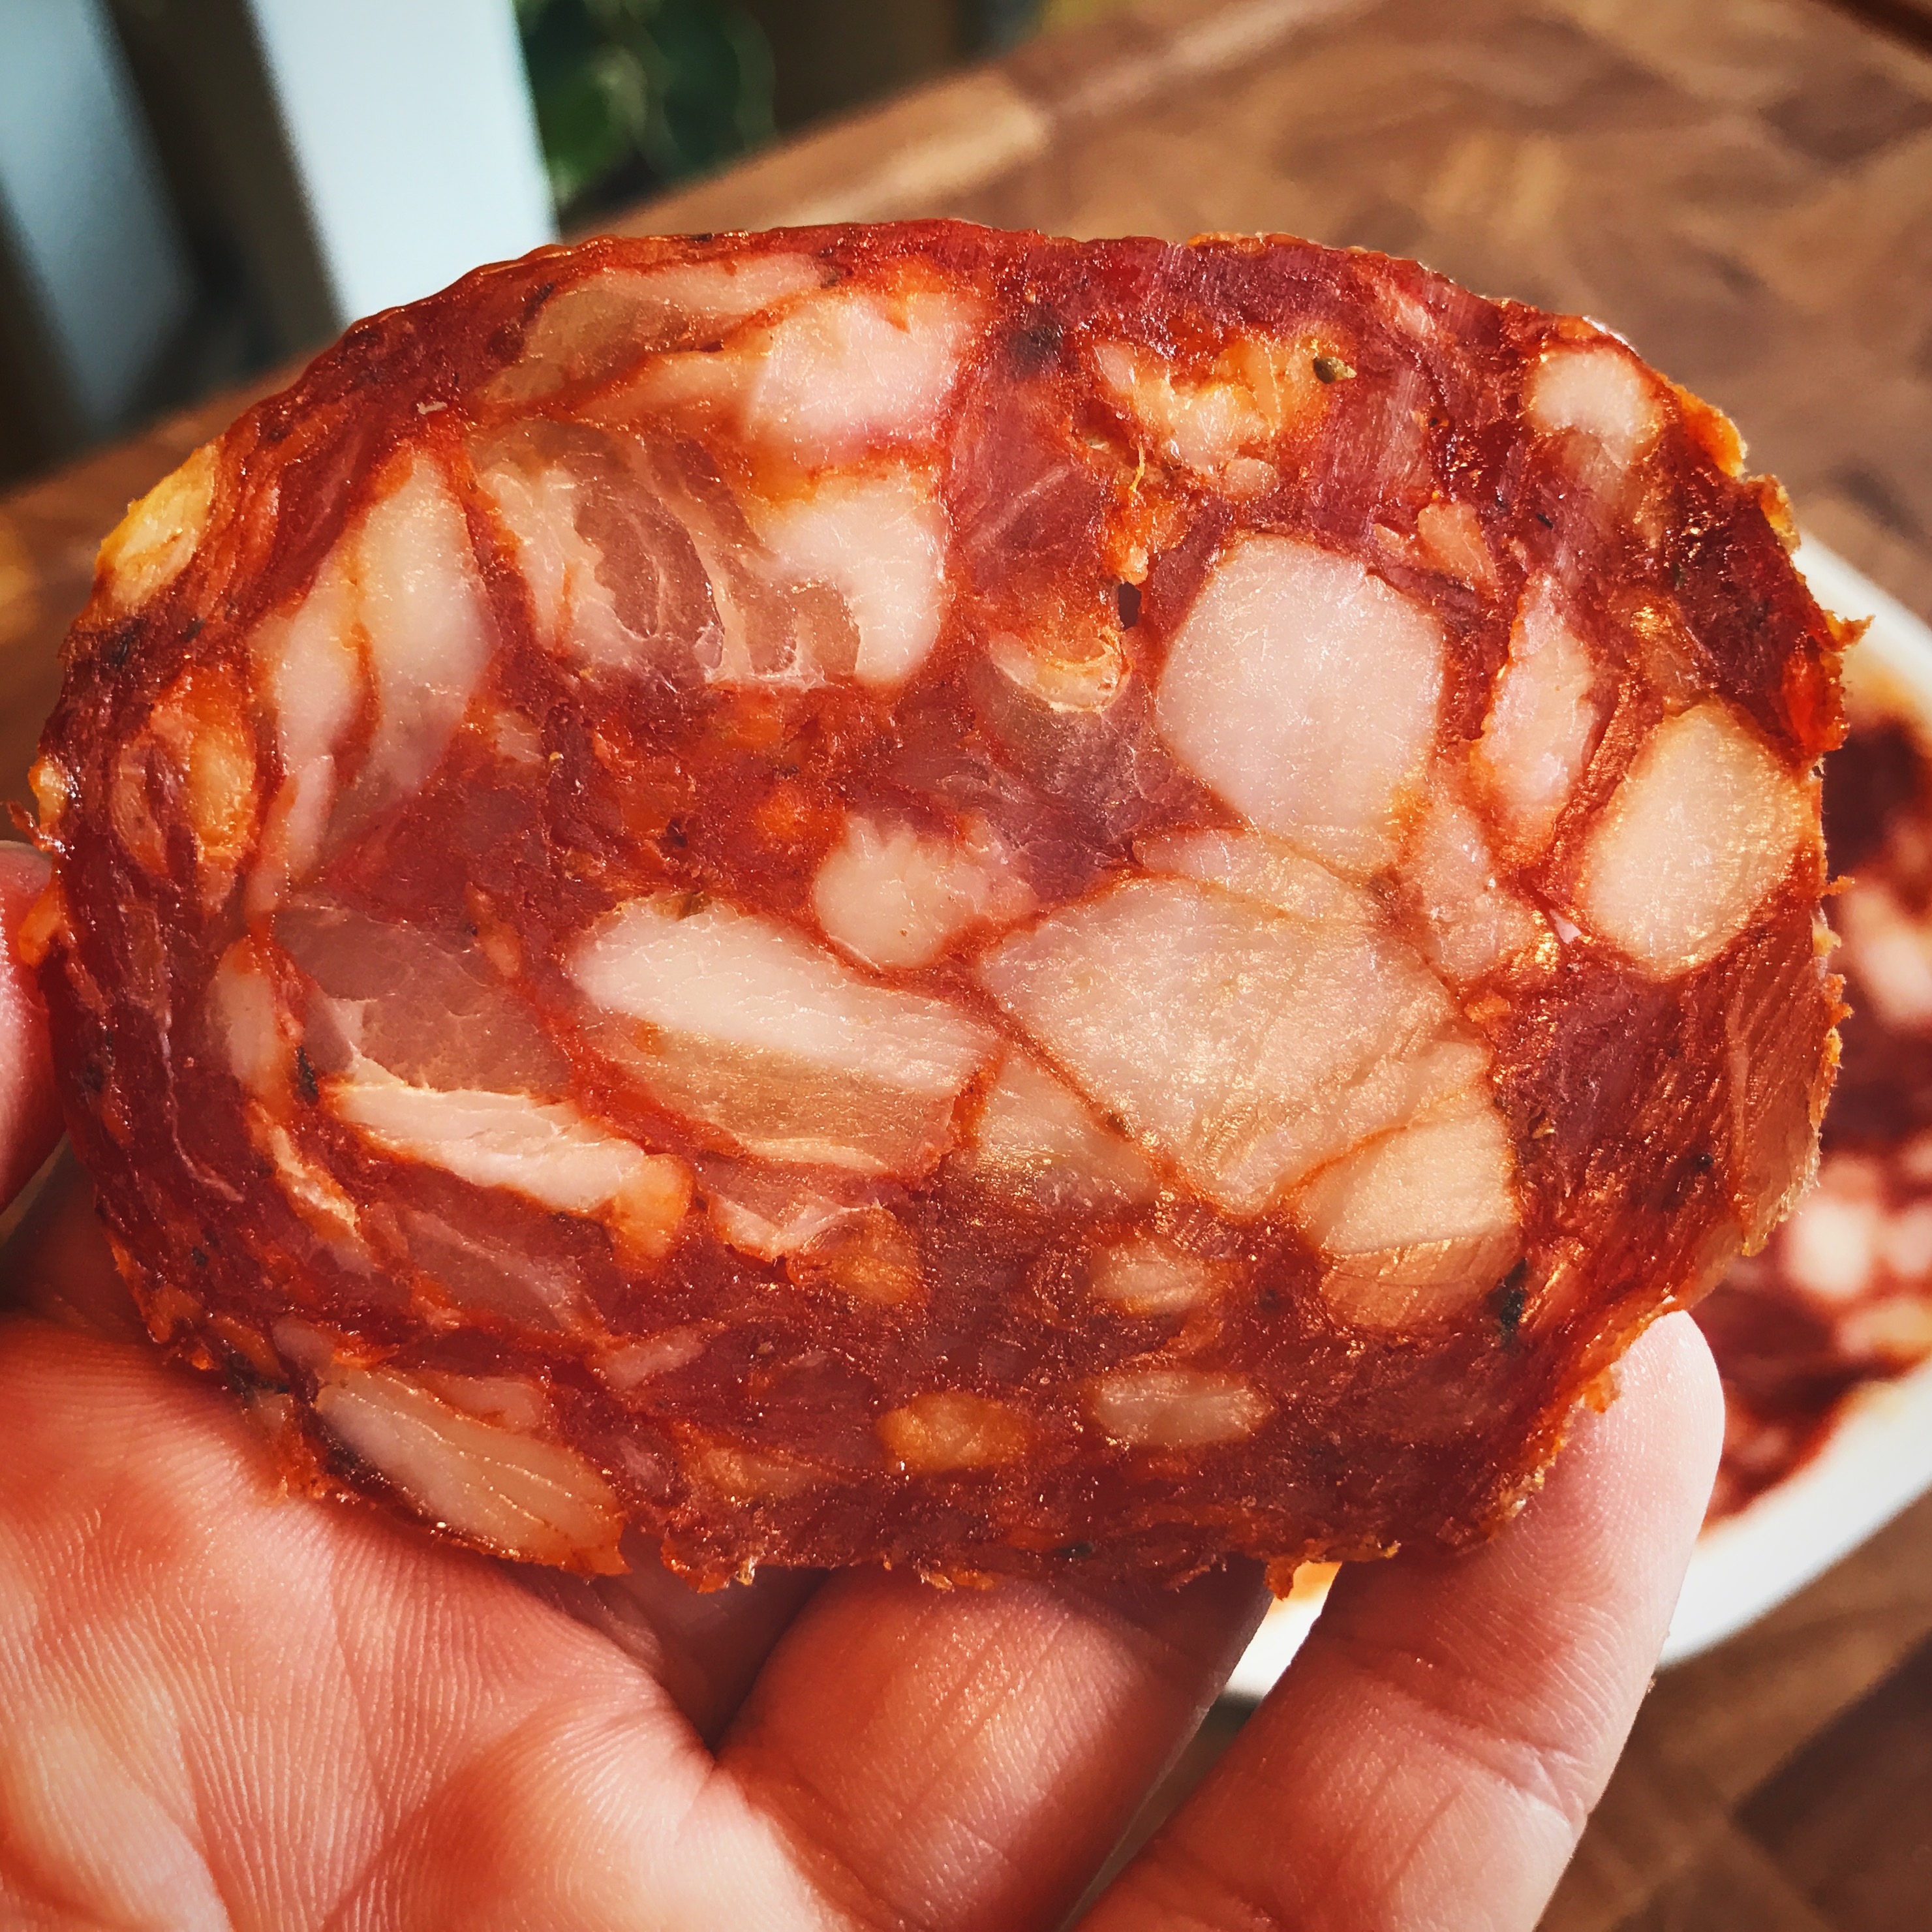
Nothing was different in this one except for the diameter of the casing, but I liked it a lot more. Maybe just because I could slice it thin and really taste it, but WOW; this is an all-time favorite.

IMG_3332

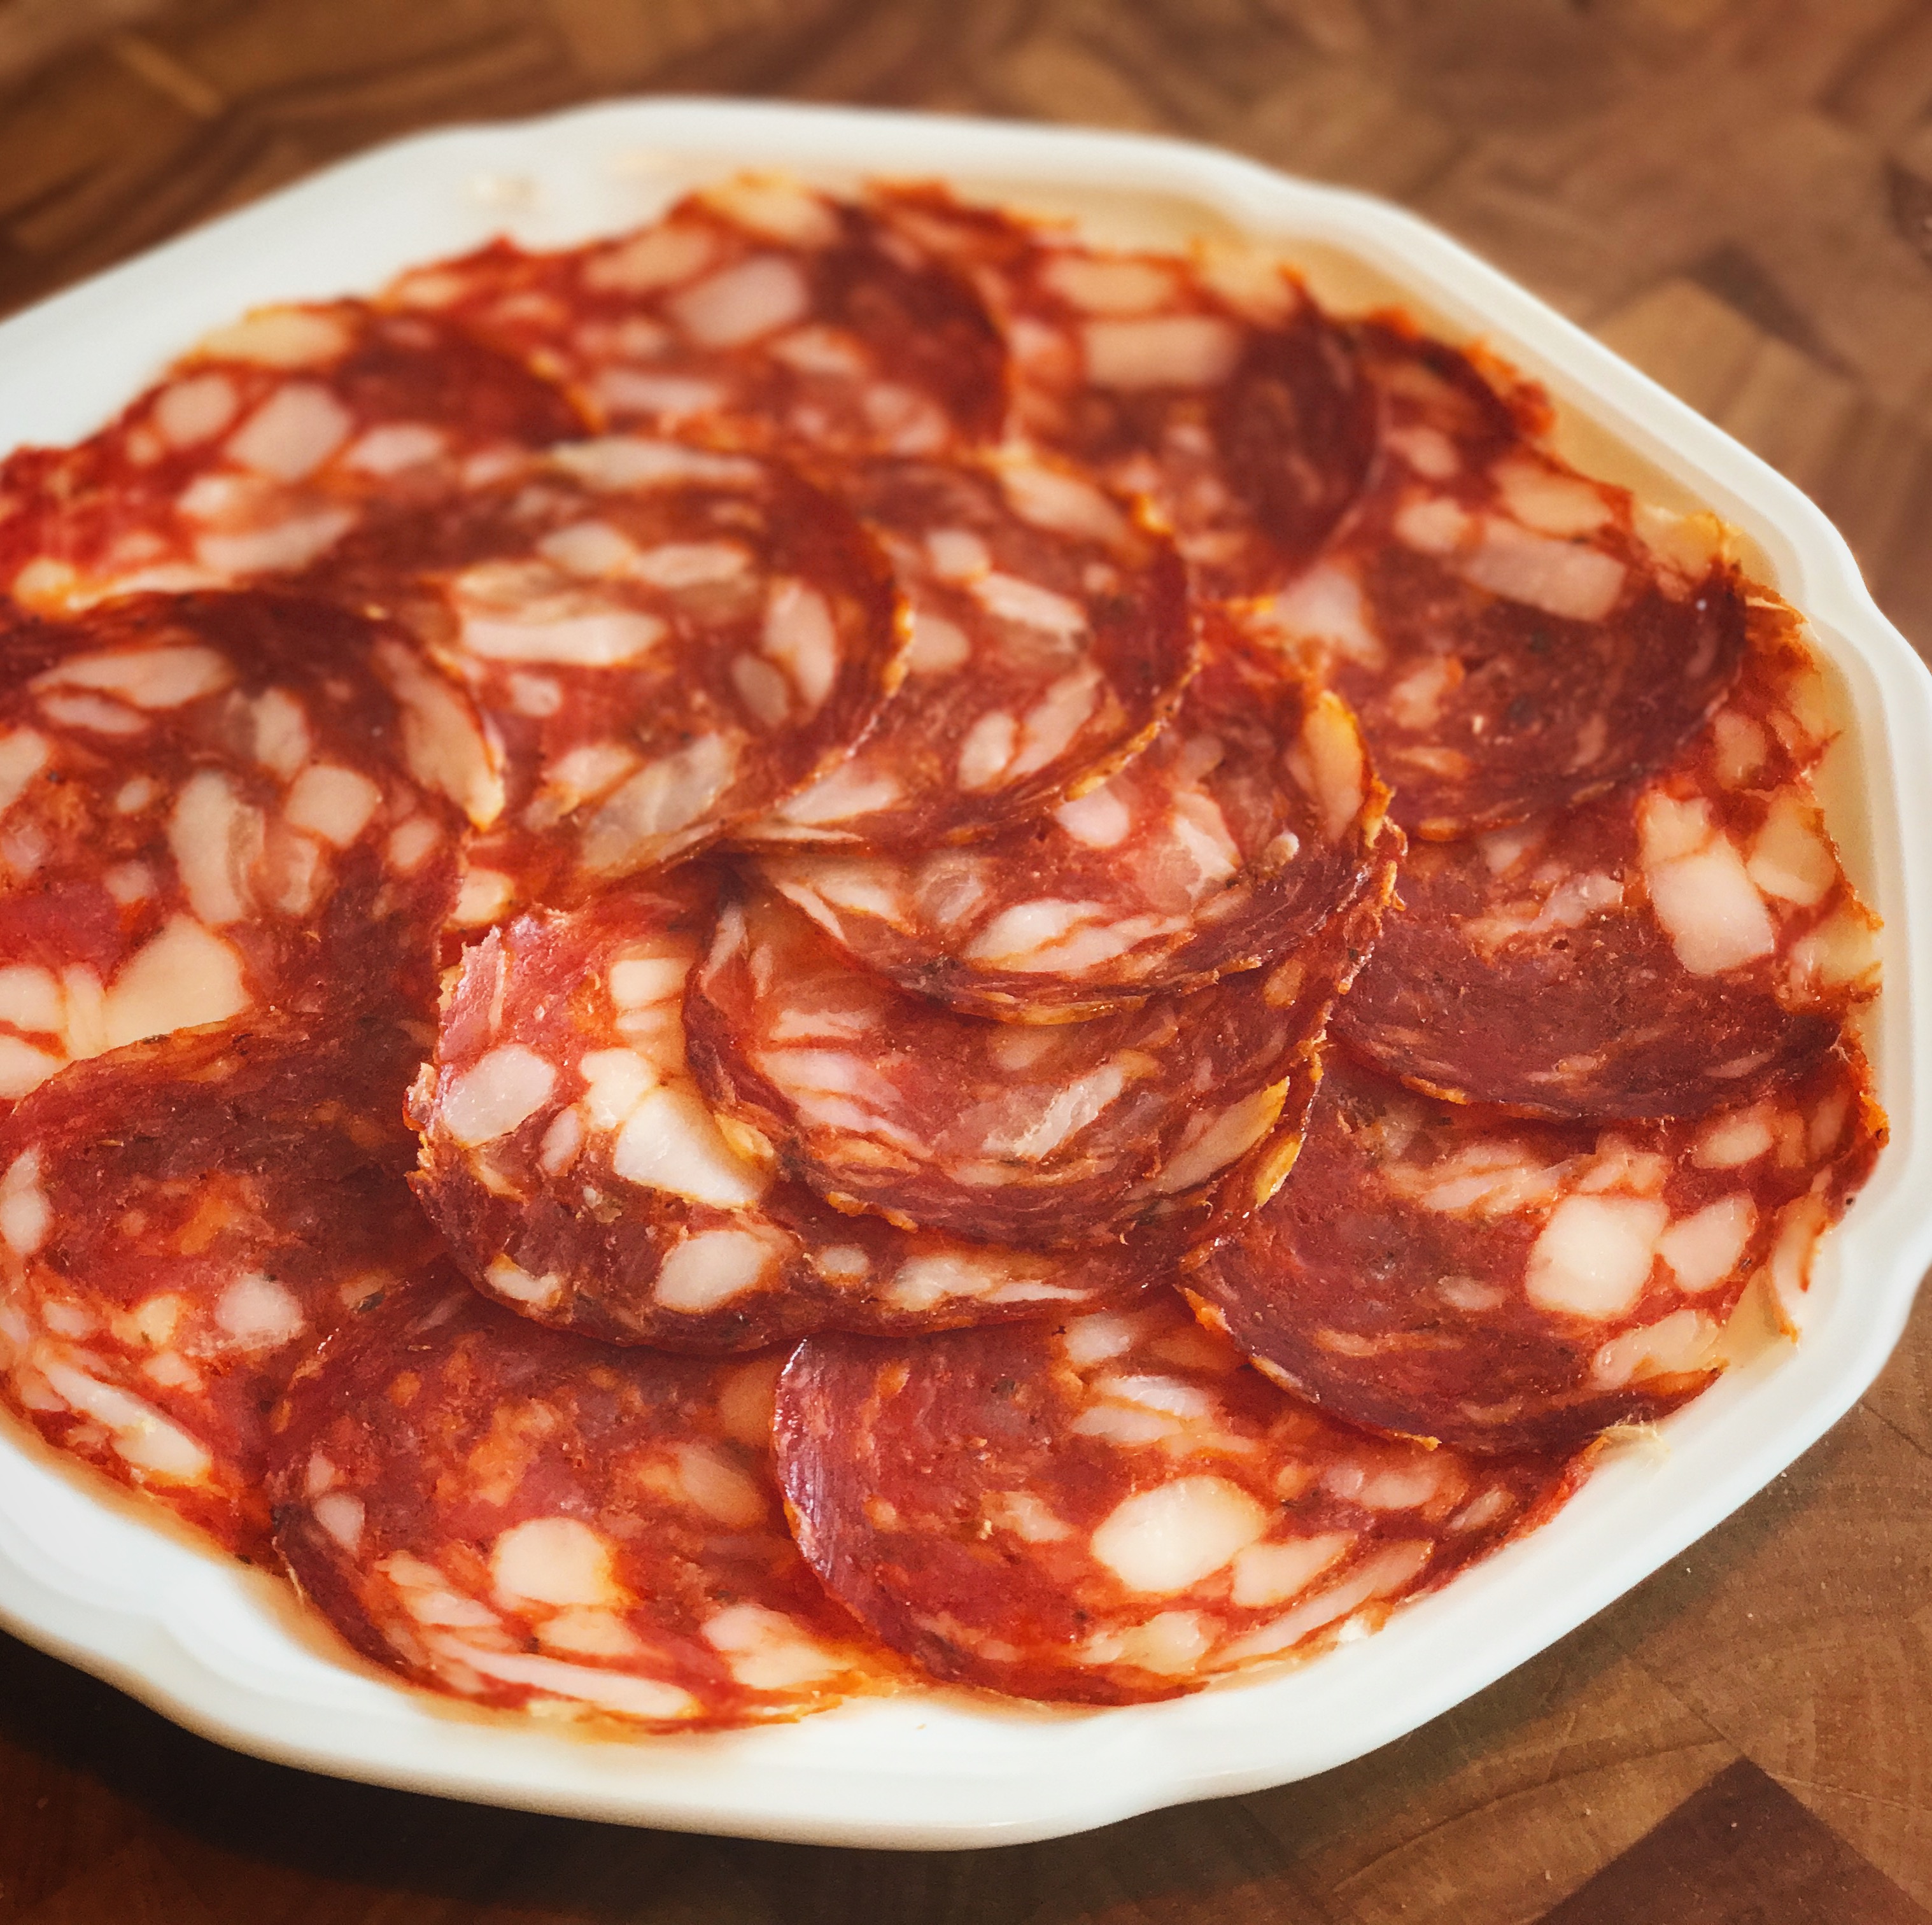
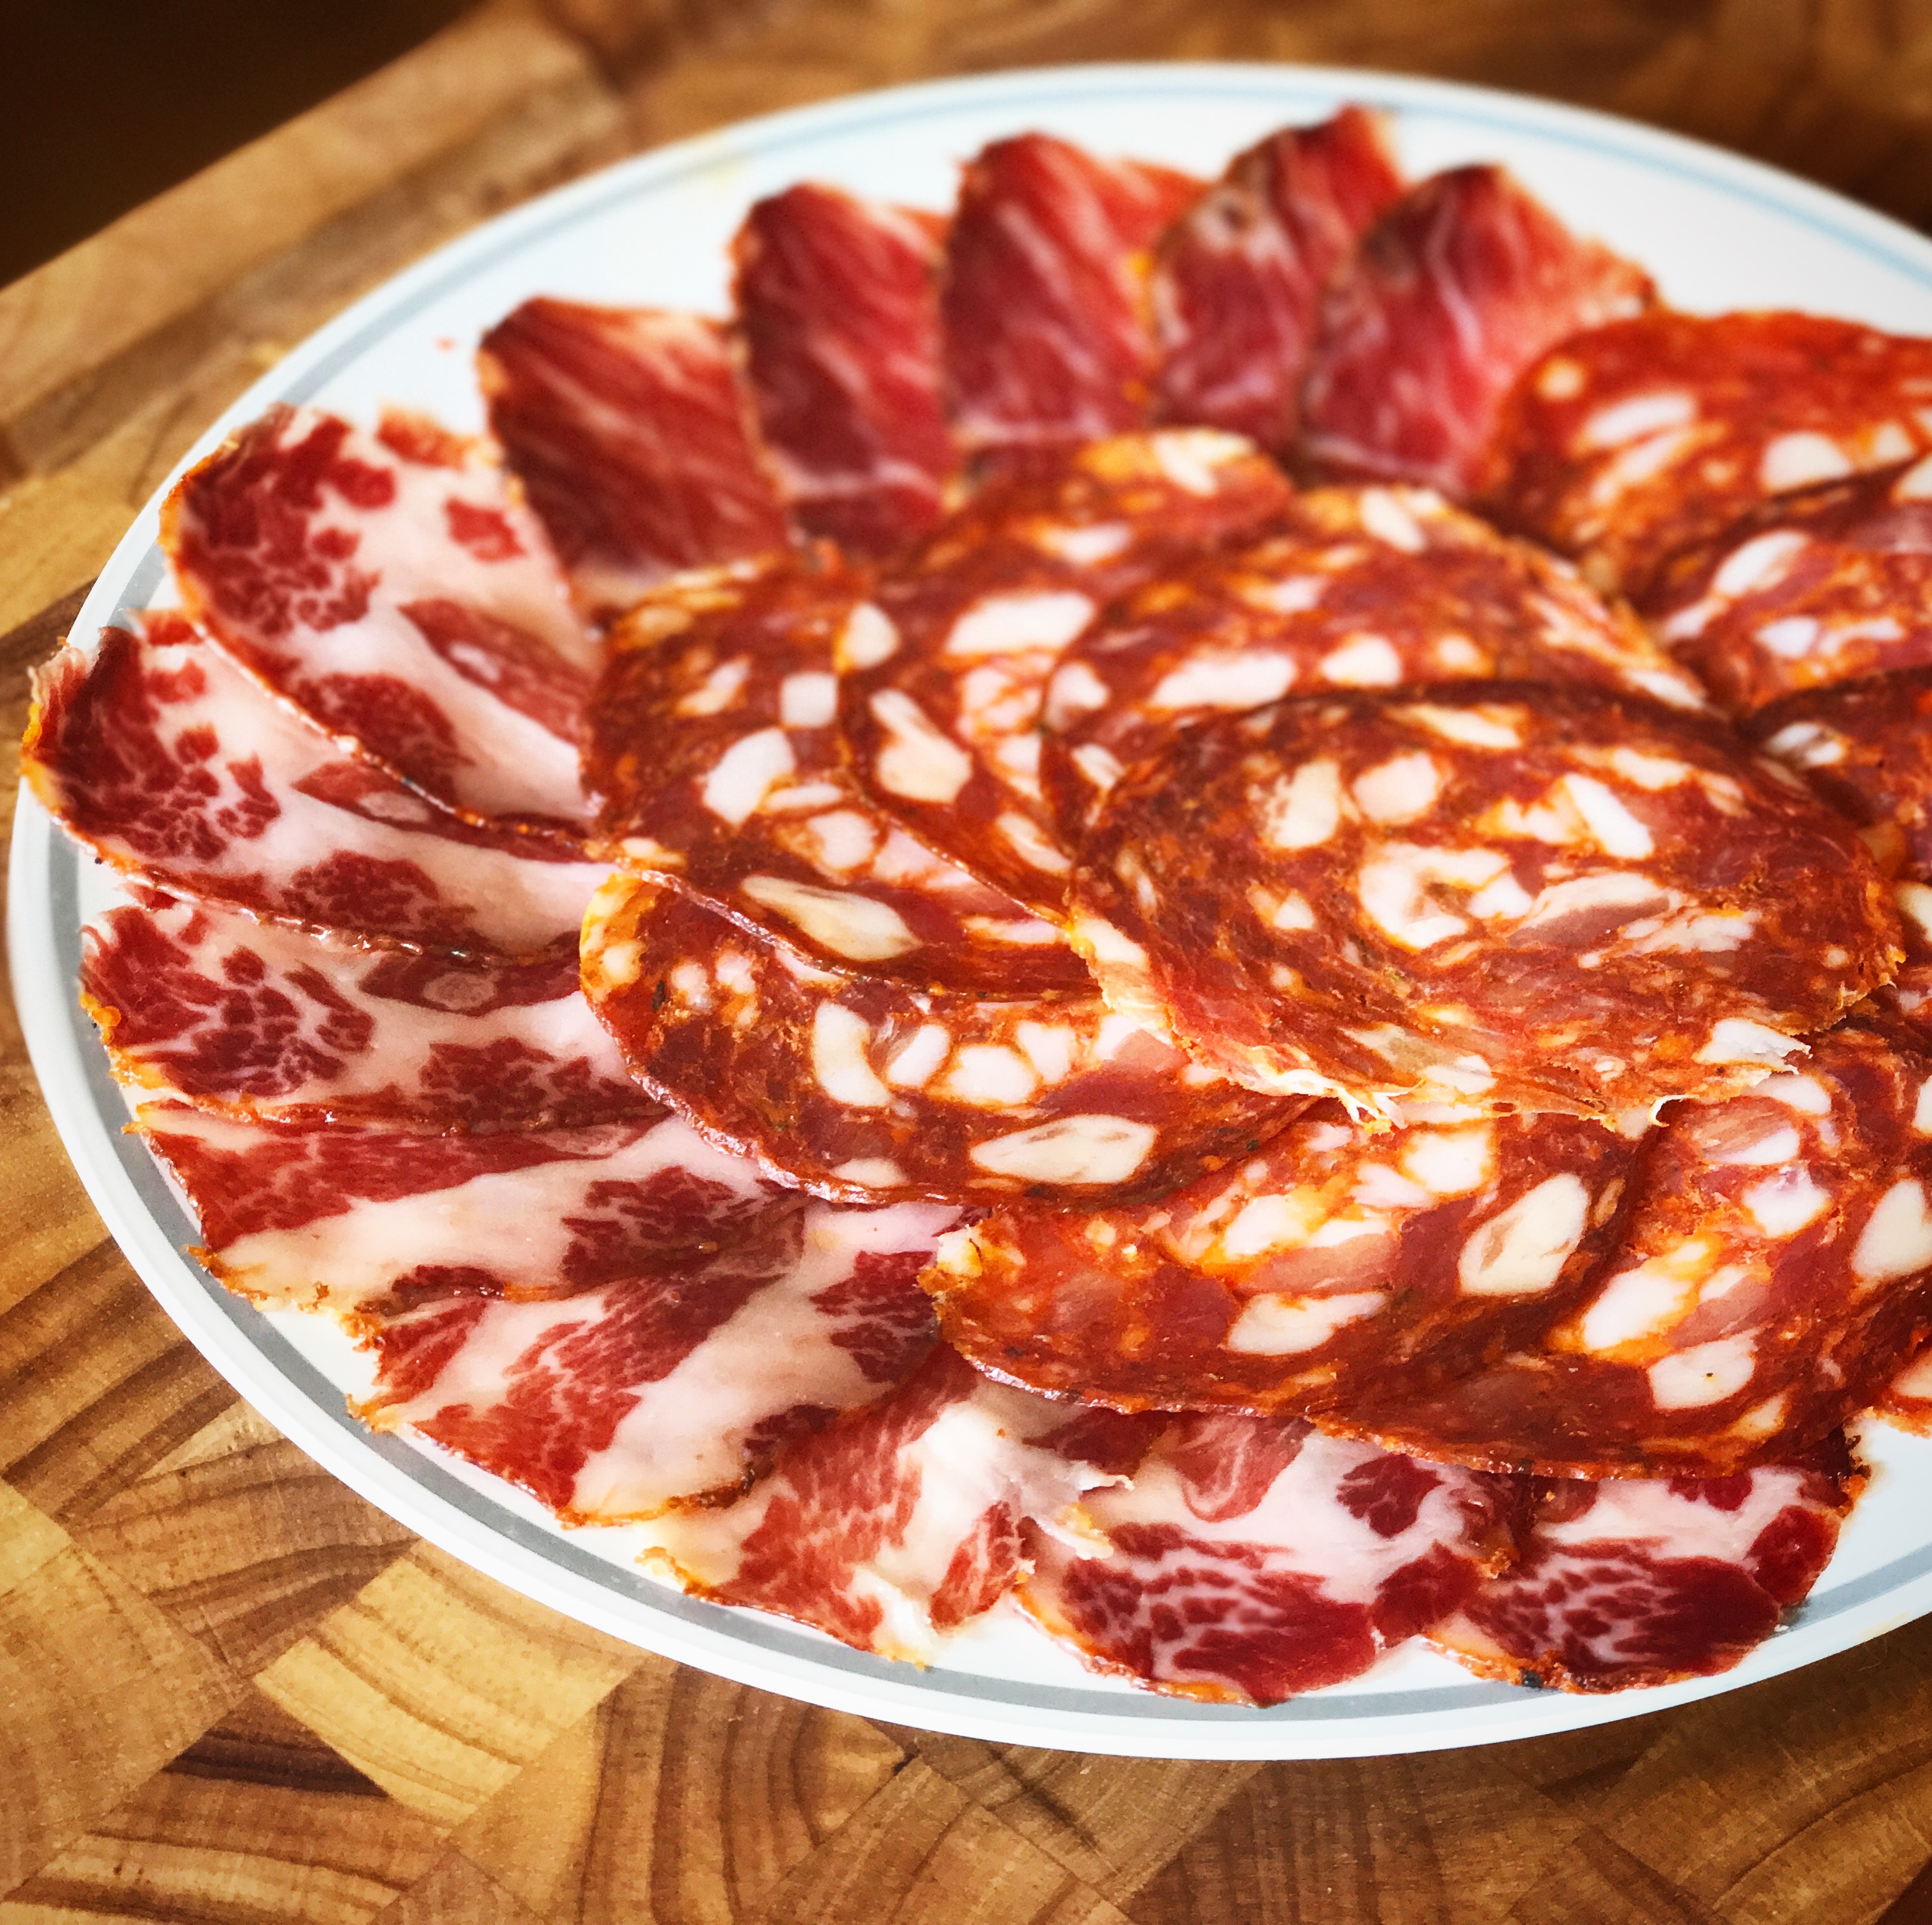
This chorizo is great served in a platter with other meats, on bread, or with wine.

IMG_5931

IMG_8766

IMG_3377


Disclaimer: Meat curing is a hobby that comes with inherent risks. We can all do things to limit this risk by educating ourselves about the process and the utilizing the safest known methods to create our products. This website is for educational purposes only, and all experimentation should be done at each individuals own risk.


Filed Under: Charcuterie Tagged With: charcuterie, chorizo, cured meats, curing, diy, homemade, recipe, spanish style chorizo

Duck Salami

March 14, 2016 by AOG 13 Comments

Duck salami, or salami d’anatra, is a project that I had been wanting to tackle for a while. Duck salami itself isn’t easy to find commercially, and even the duck salami that is found in stores and restaurants tends to use pork fat. I was looking to create a pork free product, for those who keep kosher or halal, so I debated a number of different sources for fat, before deciding to do a 100% duck salami.

I love duck fat, so the taste of it was a huge pro for me. I also like the way that duck fat melts in your mouth, another pro. My main concern about using duck fat in duck salami was working with the duck fat at room temperature. I have seen a few different values given for the slip melting point of duck fat, but the most consistent value seems to be around 77F/25C. I made sure to do all of my processes at around 70F/21C, worked fast, and I utilized the freezer to make sure everything stayed cold.


Planning Phase:

I bought 4 duck breasts to use for this project. Before I started, I put them in the freezer for an hour or so to get them nice and cold. I cut the fat away from the meat, and I weighed the meat and the fat separately. Ideally there would be a 70% meat to 30% fat ratio, mine was close enough to that, so I just worked with what I had. I decided to try two different cures, one spicy using calabrese peperconcini and one in the style of duck l’orange.

Below are the cure ratios I used:

image image(1)I weighed everything necessary for the cure, and mixed it altogether (with the exception of the starter culture).


Meat Cubing Phase:

After I weighed all of the meat, fat, and cure spices, I was ready to move on. I cubed both the fat and the meat and kept them separate.

In this case, I mixed the cure with the cubed meat. I don’t always do this; sometimes I wait to mix the cure with the ground meat. I haven’t assessed which method is best yet, and both have worked for me.


Meat Grinding Phase:

After I cubed the meat, I put it back in the freezer to let it get colder again. After an hour or so, I was ready to grind the meat. I had decided to use a course ground on the duck meat, and hand cut the duck fat in order to avoid smearing.

image(7)

image(11)

I ran the meat through the meat grinder, and collected it into a bowl at the end. At this point, I had course ground duck meat and hand cut fat.

image(3)

image(2)

I mixed this with the fat that was hand cut. I also dissolved the starter culture in a minimal amount of water and mixed it with the ground meat, hand cut fat, and spice cure.

If you are in need of a break, this is a good point to stop. You can freeze the mixture overnight, and get started again if the morning if need be.


Meat Stuffing Phase:

Once you have your ground meat/fat/cure/spice mixture it is time to stuff it into casings. I used to use the grinder to stuff my salami, but I have since moved to a dedicated stuffer and it is awesome.

image(4)

I only had one wide diameter casing left, and a bunch of small ones. I decided to make the duck l’orange into a larger duck salame, and the spicy calabrese duck salami into numerous smaller duck salami. I soaked the casings to get them ready to use.

I made sure to mix the ingredients together thoroughly. I put the mixture into the stuffer, and got out as much air as possible.

At this point, I picked the casing, tied off one end, and gathered the rest of the casing, pushing it down around the stuffing horn.

I used one hand to steady the casing around the stuffing horn, and another to crank the stuffer. When the salami reached my desired size, I twisted the casing and used butcher string to keep the separation.image(140)

I continued this process until I finished stuffing all of the duck salami mixture. I used a toothpick, to puncture any air holes in the salami at this point.


Fermentation Phase:

Temperature: 75ᵒF/23-24C

Humidity: 80-90% RH (strain dependent)

Time: 48-72 hours (until pH drops to at least 5.3)

Once all the salami was stuffed into casings, it was time to allow the meat to ferment. This is the stage I was most worried about when thinking about using duck fat. Luckily, the starter culture I was using had a relatively low fermentation temperature, and I made sure the temperature didn’t rise about 75 F/23-24C in the fermentation chamber.

At this point, I sprayed the salami with Bactoferm 600, a commercially available form of penicillium nalgiovense.

image(18)

I have attempted to track the fermentation stage using pH monitoring before, but I don’t always do that. This time, I tracked the fermentation stage just by time. After 3 days, I moved on to the drying phase.


Drying Phase:

Temperature: 54F/12C

Humidity: 70% RH

For the drying phase, I set the chamber to its usual settings (55F/70-80% RH). The salami was allowed to dry over time. Usually I allow my salami to go to 40% weight loss, but these plateaued at around 35% weight loss. I attribute this to the higher fat content of these salami. Regardless, they were pulled at around 35% weight loss.

image(20)

Duck Salami Weight Loss


Initial Tasting Phase:

After the duck salami weight loss plateaued, I pulled them from the chamber.

image(26)

After I pulled the duck salami, I removed the casing, and wiped them down with white vinegar. I patted them dry after this.

image(30)

image(34)

I sliced them open. Wow.

The spicy calabrese duck salami was a kick in the mouth. Flavorful and spicy. They were slightly over powering due to the strong heat from the calabrese pepperoncini, but if it’s not spicy, you’re not doing your job right?

image(29)

The salame duck l’orange was amazing. The complex flavors really lent themselves well to the flavor of the duck.

image(37)

After one last look…

image(38)
I took the salami and vacuum sealed them, before putting them in the fridge for long term storage.

image(39)


Disclaimer: Meat curing is a hobby that comes with inherent risks. We can all do things to limit this risk by educating ourselves about the process and the utilizing the safest known methods to create our products. This website is for educational purposes only, and all experimentation should be done at each individuals own risk.


Filed Under: Charcuterie Tagged With: charcuterie, cured meats, diy, duck, duck salami, halal, homemade, kosher, salami, salami d'anatra

Curing Chamber: Construction

April 1, 2014 by AOG 8 Comments

Construction day was finally upon us! After months of dreaming and planning and buying parts online, we were finally ready.


Step 1 (Air circulation):

Air circulation is vital for curing meats, so we decided to insert a computer fan into the top of the refrigerator door and a hole at the bottom, in order to generate air flow in the chamber. We removed the door of the refrigerator in order to better access what we needed. We measured the area that we needed to cut in order to saw the holes.

The hole at the top was cut for the size of the computer fan, and was square.

The hole at the bottom was circular, in order to insert a piece of PVC pipe into the air outflow hole.

After these holes were cut, the computer fan was inserted into the top square hole and the PVC pipe was inserted into the bottom round hole.

We then added wire mesh and dryer vents to both holes.

At this point, the door was done!


Step 2 (Power):

The next step was to add a power strip to the inside of the fridge. We drilled a hole for the power cord, and then glued an outdoor power box to the side of the fridge.

We screwed on the outer portion of the outlet and it was ready to supply power to the inside of the fridge! We were able to plug the computer fan into the outlet at this point.


Step 3 (Temperature):

The next thing we did was insert the temperature probe. This was done by drilling a small hole and feeding the probe wire through the hole. The probe wire was placed  roughly in the middle of the fridge, while the control box was adhered to the outside side of the fridge and plugged into an external power outlet. The probe wire senses the temperature and sends that information to the control box on the outside of the fridge, which has a control switch for you to control the set point. When the sensor reaches the set point, the fridge turns off/on in order to maintain the proper temperature.


Step 4 (Humidity):

The last step was to get the humidity right. We bought an ultrasonic humidifier that we filled with filtered water. We plugged it into the hygrostat which we then plugged into the outdoor power outlet on the inside of the fridge. The hygrostat monitors the humidity and turns the humidifier on/off as needed.

VOILA! And with that our curing chamber was all set up and ready for its first trial: Bresaola!


Resources:

And, again. Here are the sources that were so useful for our endeavors!

http://curedmeats.blogspot.mx/2007/07/key-equipment-piece-3-curing-chamber.html

http://benstarr.com/blog/how-to-convert-a-refrigerator-for-curing-meat-or-aging-cheese/

http://pickledpig.wordpress.com/2010/09/24/the-curing-chamber/

http://mattikaarts.com/blog/charcuterie/meat-curing-at-home-the-setup/


Disclaimer: All information stated on this website is for information purposes only. The information is not specific advice for any individual. The content of this website should not substitute electricity/engineering/building advice from a professional. If you have a problem, speak to a professional immediately about the issue.

Filed Under: Charcuterie Tagged With: charcuterie, cured meats, curing chamber, diy

Curing Chamber: Instructions

April 1, 2014 by AOG Leave a Comment

And so the adventure begins.  It would be hard to say where the idea of curing our own meats came from originally, but once it was there, it became an obsession that was never far from mind. There are so many appealing aspects to curing your own meat, from the self-sufficiency it affords, to the ability to create un-tasted and commercially non-viable delicacies, to the intellectual challenge of understanding and optimizing the chemistry behind what is going on.

There are many different styles of cured meats, from sausages made from ground meat to prosciuttos made from whole muscles. In addition, there is a wide range of materials and methods that are used: from caves in Tuscany, to refrigerators in New Jersey; from natural bacteria, to Bactoferm M-EK-4, it’s all been done (and if it hasn’t been done yet, you can bet that someone is thinking about trying it as we speak).

Due to our lack of a cave with low temperatures and high humidity, the first step in our journey was to create a curing chamber for our meat. The goal for a curing chamber is to create an environment that has the relatively cool temperatures of  50 F/10 C and the relatively high humidity of 70-80% RH. The best way for us to do this was to outfit an old fridge with all the necessary trappings.

We were able to find a used fridge on Craigslist that was suitable for our purposes, larger than a traditional dorm fridge, but smaller than a regular sized fridge, and lacking a freezer section meaning that we could use all the available space to hang our meat.


There are 4 important aspects you want to be able to control in your curing chamber; air flow, humidity, temperature, and power.

Air Flow: Achieved through inserting a computer fan into the fridge door. Air gets blown out from the fan, which is inserted at the top of the door. Air comes in through the bottom of the door, which has a dryer vent on the inside of the door to block backflow through the same vent. The bottom vent should be covered by wire mesh to prevent rodent/insect entry, while the computer fan should be covered with a dryer vent for the same purpose.

Humidity: Achieved through the use of a humidifier, attached to a hygrostat to regulate the humidity. The RH in a fridge is much lower than needed, so we added an ultrasonic humidifier that needs to be refilled about once every two weeks or so, depending on different factors.

Temperature:Achieved by inserting a temperature sensor into the fridge, and attaching that to an on/off switch for the fridge. The fridge will naturally run colder than the desired 50 F/10C that we want, so the temperature sensor will detect when the fridge is at the correct temperature and switch off power to the fridge.

Power: Power for the internal accessories achieved by mounting an outdoor power strip on the inside door-side side wall of the fridge.


Our finished product looked like this:


Resources:

Of course, we never would have even known where to begin with this construction without the help and guidance of other like-minded bloggers.

http://curedmeats.blogspot.mx/2007/07/key-equipment-piece-3-curing-chamber.html

http://benstarr.com/blog/how-to-convert-a-refrigerator-for-curing-meat-or-aging-cheese/

http://pickledpig.wordpress.com/2010/09/24/the-curing-chamber/

http://mattikaarts.com/blog/charcuterie/meat-curing-at-home-the-setup/


Disclaimer: All information stated on this website is for information purposes only. The information is not specific advice for any individual. The content of this website should not substitute electric/engineering/building advice from a professional. If you have a problem, speak to a professional immediately about the issue.

Filed Under: Charcuterie Tagged With: charcuterie, cured meats, curing chamber, diy

  • Instagram

Copyright © 2025 · Foodie Pro Theme by Shay Bocks · Built on the Genesis Framework · Powered by WordPress