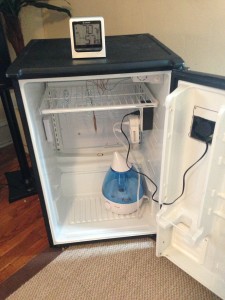
Construction day was finally upon us! After months of dreaming and planning and buying parts online, we were finally ready.
Step 1 (Air circulation):
Air circulation is vital for curing meats, so we decided to insert a computer fan into the top of the refrigerator door and a hole at the bottom, in order to generate air flow in the chamber. We removed the door of the refrigerator in order to better access what we needed. We measured the area that we needed to cut in order to saw the holes.
The hole at the top was cut for the size of the computer fan, and was square.
The hole at the bottom was circular, in order to insert a piece of PVC pipe into the air outflow hole.
After these holes were cut, the computer fan was inserted into the top square hole and the PVC pipe was inserted into the bottom round hole.
We then added wire mesh and dryer vents to both holes.
At this point, the door was done!
Step 2 (Power):
The next step was to add a power strip to the inside of the fridge. We drilled a hole for the power cord, and then glued an outdoor power box to the side of the fridge.
We screwed on the outer portion of the outlet and it was ready to supply power to the inside of the fridge! We were able to plug the computer fan into the outlet at this point.
Step 3 (Temperature):
The next thing we did was insert the temperature probe. This was done by drilling a small hole and feeding the probe wire through the hole. The probe wire was placed roughly in the middle of the fridge, while the control box was adhered to the outside side of the fridge and plugged into an external power outlet. The probe wire senses the temperature and sends that information to the control box on the outside of the fridge, which has a control switch for you to control the set point. When the sensor reaches the set point, the fridge turns off/on in order to maintain the proper temperature.
Step 4 (Humidity):
The last step was to get the humidity right. We bought an ultrasonic humidifier that we filled with filtered water. We plugged it into the hygrostat which we then plugged into the outdoor power outlet on the inside of the fridge. The hygrostat monitors the humidity and turns the humidifier on/off as needed.
VOILA! And with that our curing chamber was all set up and ready for its first trial: Bresaola!
Resources:
And, again. Here are the sources that were so useful for our endeavors!
http://curedmeats.blogspot.mx/2007/07/key-equipment-piece-3-curing-chamber.html
http://benstarr.com/blog/how-to-convert-a-refrigerator-for-curing-meat-or-aging-cheese/
http://pickledpig.wordpress.com/2010/09/24/the-curing-chamber/
http://mattikaarts.com/blog/charcuterie/meat-curing-at-home-the-setup/
Disclaimer: All information stated on this website is for information purposes only. The information is not specific advice for any individual. The content of this website should not substitute electricity/engineering/building advice from a professional. If you have a problem, speak to a professional immediately about the issue.
