The Explorations of a Gastrochemist

...because science can be delicious.

  • Beginner’s Guide
  • Wurst Adventure
  • Charcuterie
  • Preservation
  • Science
  • Molecular Gastronomy
  • All Projects
You are here: Home / Archives for diy

Perfect Nova Lox

January 11, 2018 by AOG 8 Comments

Okay. Here it is. The simplest, best way to make real nova lox at home. I’ve made lox a number of different ways throughout the years, many of which have been chronicled here (3-step Lox, Quick Lox, etc…). But I have finally perfected the simple 2 step, equilibrium cured nova lox, and I think it’s a real winner. Try it if you don’t believe me.

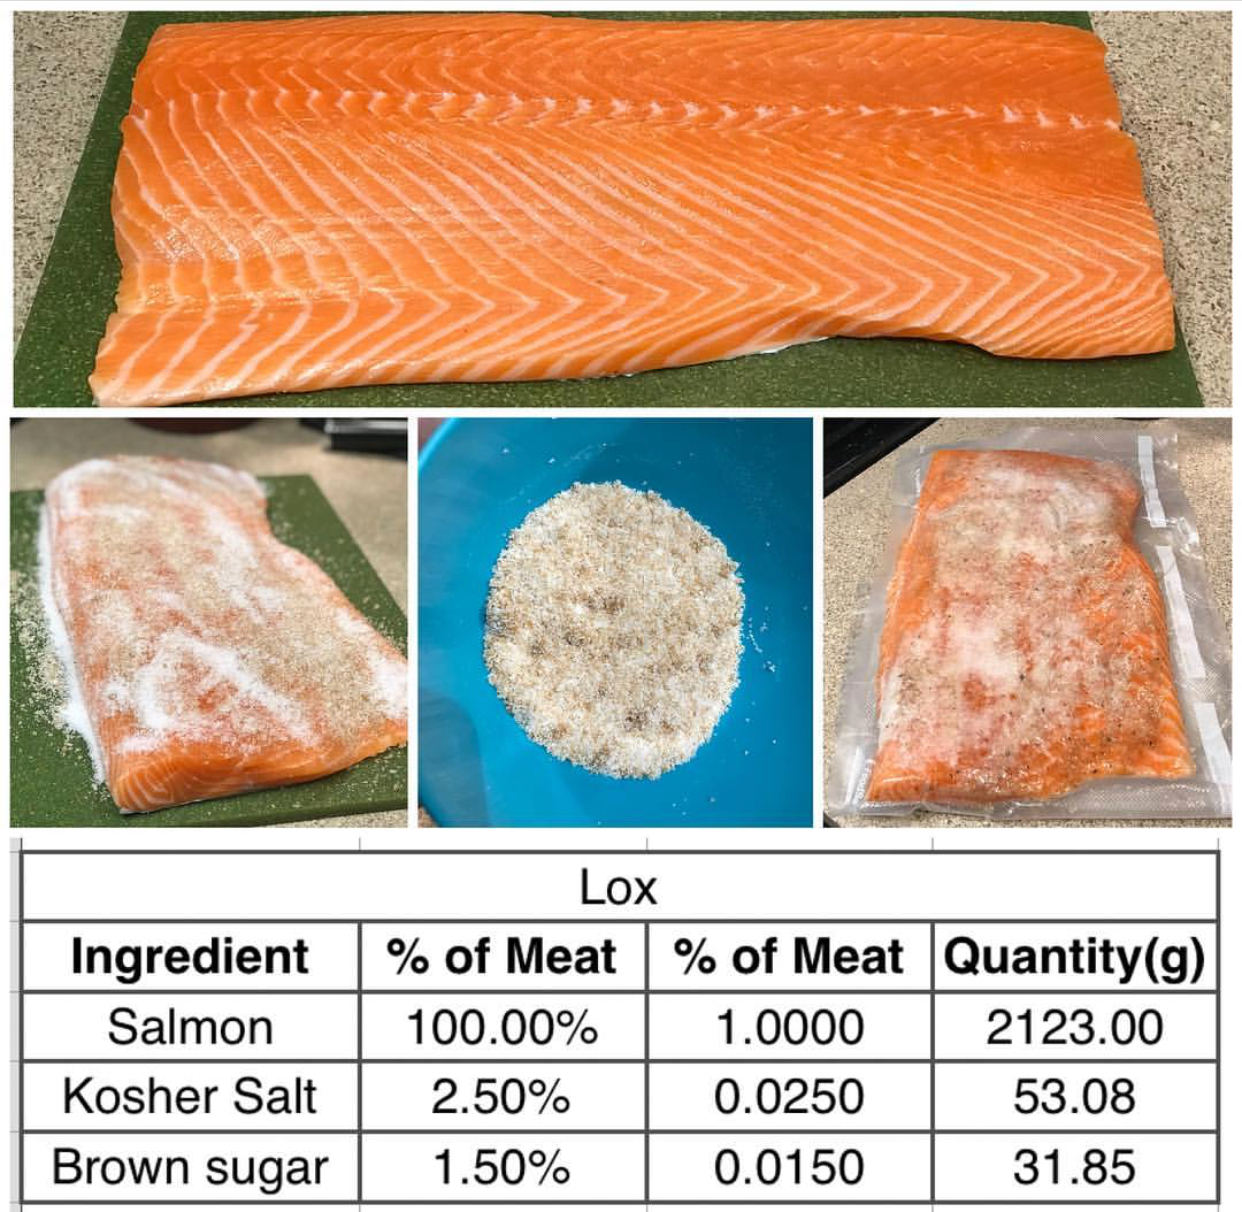
This method uses equilibrium curing (which if you don’t know what I’m saying, read up on it here). This method uses 2.5% salt and 1.5% brown sugar, time, and smoke to create some of the most delectable cured fish you’ve ever tasted. Let’s dive in.

99EFFCF2-5C37-42EE-94A2-564A4A9AFB74


The Fish

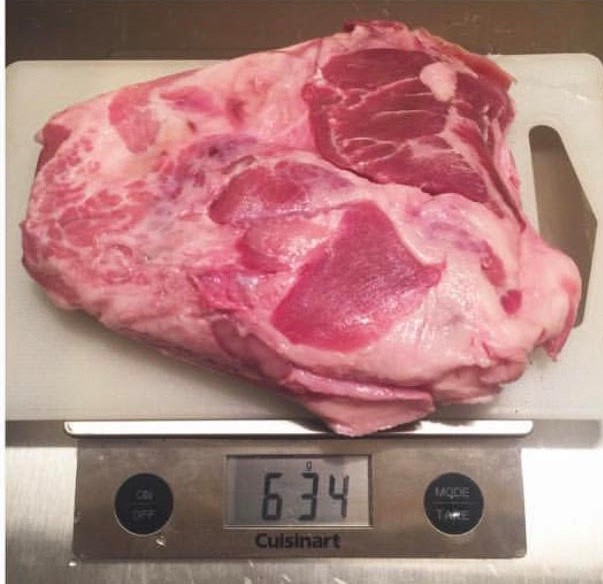
First, you want to find a nice piece of salmon fillet. I get sushi grade salmon from my local Asian food stores, but any good quality salmon should work. You can pick it based on the size you want to cure; if I’m making it for myself I will pick up just a small fillet, whereas if I’m making it for a group of people, I will pick up a whole side of salmon. You can also pick your piece based on whether you prefer the center of the cut or the belly. I prefer the salmon belly meat, so I pick my salmon fillets to maximize the lovely fat streaks found there.

89C0AE09-3291-44BA-8CCF-92D6990E5A22


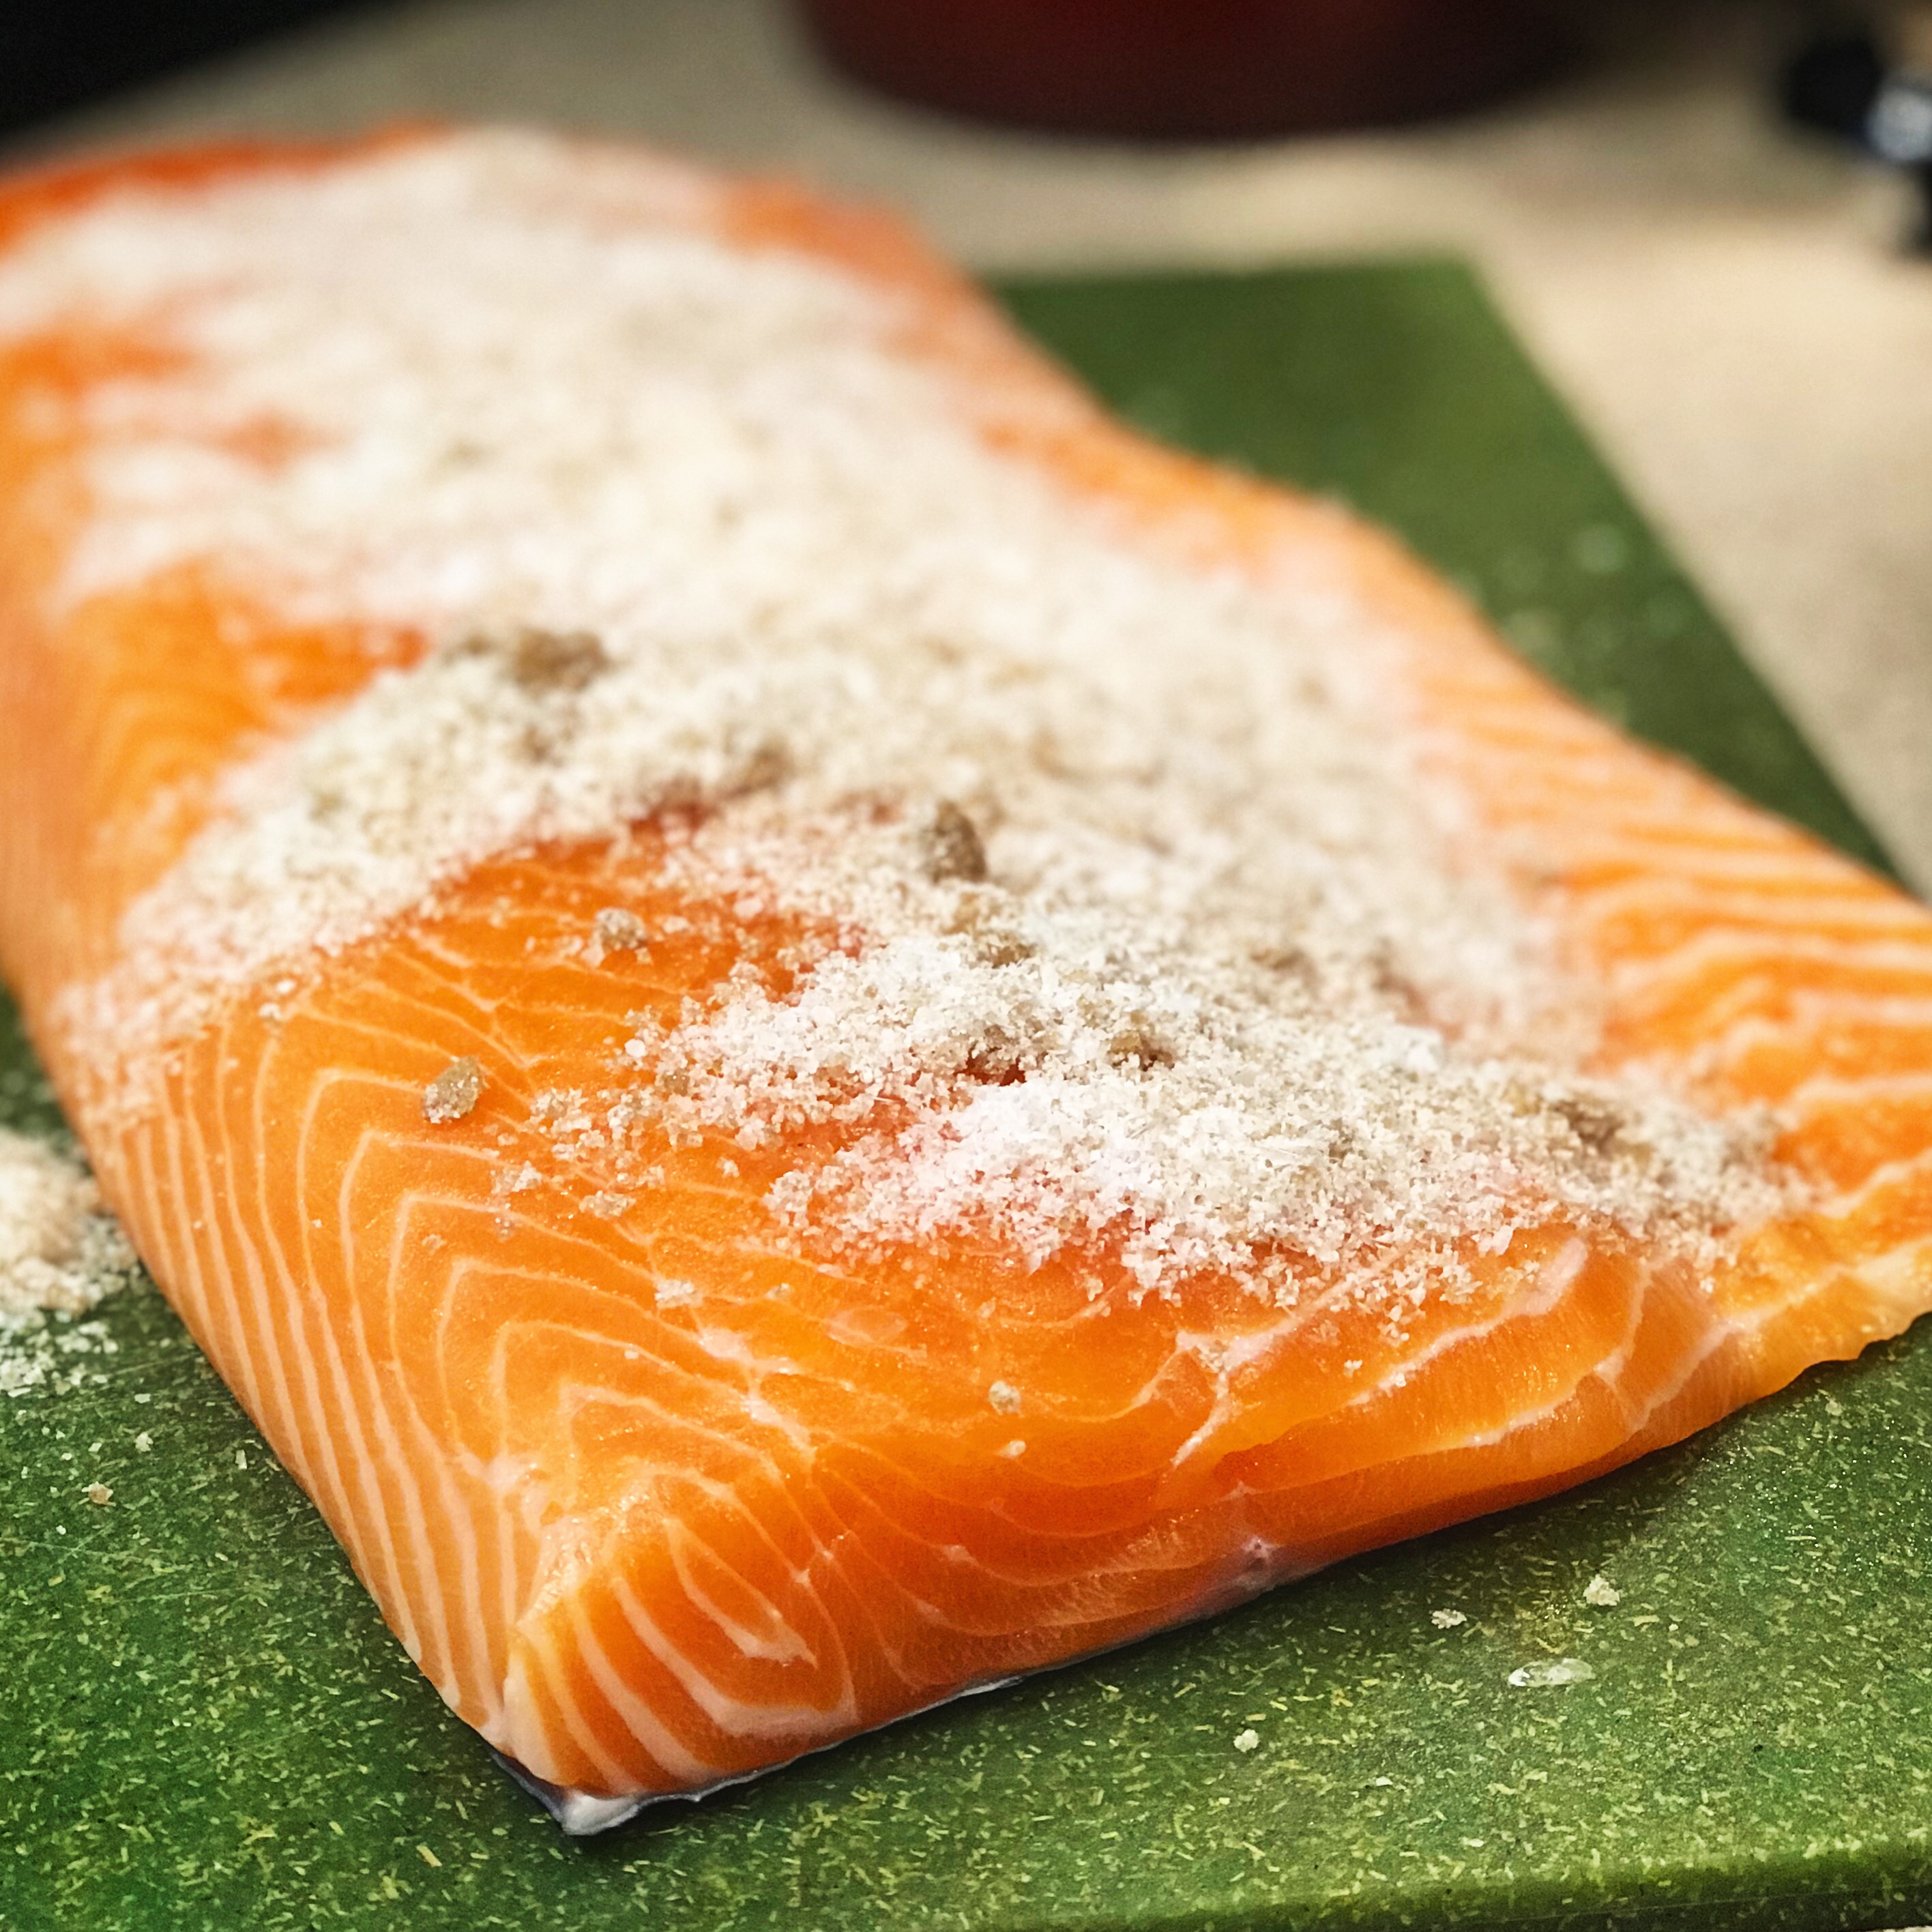
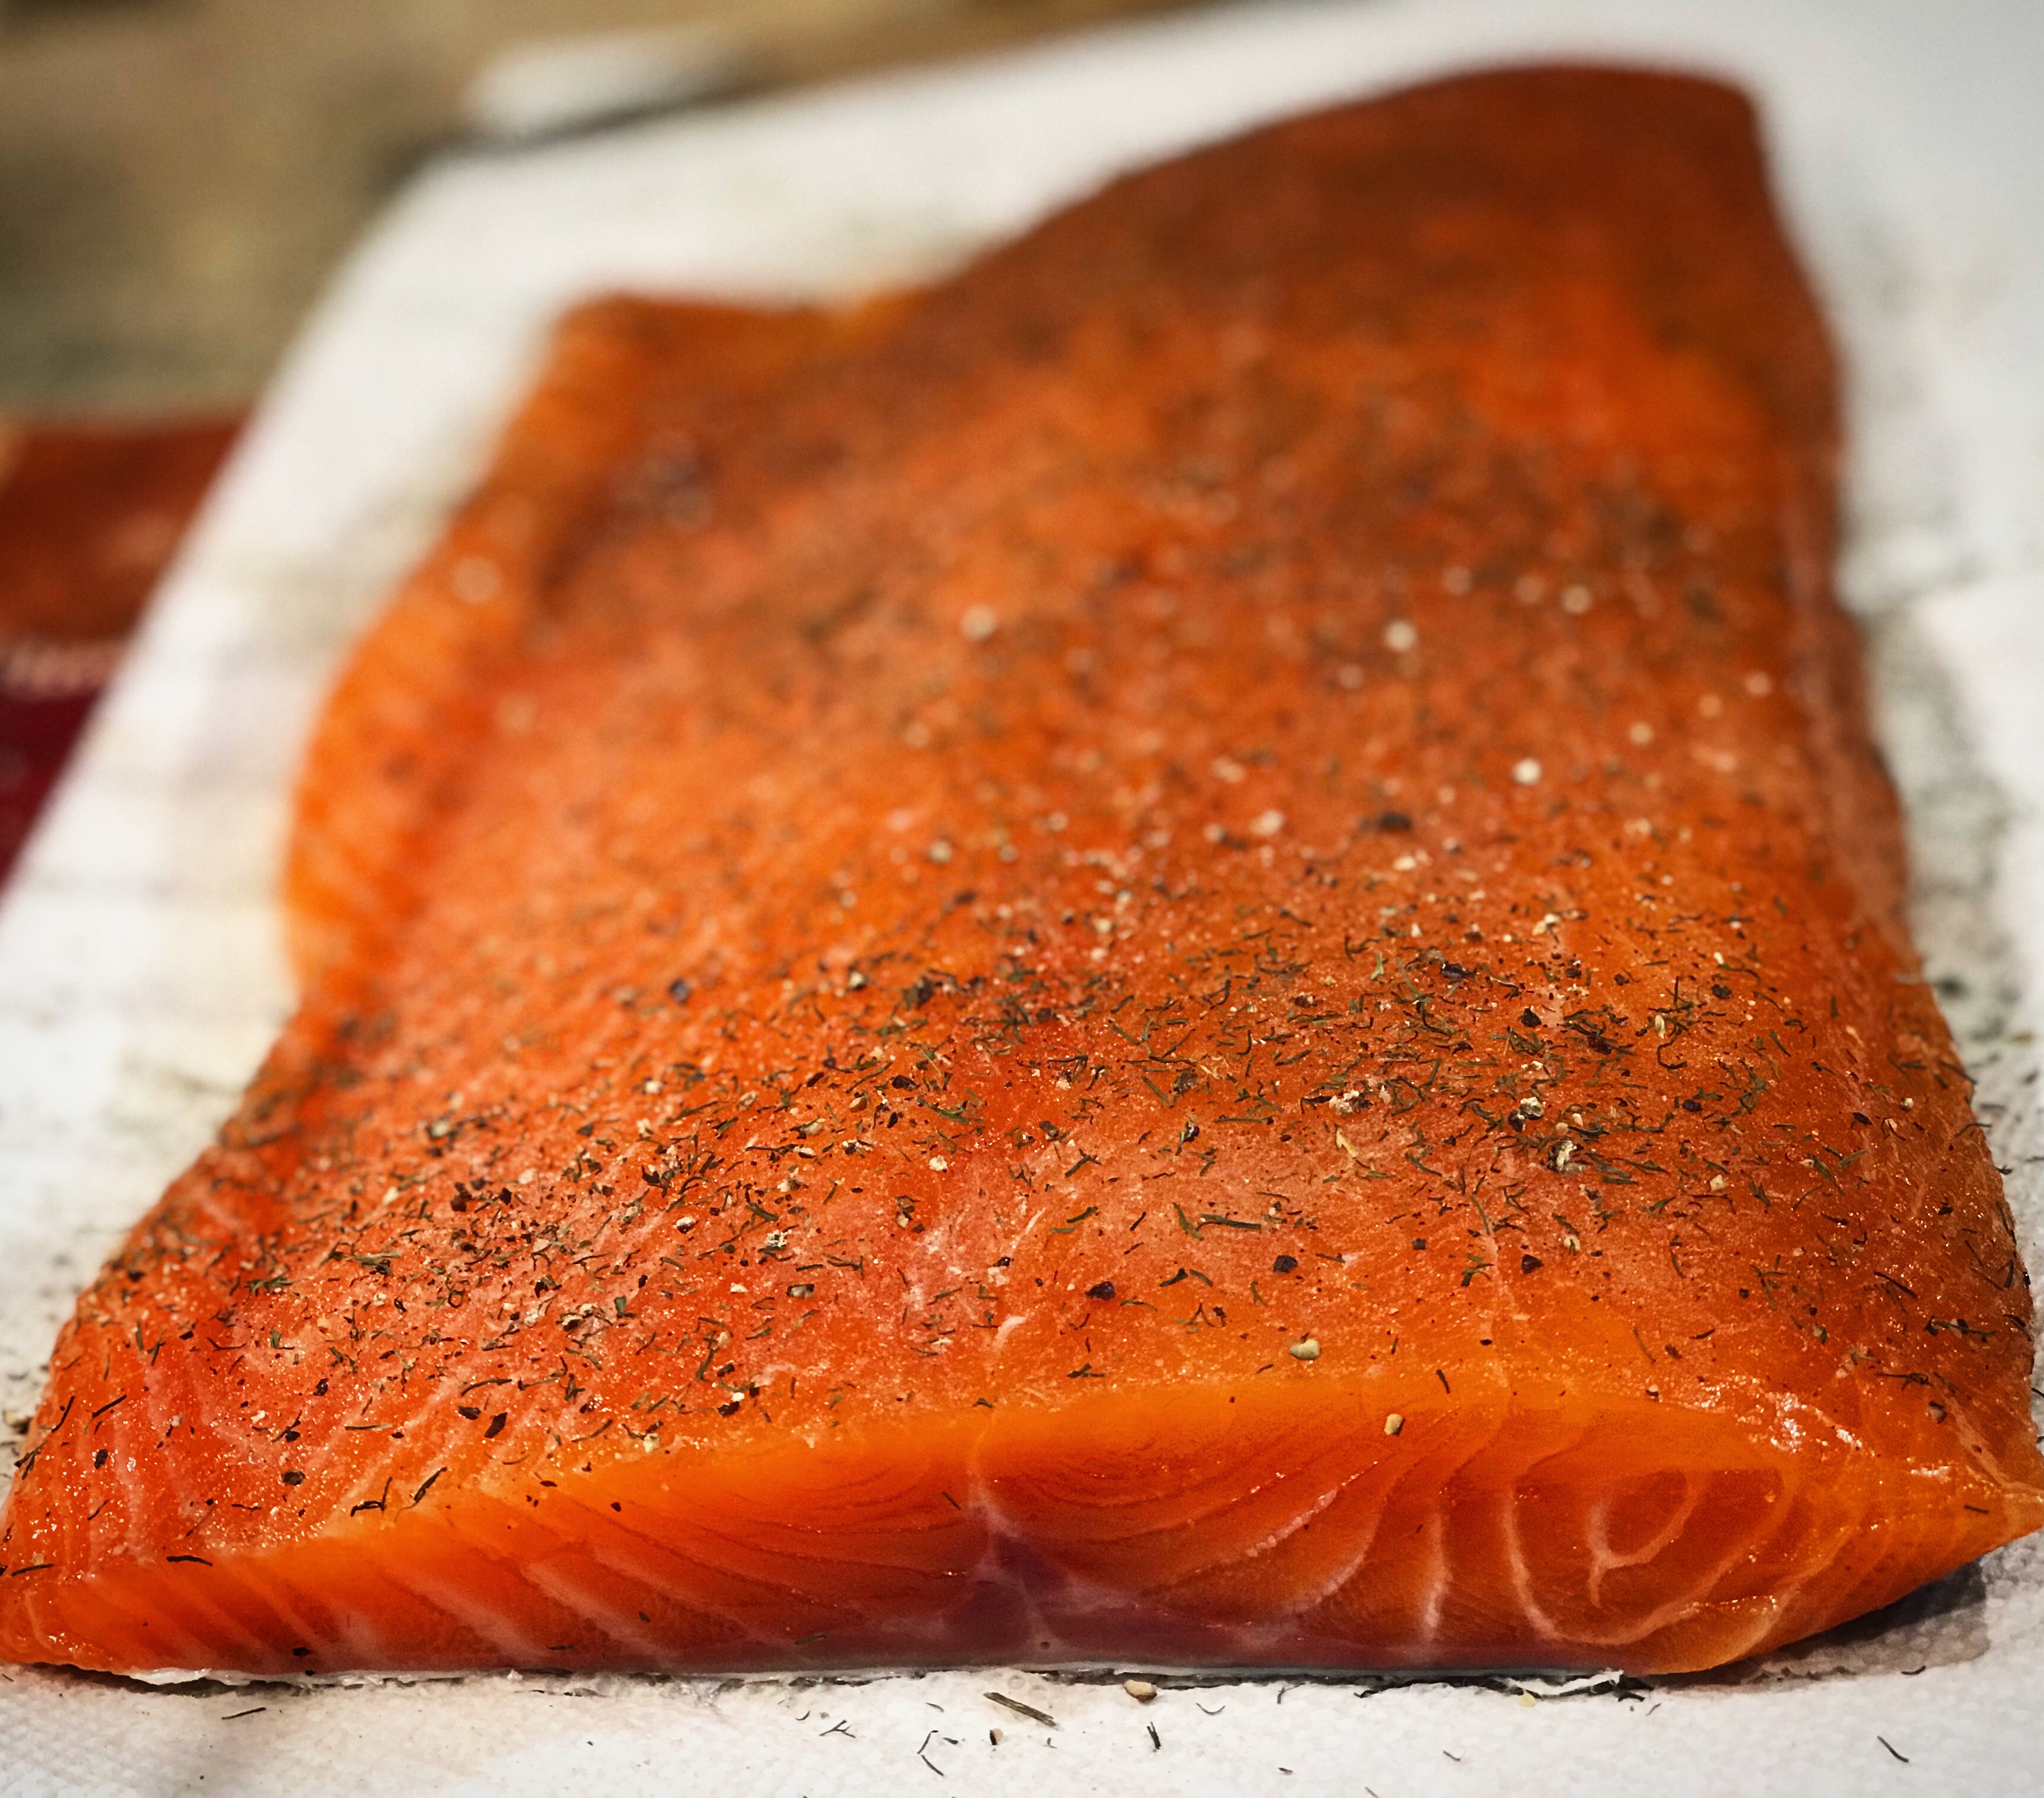
Step #1: Dry Cure (24-48 hours)

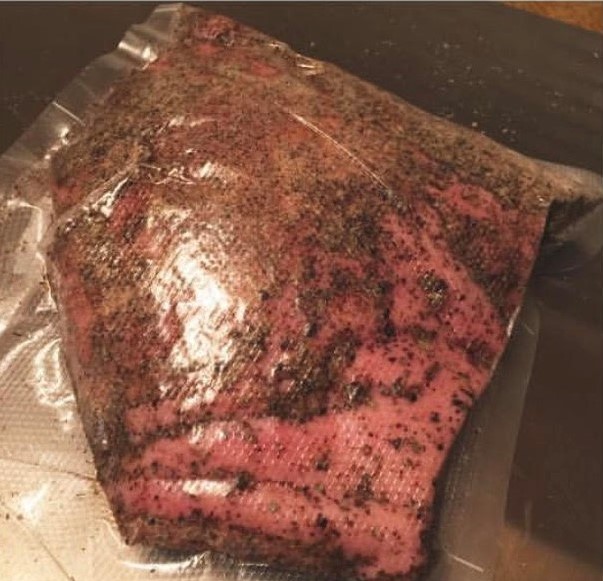
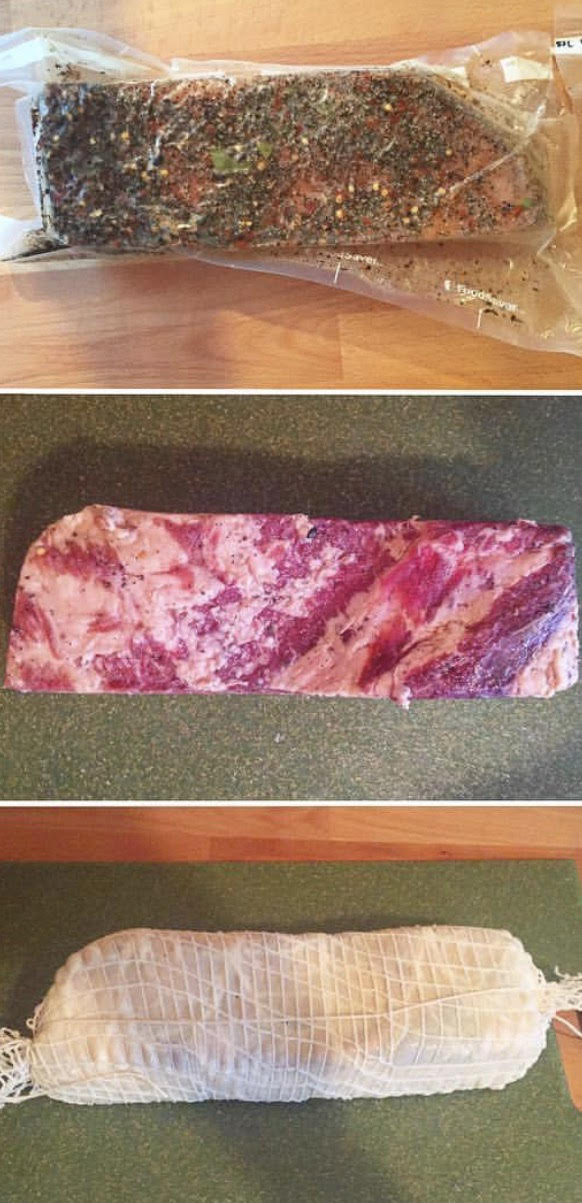
Once you return home with your piece of salmon, rinse it and pat it dry. Weigh the meat and record the weight. This is a simple equilibrium cure with just two ingredients, salt and brown sugar. Weigh out 2.5% salt, and 1.5% brown sugar. Add this to the salmon fillet, ensuring that the entire visible surface is covered. You can do this in any container that fits the salmon, and allows for the cure to stay in contact with the salmon, but I prefer to use vacuum sealed bag to maximize the surface area contact. After you have sealed your container, put it in your fridge and allow it to cure for 24-48 hours.  The beauty of the equilibrium cure is that you cannot over salt your project, so you have a bit more flexibility with time.

9F499272-39B9-4673-B9C7-067321C86272


Step #2: Cold Smoking (4 hours)

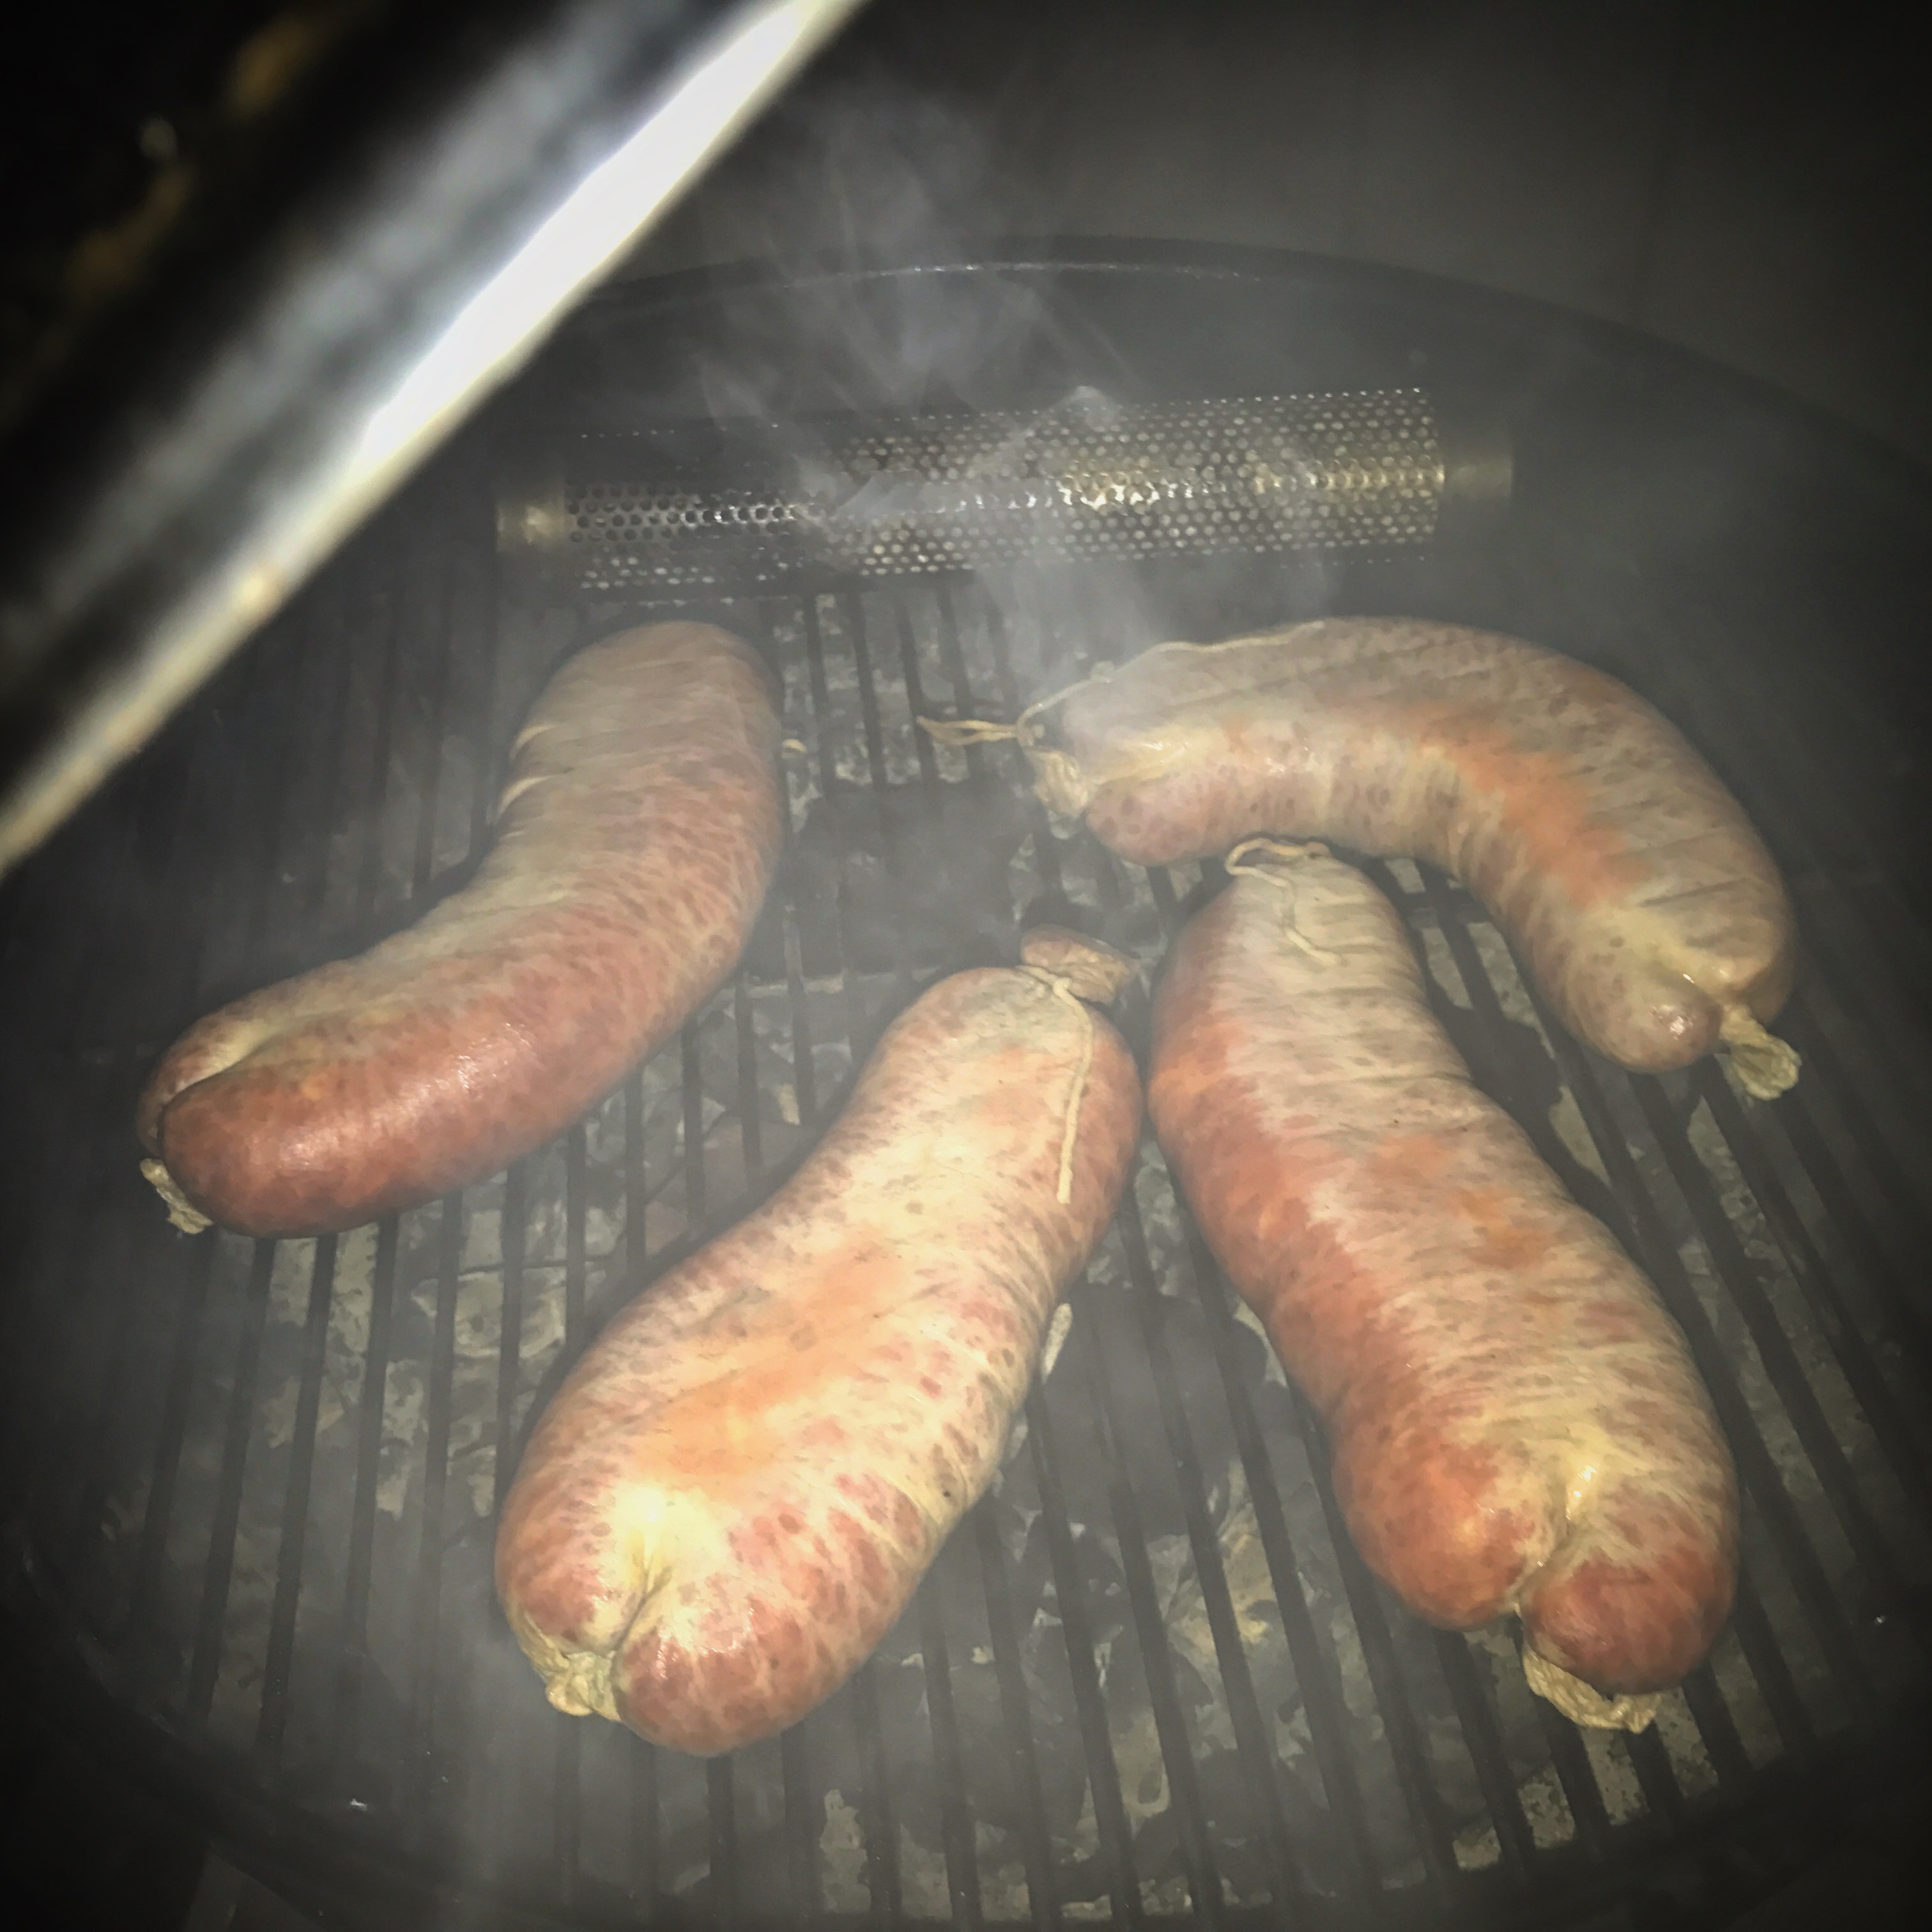
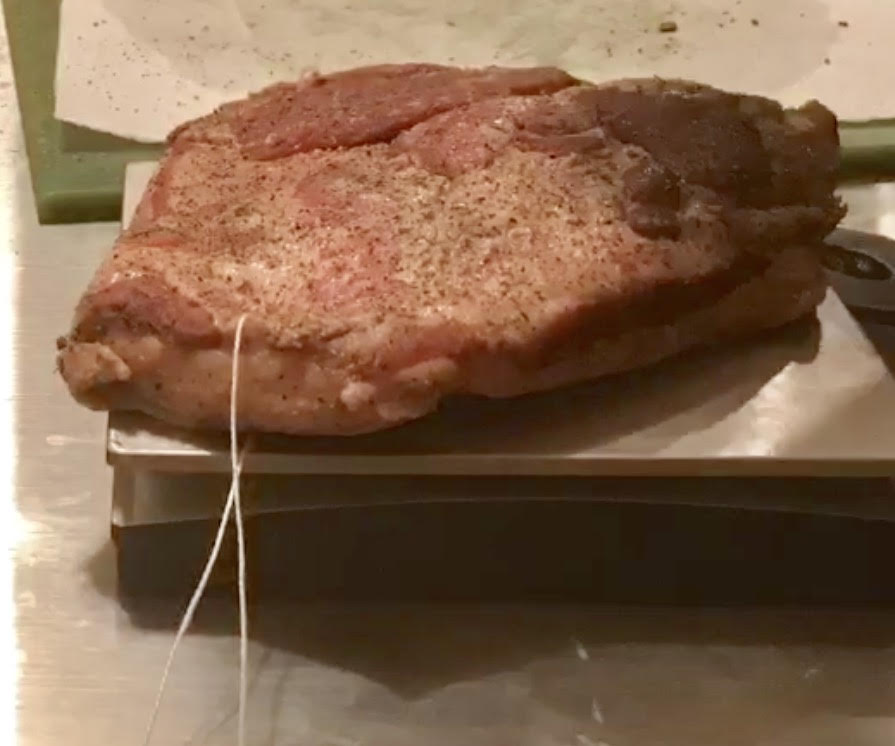
I took my fillet out of the cure after ~24 hours. You want to rinse it off, pat it dry, and move it to a rack for cold smoking. As I’ve mentioned before in my lox posts, if you want to stop at this point, you can. You will have salt cured salmon that is pretty good. But nova lox is cold smoked, so that is the next step in our project. There are a number of ways to create a cold smoking set up. I have used a bunch of different methods, from using a Smoking Gun and a Styrofoam cooler, to using a Little Chief Smoker, to the method I have finally arrived upon that I love, the A-Maze-N Smoker tube inside my Weber grill (although any enclosed space outside would work). The primary goal is to have a continuous source of smoking wood that never reaches more than 90-100 F.

Place the salmon inside your cold smoking set up on a rack to allow air flow. I like a subtle yet undeniably present taste of smoke in my lox, so I cold smoke for ~4 hours. You can adjust this time according to your tastes. I generally use applewood or hickory, but most recently I used beechwood because I had it around for other projects, and it was great, so don’t worry about experimenting with different words for this step.

42064F1E-E0DE-4A9C-B9D6-4BCA609C62AD


Equalization (Overnight)

When the cold smoking is done, you want to allow the salmon time to equalize. Sprinkle with pepper and dill if you wish, and leave the salmon on a rack, uncovered in your fridge overnight or for ~8 hours.
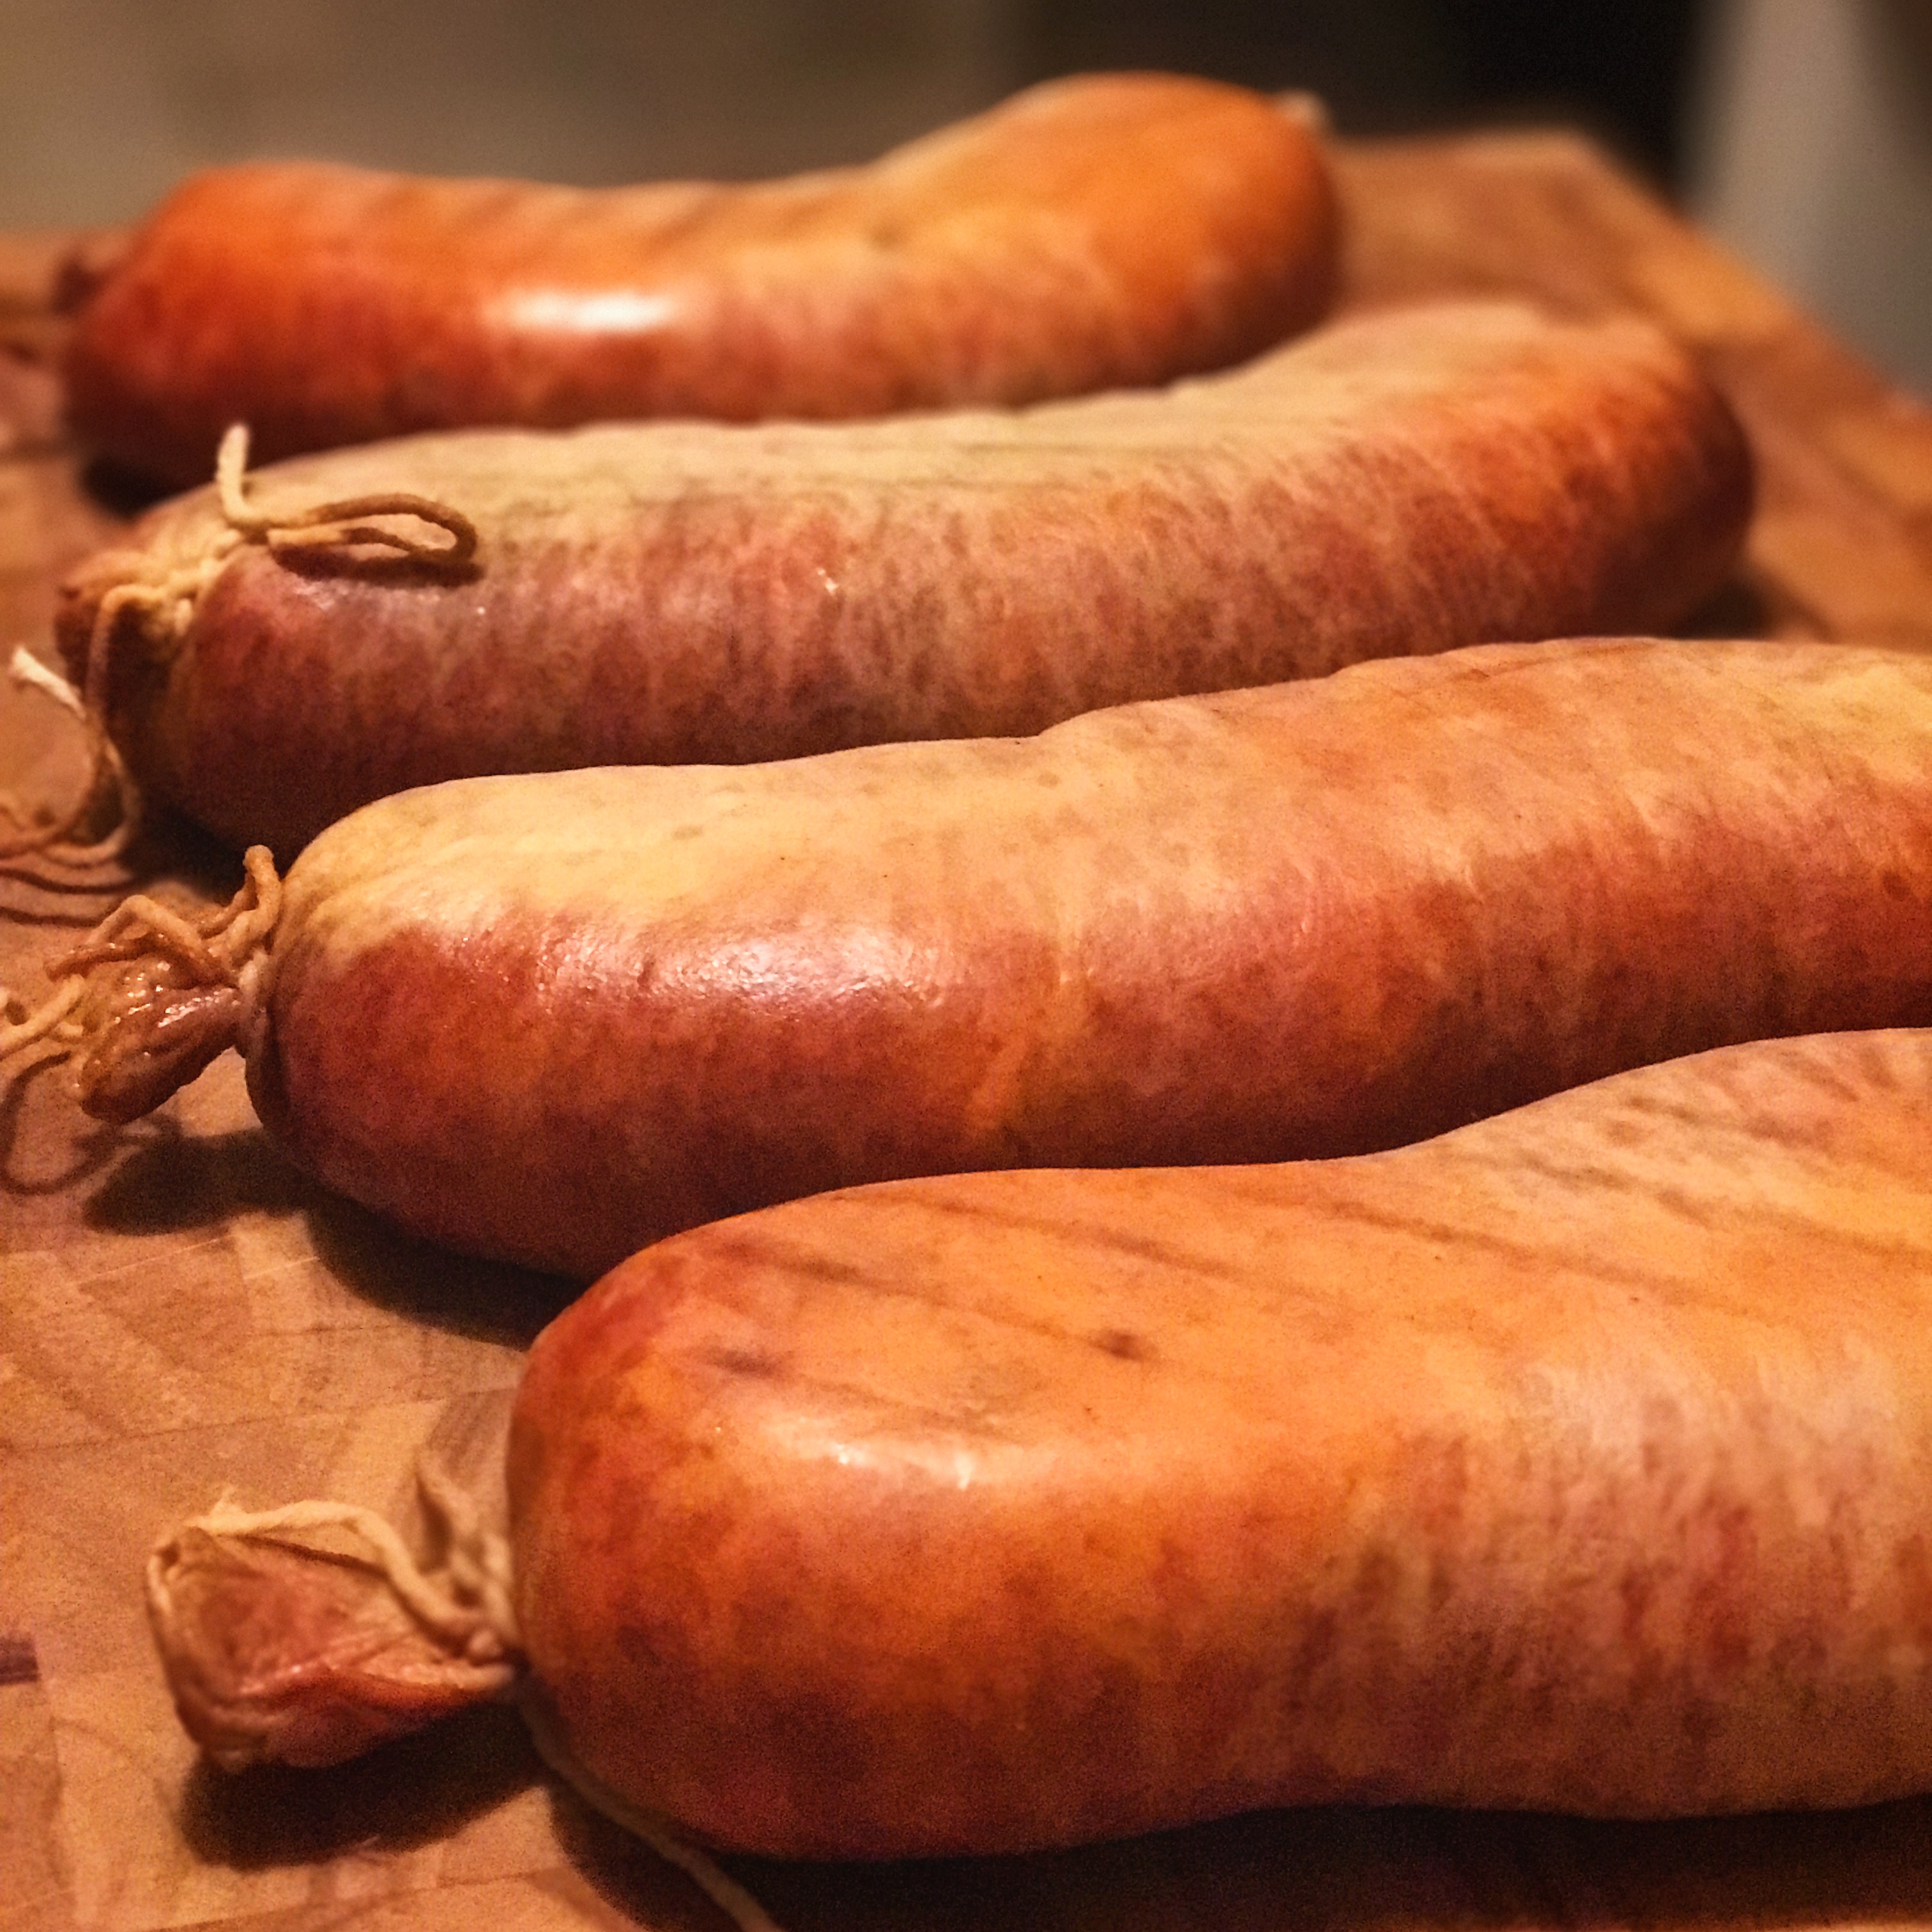
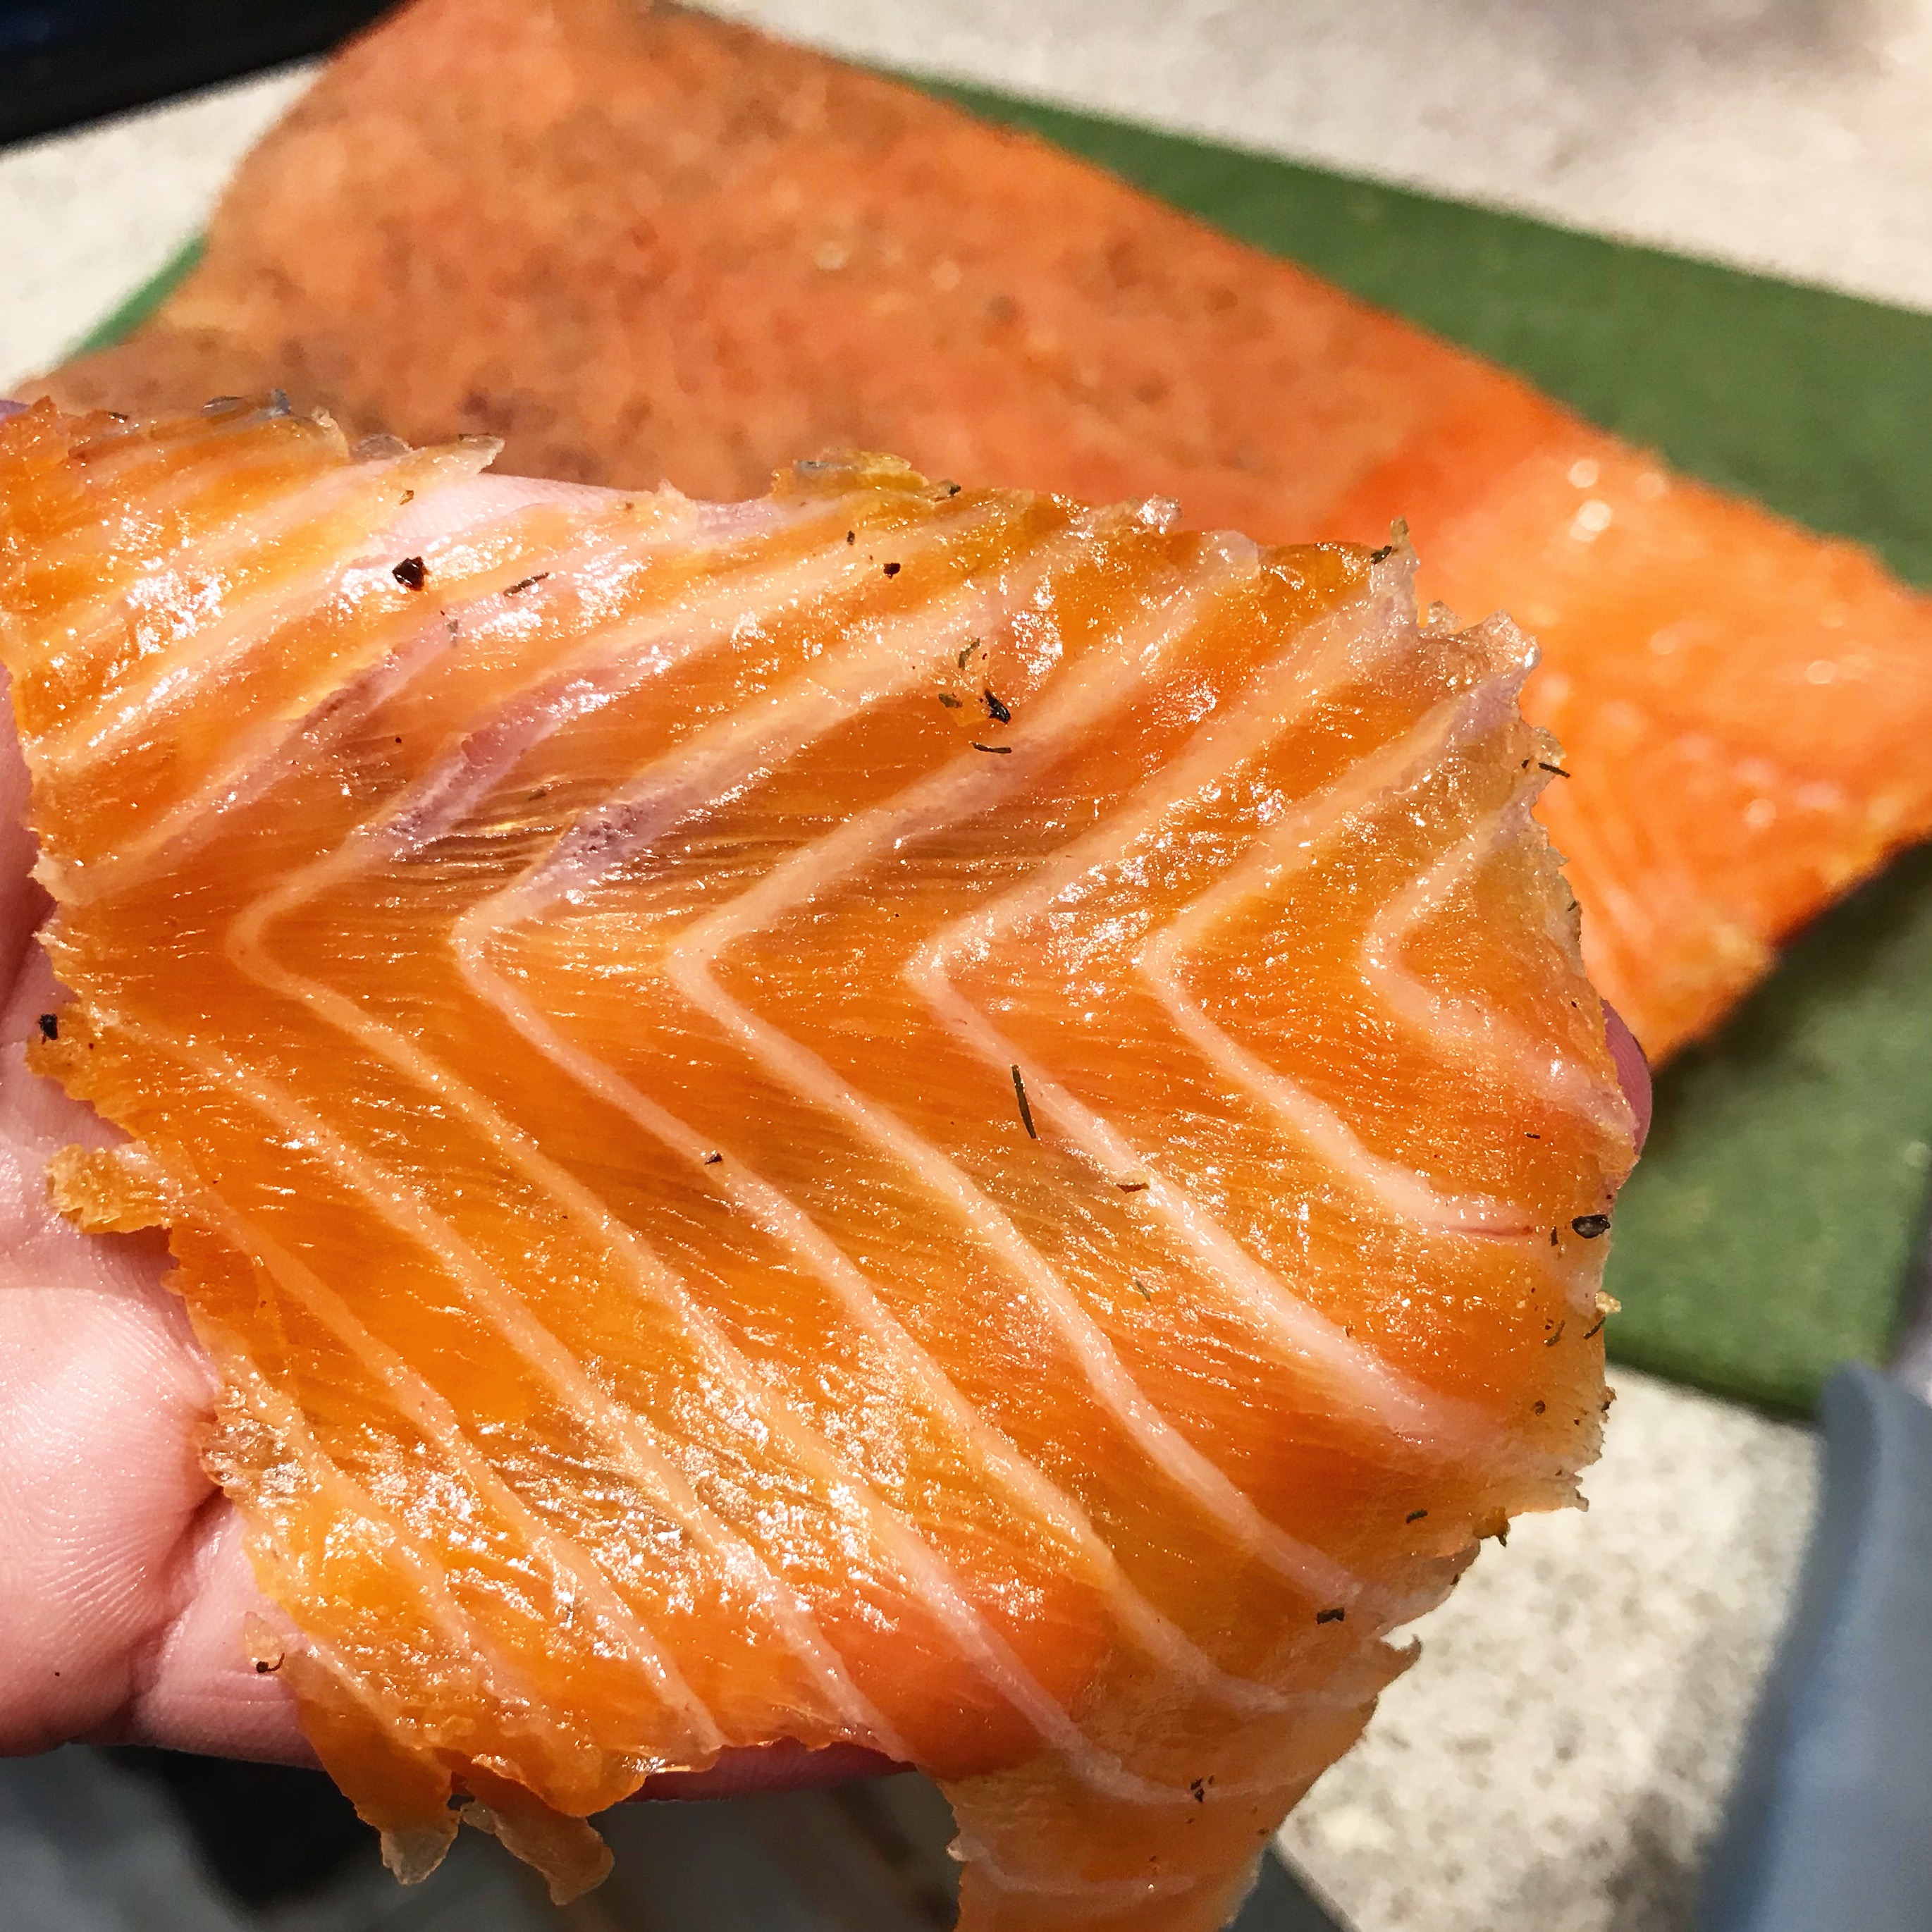
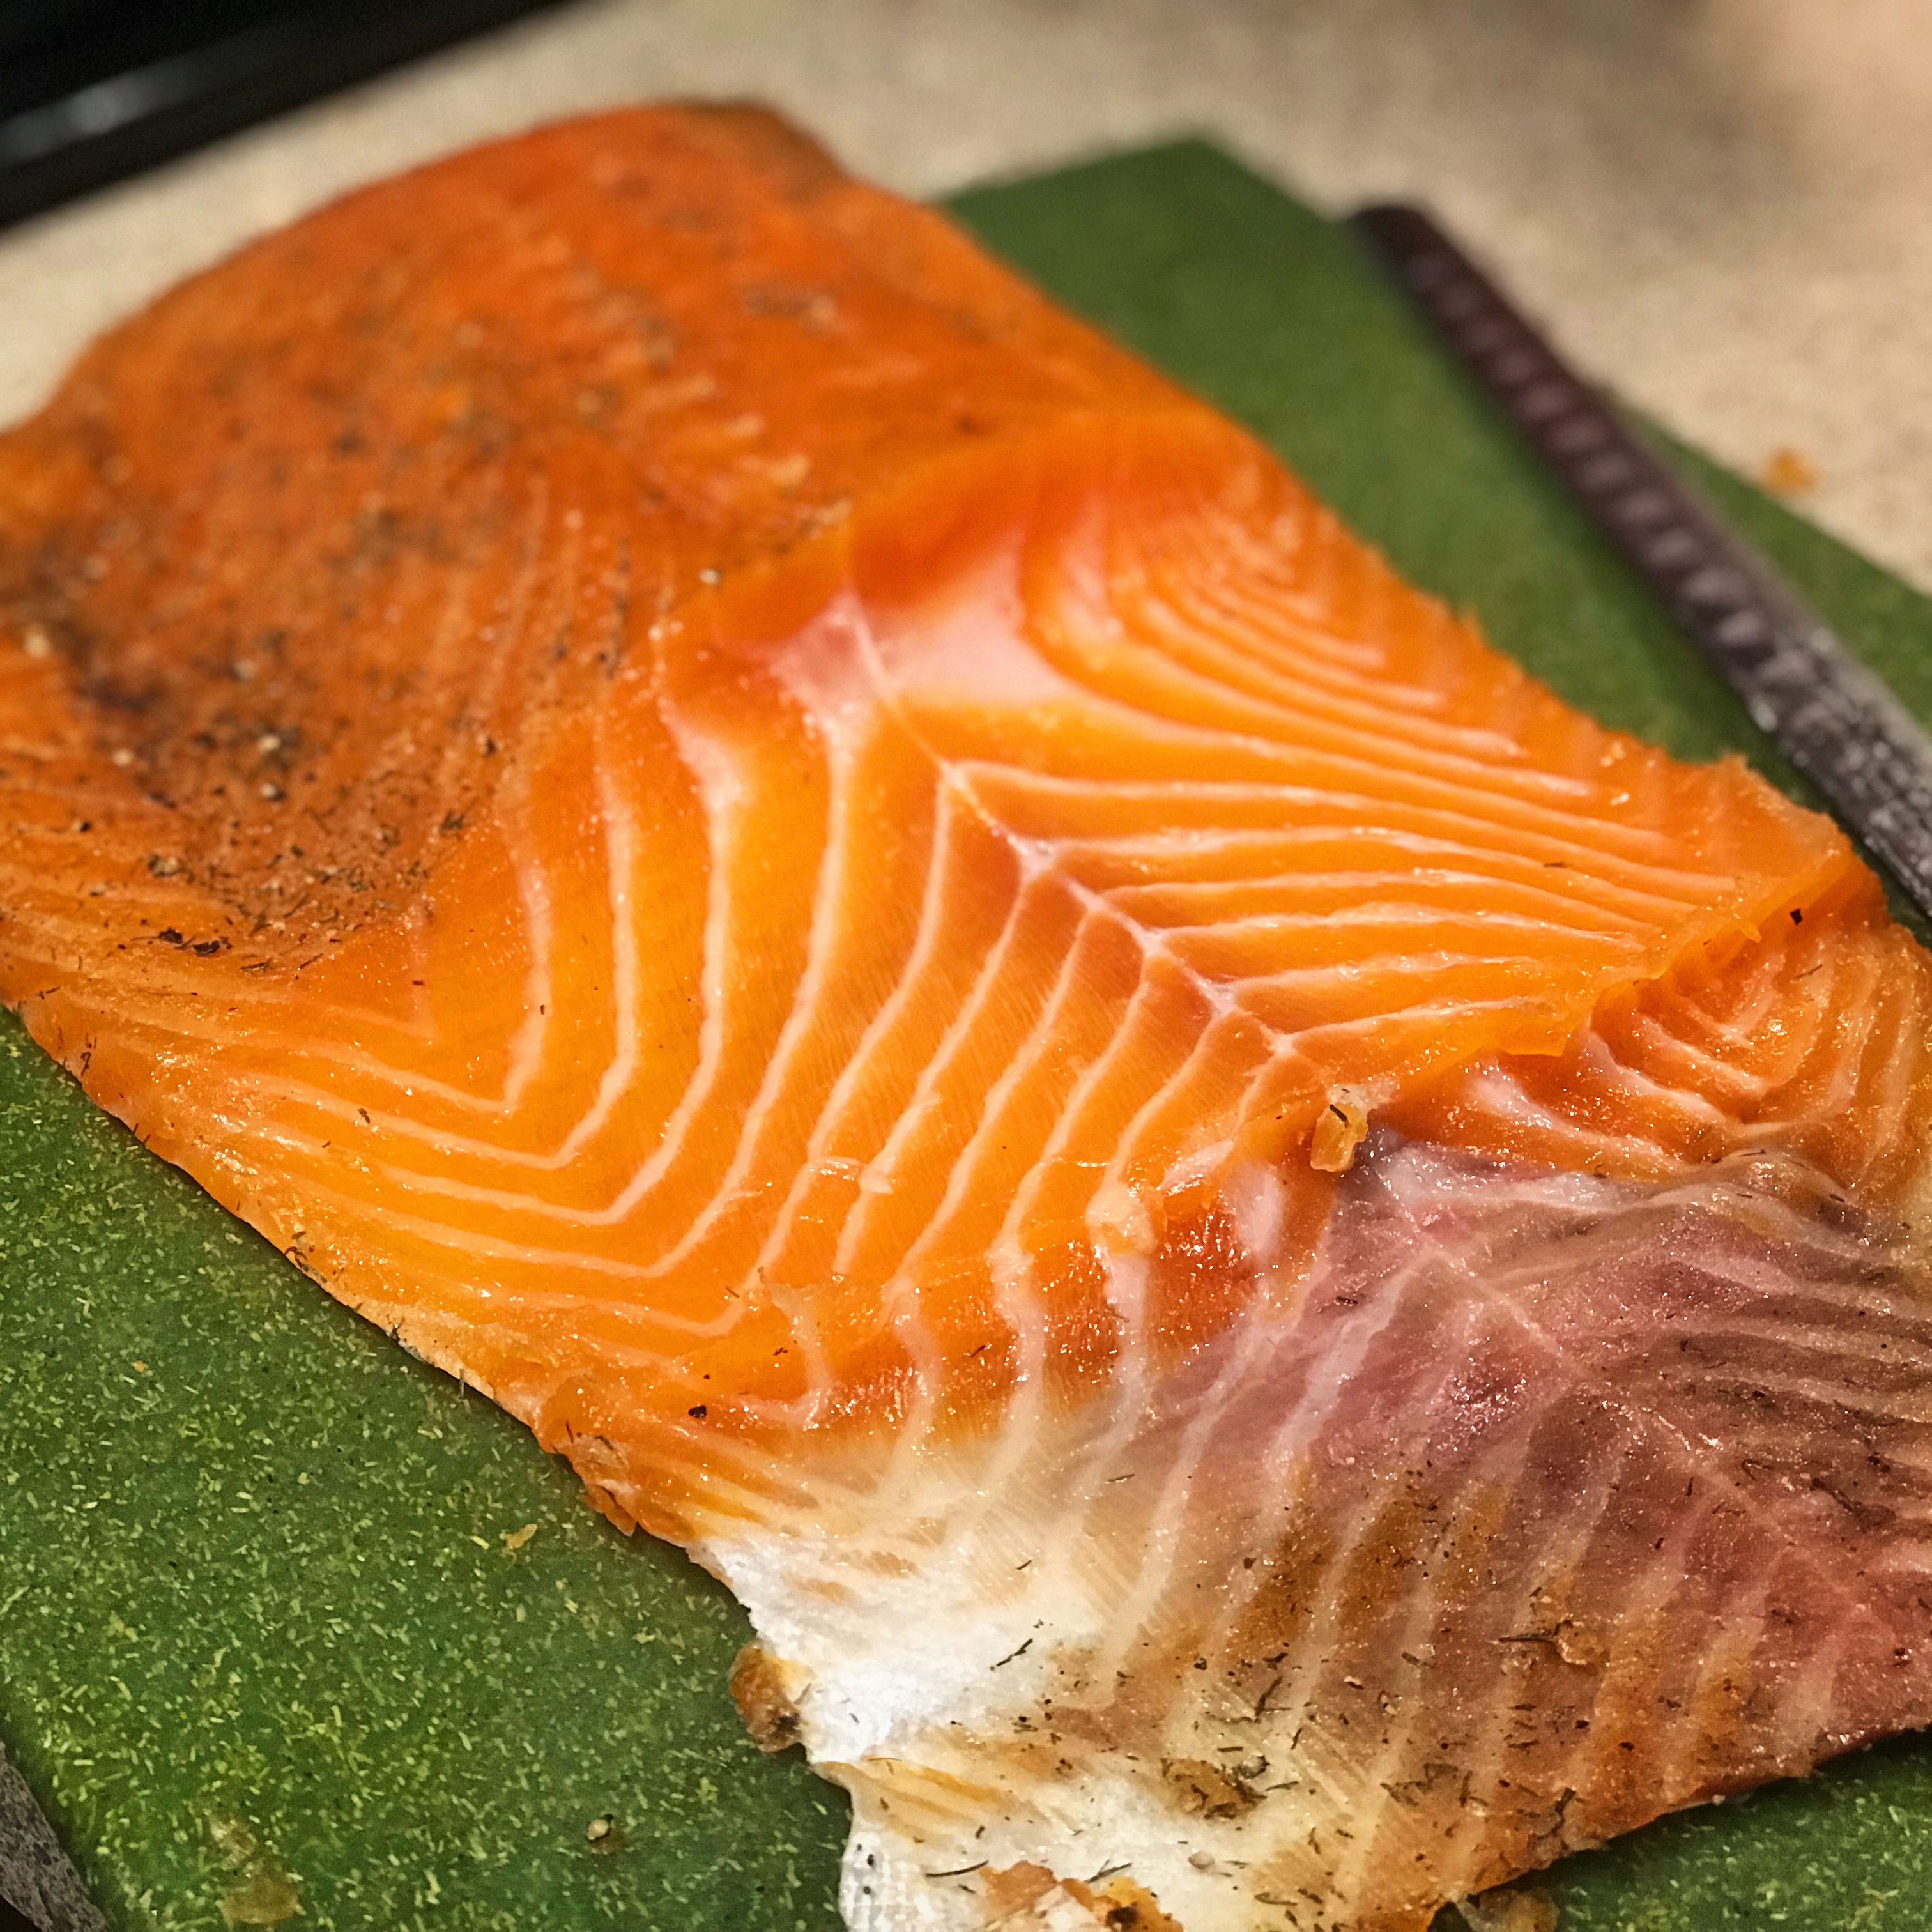
B630E7D1-EB52-4F1A-A81E-F6318C74D439


Tasting

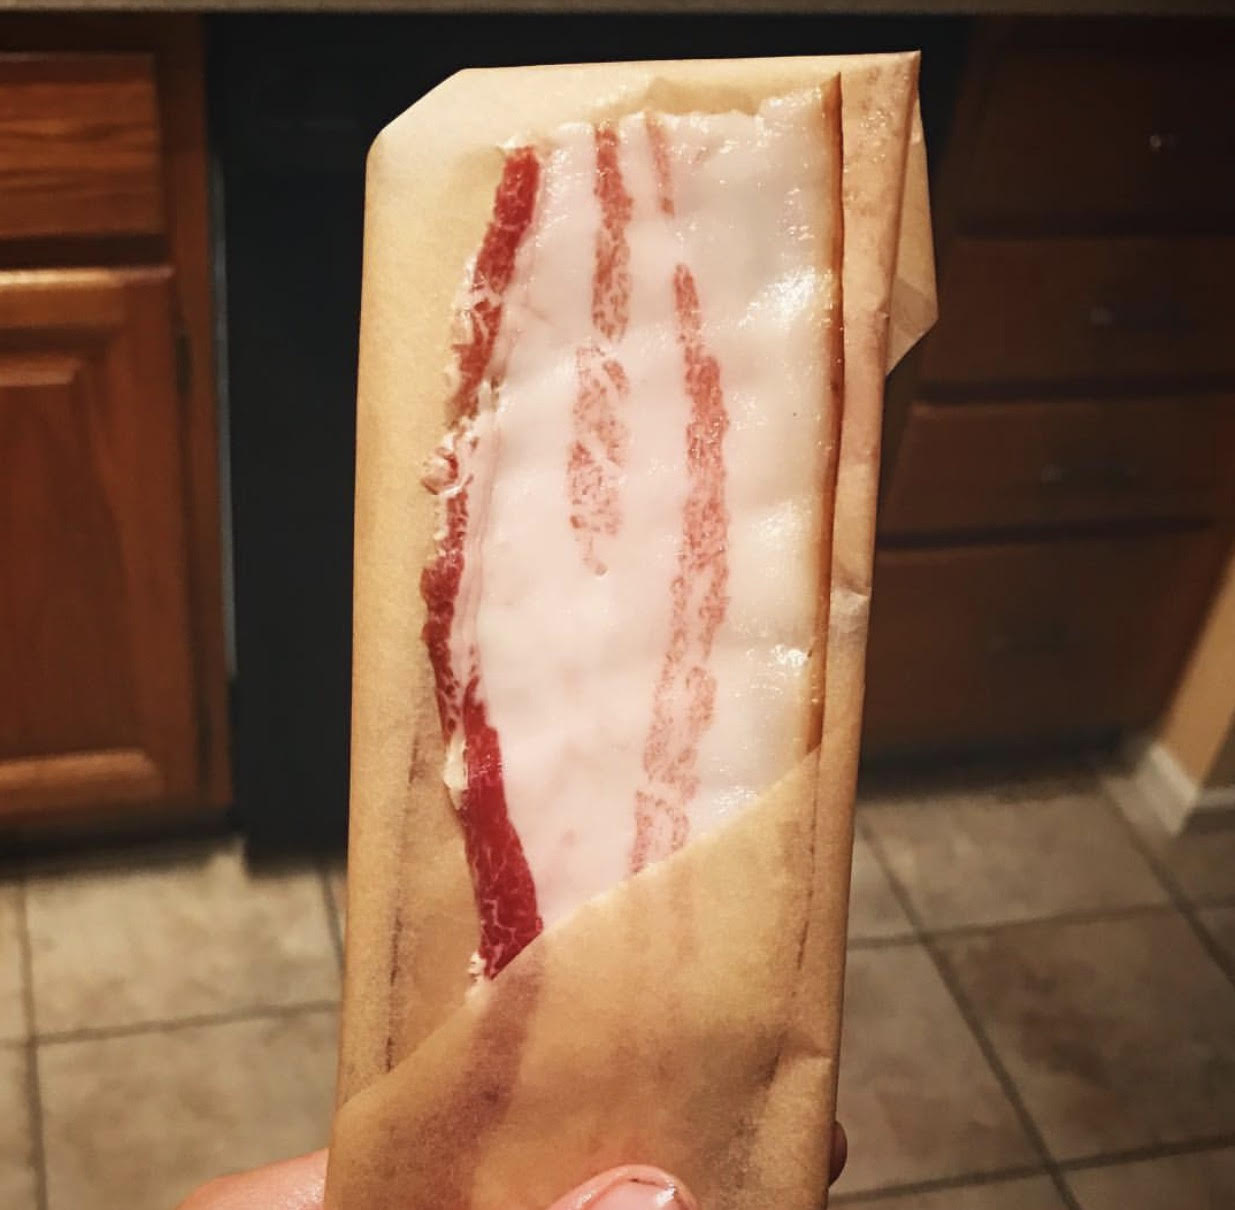
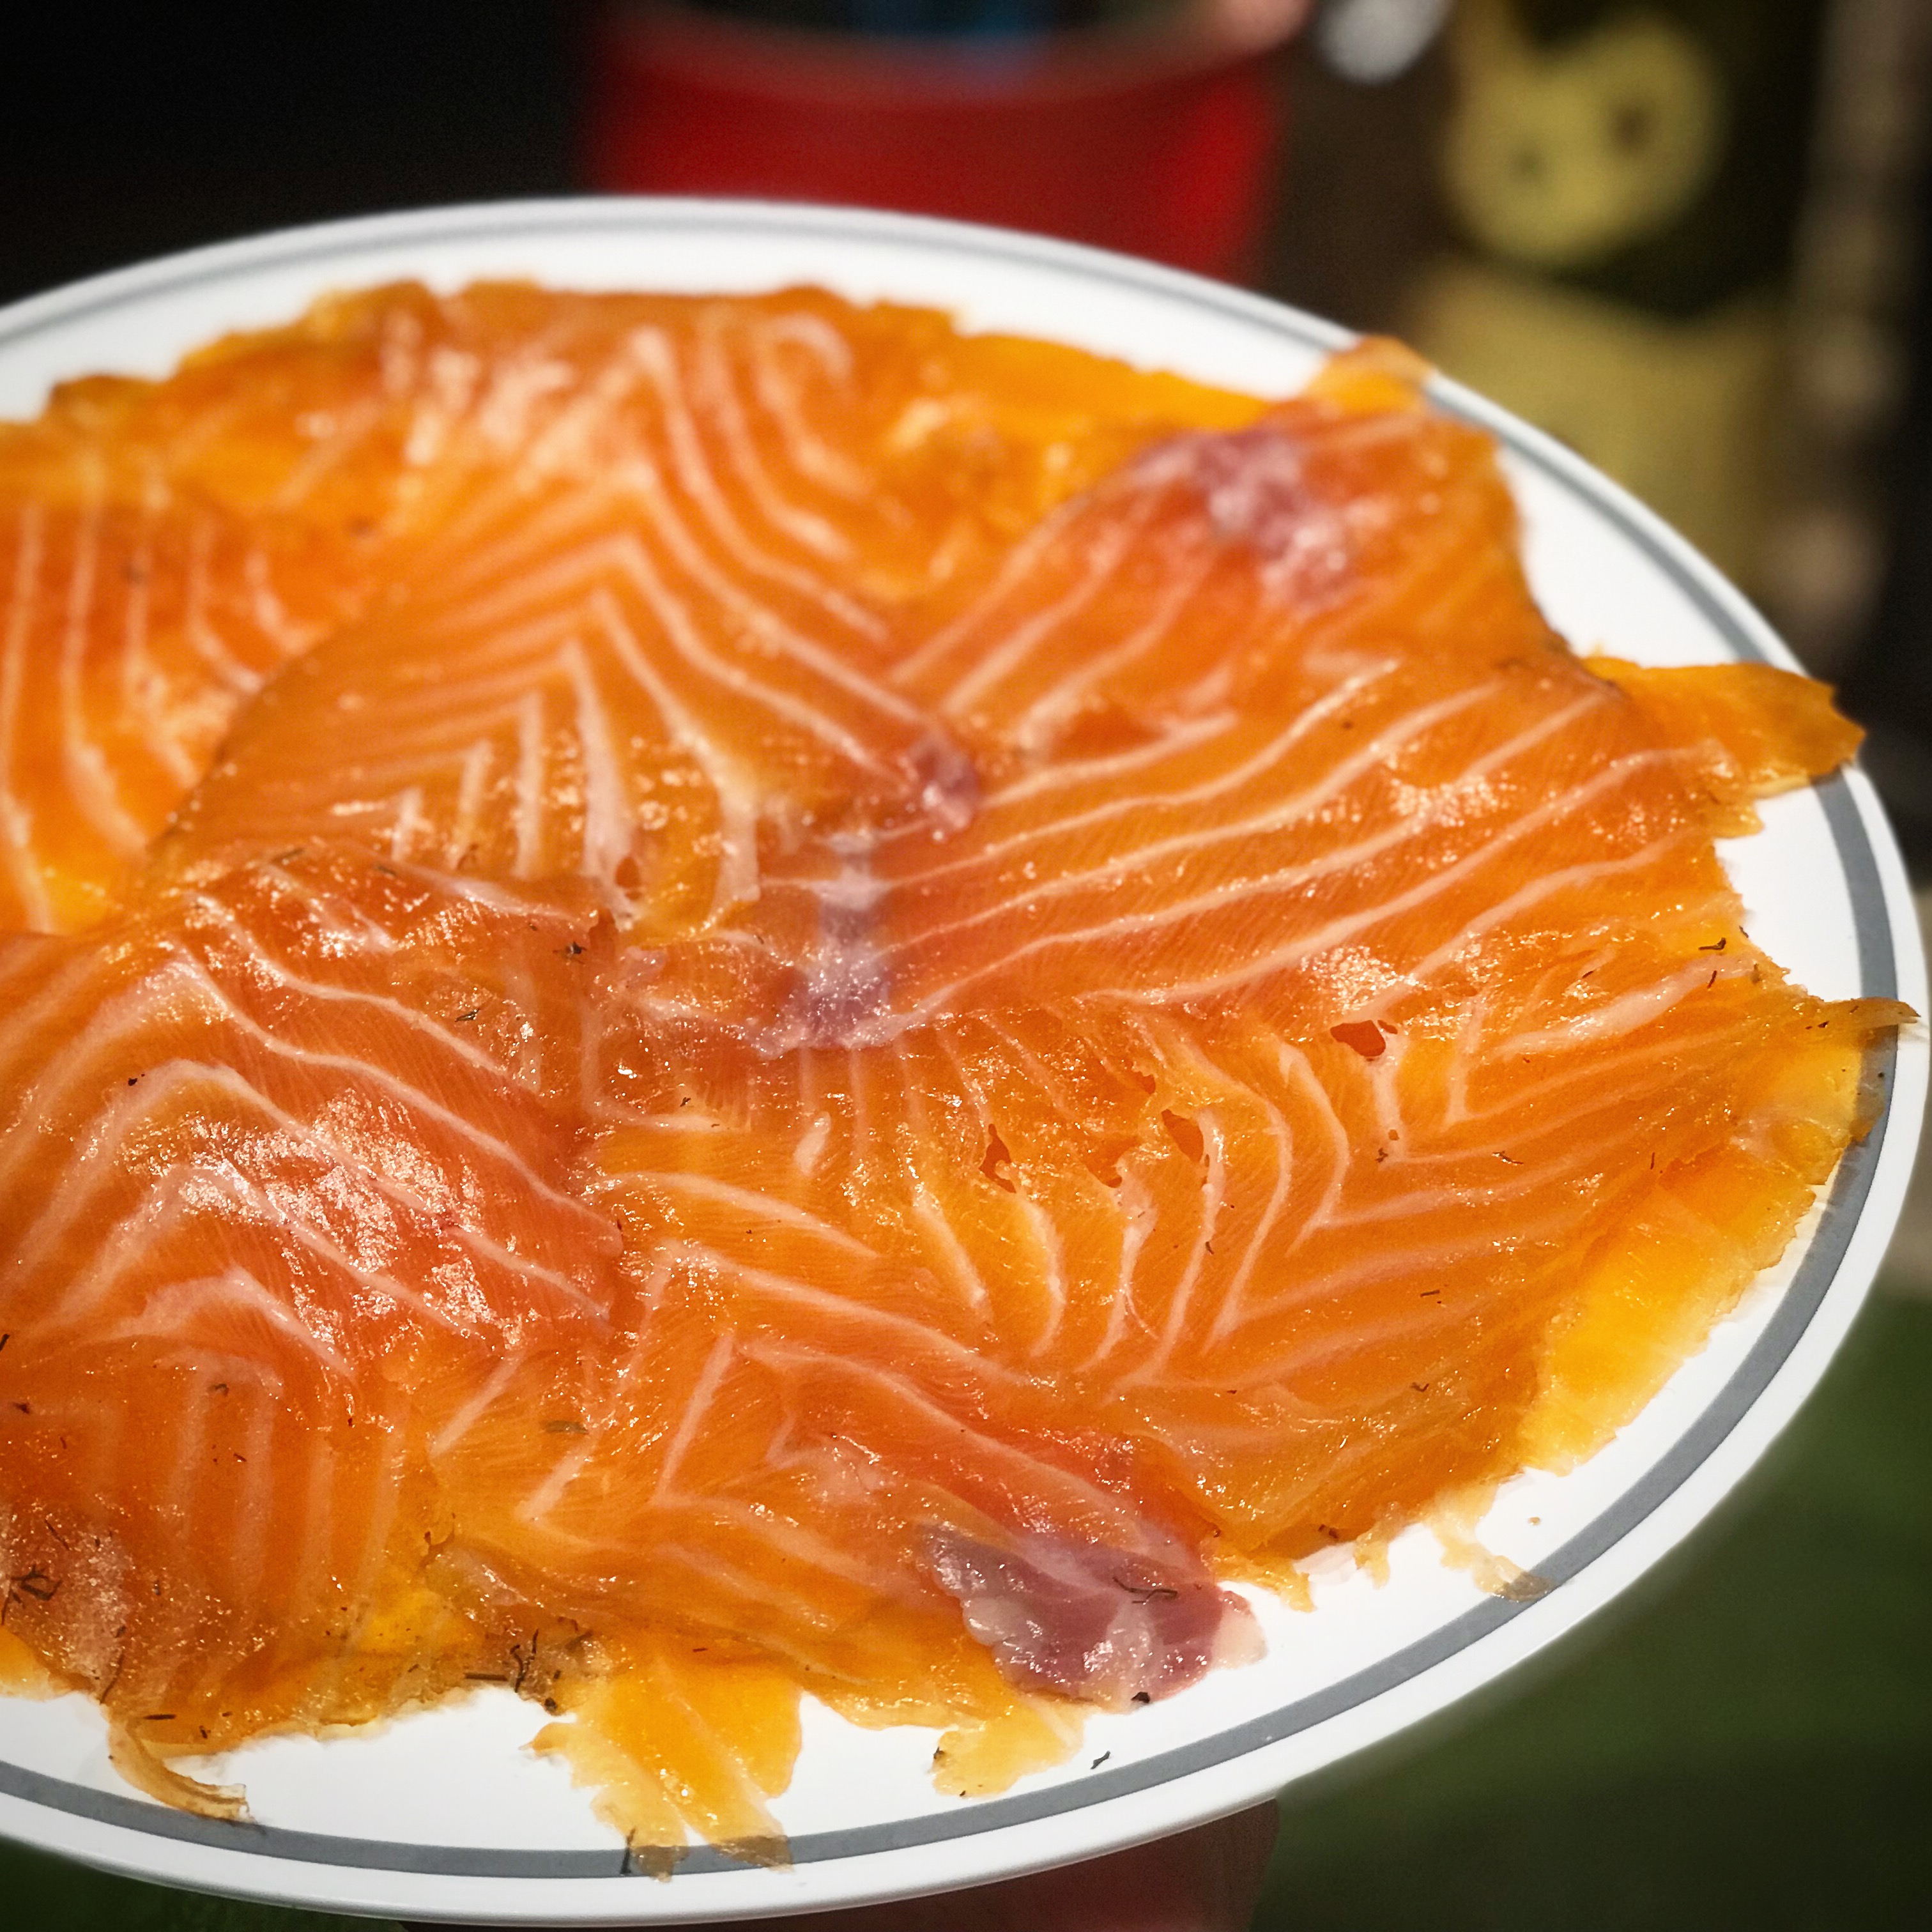
The next morning, you can start to slice up your freshly made nova lox!

5F2C8E77-3584-41F1-8CEF-375CF90844F0

If you find that you are making a lot of home cured lox, you might want to invest in a salmon knife. They’re relatively easy to get online, and making thin slicing of lox a whole lot easier.

28BBF19C-0FFB-4031-B051-77C41706E862

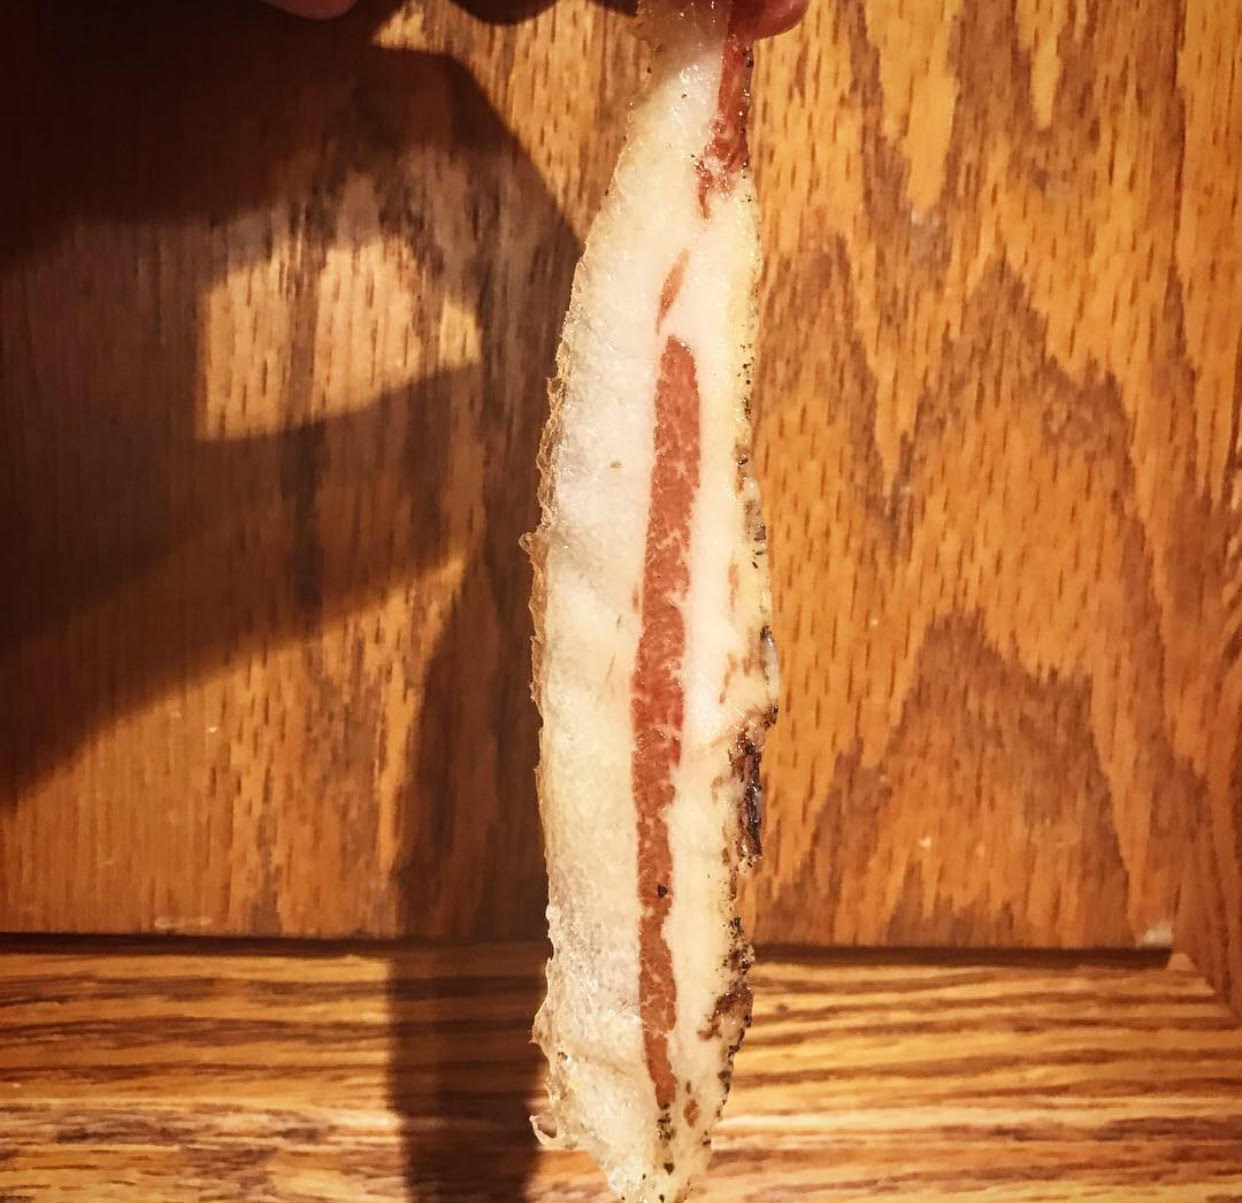
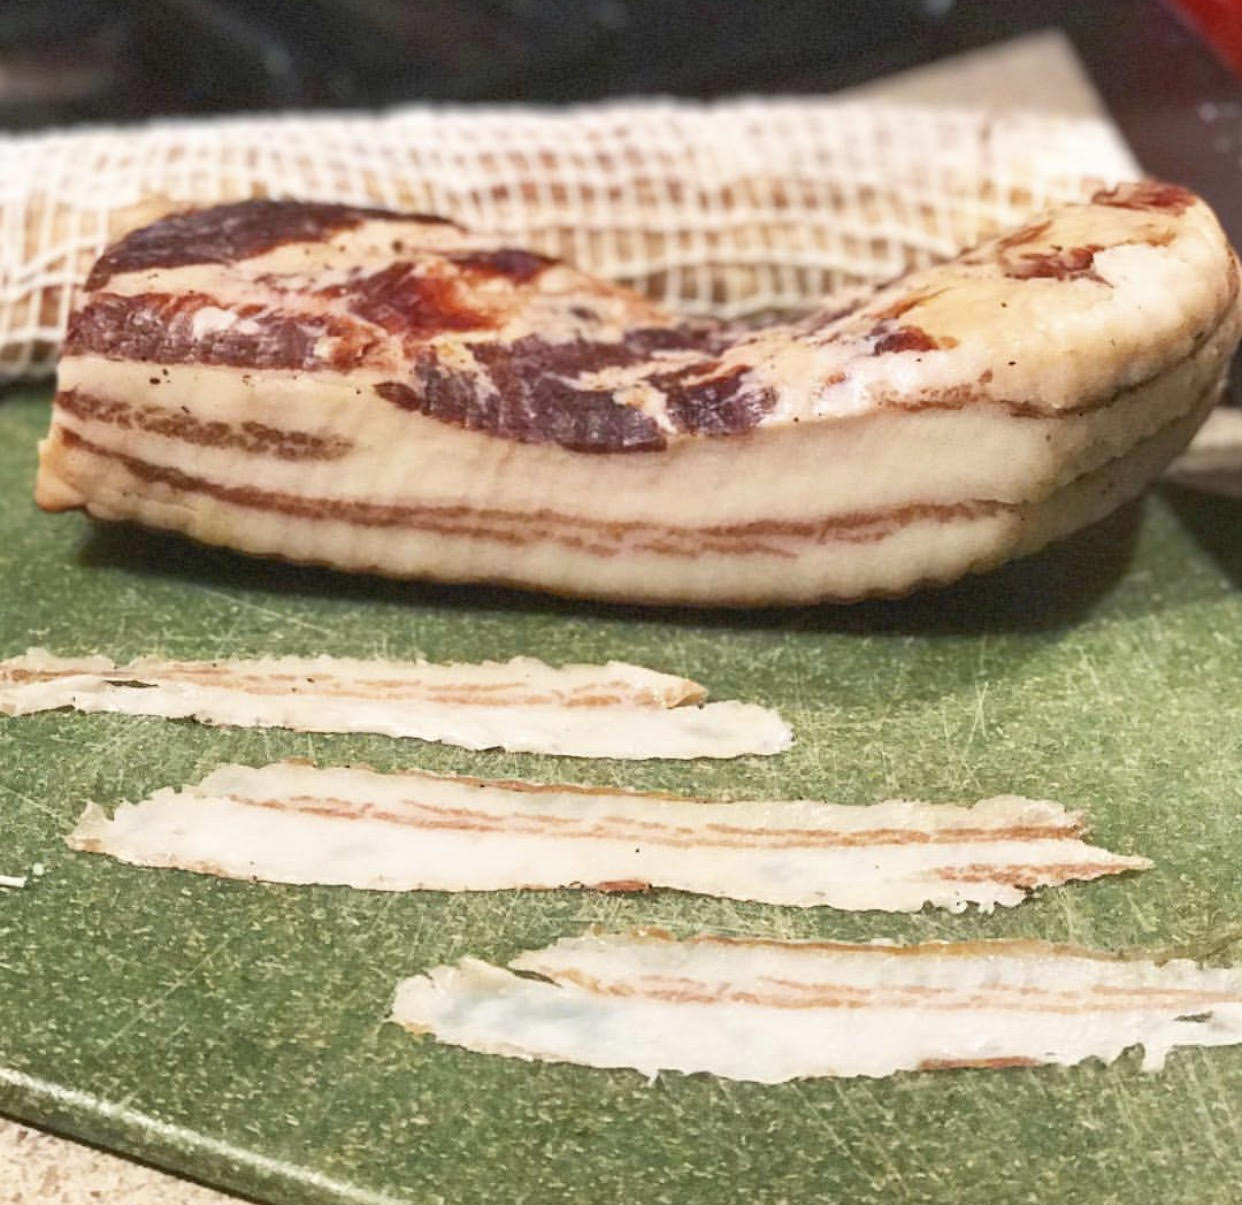
Slice it as thin as you can and you are ready to go!

4D519F0D-519E-4646-804B-B57E027993A3


Storage

You can slice it all in one go, or you can keep it in a vacuum sealed bag and take slices out of it as you wish. I find that when stored like this, it lasts about a week or so.


Disclaimer: Curing fish is a hobby that comes with inherent risks. We can all do things to limit this risk by educating ourselves about the process and the utilizing the safest known methods to create our products. This website is for educational purposes only, and all experimentation should be done at each individuals own risk.

Filed Under: Charcuterie Tagged With: diy, homemade, lox, nova lox, novalox, recipe, salmon

Spanish Style Chorizo

August 29, 2017 by AOG Leave a Comment

Chorizo! Chorizo! Chorizo! There are so many different kinds of chorizo that it can be hard to know where to begin when talking about chorizo. Some chorizo, such as Mexican style chorizo, is a fresh sausage that is great to crumble and cook with eggs for breakfast. Fresh sausage chorizo are great and can liven up any dish that they are added to. But for me, the real magic is in the Spanish style, dry cured chorizo. Spanish style chorizo is made using a combination of Spanish spices, prominently both dulce and picante pimentón de la Vera. Like any other dry cured salami, it is allowed to hang after it has been mixed and stuffed, until it loses ~30-40% of its initial weight, and is ready to eat at that point. Unlike the fresh style chorizo, the Spanish style chorizo does not need to be cooked to be eaten. The combination of spices in this Spanish style chorizo are fantastic, and it is one of my all time favorite salami. Packed full of flavor, its great however you want to eat it.

IMG_3330


Planning

For this salami, you want to use pimentón de la Vera, not just any old paprika. Good quality flavor makes all the difference. Other than that, it’s a pretty simple recipe, so the other spices are ones you probably will have on hand. The ratio of meat/fat is the usual 70/30 percent. I tend to use meat from the shoulder for the meat and belly fat for the fat (because I love the flavor/texture of belly fat) but it is more traditional to use the more firm back fat for this. Whatever you choose to use, just make sure your fat is at least 30% of the total meat weight. Once you’ve weighed your meat, put the value into your spreadsheet, and calculate how much of each spice that you will need. I used a 50/50 sweet to spicy pimentón de la Vera, but if you prefer more spice, you can up the percentage (just make sure to keep the total percentage of the pimentón de la Vera at 2.5% of the weight of the meat). My ratios are below.

IMG_2239


Cubing

After you have planned the ratios for your meat, it’s time to get started. Making sure you keep everything cold (I par freeze my meat before hand and return it to the freezer when I am done working with it), cube the meat into 1 inch pieces that will fit into your grinder. For this salami, I really prefer to have my fat hand diced, so I cut it into ¼ inch pieces. If you want to grind it, cut it into 1 inch pieces like the meat, and grind it through a coarse die.


Grinding and Mixing

Grind your meat (and your fat if you are not choosing to hand cut your fat) while it is still partially frozen to make the process go as smoothly as possible. I grind the meat on a medium grind, and the fat on a coarse grind (if I am grinding it). You can mix the spices with the cubed meat before you grind it, or with the ground meat afterwards. I generally mix it before hand to get better spice distribution.

IMG_2242

After grinding the meat, making sure to keep it cold throughout the entire process, you want to mix the meat, fat, and spices together to get a nice bind. I used a stand mixer on the slowest setting for this, although you can also do this step by hand. You want to mix it enough to get a good bind, but not so much that it becomes mush.


Stuffing

After the meat has been mixed together, it’s time to stuff it. I used two different diameter casings for this, smaller diameter beef middles and larger diameter beef bungs. The smaller diameter ones are more traditional for Spanish style chorizo, but I like a larger diameter salami, so I made one for fun.

IMG_2244


Fermentation
Temperature: 75ᵒF/23-24C (strain dependent)
Humidity: 80-90% RH
Time: 48-72 hours (until pH drops to at least 5.3)

After the chorizo has been stuffed, it’s time to allow it to ferment. The conditions for the fermentation will be strain dependent. I use B-LC-007, which is a starter culture that requires temperatures of ~70F and a relative humidity ~80-90%. I let the chorizo ferment for ~48 hours, which is about the time it should take to allow the pH to drop into the ideal range. I don’t currently use a pH meter (they’re relatively expensive), but if you have one, now is the time to use it. Ideally, you want to see the pH drop  to around 5.3.

IMG_2255


Cold Smoking

It is not traditional to cold smoke chorizo, but you can if you want to. For an experiment, I cold smoked one link of this chorizo that I made to compare it to the others during the tasting phase. Make sure you smoke with a complimentary wood (I used beech for this) and that you keep your temperatures in the actual cold smoking range (<90F).


Drying
Temperature: 54F/12C
Humidity: 70% RH

After the meat has undergone fermentation, it’s time to let it dry. I hang it in my curing chamber in the usual conditions, ~55F/70%RH, until its lost ~40% if its initial weight. If you want it to be more firm, you can let it go even longer than 40%, but I like mine to be a little on the softer side.

IMG_5612


Tasting

The best part is always the tasting! After the meat has lost the appropriate amount of weight for your tastes, you can pull it from the curing chamber. For this, I pulled the smaller diameter chorizo first.

IMG_8292

I compared the flavor of the smoked chorizo to the non-smoked chorizo.

IMG_8286

I personally preferred the non-smoked, but others who tried it preferred the smoked. I think it’s one of those things that is up to personal tastes.

After the larger diameter salami lost the appropriate amount of weight, I pulled it as well. This one was great!

IMG_3331

Nothing was different in this one except for the diameter of the casing, but I liked it a lot more. Maybe just because I could slice it thin and really taste it, but WOW; this is an all-time favorite.

IMG_3332

This chorizo is great served in a platter with other meats, on bread, or with wine.

IMG_5931

IMG_8766

IMG_3377


Disclaimer: Meat curing is a hobby that comes with inherent risks. We can all do things to limit this risk by educating ourselves about the process and the utilizing the safest known methods to create our products. This website is for educational purposes only, and all experimentation should be done at each individuals own risk.


Filed Under: Charcuterie Tagged With: charcuterie, chorizo, cured meats, curing, diy, homemade, recipe, spanish style chorizo

‘Nduja

August 24, 2017 by AOG 5 Comments

‘Nduja (en-DOO-yah)  wanna do something fun today? Make ‘nduja! If you’re looking for something that is the opposite of subtle, that will kick you in the face and leave you smiling, look no further. ‘Ndjua is a fatty, fiery hot, smoked, spreadable salami that is perfect on some crusty Italian bread or as base for pasta sauce. The combination of spice, smoke, and fat will leave you constantly craving more.

IMG_5647


Planning Phase:

The process of making ‘nduja may seem odd to you if you’re used to making traditional salami. The ratios you need to use may seem completely ridiculous. Don’t worry. If it seems excessive, it is. That’s the point. You’re going to want 70% meat and 30% pepper.

In the 70% meat fraction, you want 85% fat and 15% lean meat. No, that’s not a typo. This salami is mostly fat. There are a number of ways to get to this. You can use straight belly or jowls, which tend to have this ratio naturally. Or, you can use backfat and mix it with lean meat.

In the 30% pepper fraction, you can vary the ratios based on tastes.  I used 50% sweet pepper and 50% hot pepper.  (Just a note: There are a number of ways to make the pepper fraction for ‘nduja. Some people use dried whole peppers, others use dry pepper powder, and still others use paste. If you are using dried whole peppers, you will need to put them through your grinder first. Once they are ground, you can reconstitute them into a paste.) For mine, I used a combination of dry pepper powder and pepper paste to get to my 30% total pepper.

IMG_9313


Cubing and Mixing Phase:

Once you have weighed all of your ingredients, you can put them aside while you deal with the meat. First, you want to cube the meat into smaller chunks that will fit in your grinder. I par-freeze my meat, and keep it in the freezer while I am working to ensure that it stays cold and therefore grinds more easily.  After the meat is cut, I mix it with the spice cure that I previously had measured out. Some people wait until the meat is ground to mix in the spices, which is also an option, but I feel as though I get a better mixing process achieved by mixing them before grinding (however, it makes my grinder a lot messier this way).

IMG_9315


Grinding and Stuffing Phase:

After the meat and spices are mixed, I ran it through the grinder on a fine grind. After the meat was ground, I mixed it in a stand mixer on a low speed to promote adhesion. Then I added the mixture to my vertical stuffer and stuffed the meat into hog middles, a traditional casing for ‘nduja.

IMG_9317


Fermentation Phase:

~70F/80-90%RH (starter culture dependent)

After stuffing, I allowed the meat to ferment for 48 hours in my fermentation chamber (aka my oven with the light on, a pan of water at the bottom, and the occasional water spray bottle service).

IMG_9319


Cold Smoking Phase:

After the fermentation stage was done (and boy was I glad when this time was up, hog middles stink like no other casing I have worked with before), I put the meat into my cold smoking set up, and cold smoked them with beech wood for 4+ hours.

IMG_9695

IMG_9704

IMG_9858


Drying Phase:

~55F/70%RH

After cold smoking, I tied and weighed each of them.

IMG_9859

Then I hung them up in the curing chamber to dry.

IMG_9861

‘Nduja has such a high fat content that it’s not expected to lose much weight in the drying phase (10-20%), but importantly it experiences a maturation of flavor in this time.  Most people hang their ‘nduja by time instead of weight loss for this reason, and I picked a time point of 2 months.


Tasting Phase:

After 2 months, my ‘nduja had each lost about 20% of their initial weight, more than I expected.

IMG_5627

I cut it open and was excited by how beautiful it looked. So, I dove right in. I took a knife and spread some onto a nice piece of toasted sourdough.

IMG_2879

WOW. I was blown away; an instant favorite. I knew that I had better start a second batch immediately, because I was going to find a way to sneak this into every dish I made, as well as eat it as a snack as often as possible.

It’s a great way to start a sauce for pasta.

IMG_2996

Really, just great all around.


Disclaimer: Meat curing is a hobby that comes with inherent risks. We can all do things to limit this risk by educating ourselves about the process and the utilizing the safest known methods to create our products. This website is for educational purposes only, and all experimentation should be done at each individuals own risk.

Filed Under: Charcuterie Tagged With: charcuterie, diy, fatty, homemade, nduja, spicy

Pancetta Arrotolata

August 24, 2017 by AOG 4 Comments

Previously, I have discussed the different types of pancetta that are commonly made. You can read more about it in my post here. The take away points are that pancetta can either be semi-dried or fully-dried, made either flat (Tesa) or rolled (arrotolata). I prefer the fully dried version of pancetta, so here I made the fully-dried version of pancetta arrotolata.

Pancetta arrotolata is what many people traditionally think of when they think of pancetta. Beautiful streaks of meat and fat, winding in and out, creating a circle of perfection.

IMG_2505


Planning Phase:

In order to make pancetta arrotolata, you will need to start with a flat pork belly. You can either use a pork belly that has skin on or skin off. Skin on is traditional, and ensures that you will have a slower, steadier weight loss. The downsides are that it can take a lot of time to lose the weight you need and it is a bit trickier to manipulate. I used skin on for mine, but if I were to do it again, I might choose to do skin off and save the skin for another purpose.

IMG_0607

First, weigh the pork belly, and put the weight of the meat into your spice cure spreadsheet to get the values that you need to use for your spice cure mixture. Pancetta is generally made with aromatic spices, so that is what I did here.

IMG_0608


Curing Phase (3+ weeks):

After the spice cure is weighed, mix it, and add it to the meat, making sure cover the meat thoroughly.

IMG_0609

Add it to a vacuum sealed or ziplock bag, and leave it to penetrate the meat for 3+ weeks in the fridge.

IMG_0610


Casing and Tying Phase:

After the meat has cured, it’s rinsed and dried. Now, pancetta arrotolata has a few extra steps that pancetta tesa does not have. Anytime you introduce an exterior into the interior of a meat that will be cured, you increase the possibility of things going awry. When rolling the pancetta, you want to make sure that you roll it as tight as possible, so that you don’t introduce air pockets into the cured where undesirables can thrive. Toasted black peppercorns can be added to the meat to help protect against the growth of bad bacteria, as well as for flavor.

There are a few ways to roll pancetta arrotolata, but I chose to use a traditional method. For this method, a flap of skin is removed from the underlying belly, but remains attached to the test of the skin. With the meat side of the belly facing upwards, a cut is made in the center, and half of the belly is cut into two thinner pieces, still attached to the rest of the meat. The exposed meat is covered with black peppercorns, and rolled up from the thin side to the thick side. My butchering left a bit to be desired, but take a look at the pictures to get an idea of what I mean. If this sounds too complicated for you, you can just roll the belly up tightly, making sure to cut off the skin on the areas that will be rolled into the interior.

IMG_6459

After the belly is rolled up tightly, you want to make sure it stays that way. Traditionally this is done by tying string around the meat and making sure it’s as tight as possible. Another way to do this is to use zip ties. Zip ties are less aesthetically pleasing, but I wanted to make sure that I didn’t get a ruined piece of meat at the end with a lot of air pockets and interior mold growth, so I used them.

IMG_6460

The skin acts as a natural casing for this meat, so you don’t need to case it if you are doing it skin on. If you are doing it skin off, I would suggest using a natural casing to slow the weight loss and to maintain more even drying. After its all tied up tightly and cased, I added string to hang it.

IMG_6461


Drying Phase (3+ months)

55F/70%RH

It was allowed to hang in the curing chamber at 55F/70%RH. My target weight loss was 30%, but I was happy to pull it when it reached 20% due to its high fat content.

IMG_6463

After 3-4 months, I pulled the pancetta arrotolata at ~20% weight loss.

IMG_1022

The outside looked gnarly.

IMG_0604

But the inside looked beautiful.

IMG_0605

Decadent and delicious.

IMG_0606


Disclaimer: Meat curing is a hobby that comes with inherent risks. We can all do things to limit this risk by educating ourselves about the process and the utilizing the safest known methods to create our products. This website is for educational purposes only, and all experimentation should be done at each individuals own risk.

Filed Under: Charcuterie Tagged With: arrotolata, charcuterie, cured meat, diy, homemade, pancetta, pancetta arrotolata, pork belly

Guanciale

March 9, 2017 by AOG 4 Comments

Sometimes, you need to undertake a multi-month process in order to make a great dish of pasta for dinner. In this case, that process starts with a pig jowl and ends in a delicious plate of pasta all’amatriciana. Yup, I’m talking about making guanciale, or a dry cured pig jowl.

guanciale 1


Planning Phase:

This process starts with a nice piece of pig jowl, or pig cheek. In my case, I picked up a pig jowl from a local farmer’s market. I did some research into traditional cures that would give it good flavor without being too overpowering.

guanciale cure ratio for blog


Curing Phase (2 weeks+):

I weighed the meat and the spices first.

guanciale 6

Then, I vacuum sealed them and allowed it to cure in the fridge.

guanciale 8

It should stay in the cure for a minimum of 2 weeks, although I left mine in for 4 months because I got distracted. That’s one of the major benefits of using an equilibrium cure, the meat can stay in it for while while life happens.


Drying Phase (2 months+):

After 4 months (whoops) I took the meat out of cure, rinsed it in cold water, patted it dry, and coated it with black pepper. I used a needle and thread to sew a hole through the meat in order to hang it up in the curing chamber.

guanciale 5

The meat was hung in the curing chamber for 2 months, until its weight loss plateaued at 20%.


Tasting Phase:

I sliced this up thin to taste it, and boy does it have some good flavor.

guanciale 3

Without being overpowering, this cure brought out the best of the flavor of the pork jowl.

guanciale 10

Sliced thin, this is perfect for tasting.

guanciale 2

I cut thicker stripes to use as a base for pasta sauce.

guanciale 11

Pasta all’amatriciana and carbonara here I come!

guanciale 9


Disclaimer: Meat curing is a hobby that comes with inherent risks. We can all do things to limit this risk by educating ourselves about the process and the utilizing the safest known methods to create our products. This website is for educational purposes only, and all experimentation should be done at each individuals own risk.

Filed Under: Charcuterie Tagged With: charcuterie, cured meat, diy, guanciale, homemade

Soppressata Piccante

March 7, 2017 by AOG 6 Comments

Perhaps the most well-known Italian dry cured salami – Soppressata Piccante. I had been dying to make this salami for a while, and finally decided to jump in when I had some help from my sister. You know what they say about meat curing; families that cure meat together, stay together. I designed this salami based on the Soppressata Piccante di Calabria, but I didn’t strictly adhere to D.O.P. guidelines. I think this may be one of the best salami I have ever made.

soppressata


Planning Phase:

To make this salami, I put together a cure ratio based on what I have seen used for soppressata.

soppressata 11


Cubing Phase:

Then, I cubed the meat and the fat and mixed them with the spice cure.

soppressata 13

soppressata 12


Grinding Phase:

After the meat was cubed and mixed with the spice cure, it was put through the grinder. After the meat and fat was ground, it was mixed together in stand mixer while COLD until the meat was tacky and sticking together, without the fat starting to smear.


Stuffing Phase:

The meat was then stuffed into beef bung casing, which are a larger diameter and perfect for soppressata, which can also be made with hog middles or crespone. I also used a beef middle for some leftovers that I had.

soppressata 14


Fermentation Phase:
Temperature: 75ᵒF/23-24C
Humidity: 80-90% RH (strain dependent)
Time: 48-72 hours (until pH drops to at least 5.3)

The soppressata was allowed to ferment for 72 hours at 75 F and 80% RH. This was done in my modified fermentation chamber (aka my oven with the light on and an open pan of water).

soppressata 8

I didn’t press these, but I could have. In this case, gravity took care of it for me, and after the fermentation stage, they took on the characteristic soppressata shape.


Netting Phase:

After the fermentation, the soppressata was netted and prepared to move into the curing chamber.

soppressata 7

soppressata 6


Drying Phase:
Temperature: 54F/12C
Humidity: 70% RH

After the soppressata was fermented and netted, it was moved into the curing chamber to dry.

soppressata 5

It was allowed to stay in the chamber for 3 months, over which time it developed a nice beneficial mold growth.

soppressata 4

It was pulled at the end of this time, at around 40% weight loss.

soppressata 3


Tasting Phase:

Andddd the best part, the tasting. Look at that guy.

soppressata 2

This one is awesome. Flavorful. Spicy without being overpowering. An overall winner.

soppressata 10


Disclaimer: Meat curing is a hobby that comes with inherent risks. We can all do things to limit this risk by educating ourselves about the process and the utilizing the safest known methods to create our products. This website is for educational purposes only, and all experimentation should be done at each individuals own risk.


Filed Under: Charcuterie Tagged With: charcuterie, cured meat, diy, homemade, piccante, recipe, soppressata

Italian Style Dry Cured Salami

March 7, 2017 by AOG 1 Comment

If you’re looking for a nice, easy salami to make that evokes the sensory experiences of traveling to Italy, look no further than to this salami. This is a good jumping off point to make salami because it uses a moderate amount of traditional, Italian spices. After making this salami, you can decide if you want to use more fennel, make a spicy variety, or throw in some crazy spice that’s a favorite of yours.

salami 9


Planning Phase:

The first step is to weigh your meat and input it into your spreadsheet.  A good ratio of lean meat to fat is generally around 70% to 30%. This can be achieved if you get a nice fatty shoulder, although I like mixing meat from the shoulder and the belly. Based on the weight of the meat, you will be given how much of each spice you want to use.

salami cure ratio italian style

Then you want to weigh out all the spices that you will be using.

salami dry cure

To prepare for the next steps, I like to freeze my meat for a few hours before starting. This helps to keep the meat cold during the grinding process, and makes things go more smoothly.


Cubing Phase:

Next, you want to take the cold meat and cube it into pieces that will fit into your grinder, usually about an inch by an inch by an inch.

salami 2

I separate the meat from the fat, since I may end up grinding them with different size grinds.

italian salami meat cubed

You can cube both the meat and the fat, unless you are planning to hand dice the fat instead of grinding it. If you are planning to hand dice the fat, cut it into pieces that are the size you want in the salami, usually about ¼ of an inch on each side.


Mixing Phase Part 1:

Once the meat and fat is cubed, you want to mix it with the cure spices and the starter culture dissolved either in the wine or if you prefer, water.


Grinding Phase:

Now that you have the meat and fat all mixed with the cure and ready to go, it’s time to grind that meat! I like to use 3/16” grinder plates for the meat and 3/8” grinder plate for the fat (if I decide not to hand dice the fat).

salami 3

Run the meat through the grinder, making sure to keep everything as cold as possible, and return to the fridge or freezer when not in use.


Mixing Phase Part 2:

When you have finished the grinding phase, you should have a nice mixture of ground meat with the cure mixture and the starter culture thoroughly mixed in. The next step is to mix the meat and the fat together. This can be a tricky part. Ideally, you want to mix the meat and fat so that the mixture becomes tacky and sticks together, but not so much that the fat starts to smear. You can usually accomplish this if you keep the meat cold and work fast. This is either done using a stand mixer or by hand. One you have mixed everything together, you can leave the mixture to chill overnight in the fridge (which can help to increase the cohesion of the meat), or you can move on to the next phase.


Stuffing Phase:

Finally, we’re ready to stuff the meat. There are many options for casings, from the variety of natural casings that are available, to artificial collagen casings. The casings you choose will help determine the final diameter of your product as well as its final shape. Collagen casings are fine, and might be preferred by beginners since they are easy to store and use, don’t have an odor, and are relatively difficult to burst. For the traditional Italian style salami made here, I prefer using beef middles.

beef middles

In order to stuff salami, you can use the stuffing horn that comes with many grinders, or you can use a dedicated stuffer. I have a dedicated hand crank stuffer, which I prefer to using the grinder to stuff the salami.

The first step is to tie off the end of the casing, and slide it down the stuffing horn.

casing on stuffer

With one hand on the casing, and one hand working the stuffer, start to stuff the salami at a constant rate. Ideally, you want to allow the meat to fill up the casing without having room for air gaps. This will put pressure on the casing walls, hopefully without bursting the casing. This is easier in certain types of casings compared to others, and over time you’ll find the right balance of pressure to apply to the casings that you use. When you get to the end of the casing, tie it off, and start again with a new casing until you finish stuffing all of the meat that you have prepared.


Fermentation Phase:
Temperature: 75ᵒF/23-24C
Humidity: 80-90% RH (strain dependent)
Time: 48-72 hours (until pH drops to at least 5.3)

At this point, you’ve finished all the heavy lifting! You want to put your salami in a fermentation chamber in order to jump start the beneficial starter culture that was added to the meat, which will make it both safer and tastier over time. People have come up with very clever ways to do this, from dedicated chambers to DIY hacks. The temperature and humidity you want will vary based on the starter culture that you use. For B-LC-007, I aim for 64-75 ⁰F and 80-90% humidity. In order to achieve this, I use my oven with the light on and an open pan with water in it. I also spray the meat with a bactoferm mold-600 solution to encourage the growth of the beneficial penicillium nalgiovense.

italian salami fermentation

If you have a pH meter, you want to monitor the pH during this phase. Ideally, the pH will drop below 5.3 during the fermentation phase. If you don’t have a fermentation meter, you can do this stage by time and smell. I generally let my salami ferment for 48-72 hours before moving on to the next phase.


Drying Phase:
Temperature: 54F/12C
Humidity: 70% RH

After you’ve allowed your salami to ferment for the appropriate amount of time, it’s time to let it dry. This is best done in a curing chamber with a temperature around 55F and a humidity of 70% RH.

salami 6

Overtime, you will see beneficial mold growth on the salami in your curing chamber.

salami 7

I track the salami weight loss over time, and pull them from the chamber at 40% loss of the original weight.

salami 11


Tasting Phase:

And now, to the best phase of making salami! The taste testing. When the salami have reached 40% weight loss, I pull them from the chamber.

salami 14

I remove the casing, rinse the down with red wine or vinegar, and slice them on a bias.

salami 12

These Italian style salami make a nice addition to a home cured meat platter.

charcuterie plate

Or packaged up to give to friends and family.

meat to go

Isn’t it just beautiful?

salami 10

Smile!salami 13


Disclaimer: Meat curing is a hobby that comes with inherent risks. We can all do things to limit this risk by educating ourselves about the process and the utilizing the safest known methods to create our products. This website is for educational purposes only, and all experimentation should be done at each individuals own risk.

Filed Under: Charcuterie Tagged With: charcuterie, cured meat, diy, home-cured, homemade, italian salami, salame, salami

Lardo Ibérico de Bellota

February 7, 2017 by AOG 8 Comments

Lardo. Aka FAT. Or, as a friend of mine described this upon tasting it, “The most delicious rosemary fat ever.” Yeah. I like that description. There are a number of ways to make lardo. Some traditional lardo is made in Italy by soaking the backfat in an aromatic brine inside marble vats for months to years. Others use a dry cure, either excess or equilibrium. How it is cured doesn’t matter, but the important thing is to get a nice thick slab of back fat to cure, which is usually best acquired from a farmer who has raised pigs to have a great fat profile.  Some people allow lardo to cure and then serve it. Others cure it, let it hang to dry, and then serve it. Because lardo is 100% fat, it won’t lose much moisture when hung, and many people don’t find it necessary to hang to dry. Fat, spices, and time. That’s all it takes.

lardo1


Curing (6 months+):

For my lardo, I obtained a nice piece of ibérico de bellota backfat.

lardo6

I used an aromatic equilibrium cure.

lardo cure ratios

lardo5

I covered the fat from light during the curing phase to prevent oxidation which can lead to discoloration. I allowed the lardo to cure for 6 months. Spices migrate slower in fat than they do in meat, and this allows them to migrate and equalize over time, and to develop flavor.


Tasting:

I decided not to hang this lardo. After it was done curing, I rinsed it off and sliced it with a few other home cured meats.

lardo2

Wow. Rosemary fat is right. Decadent and delicious. Perfect served on a piece of toasted bread.

lardo3


Disclaimer: Meat curing is a hobby that comes with inherent risks. We can all do things to limit this risk by educating ourselves about the process and the utilizing the safest known methods to create our products. This website is for educational purposes only, and all experimentation should be done at each individuals own risk.

Filed Under: Charcuterie Tagged With: charcuterie, cured meat, diy, fat, homemade, ibérico de bellota, lardo, recipe

Pancetta Tesa Ibérico de Bellota

February 2, 2017 by AOG 2 Comments

Pancetta is a cured meat product made from pork belly. There are two major different types, which are then done in different styles based on regional differences. The two major types are semi-dried and fully-dried. The semi-dried is more similar to bacon. It is cured, and hung to dry for maybe a week or two. It is then stored in the fridge or freezer, sliced, and cooked before eating. The fully dried is cured, and hung to dry until it loses about 30% of its starting weight, which usually takes a few months. The fully-dried doesn’t need to be cooked to be eaten, but it can be if desired. The semi-dried uses Cure #1 like bacon does, and the fully dried uses Cure #2 like other dry cured meats.

Now, these are the two major types, but they are both done in many different styles in different regions. The most recognizable style is probably pancetta arrotolata, which is where the pork belly rolled to create a long round cured meat that is then hung to dry. When it is sliced, you get pretty circular slices. Another type that is made is pancetta tesa. This is the pork belly cured,  allowed to stay flat, and hung. When it is sliced, you get long thin slices.

In this post, I will be talking about making pancetta tesa from an iberico de bellota pork belly.

pancetta tesa 2


Curing (2 weeks +):

The pork belly is put into an aromatic cure. It is allowed to cure for 2+ weeks.

pancetta tesa cure ratios


Casing (1 hour+):

The meat is taken out of the cure, rinsed and dried, is cased in a beef bung, and netted to hang.

pancetta tesa 5


Drying (1 month+):

The meat is allowed to hang until it has lost 20-30% of its initial weight. Because this is a fattier cut, it’s won’t too surprising if it doesn’t lose the full 30%.

pancetta tesa 4


Tasting: When the meat is out of the curing chamber, slice it thin, and enjoy!

pancetta tesa 3

And don’t forget, you can always take some with you as a nice to-go snack!

pancetta tesa 1


Disclaimer: Meat curing is a hobby that comes with inherent risks. We can all do things to limit this risk by educating ourselves about the process and the utilizing the safest known methods to create our products. This website is for educational purposes only, and all experimentation should be done at each individuals own risk.

Filed Under: Charcuterie Tagged With: charcuterie, cured meat, diy, homemade, ibérico, ibérico de bellota, pancetta, pancetta tesa, pork belly, recipe

Capocollo Ibérico de Bellota

January 30, 2017 by AOG Leave a Comment

Capocollo ibérico de bellota. Yes Yes Yes Yes Yes. My previous post on making capocollo used a bit of a fancier cure. Here I had such a fantastic piece of ibérico de bellota meat that I used as simple a cure as possible.

coppa1


Curing (2 weeks+): I weighed the meat for this project, and calculated the simple cure that would be used.

capocollo iberico cure ratios

The meat was allowed to stay in the cure for at least 2 weeks. In this case, it stayed in a few months because I got busy, one of the benefits of using an equilibrium cure.


Casing (1 hour+): The meat was taken out of the cure, rinsed and patted dry, cased in a beef bung, and netted.

capocollo casing iberico


Drying (3 months+): This meat was allowed to hang until it lost 30% of its weight.

curing chamber


Tasting: WOW. This was a fantastic piece of meat, with just basic prompting from me, it turned into a fantastic cured meat. This is a winner. I will be doing this one again.

coppa8

Perfect to slice up and serve as a snack.

coppa4

That’s some beautiful meat right there.

coppa7

Love to see that great fat.

coppa6


Disclaimer: Meat curing is a hobby that comes with inherent risks. We can all do things to limit this risk by educating ourselves about the process and the utilizing the safest known methods to create our products. This website is for educational purposes only, and all experimentation should be done at each individuals own risk.

Filed Under: Charcuterie Tagged With: capocollo, charcuterie, coppa, cured meat, diy, gabagool, homemade, recipe

  • « Previous Page
  • 1
  • 2
  • 3
  • 4
  • Next Page »
  • Instagram

Copyright © 2025 · Foodie Pro Theme by Shay Bocks · Built on the Genesis Framework · Powered by WordPress