The Explorations of a Gastrochemist

...because science can be delicious.

  • Beginner’s Guide
  • Wurst Adventure
  • Charcuterie
  • Preservation
  • Science
  • Molecular Gastronomy
  • All Projects
You are here: Home / Archives for prosciutto

Prosciutto

September 16, 2018 by AOG 12 Comments

“This is it. The big one. The one we’ve all been waiting for.” -Oliver Wood

C6DEE7CF-4B6D-4BDD-A327-9941C9CE4806


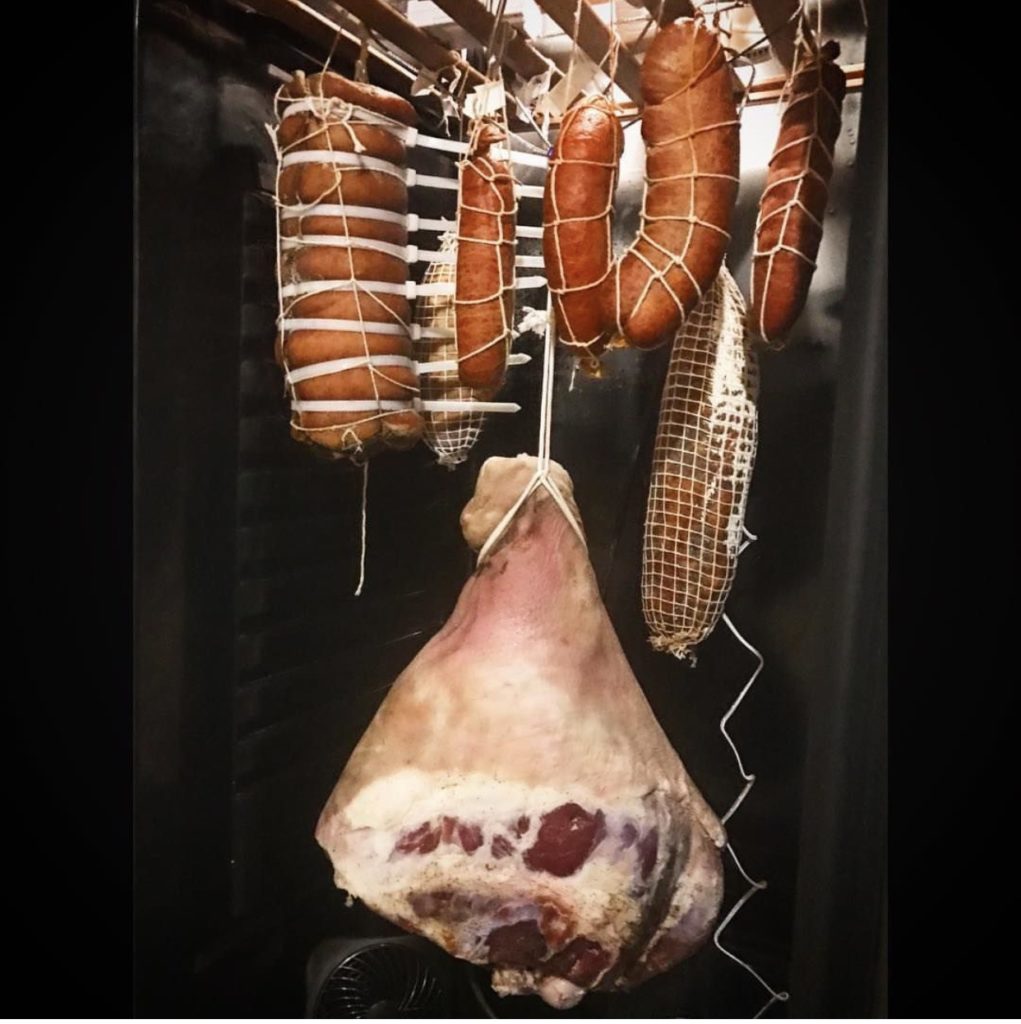
When I was a kid, I begged my parents to buy me lunchables; instead, they stocked my brown paper bag with prosciutto, mortadella, and crackers. In high school, prosciutto and arugula sandwiches became my daily lunch and pre-sports snack. When I studied abroad in Pisa, I alternated between caprese sandwiches and the wide range of salumi available to me, always finding a way back to the prosciutto. When I traveled to Spain and discovered the Spanish sister of prosciutto, jamón, I made my sister eat so much of it with me that she became a vegetarian for a bit when we came back home. So, it seemed only natural to me when I started along my meat curing journey, that making prosciutto would be on the list.

It took me a while. Making prosciutto, or jamón, is an intimidating undertaking. I read and read and read. I found books, blogs, online groups, and research articles. Finally, I traveled to Emilia-Romagna with my sister, and we visited two different prosciuttifici, one in Parma and one in Modena. It was these visits that finally gave me the confidence to go forward with curing my own prosciutto. (NOTE: All of this preparation was probably overkill, if you’re considering taking the plunge, go for it!)

Finally, I made contact with a farm in Michigan I found through online meat curing groups, Ham Sweet Farm. They raise great quality animals in a very conscientious manner, and their meat has been among the best I’ve used, if not the best. I got a rear leg from them to use for prosciutto, and the process was started.

EC63CE5D-D78B-4524-B39B-209A2245F2BA


The meat:

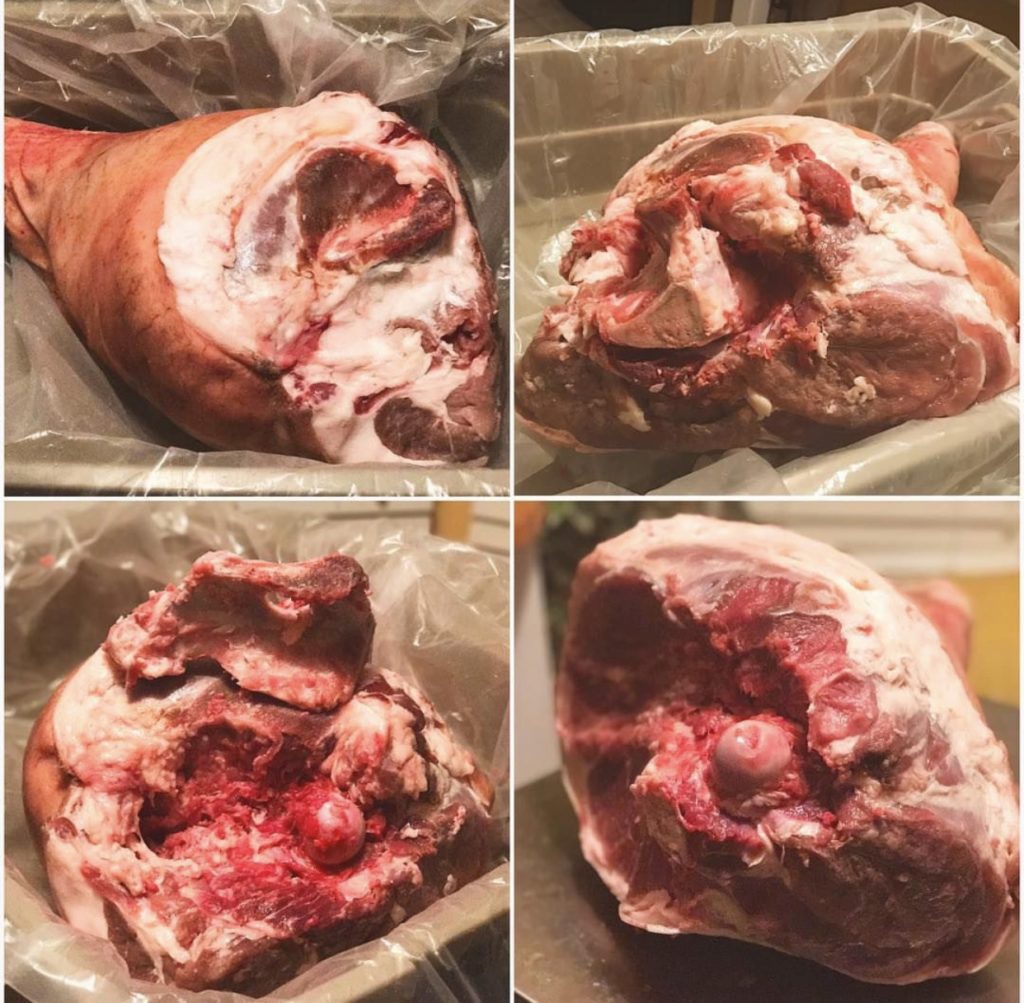
In Europe, animals are usually processed using seam butchery, meaning that individual muscles are kept intact. This is an intensive process that requires significant time and effort, so in America most animals are butchered by making cuts across the muscles, using technology such as the band saw. Both methods have their own pros and cons, but it’s important to know that if you receive the meat as a primal from an American processor, you will generally receive it with the ball and socket hip bone intact, and part of the hip bone just sawed through to create the cut of meat.

In order to cure prosciutto in the Italian way, as opposed to the Spanish way, you need to do some butchering to the leg primal. You will need to remove what is left of the hip bone, called the aitch bone in this context, and expose the ball part of the ball and socket hip joint. You can then clean up the surface, and this will give you the characteristic shape of the Italian prosciutto. If you prefer to cure the prosciutto the Spanish way, you can leave the aitch bone in place and simply clean up the surface of the meat as needed.

8EEEE01E-ECE2-448C-9843-2EFE6ACE13F7

After the aitch bone is removed, the next important step is to milk the femoral vein. After death, blood can pool in the venous system. The processor will usually do their best to flush the system of all blood, but often they don’t get it all. You want to “milk” the vein by pressing firmly on the distal end of the vein and tracing its path through the leg until you get to the proximal, open end at the face of the leg. Blood should pour out of the open end. Repeat this until it doesn’t. If the meat you are using is still semi frozen (like mine was), you may not have a lot of luck with this process. You can try again after the “first salting”.


First Salting (4C/40F, 1 week):

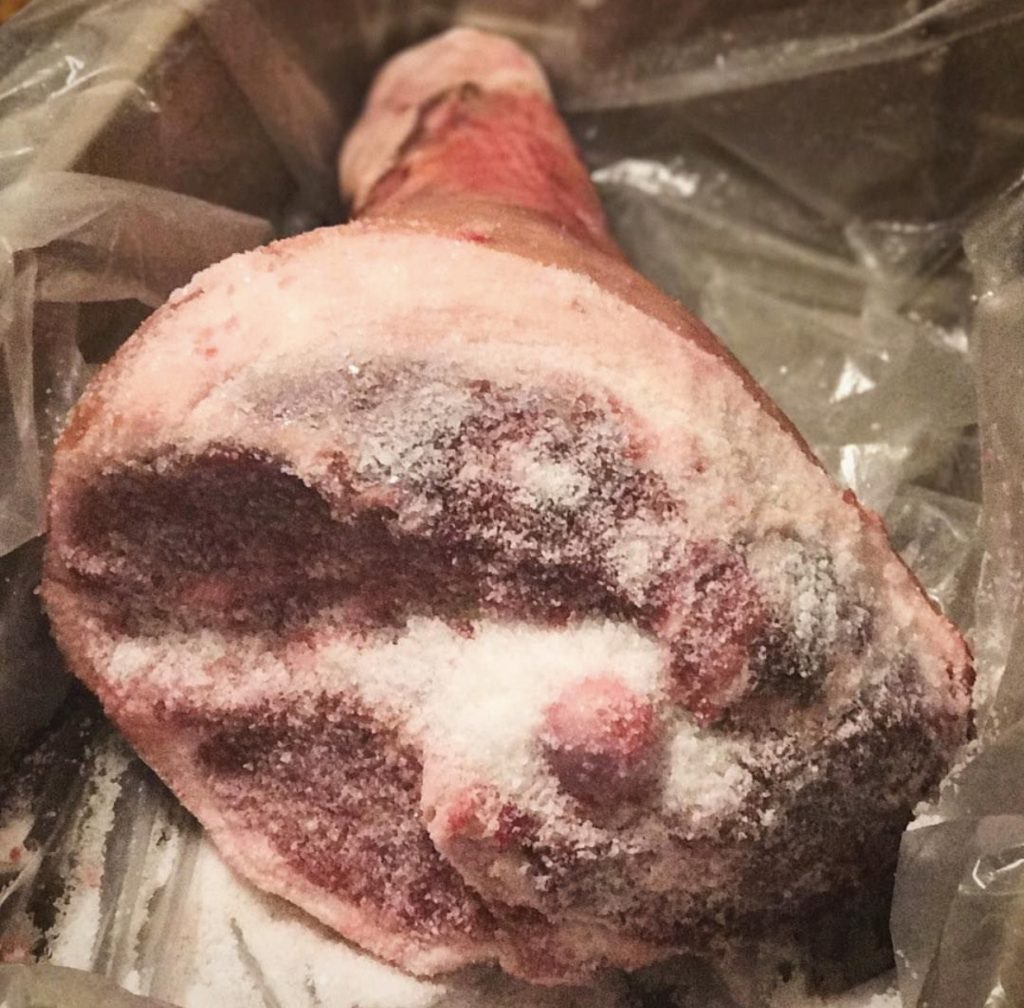
For prosciutto, we add in a step we don’t usually use for other cured meats called the “first salting”. I learned about this method when visiting the prosciutto factories in Parma. It was explained to me that this is done to draw out excess blood and to limit bacteria growth early in the process.

To do the first salting, you take an excess of sea salt, and pack it onto the open face of the prosciutto, paying particular attention to the femoral head and the places where the veins are exposed. Use an extra-large ziplock bag in a plastic container (in case of leakage) and allow this process to take place in your regular fridge at 4C. After a week, you want to wash away the excess salt. Don’t be surprised if you see a bloody and salty liquid in the bottom of the bag… that just means the salt is doing its job of pulling out any excess blood. Try again to milk the femoral vein to get out any blood that may be left, and then move on to the second salting.

352AF1CF-3AEB-4A9D-BD3B-9401CB4D31BE


Second Salting (4C/40F, 3 weeks+):

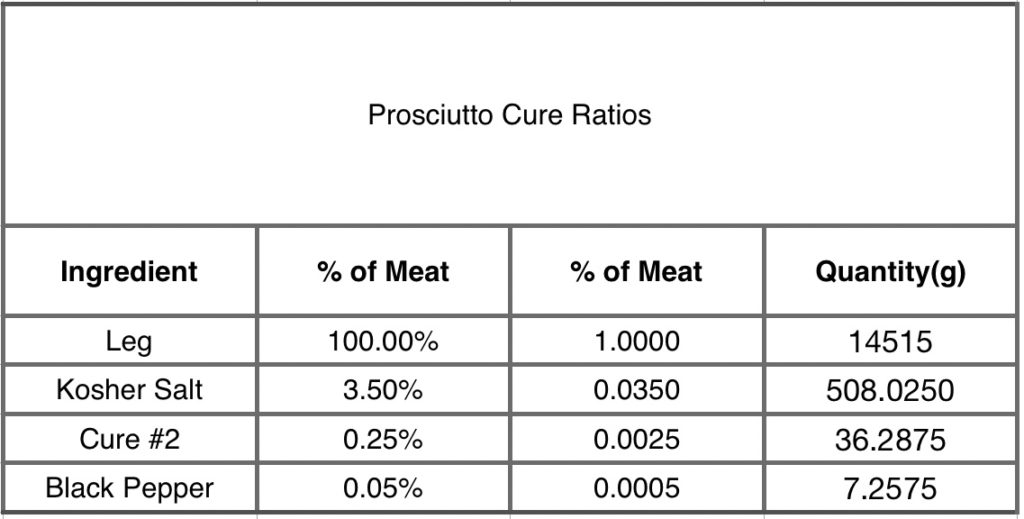
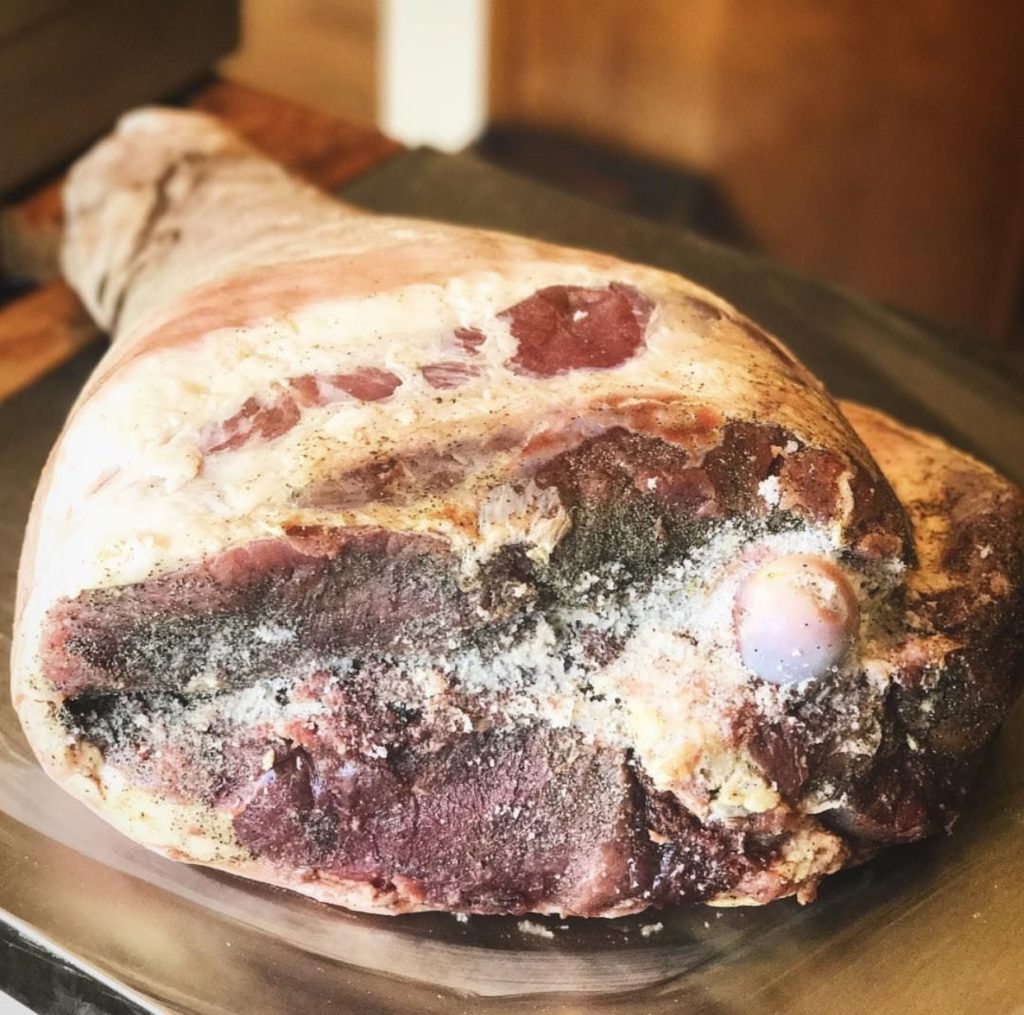
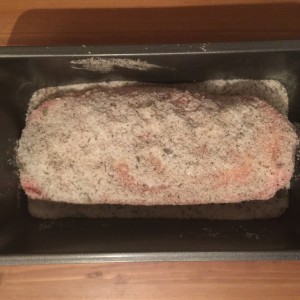
For the second salting, we do an equilibrium cure. The Italian method just uses sea salt, while the Spanish method also uses nitrates. Because I am a fan of using nitrates for safety reasons, I added them into my cure.

6BD4389D-2343-4450-8030-8A3236F879E4

*Note: I like to use equilibrium curing. It allows me some flexibility in when I process the meat after curing, since the time left in the cure doesn’t matter, it is the percentages that are used that do. However, some people don’t do this type of curing and use excess curing instead. In excess curing, it is the time that the meat is left in the cure that matters.  If you would rather do excess curing for prosciutto, cure the prosciutto in excess sea salt for 1 day per kg of meat. (For example, for a prosciutto that weights 14 kg, this means it would stay in excess sea salt for 14 days).

FBBA4F45-BCBB-4E3E-957C-E1D9BA42438D


Drying (13C/55F, 65%RH, 12 months):

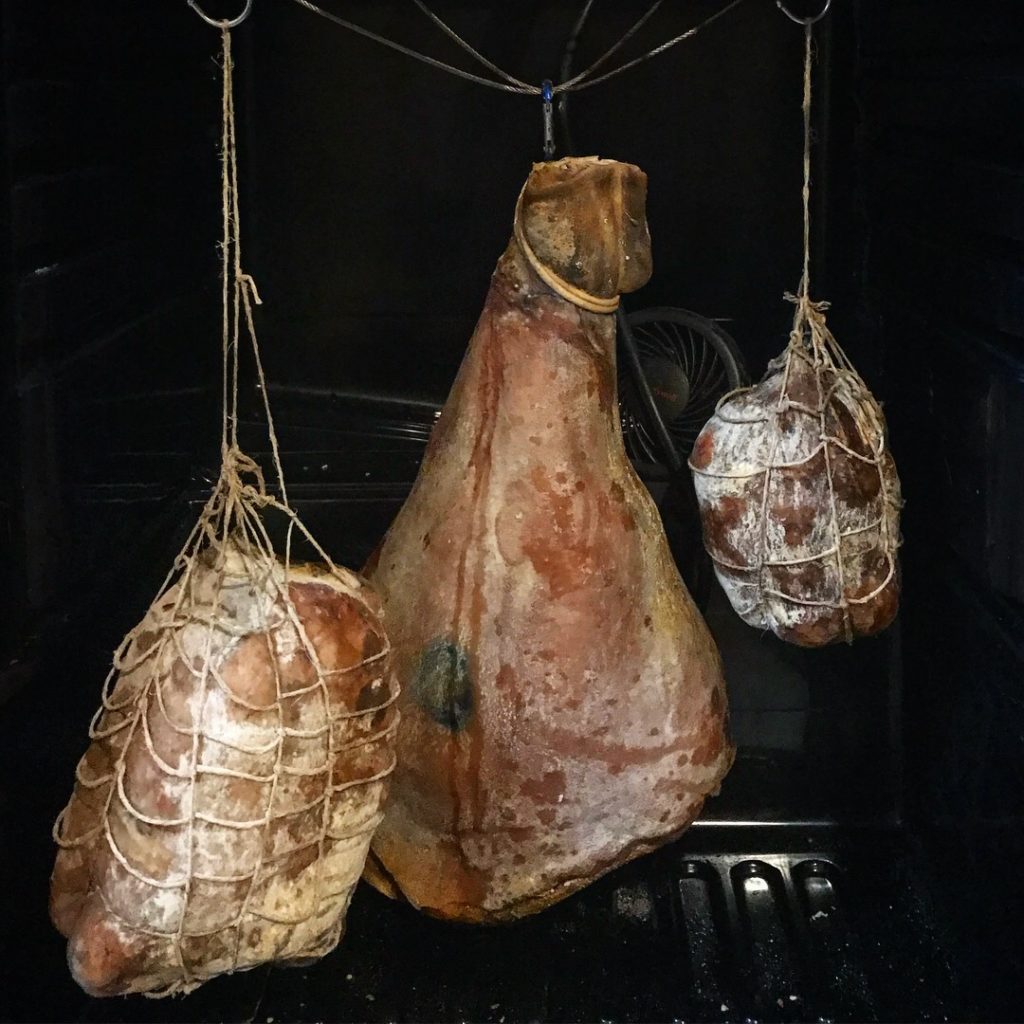
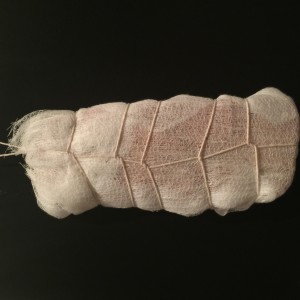
After the meat as been cured, it is time to move it to the curing chamber. Brush off any remaining cure and hang it in the chamber set around 55F and 65% RH.

FD1A6D99-899F-4EA7-B585-6627D532B326

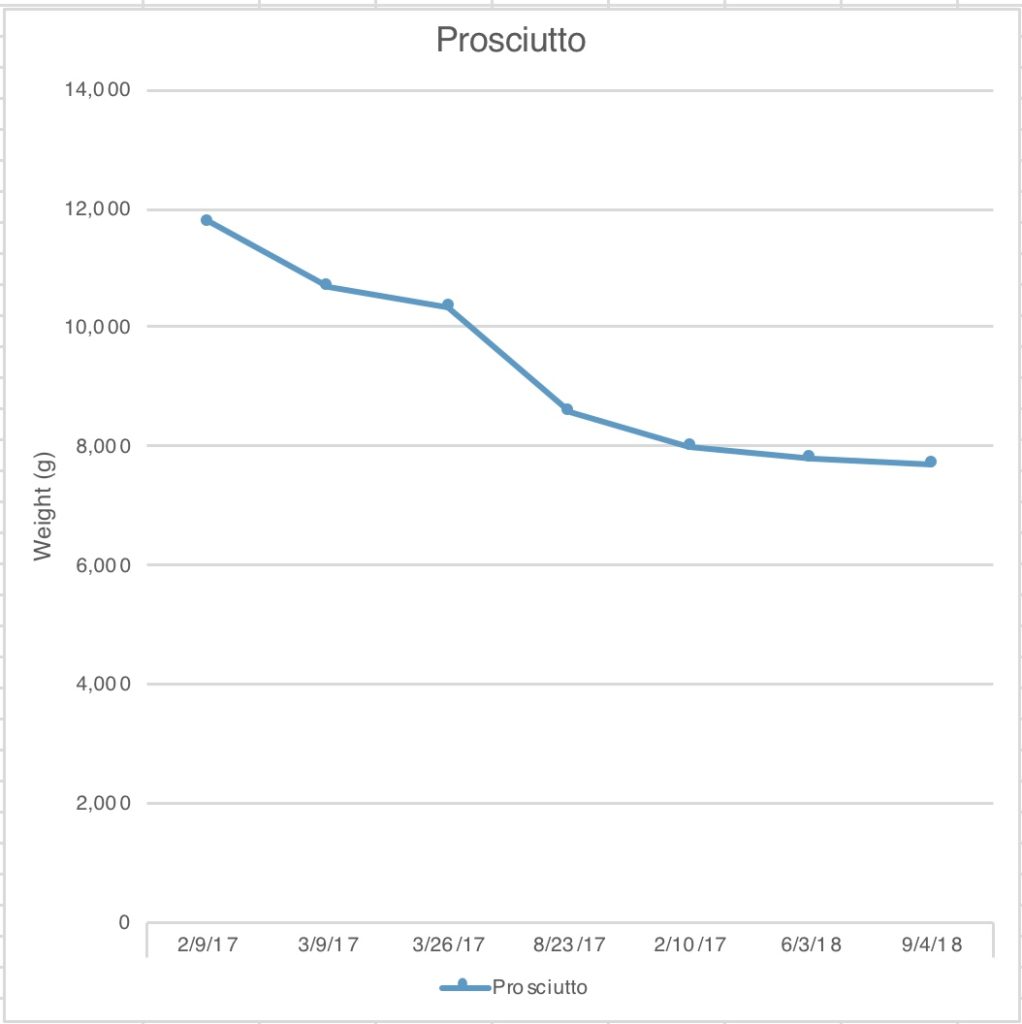
Allow the prosciutto to hang for 12 months, tracking the weight loss over this time if possible. By the end of the year, it should have lost around 30% of its initial weight.

55761004-EBA9-4BCB-A84B-F129D9AFF174


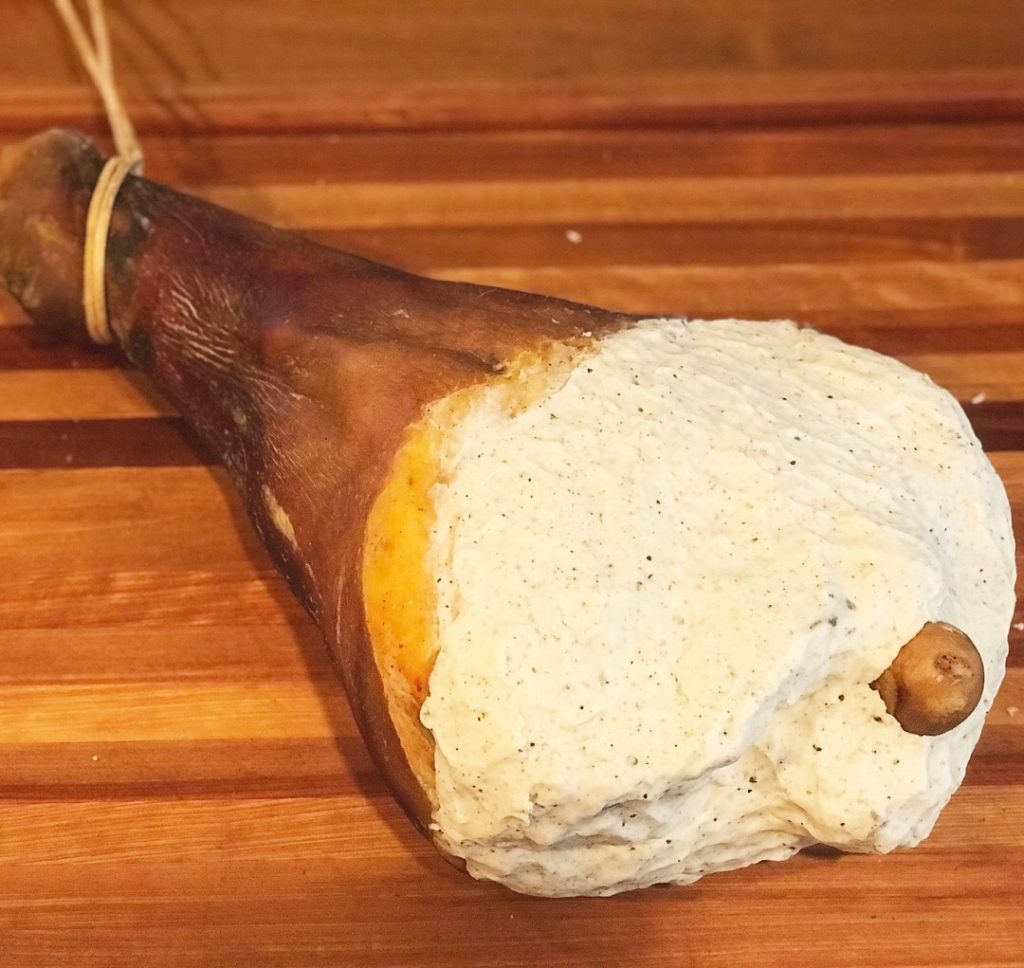
Applying a Sugna:

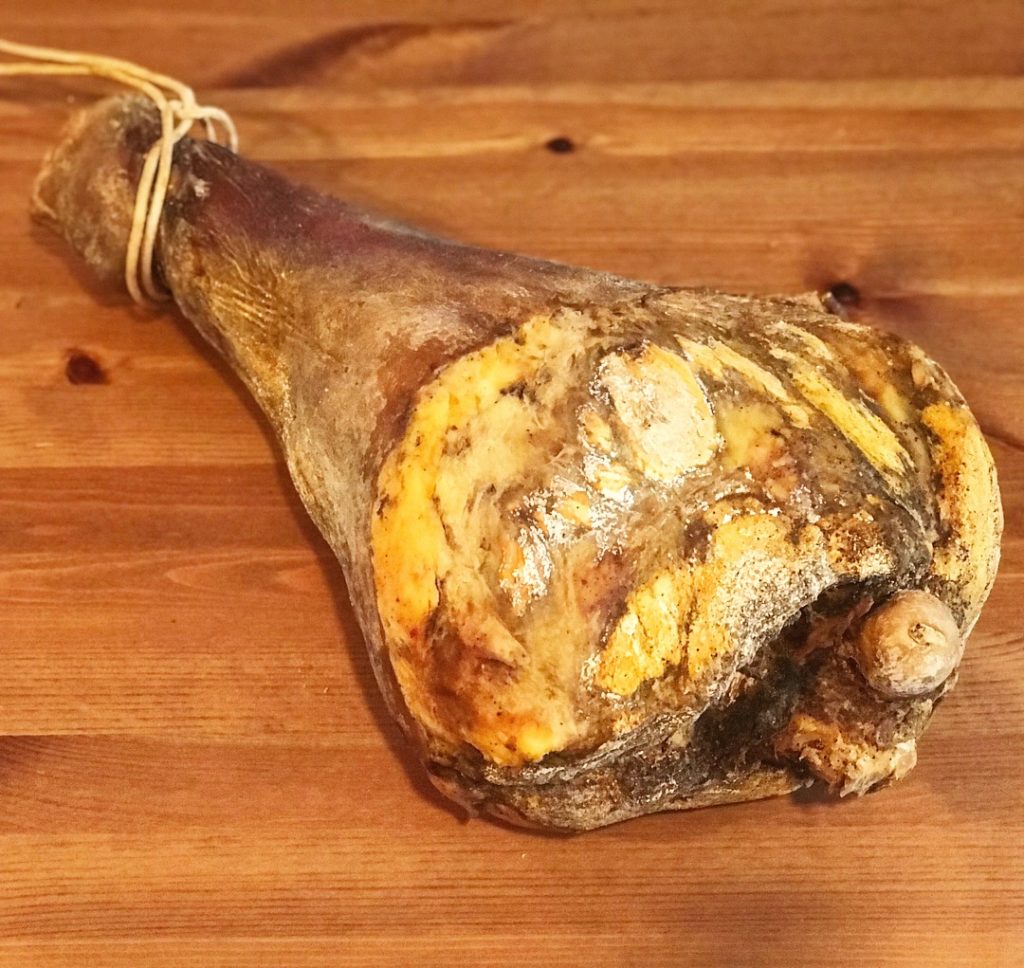
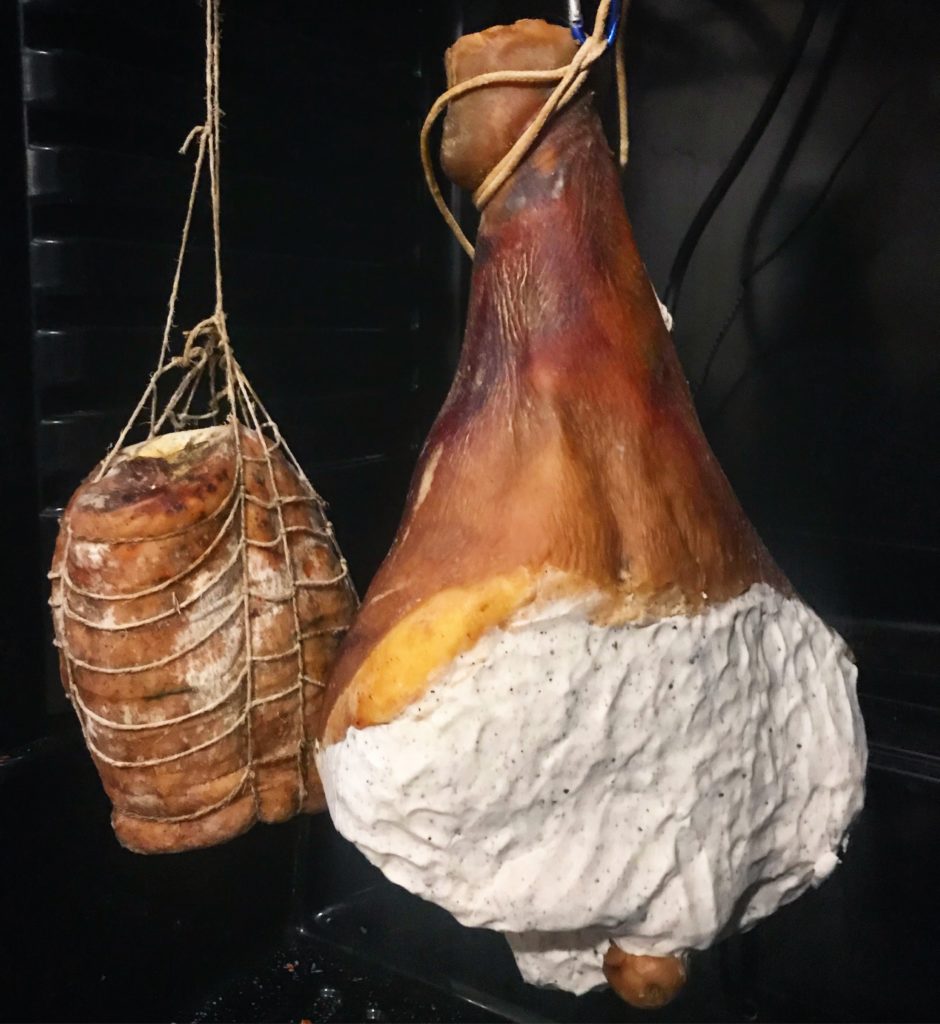
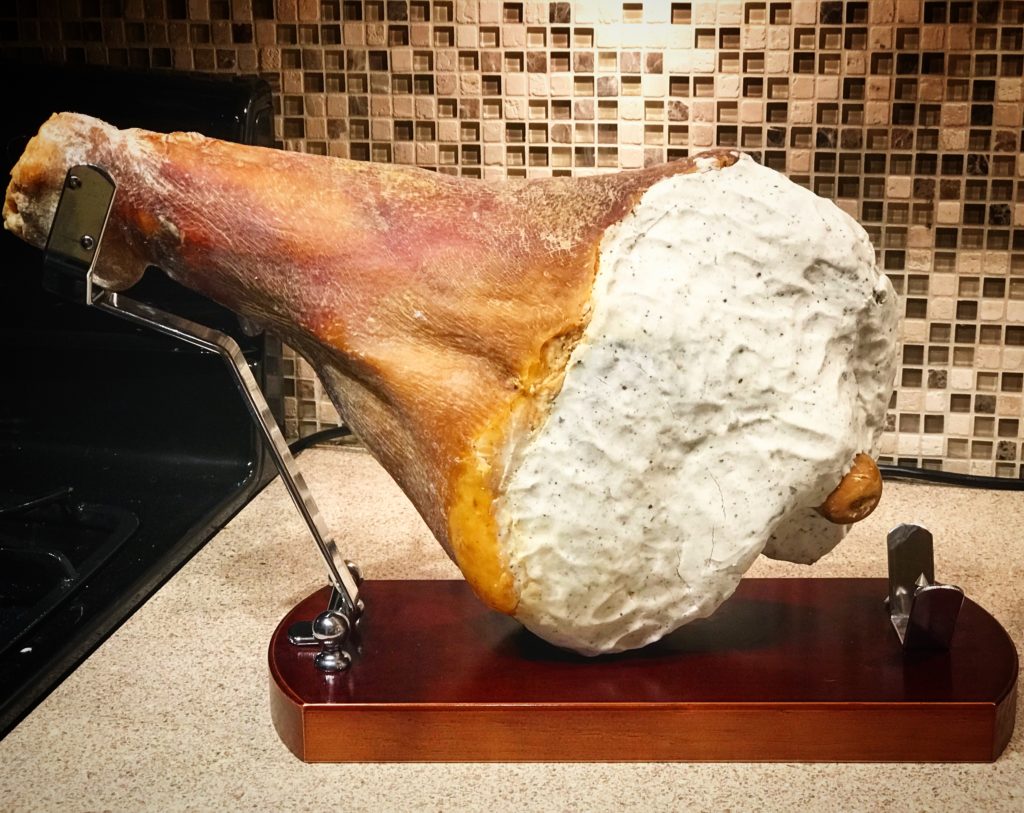
Following in the Italian tradition, a sugna is applied after the meat has reached its approximate final weight loss, to allow for continued aging for flavor development without drying out the meat.

EE434080-100A-477E-8E04-A621FE8B5A74

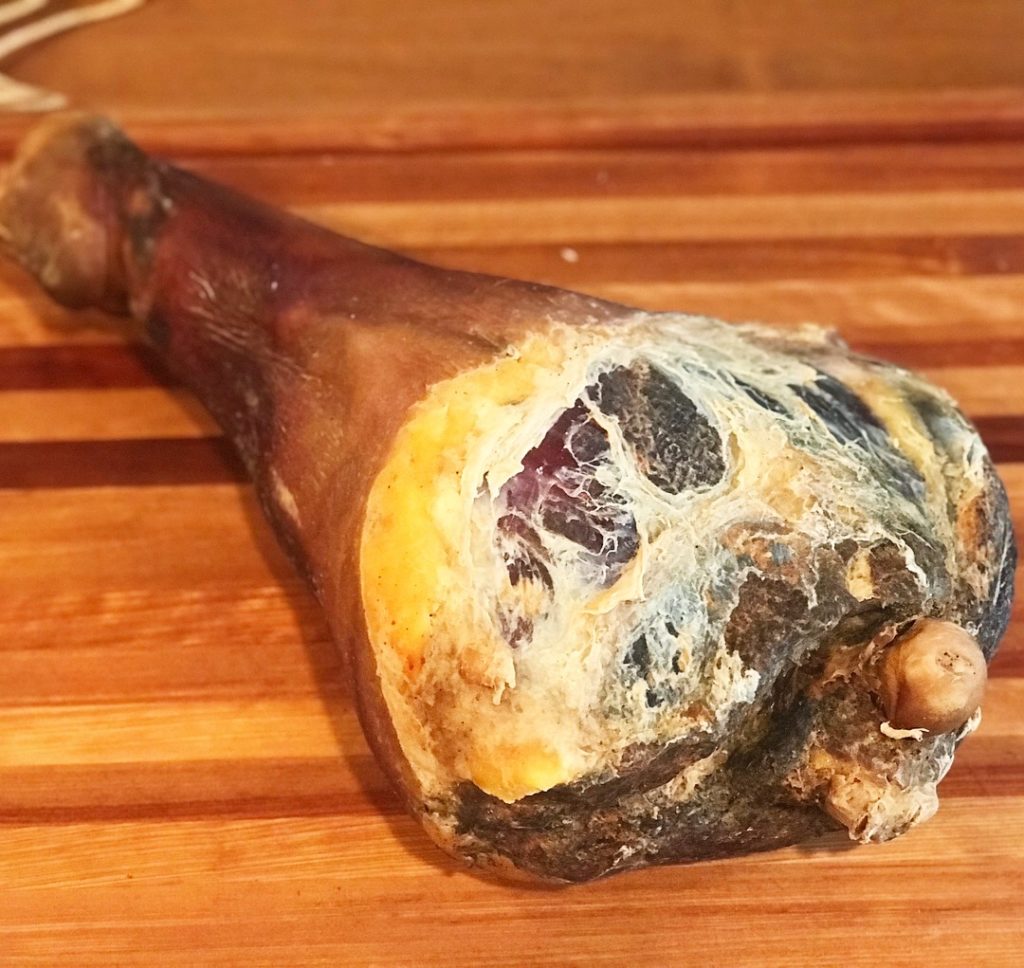
Before applying the sugna, make sure to use white vinegar to clean off the surface of the prosciutto, removing any mold that has accumulated on the surface.

1FB4DEBE-4AAB-4665-8232-B9F29279A07D

The sugna is made of lard, rice flour, and black pepper. For my sugna, I rendered leaf lard that I had from Ham Sweet Farm. However, you can use lard that is purchased from the store as well.

0FBFFA6D-702D-468A-9766-AD4A309DF73F

After the sugna is applied, the meat is either put back in the curing chamber, or more ideally in a wine cellar or aging room at a slighter higher temperature to allow for better flavor development. Not everyone uses this method, so if you’d prefer to skip it, that’s alright too. Instead of continuing to age the prosciutto after 12 months and around 30% weight loss, you can move straight to harvesting and tasting your prosciutto.

023AED0F-ED6A-4741-A611-615AFD28C022


Aging (17C/62F, 50%RH, 6 months+):

The prosciutto with the sugna is allowed to age for another 6 months to a year to develop a more complex flavor profile.

E645CC64-3EF2-4BAB-B323-A66050813967


Tasting:

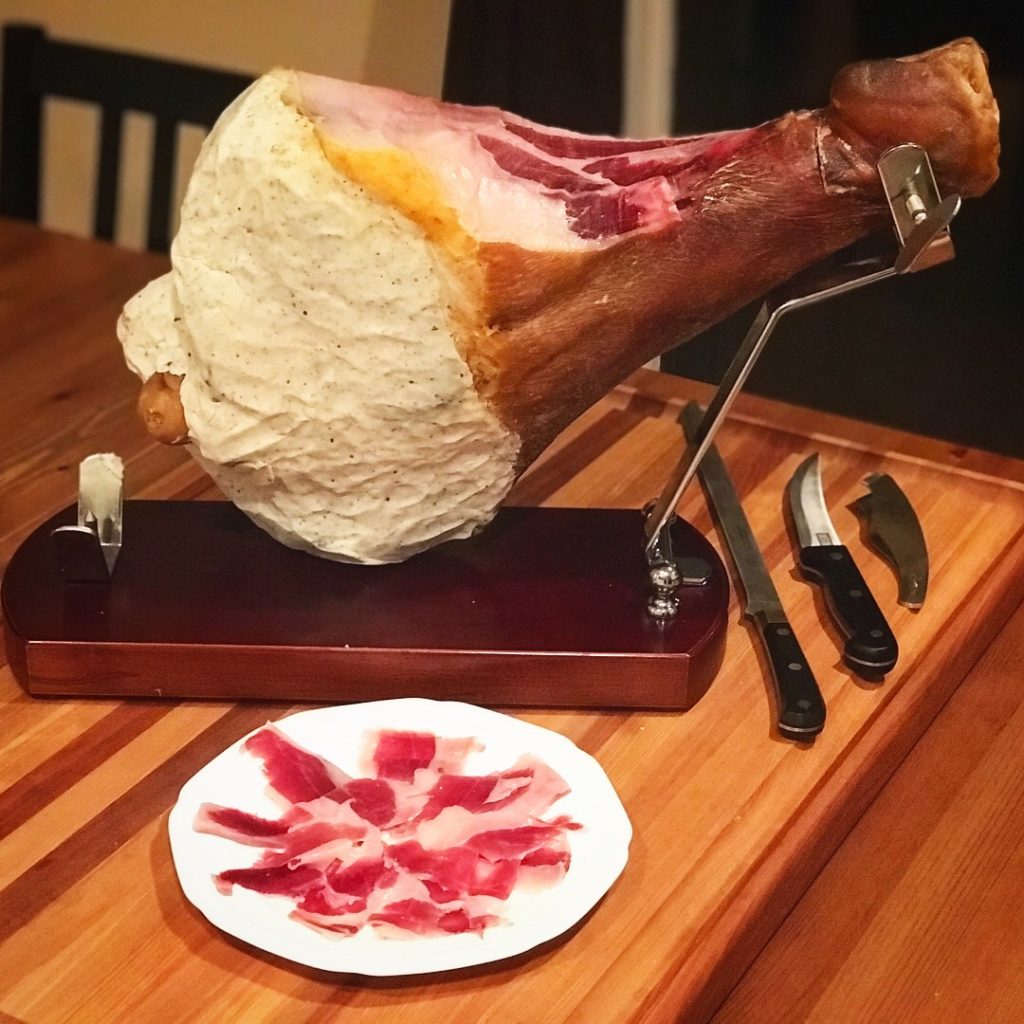
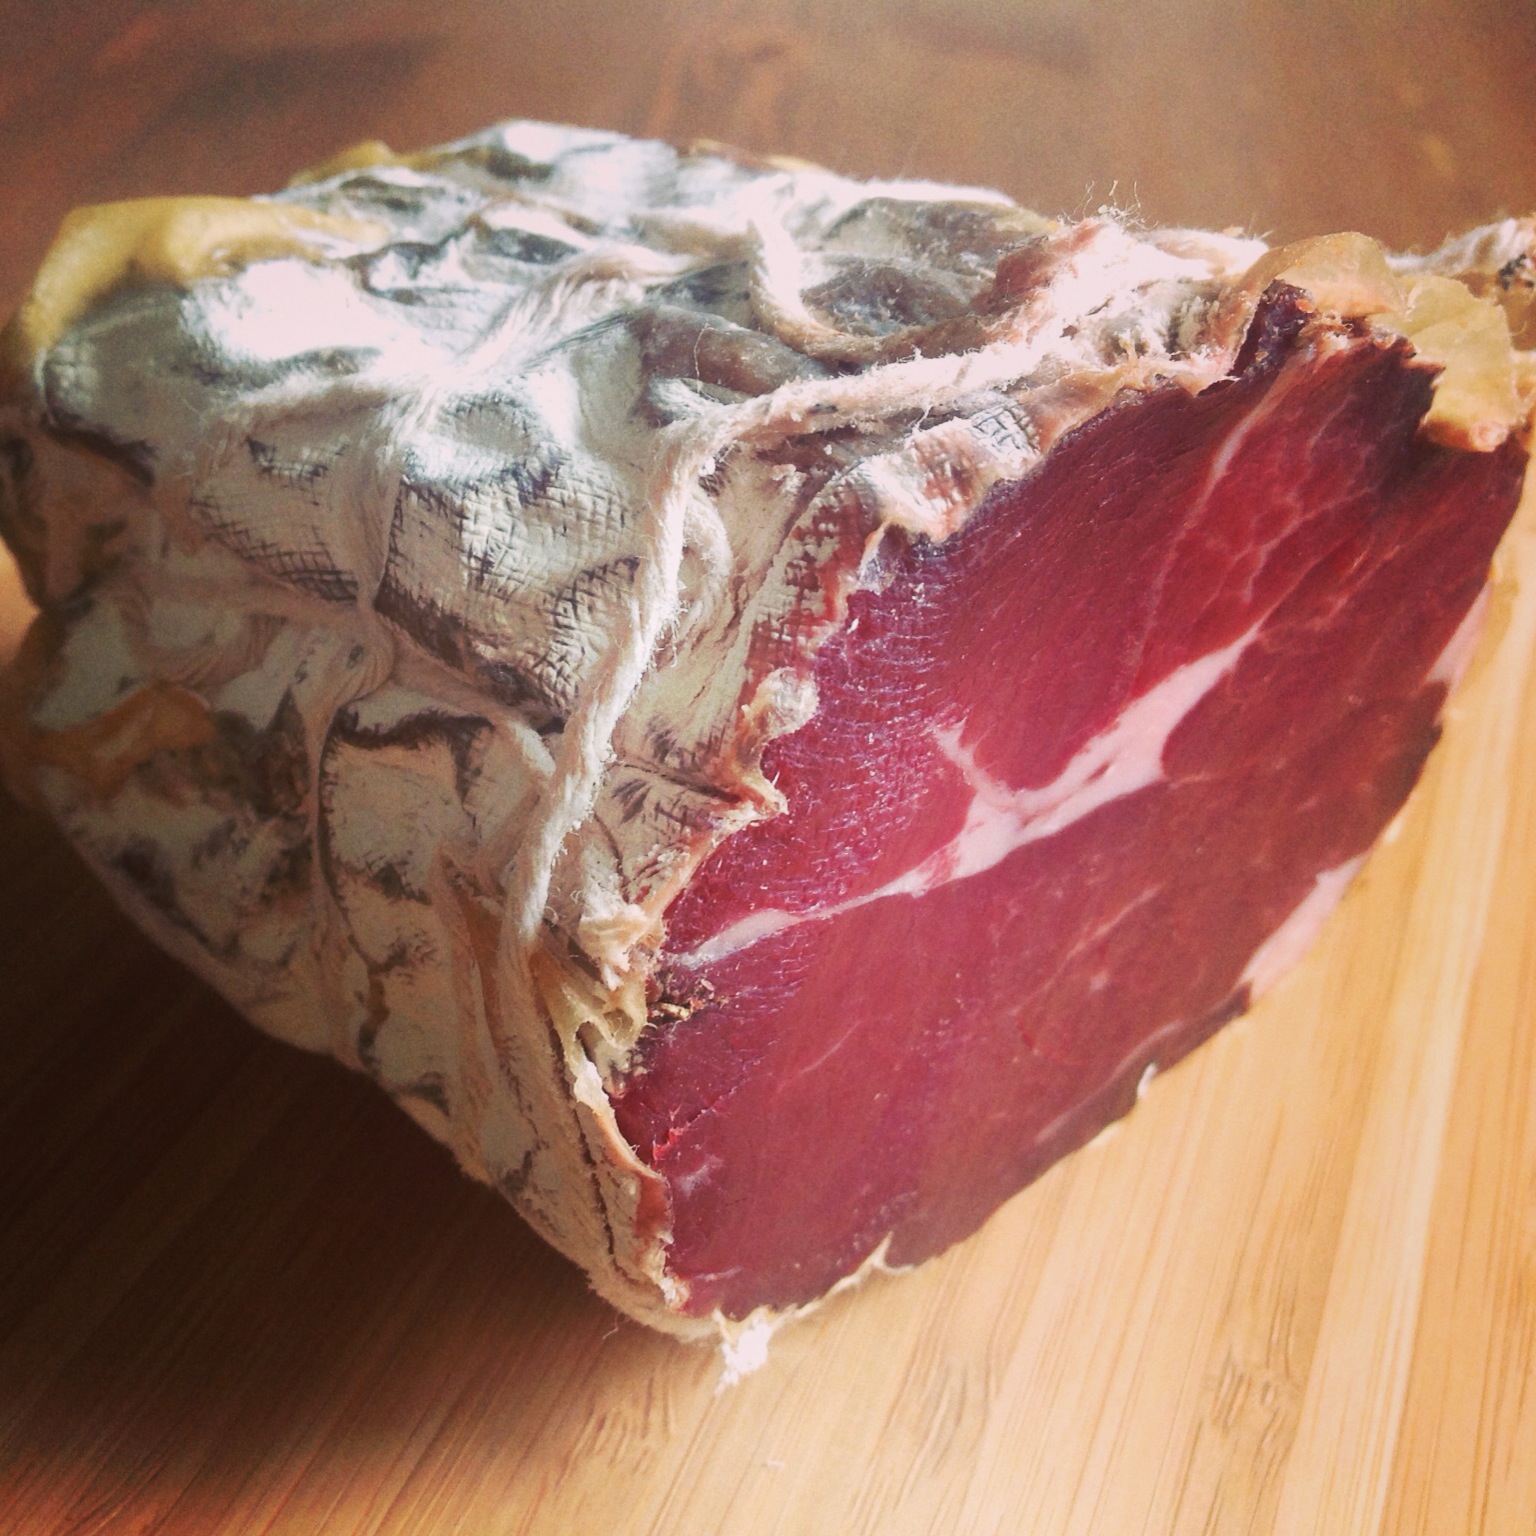
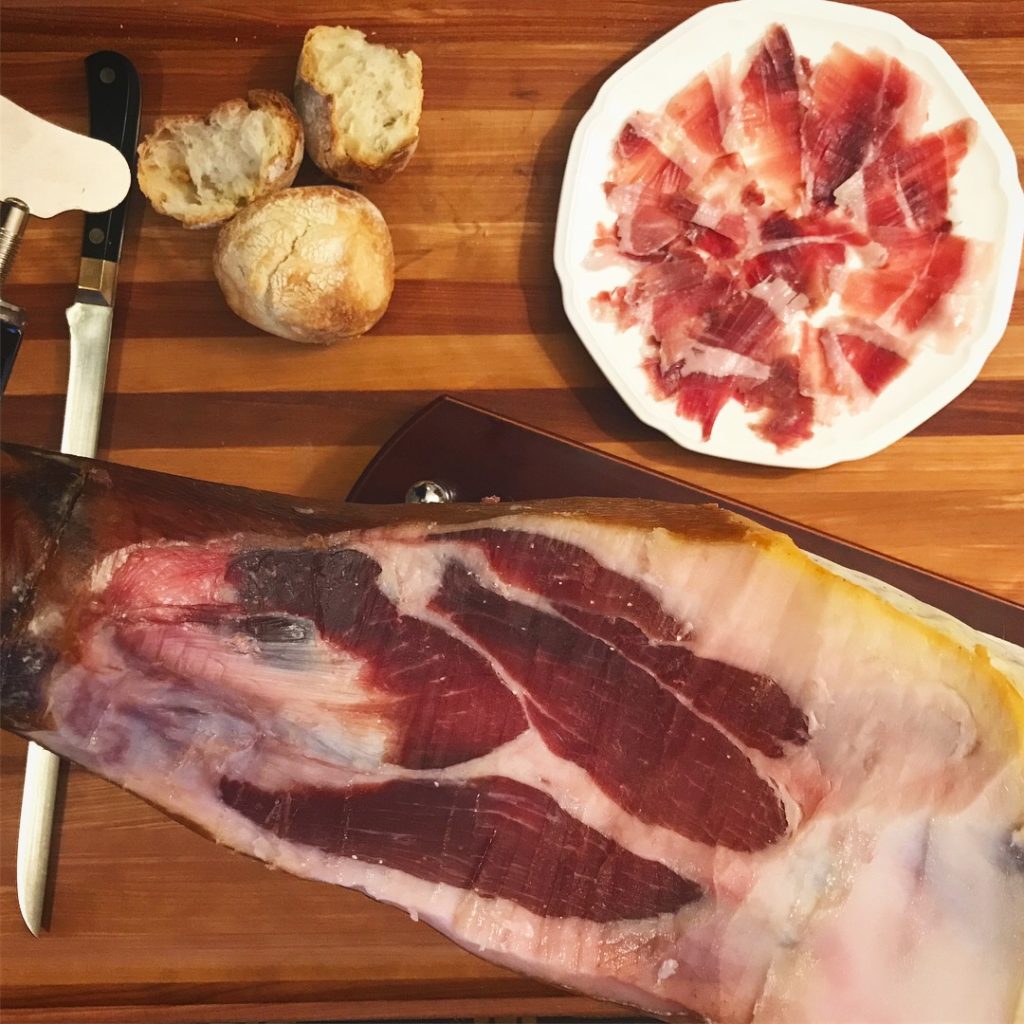
That’s it! When the prosciutto has been aged for at least 18 months, it’s ready! You can either hand cut the prosciutto or remove the bone and slice it on a deli slicer. To hand slice it, place the prosciutto on its side and cut away the skin and outer fat first. Then, carefully cut slices off the prosciutto using a thin, long knife. When you reach the bone, cut around it as much as possible. Then, flip the prosciutto over and cut from the other side. You can keep hand slicing around the bones until all the meat is gone!
918539CF-E189-4218-ABB5-6BFE320BA7E6

Filed Under: Charcuterie Tagged With: charcuterie, diy, homemade, jamon, meat, meatcuring, prosciutto, recipe

Arthur Ave Lamb Prosciutto

February 27, 2016 by AOG 4 Comments

Lamb prosciutto, or prosciutto d’agnello can either be made with the bone in or bone out. If it is made with the bone in, it is slightly harder to deal with, and it is harder to slice on a commercial slicer. If it is made bone out, you have to deal with the air pockets that the removal of the bone creates. There are two ways to deal with this; you can cure it in two separate pieces with no potential for air pockets, or you can cure it in one piece by tying it together as tightly as possible to eliminate any air pockets (some people use meat glue to eliminate any chances of air pockets when following this procedure). Air pockets are dangerous because they create an anaerobic environment which can promote the growth of dangerous bacteria.

My first attempt at lamb prosciutto turned out remarkably well, even with as little as I knew at the time. I bought a bone out leg of lamb, and cured it in two separate pieces. You can see the details here: Lamb Prosciutto Attempt #1.

Since my initial attempt, I have made lamb prosciutto again:

  • The second time, emboldened my previous success, I decided I wanted to try to cure a bone out leg of lamb, tied tightly together in one piece. I bought a bone out leg of lamb from a specialty Italian butcher, who butchered it and tied it together like you would for a roast.
  • The third time, I decided to go back to my method of splitting the bone out leg of lamb into two pieces to cure, in order to experiment with two different spice cure.
  • In the future, I plan to cure a bone in leg of lamb, and hand slice it with my cuchillo jamonero, or my specialty jamón carving knife.

Here, I will detail the process that I followed for my second lamb prosciutto attempt. In a future post, I will discuss the lamb prosciutto that I cured most recently using two different winter spice cures.


I was able to buy a leg of lamb from an Italian butcher shop at Arthur Ave in the Bronx. I explained to the butcher there what I wanted, and he took the time to tightly tie the leg of lamb together into a roast.

image(3)


Curing (3 weeks):

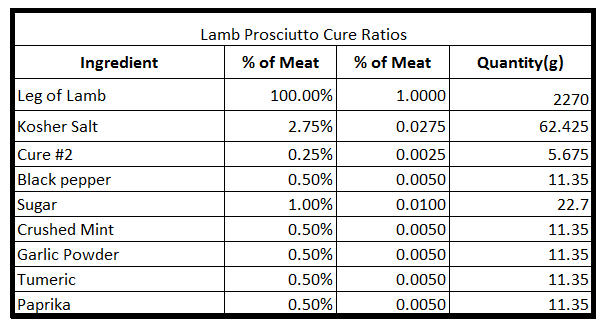
I have updated the curing ratios to reflect my most recently used values.

lamb prosciutto arthur ave

image(4)

I allowed the leg of lamb to sit in the cure for 3 weeks under vacuum seal.

image(2)

image(1)


Casing (1 hour):

The meat was cased in a 100 mm collagen casing. After this, a toothpick was used to puncture any air holes that may have been evident and could harbor the growth of bad bacteria.

I then sprayed my meat with Bactoferm Mold 600, which is a single strain culture that contains freeze-dried form spores of Penicillium nalgiovense. This promotes beneficial mold growth and tends to keep any potentially dangerous mold growths at bay.


Drying (1 month+, until 30% of weight is lost):

Temperature: 54F/12C, Humidity: 70-80% RH

The lamb prosciutto was put directly into the curing chamber at this point. If you have read my first lamb prosciutto post, you know that I used to use a fermentation stage step. I have found this to be unnecessary for whole muscle cured products, and now move directly from the curing and casing stages to the drying stage.

image(17)

The meat was allowed to lose ~30% of its initial weight, and was pulled from the chamber.

image(16)

image

It was taken out of its casing, rinsed off with white vinegar, and patted dry.

image(1)


Tasting:

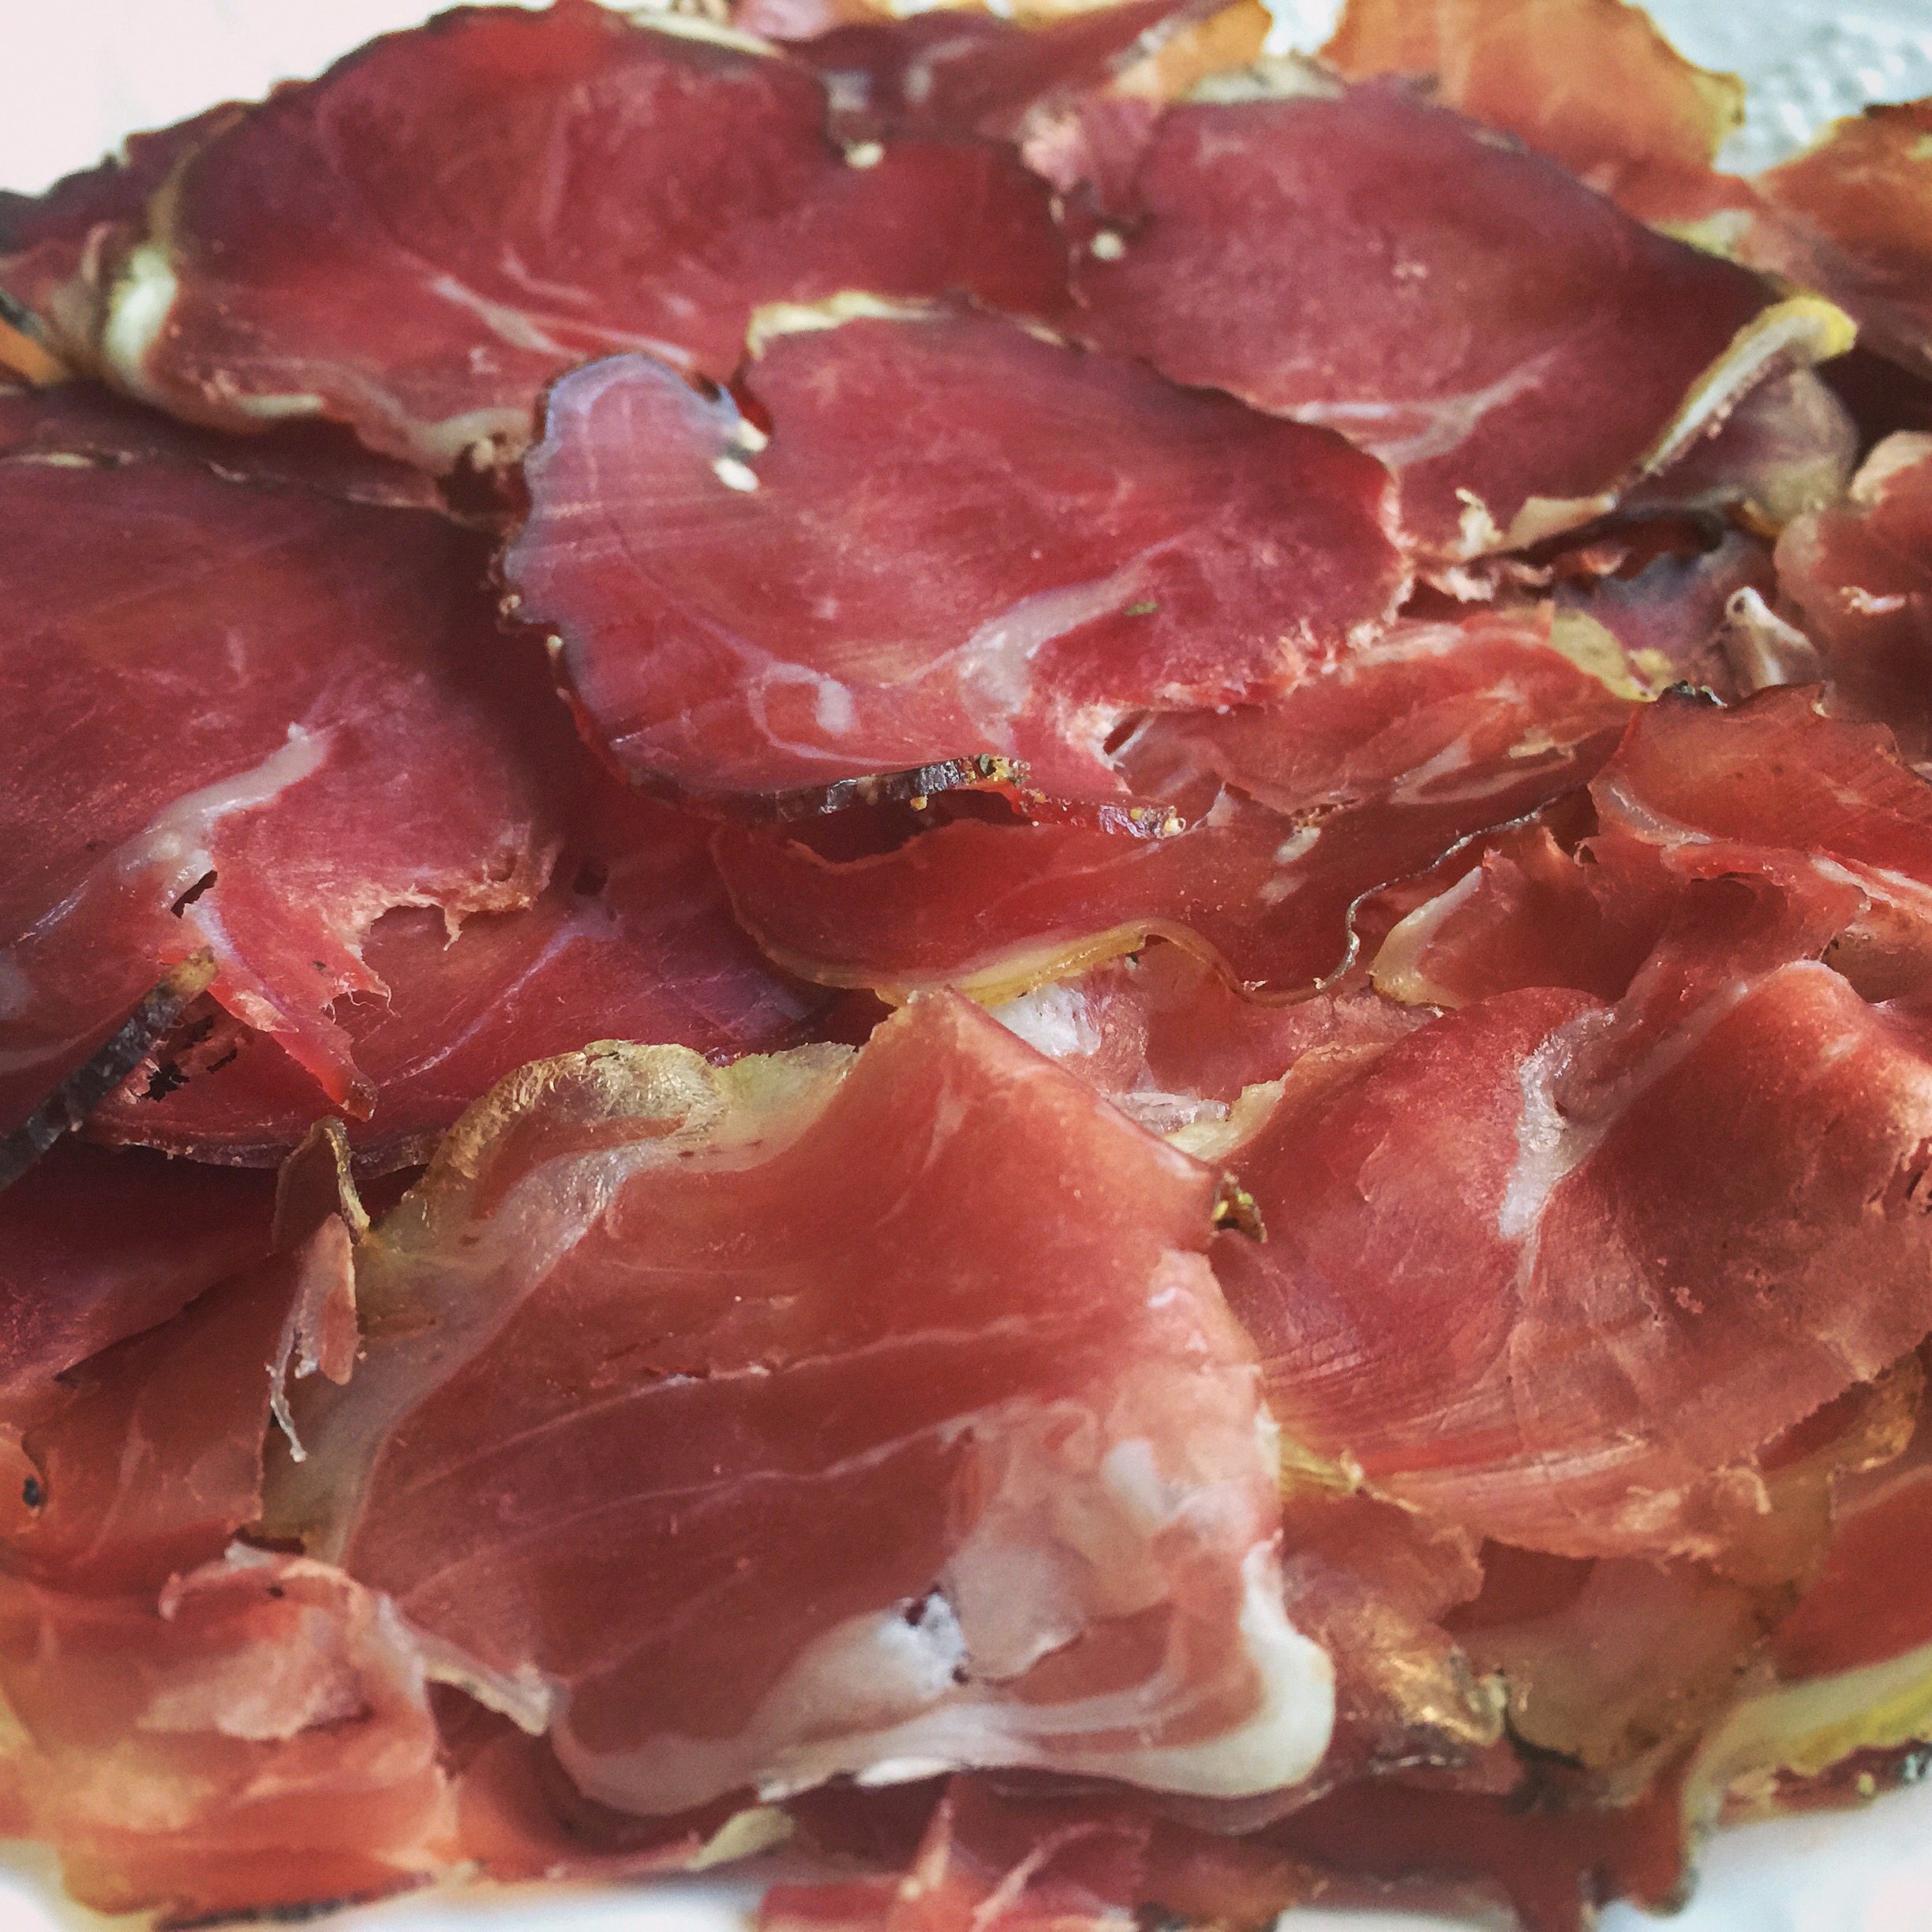
Ahhh the flavor of lamb prosciutto, one of my all time favorites.

image(5)

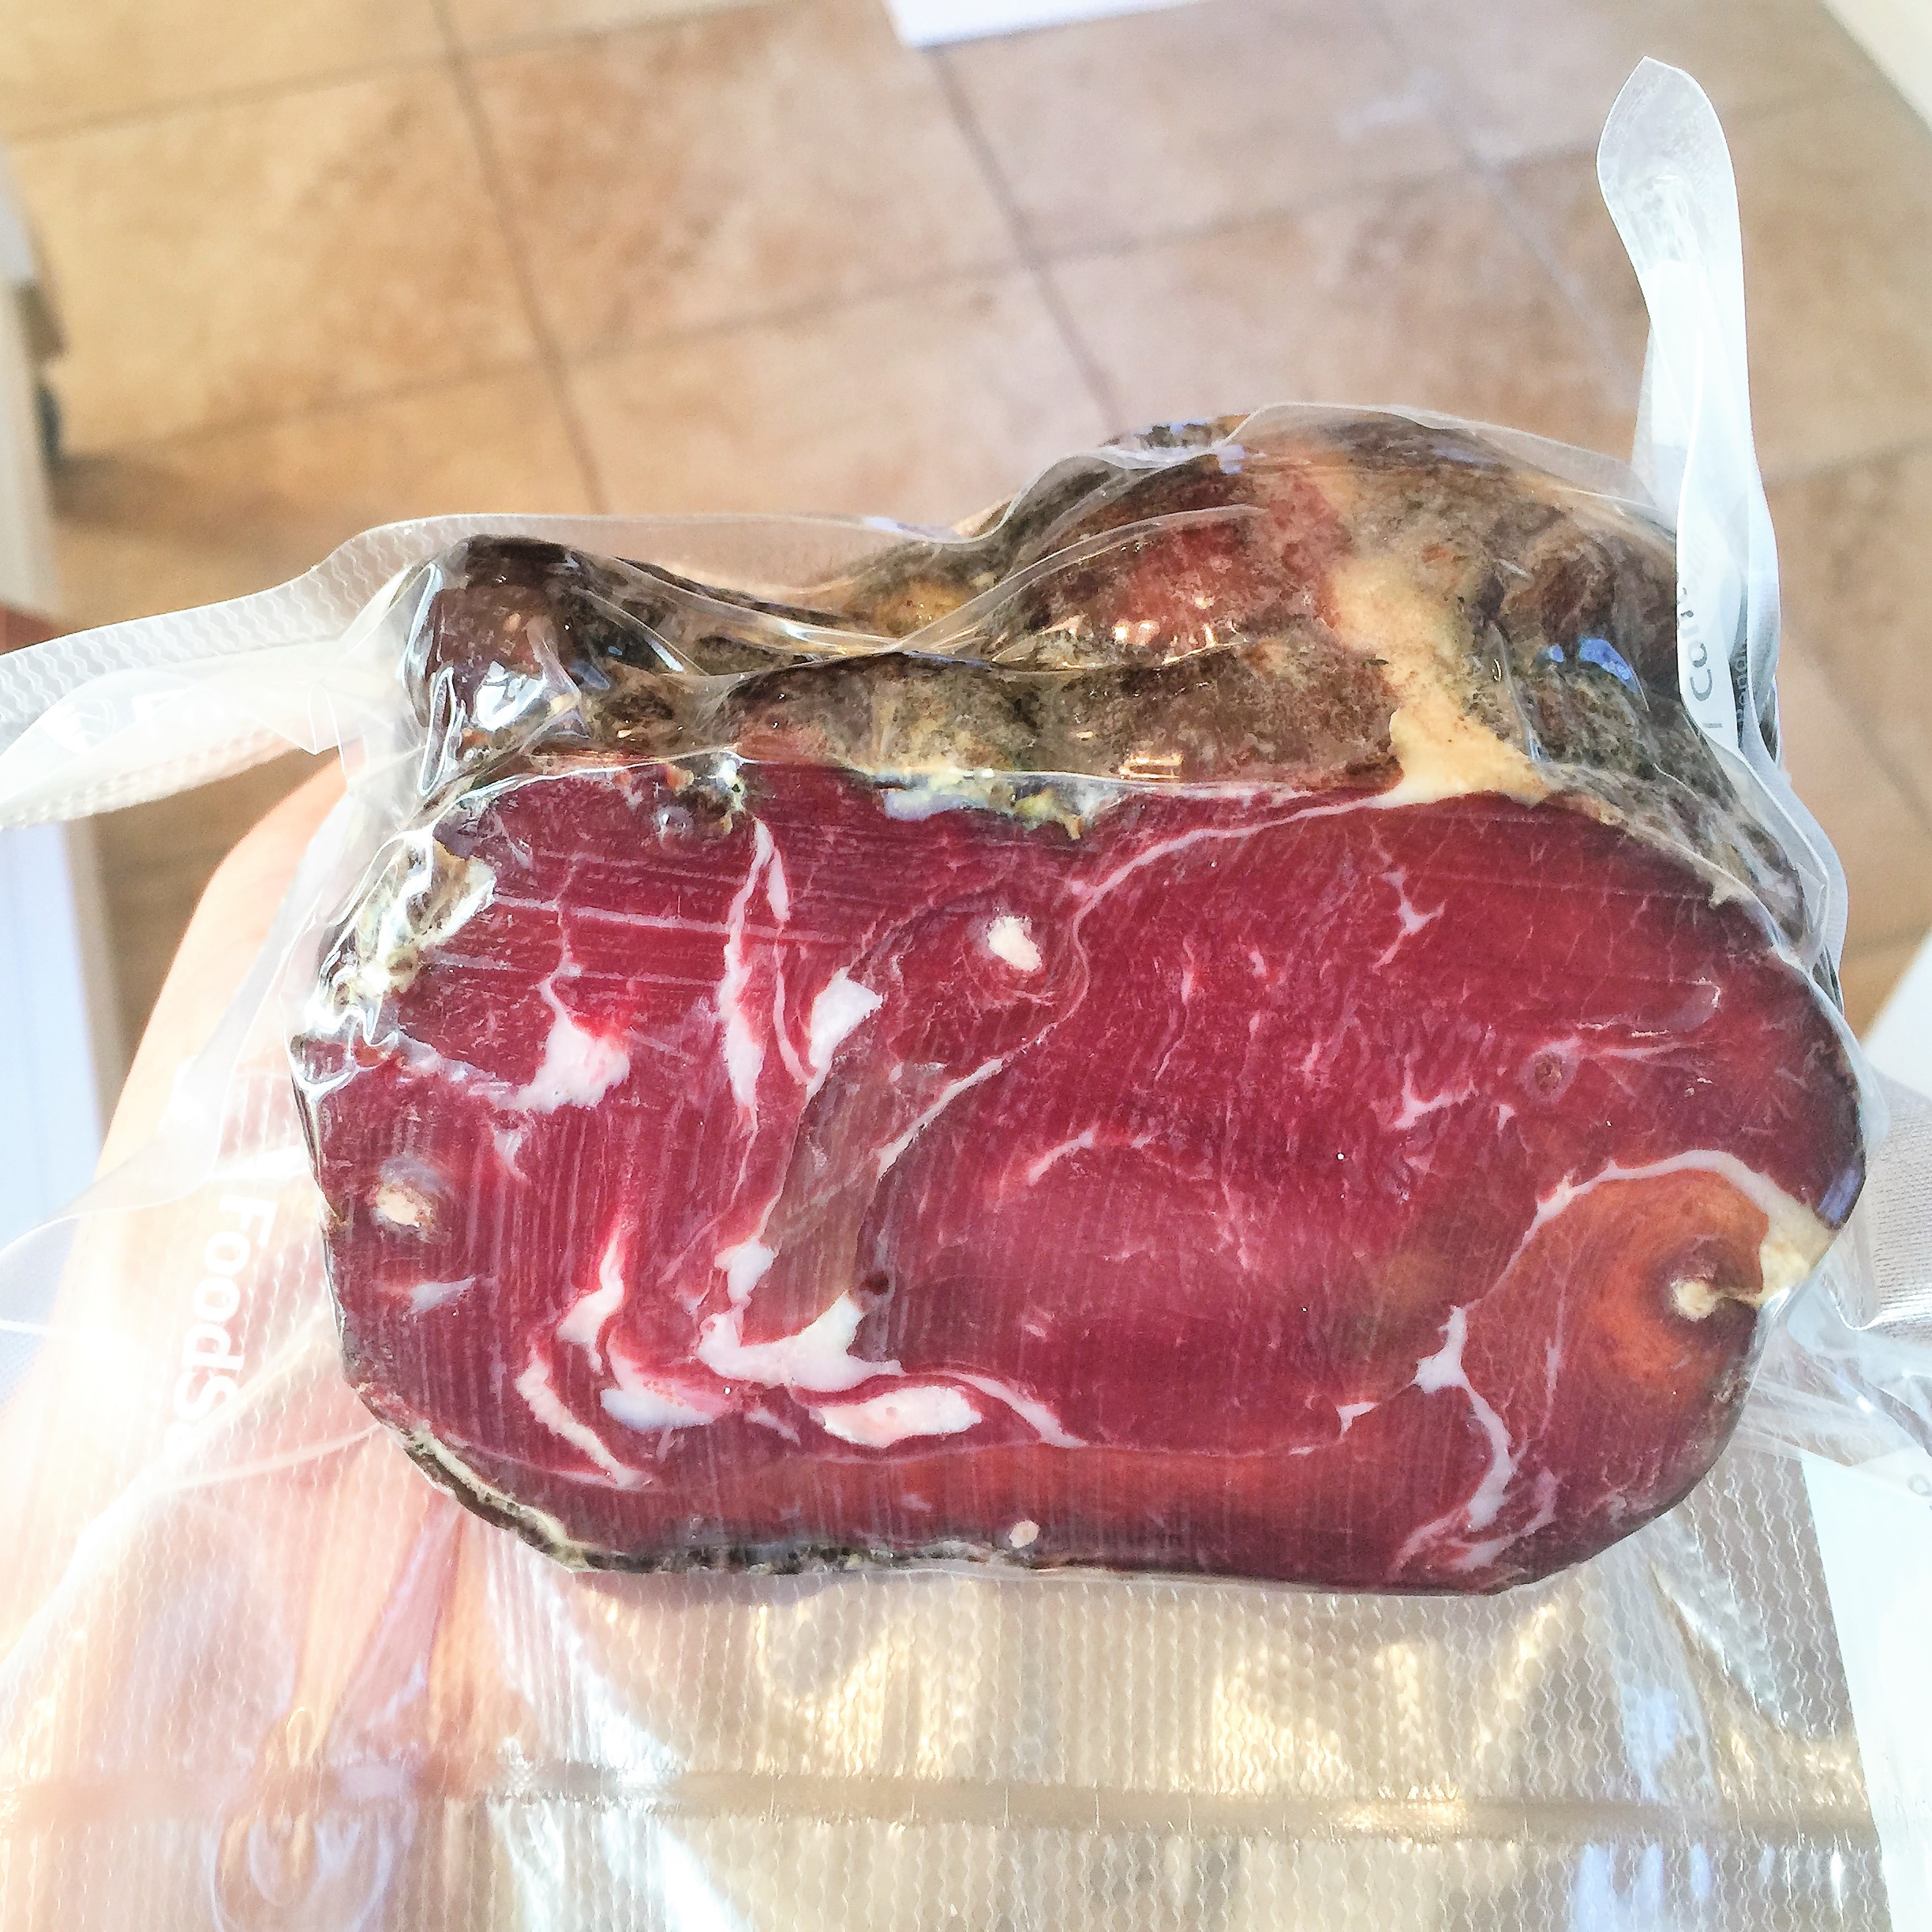
This one looked a little gnarly, due to the butcher string that kept it together.

image(9)

Sliced thin, the taste was great…

image(4)

However, compared to my previous attempts, I didn’t love the aesthetics of this final product. That is why for my next attempt, I cured my lamb prosciutto in two pieces. I also will be trying a bone in lamb prosciutto in the future to avoid this problem. This product was stored under vacuum seal.

image(26) (2)


Disclaimer: Meat curing is a hobby that comes with inherent risks. We can all do things to limit this risk by educating ourselves about the process and the utilizing the safest known methods to create our products. This website is for educational purposes only, and all experimentation should be done at each individuals own risk.

Filed Under: Charcuterie Tagged With: charcuterie, cured meat, lamb prosciutto, prosciutto

Duck Prosciutto

January 24, 2016 by AOG 8 Comments

While I have previously written about making whole muscle cures, I have learned a lot since my initial attempts which I chronicled at the time. As I am constantly learning and adapting methods, my next few posts will discuss some of the whole muscle cures that I have made more recently, and the specific protocols or recipes that I have used. If you are looking for an overview of meat curing, please refer back to my charcuterie page introduction.


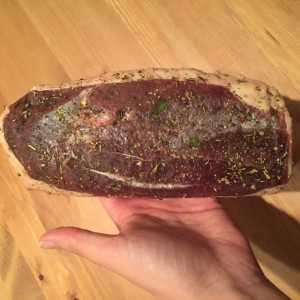
Duck Prosciutto, or prosciutto d’anatra, is a delicious cured meat product made by curing duck breasts. It can be made a few different ways, two of which I will detail here.

duckprosciutto

Duck Prosciutto is a cured meat product that many suggest as an entry level cured meat. While that may be the case due to its small size and short curing time, the layer of fat on the breast as well as traditional casing methods can complicate things. In fact, my first duck prosciutto attempt was actually my first cured meat failure. I had uneven drying, and instead if using a method to even it out, I considered it a failure and threw it out.

(I now know better, and if any of my products have uneven drying or case hardening, I make sure that I vacuum seal them and leave them in a traditional refrigerator for an unspecified period of time until they have evened out. At this point, they can be rehung until they reach the desired water weight loss point.)

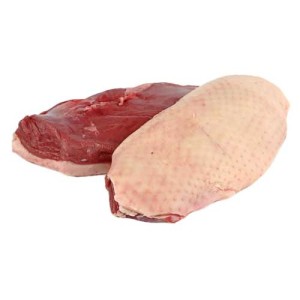
A traditional duck breast is part meat, with a thick layer of fat on one side.

030210-duck-breast-magretBecause of the makeup of fat compared to protein, the fatty portion of the duck breast has less water to lose than the meat portion of the duck breast. This is important to know when deciding when a duck prosciutto is ready, since the target of 30% water weight loss might take longer than expected to reach (and in fact, may not be necessary depending on how much fat the cut really has!)


Method #1: Equilibrium Curing

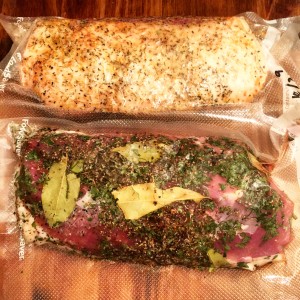
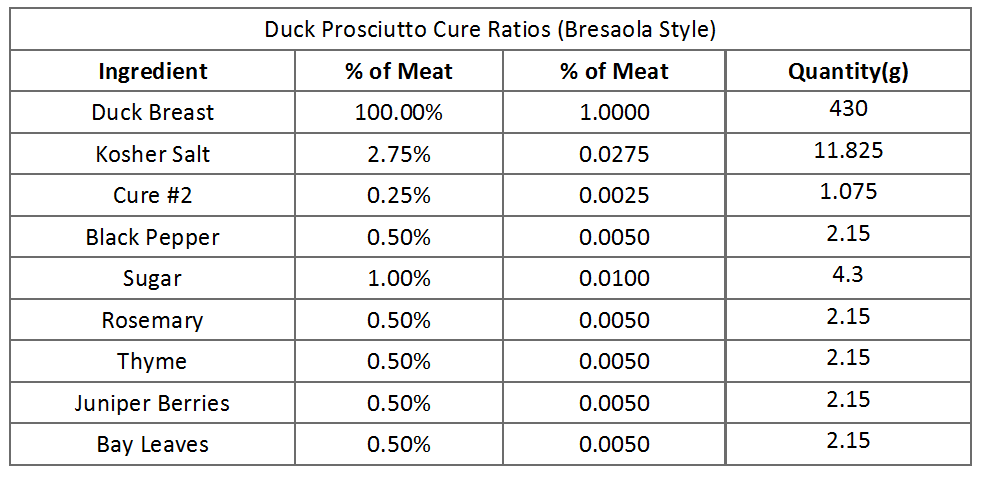
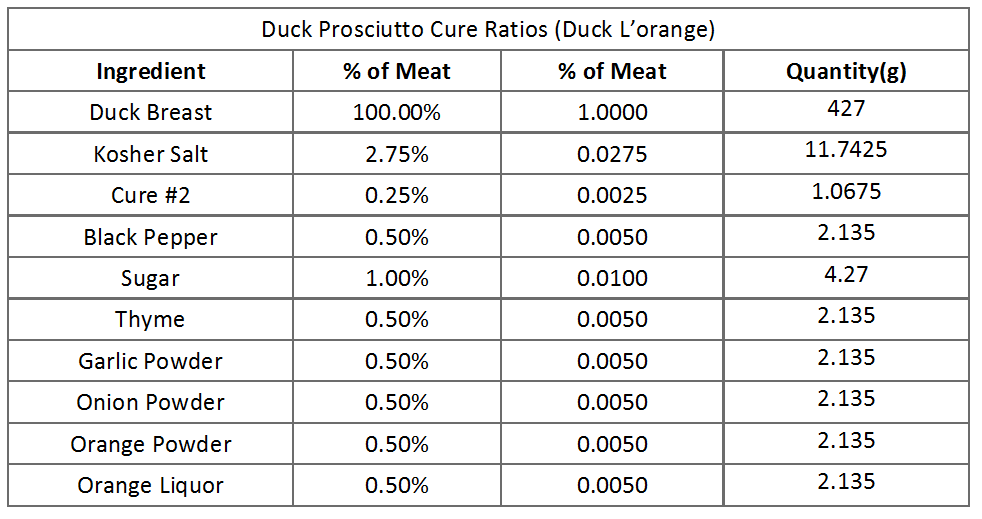
Deciding on a spice cure for a duck prosciutto is 100% personal preference after the necessary additional of salt, and in my opinion, nitrates or cure #2 as I will refer to it from here on out. While some people use excess curing for duck prosciutto, I have switched over to using equilibrium curing completely. For more information on this, see the charcuterie introduction. This winter I decided to make two different duck prosciutto, one using more traditional bresaola spices and one that was a play on the French dish of duck l’orange.

imageb


Curing (2 weeks):

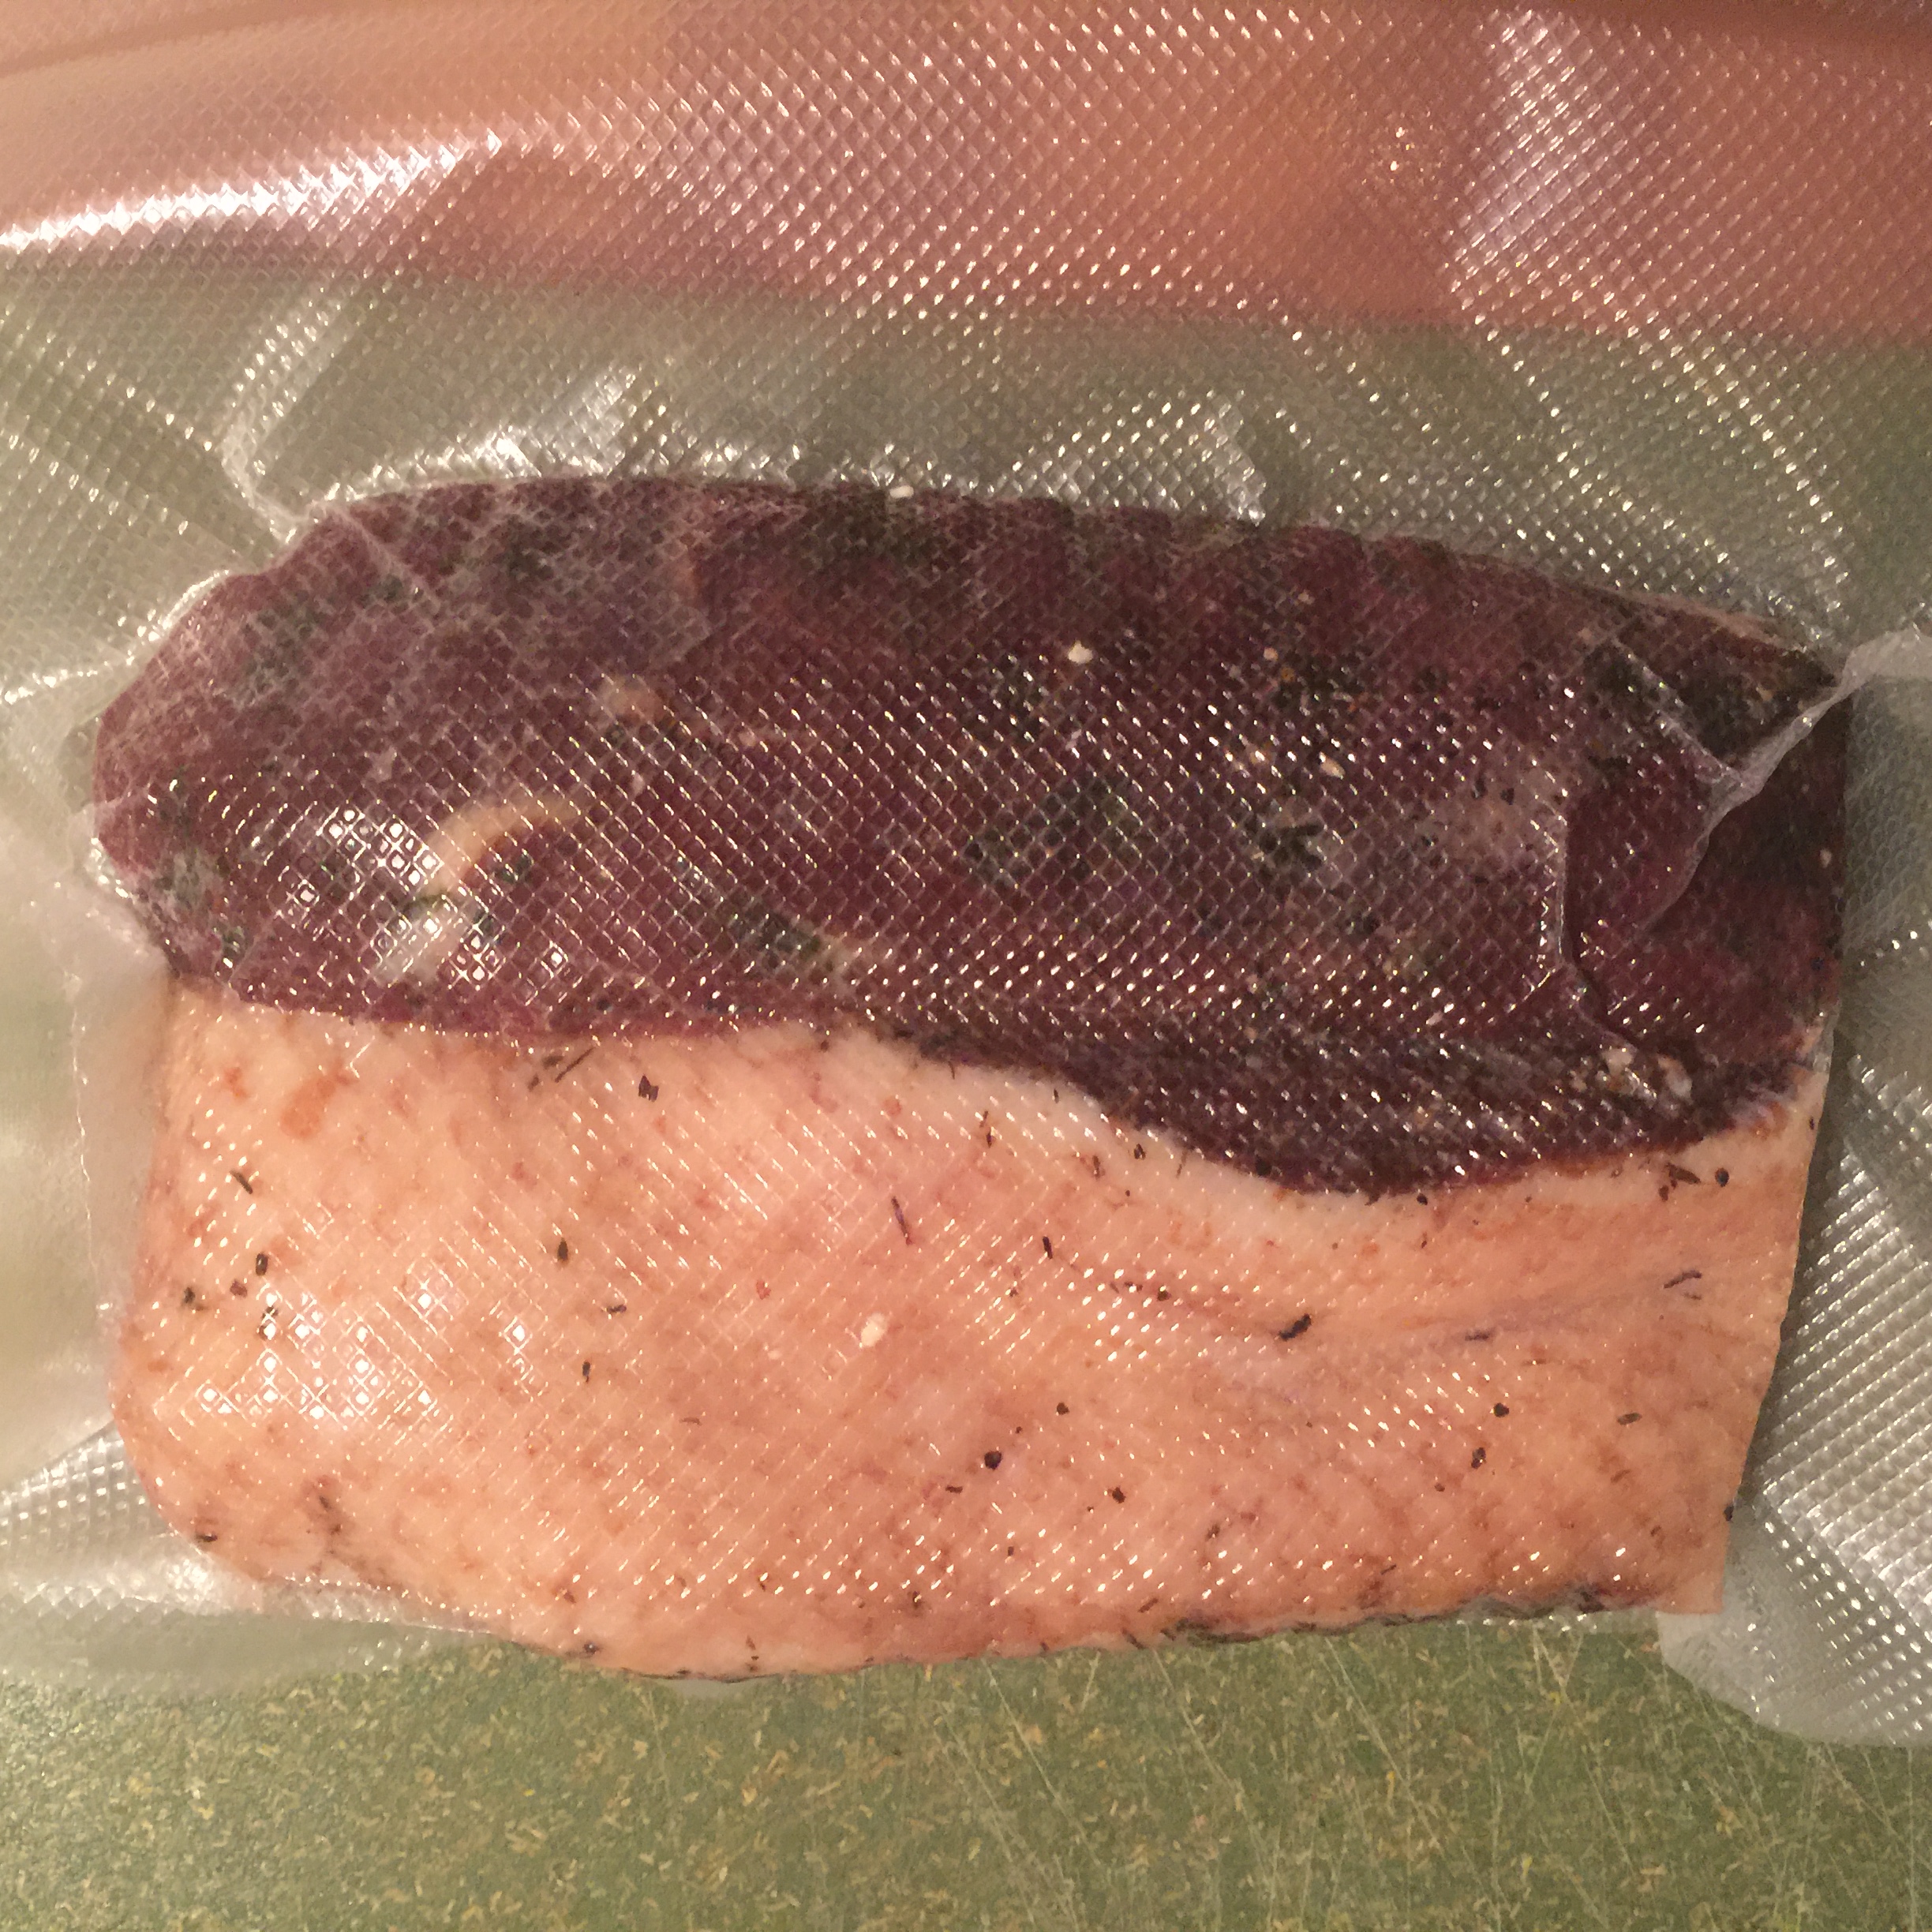
The duck breasts were mixed with the spice cure and vacuum sealed in a bag and allowed to equilibrate in a traditional refrigerator for the period of two weeks.

Duck Prosciutto Cure (Bresaola Style)

Duck Prosciutto Cure (l'orange Style)


Casing (1 hour):

After the two weeks of curing was up, the duck breasts were washed off of all spices and patted dry.

image(24)

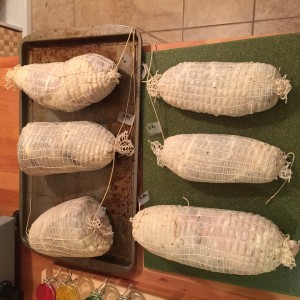
They were cased in beef bungs, and wrapped in butchers netting.

image(53)

If you refer to older posts, at this point, I used to do a fermentation stage for whole muscle cures. I have come to the conclusion that that is only really necessary for salami, and have stopped doing a fermentation stage for whole muscle cures.


Drying (1 month+, until 30% of weight is lost):

Temperature: 54F/12C, Humidity: 70-80% RH

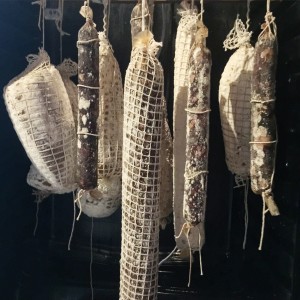
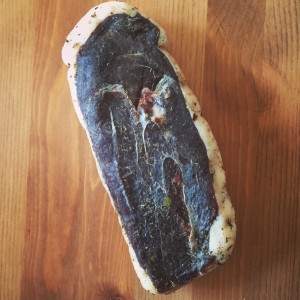
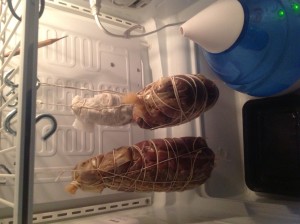
After casing, the duck prosciutto was hung in the curing chamber at around 55F/12C and around 80% RH.

image

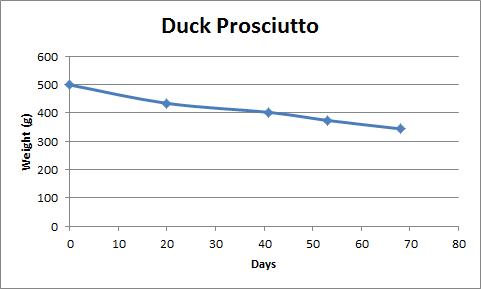
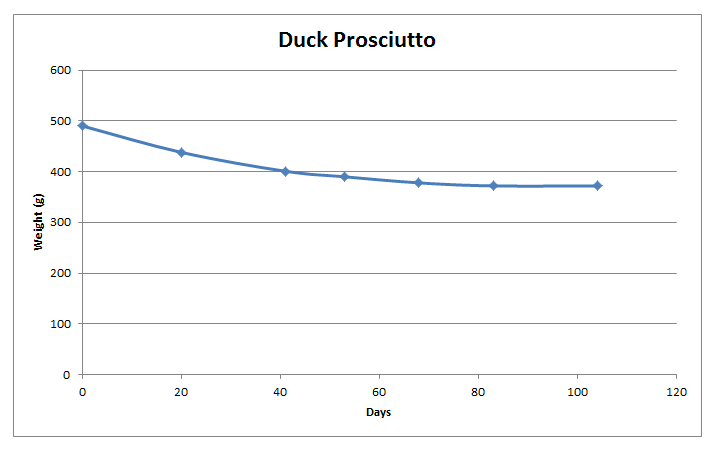
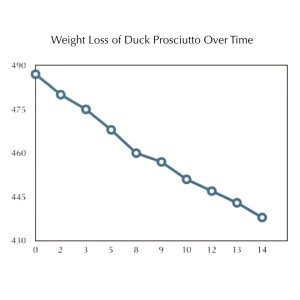
I have been keeping my humidity higher than I have in the past to allow to slower and more even weight loss, as well as to accommodate the cheeses that I have been keeping in the curing chamber. In this case, the traditional bresaola spiced duck breast reached 30% weight loss first and was pulled. The duck prosciutto l’orange style plateaued at a weight loss of ~25%, most likely due to its high fat content. It was pulled after it plateaued.

Duck Prosciutto Weight Loss over Time Bresaola Style

duck prosciutto orange


Tasting:

The taste test may be the best part of the whole project. The beef bung casing and netting is removed and the meat is rinsed with red wine or white vinegar (personal preference) to remove any mold that may have gotten through the casing on to the meat before being patted dry. The meat can be sliced with a deli slicer or by hand. Hopefully, the results will be heavenly.

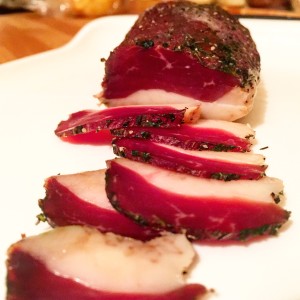
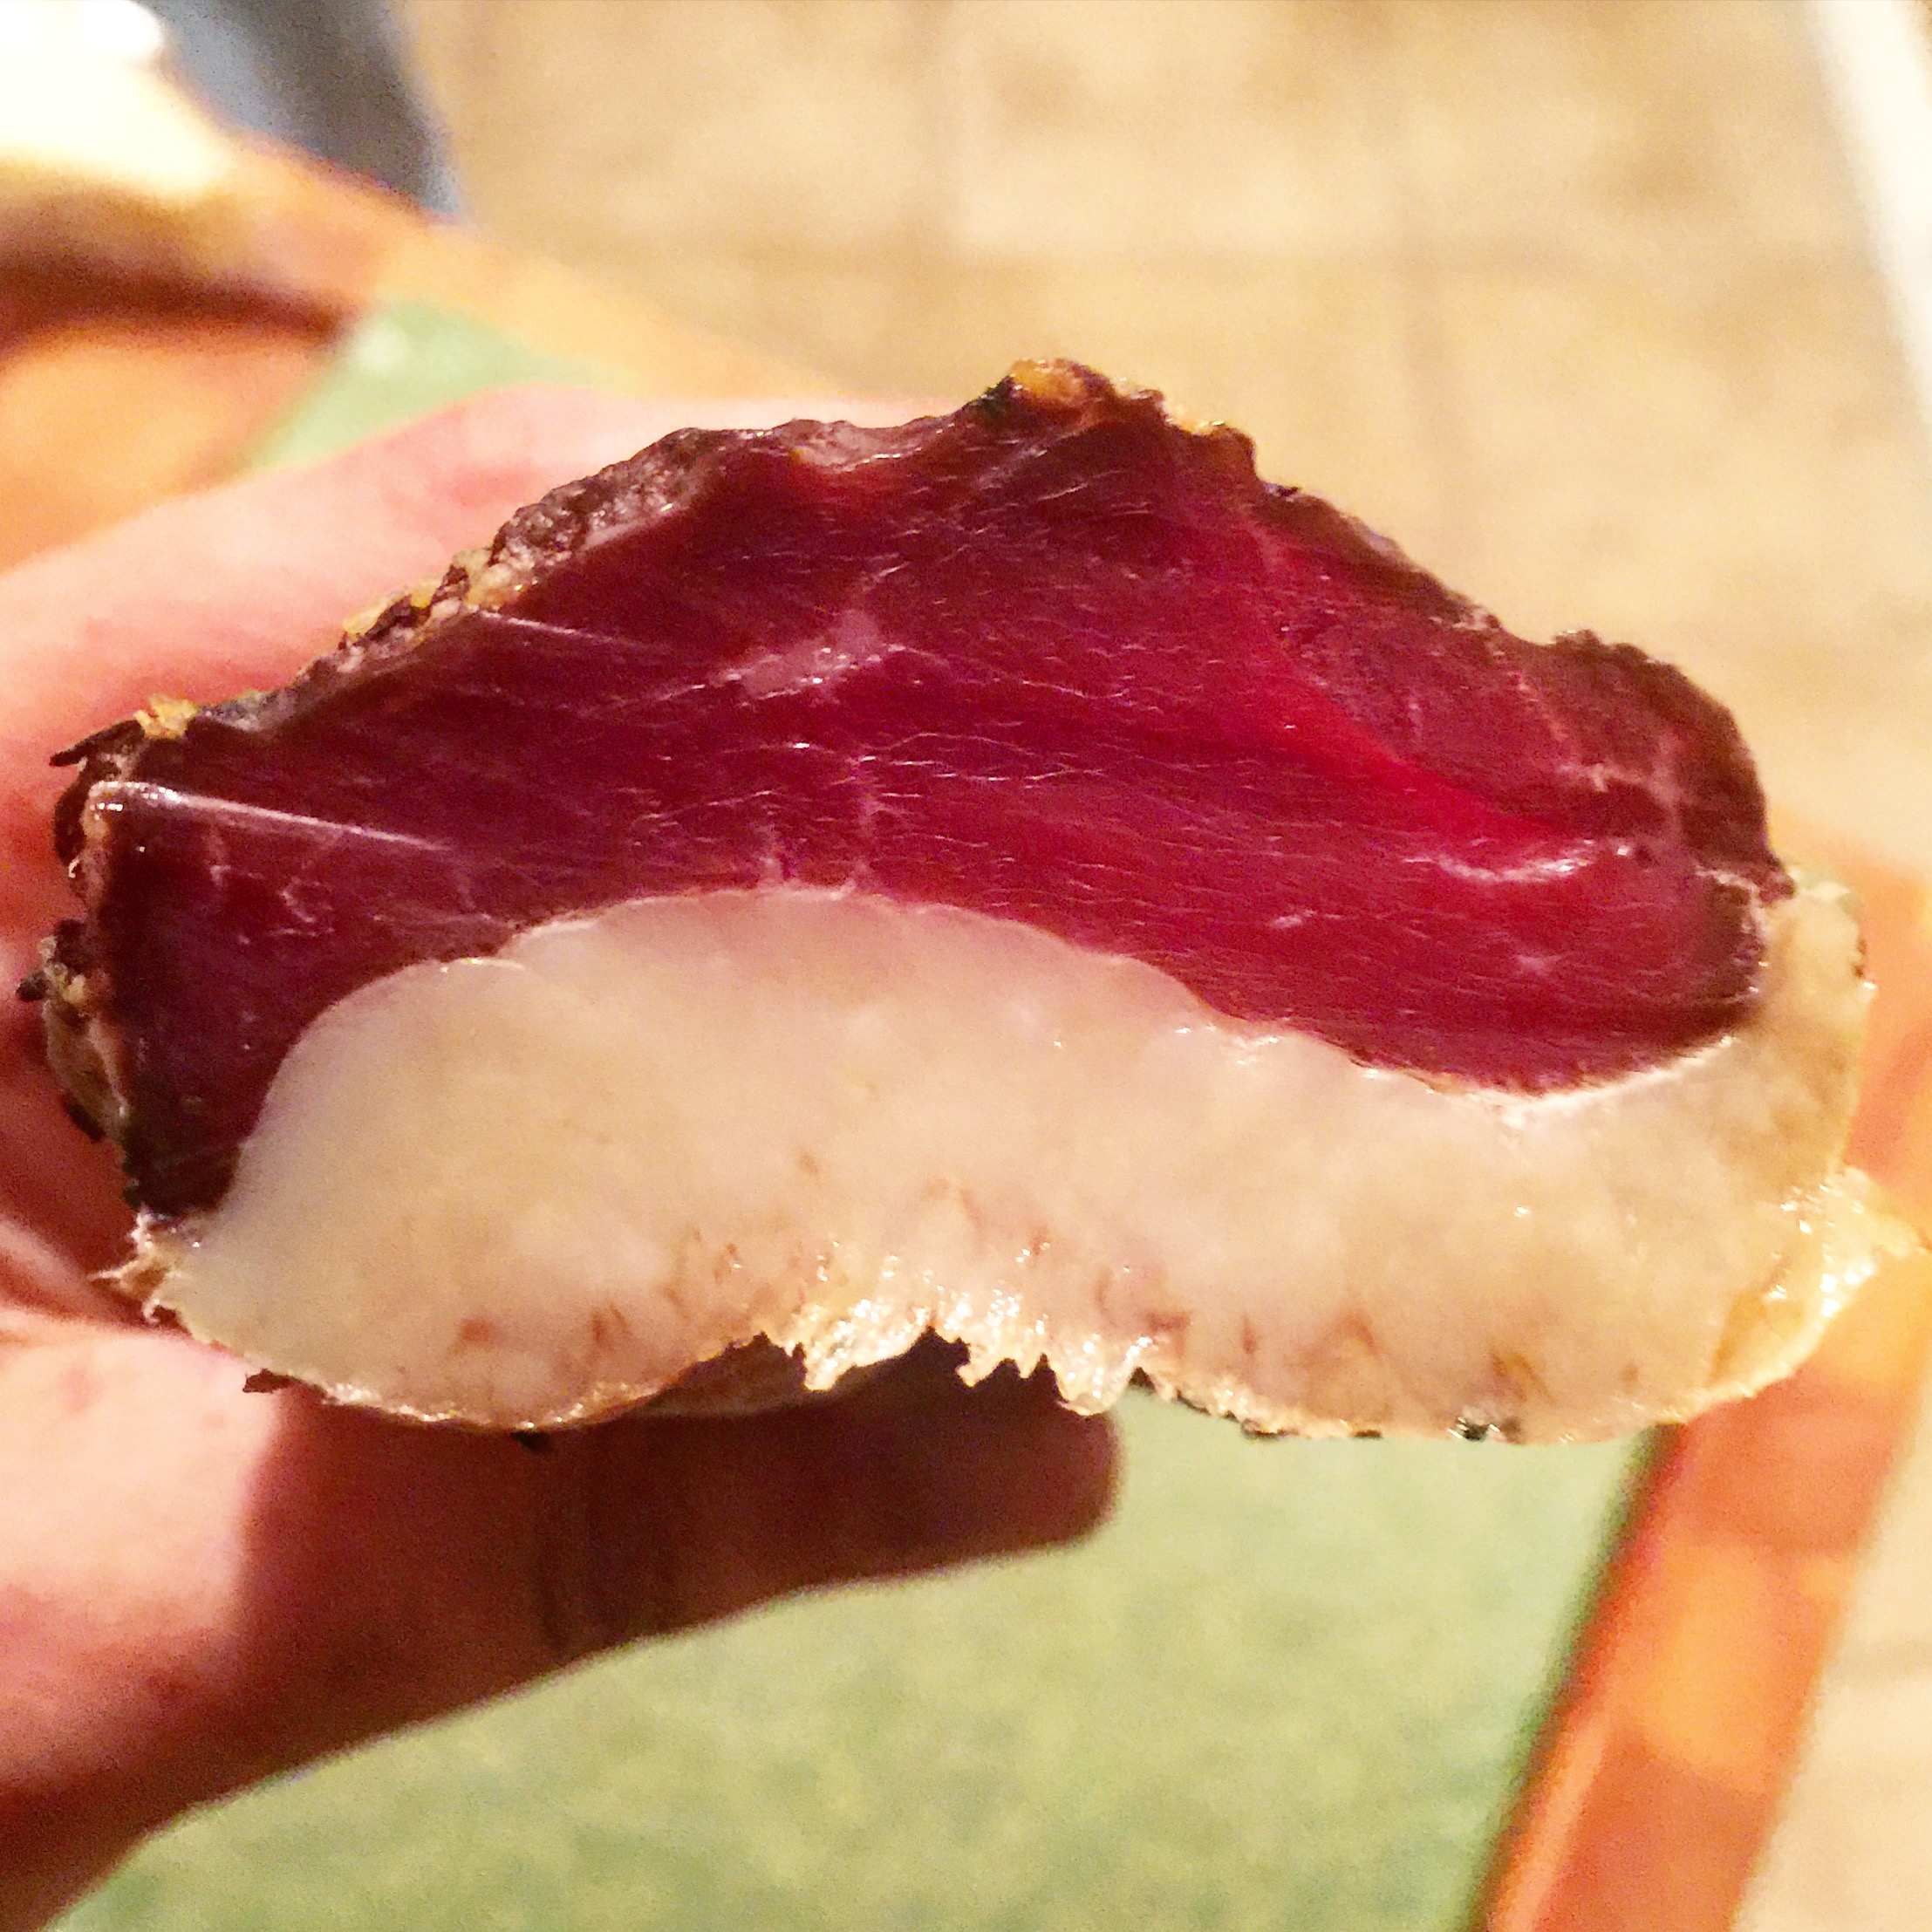
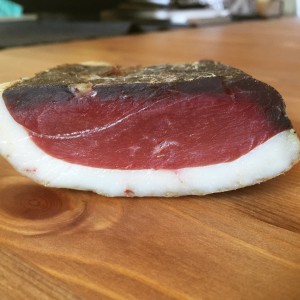
The duck prosciutto was hand sliced with my new jamon knife, resulting in thicker slices than the deli slicer produces. Perfect for some late night duck prosciutto snacking.

Tasting of the traditional spiced duck prosciutto:

image

Tasting of the l’orange style duck prosciutto:

image(3)

image(7)

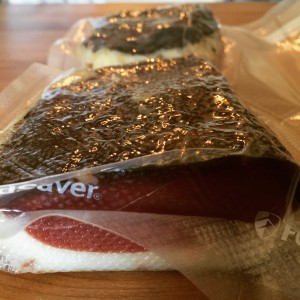
The duck prosciutto was stored in a vacuum sealed bag for snacking at a later date.

image(8)


Method #2: Excess Curing

Previously, in order to make duck prosciutto I followed the method that is in a lot of the traditional literature. Excess curing is a method where the meat is packed into excess salt and spices, and allowed to cure for anywhere from 24-72 hours.


Curing: First, I did an excess salt/cure #2 and spice cure for 3 days.

duckcure


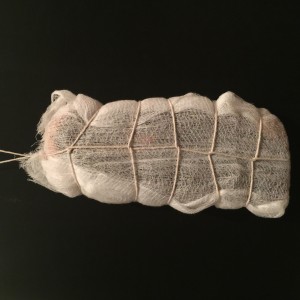
Casing: Then, I wiped off then cure, and hung it in a cheesecloth casing for drying.

duckcheesecloth1


duckcheesecloth


Drying (2 weeks+): Temperature: 54F/12C, Humidity: 70% RH

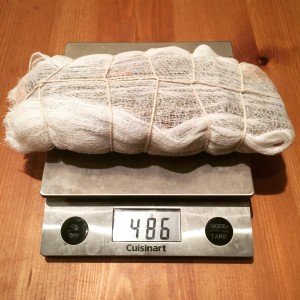
The duck breast was weighed in order to track the weight loss over time.

image(20)

I tracked the weight loss over time and found that it stagnated at about 20% weight loss with some case hardening.

image(163)image(185)

In order to even it out, I placed it under vacuum seal.

image(186)


Tasting: After it spent some time under vacuum seal, it evened out and ended up absolutely delicious.

image(183)

image(184)


These are the two most common methods used to make duck prosciutto. Everyone finds methods that they prefer, and as discussed previously, I have switched to equilibrium curing and beef bungs for more even and replicable drying in the future. However, that is not to say that the excess curing method won’t work for you. Feel free to play around with your curing and create products that make you happy.


Disclaimer: Meat curing is a hobby that comes with inherent risks. We can all do things to limit this risk by educating ourselves about the process and the utilizing the safest known methods to create our products. This website is for educational purposes only, and all experimentation should be done at each individuals own risk.

Filed Under: Charcuterie Tagged With: charcuterie, cured meat, duck, duck prosciutto, prosciutto, prosciutto d'anatra

Lamb Prosciutto

June 9, 2014 by AOG Leave a Comment

This post is on the making of lamb prosciutto, or prosciutto d’agnello. The term prosciutto usually refers to the cured leg of an animal, whether it be pork or goat or lamb or what have you. Regardless of what you want to call it, it’s delicious, and is a fun project for anyone who is interested in meat curing.

Lamb Prosciutto

Lamb is one of those meats that its often said you either like or you don’t. I lived my whole life disliking the flavor of lamb, until after a meal at an Indian restaurant it suddenly clicked and I fell in love with it. I think it has a lot to do with the way the lamb is prepared,so my advice to all who say they just “don’t like the flavor of lamb” is to keep trying it prepared in different ways. You’ll never know which one clicks with you.

After experimenting with different style bresaola, we decided it was time to move on to a different type of meat. Which better meat to try than lamb? Lamb prosciutto was one we had tried in restaurants before, and even though I hadn’t loved it, I thought there could be room for experimentation and improvement which turned out to be 100% correct.

The process started with a boneless lamb leg roast purchased from a local grocery store. Although it was actually butchered pretty cleanly, we separated the meat into two pieces to avoid creating troublesome air pockets within the meat and to let it dry faster, since I’m not the most patient of all meat curers.

lambwegmens


Curing (3 weeks):

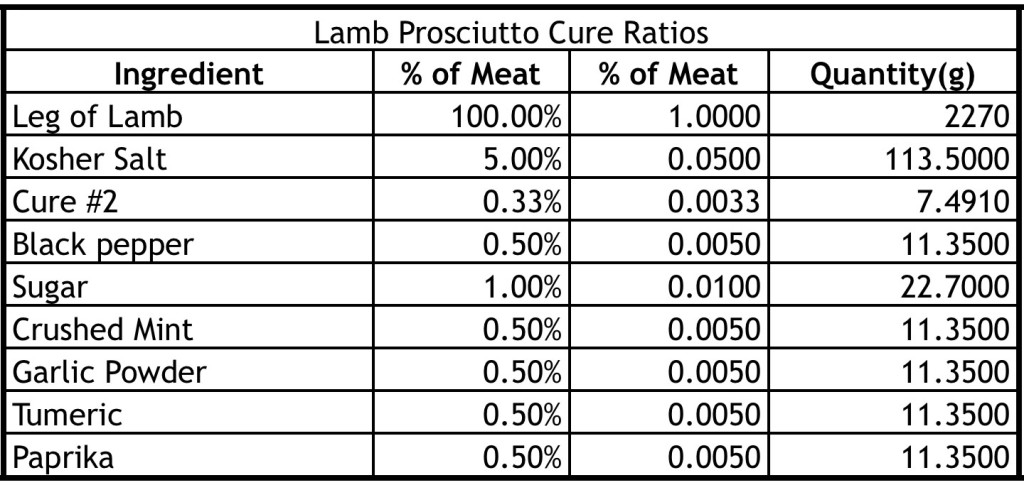
By this time, I’d gotten so familiar with the usual ratios of spices that I did a good amount of ad libbing with the cure. I added some spices that are usually paired with lamb to complement the meat. The basic ratios that I used are in the following chart:

*I have since changed the ratios I use for salt and cure #2. See my most recent posts for the most up to date ratios that I use.

lambchartcorrect

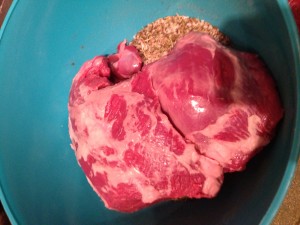
The lamb was mixed with the spices, massaged, and vacuum sealed. It was put in the refrigerator for 3 weeks to cure.

lambspices

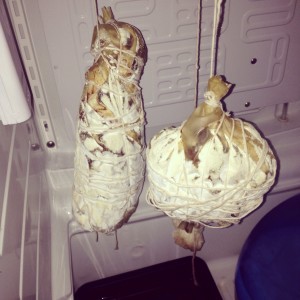
After 3 weeks, the cure was washed away from the lamb using cold water and lamb was dried off. We packaged it usually the available casings that we had, 100 mm collagen casings. After using beef bung, I would probably prefer this method in the future, but collagen was what we had so collagen is what we used. The two pieces of lamb were oddly shaped, and so my barely adequate butcher string technique led to some interesting looking hanging lamb, but hey if it hangs it hangs right?

lambhanging1


Fermentation (48 hours):

Temperature: 69F/20C

Humidity: 80-90% RH

*I have since stopped doing a fermentation stage in my whole muscle cures. See my more recent posts for information on this.

There is some debate on the usefulness of a fermentation stage in whole muscle meat curing. We left the lamb hanging in the curing chamber for 48 hours during this stage, after spraying the meat with a 0.5% solution of Penicillium nalgiovense to induce beneficial mold growth.

Ideally at the end of the fermentation stage, you would see a decrease in pH to less than 5.1, letting you know the meat was becoming acidic due to beneficial bacterial activity. Since I don’t currently have a pH meter, and pH strips are moderately useful at best, I’ve gone forward after 48 hours regardless. This drop in pH is much more necessary to check in ground meat salami preparations such as sausage making.


Drying (6-8 weeks):

Temperature: 54F/12C

Humidity: 70% RH

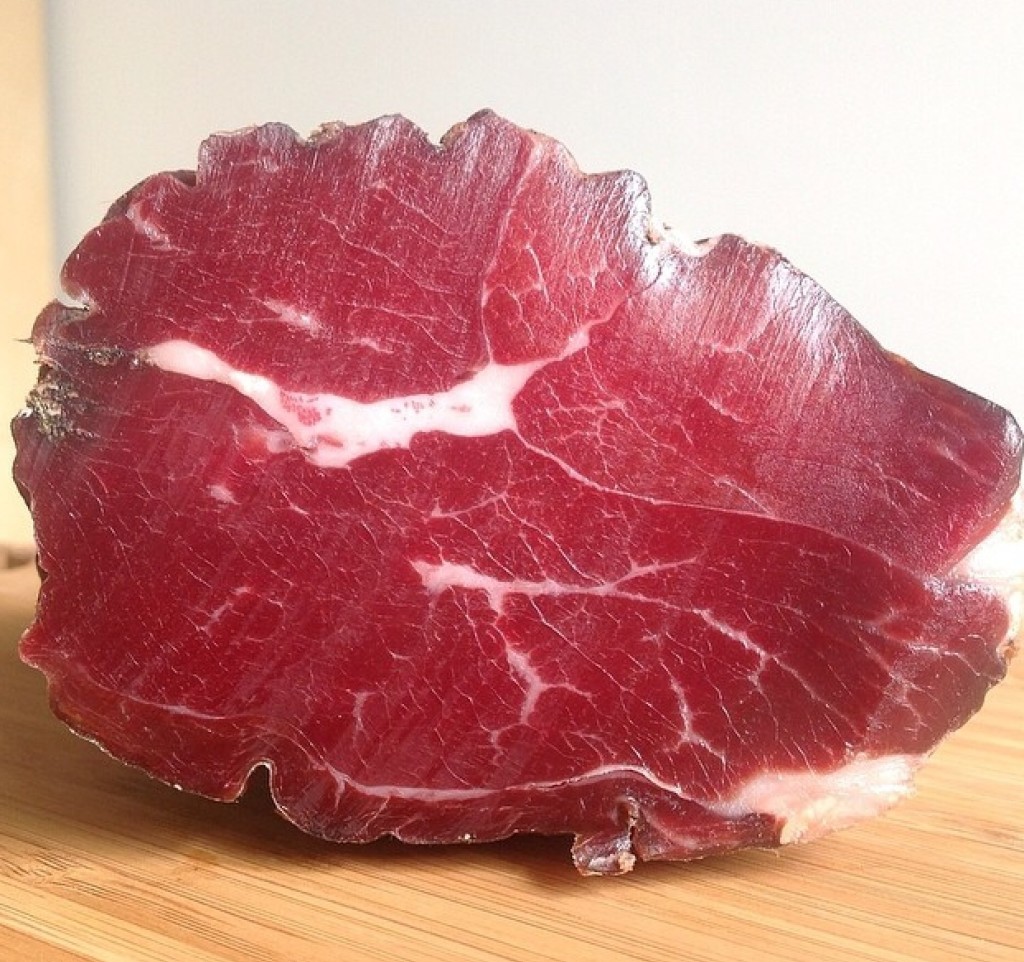
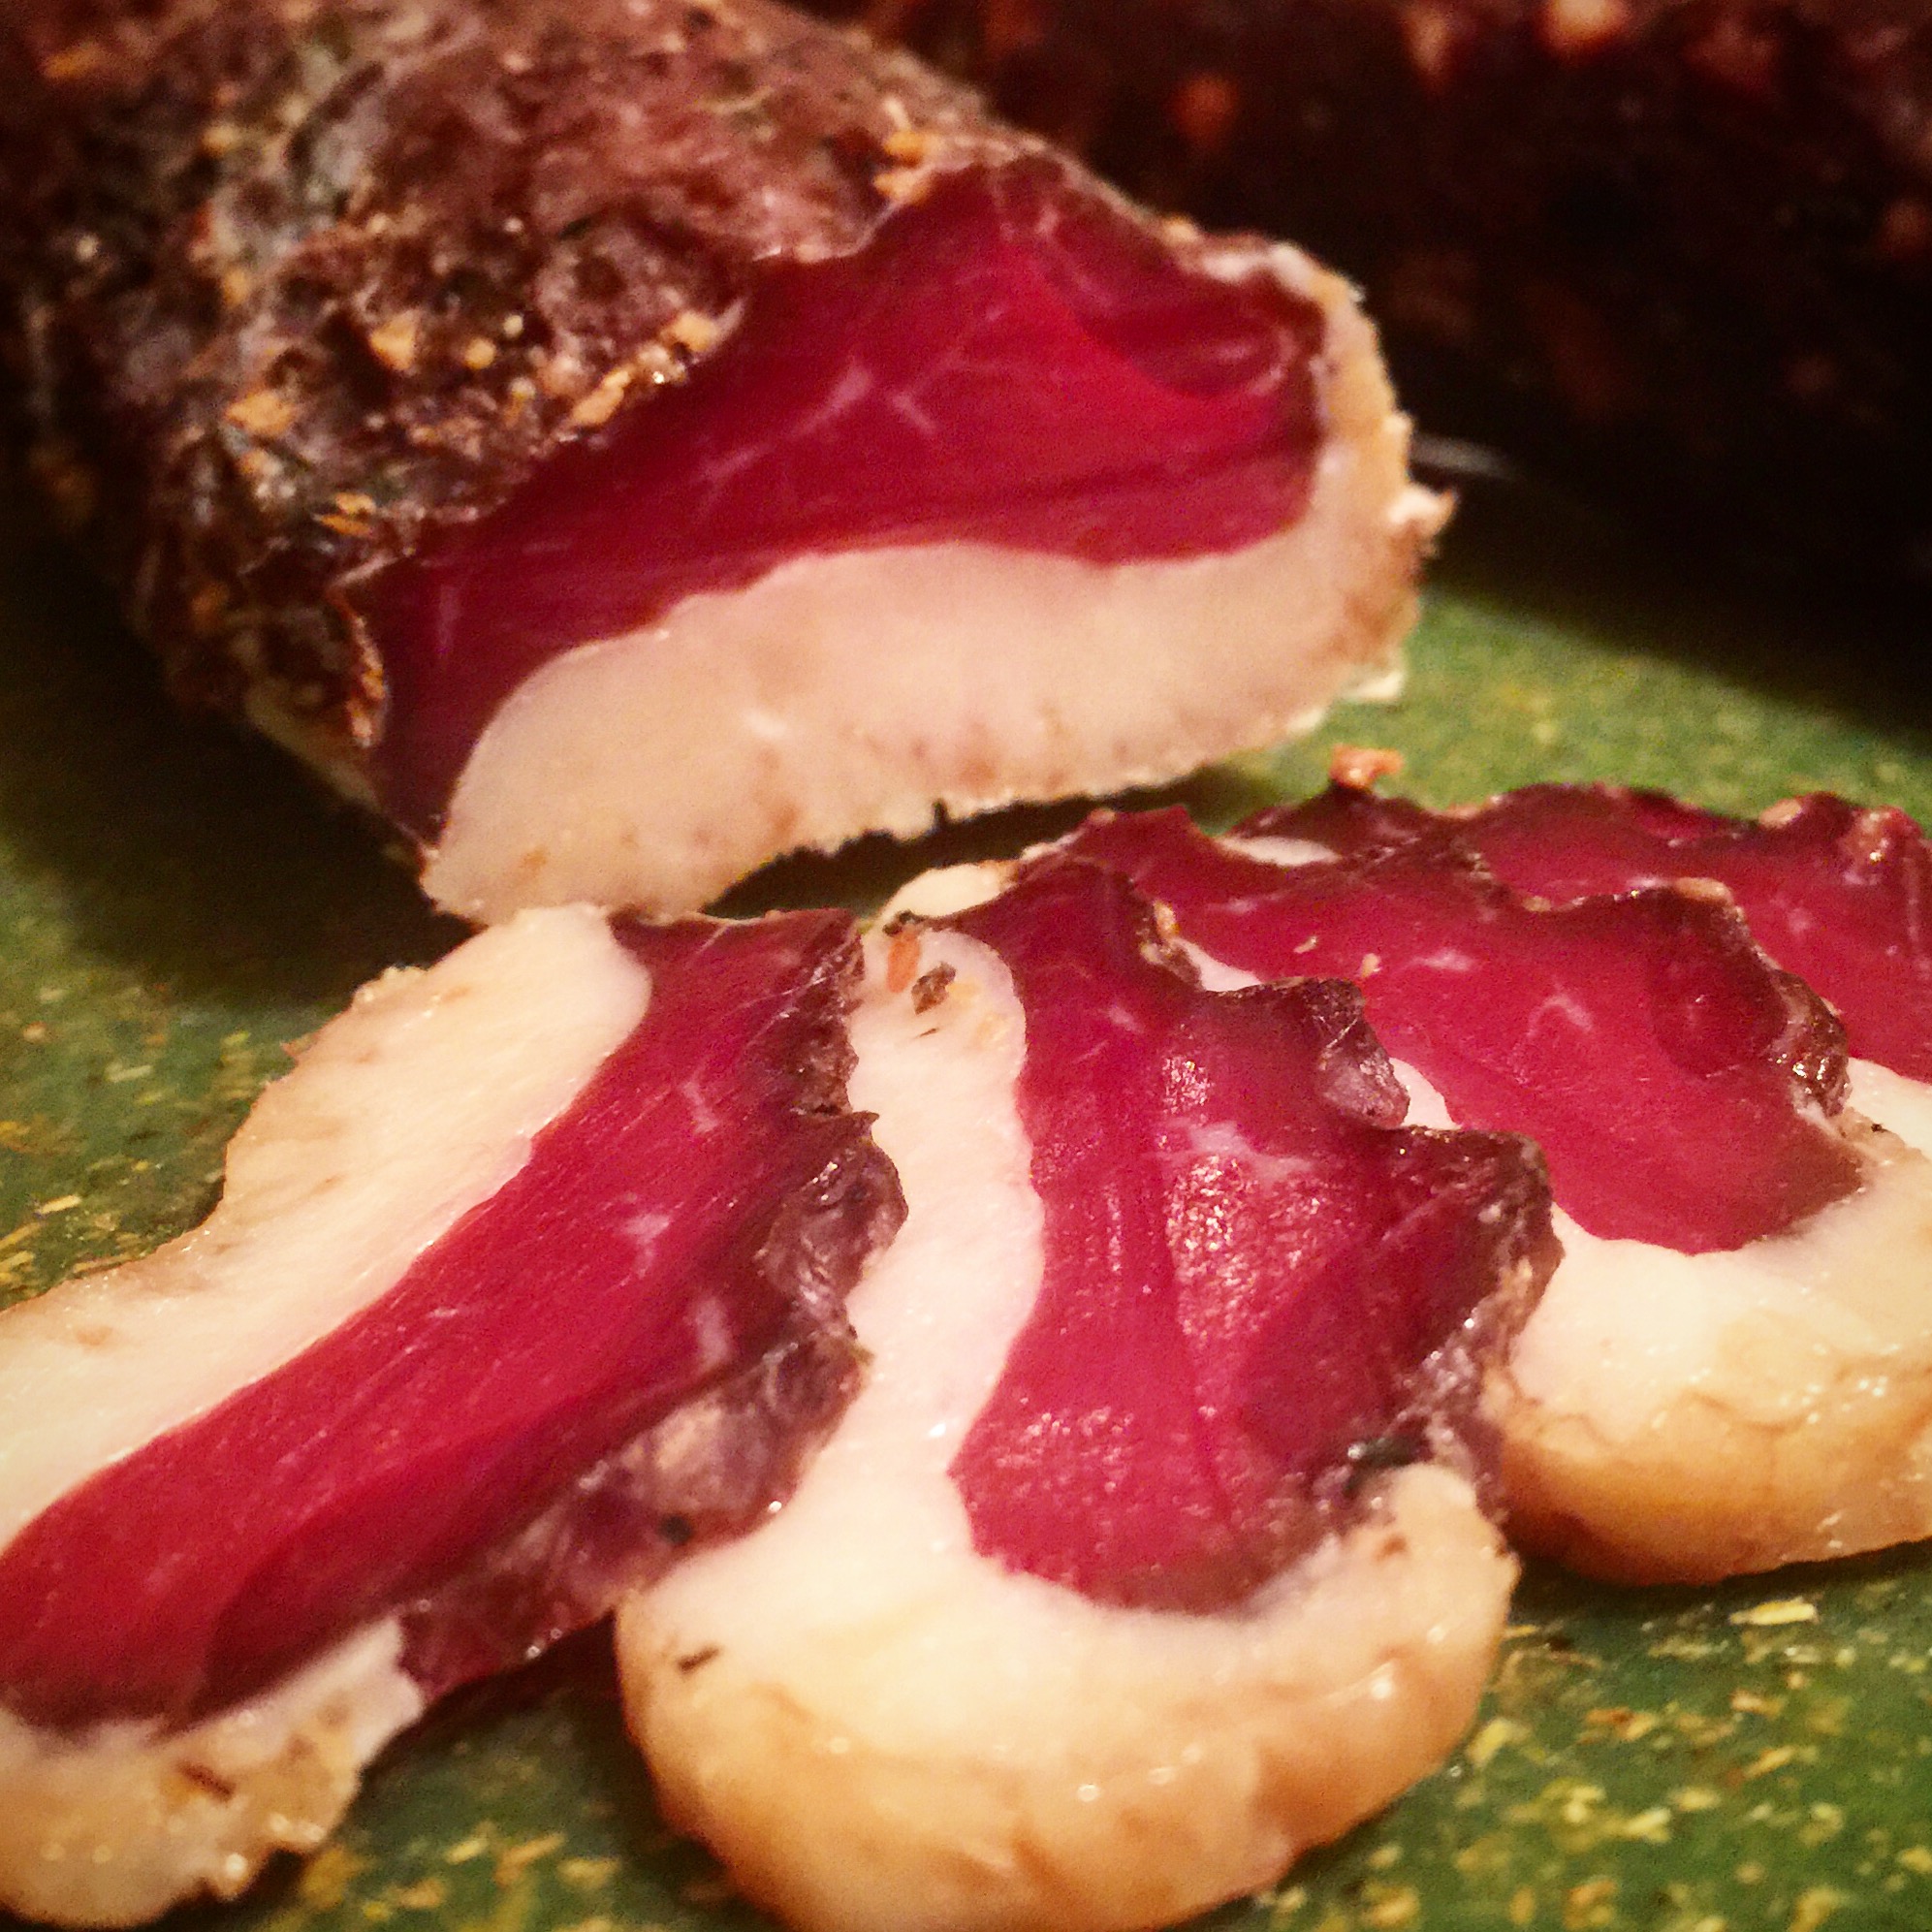
The waiting is the hardest part. At this point, all you can do is wait and monitor weight loss. Keep a careful eye on the temperature and humidity, and when weight loss reaches 30% you are ready! Some may like more weight loss, some may like less, but I’ve settled on 30%. At a weight loss of 30% your meat is definitely not the same meat you put into the curing chamber, but it’s still moist and delicious and when sliced thin is heavenly.
lambhanging2

This lamb took somewhere between 6-8 weeks to be ready, the smaller one was ready sooner. This slightly longer time was probably due to the fact that our humidity was on the higher side, but I prefer it that way. Higher humidity means it will take longer for your meat to dry out, and you might need to combat some enemy molds, but you won’t have case hardening or end up with jerky like meat instead of the succulent treasure that is slowly cured and dried charcuterie.

Lamb Prosciutto2

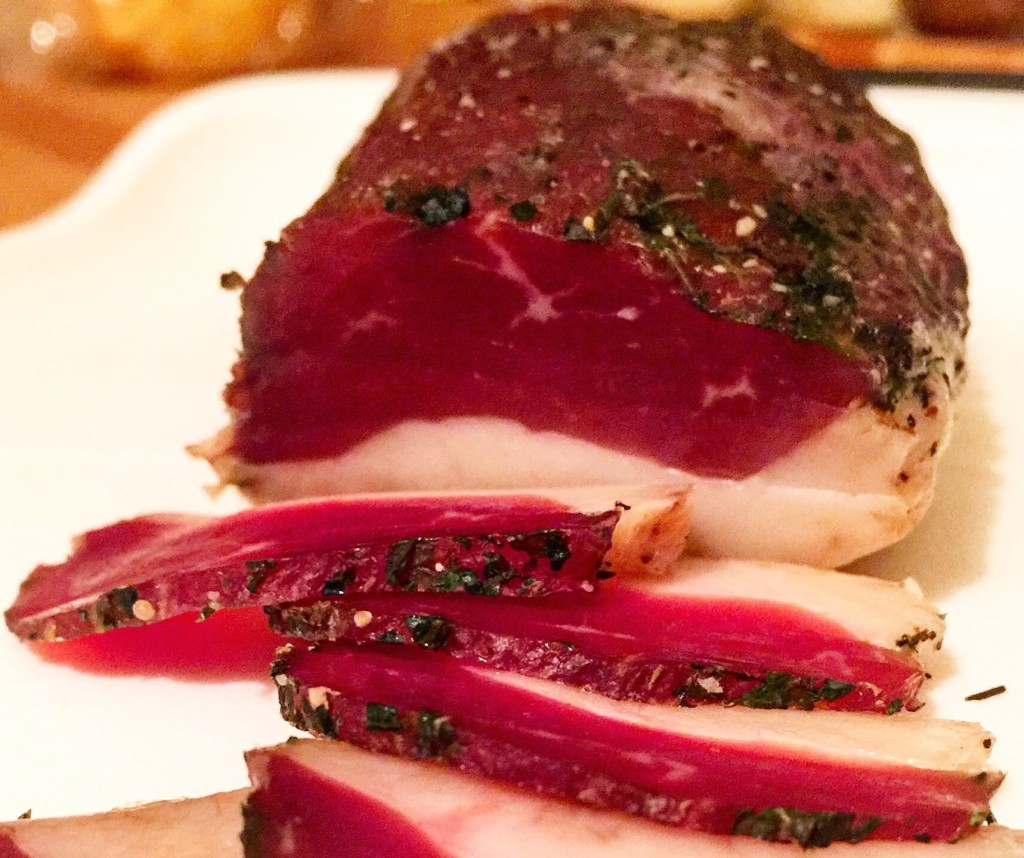
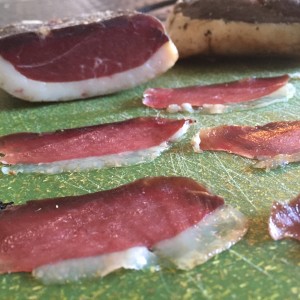
Slice it up and pair it with cheese and other fermented treats and enjoy!

lambproplate1


Disclaimer: Meat curing is a hobby that comes with inherent risks. We can all do things to limit this risk by educating ourselves about the process and the utilizing the safest known methods to create our products. This website is for educational purposes only, and all experimentation should be done at each individuals own risk.

Filed Under: Charcuterie Tagged With: charcuterie, cured meat, lamb prosciutto, prosciutto, prosciutto d'agnello

Spherification of Melon

January 7, 2013 by AOG 4 Comments

Nothing is better than a delicious tapa. There are many different traditional tapas from different regions of Spain. If we look beyond Spain, we can find traditional food pairings from other cuisines, such as Italy. Cured meats paired with fruit is a dish found in many different cultures, for good reasons. It is delicious. One of the things I like best about molecular gastronomy is playing with traditional food pairings in new and unexpected ways.

In Italy, prosciutto e melone is a well known pairing. As a fan of the Spanish jamón serrano, I often keep some in stock. For this experiment, I decided to play with this pairing. I made spherical melon “caviar” served on jamón serrano as a tapa.


Background:

Science is the pursuit of knowledge that is approached from a systematic methodology that is ever questioning, criticizing, and incorporating. It takes theories based on facts that it came up with yesterday, dissects those decisions, and creates newer and more accurate theories. These theories will inevitably undergo the same evolution when tomorrow’s scientists realize what dunces we are today. However, it takes the semi-accurate discoveries and theories of the past to build upon the more right theories of today (Grobstein).

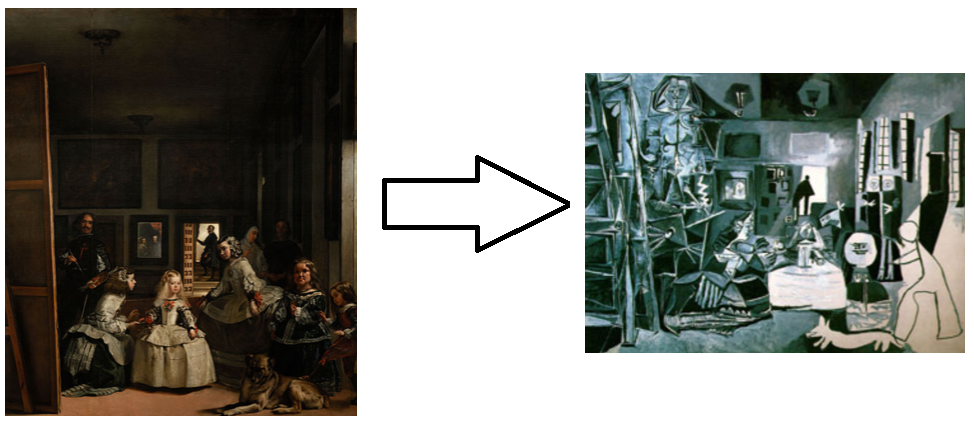
The scientific method can, and should, be applied gastronomy. It is not to say that food creations of the past are outdated, quite the opposite in fact. They are well established models for a reason. We are able to build upon what those before us have created, and create something new. This process is similar to Picasso studying the masters at the Prado, deconstructing their creations, and creating his own masterpieces. That is the goal of molecular gastronomy; to understand food at its core, to deconstruct it, and then create our own masterpieces that surprise and delight.

Picasso

There are both simple experimentations and more complex ones. One of the more complex and important experiments in gastronomy was the discovery that Chef Auguste Escoffier made with his use of chemistry (whether he knew it or not) to create veal stock using pan deglazing, and the subsequent introduction of umami to the western palate. (NPR)

A simple experimentation is the utilization of spherification to create foods with new texture compositions. However, it is not to be overlooked. It is one of the ways that molecular gastronomy can take traditional dishes and play with the textures and therefore tastes of the plate.

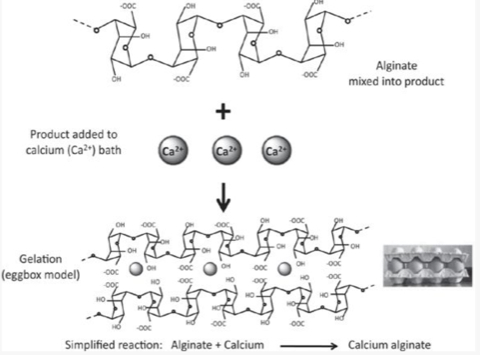
Spherification is a method that utilizes the chemistry of gelling agents. I’ve discussed agar-agar before, but this method uses sodium alginate. Sodium alginate is a gelling agent, which like agar, is extracted from seaweed. This method creates spherification via a calcium mediated gelling mechanism.

First, the sodium alginate is dissolved in a solution of what the spheres will be made out of. Then, a calcium bath is made by dissolving either calcium chloride or calcium lactate in water.  A syringe is loaded with the sodium alginate solution, and droplets are released into the calcium bath.

When the droplets make contact with the calcium bath, the outermost layer gels. This is due to calcium-mediated gelling. Calcium is a divalent ion that acts like a bridge between alginate chains. When the sodium alginate solution comes in contact with the calcium bath, the negative polymeric alginate chains are attracted to the positive calcium ions. They fit together in an “egg box configuration.” These polymer chains continue to form on the area that is in contact with the calcium bath until an outer layer gel has formed. The result is a gelled outer layer with a liquid center. (Kitchen as Laboratory)


Experiment:
The traditional dish I decided to play with was the pairing of cured meat with melon. Traditionally an Italian dish, prosciutto e melone, can be made just as well (if not better) with the Spanish cured ham, jamón Serrano.

Before I started with anything, I prepared the calcium bath that would be used later. To do this, I dissolved 5 g of calcium lactate in 500 g (18 oz) of water.  Once the calcium lactate is dissolved, this bath was put in the refrigerator to cool while the rest was being prepared.

The first step was to take a melon, and chop it into smaller pieces.

                       
These pieces were then put in a small blender and smoothed into a puree. The puree was passed through a strainer to create a fine melon juice, and measured at 8.5 Oz.
Then, 8 Oz (~150 g) of strained melon juice was added to 2 g sodium alginate and the mixture was blended until the sodium alginate was completely dissolved.

Then it was time to start! The calcium bath was removed from the fridge, and the syringe was filled with the melon-sodium alginate mixture.

Droplets were released from above the calcium bath and allowed to solidify for ~2 minutes in the bath.

                    
They were removed from the bath using a slotted spoon and gently rinsed with water to remove any traces of calcium.

Tasting:

The melon spheres were plated on top of delicious jamón Serrano, creating a delightful tapa of complementary flavors that literally explode in your mouth. This was a delightful play on the usual dish, and the perfect accompaniment to any meat and cheese platter. The spherification of fruit; definitely something you are going to want to try to complement any favorite cured meat or cheese.


Resources:

Grobstein: http://serendip.brynmawr.edu/local/grobstein.html

Picasso: http://en.wikipedia.org/wiki/Pablo_Picasso

Picasso Meninas: http://en.wikipedia.org/wiki/Las_Meninas_(Picasso)

Las Meninas: http://en.wikipedia.org/wiki/Las_Meninas

NPR: http://www.npr.org/templates/story/story.php?storyId=15819485

Molecular Recipes: http://www.molecularrecipes.com/spherification/melon-cantaloupe-caviar/

Kitchen as Laboratory: The Kitchen as Laboratory: Reflections on the Science of Food and Cooking, Edited by Cesar Vega, Job Ubbink, and Erik van der Linden

Filed Under: Molecular Gastronomy Tagged With: alginate, caviar, melon, melone, molecular gastronomy, prosciutto, spherification

  • Instagram

Copyright © 2025 · Foodie Pro Theme by Shay Bocks · Built on the Genesis Framework · Powered by WordPress